

In today's post, we are gonna get value from this sensor and then print it over the Serial Terminal as well as LCD. We will get the values in degree centigrade. Its not much difficult to interface 18B20 with arduino and also an Arduino library is also availble, using which you can quite easily interface 18B20 with Arduino. Let's get started with interfacing of 18B20 with Arduino.
Note:
- In today's post,we will show the values of temperature sensor over the LCD, the complete code is given below but I am not adding the circuit diagram of LCD I have already explain it in detail which you can check at Circuit Designing of LCD with Arduino in Proteus ISIS.
Interfacing of Temperature Sensor 18B20 with Arduino
- As I explained earlier, it works on single wire and hence we are gonna need 1-wire library for Arduino along with 18B20 arduino library.
- Download both of these libraries by clicking on the below buttons:
Download One Wire Library Download Dallas Temperature Library
- After downloading the library, place it in the libraries folder of your Arduino Software.
- Now restart your Arduino software and you will find the Arduino folder in the Examples section.
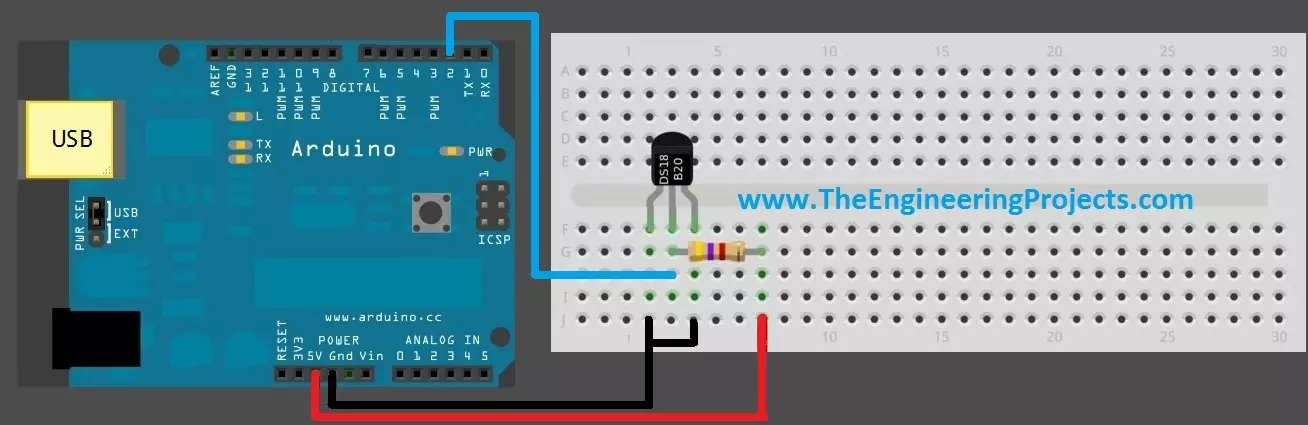
- Next we need to interface our sensor 18B20 with Arduino so design your circuit as shown in below figure:
- So, connect the sensor 18B20 with Arduino as shown in the above figure, connections are quite simple and are as follows:
- Pin # 1 of 18B20 with GND
- Pin # 2 of 18B20 with Pin # 2 of Arduino.
- Pin # 3 of 18B20 with GND of Arduino.
- Add a pull up resistor of 4.7k ohm at pin # 2 of 18B20.
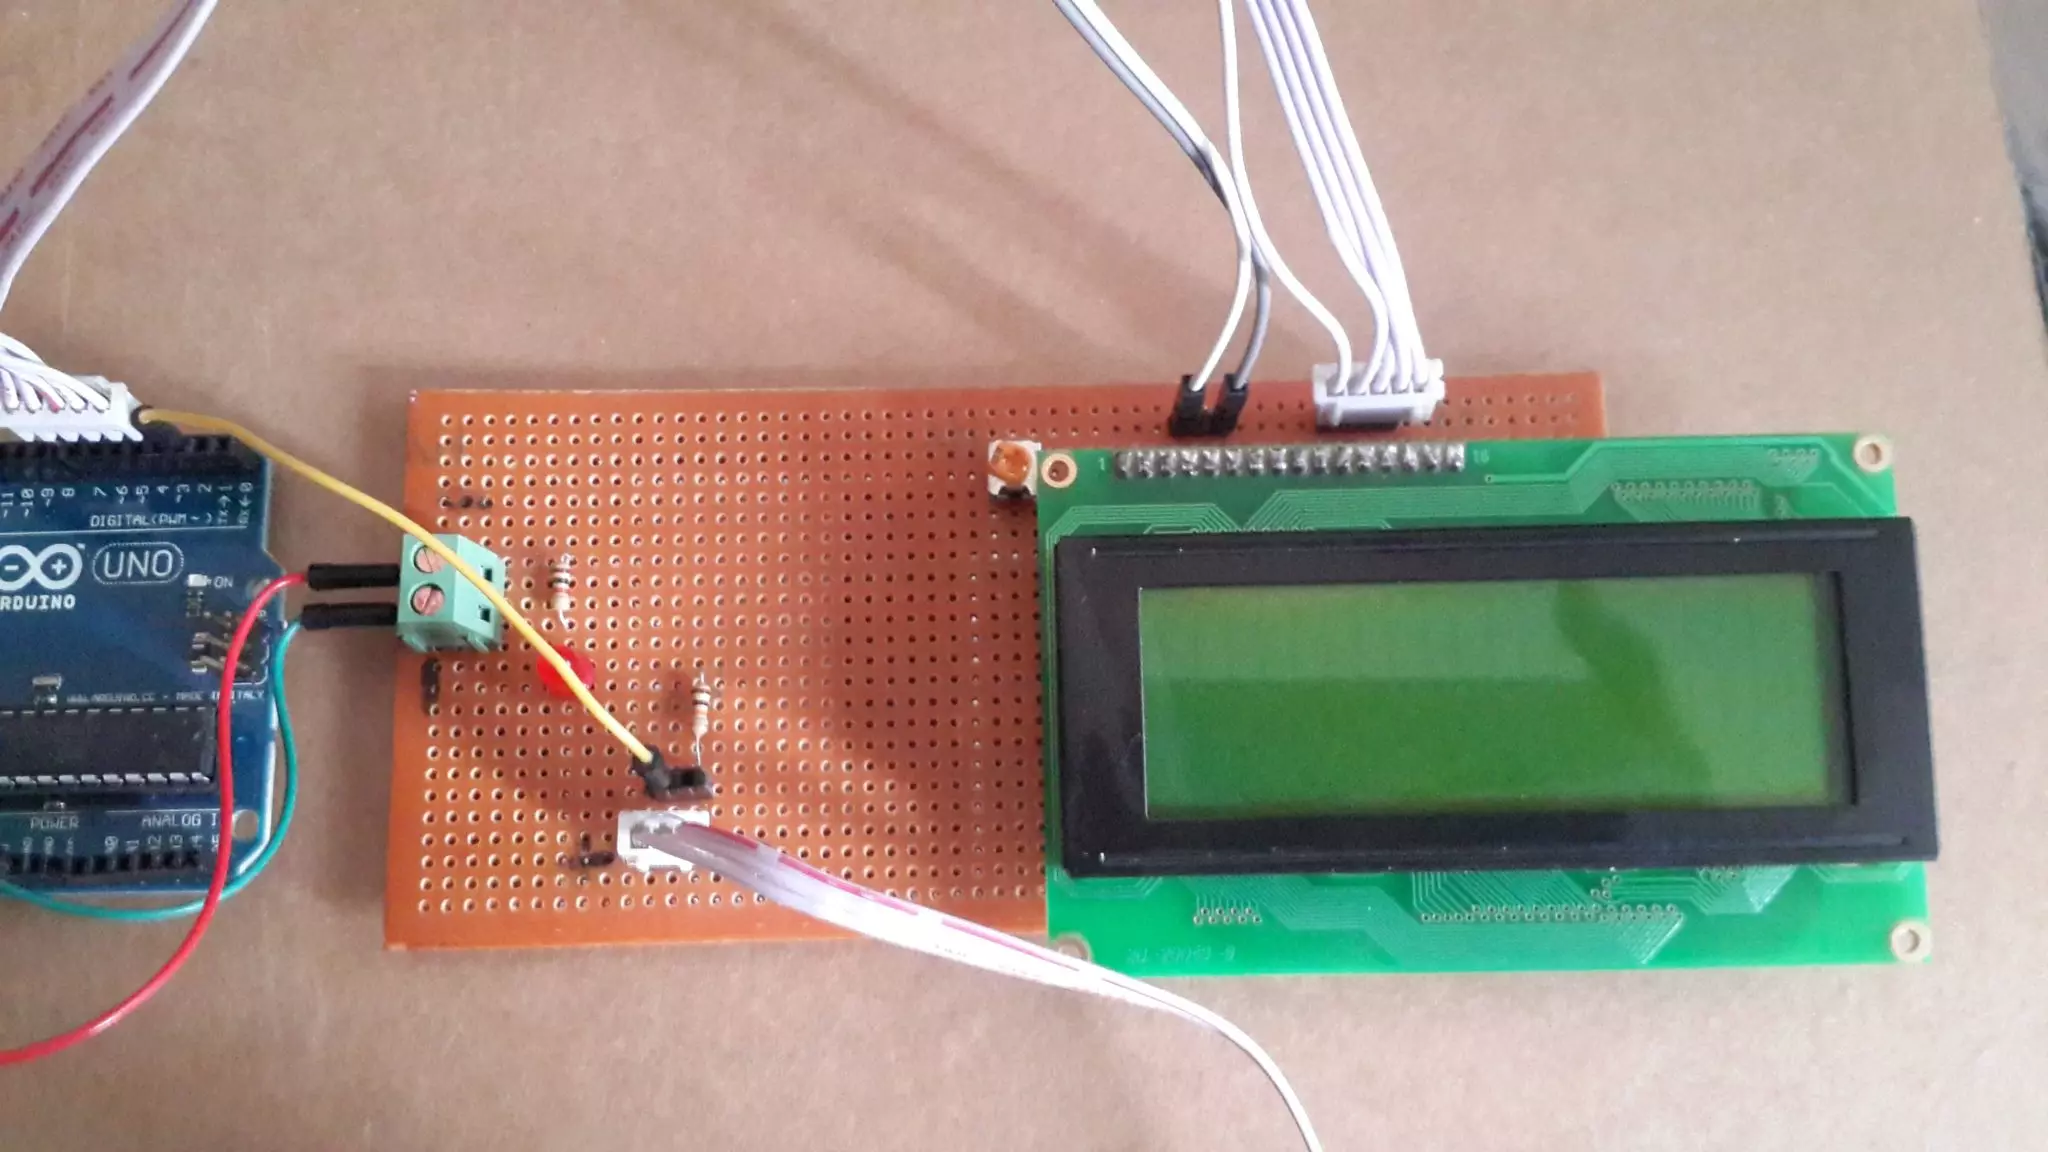
- Here's the images of hardware, we designed for this project, its a 20 x 4 lcd we have used:
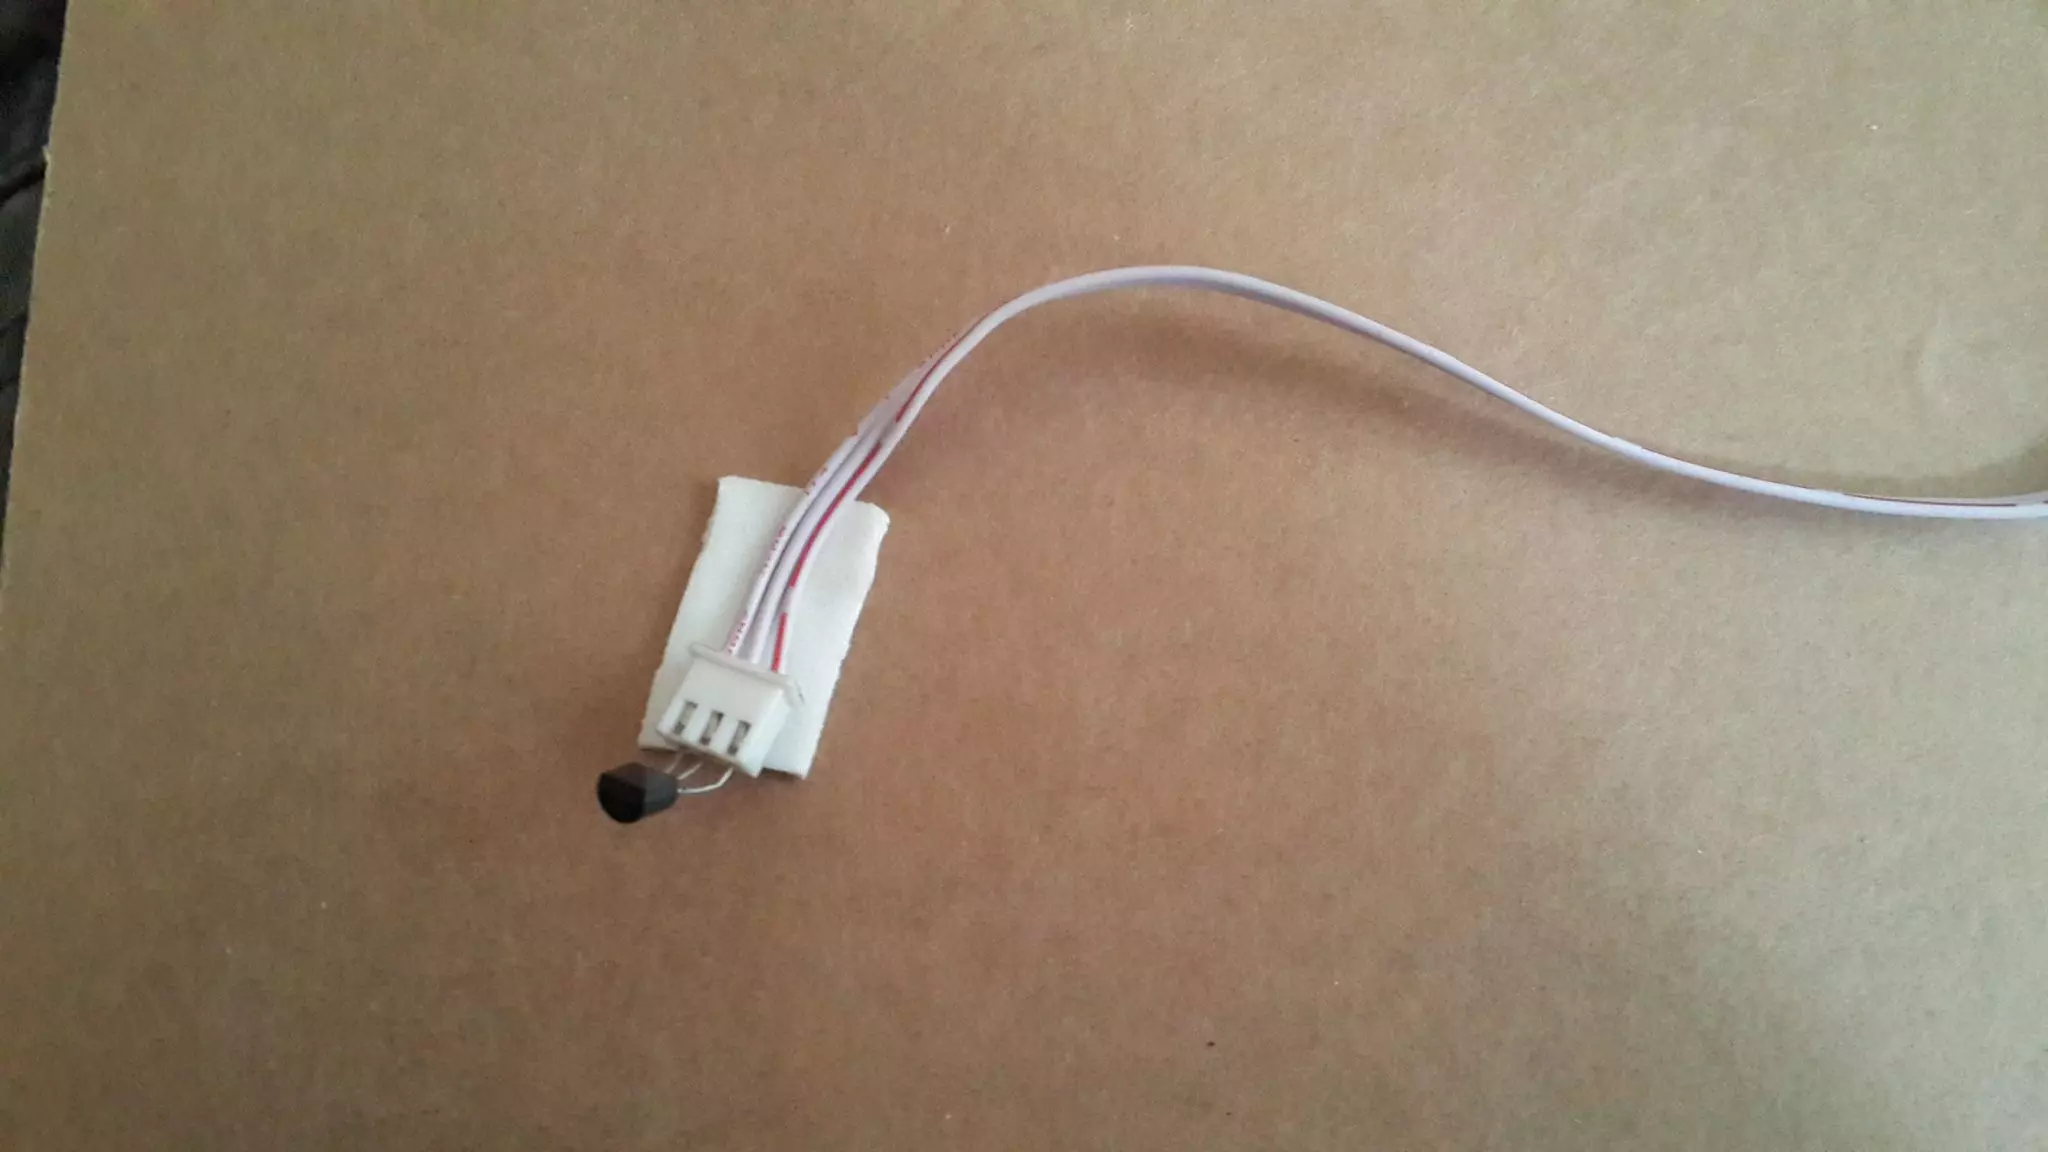
- Below image shows the small 18B20 sensor, used in this project, it looks small but very efficient.
- Here's the image showing the complete project:

- Now, copy below code and upload it in your Arduino board and open your serial terminal.
#include <OneWire.h> #include <DallasTemperature.h> #include <LiquidCrystal.h> #define ONE_WIRE_BUS 2 OneWire oneWire(ONE_WIRE_BUS); DallasTemperature sensors(&oneWire); LiquidCrystal lcd(12, 11, 7, 6, 5, 4); void setup(void) { Serial.begin(9600); Serial.println("Welcome to TEP !!!"); Serial.println("www.TheEngineeringProjects.com"); Serial.println(); sensors.begin(); lcd.begin(20, 4); lcd.setCursor(5,0); lcd.print("Welcome to:"); lcd.setCursor(1,2); lcd.print("www.TheEngineering"); lcd.setCursor(4,3); lcd.print("Projects.com"); delay(5000); } void loop(void) { sensors.requestTemperatures(); Serial.print("Temperature : "); Serial.println(sensors.getTempCByIndex(0)); //lcd.clear(); lcd.setCursor(0,0); lcd.print("Temperature: "); lcd.print(sensors.getTempCByIndex(0)); lcd.print("C"); delay(1000); }
- After uploading the code, when I start the project, it started showing the temperature values as shown below:

- As you can see, its giving the temperature of my room which is 23.56 degree centigrade.
- I have also designed a video for more demonstration which is given below:
- It's quite a simple code and is self explanatory but still if you need help ask in comments and I will help you out.

Reply