

Now question arises what this module does ? Actually this Pixy module has a NXP microcontroller on it which does all the image processing and is controlled by a computer. (We are gonna cover this in coming tutorials) Once you set its parameters like color detection or object detection etc then you simply unplug it from computer and plug it with Arduino or any other PIC Microcontroller. Now whenever that object comes in front of Pixy Camera it will automatically recognize it and will send the command to your microcontroller and will also send the parameters like X, Y coordinates or size etc of the object and what you need to do is to apply your algorithm on Arduino i.e. what you gonna do if the object is infront of the camera. Sounds complex, don't worry we are gonna follow everything in detail in coming tutorials. So, now we are gonna have a look at how to get started with Pixy Camera.
Getting Started with Pixy Camera
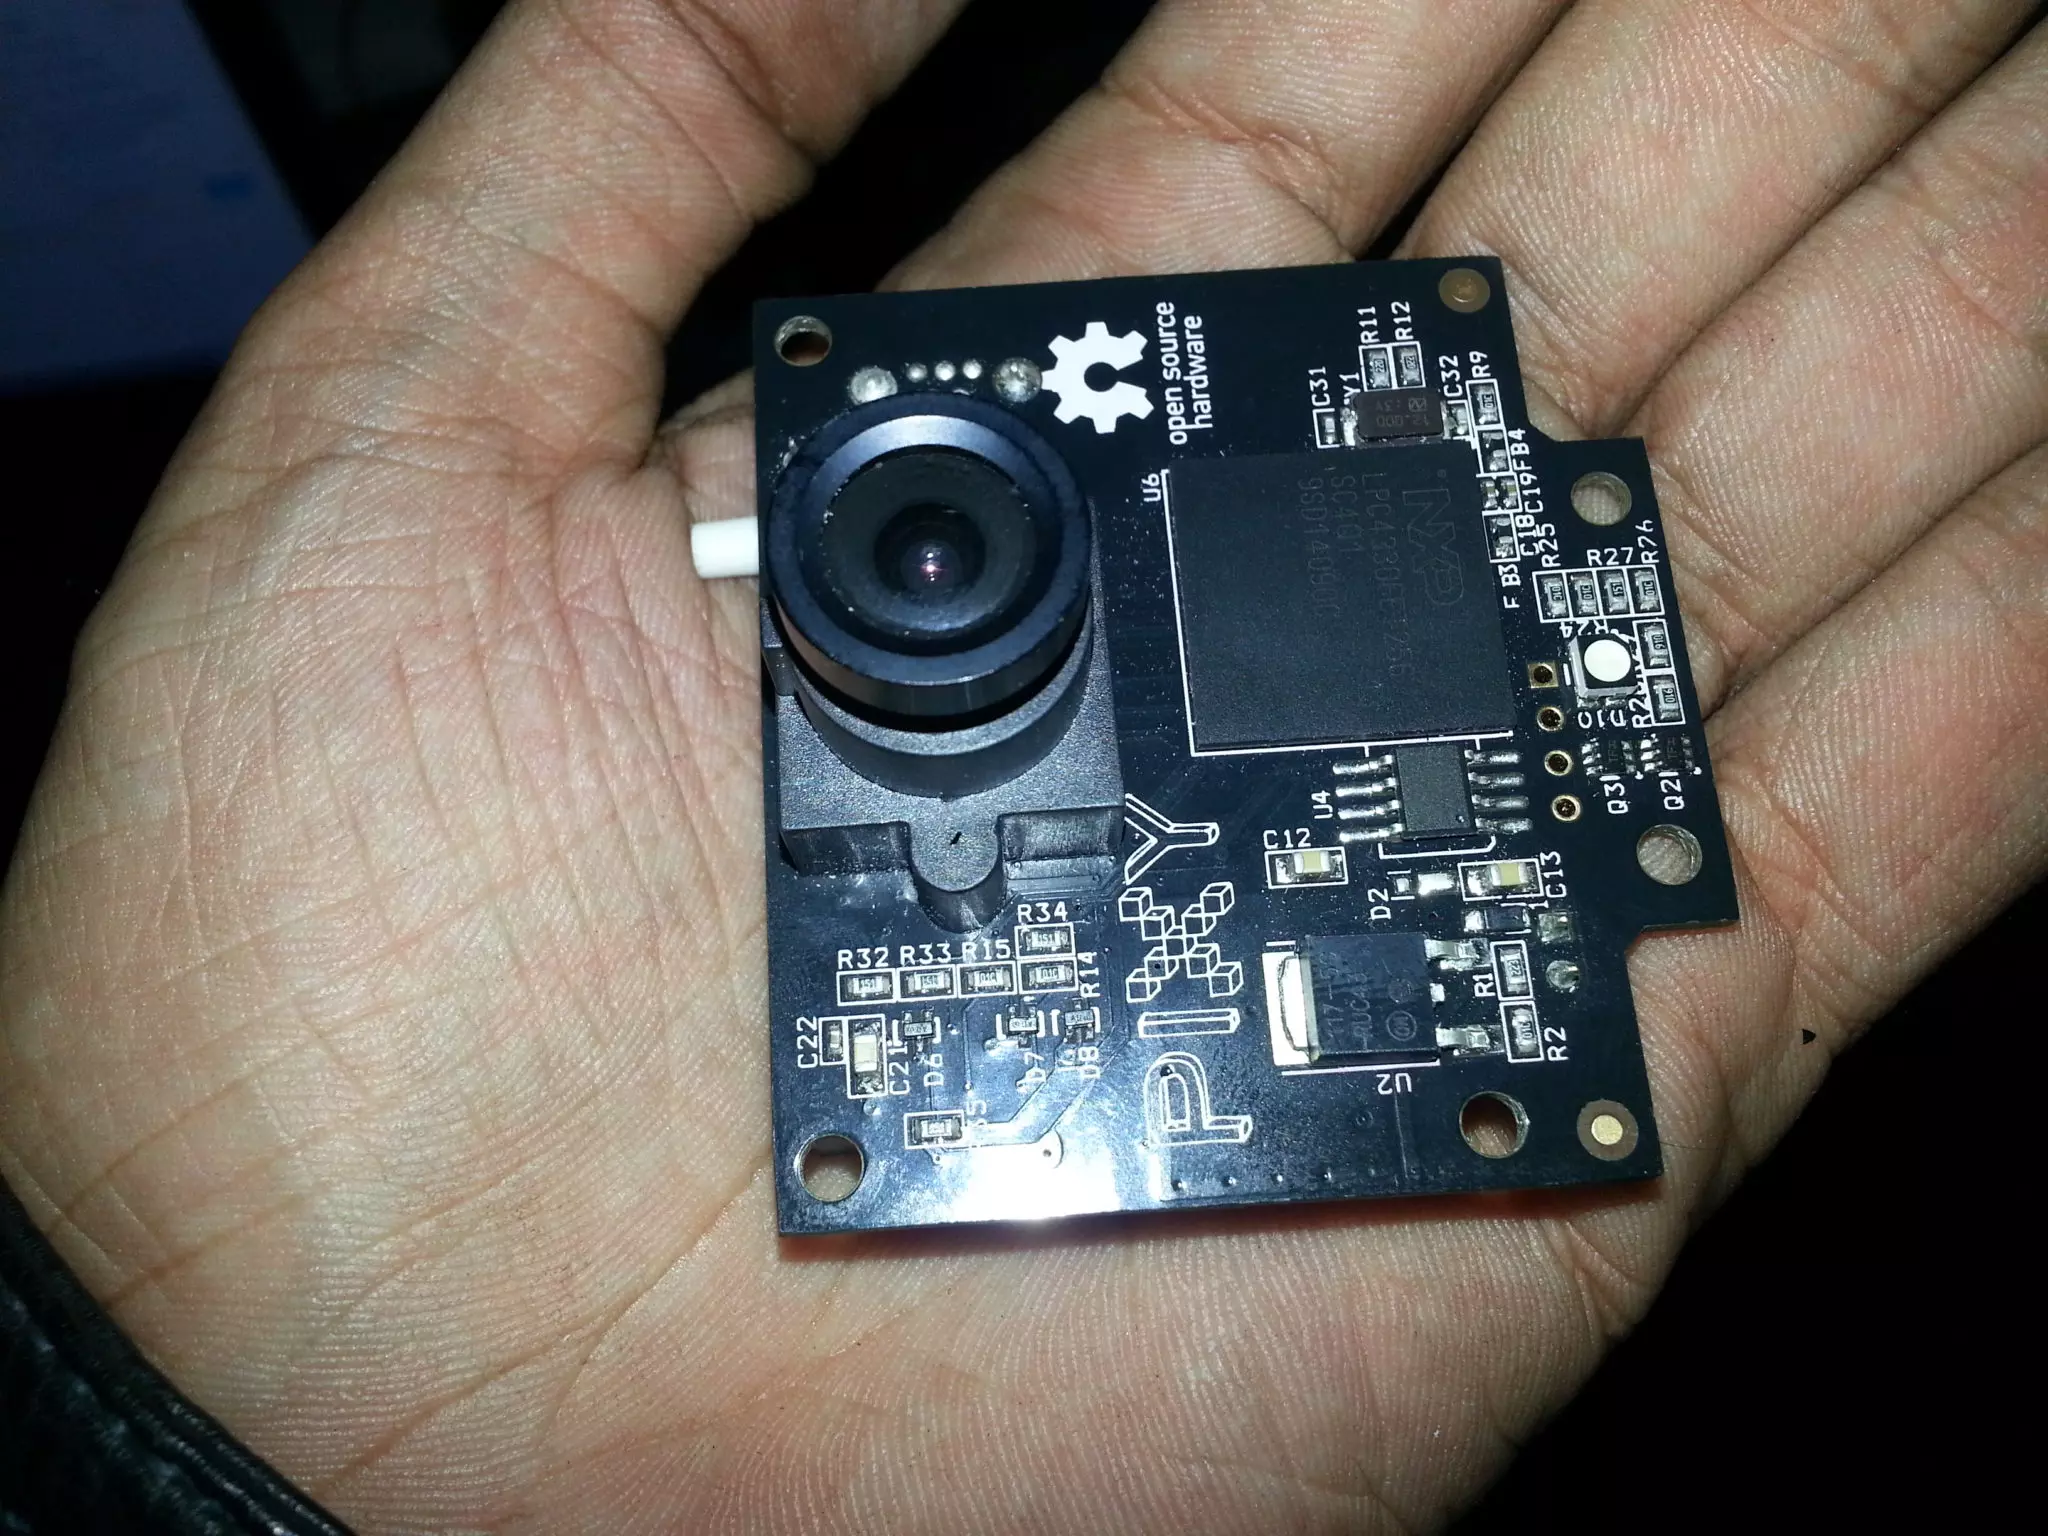
- So, when I ordered for my Pixy Camera, I got the box within 10 days.
- As I received the box I opened it and I got two items from it, one is the Pixy Camera board itself and second is the Serial to SPI cable which is used to connect Pixy Camera with Arduino or PIC Microcontroller.
- The Pixy Camera is shown in below figure:
- The Serial to SPI cable which is received has 9 pins on one end which is inserted in Pixy board while six pins on the other end which is inserted in Arduino Microcontroller.
- This cable is also shown in below figure:
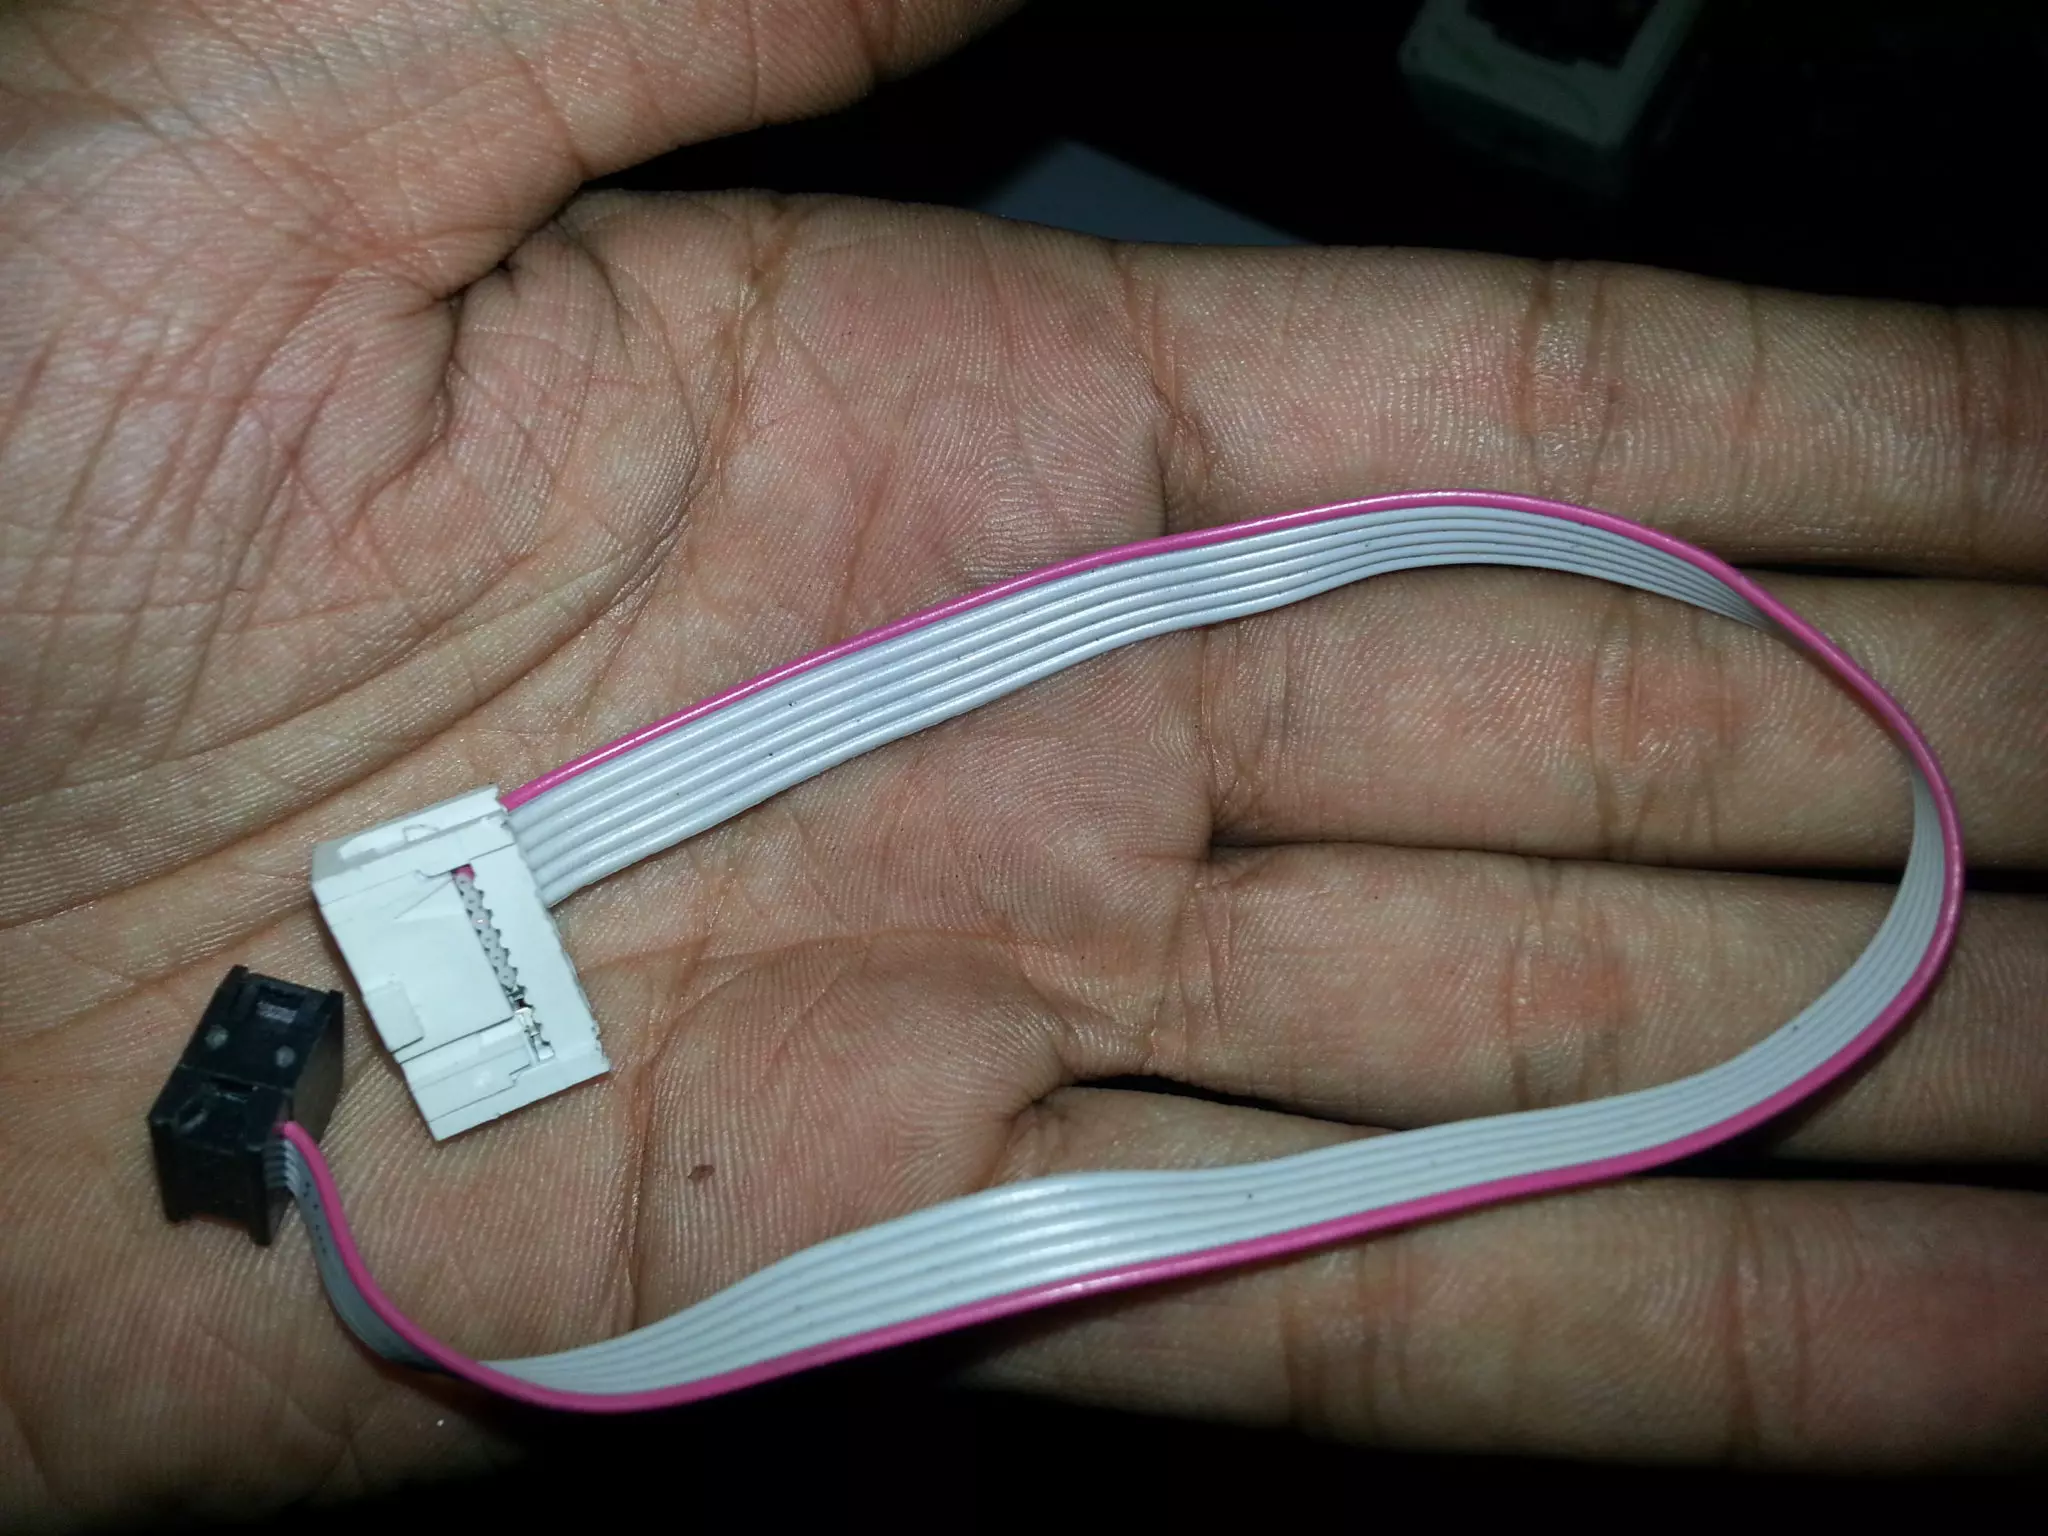
- The black side of this cable is for microcontroller while the white side is for Pixy Camera board itself.
- Next cable you are gonna need is the USB to mini USB cable, which is not with the package so you need to get it on your own.
- I got mine as well and is shown in below figure:
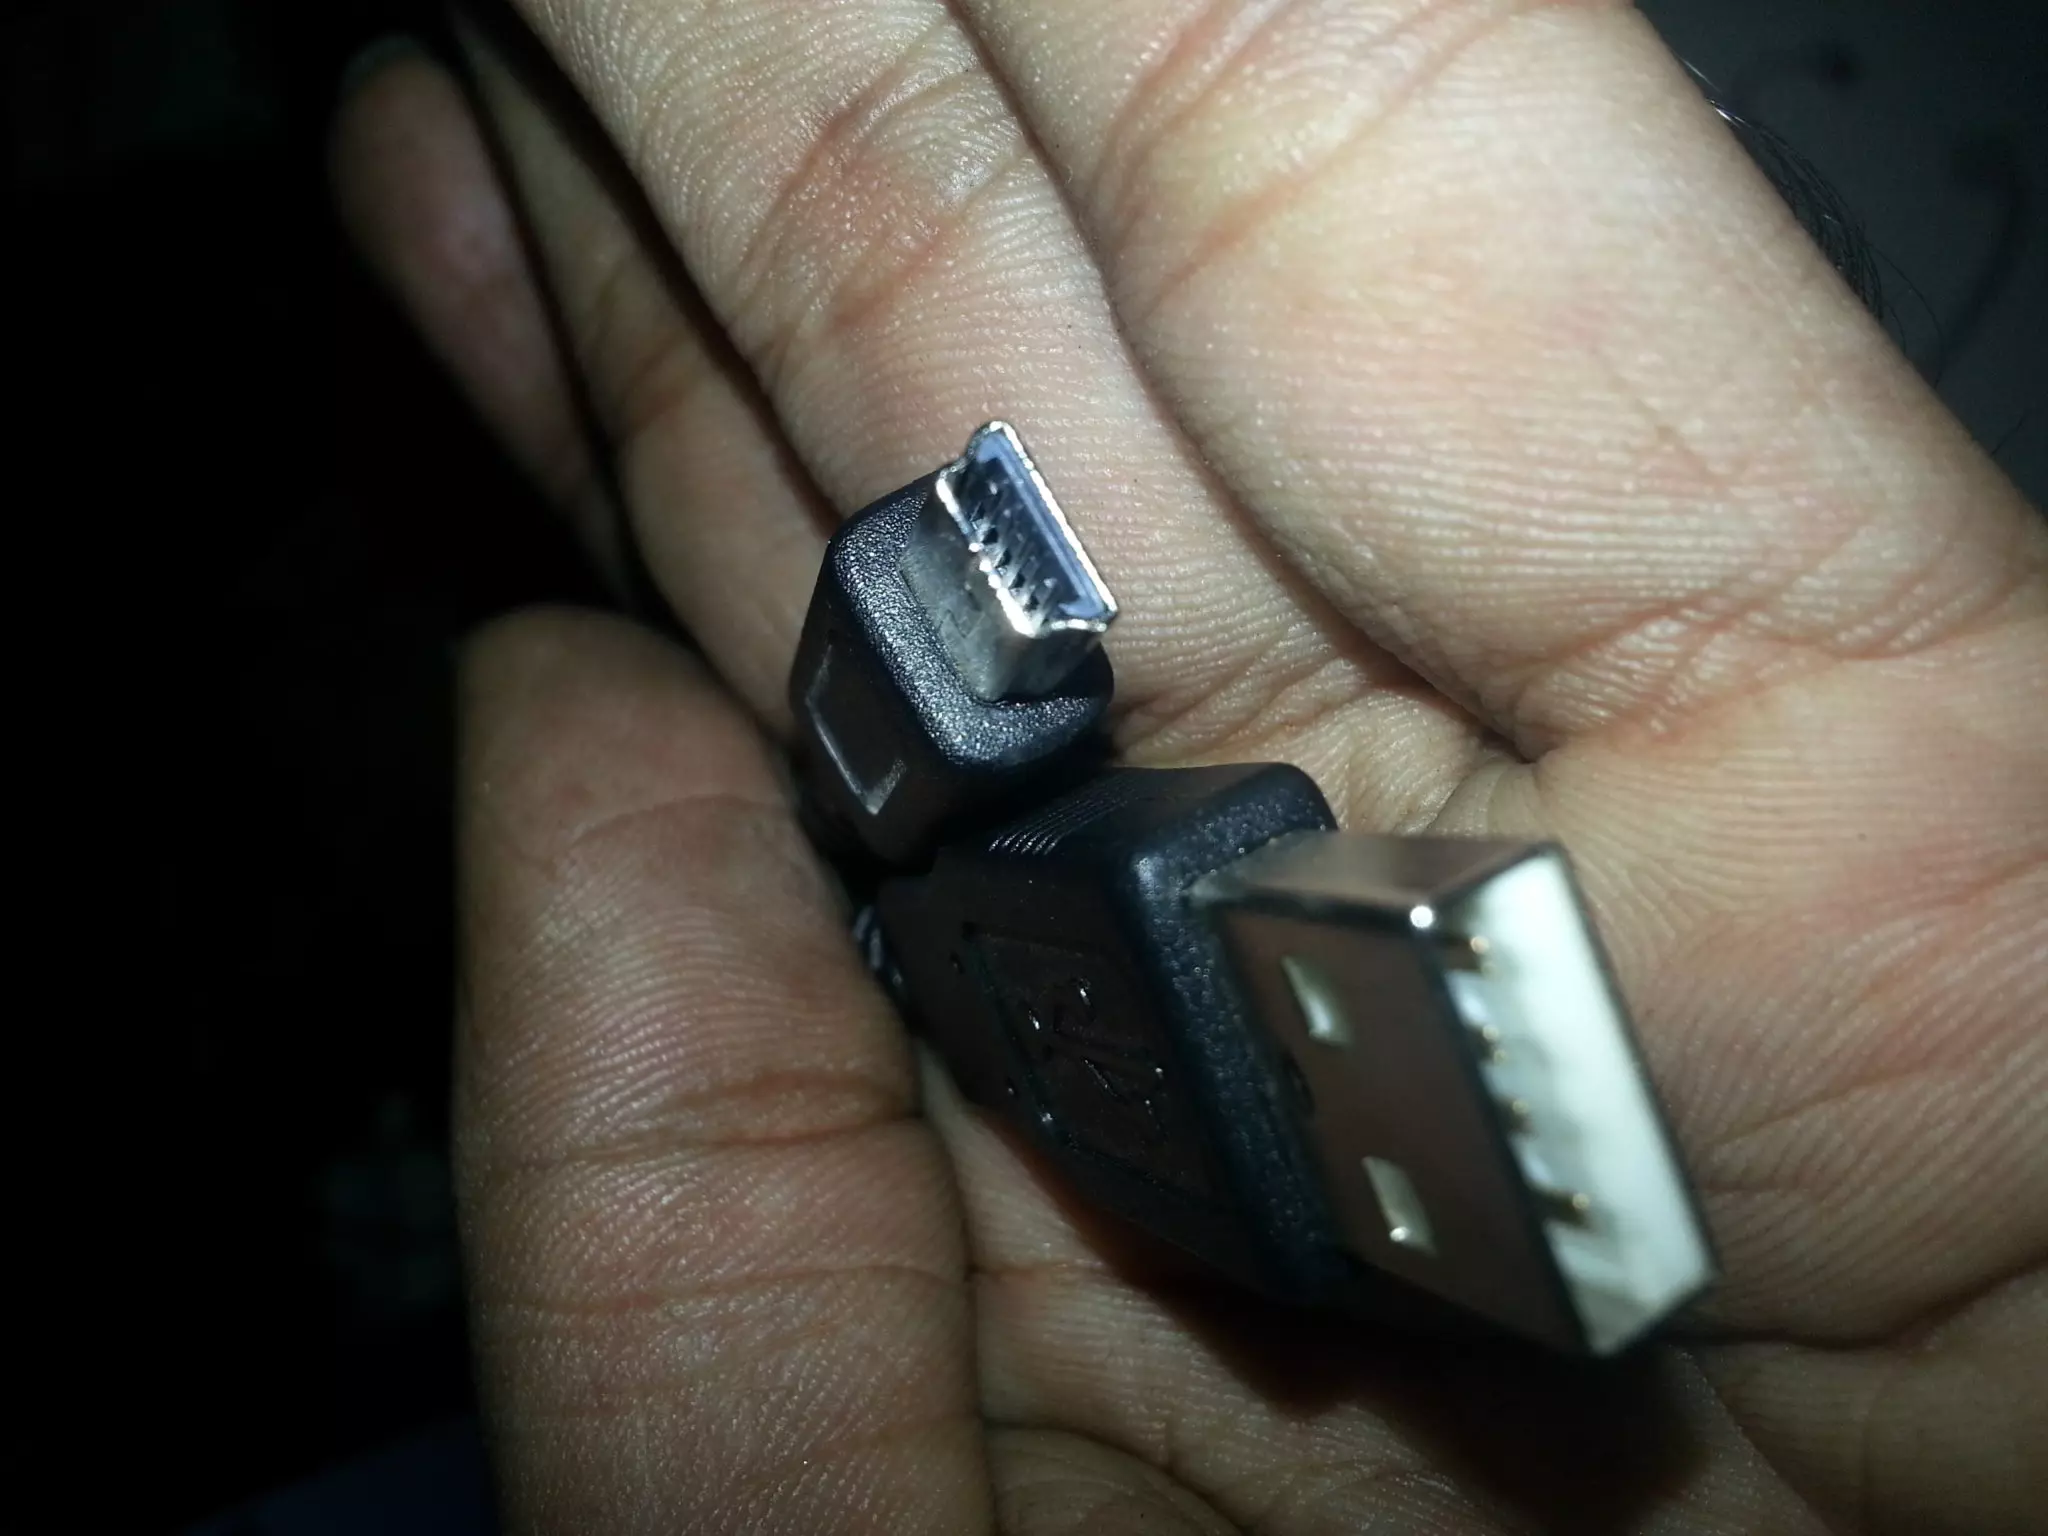
- This cable is used to connect your Pixy Camera board with computer.
- Using this cable, we train our Pixy camera and let it know about colors and objects.
- We actually set signature using Pixy Camera Software, which I am gonna cover in my next tutorial and using this software we make pixy do incredible things.
