How to Create PWM in Raspberry Pi 3


Create PWM in Raspberry Pi 3
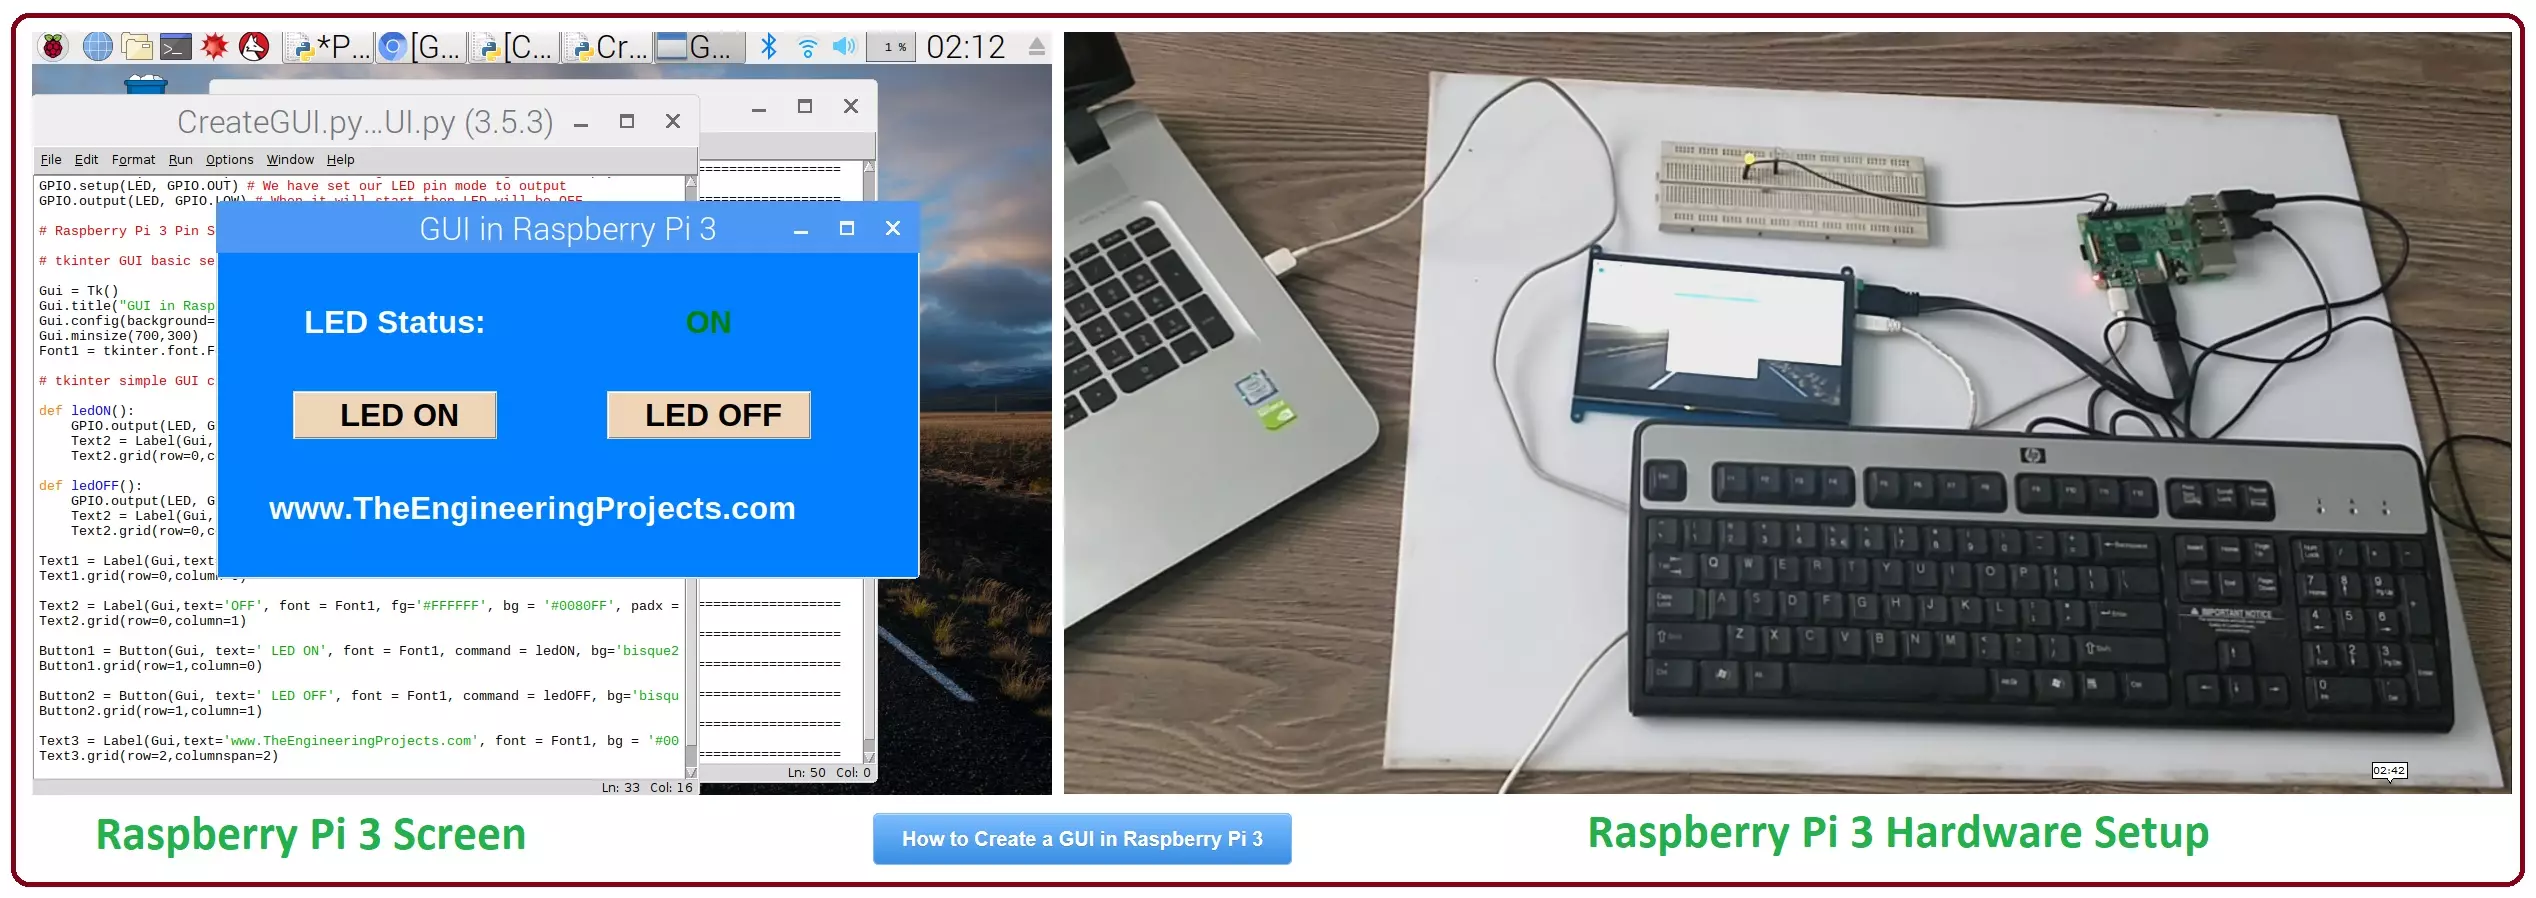
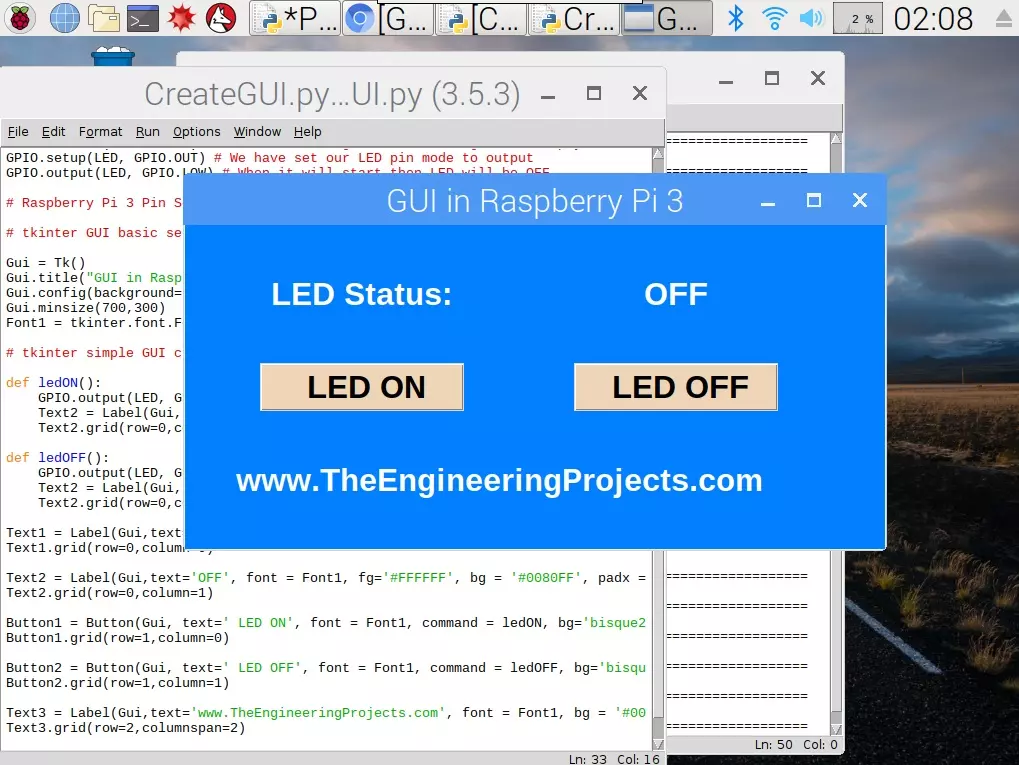
- In our previous post, we have created a simple GUI to control an LED, that GUI is shown in below figure:
- I hope you have remembered the Grid system which we discussed in last lecture, we are now gonna add a new scale in our GUI and we will place it at row = 1 & column = 2.
- It's on the right side of 'LED OFF' button. Here's the code for it.
Scale1 = Scale(Gui, from_=0, to=100, orient = HORIZONTAL, resolution = 1, command = ChangePWM)
Scale1.grid(row=1,column=2)
- We have created a new slider and it's value starts from 0 and it ends at 100.
- Its orientation is horizontal, by default its vertical.
- We have assigned it a function named as ChangePWM and this function will execute whenever we change the value of this slider.
- As, we haven't yet created the function so if you will change its value then it will give error.
- If you run it, it will look something as shown in below figure:
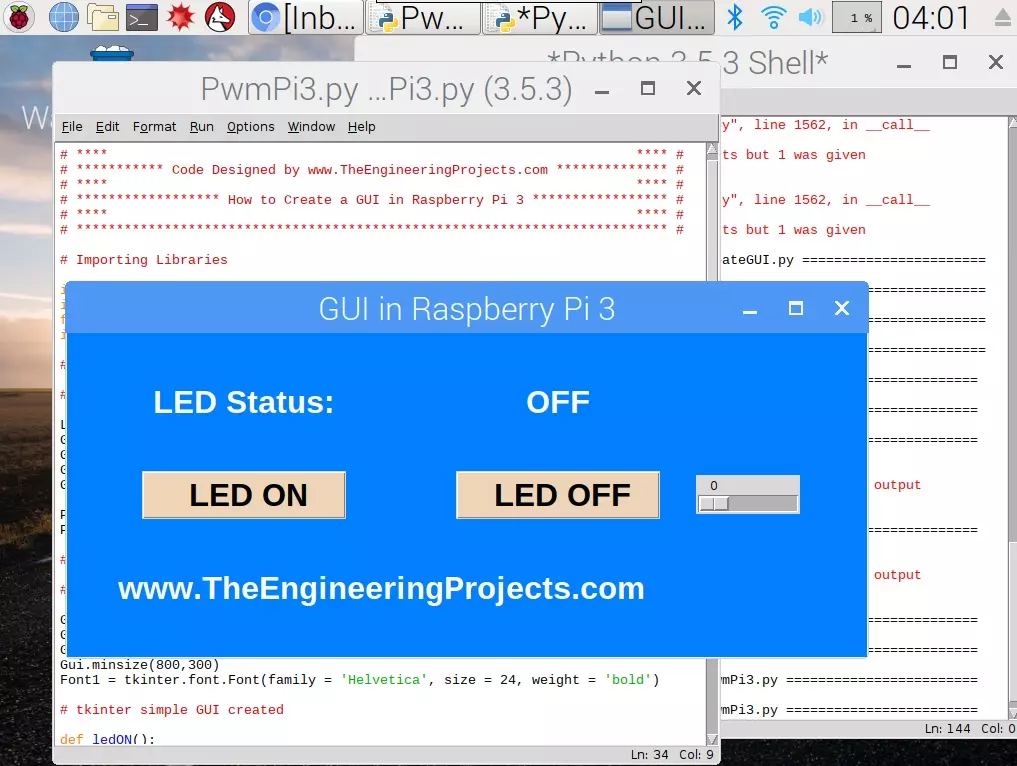
- I have given it a value from 0 to 100 because our PWM pulse value also goes from 0% to 100%.
- If you don't know much about PWM then you should have a look at How to use Arduino PWM Pins, just read the PWM part I have discussed it in detail there.
- In raspberry Pi 3, we have Pin # 12 and Pin # 32 as PWM Pins but I have tried different I/O Pins and this PWM commands works quite fine on all of them. :P
- Anyways, I am going to use Pin # 12 of pi 3 so change this value from 11 to 12.
- So, first of all we are gonna create our PWM frequency, which I have set to 5000.
- After that I have started my PWM Pulse with a value of 0.
PwmValue = GPIO.PWM(LED, 5000)
PwmValue.start(0)
- As you can see in above code our PwmValue is 0 so which means our LED will remain OFF.
- Now, we have to create our slide function ChangePWM.
- So, add the below code after your Buttons functions:
def ChangePWM(self):
    PwmValue.ChangeDutyCycle(Scale1.get())
- Just make sure to add this self in functions' name.
- Slide function works a little different than Button function, so we have to add this self. If you have ever worked on embedded then we add (void). :P
- ChangeDutyCycle is the command to change duty cycle of our PWM Pulse.
- So, we are simply getting value of our Scale and then giving this value to our pwm pulse which in turn changes the intensity of our LED.
- So, if we have 0 on slider then our LED will be at lowest intensity so means OFF and at 100 it will glow at maximum intensity or 5V.
- Here's our complete code:
# ************************************************************************** #
# ****                                                                  **** #
# *********** Code Designed by www.TheEngineeringProjects.com ************** #
# ****                                                                  **** #
# ****************** How to Create a GUI in Raspberry Pi 3 ***************** #
# ****                                                                  **** #
# ************************************************************************** #

# Importing Libraries

import RPi.GPIO as GPIO
import time
from tkinter import *
import tkinter.font

# Libraries Imported successfully

# Raspberry Pi 3 Pin Settings

LED = 12 # pin12
GPIO.setwarnings(False)
GPIO.setmode(GPIO.BOARD) # We are accessing GPIOs according to their physical location
GPIO.setup(LED, GPIO.OUT) # We have set our LED pin mode to output
GPIO.output(LED, GPIO.LOW) # When it will start then LED will be OFF

PwmValue = GPIO.PWM(LED, 5000)
PwmValue.start(0)

# Raspberry Pi 3 Pin Settings

# tkinter GUI basic settings

Gui = Tk()
Gui.title("GUI in Raspberry Pi 3")
Gui.config(background= "#0080FF")
Gui.minsize(800,300)
Font1 = tkinter.font.Font(family = 'Helvetica', size = 24, weight = 'bold')

# tkinter simple GUI created

def ledON():
    GPIO.output(LED, GPIO.HIGH) # led on
    Text2 = Label(Gui,text=' ON ', font = Font1, bg = '#0080FF', fg='green', padx = 0)
    Text2.grid(row=0,column=1)

def ledOFF():
    GPIO.output(LED, GPIO.LOW) # led off
    Text2 = Label(Gui,text='OFF', font = Font1, bg = '#0080FF', fg='red', padx = 0)
    Text2.grid(row=0,column=1)

def ChangePWM(self):
    PwmValue.ChangeDutyCycle(Scale1.get())

Text1 = Label(Gui,text='LED Status:', font = Font1, fg='#FFFFFF', bg = '#0080FF', padx = 50, pady = 50)
Text1.grid(row=0,column=0)

Text2 = Label(Gui,text='OFF', font = Font1, fg='#FFFFFF', bg = '#0080FF', padx = 0)
Text2.grid(row=0,column=1)

Button1 = Button(Gui, text=' LED ON', font = Font1, command = ledON, bg='bisque2', height = 1, width = 10)
Button1.grid(row=1,column=0)

Button2 = Button(Gui, text=' LED OFF', font = Font1, command = ledOFF, bg='bisque2', height = 1, width = 10)
Button2.grid(row=1,column=1)

Scale1 = Scale(Gui, from_=0, to=100, orient = HORIZONTAL, resolution = 1, command = ChangePWM)
Scale1.grid(row=1,column=2)

Text3 = Label(Gui,text='www.TheEngineeringProjects.com', font = Font1, bg = '#0080FF', fg='#FFFFFF', padx = 50, pady = 50)
Text3.grid(row=2,columnspan=2)

Gui.mainloop()
- You can download this PWM code by clicking the below button:
[dt_default_button link="https://www.theengineeringprojects.com/RaspberryPi3/How to Create PWM in Raspberry Pi 3.rar" button_alignment="default" animation="fadeIn" size="medium" default_btn_bg_color="" bg_hover_color="" text_color="" text_hover_color="" icon="fa fa-chevron-circle-right" icon_align="left"]Download PWM Pulse Code for Raspberry Pi 3[/dt_default_button]
- So, now let's run our code and get the results. I have shared the below image in which I have set the value of scale to 15.
×
![]()