String Array using Jupyter Notebook in Python

Hey peeps! Welcome to the Engineering Projects where you are learning the basics of Python in detail. We are working a lot with the arrays as these are important concepts in most of the high-level programming languages till now, the numeric data was used in the arrays but for our practice, we are moving towards the next step where the focus will be on the string data type. The practice is done on the Jupyter notebook and every step is going to be explained well without skipping any concepts but to keep things easy, we are not emphasising unnecessary details and concepts. So, before going deep into the topic, have a look at the list of the contents that will be discussed in this lecture:

  • What are the strings?

  • How do we use the string in arrays?

  • What is the list?

  • How do we extract the characters from a simple string through indexing?

  • How do you relate the string array with the list?

  • How can we get more than one character from a string message without using the array?

  • How do we add more than one message together by using the concatenation?

  • What is the best way to access the elements of the string array through indexing?

  • Can we add more elements of the string array into the already declared array?

  • How do we remove the elements from the string array?

  • What is the relation between the string and character in Python and how do you extract the single alphabets from the string using the list method?

All these concepts will be discussed in detail and will be understood by using the coding in Jupyter Notebook. 

What is the String Array in Python?

Here is a quick revision of the concept we have learned so far in this series but it is important to understand the basic definition so that we may understand the difference between all of some basic data types. The string is the sequenced order of the characters. It means that all the meaningful conversations between people and even this lecture are in the form of string. So, in this way, the array, containing all the elements in the form of the string is called the string array. We define it as:

"The string arrays are the specific type of arrays in which all the elements are in the form of string which means it contains the collection of characters in such a way that every element is a meaningful word."

We use the string in our daily life during the conversation and there is no need to explain more because we have used the string many times in our series of these lectures. 

Getting the Character of String Through Indexing

If we start from the basics then we have to mention that as the string is a collection of different characters, then extracting the characters from the strings it is quite simple and easy. Why we are associating this method with the arrays? It is because the compiler can read all the characters by indexing them one after the other and that is the reason why we can fetch the characters in Python by using the indexing method. So, have a look at the code for doing this simple task:

Code:

#Declaring and printing the string message

str="We are learning Python"

#printing the single character from the message 

print("The string message = ", str)

print("The second character is " ,str[1])

print("The tenth character is ", str[11])

Output:

Getting More than one Character from String

Code:

#Declaring and printing the string message

str="We are learning Python"

#printing the single character from the message 

print("The string message = ", str)

#More than one character

print("The characters from second to ninth index are: " ,str[1:8])

#using only semicolons

print("The first ten index characters are :  " ,str[:10])

#out of the range characters

print("The out of the range characters are :  ", str[:45])

Output:

Here, the following points are to be understood:

  • More than one character can be extracted from the string using the index.

  • The starting and the ending number of the range you want to print are to be given in the index with a separation using the colon. 

  • If the programmer wants to print the elements from the start to a certain number, there is no need to mention the zero, and we can start directly from the colon. 

  •  By the same token, if the colon comes second and then the number is before it, the compiler will print the character at the index starting from the number till the end of the series of the characters.

  • In case, the programmer gives the numbers that are out of range then the compiler, instead of throwing the error, prints the whole string with its intelligent working. 

Adding String Arrays in Jupyter Notebook

We all have been working with the addition of numbers in our tutorials, but today, the good thing about the string array in Python is, the addition of the arrays, even if they have strings in them, is as easy as the other types of “addition processes." The process of concatenation is used for this. We define it as:

"The concatenation is a specific process used for the string to join two or more strings together in a specific manner."

The At this level, there is no need to explain more. Have a look at the following code:

#decalring the arrays with string words

A=["hi", "we", "are", "learning", "Python"]

B=["It", "is", "easy", "with", "theengineering.com"]

#Using the concatenation for the addition

print(A+B)

Output:

Arrays as List of String in Python

In Python, the concept of a string array can be associated with the list because it becomes easy for the programmers to deal with the string as the list has the following feature:

  • These contain the specific order of the elements, and for the string, if we want to have a specific message, the order is important and it makes our task easy. 

  • It allows frequent changes in the elements so that we may change the message according to our requirements.

  • Duplication of the element is possible in the list, and in the passing of the message, we observe the same words in single sentences. 

Similar concepts are being used here that we have seen when we were learning the numerical problems, but this time, it will be interesting to know the difference between the results with the help of shortcodes. 

Accessing the Strings in Different Ways

Once you have declared your string, the extraction of single or multiple strings from the same array is fun. The programmer just has to specify the location, and the element is popped on the output. But there are different ways to do so, and some of them are shown in the code next. 

Code:

#initializing the array containing the name of programming languages

languages=["C++", "C#", "MATLAB", "ASP.NET", "FLutter"]

#printing the arrays using the index in two ways.

print("\bAccessing the data through index: ",languages[3] )

print("\bAccessing the data through negative index: ",languages[-3] )

#getting the whole array of strings through for loop

print("\bPrinting the whole series using loop")

for lan in languages:

    print(lan)

Output:

Updating the String Array

Once the array is made, the good thing is that it can be updated according to the will of the programmer. Let’s say we had an array containing the names of the students in the class; if a new student gets admission or the previous one changes the class, it can be updated easily. In other programming languages, the arrays do not allow the updating of the elements. 

Code:

#initializing the array containing the name of programming languages

languages=["C++", "C#", "MATLAB", "ASP.NET", "Flutter"]

#appending the new element at the end 

languages.append("java")

#getting the whole array of strings through for loop

print("\bPrinting the whole series using loop after appending")

for lan in languages:

    print(lan)

#deleting the element from the array of string

languages.pop(2)

#getting the whole array of strings through for loop

print("\bPrinting the whole series using loop after deleting")

for lan in languages:

    print(lan)

Output:

Hence, the update process is easy to use in arrays. The point that must be cleared here is, the pop function is sued to remove the element from the array and the programmer can not use a string in this place otherwise the compiler will show the error. Only the number of the element can be used in this function, and you must have noticed that it is not the position of the element that we have mentioned here but the index of that particular element. 

Converting String into the List of Characters

In other programming languages, characters are separate data types that contain single alphabets and have their own identity and existence. In this way, there must be a specific way to initialize the characters and the strings. Usually, in languages such as C++ and C#, the ways to declare the string and characters are different. Strings are denoted by double quotation marks, and the characters are defined by using single quotation marks around the alphabet. The point that I want to make here is, in Python, there is no concept of single characters, but the declaration of the words or characters, when single or double quotation marks are used, means the string, no matter if it is a single alphabet or the whole message. 

In case the programmer needs to convert the string into a single alphabet (the data type is still a string), he uses a simple and uncomplicated function to do so. The code and the output of this specific program with an example are given next:

Code to Convert String into Alphabets:

#initialization and printing of the string message.

myMsg = " Python is easy. "

print("The message before conversion= ",myMsg )

#conversion of the string into alphabets.

myMsgList = list(myMsg)

print("The message after conversion= ",myMsgList )

#removing the white spaces from the result.

myMsgList2 = list(myMsg.strip())

print("The message without white spaces =", myMsgList2)


#printing the message without any single space

myMsgList3 = list(myMsg.replace(" ", ""))

print("The message without any single space =", myMsgList3)

Output:

Here, the following points must be known to understand all the operations performed. 

  • The string message is initialized simply, and after that, the programmers can convert it into a list for useful functions. 

  • To convert the whole string message into a single alphabet, the “list” function is used, and the characteristics of the string are converted into the list. Now, you do not have the string on the screen but the list. 

  • In this case, the compiler reads even the blank spaces between the alphabet and shows them in the form of a single character with single quotation marks. 

  • To remove the starting and end spaces, there is a method called "stripping" that eliminates the extra spaces from the message, and as a result, we get only the alphabets with the necessary spaces between them. 

  • Another method called “replace” is used in Python which replaces all the spaces between the message and easily converts the whole message into a series of alphabets with no spaces between them. 

There are other such methods that deal with the string in different ways. For example, the conversion of the string into single words is also possible, but for now, we are not discussing it. This is all for today, and we hope you learned a lot from this lecture. The beginning of this lecture included a very basic introduction to the string, and we saw how we can use strings in arrays. Moreover, using our concepts, we have learned many built-in functions, and with the usage of the string, it was easy to understand the concepts. We have seen the concatenation and other ways through which we can modify the strings according to our requirements. We will talk more about the string in our next lecture; until then, happy coding. 

Types and Operations on Array using NumPy in Python

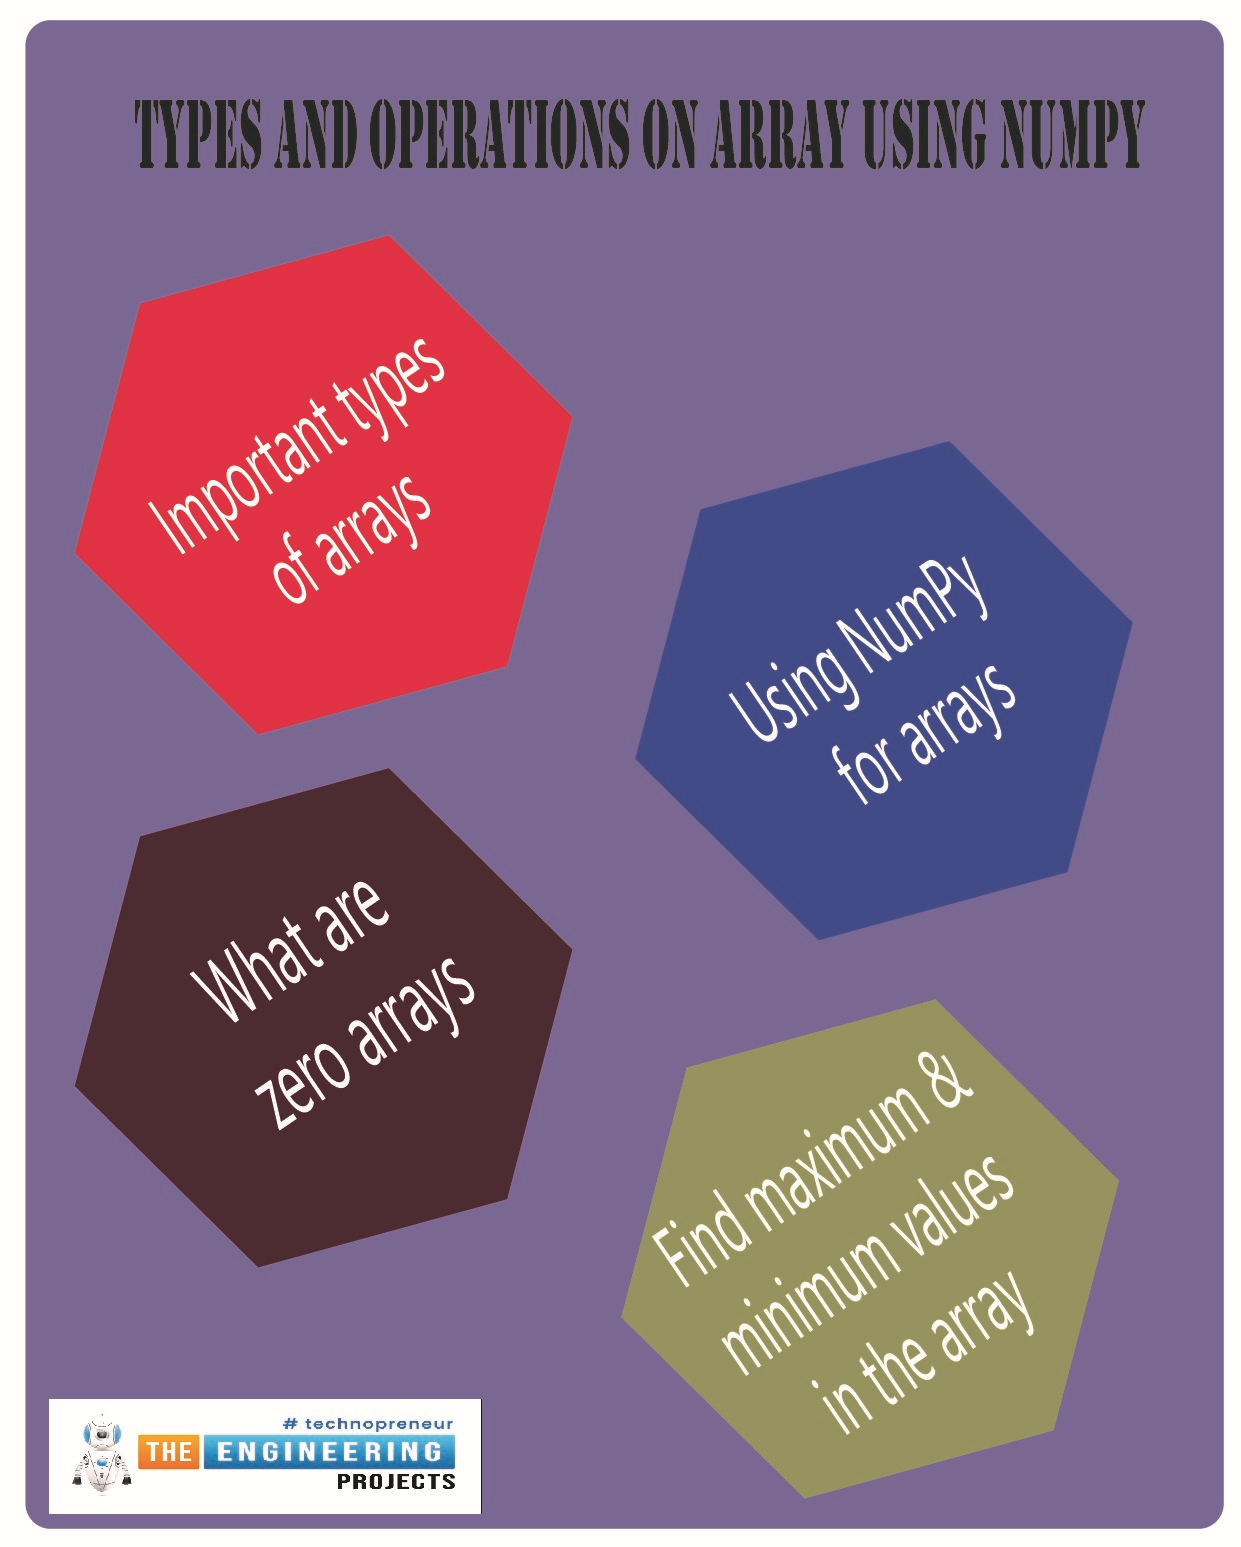
Hello students! Welcome to the next episode of NumPy, where we are working more on arrays in detail. NumPy is an important library for Python, and for concepts like integer arrays, it has many useful built-in functions that help programmers a lot. In the previous lecture, the installation and basic functions were discussed and this time, our focus is on the general operations and types of arrays that usually the programmers need during the coding. It is an interesting and basic lecture, and you will learn the following concepts in this lecture:

  • What are some important types of arrays?

  • Why are we using NumPy for arrays?

  • What are zero arrays?

  • What is the random array?

  • How can we use the ones array using NumPy?

  • Is it easy to perform the identity array in Numpy?

  • Practically perform the arithmetic operations in an array.

  • How do we find the maximum and minimum values in the array?

    Important Types of Array with NumPy

    If we talk about arrays, it is a vast concept, and many points are important to discuss. It is one of the reasons why we are using the library of numPy and it becomes super easy to work on the arrays using it. There are different types of arrays that we have learned about in our mathematics classes, and some of them are so important that NumPy has special functions for them so that programmers who want to use them do not have to write the whole code manually, but instead, using some important instructions, the array is formed and used automatically according to the instructions.

    Zeros Array in Python

    Understanding the zeros array is not as difficult as its name implies; it is the array that has all the entries set to zero. In other words, the array does not contain any other value than zero. The size and shape of the array are not restricted by any rules; therefore, any size and shape of the array can be declared as a zero array.

    By the same token, the code for some types of arrays is simple and easy, so here we want to show you how some programmers can add random numbers to their arrays by using this simple instruction. So have a look at the syntax, and then we will use it in the code:

    For the zero arrays:

    myArray =zeros((numbers of rows, numbers of columns))

    For adding more details to your array, you can use the following syntax:

    myArray = np.zeros( shape , dtype , order )

    We are using the zeros array for the first time, therefore, to keep things simple, we will use the first method in our program.

    Random Elements of Arrays:

    random.rand(numbers of rows, numbers of columns)

    Both of these require less effort, but with the help of these built-in functions, the programmers feel the convenience of getting the best result instead of using multiple lines of code to get the required results:

    Code:

    import numpy as NumPy

    #using the zeros method to print the zero array 

    print("\bZero array with two rows and three columns " )

    zeroArray=NumPy.zeros((2,3))

    print(zeroArray)

    #using the random method to print the array 

    print("\bThe random array with two rows and three columns ")

    randomArray=NumPy.random.rand(2,3)

    print(randomArray)

    Output:

    Here, if you have not noticed the syntax, you must see that both of these have similar syntax, but the numbers of brackets are different. If the programmers do not follow the same syntax for each case (for the simple syntax and for the detailed syntax of zero error), then they will face errors.

    Now, here is the task for you, check the other syntax mentioned above about the zeros array and try to find out how you can use the other details in your zeros array. 

    Ones Array using NumPy

    The next program to perform is also easy to understand if you know the previous one discussed above. This time, all the entries in the array are one. It means, no other entry other than 1 is the shape of the array can be rectangular, square, or any other according to the requirement of the programmer. 

    Syntax:

    myArray =ones((numbers of rows, numbers of columns))

    Code:

    #using the ones method to print the ones array 

    print("\bZero array with two rows and three columns " )

    onesArray=NumPy.ones((2,4))

    print(onesArray)

    # Declaring the array as a tuple

    # declaring their data types and printing the results

    onesArray = NumPy.ones((2, 3), dtype=[('x', 'int'), ('y', 'float')])

    print("\bDetailed ones array= ")

    print(onesArray)

    print("\bData type of ones array= ")

    print(onesArray.dtype)

    Output:

    Hence, in this way, we have seen two ways to print our ones array to compare the best method that programmers can use according to their requirements. 

    Identity Array Using NumPy

    The identity array is another important type of matrix or array that is used in multiple instructions, and programmers dealing with numbers must know its formation and applications. We know that the diagonal entries in a matrix or array are the ones that have the same value for row and column. In simple words:

    i=j

    Where,

    i=positions of the row

    j=position of the column

    So, for the identity array, these rules are followed:

    • All the diagonal elements are one.

    • All the elements other than the diagonal are zero. 

    • No other number is used in the diagonal array.

    • The shape of the diagonal matrix is always square, which means the numbers of rows are equal to the number of columns. 

    Now it's time to move towards its code and output.

    Syntax of Identity Array

    myArray=NumPy.identity(integer)

    As you can see, only one number is required for this type of array because it is decided that the numbers of rows and columns are equal. 

    Code for Identity Array

    import numpy as NumPy

    #declaring an identity array with four rows and four columns.

    #printing the simple identity array

    print("\bsimple identity matrix")

    myArray=NumPy.identity(4)

    print(myArray)

    #Multiplying the whole array with three.

    print("\bAfter the multiplication of the identity matrix with three")

    myArray2=3*myArray

    print(myArray2)

    Output

    In this way, we have learned that the multiplication of an array is possible in the code, and it is a simple process just as we do it manually in our mathematical problems. 

    Mathematical Operations on 2D Arrays

    When dealing with the arrays, there are certain points that are pros of choosing this data type to manage our data. One of the most prominent advantages is the mathematical operations that can be performed on the arrays by following simple and uncomplicated syntax. Here is the list of the operations that you are going to observe in just a bit on the arrays:

    Arithmetic Operations on Arrays

    This topic is interesting, and you are going to love it because it is simple to perform and easy to understand but is an important concept in Python, especially when using arrays. We all have been working with addition, subtraction, multiplication, and division since our childhood, and now is the time to use them in arrays. There is no need to explain more, so let’s move towards the code.

    Code for Arithmetic Operations on Array

    import numpy as NumPy

    #Declaring two arrays for the arithmetic operations.

    print("\bElements in arrays")

    A=NumPy.array([[12,45,11,7],[23,8,11,90],[12,55,1,90]])

    print("A= \n", A)

    B=NumPy.array([[76,43,1,90],[43,99,14,11],[12,90,22,55]])

    print("B= \n", B)

    #Performing the arithmetic operations.

    print("\bAddition of arrays \n", A+B)

    print("\bSubtraction of arrays\n", A-B)

    print("\bMultiplication of first array with the second\n", A*B)

    print("\bMultiplication of second array with the first\n", B*A)

    print("\bDivision of first array with the first\n", A/B)

    print("\bDivision of second array with the first\n", B/A)


    Output

    As you can see, we have a long list of outputs, and all the operations that we have discussed are self-explanatory. Here, we have seen that all the arithmetic operations can be done from array to array. Moreover, if you look at both types of multiplication and division, the answers are different, and it makes sense because these arrays do not follow the commutative law when dealing with arrays. Mathematically,

    A*B!=B*A

    Similarly,

    A/B!=B/A

    In addition to this, you must know that scaler arithmetic operations can be performed on the array that means, an integer or the float can be added, multiplied, divide and subtracted from the whole matrix, and the effect of that number will be observed on all the entries of that particular array.

    Maximum and Minimum of An Array

    The next operation in which we are interested in finding the maximum and minimum values in the array. These work great when dealing with image processing and related concepts. These are two different operations, and keep in mind, it seems easy to find the maximum and minimum values in the simple and small arrays, but when talking about the arrays with the order 1000*1000, it becomes almost impossible to find the required value. So without using more time, have a look at the code given next:

    The Syntax for Maximum and Minimum Value

    maximum_value=numPy.max(Name of the array)

    minimu_value=numPy.min(Nmae of the array)

    Code for Maximum and Minimum Value

    import numpy as NumPy

    #Declaring two arrays for the arithmetic operations.

    print("\bElements in arrays")

    A=NumPy.array([[12,45,11,7],[23,8,11,90],[12,55,1,90]])

    print("A= \n", A)

    #Finding the maximum Value

    maximum=NumPy.max(A)

    print("Maximum Value in array = ", maximum)

    #Finding the minimum Value

    minimum=NumPy.min(A)

    print("Minimum Value in array = " ,minimum)


    Code:

    Hence, as you can see, the maximum value occurs more than once in that array, but the compiler only gives us one value. The reason why I am mentioning it is that if NumPy is not used in this case and the programmer does not associate it with the array, the compiler throws the error that there must be another function that has to be used with your particular operation because it takes the array as a tuple. These small details are important to observe because many times, the programmers are stuck into such problems and do not get the reason behind the array. 

    Syntax of Determinant in NumPy


    Determinant=numPy.linalg.det(Name of array)

    Code:

    import numpy as NumPy

    #Declaring two arrays for the arithmetic operations.

    print("\bElements in arrays")

    A=NumPy.array([[12,45,11,7],[23,8,11,90],[12,55,1,90],[11,33,66,1]])

    print("A= \n", A)

    #Getting the determinant of the array

    determinant =NumPy.linalg.det(A)

    print(determinant)

    Output:

    If you are confused with the keyword that we have just used here, let me tell you that linalg is the method in Python that is associated with the determinant of the square array. In other words, as we have used ”random” with the rand function above, there must be the use of linalg with the det function. Moreover, never use these functions with other types of arrays. The determinant can only be used with the square matrix. 

    Hence, it is enough for today. We have seen a lot of information about the arrays in this lecture, and all of these were performed on the NumPy library. At the start, we saw the types of arrays that the programmers used often in the coding. After that, we saw the mathematical operations such as the arithmetic and general operations in the NumPy. We tried our best to use similar arrays for different operations to make the comparison in our minds. All of these were uncomplicated, and throughout this lecture, we revised the basic concepts of the matrices and arrays that we learned years ago during our early education of computers and mathematics.

    Installation and Functions of NumPy in Python

    Hey, peps! Welcome to the new tutorial on the Jupyter notebook. As we are moving towards a higher level of Python, therefore, it is important to understand other ways of doing the same task. As we read in the previous lecture about 2D arrays, this time it is going to be done with the help of a famous library in Python. This time, you are going to learn different, engaging, and advanced-level concepts that not only help you deal with the 2D array but also the installation and working of the unique library of Python, which is NumPy. This lecture is going to be very useful and interesting, and therefore, we suggest you have a glance at all the goals of this lecture.

    • Getting the introduction to NumPy

    • Successfully installation of NumPy and knowing different methods for it

    • Using the arrays with the help of NumPy

    • Creation, indexing, flattening, and appending of the arrays using NumPy

    • Knowing the different ways in detail to use these methods.

    All of these concepts will be clear to you, and we will move on to more details in the next lecture but for this lecture, it is important to learn the basics.

    What is NumPy?

    NumPy is a fantastic library for dealing with numeric data. You must know that a library in Python is a collection of modules that add functionality to a Python program. Libraries are typically distributed in the form of packages, which can be installed with package managers such as pip. If you remember, at the very first lecture of this course, we installed the packages by using pip. The same is the case with NumPy, and this will be clear in just a bit, but for now, you must know that they said that they could include modules that define functions, classes, and variables, as well as algorithms and other services.

    NumPy, Pandas, matplotlib, and sci-kit-learn are some of the most commonly used Python libraries. They can be used for a variety of tasks, including data analysis and visualization, machine learning, and web development. Python programmers can take advantage of pre-existing code by using libraries, which can save time and effort when compared to writing everything from scratch.

    "NumPy (Numerical Python) is a Python library that adds support for large, multi-dimensional arrays and matrices, as well as a large collection of high-level mathematical functions for operating on these arrays."

    It is a fundamental Python package for scientific computing. The good thing here is, Python provides programmers with several ways to perform the same task so that every person may use the best way according to the requirements and expertise of the programmers. In the previous lecture, a simple method was used to perform the two-dimensional arrays, but you must know that NumPy is the second way to do so, which is the reason why we arranged this lecture.

    Installation of NumPy in Python

    Here comes the action. We are going to work with NumPy, and therefore, the installation process is necessary. The good news is, the programmers do not have to follow the prerequisites when you need to install the NumPy but only Python is enough. So if you are following our previous course, you are good to go with the Numpy. There are two ways to install NumPy:

    1. Installation with the Conda (Advanced level)

    2. Installation with the pip (Beginner’s level)

    Difference between Conda and Pip


    conda

    pip

    It is preferred by professional programmers.

    It is best for the students and learners. 

    It is a cross-language therefore, it can install non-python tools and libraries such as compilers and CUDA.

    It only installs the particular Python on the system. It can not install other libraries rather than Python.

    The source through which the conda installs libraries is its own channel so the resources are owned by the conda itself for the installation. Examples of the channels are defaults and conda-forge. 

    The installation is done from the Python Packaging Index (PyPI). Here it is important to understand that PyPI is the largest collection of packages and therefore, it has many features that create ease for Python programmers. 

    Conda is considered an integrated solution that is used to manage different types of dependencies and environments. It does not need other tools to manage the packages. 

    pip method has to get help from different types of tools to manage and arrange the dependencies and packages.


    Installation of NumPy Using Conda

    Installation with the help of Conda also has different types of methods and for the convenience of all types of users, we are discussing all the basic instructions here.

    The best practice for such installations is to use an environment. It means, instead of using the “install” method, the programmers will create the new environment.

    conda create -n my-env

    Once the environment is created, it's time to activate that particular environment.

    conda activate my-env

    Another option to perform the same option is to use conda-forge. Many professional programmers prefer this method because conda-forge provides a wide range of software packages, and in our case, NumPy is one of them. If you want to install from conda-forge then the following command is needed:

    conda config --env --add channels conda-forge

    The methods given above were a little bit tricky, and if the programmer prefers the simplest way, then they must only write the command given next:

    conda install numpy

    Pip Method for the NumPy

    Now, for the installation process at the beginner level, you have to follow the steps listed next. You have to understand that it is recommended to be at this level because all the requirements of this course are designed according to easy and effective ways to code. Hence, the steps given next are enough for all of you:

    • In the window’s search panel, write the Anaconda prompt.

    • Here, write the following command:

    pip install numpy

    • Wait for the installation and loading of the library on your personal computer. 

    • Now, to check if your NumPy is working well, go to your Jupyter Notebook.

    • For this, fire up your Jupyter Notebook by searching for it in your window applications. 

    • Go to the new Python project and wait for the new tab to be opened in your browser.

    Note: It is essential to notice that every time the programmers want to use Numpy, they have to import it into the code, and that is the first step of every program where the programmer needs to get help from NumPy. 

    Using the Arrays with NumPy

    The typical easy-to-deal-with arrays are similar when we talk about the Jupyter notebook and MATLAB etc. Yet, with the advancement of techniques, better and updated methods have been introduced. The NumPy is a numeric library and to learn its usage, the best way is to deal with the arrays. We hope you know the basics of arrays and their fundamental information; therefore, we are directly starting the practice of arrays. In this way, the students will learn the details of 2D arrays and NumPy side by side. 

    Creating 2D Array Using NumPy

    Creating the array is as simple as what the students have seen in the previous lecture. All the steps are easy, and the comments explain the function of each line.

    #importing the numpy

    import numpy as numPy

    #creating the new array from the imported NumPy library

    myArray = numPy.array([[34,8,12,4],[90,5,12,78]])

    #printing result

    print("The 2D array \n ", myArray)

    The output of this code is as expected:

    Getting Basic Information of Array with NumPy

    If you want to make an array automatically with the minimal information provided by you, then it can be done with the help of NumPy (such as declaring the shape and size of the array). There are other ways to do so, but using NmuPy gives the programmers relief. It is because NumPy has built-in functions; they just have to associate their array with that particular function and get the desired output. 

    #importing the numpy

    import numpy as numPy

    #creating the new array from the imported NumPy library

    #using the reshape and arrange functions

    myArray = numPy.arange(9).reshape(3,3)

    #printing the result

    print("The 2D array \n ", myArray)

    Output:

    Here, the important points to be noticed are

    • The arrange function is used to provide information about the total number of elements in the array. But this must be declared by keeping the shape of the array in mind. 

    • The reshape method has the following syntax:

    reshape(numbers of rows, number of columns)

    • The total number of elements must match the shape so that the compiler may arrange the numbers easily; otherwise, the programmer observes the error. 

    • All of the information is connected with the dot operator in the code. 

    • The values in both these functions are enclosed in parentheses.

    • The arrangement of both functions is important because if the reshape method comes before the arrange method, there will be a long list of errors and the program will not run.

    Indexing and Flattening Using NumPy

    The indeed method is not new to us. We all know that the index always starts at zero. But in the case, we are discussing, one must know that when an array is declared, the index is not for only the elements but for the whole set of the row. 

    Moreover, flatting is a special method in NumPy in which the output of the resultant elements in an array is not shown in the form of brackets and single rows, but the programmer gets the real form of the array that we have used in our mathematics and other cases of the array. If these two are not clear to you now, do not worry because after looking at the code given next, all things will be clear.

    #importing the numpy library

    import numpy as numPy

    #declaring my array

    myArray=numPy.array([[12,56,33,90],[3,89,12,45],[34,89,12,90],[56,12,9,221]])

    #using the flatten function

    output=myArray.flatten()

    print("The array is now = ", output)

    #using the index method to get the third-row

    a=myArray[2]

    print("The third row= ", a)

    The output of this program is given next:

    Hence, in this way, we have learned two functions in one code. Here you must know that there are many simple and important concepts about arrays. If we start discussing them in separate codes, then it will become boring and lengthy to learn the small functions and methods. 

    Appending the Elements in Array 

    Once the array is declared, the elements can then be modified. This concept is not applicable to other programming languages, such as C++. Yet, Python gives us this convenience, which is useful for programmers. The appending method is simple and easy, and this code will justify this:

    #importing the numpy library

    import numpy as numPy

    #declaring my array

    myArray=numPy.array([[12,56],[3,89],[34,89],[56,12]])

    print("\bThe array before appending  \n", myArray )

    #declaring the second array to be appended

    myArray2=numPy.array([[23,89],[12,90],[78,9],[78,11]])

    #appending the second array with the first one and printing the result

    print("\bThe result of two matrices \n ", numPy.append(myArray,myArray2,axis=1))

    Hence, both of these arrays are merged by simply appending them to each other. Moreover, the “axis=1” instruction tells the compiler that the rows of both of these arrays are to be joined in the respective manner; otherwise, the whole array is fixed after the second one. You should check it on yourself.

    Consequently, we have learned a lot today. From the introduction of NumPy to the installation of this library, all the steps were discussed here in detail. Moreover, this library was tested by using the array in different ways, such as creating, changing the dimensions, indexing, flattening, and appending the elements. All of these concepts were discussed thoroughly, and there are many more operations on the arrays. Hence, stay with us for more details in the next lecture.

    List of Python Libraries: That You Must Know

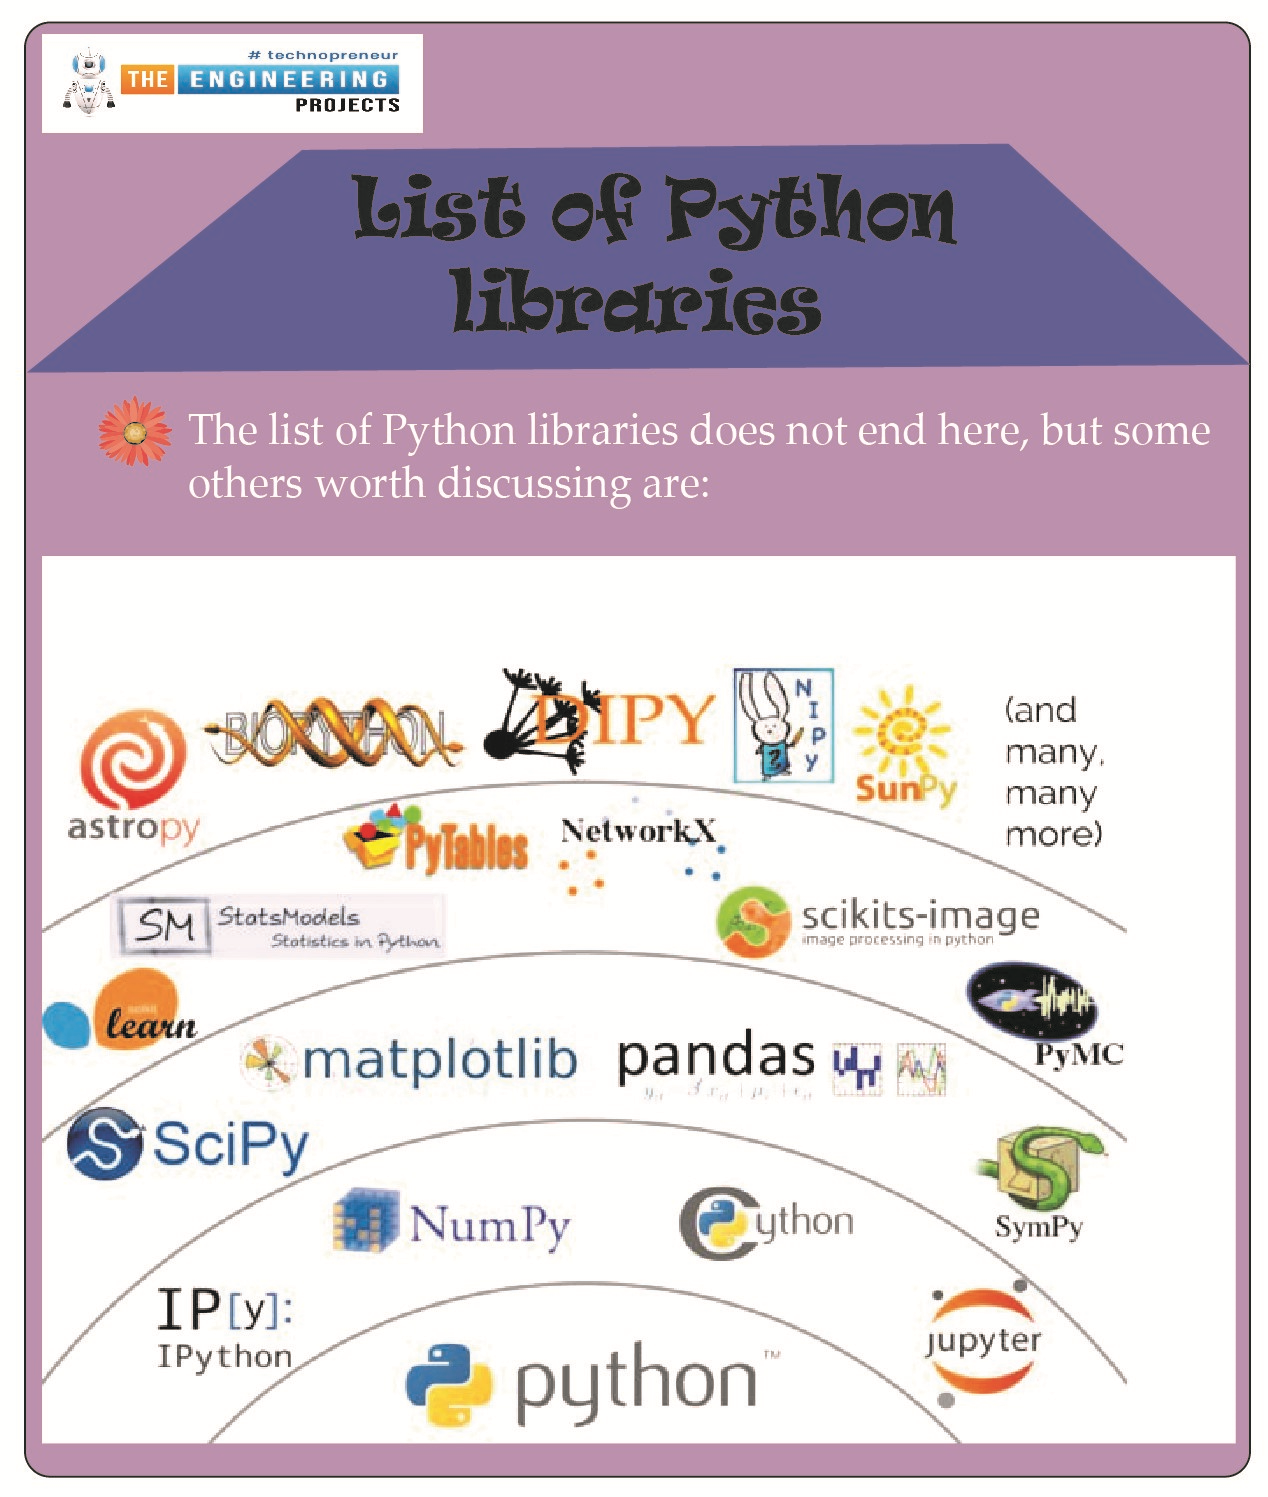
    Hello students! We hope you are enjoying learning Python, and therefore, we are moving forward with the advanced level of Python. For this, you have to keep in mind that you are moving towards complex codes, and therefore, you have to get ready for expert-level problems. Do not worry, we are not going to leave you alone with these complex codes; rather, we are discussing the amazing and interesting libraries in Python so that your work may be done with the pre-defined codes and applications so you get amazing results by following simple operations and statements. If it is confusing for you right now, do not worry. Have a look at the topics that you will learn about today, and after that, we will move towards the details:

    • What is meant by a library in programming languages?

    • List some of the important libraries that are related to Python.

    • Why learning the introduction of important Python libraries is essential for developers and engineers?

    • Give us a short introduction of libraries that are specific to some fields and playing important role in the popularity enhancement of Python as a programming language.

    • Why most of the libraries are specific for neural networks, machine learning and related fields?

    What is a Library in Python?

    We all know the proper meaning of the generic name of a library. It is a collection of books of a different kind in a single building. There are different kinds of books that are related to each other but are different in their content and types. The reason why we are discussing this here is, the libraries of Python, or simply any other programming language, can be defined as:

    "In programming languages, a library is a collection of gigantic pre-compiled and pre-defined code that makes the programming more efficient, simple, and interesting."

    Not only the codes, but the libraries also contain the documentation, message templates, configuration data, etc. In this way, we get the proper package that now only gives us unique outcomes, but these libraries are very specific to their related fields, and therefore, there is no need to have knowledge about all the applications of Python; one or more specific libraries for a specific field are enough.

    The good thing about the Python libraries is that they are similar to other entities, such as methods; that is, they make us comfortable reusing the same code again and again with the help of simple commands. Python has been at the top of the programming language for years, and therefore, there are many communities that are working on it and have useful and fantastic features and workings in their company that give motivation to beginners.

    The role of Python libraries is remarkable, given their popularity and the number of people working in the fields of data science, deep learning, machine learning, and related concepts. People are interested in the workings of these libraries, and therefore, every year, more and more findings in these fields are obtained using these libraries.

    Python Standard Libraries

    Let us tell you more about the libraries so that you may understand them better. Python libraries are written in the same syntax as Python semantics, tokens, and syntax. It is surprising to note that most of the Python libraries are written in C language. More than 200 core modules can be used in the Python standard libraries, and this makes Python a terrifically interesting and complex programming language because the programmer has the greed to use more and more features if he is crazy about it.

    Without the standard libraries, any programming language is not that efficient, and therefore, we are emphasizing the importance of these libraries. You do not have to know all of these at once, but at this level, we will recommend that you know some very important standard libraries that all Python programmers must know. So here is the introduction of some very essential Python libraries with a very short introduction and the speciality of the related field. 

    TensorFlow for Python

    No matter which tutorial you follow, the most remarkable Python library is TensorFlow. At this level, we hope that you know about it or have heard its name. The base of this library is found in Google because it was introduced by Google for numerical analysis and machine learning applications. The basic purpose of TensorFlow is to train machine learning and deep learning models and not only this but also helps to deploy these models on different platforms such as CPUs (Central Processing Units), GPU( Graphic Processing Units), or TPU( Tensor Processing Units), where the last one is special for the numerical analysis of the machine and deep learning methods. The good thing about this library is its flexible architecture and you will be amazed to see it works.

    NumPy for Python

    It is one of the most common libraries that is used for numerical analysis, and therefore, the name stands for Numerical Python. This one is also for machine learning applications and is perfect for large-sized matrices and a great amount of data in the multi-dimensional data processing. For easy computation, the built-in mathematical functions are ideal. 

    The importance of NumPy can be understood by the fact that even powerful libraries such as TensorFlow use NumPy internally to perform the computation with the tensors. Another feature that must be mentioned here is the array interface.  

    Panda for Python

    If your aim is to be a data scientist, then this library is a must-have skill for you. If we talk about machine learning, this library provides professionals with a high-level data structure along with analysis tools for data manipulation and cleaning. The basic operations on data such as indexing, re-indexing concatenation, segregation of data, etc can be done with the help of this data science library. This library functions similarly to NumPy, and the programmers can get a highly responsive data structure using the fantastic features that make it the best tool for solving real-life problems.

    PyTourch Library for Python

    If you are interested in the computation of tensors in machine learning, then you cannot ignore Pytourch. It is the largest machine-learning library that works for tensor computation and, with strong GPU acceleration, the rich collection of APIs of PyTourch. In solving the complex issues in neural networks, Pytourch has amazing solutions. For the developers of GPU acceleration, PyTourch gives built-in support and therefore, they observe the remarkable speed, efficiency, and working in their field. 

    SciPy Library for Python

    The full name of SciPy is Scientific Python, which is an open-source library for scientific computation at a high level. Keep in mind, this is an extension of NumPy, and it is used to deal with complex computational problems with simple commands. You can think of the sorting and indexing of the data as the specialities of SciPy. Most of the developers and engineers know the workings of Scipy, and it gives you a big setup as compared to using NumPy alone. 

    We have seen that SciPy is more famous for research purposes, and it also offers a C++ interface. Not only with Numpy, but you can have the pair of SciPy with other libraries as well, and it is the favourite library of engineers and developers.

    Keras Library for Python

    The next library we are discussing is Keras, and  Francois Chollet introduced this library as a powerful tool and flexible API by which deep learning and neural networks are dealt with. To reduce the cognitive load on the processors, Keras is designed simpler yet it gives the programmers the perfect working all the time. 

    When dealing with the deep neural network, GPUs are used for better performance, and Keras helps the developers effortlessly scale the models. If you are interested in building model prototypes quickly, then you should have Keras, because no matter if you are interested in the web browser, iOS, embedded devices, or any other platform, Keras shows impressive deployment capabilities. 

    PyGame Library for Python

    If you are a game lover or want to develop games, then this library is for you. For some people, PyGame is the most popular library in Python because the developers know the importance of this magical library. You will find it at the top of SDL (Simple DirectMedia Layer), and the reason behind this is, it provides low-level access to computer hardware such as keyboards, mice, etc. and graphic units such as GPUs via OpenGL and Direct3D.

    PyGame is amazing because it makes industry-standard games so that people can use them as a profession. In simple words, Pygame is a cross-platform that offers developers tons of interesting features through which they can develop games efficiently and with less effort. It makes it easy to have the optimized code, so it is easy to understand. Moreover, it supports a multi-core system that makes the code portable for the convenience of the game developers.

    Metaplotlib For Python

    Coming back to the numerical data, those who have a large amount of data and want to plot them with minimum effort must install Metaplotlib. Hundreds of companies are using this library because it let the user visualize the data in several ways. Some of the very common uses of this library are histograms, tables, and different types of charts such as bar charts, pie charts, etc. 

    The good thing about this library is, it is not just restricted to static visualization, but the experts are working deeply with it to get creative and interactive animations with hard work. Another plus point that must be discussed here is that these give fully customizable results that seem great and can be used with other applications.

    PyBrain Library for Python

    The name of this library stands for Python Based Reinforcement Learning, and it is a special library for neural networks and artificial intelligence. It is a perfect library for beginners because it is an open-source library, and its easy-to-use algorithm makes it perfect for those who want to get started with learning. Its flexible structure is quickly understood. We recommend this library to those researchers who want to learn the skills and workings of many different fields, including machine learning.

    This library has a nice repetition in the student community because artificial intelligence and deep learning are leading fields in many pieces of research, yet not all people are experts in them. In many researches, there is no need to be an expert; the beginner level is more than enough. In such cases, the simplicity and ease of such libraries are a blessing.

    The list of Python libraries does not end here, but some others worth discussing are:

    • Scikit-Learn

    • scrappy

    • LightGBM

    • Bottle

    • Tkinter

    • Eli5

    • Django

    • MoviePy

    • NLTK

    • Open CV

    • Pillow

    • Peewee

    • Beautiful Soup

    • PyQt

    • Pytest

    All of these are important in specific fields, and you will notice that most of these are specifically optimized for neural networks, artificial intelligence, deep learning, machine learning, etc because these are emerging fields and Python is the most suitable language for these fields. There is so much to talk about in every single library, and you will learn it soon in the coming lectures.

    Thus, we saw many useful topics today, and we can say that every library had great value in the information. We started this lecture with an introduction to libraries and kept the compatibility of Python in mind with that introduction. After that, we started introducing the important libraries that every Python programmer must know. It is not necessary that you learn all of these, and it is not wrong to say that a single person cannot be an expert in all these libraries, but the point that we want to make here is that Python is an extremely interesting and useful programming language, and if you want to learn it, you must know the scope of this magical programming language. We will write tutorials on these libraries and their projects in the next lectures, so stay with us for more detailed information about libraries.

    While Loop and its Statements in Python

    Greeting learners! Welcome to the new tutorial on Python, where we are going to discuss the loops. In the previous lecture, our focus was on the primary introduction of the loops in Python. If you are from a programming background, you must know that there is a little bit of difference between the loops in Python and those in other programming languages. At the end of the previous lecture, we saw the details of the basic differences and examined why we consider Python better than other languages when considering loops. In the current lecture, our focus is only on the while loop, and you will get to know its importance soon when we discuss the detail of this loop. But before this, have a look at the list of the major concepts:

    • What are the loops?

    • Why do we use the while loop in Python?

    • What are some major points that must be known about the while loop in Python?

    • Can we use the loops while designing the games?

    • What is the concept of statements in Python?

    • How do break statements work in Python?

    • What do you know about the continue statement in Python?

    • What does the else statement do in Python when we use it with the while loop?

    All of these are important interview questions and we will find the answer to each and every concept in detail with the example. We have been working with the Jupyter Notebook and therefore, we are again using it for the practical implementation of the concepts of the current lecture. So let’s move towards the first concept.

    Why Do We use While Loop in Python?

    While loop is one of the most common loops in programming languages and if we talk about Python, loops have fundamental importance and while loop is the favorite of many programmers. No one can get excellence in programming in Python without knowing the detail of the loops in it. The reason why we are learning it so deeply is, there is a bit of difference between Python loops and other programming languages. We discussed it in the previous lecture. There are different reasons behind this statement, and some of them are explained next:

    Repeating Action in While Loop

    As all the loops do, the while loop repeats itself until a certain condition is satisfied. There is no restriction on the data type in the loop, which means, no matter if you have sequences, strings, integers, or other data types, you can use the while loop anywhere. This gives the programmer the independence to use it in a versatile way by using their creativity. Moreover, keep in mind the condition where the programmer wants to get input from the user after a certain condition is met in the code. In such cases, a while loop is perfect to use, and the restriction can be applied to the input as well. 

    While Loop on Sequence of Unknown Length

    The idea of the condition is so smooth in the while loop that it becomes interesting to use the sequences in the while loop. In some cases, when the length of the sequence is not known, programmers can use the sequence in the while loop to get the required result. In this way, the compiler keeps iterating the sequence until a certain condition is met. 

    Gaming and While Loop

    Have you ever noticed the condition of a game where the sequence of certain objects keeps on moving in a specific sequence? This happens when the loops are used with special planning, and the while loop is one of those loops that provide the perfect results according to the needs of the program. In the simulations where a certain condition is to be fulfilled, the need for the while loop is always felt. 

    In addition, when the need to fulfil a certain condition is felt, a loop can be used, and the compiler uses the condition again and again until the requirements are met; once the mission is completed, the game is then over. This is the very basic idea that how programmers use while looping in gaming, there are many innovations every year where programmers use the loops in a different way to present interesting results. All the discussion can be proved with the help of the example in the jupyter notebook:

    Code:

    #initializing the while loop with the true condition

    while True:

    #providing the first condition 

        try:

    #using the integers as the condition

            number = int(input("Enter the age of your character: "))

    #if the condition is satisfied, the program is terminated

            break

    #if the condition is not true, throw the error

        except ValueError:

    #printing the error message

            print("The input is not correct, enter only the integers")

     Output:

    Discussion:

    Once you have seen the working of the code, you might be thinking, "What happens at the backend?" This example is chosen here to tell you that not all conditions of the loops use a comparison between two things only. We can use the boolean conditions as well to get the required output. If you have seen the simple examples of the while loops, then you must be wondering about the output of this program. You can see that the compiler first gives an error when the input does not meet the requirements of the program.

    If the user does not give the expected data type for the program, the compiler goes out of the loop and ignores the break statement. In the second part of the program, the compiler goes to the except value and prints the error message that tells the details of the expected input. In this way, the user understands the requirements in detail, and the program does not end, but the iteration is continued until a certain result is obtained. 

    Python Statements in While Loop 

    In the while loop, there is the ability to use statements of various types, one of which you have just seen. Yet, for the convenience of the learners, we are discussing all the categories in detail. Each of the types has its own example in the Jupyter notebook. To open this, have a look at the steps given next:

    • In your Windows search bar, go and search for "Jupyter Notebook.”

    • Wait until it opens a new tab in your browser. 

    • Once the tab is opened, go to the dialogue box and open a new Python project. 

    • It will open a new tab with the cells where you can write your code.

    Break Statement in While Loop

    In the while loop, the break statement is used many times. As the name suggests, the break statement breaks the iteration, and the compiler stops executing the program as soon as it passes through the break statement. No matter if the body of the code still has to be executed, if the break statement appears in the code, the compiler stops working. Therefore, programmers use the break statement when they have more than one case and just want to execute the one that suits the condition. There are certain benefits to this statement, and one of these is, it gives the programmer all the long codes at once. Here is an example of a break statement in a while loop:”

    Code:

    #Initializing the variable

    a = 4

    #Starting a while loop

    while a <= 12:

    #Printing the required output that we want on the screen

      print(a, ":I am a Programmer of Python")

    #Using the if loop to provide the condition to the compiler for break statement

      if a == 9:

        break

    #iteration

      a += 1

    Output:

    Discussion on the Code:

    It may seem that the code has some unusual things in it such as the starting point is from 4 instead of 1. This is the way to give you the concept that the starting point is not always zero. It totally depends on the choice of the programmer according to the requirements of the program. Once the variable is declared, the while loop is started, where the maximum number of iterations is shown. Right after declaring the condition, the results are printed.

    For the convenience of the reader, I have shown the number of the iteration so that one may understand the whole scenario. Here, to use the break statement, I have shown you the “if” loop. In this way, the compiler understands that whenever the iteration number is 9, it has to stop and jump to the next line instead of completing the iteration. Therefore, after the 9th iteration, the compiler is not showing us any results. 

    Another thing to notice is, the value of “a” is 4 at the start, but after every iteration, the compiler checks for the value when it is at the last line, and then it sees that the value of “a” is now one number greater, and therefore, the next iteration starts. 

    Continue Statement in While Loop 

    If you have understood the previous case, then this one is like a piece of cake because we can say that the working of the continuous statement is somehow opposite to the break statement. 

    Code:

    #Initializing the variable

    a = 0

    #Starting a while loop

    while a <= 12:

      a += 1


    #Using the if loop to provide the condition to the compiler for the continue statement

      if a == 3:

        continue

    #Printing the required output that we want on the screen

      print(a,"I am using the continue statement")

    Output:

    Discussion:

    The other pieces of code are the same, but you can see there is a bit of difference in the position of some lines. If you have observed this, then you are on point. The iteration is done in   the body of the while loop, and right after this, we are using the “if” condition. In the output, observe that the third number of iterations is missing, and this is because we told the compiler to jump whenever the iteration is at the third position. Once the iteration is ignored, the print operation gives us the output on the screen, where our value of the variable and the message on the screen are printed. 

    else Statement in While Loop

    The third and last statement of today is the else statement, and this is quite similar to the cases given above. The else statement has the power to show the result once the condition is no longer true. It means that it can be the ending message that we want to print until the condition is satisfied. As a result, we get two blocks of the code at once that can be printed using the same code. 

    Code:

    #Initializing the variable

    a = 0

    #Starting a while loop

    while a <= 12:

    #Printing the required output that we want on the screen

       print(a,"I am using the continue statement")

    #iteration

       a +=1

    #Using the else statement to tell the user that the condition is satisfied

    else:

        print("The condition is satisfied")

    Output:

    Discussion:

    Here, you can see we are getting a continuous stream of the output where every number of the variable is being used. It is because there were no distractions for the compiler in the code within the while loop. Once we have used it to show that all the iterations are done, the compiler then jumps to the else statement, which tells us the final words of the code.

    In the end, we can say that today we have learned a lot about the statements used with the while loop in Python, and with the help of examples, the concept is not completely clear. The focus was on the while loop, but using the example of the statements, we understood how we could get the perfect result by merging the concepts of loops and statements in Python. From the introduction to the ending, the discussion was clear about the loops, and we took care of the minor details as well to know best about the while loop. It was an informative lecture, and in the next lecture, we have to know more about loops in Python, so stay tuned with us and be happy with the practice. 

    Loops in Python using Jupyter Notebook

    Greetings Learners! Welcome to the new lecture on Python. Today we are moving towards an interesting and important concept. If you have come from a programming background, then you must know about the workings of loops. To make the repetition of the same sequence, we use loops. We are familiar with the sequences in detail as we have learned them in the previous lectures and have received the concept in the recent lecture. If you want to be a programmer, then you can not move forward without a solid base of loops; therefore, in this lecture, we will learn the concept of loops from scratch and then go on to a deep understanding of each loop in the next episodes. So have a look at the concepts that you will learn today.

    • What are the loops?

    • How do we understand the concept of loops from scratch?

    • What are some conditions of the loops that we have to understand before programming in loops?

    • What are the two basic types of loops in Python?

    • Discuss the syntax and types of loops.

    • What is the speciality of the while loop?

    • Why do we prefer the for loop when dealing with for loops?

    • What are the major differences that make Python better at looping than other types of programming languages?

    Each of these is an important interview question, and will we explore the answers of every question mentioned above. In this lecture, the use of Jupyter notebook is not much but for the practicle implementations, this lecture is very important so let us start finding the answers of each question that we have just read now.

    Introduction to Loops in Python

    In programming languages, loops are the repetition of the same concept, again and again, to get the required output according to the requirements of the programmer. In other programming languages, there are many types of loops, and programmers use them in different ways. Usually, it has been observed that the programmer uses the same kind of loop most of the time that he finds useful or has a good grasp on the concept of a particular type of loop. Loops are defined as:

    "Loops are a fundamental control structure in programming that allows you to execute a set of instructions repeatedly until a certain condition is met."

    These are extremely useful to execute the conditions and calculations. The working of loops may be different, and the difference in the syntax is an important thing to be noticed, but keep in mind that the output of the loops is almost the same. No matter which type of loop the programmer uses, the output remains the same, just as at the backend, the working and the logic are the same. 

    How Do Loops Work in Python

    When you are going to learn the loops, many people ignore the first step, which is to understand how the loops work at the backend of the code. We are not going into details about how the compiler executes the instruction, but just the steps that have to be followed by the compiler when the user runs the loop. Here are three basic steps:

    Checking the Condition

    Checking for the condition created by the programmer. The user always gives the condition at the start of the loop so that the compiler may understand whether the given loop is possible to execute or not. One must keep in mind that the compiler works with the general truths and facts of the real world. It means that if the programmer, say, tells the compiler that 2 is more significant than 10,000, the compiler will reject the condition.

    Making the condition is the most important part of the loop for the programmer, and this is the only step where, if you have a strong base in the concept, the programming will become easy for you. This is the only step that will surely run in the loop no matter what condition the programmer applies. It is usually a single line of code, but it is crucial. 

    Execute the Body

    Once the condition is satisfied, the body of the code is executed. This is the main step where you will see if you are successful in the loop or not. Once the condition is met and the outcome is true, the compiler enters the body of the loop specified by the programmer and gives the output. Most of the time, the programmer wishes that the condition becomes true, so the remaining code gets the attention of the compiler. 

    The whole processing is done in the body, and the compiler can give more than one true condition according to the type of condition and other requirements. 

    It is true that programmers created unusual and amazing products, but there is a limitation that the fact is never ignored. The programmers use the facts in a better way by using their creativity, which results in perfect outputs. 

    Coming Out of the Loop

    It is obvious that many times, the condition is turned false, and then the compiler simply ignores the body and jumps out of the code. This will only happen if the condition is not satisfied, and this step is not connected with the one that we have just discussed. The detail of each of the steps can be understood by observing the flowchart of the loops given next.

    Types of Loops in Python

    In other programming languages, such as C++ and C#, there are many types of loops. However, in Python, there are primarily two types of loops, each of which has subtypes. In this lecture, you will understand the basic introduction to both of these, and after that, we will move towards the deep concepts and examples of these loops. So, at the most basic level, we can see that there are two types of loops in Python:

    • While loop

    • For loop

    An introduction to both of them is given next.

    While Loop in Python

    The while loop starts with the keyword "while” and then the condition is written so that the compiler can check the condition and then execute the statements written after it accordingly. We introduce the while loop as:

    “In programming, the while loop is one of the fundamental types of the loops in which the condition and the statement are the necessary parts of the syntax”

    The condition is checked at the start of each iteration, and if it is still true, the loop executes, and this cycle continues until the condition is found to be true. The syntax of a while loop is given next:

    Syntax of the While Loop:

    while condition

    statement(s)

    As you can see, the condition is always given first, and the number of statements may vary according to the complexity of the program. 

    Types of While Loop in Python

    If the concept is taken to a deeper level, we will see that while a loop is a simple type of looping in Python, it has further subtypes, and the names of these are

    1. Infinite loop

    2. Else statement

    3. Single statement while loop

    The details and examples of each of them will be discussed in the next lecture. 

    For Loop in Python

    The for loop is the basic type of looping, and usually, I find it more convenient to use it. Iterations are usually used with the sequence, where the elements of the sequence are repeated again and again. To control the number of iterations, the programmer sets a condition with the “for” keyword, where the compiler always checks the condition and decides whether it has to enter the body or not. Just like the while loop, it can also have more than one statement, and the control is totally in the hands of the programmer.

    Syntax of For Loop in Python

    For iterator in sequence:

    statement(s)

    Here, you have to understand some concepts:

    • “For” is the keyword that initiates the loop and tells the compiler to work according to the information fed into the backend. 

    • An iterator can be thought of just like the variable name and the programmer may call it anything according to his choice. Let us say, if it is a, then he will call it in the statement with the same name.

    • “In” keywords specify that the name of the iterator is now ended and the compiler is now entering into the sequence. 

    • The sequence may be of any type no matter if it is a tuple, array, or list. The good thing about for loop is, it is associated with the sequences and according to the requirement, the programmers can access each and every member of the sequence without making much effort. 

    • Statements may be one or more and it is important that every word of the sequence is correct so that the compiler will execute the instruction and then move towards the for keyword to check the condition again. 

    Difference Between Python Loops with Other Languages

    From the beginning, we have been saying that Python is simpler than other languages. Moreover, there are other characteristics that make it unique and better. As we are studying the loops so I have made a little comparison between the loops of Python with other programming languages.


    Sr#

    Name of the Loop

    Python 

    Other Programming Languages

    1

    For loop

    In Python, the for loop is more versatile because it gives the independence to use any data type whether it is numeric of the string, list, or tuple 

    The other programming languages deal with the for loop in just a number of way. It means only the integers are allowed to feed into the for loop of other programming languages. 

    2

    Range function in for loop

    The range function is used in collaboration with the for loop. In Python, it is more concise and dealing with the range function in Python is easier than in other languages, 

    In other programming languages, the range function is less concise. The programmers can also use the same function in other languages as well, but dealing with this function is more difficult than in Python. 

    3

    While loop

    The while loop in Python is almost the same as the other languages, but the syntax is different.

    In other programming languages, the while loop works the same as the Python as at the backend, the conditions and workings are the same. 

    4

    Break loop

    Only syntax is different

    Only syntax is different

    5

    Identation 

    It is an important point about Python that makes it unique among others. The identifier is mandatory at some points in Python loops, but in some areas, the unnecessary indentation causes the error. 

    The spaces and indentations in other programming languages do not result in any change in the output of the compiler. 


    Hence, by using these points, we can conclude that, like every programming language, Python also has many features that make it unique. The loops are more specific and more interesting in Python than in other programming languages, but we have less variety in the loops in Python. 

    The range function and other functions that have been mentioned above will be discussed with you in detail in the next episode of this lecture. Till then, let us revise the concepts that we have discussed. The concept of loops is important in Python,n and there are only two major types of loops that we have also introduced. The subtypes of these loops also exist. The working of the loops is easy in Python, and we have seen that not all loops have the same syntax, but the differing syntax is important as it differentiates the languages just like other syntaxes. There are three basic steps that are followed by the loops and while constructing the loops, these steps must be cleared in your mind. This was all for today, and in the next episode, you will see the practical implementations of the loops in Python one after the other. Then, try to practice these concepts and keep learning.

    Built-in String Functions & Methods in Python

    Hi learners! Welcome to the next episode of learning the arrays using string data. We have been working with the arrays and in the previous lecture, we saw the interesting characteristics of the string arrays. In the present lecture, our target is to get knowledge about the built-in functions and we will take the strings in the array so that we may know about both of them together. String arrays are used in many officials uses and therefore, we want to use the built-in functions that every Python programmer must know. Here is the list of the concepts that will be polished in this lecture:

    • What are the built-in methods?

    • How do you differentiate between methods and functions in programming?

    • Give different examples to understand different built-in methods to be used in the same code.

    • How do Jupyet notebook use the copy(), clear(), Insert (), Index(), reverse(), range(), and sort() function in Python on the string array?

    • How do these functions are related to the working of simple string messages?

    For the convenience of the students, we will refresh some important concepts in our mind side by side and whenever required, we will provide the necessary details about the working of the particular method. All these methods have been introduced in Python for a better user experience. One must notice that the same work is also done in other programming languages but Python gives us an uncomplicated way to use them.

    Difference between Methods and Functions

    Programming is a vast subject and if programmers start making short programs again and again when required, the programming process becomes boring and time taking. For this, the programming languages have built-in methods and functions to be used by simply mentioning them in a specific syntax. Normally, people seem confused between these two because the working and syntax of both of these look alike. So, let's discuss some minor differences between these two.


    Function

    Method

    A function is a piece of code that can be reused. It can operate on input data (i.e. arguments), and it can also return data by having a return type.

    A method is associated with the objects with which it is being used.

    It is independent.

    It depends upon the object’s name and requires a reference. 

    It is related to the procedural or functional programming language.

    It is related the object-oriented programming concepts. 

    The data passes explicitly or at the external level. 

    The data in the method is passed internally. 


    The working of both of these is similar as the programmer has to input the required data and both of these, after their specific operations, provide the required output as expected.

    Built-in Method Used with String Arrays

    There are certain methods for the arrays and related concepts that are defined by the Python programming language, but to understand them, we are using the arrays with the string values in them. The method makes the coding easy to use and without knowing them, it is not possible to get the perfect result for a complex task. This will be clear with the help of examples of each of them. A list of such methods is given next:

    1. clear()

    2. copy()

    3. extend()

    4. count()

    5. insert()

    6. index()

    7. Reverse()

    8. Sort()

    Here, we want to compare these functions with some of those that are discussed before in this series. So, let’s move towards the first example:

    Copy() and Clear() in Python

    If you are interested in programming, you must know to copy the code from one place to another so that you may test it more accurately and produce the better one by using your concepts. By the same token, another method that is important is clear() which is used to clear the memory area where the array is being stored. In this way, the programmer gets the empty space. For convenience, we are using these two in a single code:

    Code:


    #initializing the array containing the name of programming languages

    languages=["C++", "C#", "MATLAB", "ASP.NET", "Flutter"]

    print("The original array= " ,languages)

    #copying the contents and printing the same results

    Languages=languages.copy()

    print("The copied array = " ,Languages)

    #clear the whole array and printing the results

    languages.clear()

    print("The clear array= ", languages)

    Output:

    Here, it is important to notice the difference between the clear() and remove(). The clear() causes the empty locations in the array no matter what the size of an array is whereas, in the remove method, the whole array was removed and the compiler throws the error about the existence of that particular array. In other words, the compiler, after the clear() gives you the chance to add the new data of your own choice and you can think that the container of the element is empty but still, we have that container and can fill the data according to our will. 

    Extend() and Cout() Method in Python

    The next methods that we are going to discuss are fun to perform. In the previous lecture, we saw the append method, and this time the same task will be performed with the help of another method called extend(). As the name suggests, this function extends the length of the array by adding another array or extra item to it. The modification of the array is an important feature of Python, and practically, it seems like a blessing in some cases. 

    The other method that will you see in the code is the count(). It counts the frequency of the mentioned item in the data type, and in our case, we are using it to compare the frequency of the “flutter” before and after the extended array. The element may be any, and the programmer simply has to input it into the method to get the frequency. In programs with a large amount of data where the array or list has 1000+ or even more items, the count() method is a blessing. 

    Code

    #initializing the array containing the name of programming languages

    languages=["C++", "C#", "MATLAB", "ASP.NET", "Flutter"]

    print("The original array= ",languages)

    result=languages.count("Flutter")

    print("Numbers of an element before extending =",result)

    #extending the array of string

    arrayToBeExtend=["java", "javascript", "Flutter"]

    languages.extend(arrayToBeExtend)

    print("The extended array= ",languages)

    result=languages.count("Flutter")

    print("Numbers of element before extending =",result)

    Output

    Insert() and Index() in Python

    The next methods to be discussed are the insert and index methods in Python, and we are expecting that you understand the working of these methods. As in the previous cases, the name exactly matches the working name of the method. 

    Code:

    #Decalring the array with strings

    myStationary=["Notebook", "Pencil", "Erasor", "Pointer", "Papers", "Duster"]

    print("Stationaries before insertion= ", myStationary)

    #Getting the index of Erasor before insertion

    a=myStationary.index("Erasor")

    print("Index of Erasor" ,a)

    #inserting the new eleemnt at index 2

    myStationary.insert(2,"Sharpener")

    print("Stationaries after insertion= ", myStationary)

    #Getting the index of Erasor before insertion

    a=myStationary.index("Erasor")

    print("Index of Erasor" ,a)

    Output:

    In the program given above, we have seen that the list of stationary contained the specific numbers of the elements, out of which, the index of the eraser was 2 at first, but after the addition of the new element, the index function tells us the 3 index number. 

    Reverse() and Range() in Python

    Now, we are moving towards the situation where we will play with our array. It is interesting to notice that we can retrieve the data in different ways from a single array. Let’s say, the programmer wants results in which the order of the elements in an array is reversed. No matter what the length of the array is, the reverse() method creates the mirror image of the array and represents it. This is important in the field of image processing, where we can invert the images in a simple way. 

    On the other side, the range function gives us the elements in a specific length of the array according to our needs. We have been using this in the previous examples in this course, but this time, we are specifying the range() method. It is a professional way to do so. The logic behind this is not compulsory to understand; therefore, to make things simple, we are not going into detail. Have a look at the code where we are using both of these methods. 

    Code:

    #Declaring the array

    myDishes=["chow mien", "sandwiches", "rice", "butter puffs","pizza","meat balls", "rolls",  "momos", "patties", "chicken", "coffee cake", "wings"]

    print("\bThe array before reversing= ", myDishes)

    #Reversing the whole array using the reverse method.

    myDishes.reverse()

    print("\bThe array after reversing= ", myDishes)

    #Using the range method to get the elements

    print("\bThe element from 3rd to 8th position are myDishes", myDishes[3:8])

    Output:

    Here, the interesting thing is, just like we used the same method in the previous lecture when we were using the same procedure on the simple string, this time, we have used it on the whole array of the string, and the outcomes are perfect. The programmer can easily get the part of the array they only want and perform different operations on that certain list. 

    Moreover, the reverse function is also useful in many places, as we have discussed before. The transformation of the array is not just limited to the strings, and in this way, the numbers, when used in the array, can be inverted in their prepositions and useful results can be obtained. 

    Sorting of String Array 

    We believe that you are from a programming background, and if you are from a C++ background, then you must have experience with the sorting of an array. We define the sorting process as:

    "The sorting of the data is defined as the technique to rearrange the elements in a particular order or manner according to the needs of the data."

    Hence, as you can see, there are different ways of sorting, but here, we are using the sorting method that arranges the elements of the string array in alphabetical order. This type of sorting follows the ascending order of the alphabet, and as an example of the reverse method, we will use the sorted array in reverse to get the new array with the descending order of the string array.

    Code for Sorting String Array:

    #Declaring the array

    myDishes=["chow mien", "sandwiches", "rice", "butter puffs", "pizza",

              "meat balls", "rolls",  "momos", "patties", "chicken", "coffee cake", "wings"]

    print("\bThe array before sorting= ", myDishes)


    #sorting the whole array using the sort method.

    myDishes.sort()

    print("\bThe array after sorting= ", myDishes)

    #Reversing the whole array using the reverse method to get the array in descending order

    myDishes.reverse()

    print("\bThe array after sorting= ", myDishes)

    Output:

    Hence, it is a perfect way to understand how we can use the different methods together, (in this case, the reverse method) in the same code to get the desired output. Sorting is an important concept, and in programming languages such as C and C++, sorting is done by long codes, but with the help of this uncomplicated method, the programmers can get the desired output easily in just one step.

    Consequently, it was a lecture full of practical examples of the methods in Python, and we have seen many daily life problems that can be arranged in a better manner using the built-in methods. We made the pair of methods into single programs so that we could ignore the repetitions of the same data again and again. Moreover, it provided us with a better chance to understand the professional use of the methods in real-life problems. We hope you learned a lot. Stay with us for more learning.

    Inheritance in Python using Jupyter Notebook

    Hola students! Welcome to the new Python tutorial, where we are learning about OOP. We all know why OOP is important in programming. In the previous lecture, a detailed overview of classes and objects was discussed. We are moving towards the next step of learning where our focus will be on inheritance. Yet, programming also contains inheritance. We have all read about inheritance in real life and are aware of the concepts surrounding it. This time, we will discuss these concepts according to the workings of the classes and related entities. The concept of inheritance is the same in both scenarios, and with the help of interesting examples, the practical implementation of inheritance will be shown to you, but first of all, it would be interesting to know about the main headings that will be shared in detail with you later.

    • How do you introduce the inheritance in OOP and how do you compare it with the biological inheritance?

    • What are the basic types of classes that are used in inheritance?

    • Give some examples of parent and child classes.

    • How do you explain __init__() function with inheritance?

    • What do you know about the self keyword?

    • How to override the parent class in inheritance?

      What is Inheritance in OOP?

      Inheritance is the fundamental concept in OOP, and with the help of Python, the programmers can easily get the required outputs with minimum effort. Keep in mind, OOP is applicable because of its feature of reusability of the code in the perfect way. This helps to curtail the redundancy while working on the development projects. There are different ways of recycling the code in Python, and inheritance is one of the most prominent ways to do so. As in biological inheritance, where the characteristics of the parents are transferred from parents to children, so is it with inheritance in object-oriented programming. The whole concept is about the relationship between different classes and this is important to learn for the large and complex projects of Python.

      Types of Classes in Inheritance

      We have discussed in the previous lectures that different classes can be used at the same time in the same code, and this is the time to utilize that concept. When there is more than one class, it is important to make connections between these classes. Inheritance is a relationship between different types of classes, and this is the basis of the concept of inheritance. The following are the main classes used in inheritance:

      1. Parent class

      2. Child class

        Parent Class

        The parent class is also known as the base class, and it has the main characteristics that can be inherited or copied by the other classes. Any class can be the parent class, and therefore, there is no special syntax for it. The way to form the simple class is considered the parent class. So, we can think in our mind that all classes are parent classes until they are derived from other classes. Here is an example of a parent class.

        Example

        Let us take an example from the real world so that you may understand it well. We all know about bank accounts. If we consider the bank account as a parent class, then the types of the bank accounts such as business accounts, saving accounts, etc have many attributes that the “bank account” class may have. So we can consider the savings and business account as the child class so whenever we declare them, we do not have to write all the attributes of other types of bank accounts. 

        Code for the Parent Class:

        #creating the parent class

        class Fish:

        #defining the attributes

            def __init__(self, firstName="ozzy", LastName="king"):

                self.firstName = first_name

                self.LastName = last_name

        #printing the class

            print("Parent class= " , Fish)

        Output:

        In this code, we have just made a simple class with some attributes and considered it the parent class. As you can see, we can make more objects of this class and use it in different ways, but for now, we are not moving forward because the concept here is clear and one that we want to discuss.

        Child Class

        As you can guess, the child class is the one that is derived from the parent class and has the same attributes as the parent class. It is a subclass and has a slightly different syntax than its parent class. Let’s say you are talking about bears, All bears can walk, run, eat, and sleep. So, these attributes remain the same, and the parent class, in this case, is "bear,” whereas, the polar bear and brown bear are the subclasses. The same is true for all the animals that have the different kinds of the speicies in them because of the same attributes but have many subclasses. The following code will be a little bit confusing, but the discussion will clarify the concept:

        Code For Child Class

        #creating a new class with the name penguin so the animal bird specie is used

        class Penguin:

         #declaring the attribute and method of the parent class

            name = ""

            def swim(self):

                print("I love swimming")


        # a child class that inherits the message from a parent

        class tag(Penguin):

            # new method in a subclass

            def display(self):

                # access name attribute of superclass using self

                print("My name is ", self.name)


        # creating an object of the subclass

        pengName = tag()


        #Using the superclass attribute and method 

        pengName.name = "tag"

        pengName.swim()

        # calling the subclass method created above

        pengName.display()

        Output:

        Discussion:

        • In the beginning, a parent class is declared with the name "Penguin.” This class has two things declared in it. First of all, it tells us that the “name” is in the form of a string. The second thing is the attribute of swimming. This also gives us the string message that the tag can swim. We have written it here just to show that messages from the child and parent can both be used in the output. 

        • In the next step, a child class is introduced in which the particular penguin is declared to have the name “tag”.

        • Now, let us use the parent class and get the attribute of the name from it. In this way, the child gets the name "tag." Another thing that happened here is, that a new method was formed to explain swimming. 

        • In the end, a built-in method display() is used to display the name of the penguin with a string message that was shown before.

        • Keep in mind, the display method is not limited to the inheritance only but can be used with most of the entities of the Python. 

        Important Terms Used With Inheritance

        When dealing with the codes of inheritance, there are different concepts that must be kept in mind so that you may use them with the inheritance, and once the programmers have a grip on it, it becomes easy and comfortable to use inheritance in multiple ways. At this level, it is important to understand the following methods and constructors, and you will notice some of them have already been used in our codes of inheritance. Yet here, we are discussing it in detail so that you may use it in the practice and get the perfect results according to your requirement. 

        Pass Keyword in Classes

        Programming is an interesting field, and when you deal with a hundred lines of code, sometimes, when the programmer does not want to use a specific function for some reason ( when you simply declare the function but there is no need to execute it but other code must be run), then to avoid the errors, the “pass” keyword is used to do so. We can define this keyword as:

        "A pass keyword is a simple type of keyword that is used to tell the compiler that the line above this keyword has had no usage till now, so go to the next line during execution."

        Sometimes the coders are confused between the pass keyword and the comment, but the difference is that the comment is not part of the code but is the explanation to the user. The pass keyword, on the other hand, simply causes the compiler to jump to the line above it, which may be a function that does not yet have an implementation. The syntax of this keyword is to simply type “pass” right after the line to be skipped. 

        Example of Pass Keyword in Inheritance

        The reason why we are discussing this keyword here is, this helps a lot in inheritance. If there are many subclasses and the programmer simply wants to ignore one line to check whether my other classes are working or not, they use the “pass” keyword in such cases and it seems to be very interesting. 

        In the code given above, we are simply placing the pass keyword after the declaration of subclass and the compiler will jump on it and is not able to use it in the methods given in the next lines. 

        Code:

        #creating a new class with the name penguin so the animal bird specie is used

        class Penguin:

         #declaring the attribute and method of the parent class

            name = ""

            def swim(self):

                print("I love swimming")

        # a child class that inherits the message from a parent

        class tag(Penguin):

        #using the pass keyword to jump from the line above

         pass

            # new method in a subclass

        def display(self):

                # access name attribute of superclass using self

                print("My name is ", self.name)


        # creating an object of the subclass

        pengName = tag()


        #Using the superclass attribute and method 

        pengName.name = "tag"

        pengName.swim()

        # calling the subclass method created above

        pengName.display()

        Output:

        You can see only the parent class is used here, and the child class is jumped. The code is not able to be executed well because of this jump condition.

        The __init__() Function

        Since we are using the concepts of inheritance, have you noticed the usage of __init()? If yes then you must be wondering what is it. This is the constructor of Python and it is used to initialize the data member. That is required when the object of the class is created. At the time of the creation of the object, this function contains the collection of instructions or statements that it contains. 

        Self Keyword in Inheritance

        In the previous lectures, we also used another keyword to be noticed, which is the “self” keyword. In simple words, we can say that when we are using the concept of classes, the “self” keyword is used to access the attributes and methods of the class. In some other programming languages, the @ is used to refer to the instant attribute.

        Overriding Method in Python

        Another method that is used in Python, especially with the inheritance concepts, is the overriding method. Till now, we have said that the child class gets the attributes from the parent class, but what if the programmer wants to introduce an attribute with the same name but different features in the child class? For this, we use the overriding method, which is introduced with the statement given next:

        "In inheritance, the overriding method allows the child class to have the implementation of the specific method that is already declared in the parent class."

        It is important to keep the flow of the code in mind while using the overriding method because incorrect overriding can cause errors or redundancy. Moreover, attributes and classes can both be overridden using this method.

        In this lecture, we have learned many simple and smart concepts to deal with inheritance and have learned a lot about them. At the start, we saw the basic definition of inheritance in OOP and compared it with biological inheritance. After that, we have seen what is the child class and parent class. Some important terms about te inheritance was also discussed that were different kind of constructors and methods that we useful in their functioning. In the next lecture, we will talk more about inheritance so stay with us and happy coding.

        Classes and Objects in Python OOP

        Hello pupil! We hope you are doing well with object-oriented programming with Python. OOP is an extremely important topic in programming, and the good thing about Python is that the concept of OOP can be implemented in it. In the previous lecture, we made a basic introduction to all the elements that are used in the OOP, and right now, we are moving forward with the detail of each concert with examples. The imperative nature of the OOP is useful for us because it uses the statements to change the programming state, and in this way, the working of the code becomes easy and effective. To use the applications of Python, the imperative nature of OOP will give us the tools we need to get the perfect results by using our creativity. We will prove this in just a bit, but here are the highlights of the topics that will be discussed. 

        • How can you describe the OOP by using an example?

        • Why are classes important in OOP?

        • Discuss the example and syntax of code when we use classes in OOP.

        • What are objects?

        • Give us an example where multiple objects are made if one class and the information are given by the user.

        • Discuss the basic features of objects in OOP.

        • How do you classify the attributes of objects?

        • What are the behaviours in OOP?

        All of these are important to learn so pay attention to each and every concept and if you have any confusion, you can contact us directly.

        Example of the OOP with Python

        Before going into the details of the OOP, now is the time to discuss why we are emphasizing the importance of the OOP and how we explain it with Python. The whole concept will be clear with the help of the following example:

        Think of a dog that will be taken as an example by a class. Here, we have taken a general example that is common in the real world. Think of all the characteristics of the dog that may be either physical or natural habits of the dog. The general class of dog may have many types, such as the breed of the dog. There are hundreds of breeds of dogs, and these are considered the basic members of the class "dog." 

        Moreover, different dogs have different kinds of attributes such as their size, colour, skin type, age, and other characteristics that are said to be their instance attributes. On the basis of these attribute, the division of the dogs is done into different classes. 

        Moreover, the way the dogs bark, their favourite food, and their daily routine make them more specific, and these are referred to as the methods of that particular class.

        Importance of Classes in Python OOP

        The class is the basic unit, without which, the programmers may not think about the OOP in any way.  This is the prototype with which the whole OOP process is carried out. You can think of a class as the blueprint of the house (let's say). In this way, the information about the floor, walls, rooms, windows, doors, etc. In this way, the whole house is made by following this blueprint(class) whereas, the result, that is the house is the object. Let us prove all this information with the help of this example.

        Syntax of the Class

        The class is simply made in Python with the keyword “class” and the name that we want for our class:

        class myClass:

            # class definition

        Here,

        class=keyword

        myClass= the name of the class given by the programmer.

        In this way, with the help of simple lines, the creation process of the class is carried out. Now, the definition of the class is in the new line. To make a clear difference, a colon is used after the name of the class. You must keep in mind, the class name is a single word, no matter what the length of the name, and there must be no space between the name of the class. 

        Example of Class in Python

        In the example of the class given above, where we were talking about dogs. We are using the same example and will show you the result by using them in the example. To start with a simple example, the class with only three attributes. 

        Code for Class

        #declaring the class

        class myDog:

        #defining attributes

            def __init__(self, name, age):  

        #using the attributes and storing them in the new names

                self.name = name

                self.age = age

        #usign the stored name to print the results

        tinku = myDog("Tinku", 2)

        print("The name of the dog= ",tinku.name)

        print("The age of the dog= ",tinku.age)

        Output:

        Let's see what happens during this code:

        • First of all, we created a class with the class keyword, and this time, we named it “myDog” so you are providing the information about your dog( if you do not have it, just imagine it) and we are writing the particular features of that dog. So, the class is myDog, and all the other features are its attributes. 

        • In the next step, we are defining the characteristics with which we want to describe our dog. Here, name and age are the attributes. That is taken as one of the two arguments we are defining to use later.

        • The "self" keyword will tell us that name and age are the special attributes that we want to use here.

        • In the end, a new unit is formed, where this time, we are using the values of attributes instead of the names. The first step was only to give the base of what we wanted, and this time, we will assign values to these attributes. 

        • You can see, the name is in the form of a string, therefore we have used a double quotation. In this way, we do not have to specify the data type but just represent it in a specific way. 

        • In the end, it's time to print the result and to make the message clearer, we used the written message and then declared the value we wanted.

        We can add more and more attributes to make the class clearer and store data about the dog, such as its colour, fur type, etc. This is a simple example to show you how the class works. 

        Objects in Python OOP 

        The workings of the class are not just limited to one product. This is the good thing about the OOP is, it provides us with the versatility to work in a different way with the same code. In the example given above, if more than one breed of dog is to be stored, then we will make the objects of the class "dog."

        Code:

        To understand the objects in interesting ways, we are moving towards real-time applications where different objects are made and then used in a specific way. Let us take an example where we have different types of dogs with different ages, and the combination of the ages of the first two dogs is the age of the third dog. So here is the question that can be asked of you in the examination. 

        Question:

        Write the code to get the age of a dog that is the combination of two dogs and get the input from the user for it. 

        Answer:

        #declaring the class

        class myDog:

        #defining attributes

            def __init__(self, name, age):  

        #using the attributes and storing them in the new names

               self.name = name

               self.age = age

        #using attributes in string message

            def dogInfo(self):

                    print(self.name + " is " + str(self.age) + " year(s) old.")

        #printing queries and getting input from user            

        print("What is the age of happy")

        AgeOfHappy=input()

        print("What is the age of sunny")

        AgeOfSunny=input()

        AgeOfFancy=int(AgeOfHappy)+int(AgeOfSunny)

        #using the inputs to guess the age of fancy 

        print("Age of fancy= ",AgeOfFancy)

        #printing results

        happy = myDog("Happy", AgeOfHappy)

        sunny = myDog("Sunny", AgeOfSunny)

        fancy = myDog("Fancy", AgeOfFancy)

        happy.dogInfo()

        sunny.dogInfo()

        fancy.dogInfo()

        Output:


        Discussion:

        This program has many interesting features, and these will become clear with the help of this discussion. 

        • At the beginning of the program, the class “myDog” is created so that we may give the same attributes to different objects. 

        • To declare the attributes we are using here the “def” keywords to define the keyword then the 

        • Attributes are mentioned so that we may use them later.

        • The next step is to define the message, in which we will use the attributes and get the result in the form of a message. Here, the point to notice is, we are using the string keyword for the "age,” but how can age be a string? Actually, we are using it in the string message, and if we declare the “int” here, the compiler, when it reaches this point at the output, will throw the error and not print the whole string. 

        • After that, the whole mechanism is used in which we are printing the message to input the age of the first two dogs and get the output in the form of integers. 

        • Here, if the user inputs a data type other than an integer, it will also result in an error. 

        • Both these ages are then added, and the result is saved in the “AgeOfFancy” variable.

        • The object we have just used to print the results.

        So with the help of this discussion, we come to know that the object consists of the following features:

        Attributes of Objects:

        Each object has its own set of attributes, which are variables that store information about the object's current state. We can say that objects are made of attributes. Yet, there are different types of attributes in OOP, and the following are some of the most important characteristics of attributes:

        • Instance variables: These are defined within the class but are unique to every instance of the class.

        • Class variables: These are also defined within the class but are shared with all the instances.

        • Methods: These are used to manipulate the object’s state and are defined within the class to operate the attributes. 

        • Special methods: These are also referred to as the magic methods and these tell the compiler how objects will behave under certain conditions. These are denoted by the double score in the name as we have just used in the previous code of dogs. 

        • Inherited attributes: These are used to reuse the modularity in the code as these are inherited by a subclass or a superclass. So it makes working easy.

        The Behaviour of Objects in OOP

        When an object is created in OOP, it has its own set of behaviours, which are defined by the methods in its class. These methods can be used to change the state of an object. Another function of the behaviour is to carry out other operations related to the object's behaviour. For example, if we declare the object of a car, we might have methods such as:

        • start engine()

        • accelerate()

        • brake()

        • turn()

        These methods define the behavior of the car object and enable it to perform the actions that are expected of a car. These are just simple examples, and we can add more and more behaviors, just as a car can do hundreds of tasks.

        Hence, in this lecture, we read a lot about objects and classes. There are different entities that are used in OOP, and objects and classes are the basics. We must know that objects and classes are used simultaneously, and for a better understanding, we learned the classes first and then examined where and how objects are being used. Moreover, different types of objects and fundamental knowledge about their pillars are discussed here. We have a lot of information to share with you, and you must have noticed that Python is now more complex but useful when we use the concepts of OOP. We have some mini Python projects to share with you in this tutorial, so stay with us for more programs.

        Object Oriented Programming in Python

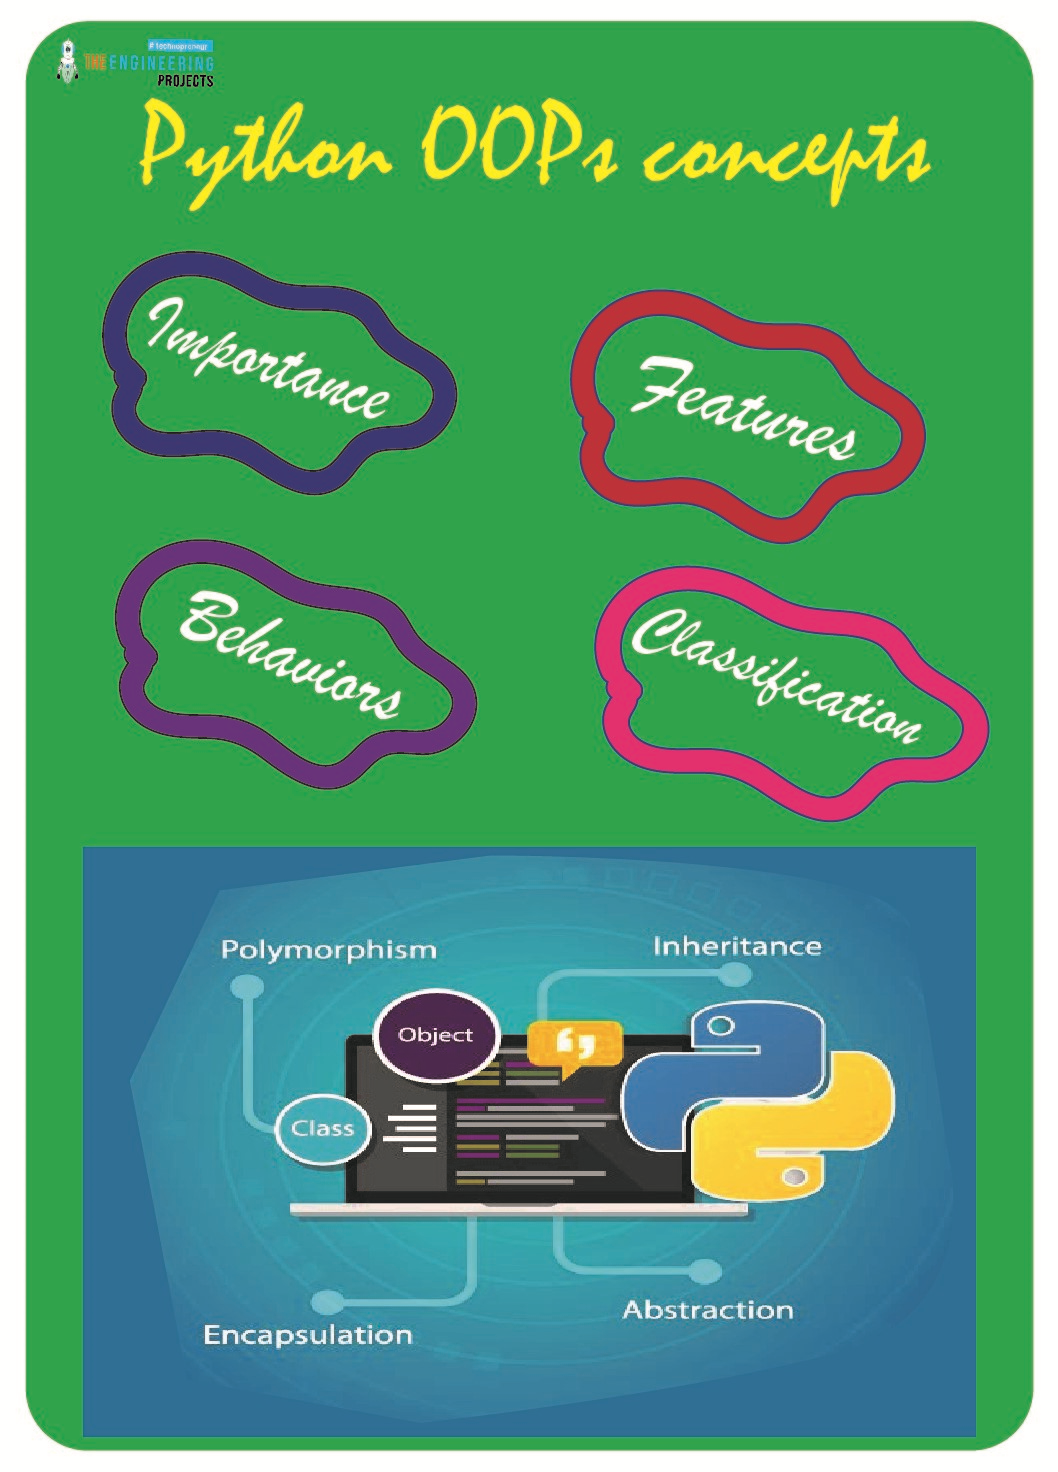
        Hey peeps! Are you excited to begin with the new chapter in Python? Till now, we have been learning the data types and their related concepts. Now, we are starting a new chapter where you will learn the details of Object Oriented Programming or OOP. We are moving towards the advanced level of programming in Python, and here, you will go through the complex but interesting concepts that will show us the fascinating results on the screen. This will be more clear when you will know the basic information about the OOP, but before going deep, we will go through the headlines of the lecture:

        • How do you classify the programming languages?

        • How do you introduce the OOP?

        • Why object-oriented programming is important in Python?

        • How do you define class and objects in OOP and how are they connected?

        • What are polymorphism and encapsulation?

        • How do you use the inheritance in OOP?

        • How do you understand data abstraction in OOP?

        • What does method overloading mean?

        Keep in mind, it is not a specific concept with Python but any higher-level programming language that supports the OOP has the same concepts and we are using a very general way to describe all the concepts.

        What does Type of Programming Language Mean?

        Before going into the detail of this topic, it is helpful to understand why we are emphasizing on the OOP and its importance. Actually, there are different types of programming languages and being a programmer, you must know the basic categories. Some of the important types of programming languages are:

        • Procedural Programming Language

        • Functional Programming Language

        • Object-oriented Programming Language

        • Scripting Programming Language

        • Logic Programming Language


        Out of which, we are interested in the OOP. The reason why the type of programming language is important, it describes the paradigm of the language, and therefore, we can understand the nature and the importance of that particular language in the profession you are using it for. Here, we should know what exactly the “paradigm” means:

        “A programming paradigm is the concept to which a programming language's methodology adheres."

         Paradigms are significant because they define a programming language and its operation. The classification of the programming languages is done by keeping its paradigm in mind and in this way, the programmer may choose the type of programming language that exactly suits the application for which the coding is required.

        You can see that OOP comes in the imperative paradigm. In imperative programming, the user typically interacts directly with the computer's state, deciding how things should be calculated. In this way, more control is in the programmer’s hands, which is the basic source of attraction towards this programming language. In the practice of programming, I am sure you have touched other types of languages as well at any point. So, it becomes easy to compare and practice the code.

        What is OOP in Python?

        In real-time education, different types of subjects are taught to us by teachers. We are moving from basic to advanced programming in this course; therefore, we have covered the concept of data types before. This time, the OOP is our source of attraction, and we are going to learn it deeply because the programmers, most of the time, deal with the OOP when they are using the practical applications of the programming. Let us look at the introduction to the OOP:

        “OOP (Object-Oriented programming) is a programming paradigm that organizes and structures code using objects and classes.”

        For now, do not bother about the special terms used in this definition. We will learn a lot about them in these lectures with the help of different terminologies. Hence, if anything is causing confusion, do not worry because everything will be clear in just a bit. 

        The concept of OOP is so vast and important that it is widely used to write powerful applications. The data engineers have to write these applications to access and use the data stored in different entities. 

        The feature that makes the OOP unique is, it uses concepts that not only make the programming easy but efficient. It is based on the imperative programming paradigm, which employs statements to alter the state of a program. It is concerned with describing how a program should work. One must keep in mind that the main objective of the OOP is to bind the data and the functions of the program in such a way that all of these may work as a single unit but the security of the data remains intact. There are some important terms that you will see often in these lectures, so have a look at all of them.

        • Class

        • Objects

        • Polymorphism

        • Encapsulation

        • Inheritance

        • Data Abstraction

        Keep in mind that you have to grasp the concept of each of these terms clearly so that, when you read them with other types of definitions, you may not be confused. You will learn all of these in detail in the coming lectures, but the basic introduction to all of them is given next:

        Class in OOP

        Before going into the introduction of the OOP, one must know that an object is an instance of a class. Object and class are interconnected terms, and a class is defined as:

        “In OOP, a class is a basic unit that represents the collection of objects, and it can be thought of as the blueprint or the prototype by following which, the objects are made.”

        The attributes of a particular thing, connected with each other, can be represented with the help of the class, where the number of the attributes starts at one and can be two, ten, or any other positive number. In this way, a simple and basic class can be used to store all types of physical or logical information about a particular product. 

        Objects in OOP

        In object-oriented programming, objects are the basic units of data. An object is associated with the class and is the entity with which the state and behaviour of the class are associated. If it is confusing at this point, do not worry because we are going to discuss the object in detail and will work again and again with the objects.

        The good thing about the objects in OOP is that, just like the real-time concept of objects, the programming objects may be anything, whether it is physical, such as a car, an animal, a plant, a cooking item, any food, or any other thing, or abstract, such as any software, a bank account, a soft blueprint, or any document. The positive thing about the object is, it allows us to reuse the same code anywhere in any block of the same code where the same attribute of the object is to be used.

        Polymorphism in OOP

        The fundamental concept of the OOP is polymorphism, and it has the same features as the family in real life. To keep things simple, we assume that all the objects belong to the same class, and the polymorphism allows us to use the objects together as they are from the same family. In this way, the same objects can be used interchangeably in the same context. In this way, the workload of the programmer is minimized as much as possible through polymorphism. In simple words, the concept of polymorphism is the same as it is in chemistry, where the same element can be used in different ways when certain conditions are met.

        Another feature that makes the polymorphism attractive is the availability of the alteration in the classes, both in terms of their size and the data stored in them. All this information will be cleared up in the coming lectures, but for now, we only understand the basics of polymorphism. In other words, we all know that poly means "many,” and if we talk about OOP, it includes the concept of a class's ability to get the features of already existing classes in this way. For example, you can assign the attributes of a particular product, such as a car, to another car with the same basic features but with different attributes. This is just a basic example of polymorphism, and many people mix this concept with inheritance, but these are different, and you will learn a lot about them in the next lectures.

        Encapsulation in OOP

        The next concept that we are going to discuss is encapsulation, and to make your concept clear, let us take the example of the capsules that we get from the pharmacy for different health issues. These capsules protect the inner medicine, and the same concept can be applied to this type of encapsulation to reinforce the concept. Basically, the data is protected with the help of different concepts used in the encapsulation.

        The programmers are very sensitive about their codes and the data stored with the help of these codes. Encapsulation is used to give the code privacy and protect it from unwanted users. The private attributes of the code that are enclosed in the capsule are only accessible by the programmer itself. In other words, we cannot use the private attribute in other blocks of code until the programmer himself allows it. 

        Inheritance in OOP

        Another important feature of the OOP is inheritance, and this is the point where we can say that the OOP is making Python more effective and easier to use. It is one of the most significant points of the OOP, and with the help of easy and effective Python, programmers can inherit the characteristics and attributes of any class and assign them directly to others. For this, you have to learn about the child and parent classes, but for now, we are leaving this topic here and moving on to the next point that will show us the importance of the OOP, especially when we use it in Python. 

        Data Abstraction in OOP

        If you are interested in becoming a professional programmer, then some points should always be kept in mind, and the most important one is to always go with clean code that precisely describes the code and gives the exact coding without any errors. For this, some concepts will help you a lot, and one of them is the concept of data abstraction. With the help of this concept, the programmer is able to code cleaner because "data abstraction" means writing cleaner code and hiding unnecessary details from the users. It is yet another method for the programmer to maintain privacy from the end user. THE SENSITIVE CODES ARE HIDDEN FROM THE OTHER USERS USING DIFFERENT TECHNIQUES. The whole process of data abstraction revolved around making and implementing the abstraction classes and then calling them in different ways according to the requirements of the code.

        Method Overloading in Python

        Here is a small topic to be discussed that is not a particular part of OOP in Python, but almost every programming language that works with OOP has it. This is also true for other characteristics that we have discussed so far. 

        In method overloading, many methods with the same name are declared and then called at once. In this way, a single class can take multiple arguments. Other concepts, such as method overriding, are also connected with the same concept, and we will discuss them with some suitable examples. 

        Consequently, we have almost all the basics of the OOP. We have read a lot about them and tried to make them more general so that the programmers working on them other than Python may also get the useful concepts from this lecture. Actually, the OOP is not just confined to Python, but we have to connect it with Python, and this will be more fully discussed in the next lectures, where all these concepts will not only be discussed but the practical implementation of codes will help us to have a grip on Python. This is an extremely useful topic and therefore, we will move a little bit slowly on these lectures and will understand each and every point in detail. 

        Syed Zain Nasir

        I am Syed Zain Nasir, the founder of <a href=https://www.TheEngineeringProjects.com/>The Engineering Projects</a> (TEP). I am a programmer since 2009 before that I just search things, make small projects and now I am sharing my knowledge through this platform.I also work as a freelancer and did many projects related to programming and electrical circuitry. <a href=https://plus.google.com/+SyedZainNasir/>My Google Profile+</a>

        Share
        Published by
        Syed Zain Nasir