How to Create a Time-Lapse Animations with Raspberry Pi 4


Welcome to the next tutorial of our Raspberry Pi programming course. Our previous tutorial looked at how to Interface DS18B20 with Raspberry Pi 4. This tutorial will teach us how to create a time-lapse video with still images and understand how phototimer and FFmpeg work.
What is time-lapse?
When photographing something over a lengthy period, "time-lapse" comes to mind. A video can be created by mixing the still photos. Plant development may be tracked with time-lapse movies, as can the changing of the seasons. They can also be utilized as low-resolution security cameras.
Components
- Raspberry pi 4B
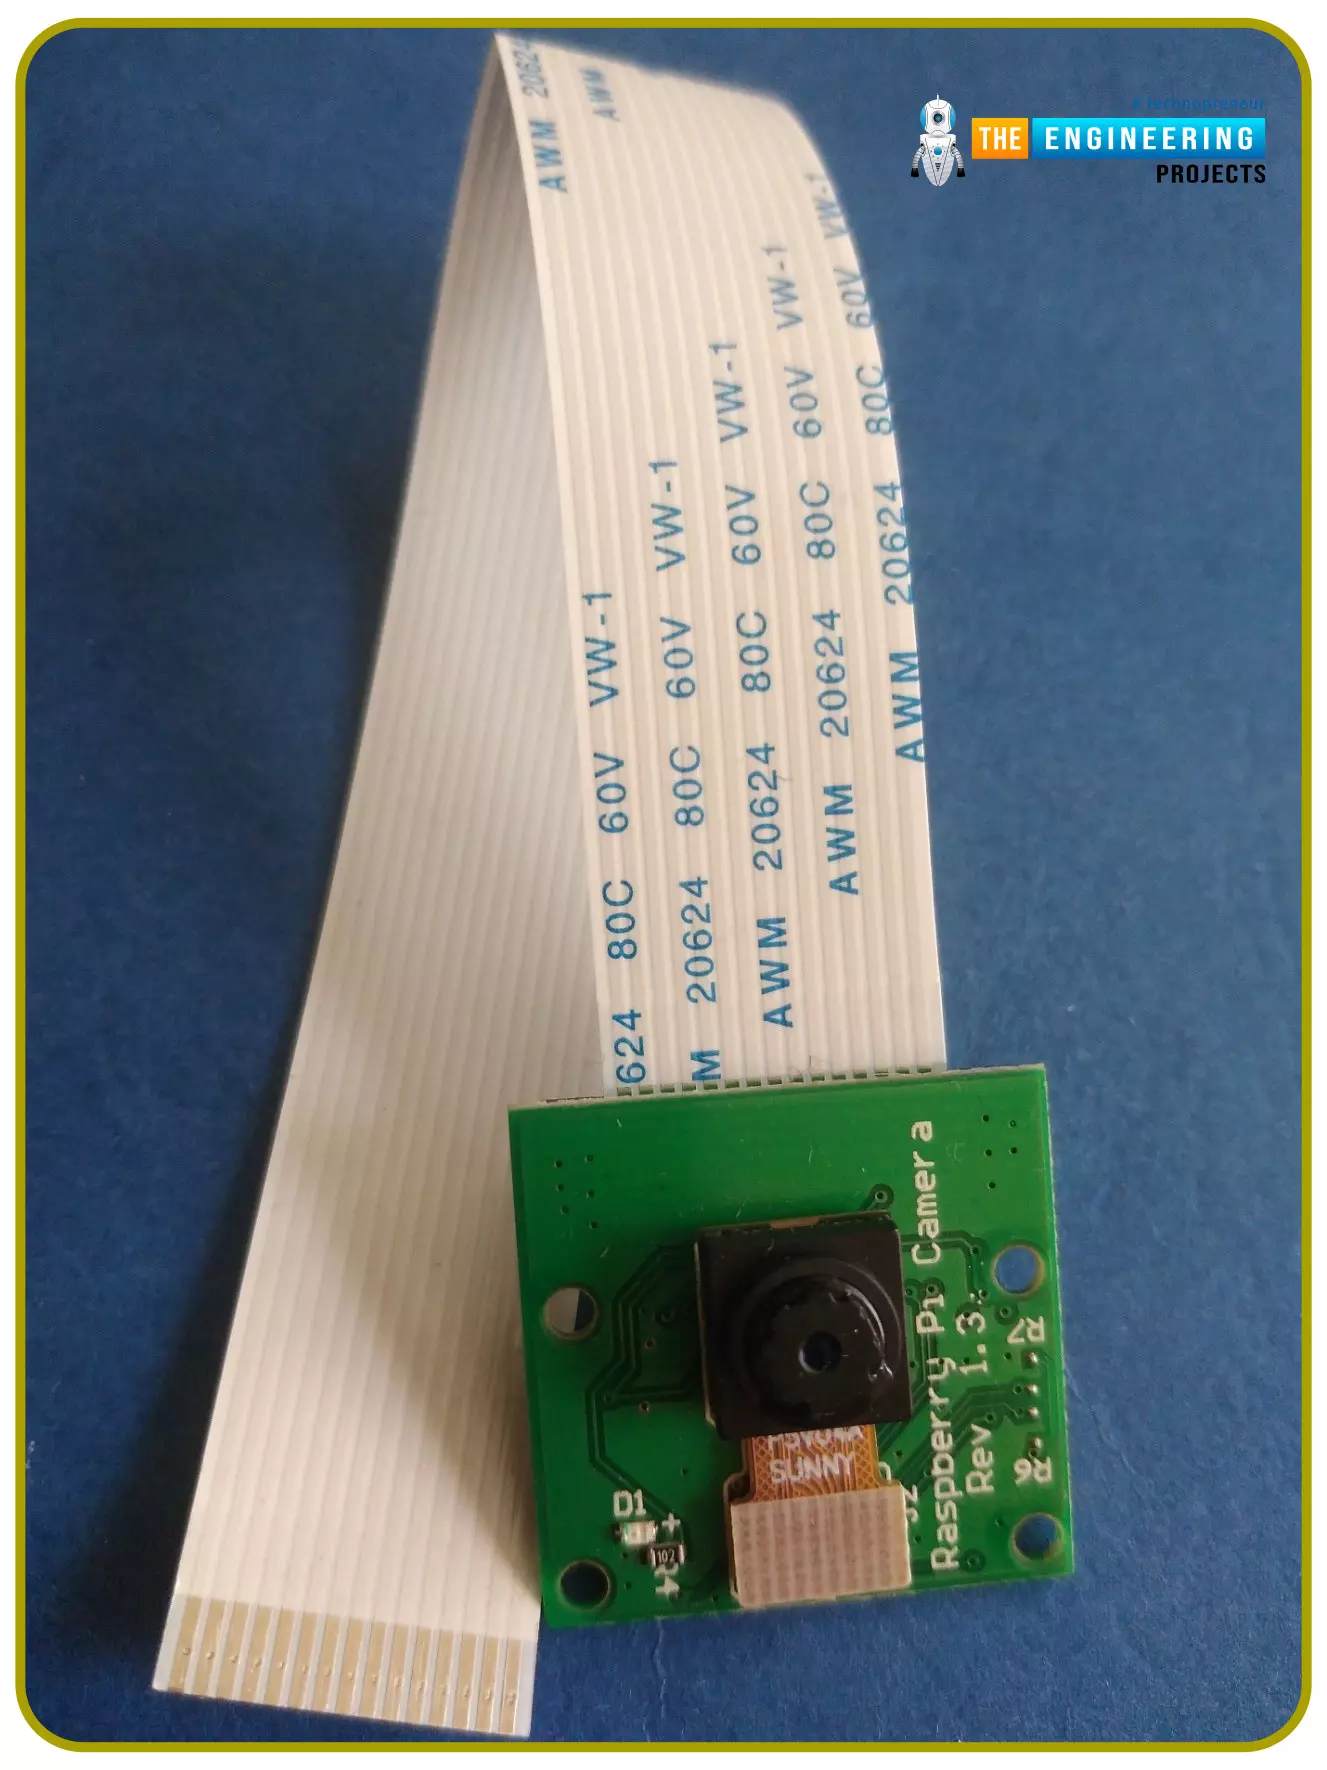
- Pi camera
Connect to the Raspberry Pi
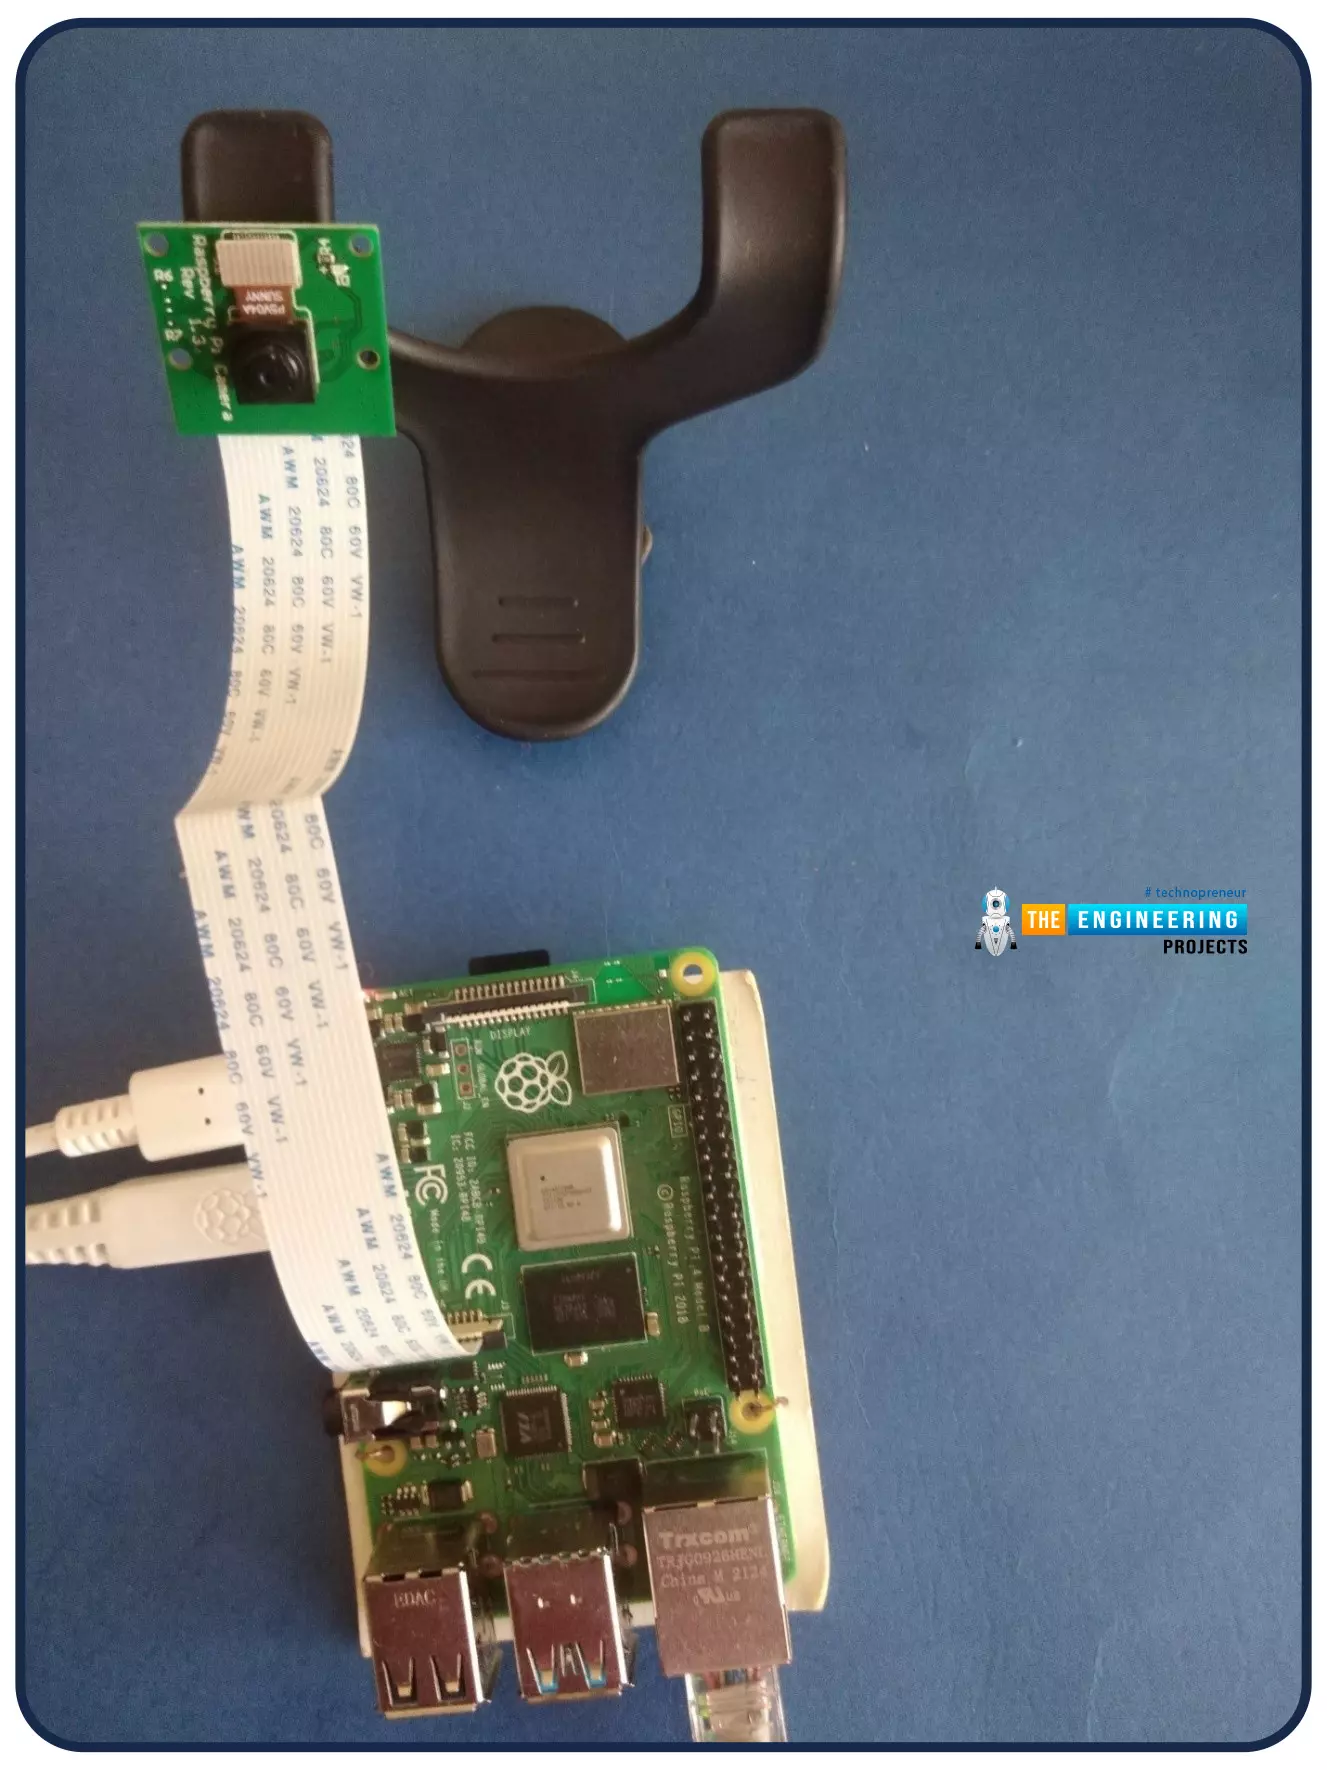
Cameras that can be used with the Raspberry Pi are a bit limited. A powered USB hub is required for most webcams that are compatible. For this post, we’ll be using a camera specifically made for the Raspberry Pi. The camera module can be plugged into a specified port on the Raspberry Pi. How to do it;
- Turn off the pi
Shutting down the pi is recommended before adding a camera. A power button should be installed on Pi 4 so that you may shut down the device safely every time.
- Locate the camera port and lift the tabs to install the camera's cord.

- Secure the tabs on the flex cable after inserting it into the flex cable slot.
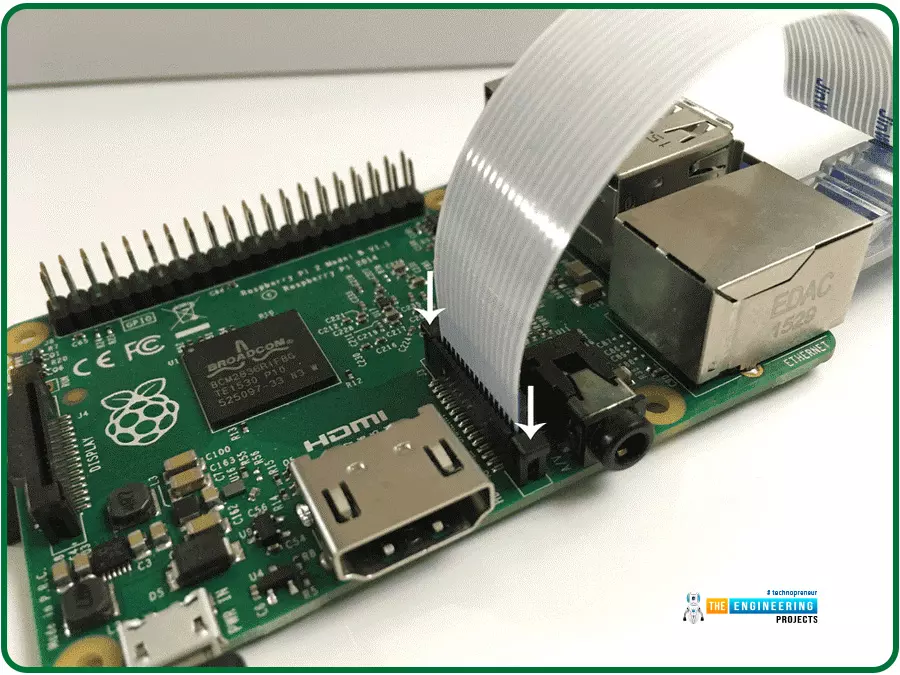
Slide the cord into the port by using an image as a guide. Finally, press down tabs, securing the cable to the motherboard.
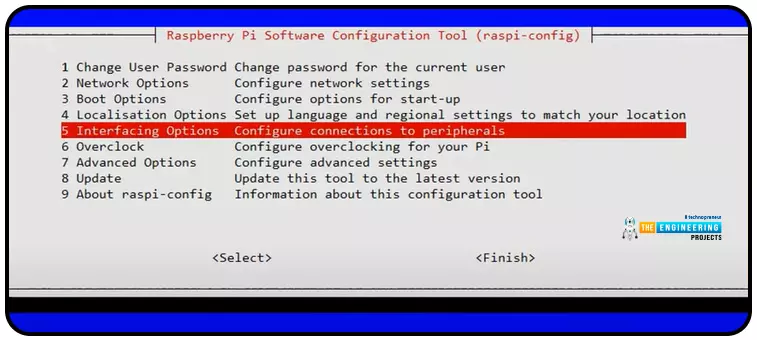
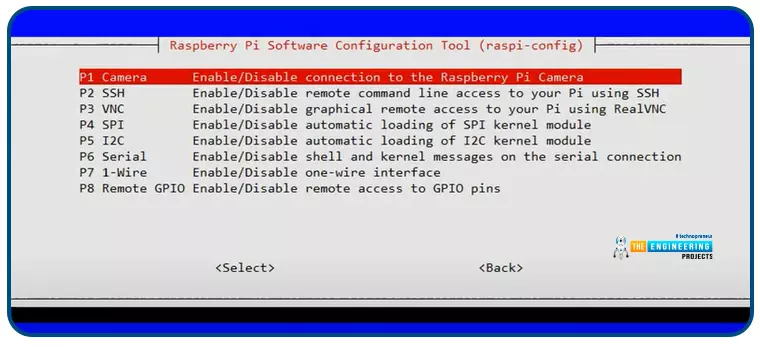
Enable the camera in Raspberry Pi OS
Click on the main menu button, select Preferences, and then click Pi Configuration if you're using a monitor. Enable the camera by clicking on the Interfaces tab.
To continue, headless users must type the command below. Make sure the camera is turned on in Interfacing Options. Rebooting the Raspberry Pi will be required.

How to record time-lapse images
Individual stills are used to create time-lapse videos. We'll be using raspistill to acquire our time-lapse images. As part of the Raspberry Pi OS, you don't need to install anything extra. The are two way to record a time lapse:
- Using the raspistill tool on the Rpi alone
- Using phototimer
-
Using the Raspistill tool only
Raspistill is a Linux-based software library that aims to make it easier for Linux users to use sophisticated camera systems. We can use open-source programs running on ARM processors to control the camera system with the Raspberry Pi. Almost all of the Broadcom GPU's proprietary code is bypassed, which customers have no access to.
It provides a C++ API to apps and operates at the base of configuring a camera and enabling the program to obtain image frames. Image buffers are stored in memory space and can be supplied to either video encoders (like H.264) or still image encoding algorithms like JPEG or PNG. raspistill, on the other hand, does not perform any image encoding or display operations directly.
How can we use this tool?
An illustration of how to take time-lapse photography is shown in the following image.

In this case, the time-lapse capture was 10 seconds long. The Raspberry will wait for a total of 2000 milliseconds between each image. For 10 seconds, the Raspberry Pi will take a picture every two seconds.
The photos will be stored as .jpg files. This example uses the name "Pic" and a number that increases with each frame to identify each image. The final digit of percent 04d is a zero. Pic0000.jpg and Pic0001.jpg would be the names of the first two photographs, and so on. Change this value according to the requirements of your project.
How can we compile the to a video?
Your time-lapse video needs to be put together once all of your photographs have been taken. FFmpeg is the tool we'll be utilizing to generate our timelapse video. The command to download the package is as follows:

Allow the installation to be complete before moving on. Using this command, you can create a finished video:

Pic%04d.jpg corresponds to the image filename you specified in the preceding section. If you have previously changed this name, please do so here. With the -r option, you can specify how many frames per second you want to record. When creating a time-lapse video, replace the phrase video-file with your name. Make sure to keep the .mp4 file extension.
What is FFmpeg?

A high-speed audio and video conversion tool that can also capture from a webcast source is included. On the fly, video resizing and sampling can also be done with high-grade polyphase filters.
A plain output URL specifies an indefinite number of outputs that FFmpeg can read from (standard files, piped streams, network streams, capturing devices, etc.), whereas the -i option specifies the number of input files. An output URL is encountered on the command-line interface that cannot be treated as an option.
Video/audio/subtitle/attachment/data streams can all be included in a single input or output URL. The container format may limit the quantity or type of stream used. The -map option can map input streams to output streams, either automatically or manually.
For options, input files must be referred to by their indices (0-based). It's not uncommon to have an infinite number of input files. Indexes are used to identify streams inside a file. As an illustration, the encoding 2:3 designates the third input file's fourth and final stream. In addition, check out the chapter on Stream specifiers.
-
Using Photo timer
A Python library named phototimer will be used to control the raspistill command-line that comes pre-installed on the Raspbian OS.
- With the use of this tool, we're able to add valuable features like:
- Set a time frame for your day.
- After capturing a photo, create a date-based folder such as:

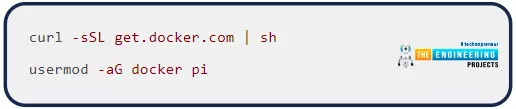
Let us install docker to use this tool
Using docker, you can develop, analyze, and publish apps in a short time. To run phototimer with Python installed, you'll need to use Docker with Raspbian Lite.
- Automatic restarts of the time-lapse
A new location does not necessitate an SSH login. The lapse of time will be restarted.
- Easy setup
Download the Docker image, activate the camera interface, and start the container instead of executing a git clone on each device.
- Easy access to logs
If you disconnect from the container, docker will keep track of the log information and will enable you to reconnect at any time.
Install Docker in Raspberry pi
We can easily set up docker with the following set of commands.
Clone the phototimer GitHub repository
Download the docker file as a zip as shown below

Or use the terminal by copying the phototimer code as shown here:

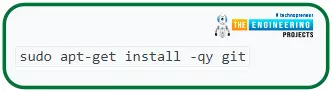
If git isn't already installed, use the following command to add it:
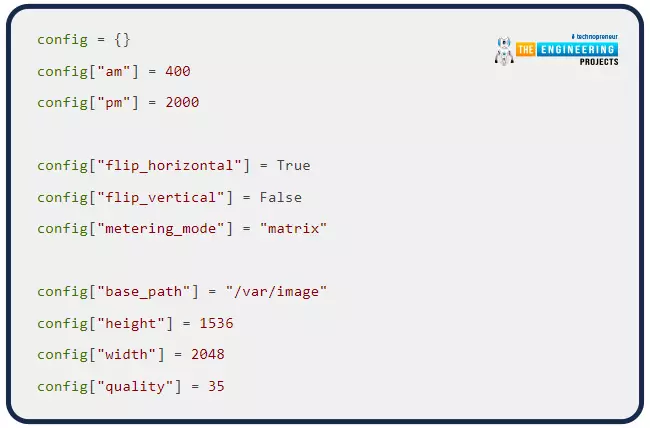
Edit the config file
By modifying the config.py file, you can change the time-appearance lapses and duration.
- Set the hours
You will likely want to alter the default time-lapse settings so that they better fit your requirements, which start at 4 am and end at 8 pm.
- Set the quality level
For some reason, overall quality of 35/100 produces a substantially smaller image than one with a quality of 60-80/100. You can modify the file to determine how much space you'll need.
- Flip the image
Depending on how your camera is positioned, the image may need to be flipped horizontally or vertically. True or False in each situation will have the same result.
- Height and Width
To achieve a specific aspect ratio, you can change the height or width of the image in this way. The default setting is what I use.
The Docker container must be re-built and restarted every time you change your setup.
Now let`s build a Docker container
When docker does a build, it will construct an image from the current directory's code and a base image, like Debian.

The most crucial part is that the image we create right now contains everything our application might want.
For those just getting started, these are some helpful keyboard shortcuts and CLI commands:
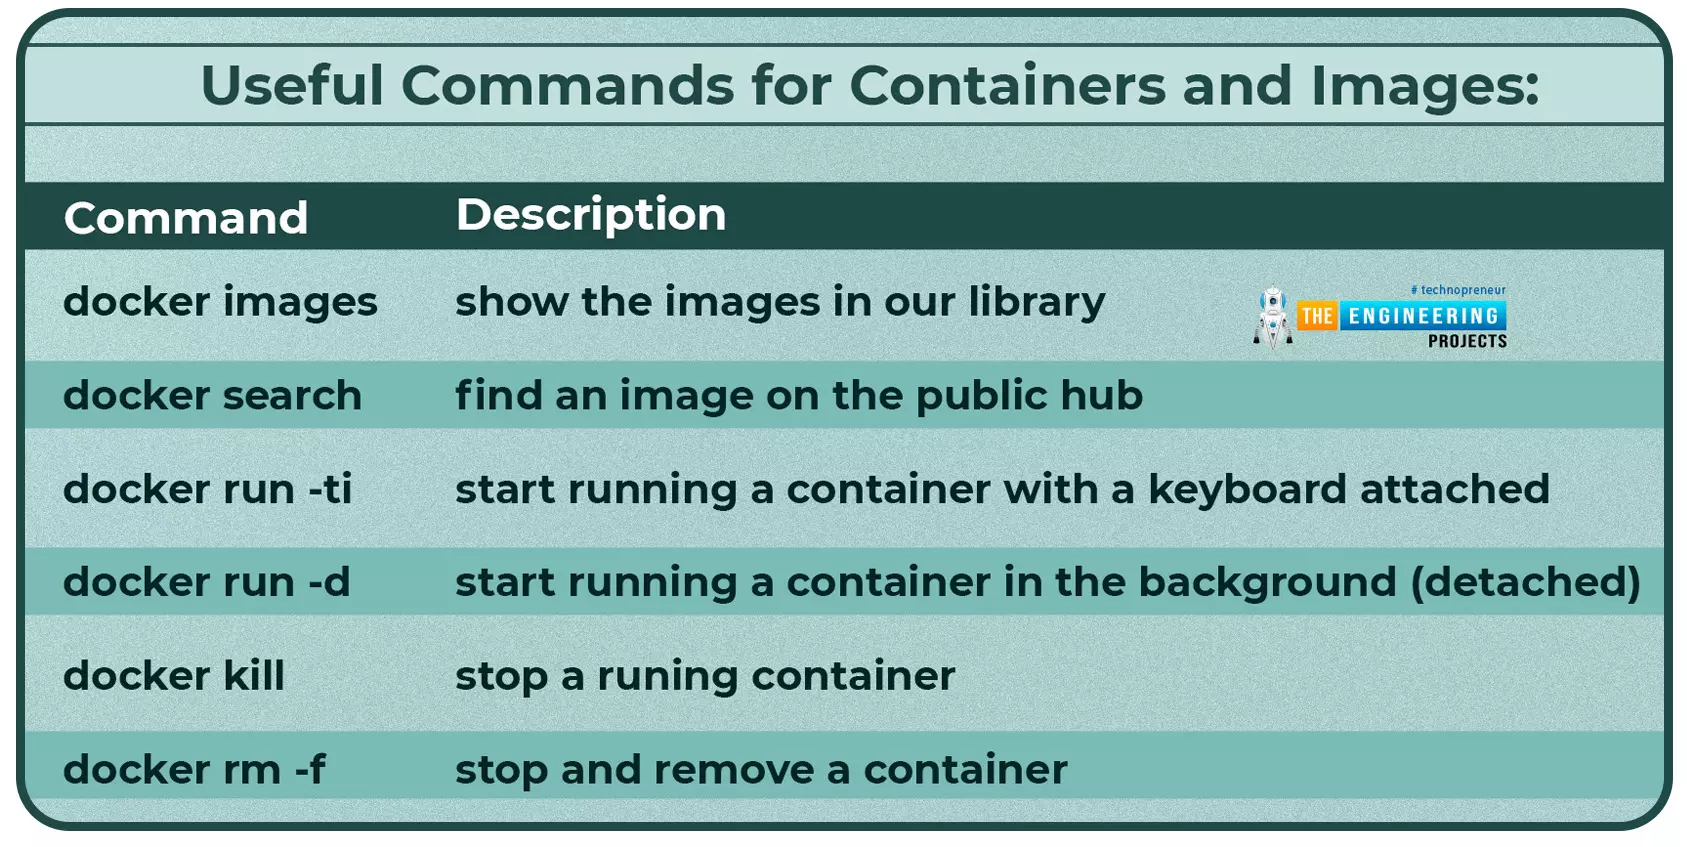
Start the timelapse

Let us configure the time zone for docker
The default time zone for the Docker container is UTC. If you're in a different time zone, you'll want to adjust your daylight savings time accordingly.
Docker can be configured to run in your current local time by adding the following additional option to the command:
As a result, the following is what a time-lapse in Texas, United States, might look like:

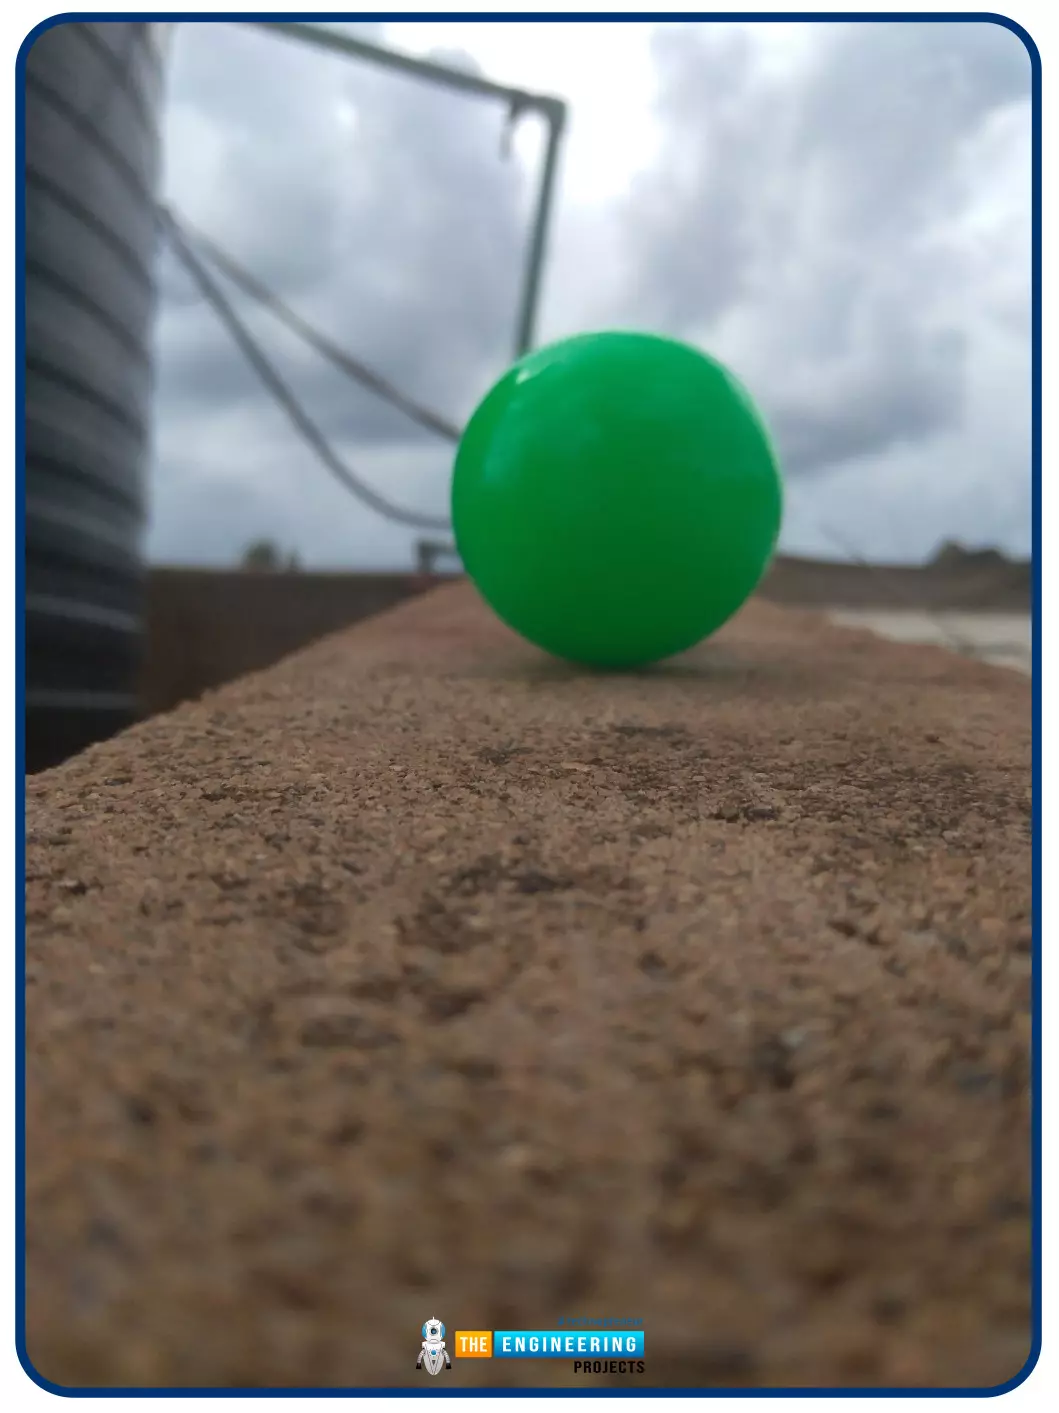
Below are some time-lapse images taken from the raspberry pi camera.
How can we save the file to our laptop?
To save your photos to your laptop, follow these steps once you've captured a few pictures:

The ssh and SCP functions are included in Git for Windows, which may be installed on Windows.
Connectivity options
You'll need a way to connect to your new rig when you're not near your wi-fi router if you plan on doing the same thing I did. There are a few ideas to get you started:
Use a USB OTG cable
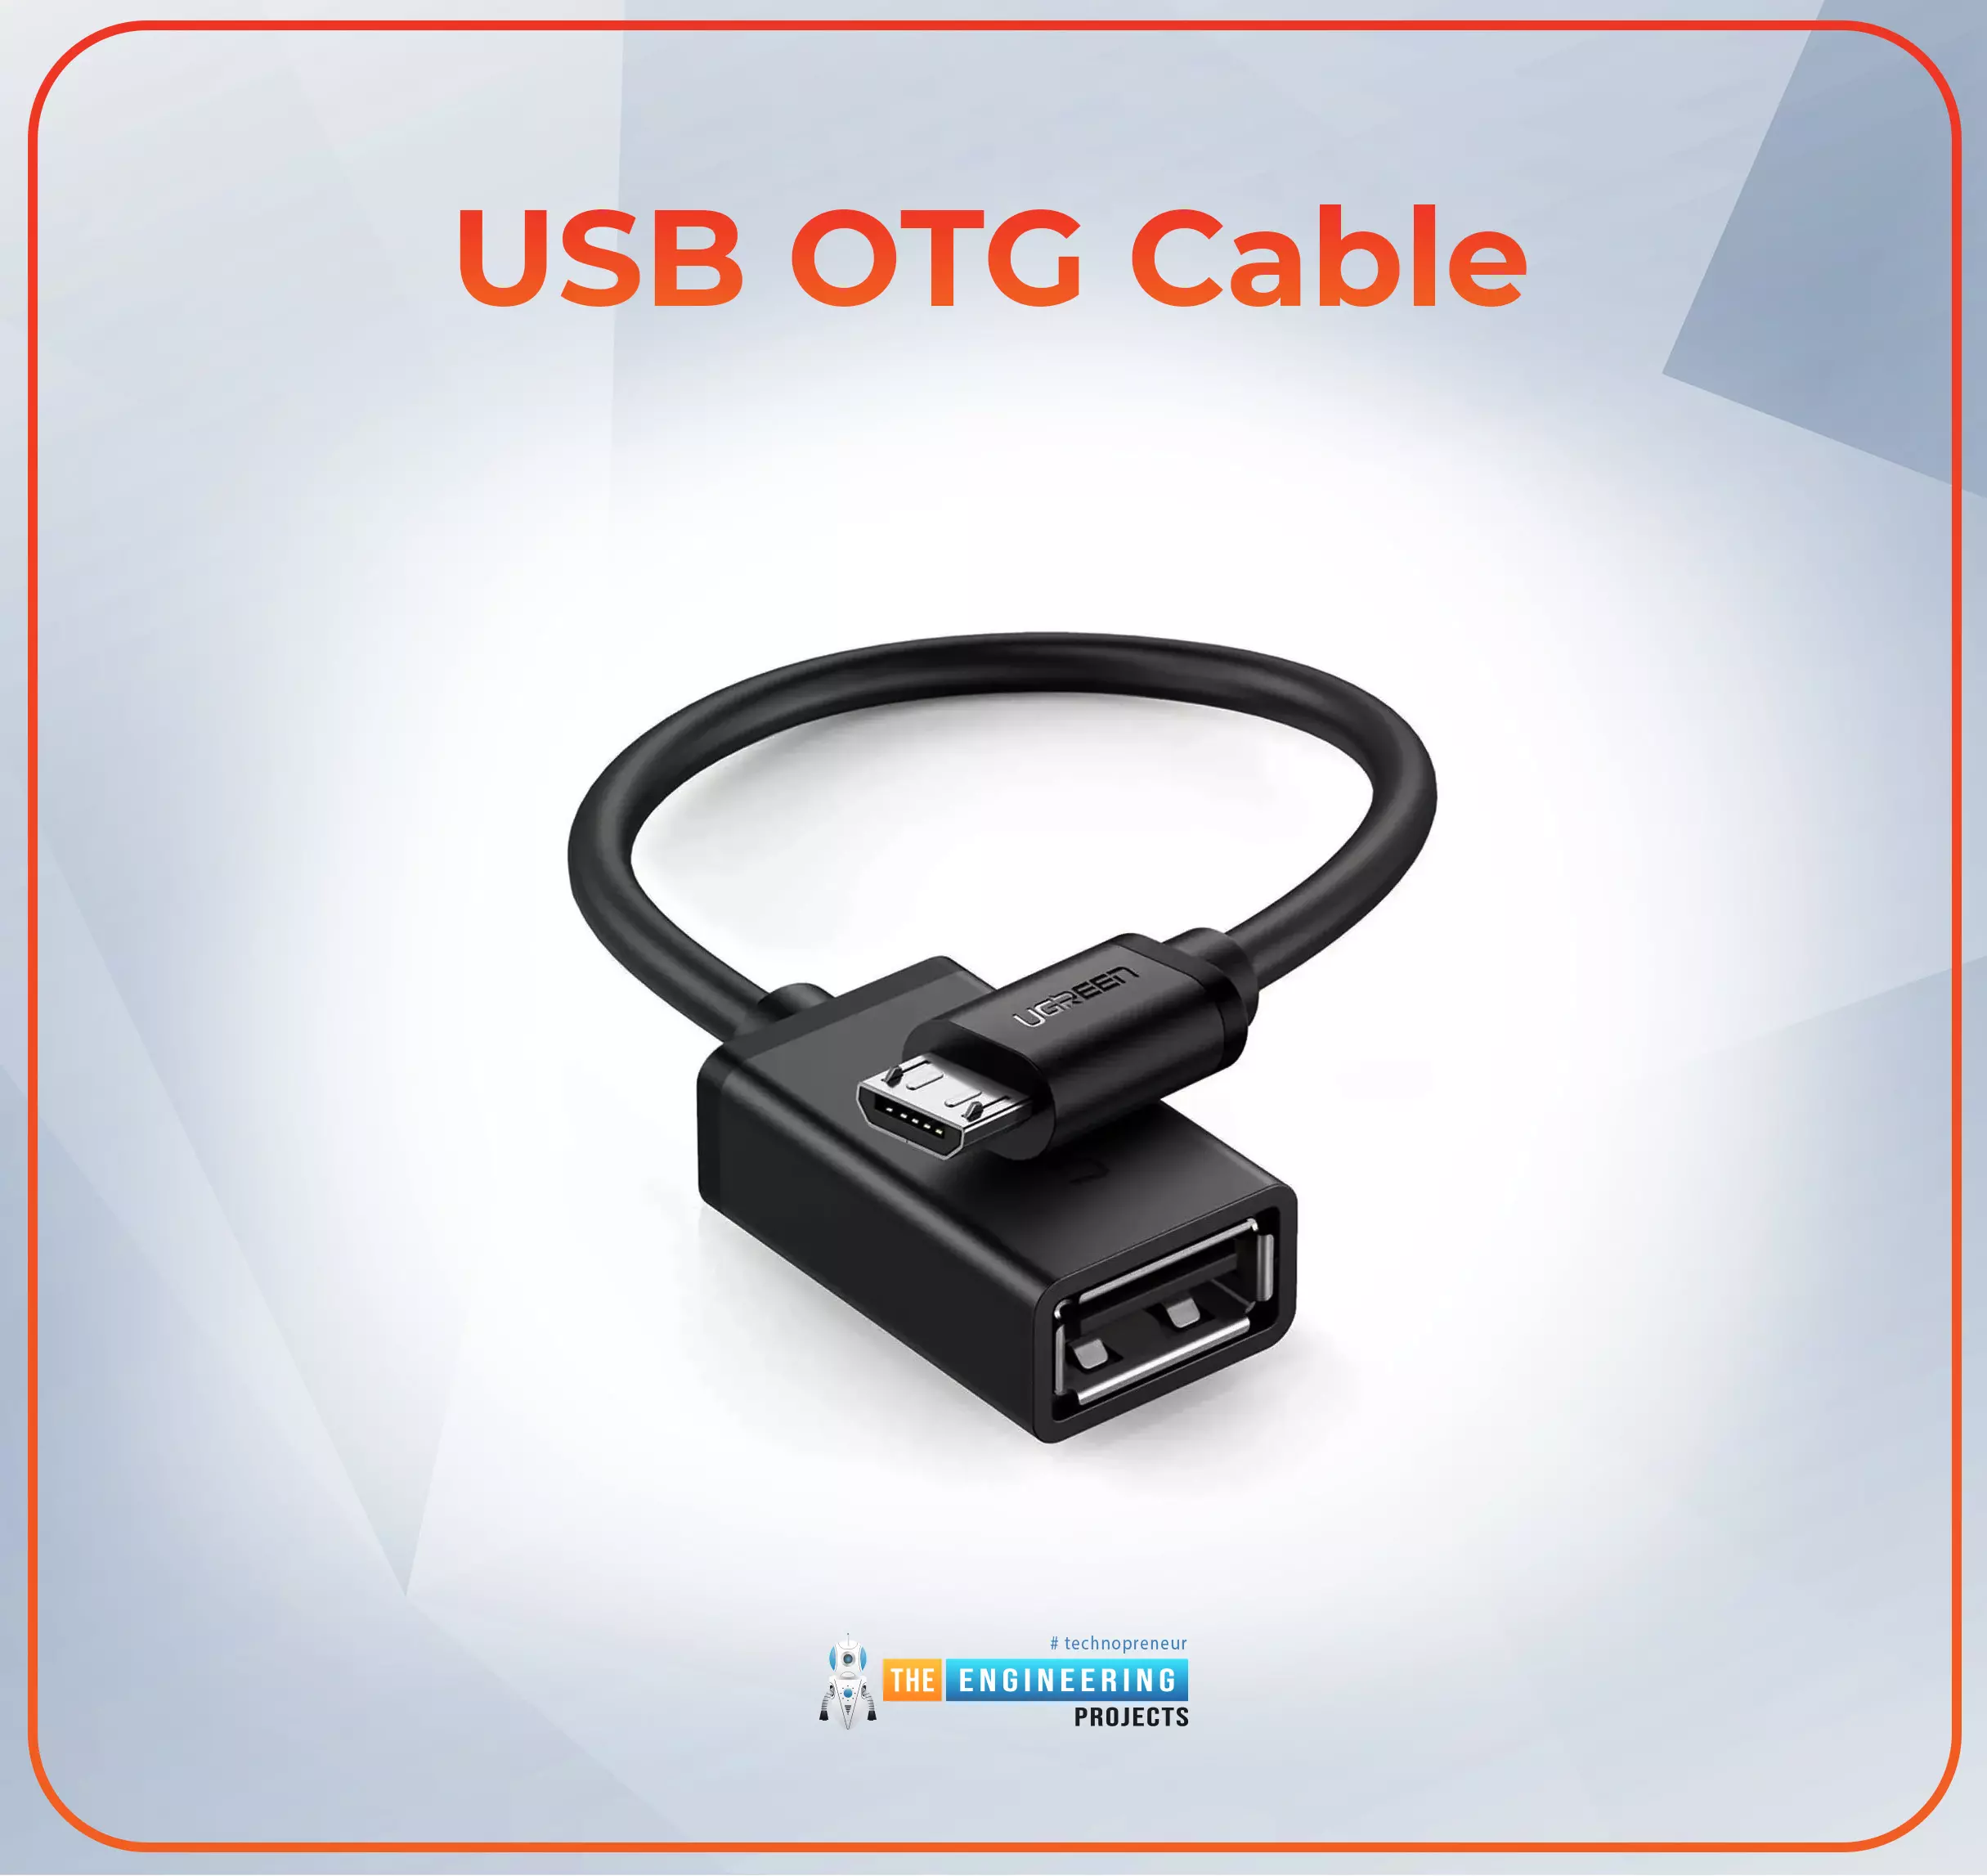
All Pi models allow networking via USB, and it is very straightforward to establish and will not interfere with the wi-fi network. You will have to bring a USB cord to each new site to directly change the Wireless SSID/password on the pi.
Drop a wpa_supplicant.conf file into /boot
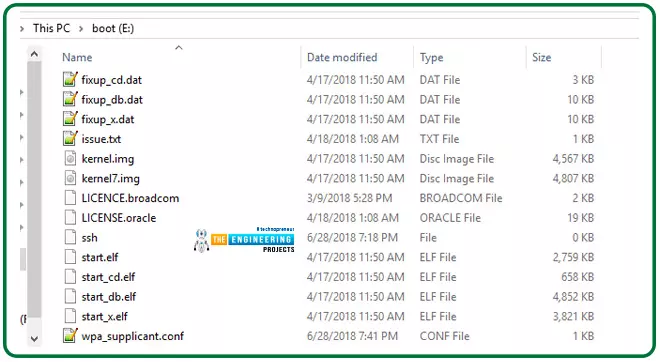
Plugging an SD card into your computer while on the road allows you to update your wi-fi configuration file easily, provided there is an SD card adapter nearby. The existing configuration will be replaced with this new one on the next reboot.
Setup the RPi as a wi-fi hotspot

If you're comfortable with Linux, you can use hostapd to create your hotspot on the RPi. To connect to your Raspberry Pi, you'll need a computer with an Ethernet cable and a web browser.
Install your wi-fi Username and password and use that to start/stop timelapse capture and download files if you won't be using the rig outside your location.
How to edit the video
The imported files should be in the correct order if you drag them onto the timeline after they've been imported, so be sure to do that. The crop factor should be set to "fill." Instead of 4.0 seconds, use 0.1 seconds for the showtime every frame.
-
Transfer files to the Raspberry Pi using SCP
It is often necessary to transfer documents between the Linux laptop to an industrial Raspberry Pi for testing purposes.
Occasionally, you'll need to transfer files or folders between your commercial Raspberry to your computer.
There is no longer a need for you to worry about transmitting files via email, pen drive, or any other method that takes up time. Automation and industry control can help you automate the process in this post.
As the name suggests, SCP refers to secure copy. This command-line application lets you securely transfer files and folders between two remote places, such as between your local computer and another computer or between your computer and another computer.
You may see SCP info by using the command below:

Using SCP, you can transfer files to the RPi in the quickest possible manner. There is a learning curve associated with this strategy for novice users, but you'll be glad you did once you get the hang of it.
-
Enable SSH
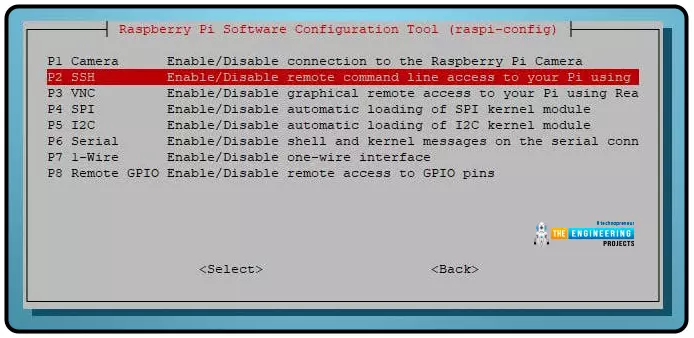
You must activate ssh on your Raspberry Pi to use SCP.
Converting to GIF
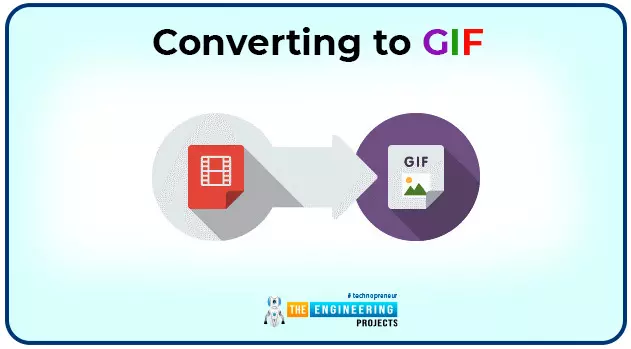
A free program like Giphy can help you convert the videos to a GIF; however, this will lower the number of frames.
Conclusion
We learned how to use the Raspberry Pi to create a time-lapse animation in this lesson. In addition, we looked into the pi camera raspistill interface and used FFmpeg and phototimer to create a time-lapse. We also learnt how to interface our raspberry pi with our pc using ssh and transfer files between the two computers. The following tutorial will teach how to design and code a GPIO soundboard using raspberry pi 4.