Interface DS18B20 with Raspberry Pi 4


Hello friends, I hope you all are having fun. Today, we are going to share the 7th tutorial of Section-III in our Raspberry Pi Programming Course. In the last tutorial, we interfaced a DHT11 sensor with Raspberry Pi 4. Today, we are going to interface another temperature sensor i.e. DS18B20 with Raspberry Pi 4.
DS18B20 is a popular temperature sensor especially in severe/critical environments i.e. chemical plants, mines, industrial sites etc. because of its 1-wire operational technique and accurate readings up to 4 decimal digits.
Project Description
Today, we will interface a DS18B20 temperature sensor with Raspberry Pi 4 and will display the values on a 16x2 LCD.
Let's have a look at the components required for this project:
Components Required
Here's the list of components:
- DS18B20.
- Raspberry Pi 4.
- LCD 16x2
- 10k trim pot
- 10k Pull up resistor
- Breadboard
- Male to Female Jumper Wires
DS18B20 Sensor: A Quick Overview
- DS18B20 is a low-cost, 3-terminal temperature sensor, that uses a 1-wire protocol to send its data.
- To communicate with a microcontroller or processor board like Raspberry Pi, the DS18B20 uses only one wire.
- We can also interact with multiple DS18B20 sensors with a single Pin by calling their signatures.
- DS18B20 temperature sensor along with pinout, is shown in the below figure:
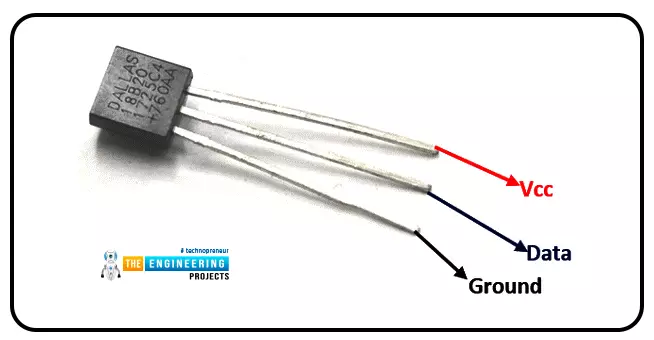
A waterproof variant of this sensor is also available, which encloses the sensor within a cylindrical metal tube. The sensor depicted in the above image will be used in today's project. The sensor's specifications are shown below.

Types of Temperature Sensors
A wide variety of temperature sensors are available. The following are the two most common kinds of temperature sensors:
Contact sensor: Some thermometers use direct contact with an object, referred to as "contact type temperature sensors," to measure the degree of warmth or cold.
Non-Contact sensor: This type of thermometer does not touch the object it is measuring; instead, it measures the temperature based on the radiation emitted from that object. DS18B20 is a non-contact temperature sensor.
Circuit Diagram of DS18B20 with Raspberry Pi 4
Here's the circuit diagram of the DS18B20 temperature sensor and a 16x2 LCD display, connected with Raspberry Pi 4:
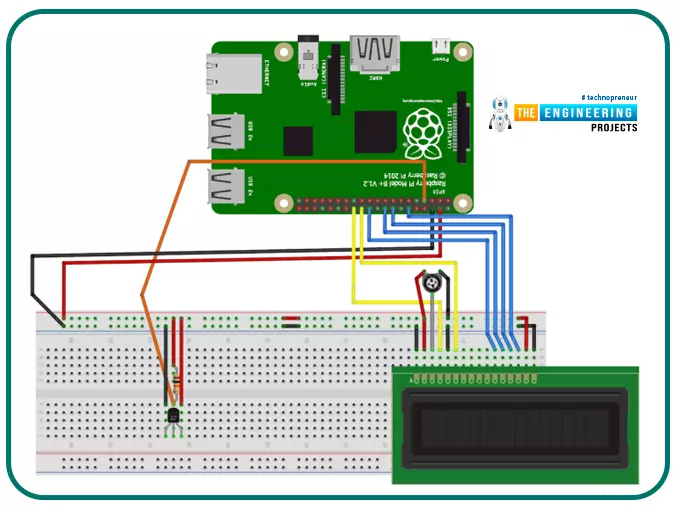
- GPIO4 of Raspberry Pi 4 is used to connect the data Pin of DS18B20 and we have placed a pull-up resistor of 10k ohm, as shown in the circuit diagram.
- GPIO 7, 8, 18, 23, 24, and 25 are used to interface LCD with Raspberry Pi 4. (You should read LCD interfacing with RPi4)
- Potentiometer is used to adjust the brightness/contrast on the LCD.
- Connected the Raspberry Pi's 5V pin with that of the LCD and DS18B20 Sensor, similarly, connect the GND pin of RPi4 with the GND of the sensor & LCD.
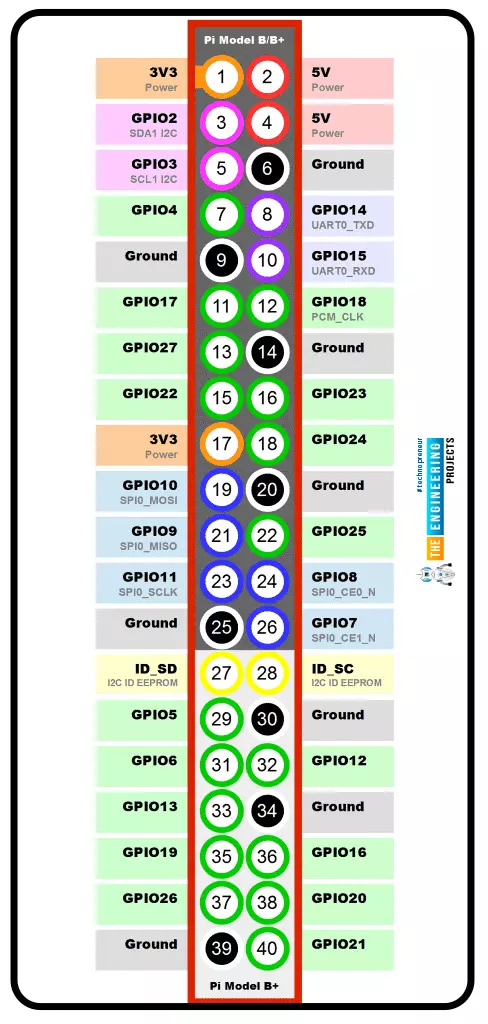
- Here's the Raspberry Pi 4 Pinout:
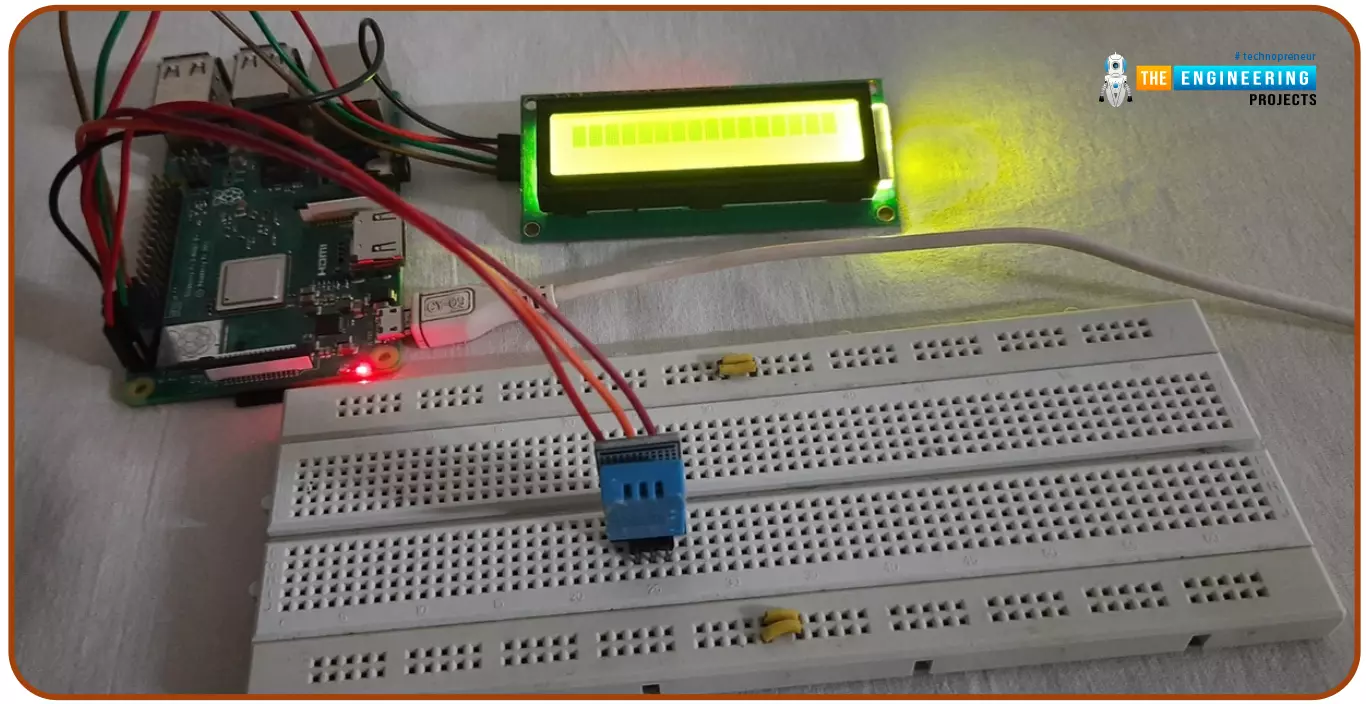
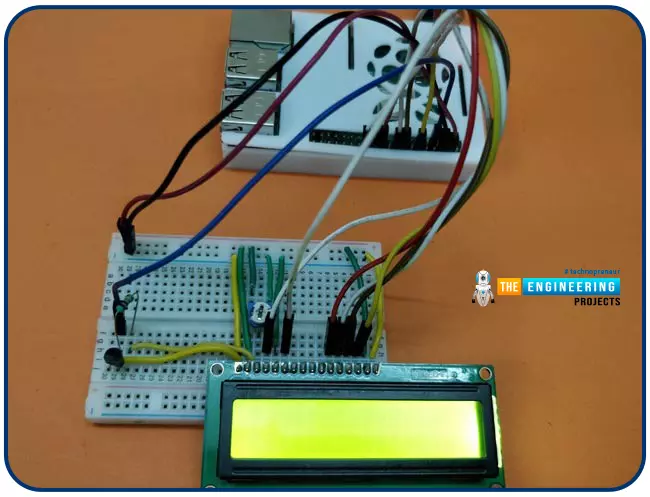
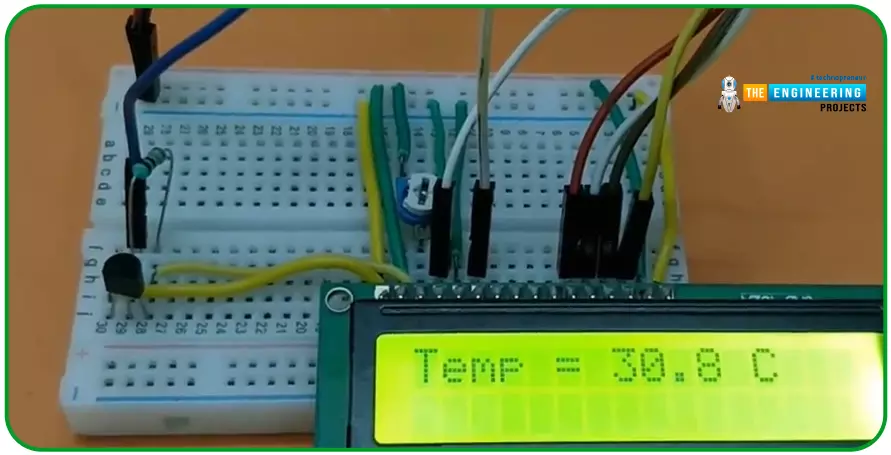
Now, let's design this circuit on a breadboard with the help of Jumper wires. When everything is connected, my hardware will look like this.

We have designed our circuit, so it's finally time to write the Python code for DS18B20 with Raspberry Pi 4:
Installation of Python Libraries
Before start working on our code, we need to first install the LCD Python library and enable the 1-wire protocol in RPi board.
- Adafruit LCD Library.
- 1-Wire Protocol.
Adafruit LCD library
We need to install Raspberry Pi's Adafruit LCD library to display the temperature on the LCD screen. Using Adafruit's library, we can easily operate the LCD in 4-bit mode. So, follow the below instructions to install Adafruit Python Library:
- Step 1: Use the following command to install git on your Raspberry Pi:

Any project on GitHub can be cloned using Git. Since the library is hosted on Github, we'll need to set up a Git before installing this library.
- Step 2: To copy the LCD library project to Pi's home directory, run the below command:

- Step 3: Now we need to open the LCD library folder, so type the below command in the terminal to change the directory:

- Step 4: Now, we need to install the LCD library, so run the following command:

That's all there is; the library should now be operational. In the same way, let's install the 1-wire library for DS18B20 sensor.
Enabling 1-Wire Protocol in Raspberry Pi
If we want to connect with the DS18B20 sensor via a One-Wire approach, we must have to enable the One-Wire Protocol in Raspberry Pi first. So, follow the below instructions:
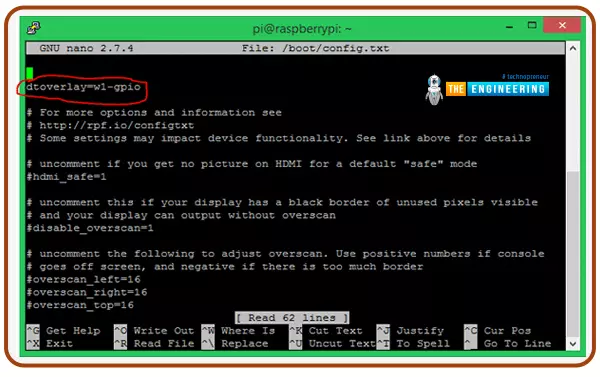
- Step 1: To open the config file, type the following command in the Command Prompt window:

- Step 2: Add the following line to the config file: "dtoverlay=w1-gpio" and save the file:
- Step 3: Run the following command to restart the Pi:

- Step 4:- Take a look at your terminal after the system has been restarted and type as follows:

This is what you can expect to see in your terminal windows:
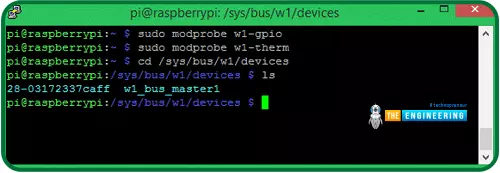
- Step 5:- To get a unique pi number, type "ls". According to the sensor, this number will vary from user to user, but will always begin with 28-. In our case, it's 28-03172337caff.
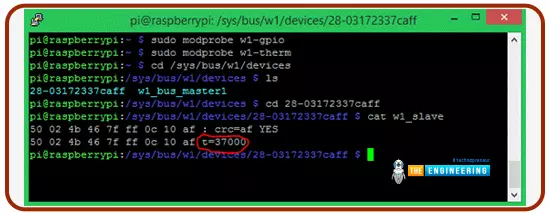
- Step 6:- The following commands can be used to verify that the sensor is functioning correctly:

You can see the sensor's readings on the terminal as a result of these commands. The image below shows a red arrow pointing to the temperature. The current temperature in my home is 37 degrees Celsius.
Using Python on a Raspberry Pi
Here's the complete Python Code to display the temperature from DS18B20 on an LCD display with Raspberry Pi 4:
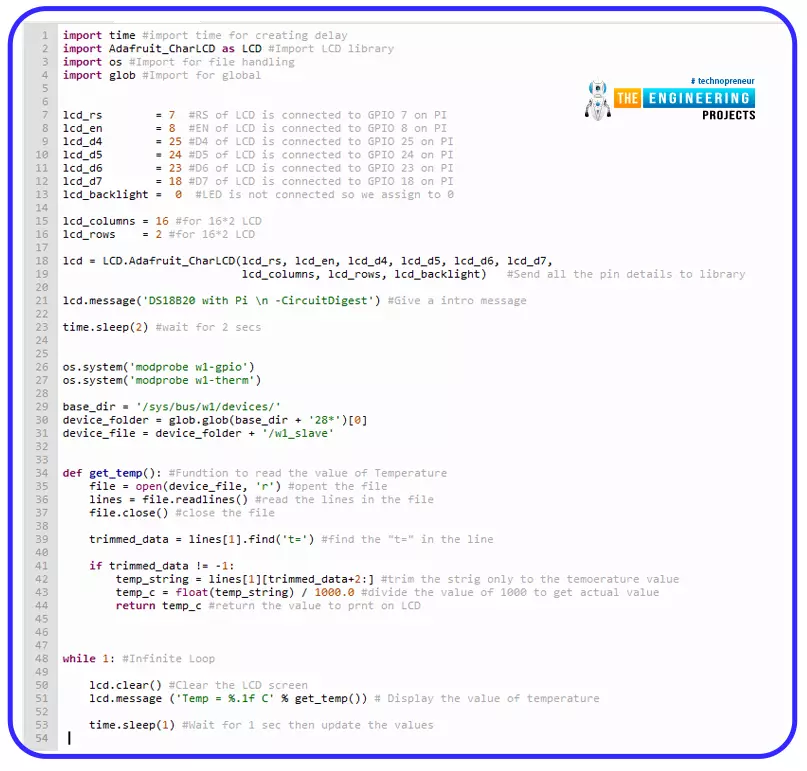
So, let's understand this Pi code for LCD display and One-Wire communication. I've broken down the code into smaller, more digestible chunks below to make it easier to understand.
DS18B20 Python Code Explanation
Importing the necessary header files is always the first step in a new program. Time and the LCD header are imported here to use the LCD with Pi.

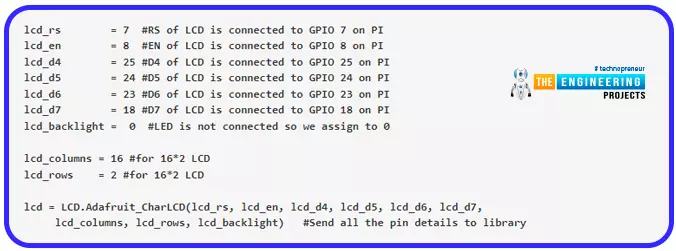
It is important to mention the Display pins linked to the Raspberry GPIO. Consult the diagram above if you're unsure of the pin numbers for specific GPIO pins. Once the pins on the PI to which the LCD is connected have been declared, use these lines of code to initialize the LCD display.
Once the LCD has been initialized, we show a sample text message. To indicate a new line, the character 'n' is used. There is a delay of two seconds before users can begin reading the intro message.

Make sure you remember what you did in step 4 in order to enable the one-wire interface on your Pi. For this reason, we are using the os.system function to repeat the code. Afterwards, a file path is supplied where the temperature value will be read from. We can't open the folder since we don't know its exact name. The device folder variable connects to the '28-' folder using the * symbol. The temperature value is stored in a file with the name device file, which is also in that folder.
Then we create a get temp method, which specifies how to read the temperature from the file we previously linked. There will be a file containing the temperature data; however, the format will be as follows:

We only need the temperature value, which is 37000, from this. A reading of 37.00°C can be seen in this instance. After trimming all the unnecessary information from this type of text, we must next divide 37000 by 1000.

Using the lines variable, the file's lines can be parsed. A search for "t=" is done in these lines, and in the variable temp string, the value that comes after that letter is recorded. Finally, we perform division on the string value with 1000 in the variable temp c to obtain the temperature value. Finally, the code should output the temp c variable.
To display the current temperature on the LCD panel, we merely need to invoke the previously described function inside the infinite while loop. Every second, we refresh the LCD display to show the current value.

Output
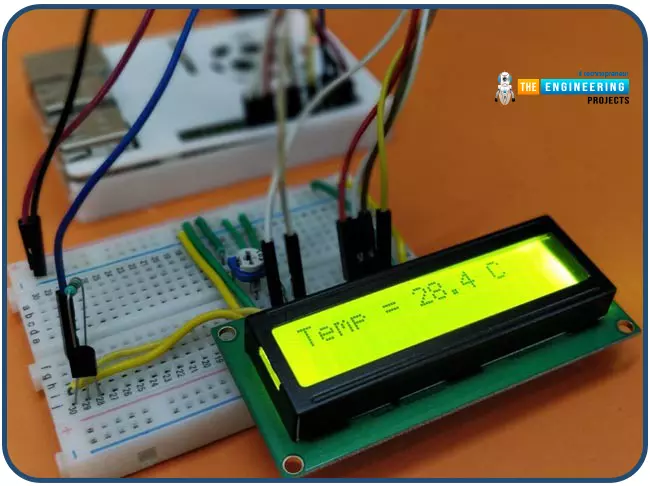
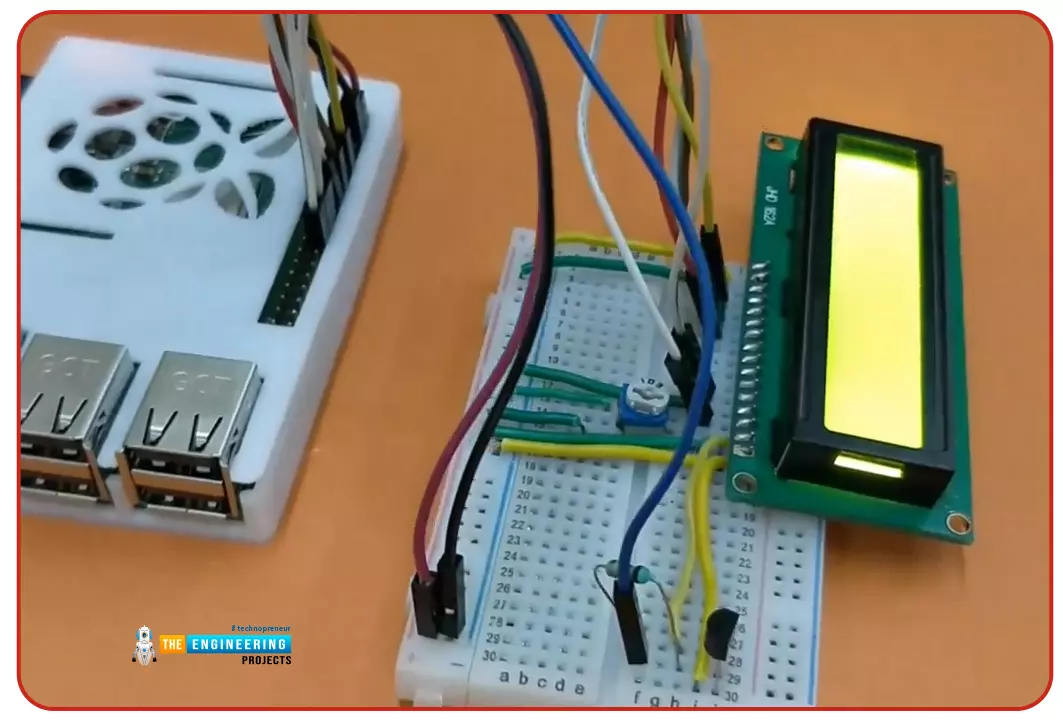
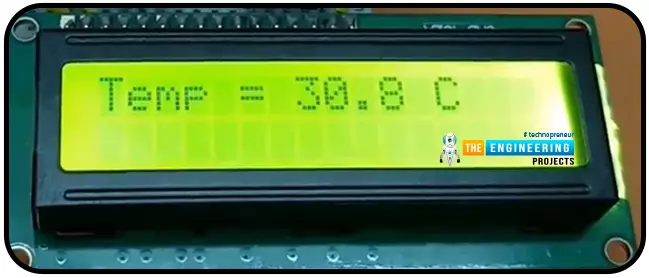
Use the code provided at the end of this page to compile it on your Raspberry Pi and see what happens. Before running the application, Install the display libraries and enable a one-wire connection on the Pi. You can now run the application and see if everything went well; if so, the intro text should be visible. Adjust the contrast potentiometer, if necessary. What you'll see when it's all done is shown in the below images:
DS18B20 Applications
Temperature sensors can be used in a variety of ways, so here are some examples.
- Motors - Temperature monitoring is required for several motor components to ensure that the motor does not overheat.
- Surface plate – In order to accurately detect temperature, a typical type of surface plate temperature sensor is the ring terminal sensor (RTS).
- Home appliances – Temperature sensors will be found in everything from coffee makers to toasters to washing machines and dishwashers.
- Computers – Temperature sensors are built into computers to guard against overheating.
- Industrial equipment – The temperature sensors utilized in these applications must be extremely durable because of the harsh conditions.
- Warming Electrical Radiators – In order to regulate the temperature of electric radiators, NTC thermistors are employed.
- Monitoring of Exhaust Gases from Racing Vehicles – Temperature sensors used in racing must be extremely reliable and long-lasting to ensure that performance does not suffer.
- Food Production; 3D printed chocolates – The melted chocolate used in 3D printing is monitored using temperature sensors.
- Alcohol breathalyzer – Alcohol breathalyzers employ thermistors to gauge the subject's exhaled breath temperature.

Conclusion
In this lesson, we have studied how to use Raspberry Pi's GPIO pins to connect DS18B20. In addition, we looked into the sensor's fundamental principles and current-day usefulness. We also designed a circuit that we later programmed to collect temperature readings using the temperature sensor and perform a little calculation and display it on the LCD screen in degrees Celsius. In the next tutorial, we will interface the BMP180 Air Pressure sensor with Raspberry Pi 4. So, stay tuned. Have a blessed day.