Interface Ultrasonic Sensor with Raspberry Pi 4 using Python


Hello friends, I hope you all are doing well. Today, I am going to share the 5th tutorial of Section-III in our Raspberry Pi Programming Course. In our previous tutorial, we have seen the interfacing of a PIR Sensor with Raspberry Pi 4. In today's tutorial, we will interface an Ultrasonic sensor with Raspberry Pi and will use Python to perform its calculations. So, let's get started:
Components:
Here's the list of components, we are going to use in today's project:
- Raspberry Pi 4
- Ultrasonic sensor
- Male-to-female jumper wires
- Breadboard
- 1k ohm resistor
- 2k ohm resistor
What are Ultrasonic Sensors?

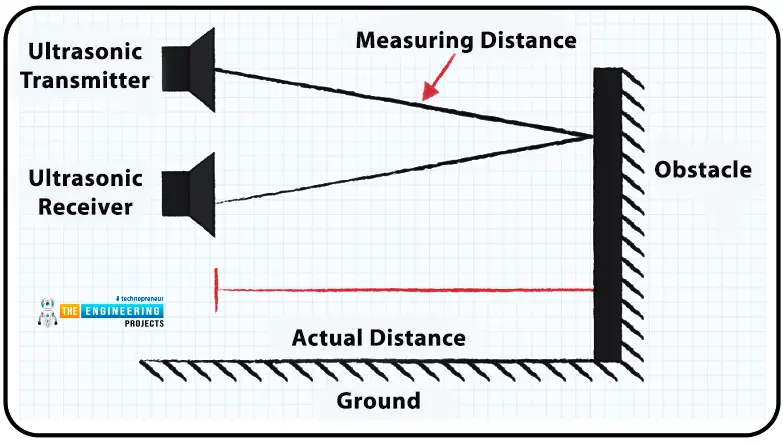
An Ultrasonic Sensor consists of a transmitter and a receiver, the transmitter emits the ultrasonic wave, which after hitting some object bounces back and receives by the ultrasonic receiver. If the Ultrasonic sensor is operated at 5V, it normally measures a distance of up to 450 centimeters.
With an ultrasonic sensor, you can measure the distance between your body and a target item, by sending and receiving ultrasonic sound waves. Unlike audible sounds, ultrasonic waves move faster. To create ultrasonic sound waves, the transmitter uses piezoelectric crystals. The sound then travels to and from the target. When it returns, the receiver gets the sound.
Mostly, ultrasonic sensors can detect objects as close as a few centimeters and as far as about five meters. Measurements of approximately 20 meters can be achieved with specially designed units.
An established technology, ultrasonic sensors have a wide range of uses, from industrial to consumer. Many new devices requiring presence detection or distance measuring can benefit from their simplicity, low cost, and durable construction. Because the hardware and software settings can be changed, they can be used in a wide range of situations.
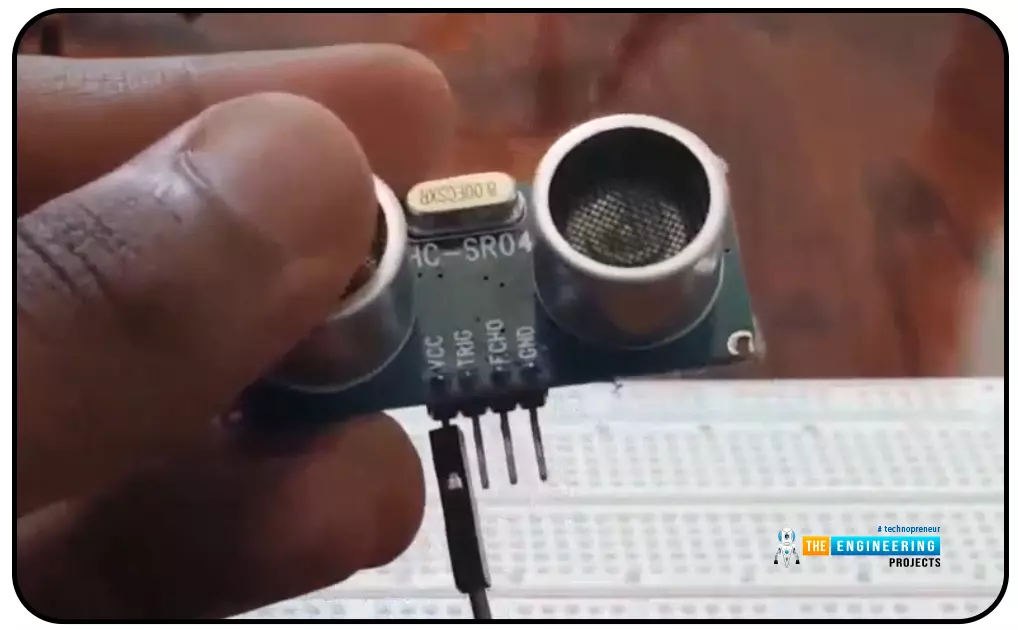
Ultrasonic Sensor Pinout
The Ultrasonic Sensor has four connections:
- Vcc: We need to provide +5V here.
- Trig: Trigger Pin(Connected to Microcontroller)
- Echo: The sensor's response (Connected to Microcontroller)
- GND: We need to provide Gound here.
Ultrasonic Sensor Working Principle
An ultrasonic sensor is made up of two parts: a transmitter and a receiver, arranged side by side as close as possible. Smaller measurement errors are achieved when the receiver is near the emitter, as the path of sound from the source to the destination is straight-lined. In addition, the transmitter and reception functionalities of some ultrasonic transceivers are combined into a single device, decreasing inaccuracy to the greatest extent possible while simultaneously reducing the PCB footprint of the device.
Moving further away from the transmitter causes sound waves to broaden and the detection area increases. Ultrasonic sensors, instead of specifying a fixed detecting region, provide coverage specifications in the form of beam width or beam angle to account for this shifting terrain. For comparison, either the full beam angle or the difference from a transducer's straight line, is being used.
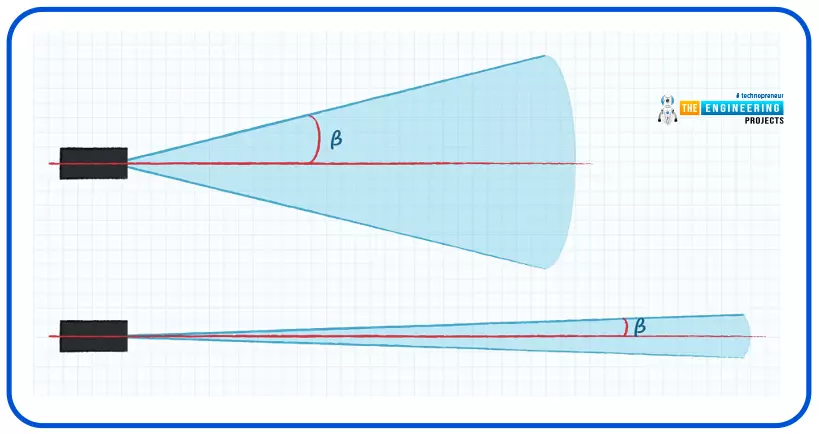
The beam angle has a secondary effect on the device's range. As shown in the above figure, in the case of a narrow beam, the energy of an ultrasonic pulse can travel farther, before it dissipates to unusable levels. Wide beams are better for broad detection and covering large regions, while narrow beams are better for preventing false positives, since they limit the detection region.
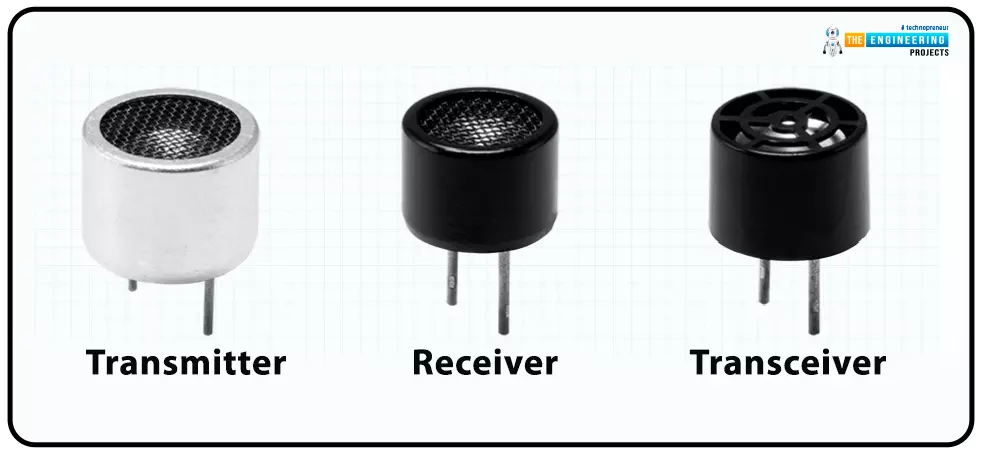
When looking for individual parts, transmitters and receivers for ultrasonic sensors can be found separately, or as part of a single device called an ultrasonic transceiver. In most analog ultrasonic sensor alternatives, a trigger signal is sent by the transmitter, and the receiver gets the signal as soon as the echo is recognized. In order to meet specific requirements, the designer can alter the pulse length and any encoding. The microcontroller is ultimately responsible for decoding and calculating the time between the trigger and the echo.
How is the distance calculated?
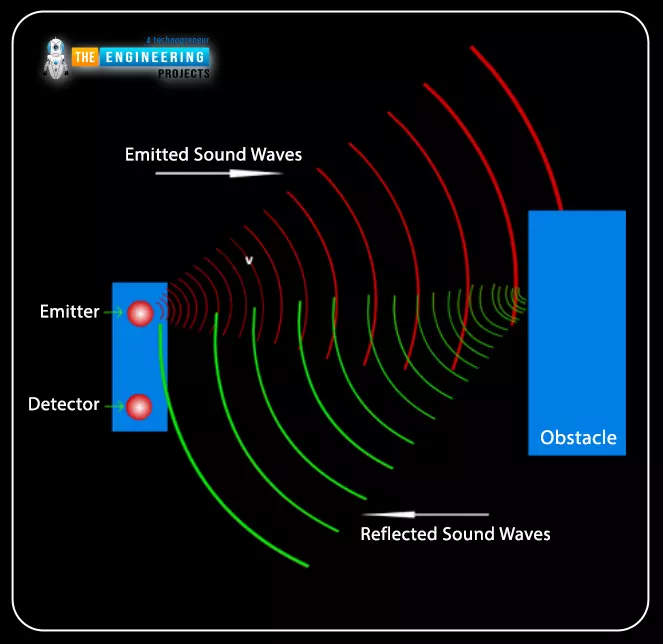
Ultrasonic sensors typically emit a chirp of ultrasonic radiation, that is much higher in frequency than the range of human hearing. This chirp is used to calculate the duration taken for sound to reflect from an item. This method is based on the principles of echolocation, which are used by bats to detect their prey. With this in mind, it is easy to convert the time of the ultrasonic chip to distance because the sound travels at 343 m/s in the air at ambient temperature. So, in order to calculate the distance covered, we will use the following formula:

We have divided it by 2 because the waves will cover the distance twice, one while going toward the object and the second while coming back from the object.
For example, an ultrasonic sensor emits an ultrasonic wave pointed toward a box. The waves take 0.025 seconds to bounce back. Now, in order to calculate the distance between the sensor and the box, we need to use the above formula and it gives us 4.2875 meters, as shown in the below figure:

Interface Ultrasonic Sensor with Raspberry Pi 4
As we discussed in the Pinout section, Ultrasonic Sensor has 4 pins in total.
- The sensor emits an ultrasonic signal if a high pulse is detected on the Trigger pin.
- An echo will return a HIGH signal to the Microcontroller, almost at the same time.
- Until the reflected sound is detected, the Echo Pin keeps on sending a HIGH signal.
- When the sensor's receiver gets a sound back, the Echo output gets LOW.
- With the time difference between the rising and falling edges of your Echo pin, we can easily get the distance between the sensor and the obstacle in the software.
Voltage Divider at Echo Pin
If you set Vcc to 5 volts, the Echo pin will also output 5 volts. Raspberry Pi GPIO pins are prone to voltages above 3.3V, so it is imperative to avoid them. Two alternatives exist at this point:
- To compensate for this, we can use 3.3 V to power the sensor, but it will reduce the range to about 50cm, which was 250cm in the case of 5V.
- The sensor is powered up by 5 volts and a simple voltage divider is used on the Echo Pin, to drop the incoming voltage from 5V to 3.3V. So, you get the sensor's full range, but you'll need two additional resistors to design this voltage divider.
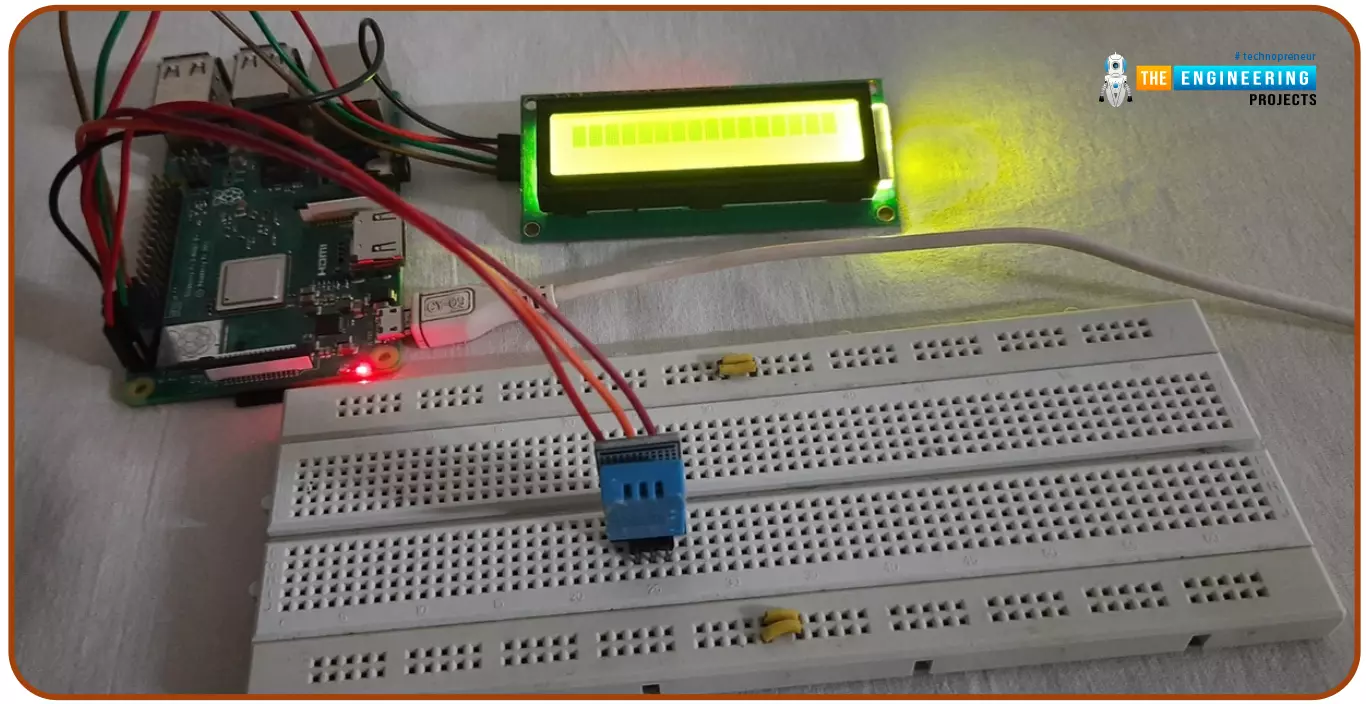
Circuit Diagram
- Here's the circuit Diagram of the Ultrasonic sensor(HC-SR04) with Raspberry Pi 4:
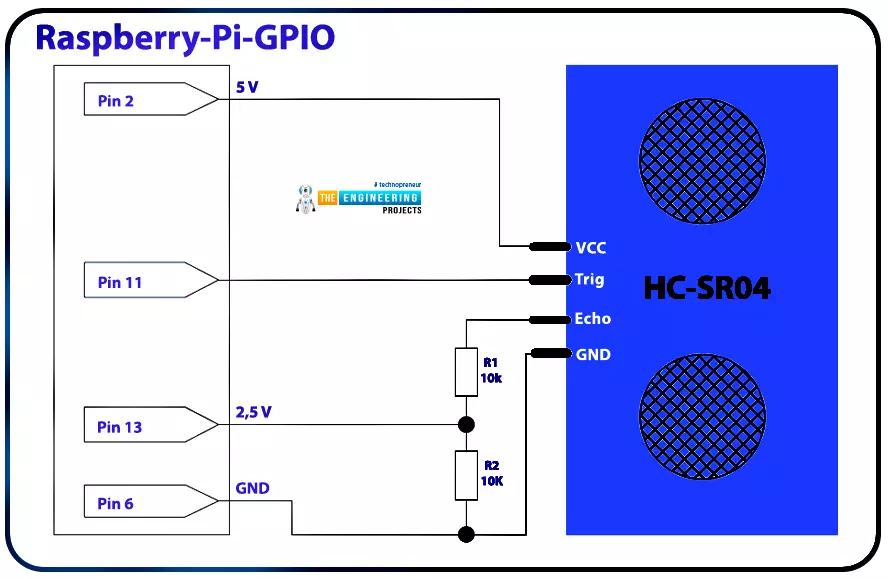
- As you can see in the above figure, we have placed two resisters at the Echo Pin, to divide the voltage, as we need 3.3V max at RPi4 GPIO.
- Any spare GPIO pin can be used, instead of Pin11 and Pin13.
Now let's design it with real hardware:
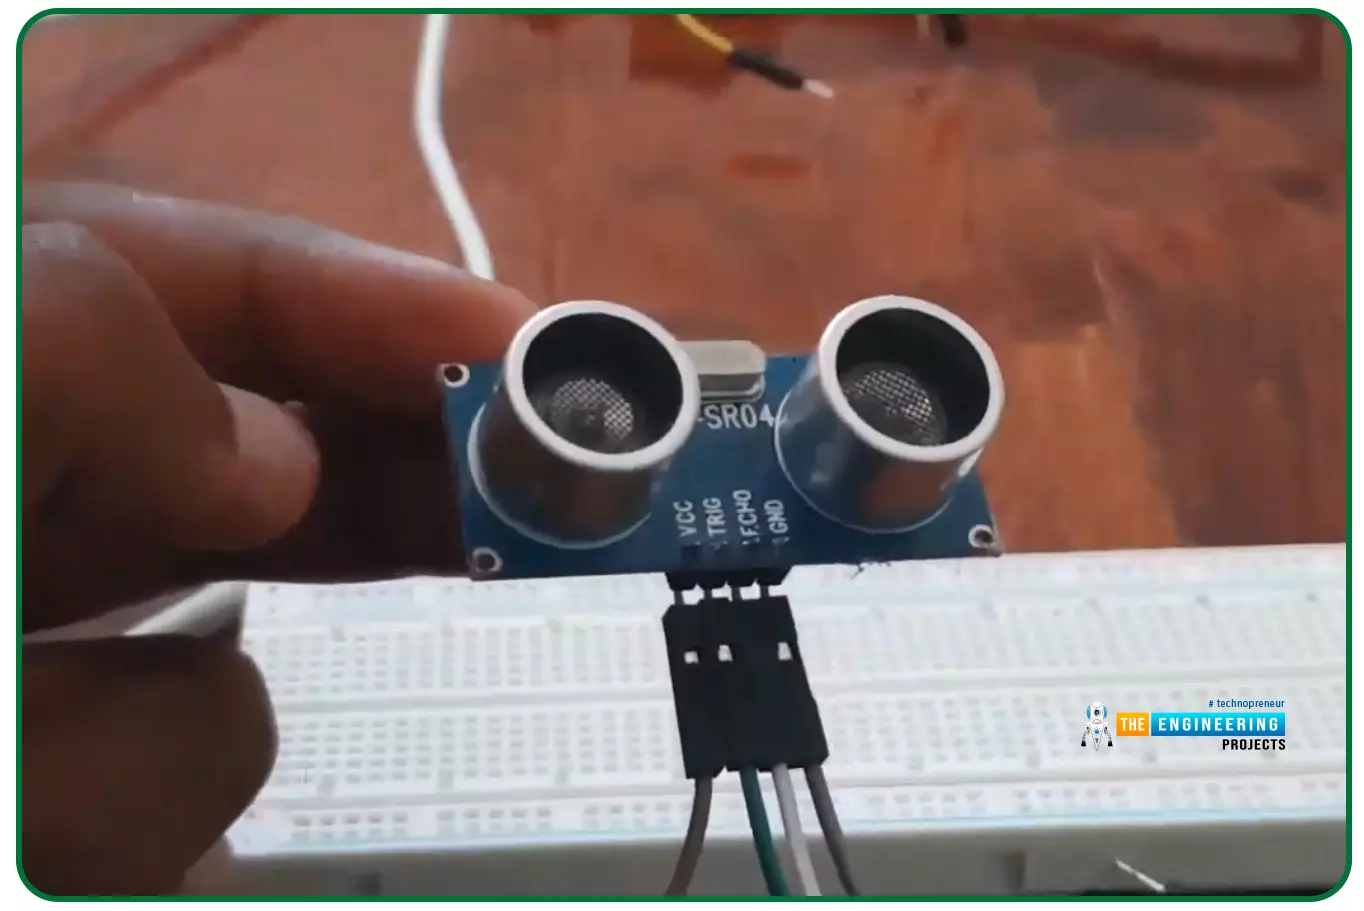
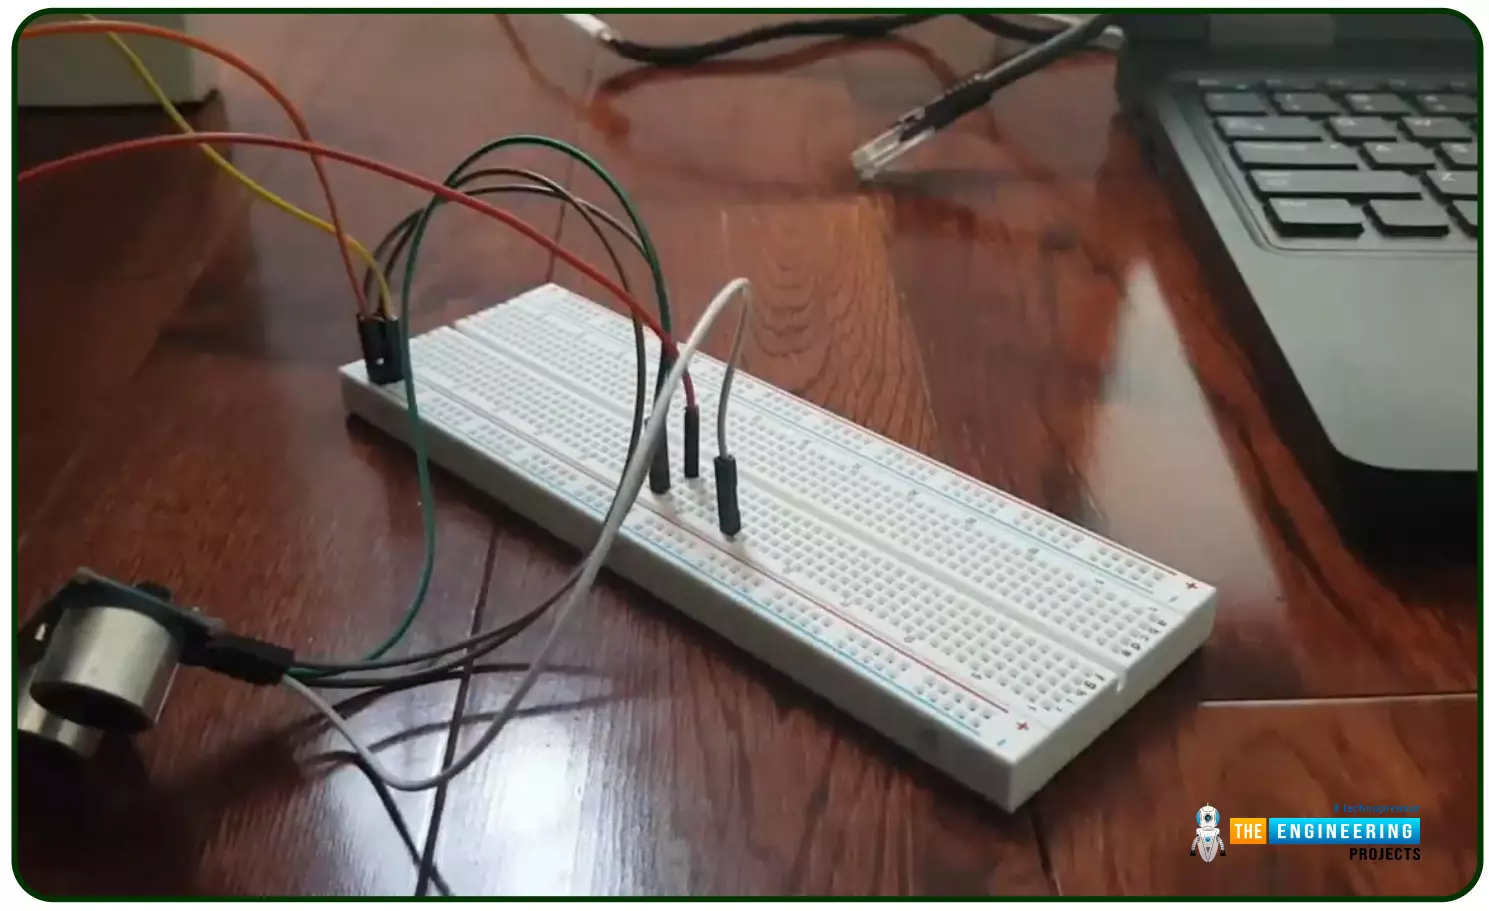
- I have placed Male-to-female jumper wires on the Ultrasonic Sensor, the other side of these jumper wires will be plugged in the Breadboard:
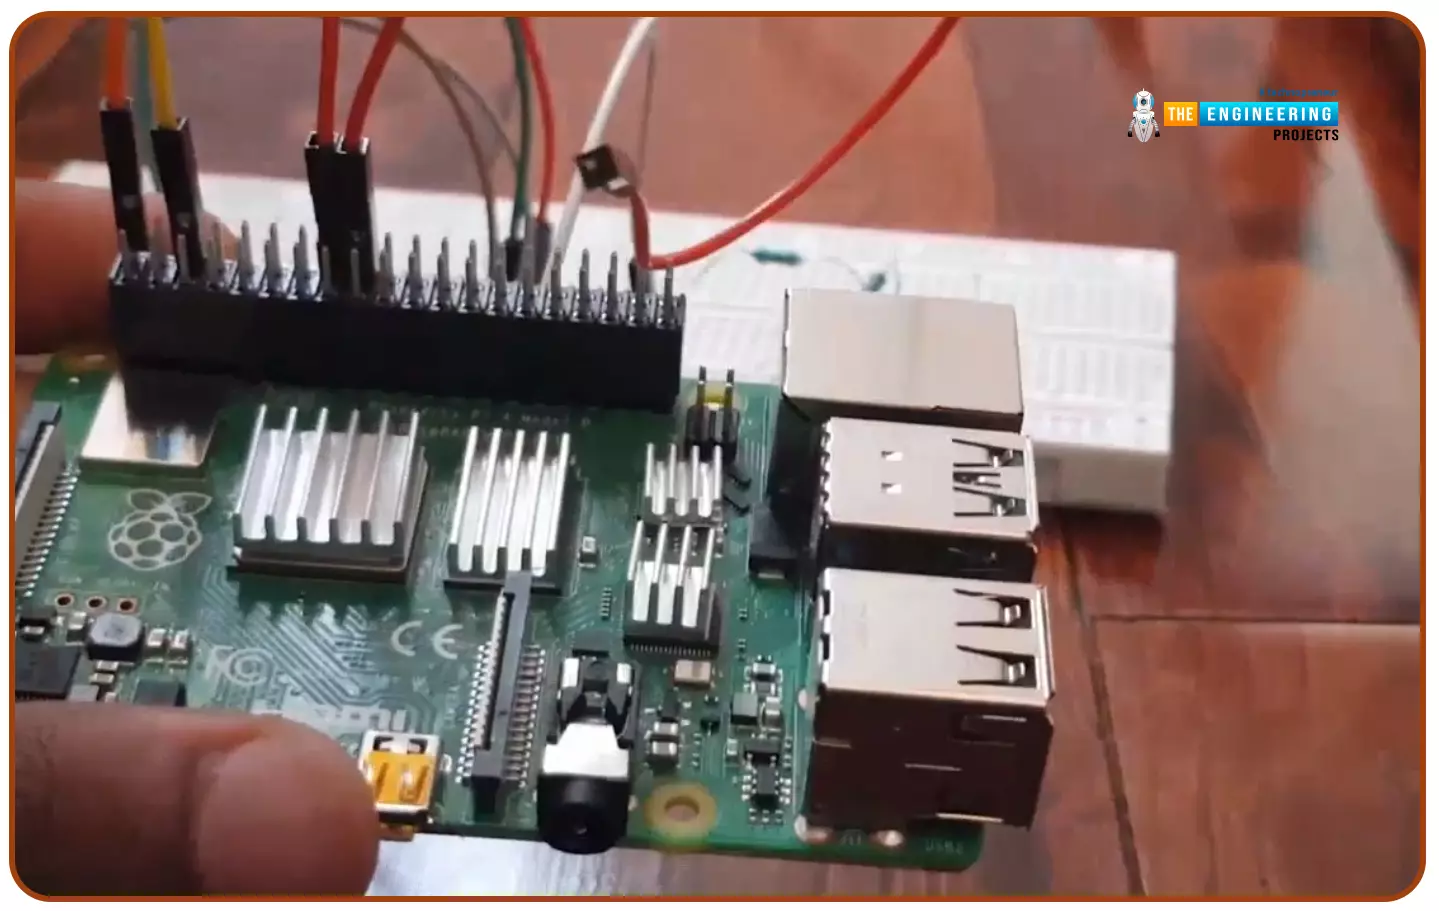
- Now connecting Jumper wires to Raspberry Pi 4:
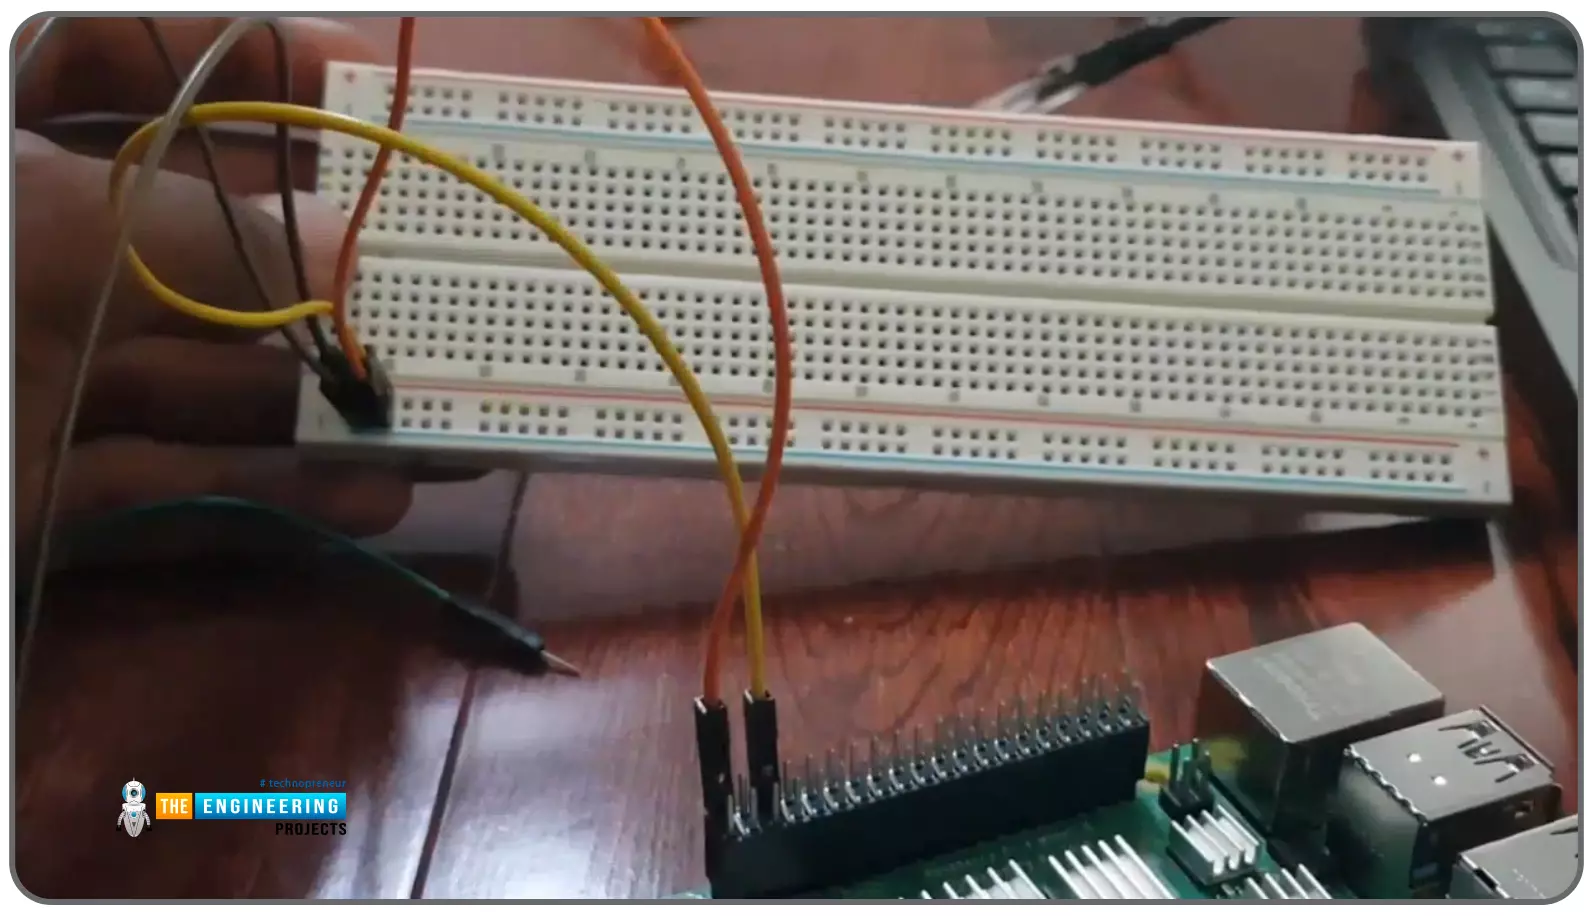
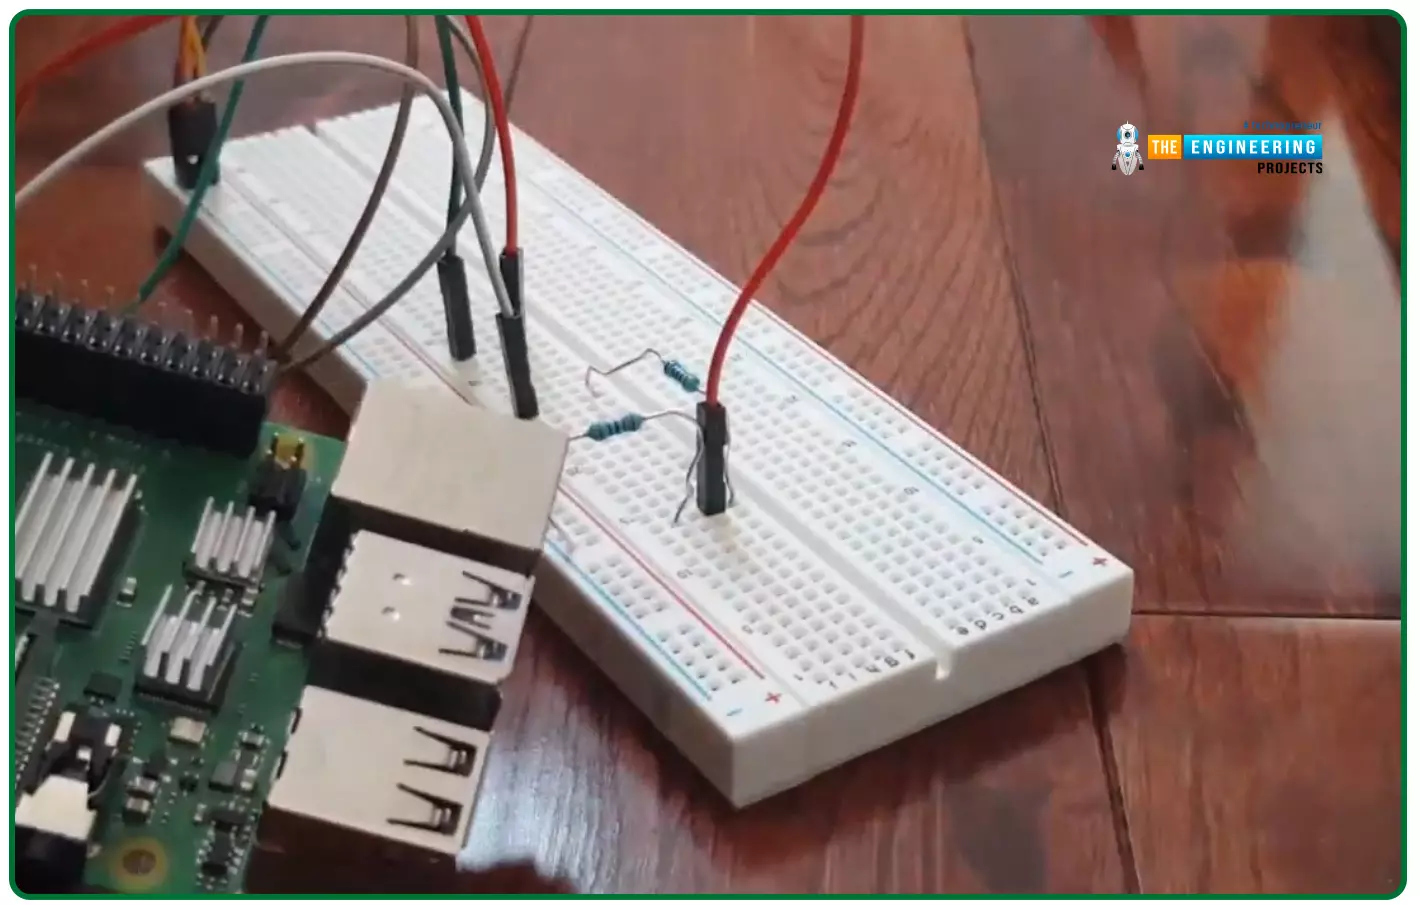
- Connected Ultrasonic Sensor & Raspberry Pi 4 via Breadboard:
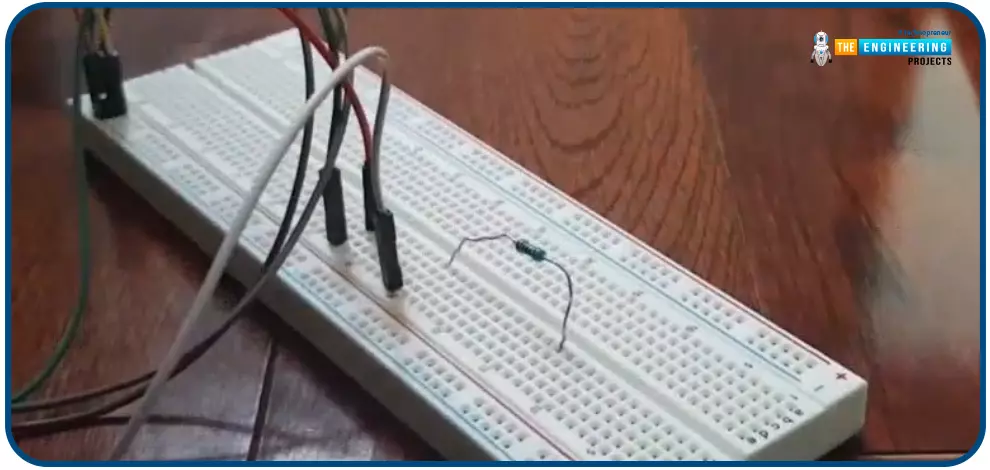
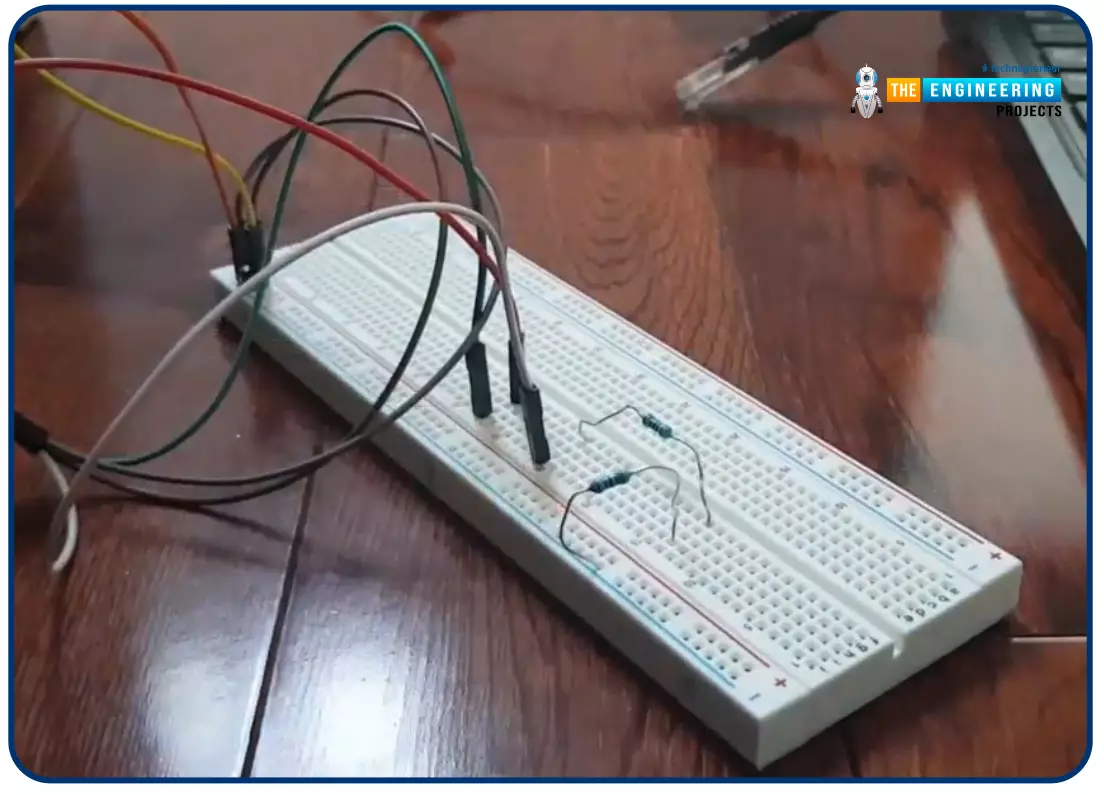
- Now, let's design the voltage divider for Echo Pin, so placing a 1k ohm resistor on the breadboard:
- The second resistor used is of 2k ohm:
- Here's our Raspberry Pi 4:
- Pin 18 will be connected between the 1k ohm and 2k ohm resistors as shown below:
Python Code for Ultrasonic Sensor
Double-time distance measurements are calculated with the following Python program:
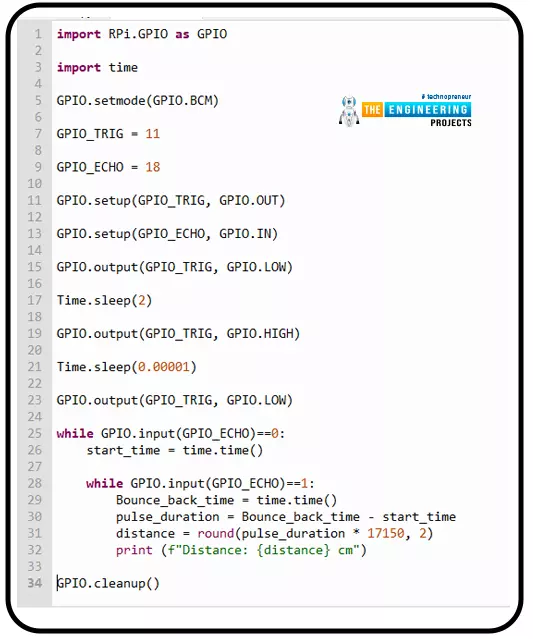
For ten seconds, the trigger is engaged and the sensor uses this signal to produce sound pulses. The start time is decided as soon as the echo signal rises to a high level. Once the echo signal's negative edge is identified, the stop time is calculated. To calculate how long it will take for a sound wave to travel between two points, subtract the starting time from the final time. The speed of sound in the air is 343 m/s, so multiple this time is multiplied by the speed of sound. You must multiply the values by 100 in order to display them in cm. A speed of 34,300 cm/s is obtained. Finally, to acquire a single distance, divide everything by 2. Now let's implement this pseudocode in Python script:
- This code's first line imports modules for working with the Raspberry Pi's GPIO pins.

- RPi.GPIO is a module that allows us to communicate with Raspberry Pi's GPIO pins.
- When delivering ultrasonic sound waves, the Time Module is used to create a delay before the sound is picked up by the receiver.
When using the GPIO SetMode, the numbering scheme used to work on Raspberry Pi's GPIO can be defined in two ways: GPIO.board and GPIO.BCM, respectively.
If you want to learn more about GPIO.Board and BCM, I'd like you to check out the following picture.
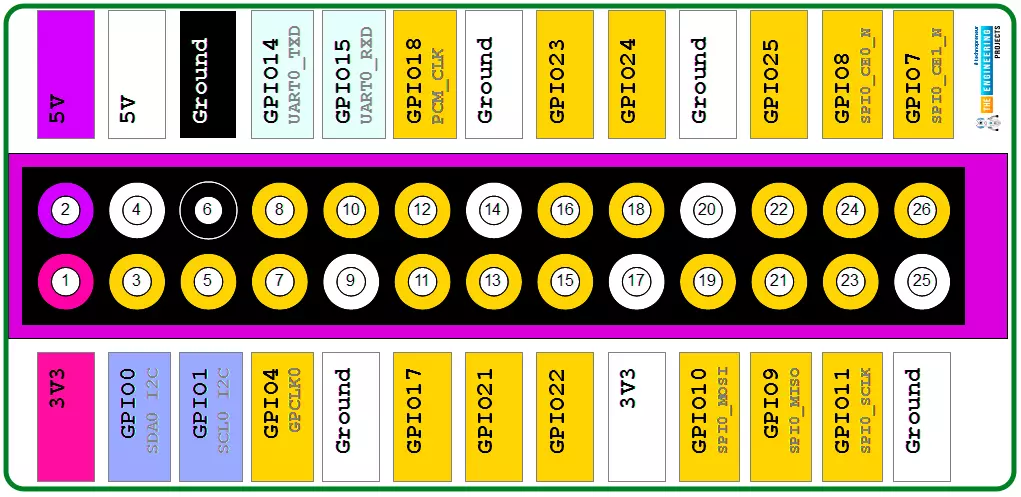
- Use the GPIO.setmode(GPIO.board) function to access the pin with the number in the circle.
- GPIO.setmode (GPIO.BCM): BCM is the abbreviation for the Broadcom chip-specific number.GPIO.SetMode can be used to represent a pin number as a rectangle (GPIO.BCM).
- When working with serial, SPI, I2C, and other communication protocols, I prefer to utilize GPIO.setmode (GPIO.BCM) method.
- Assigning GPIO Pins to Trig and Echo pins:


- Here, we are making the Trig Pin OUTPUT and the Echo Pin INPUT.

Python Code for Distance Calculation
-
In the below code, we are keeping the Trig Pin LOW for 2 milliseconds:

- After that, we sent a HIGH signal at the Trig Pin and again make it LOW.

- The delays are added to the GPIO TRIG pin in accordance with sensor datasheets.
- Next, we need to calculate the Start and Stop time.
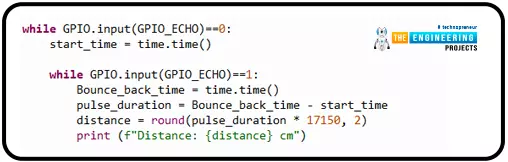
- As seen in the below code, while the Echo Pin is LOW, we keep on updating the Start Time.
- Once the Echo Pin gets HGIH, the second while loop will start and we will get the Bounce-back time.
- NExt, we calculated the Pulse Duration and applied the distance formula.
- Finally printed the distance formula in Raspberry Pi console.
- The print function described above won't work, if you are using a Python version lower than 3.0. If this is the case, the print line can be modified as follows:

- Here are the results:


Ultrasonic Sensors: Drawbacks
It is important to take into account the limits of ultrasonic sensors before making a final decision on which sensor to use.
- Temperature and humidity affect the speed of sound, which can affect the accuracy of the measurements.
- Just like any other sensor, they can become clogged, wet, or frozen, causing them to malfunction.
- In a vacuum, ultrasonic sensors can't work. This is because they need sound, which needs a medium to make it work.
Conclusion
In this tutorial, we learned how to connect ultrasonic sensors to Raspberry Pi 4. In addition, we studied the sensor's fundamentals and the distance calculation etc. Next, we'll learn how to interface a DHT11 sensor with Raspberry Pi 4 board. Till then, take care. Have fun!!!