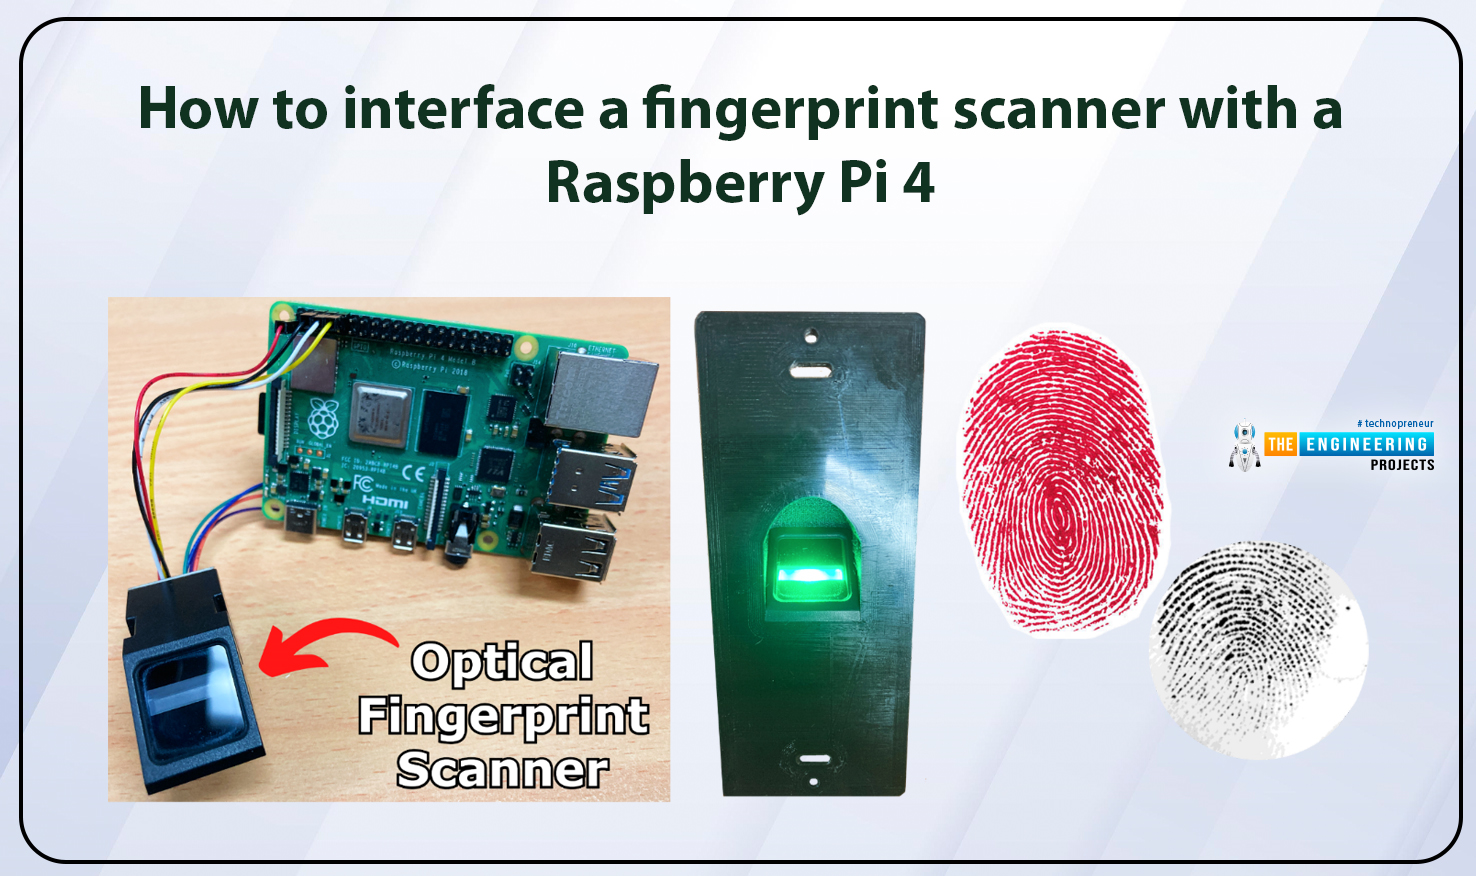
Interface a Fingerprint Sensor with Raspberry Pi 4


Hello friends, I hope you all are going great. Today, I am going to share the 10th tutorial of Section-III in our Raspberry Pi Programming Course. In our previous tutorial, we interfaced a Gas Sensor MQ-2 with Raspberry Pi 4. Today, we will be interfacing a Fingerprint Sensor with Raspberry Pi today.
After appearing only in science fiction films until recently, fingerprint sensors are often employed to confirm an individual's identity in various contexts. Today, fingerprint-based systems are used for everything from checking in at the office to verifying an employee's identity at the bank, withdrawing cash from an ATM, and proving one's identity at a government agency. For identifying purposes, fingerprint-detecting technology has been used for some time now.
Fingerprint recognition systems, in general, have advantages over other biometric technologies in terms of speed, affordability, and reliability. Ridges on a fingerprint model make for distinctive whorls and loops, making each fingerprint one-of-a-kind.
There are five different kinds of fingerprints: the whorl, the right circle, the left loop, the tented, and the arch. Most fingerprint identification systems have difficulty telling similar fingerprint types apart. Numerous fingerprint recognition methods exist, and neural networks are utilized to find ridge ends and other details needed to find a match.
Project Description
In today's project, we will design a security system using an optical fingerprint sensor with Raspberry Pi 4. We will use a 16x2 LCD to display the results. Moreover, we will use four buttons: one to enroll a new fingerprint, one to delete a previously stored one, and two more to adjust the index position of fingerprints currently in use.
When the fingerprint reader is ready to accept a
finger for matching, an LED will light up. When the user will place his finger on the sensor, the sensor will start scanning it. If the fingerprint matches with any of the stored prints, the lock will open up, otherwise, it will generate a warning.
Components Required
These are the components required to design a fingerprint-based security system using Raspberry Pi 4:
- Raspberry Pi 4
- USB to Serial converter
- Fingerprint Module
- Push buttons
- 16x2 LCD (Optional)
- Bread Board
- Jumper wires
- LED
- 10k pot
- Resistor 150 ohm -1 k ohm
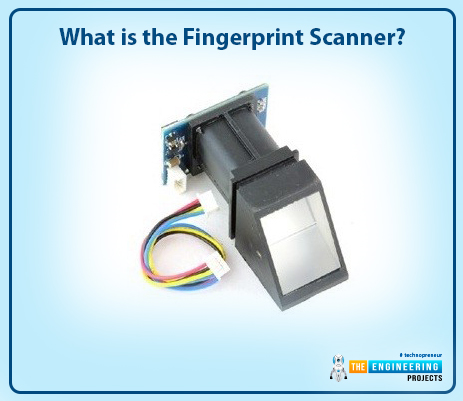
What is the Fingerprint Scanner?
- A fingerprint scanner is an electronic/optical sensor, used to scan and detect fingerprints.
- It can enroll multiple fingerprints in its built-in memory, a normal sensor can save around 100 fingerprints in its database.
- Moreover, it also has the capability to match a fresh fingerprint with the fingerprints in its database.
- This device's unique fingerprint biometric technology allows for increased precision, superior performance, and unbreakable security.
If you're concerned about safety, a fingerprint scanner is an excellent alternative to a keycode because the password can be easily scanned but is challenging to get a person's fingerprint. Therefore, normally a fingerprint scanner/reader in conjunction with biometric software for verification, identification, and authentication is used in highly secured places.
Optical, ultrasonic, and capacitive fingerprint readers are the three most typical kinds today. We used optical fingerprint sensors. It uses a camera-like gadget to snap an image of a fingerprint on a glass surface from a predetermined distance. Some optical sensors have added components of primitive artificial intelligence to verify that a living finger is being put on the reader, providing an extra layer of protection.
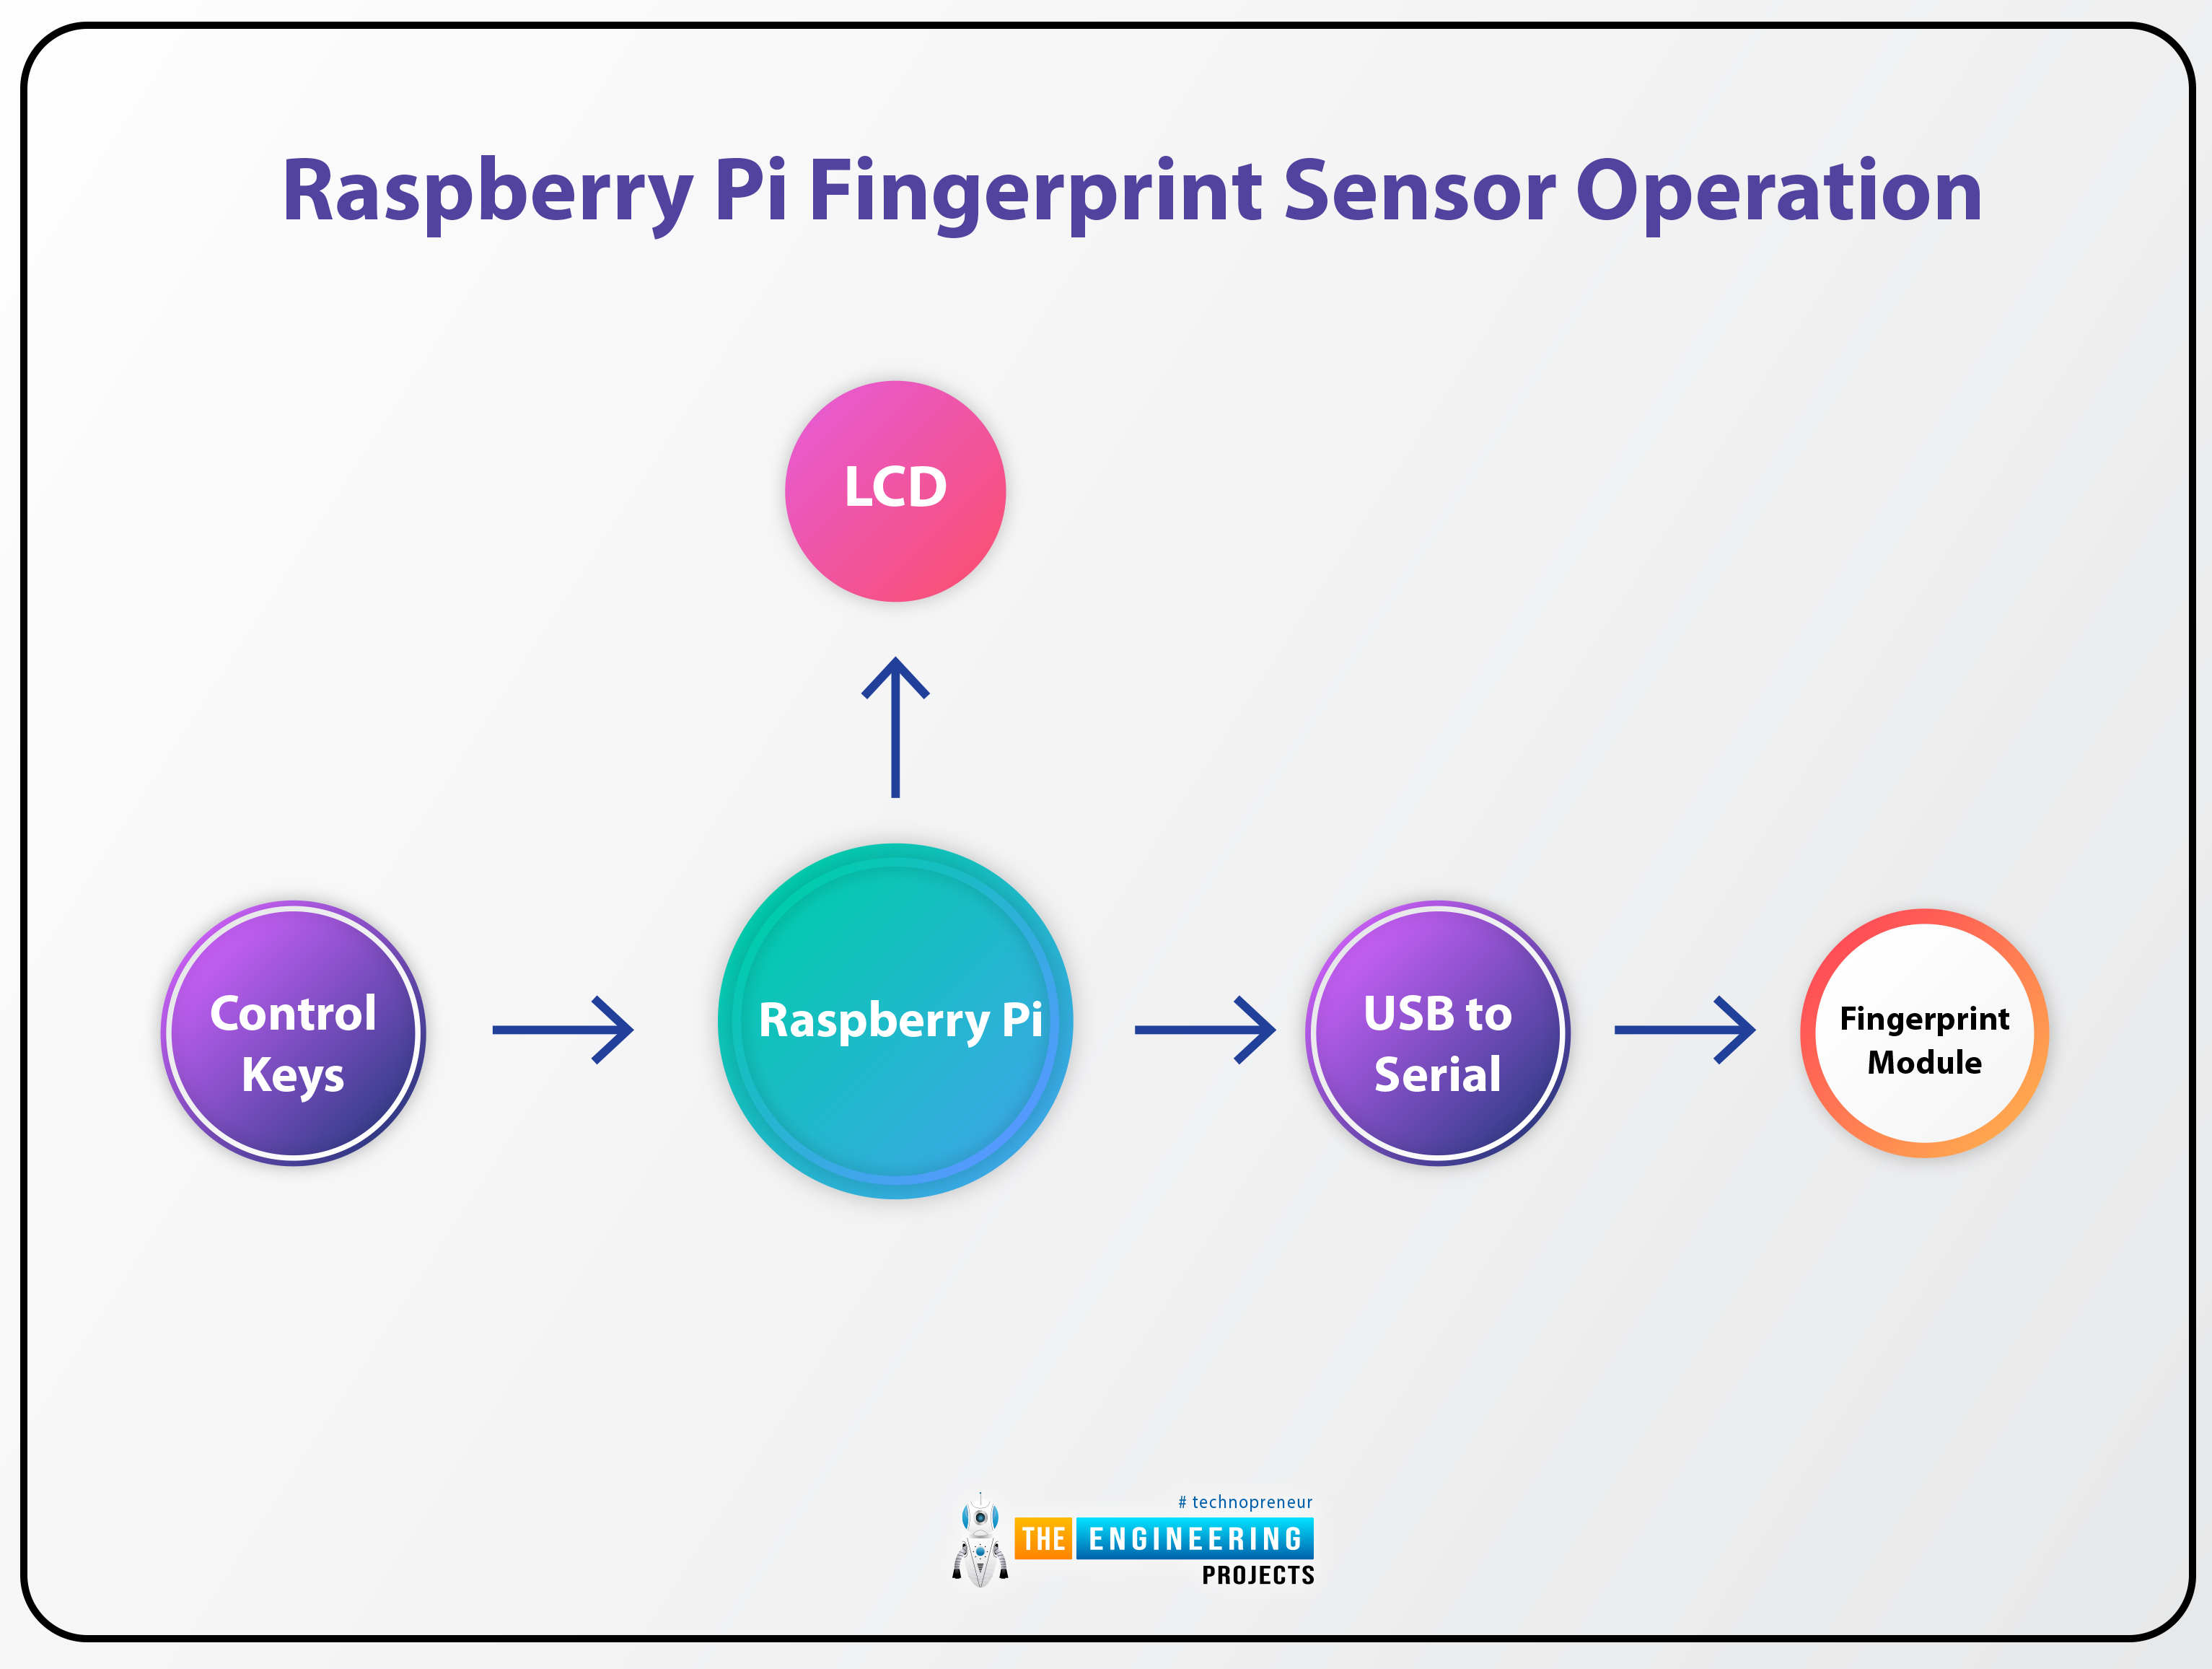
Fingerprint Sensor Working Principle
Processing plays a crucial role in the fingerprint sensor's operation. There are two essential parts of fingerprint processing i.e.
- Enrollment of Fingerprint.
- Matching of Fingerprint.
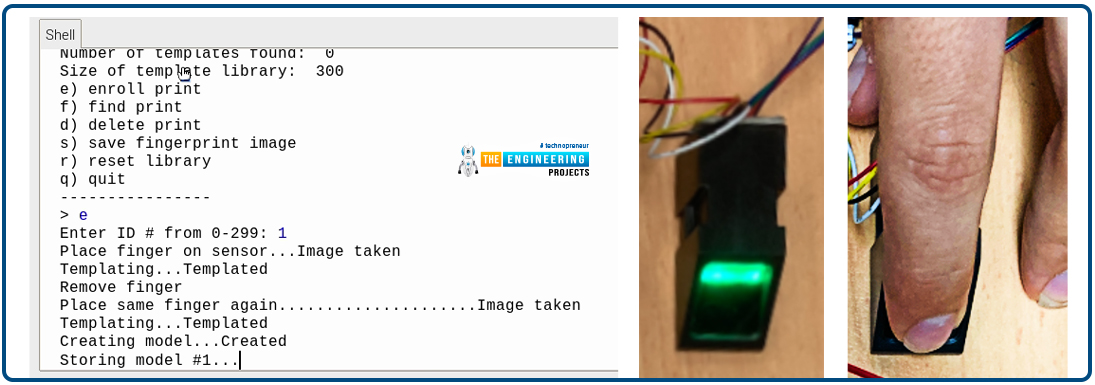
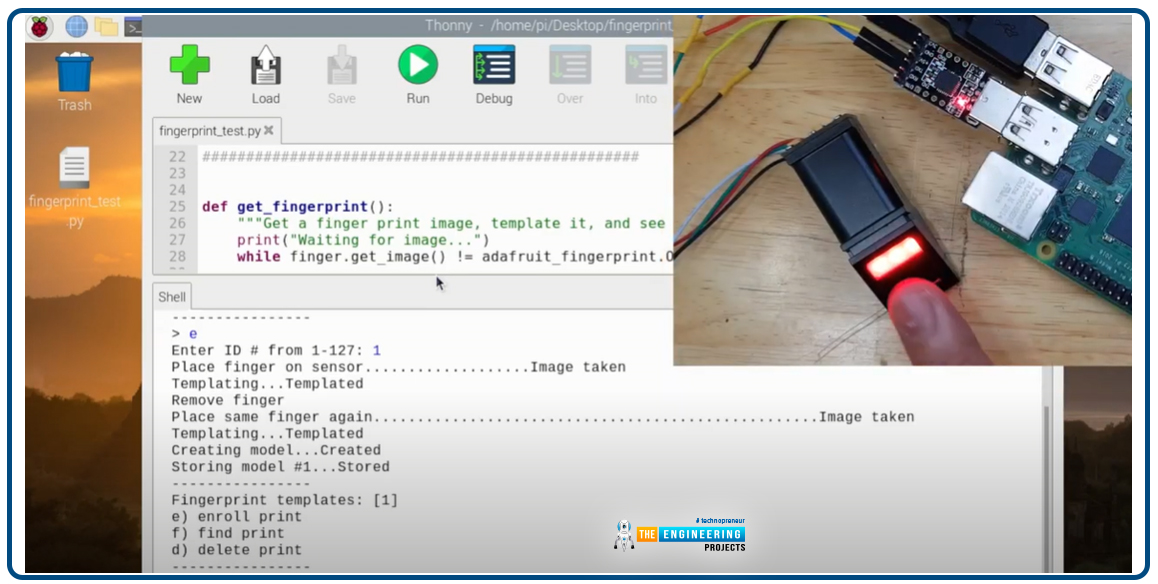
Each user must place their finger twice during the enrollment process.
This way, the system verifies the fingerprints for processing, creates a fingerprint pattern and saves the information. While in the matching process, the user lays a finger on the sensor and the system checks it against the templates stored in its memory.
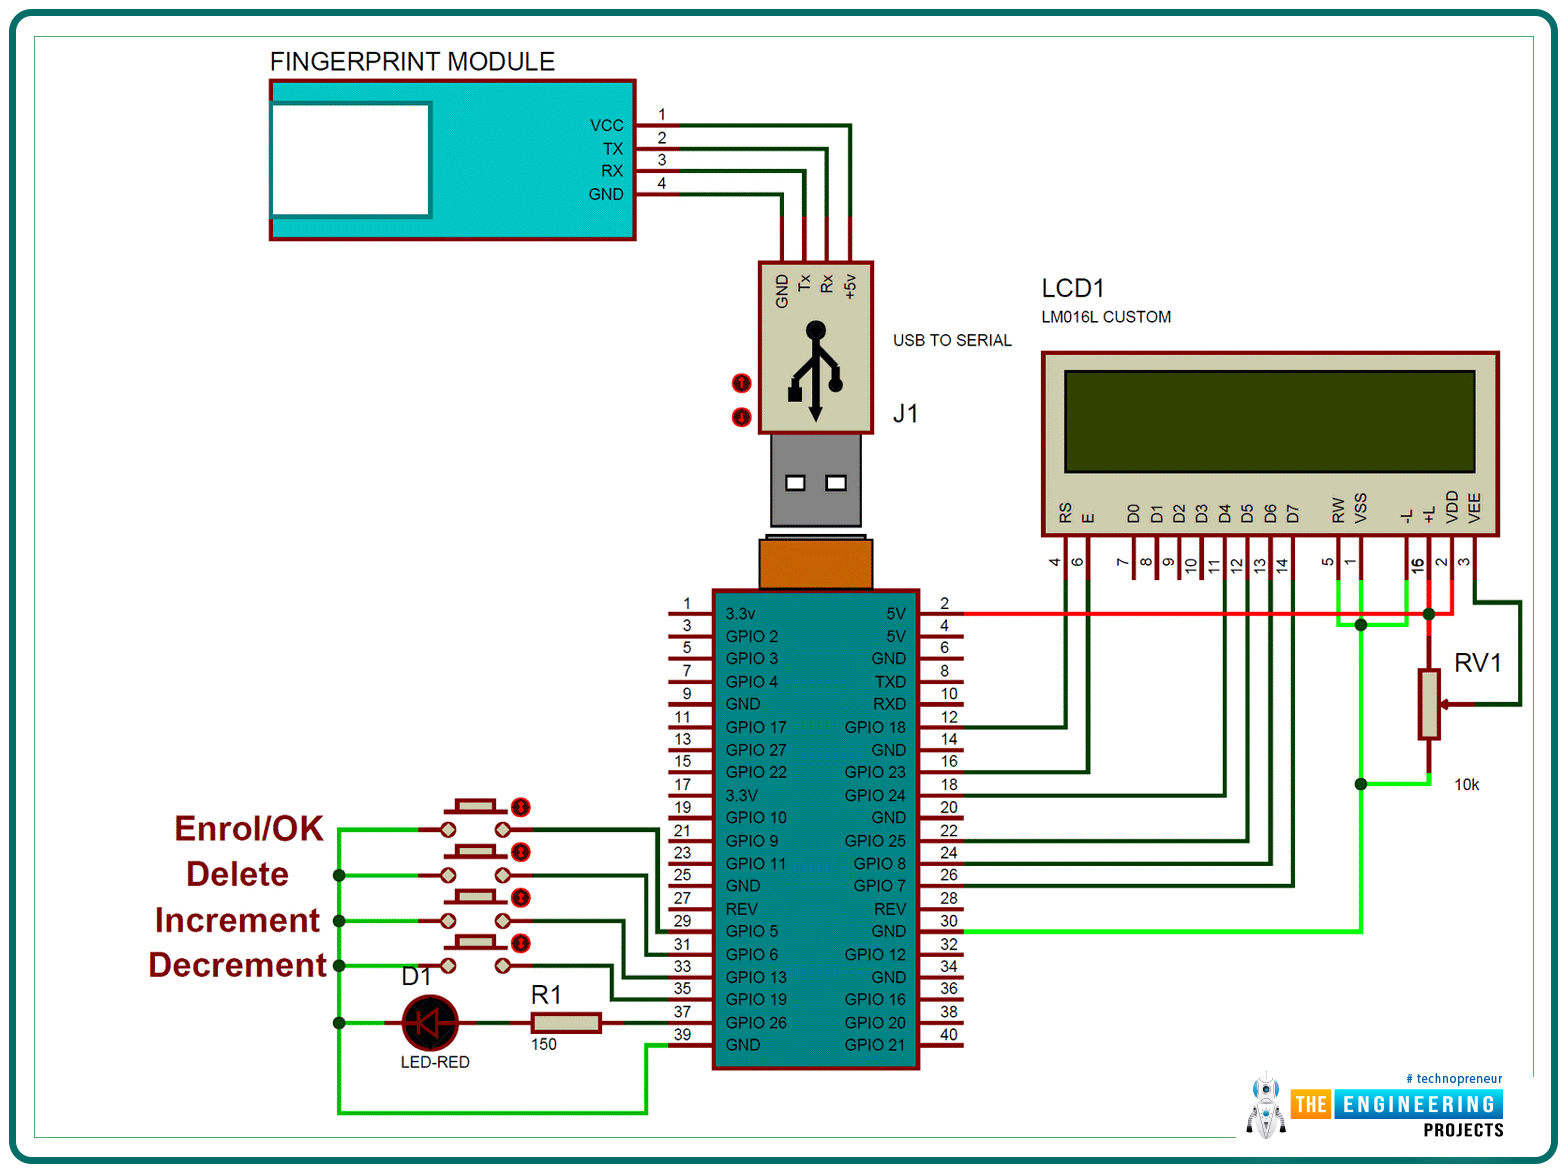
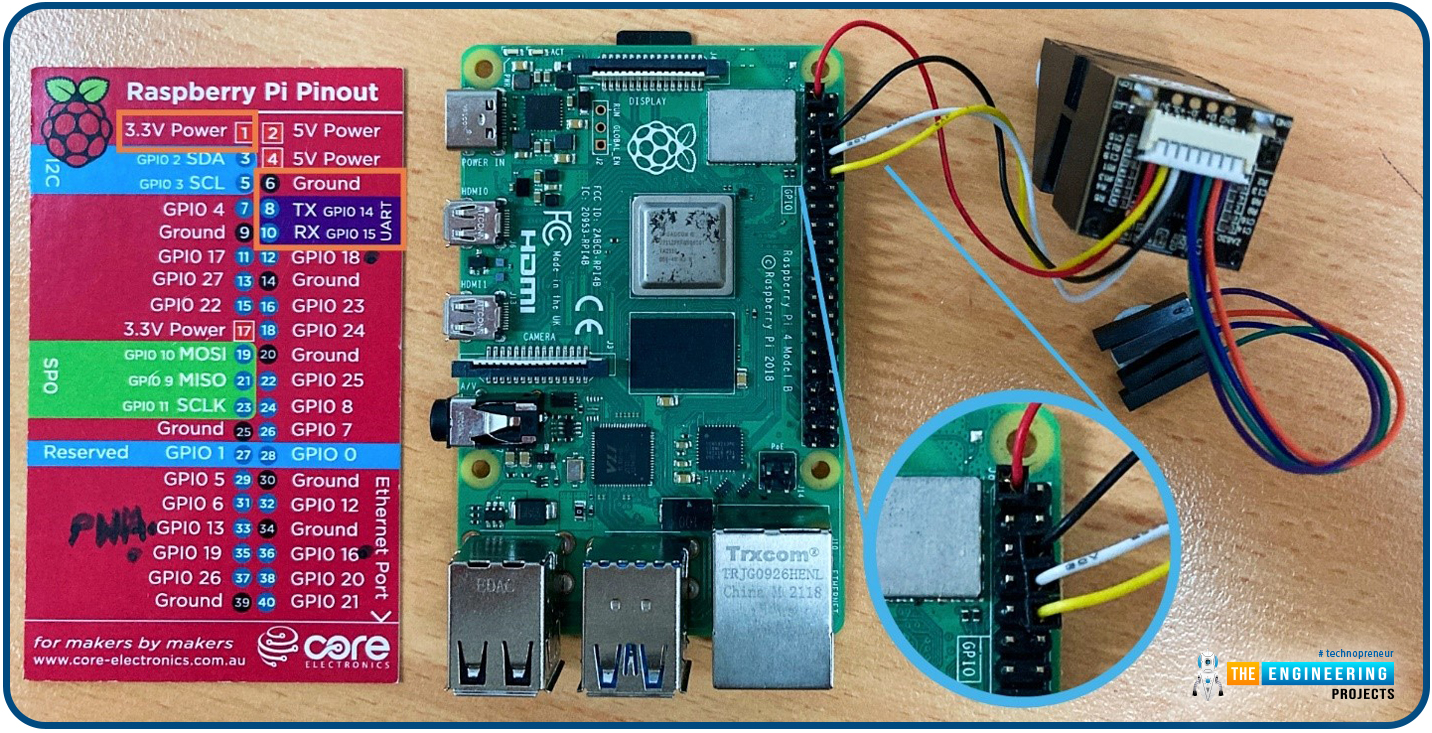
Circuit Diagram of Fingerprint Sensor with Raspberry Pi 4
- The fingerprint module, we are using is UART-based. So, we need to connect a USB-to-Serial adapter to connect the fingerprint module to the Raspberry Pi.
- Here's the circuit diagram of the Fingerprint Sensor with Raspberry Pi 4:
So, let's design it on real hardware. It's easy to set up:
- We used a USB-to-serial converter to link the Raspberry Pi's USB port with the fingerprint module.
- All notifications are shown on a 16x2 LCD.
- LCDs often have a 10k pot for adjusting contrast.
- Each 16x2 LCD's RS, EN, d4, d5, d6, and d7 connections are wired to the Raspberry Pi GPIO pin: 18, 23, 24, 25, 8, and 7 respectively.
- GPIO 5, 6, 13, and 19 on the Raspberry Pi are wired to four buttons.
- LED is wired to RPI's Pin 26.
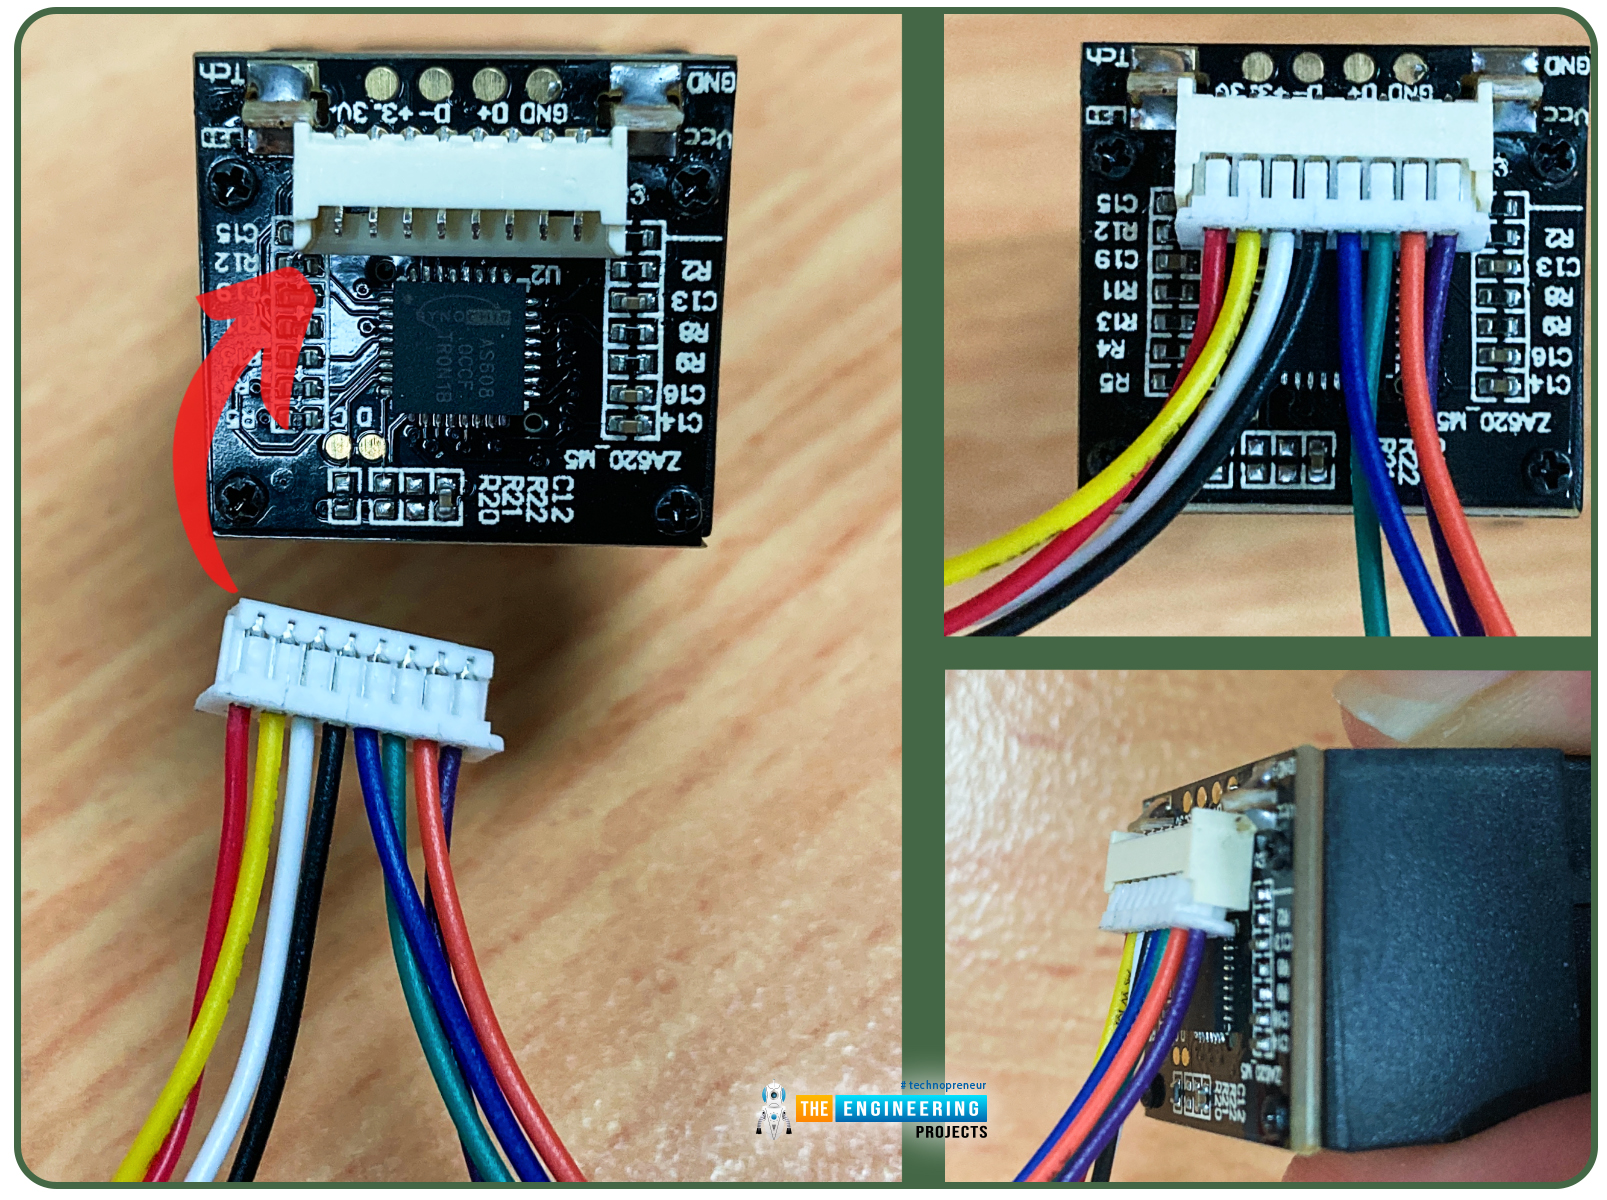
- Here are the images of our hardware setup:
Fingerprint Sensor Python Library Installation
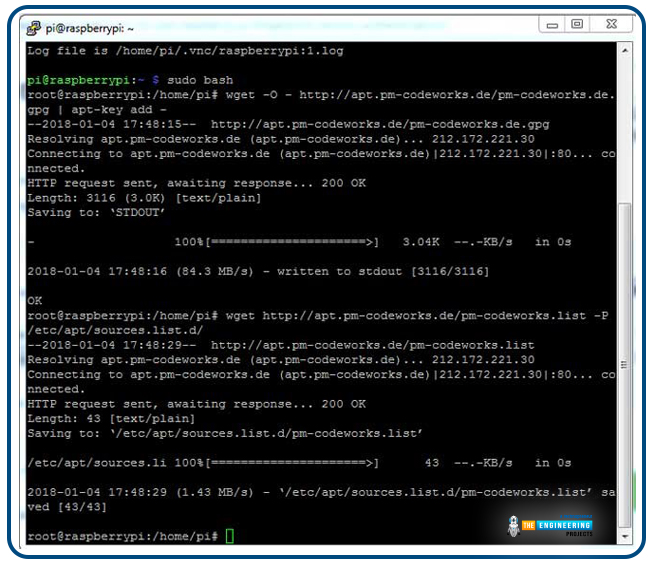
Now that we've finished hooking everything up, we can power on the Raspberry Pi and open the terminal. Now, let's look at how to install a fingerprint library for the Python code:
- Step 1: This library requires administrator access to be installed. So, let's use the following command to get root access:
sudo bash

- Step 2: Then, using the provided commands, you may download the necessary packages:

wget –O – http://apt.pm-codeworks.de/pm-codeworks.de.gpg | apt-key add –
wget http://apt.pm-codeworks.de/pm-codeworks.list -P /etc/apt/sources.list.d/
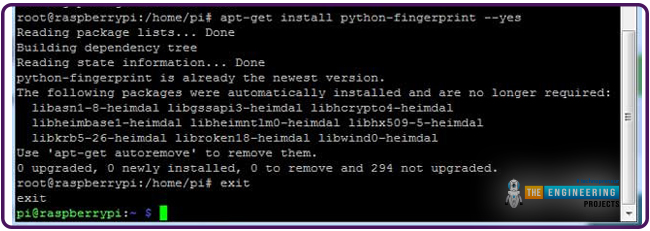
- Step 3: The next step is to update our Pi 4 and deploy the acquired fingerprint sensor library:

sudo apt-get update
sudo apt-get install python-fingerprint –yes
- Step 4: Once the library has been installed, you can verify the USB port where your fingerprint reader is attached by typing the following command:

ls /dev/ttyUSB*
On the other side of the screen, change the USB port number with the number of the USB connection you have.
Python Code For Fingerprint Sensor
Python code Operation
Running the Python code will display some introductory prompts on the LCD, after which the user will be instructed to place a finger on the fingerprint reader. Now if the fingerprints are matched with the stored prints in the sensor's database. LCDs will read something like "Fount at Pos:2" if your fingerprint has been stored there, or "No Match Found" if it has not been.
Users can enroll a fingerprint by pressing the register button and then reading the on-screen prompts.
If you want to erase a fingerprint, LCD will ask where it is located. The user can now erase a previously saved fingerprint by selecting it using the two increment/decrement push buttons and then pressing the enroll button (which now acts as the Ok button). Watch the video that is provided as part of the final deliverable to get a better grasp on the subject.
Python Code Designing
Using the fingerprint library methods in Python, connecting a fingerprint sensor with the Raspberry Pi is a breeze. If the user insists on creating the interface on their own, things could get tricky.
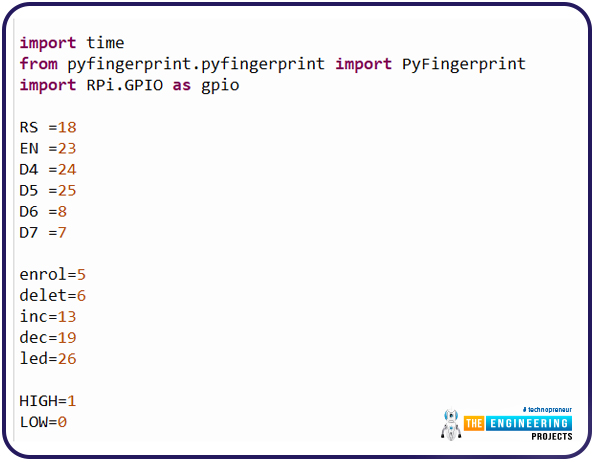
Since we already used the library, all that's left to do is call the appropriate library function. Defining the pins for the LCD, LED, and push buttons requires first importing libraries of fingerprint, GPIO, and time into the code.
import time
from pyfingerprint.pyfingerprint import PyFingerprint
import RPi.GPIO as gpio
RS =18
EN =23
D4 =24
D5 =25
D6 =8
D7 =7
enrol=5
delet=6
inc=13
dec=19
led=26
HIGH=1
LOW=0
- The following step is to initialize and assign functions to the pins:
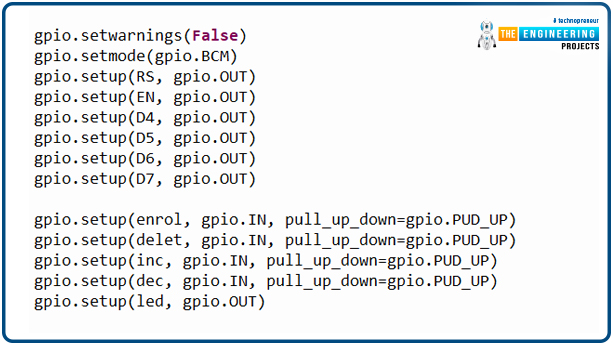
gpio.setwarnings(False)
gpio.setmode(gpio.BCM)
gpio.setup(RS, gpio.OUT)
gpio.setup(EN, gpio.OUT)
gpio.setup(D4, gpio.OUT)
gpio.setup(D5, gpio.OUT)
gpio.setup(D6, gpio.OUT)
gpio.setup(D7, gpio.OUT)
gpio.setup(enrol, gpio.IN, pull_up_down=gpio.PUD_UP)
gpio.setup(delet, gpio.IN, pull_up_down=gpio.PUD_UP)
gpio.setup(inc, gpio.IN, pull_up_down=gpio.PUD_UP)
gpio.setup(dec, gpio.IN, pull_up_down=gpio.PUD_UP)
gpio.setup(led, gpio.OUT)
- Having successfully initialized the fingerprint sensor, let's move on:
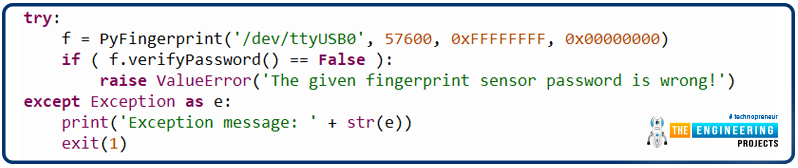
try:
f = PyFingerprint('/dev/ttyUSB0', 57600, 0xFFFFFFFF, 0x00000000)
if ( f.verifyPassword() == False ):
raise ValueError('The given fingerprint sensor password is wrong!')
except Exception as e:
print('Exception message: ' + str(e))
exit(1)
- We've built some functions to initialize and control the LCD; the complete code is included below.
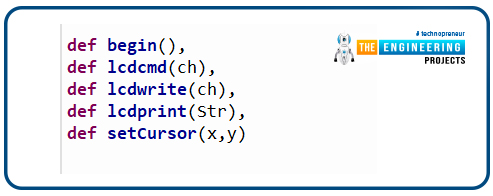
def begin(), def lcdcmd(ch), def lcdwrite(ch), def lcdprint(Str), def setCursor(x,y)
We have placed fingerprint enrolling, searching, and erasing functions after completing the authoring of all LCD driver functions.
- Call the def enrollFinger() method to enroll or save fresh fingerprints.
- The def searchFinger() function retrieves fingerprints from a database.
- When the appropriate button is pressed, the def deleteFinger() function is called to remove the already stored fingerprint.
The Python source code for all of the functions above is included below.
Next, we'll ask the user to place their finger on the sensor to verify their identity, and the system will determine if that print is valid before displaying the findings.
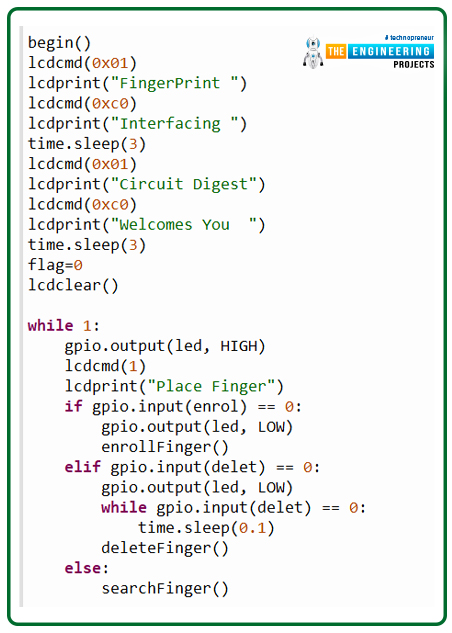
begin()
lcdcmd(0x01)
lcdprint("FingerPrint ")
lcdcmd(0xc0)
lcdprint("Interfacing ")
time.sleep(3)
lcdcmd(0x01)
lcdprint("Circuit Digest")
lcdcmd(0xc0)
lcdprint("Welcomes You ")
time.sleep(3)
flag=0
lcdclear()
while 1:
gpio.output(led, HIGH)
lcdcmd(1)
lcdprint("Place Finger")
if gpio.input(enrol) == 0:
gpio.output(led, LOW)
enrollFinger()
elif gpio.input(delet) == 0:
gpio.output(led, LOW)
while gpio.input(delet) == 0:
time.sleep(0.1)
deleteFinger()
else:
searchFinger()
Output
Complete code
import time
from pyfingerprint.pyfingerprint import PyFingerprint
import RPi.GPIO as gpio
RS =18
EN =23
D4 =24
D5 =25
D6 =8
D7 =7
enrol=5
delet=6
inc=13
dec=19
led=26
HIGH=1
LOW=0
gpio.setwarnings(False)
gpio.setmode(gpio.BCM)
gpio.setup(RS, gpio.OUT)
gpio.setup(EN, gpio.OUT)
gpio.setup(D4, gpio.OUT)
gpio.setup(D5, gpio.OUT)
gpio.setup(D6, gpio.OUT)
gpio.setup(D7, gpio.OUT)
gpio.setup(enrol, gpio.IN, pull_up_down=gpio.PUD_UP)
gpio.setup(delet, gpio.IN, pull_up_down=gpio.PUD_UP)
gpio.setup(inc, gpio.IN, pull_up_down=gpio.PUD_UP)
gpio.setup(dec, gpio.IN, pull_up_down=gpio.PUD_UP)
gpio.setup(led, gpio.OUT)
try:
f = PyFingerprint('/dev/ttyUSB0', 57600, 0xFFFFFFFF, 0x00000000)
if ( f.verifyPassword() == False ):
raise ValueError('The given fingerprint sensor password is wrong!')
except Exception as e:
print('Exception message: ' + str(e))
exit(1)
def begin():
lcdcmd(0x33)
lcdcmd(0x32)
lcdcmd(0x06)
lcdcmd(0x0C)
lcdcmd(0x28)
lcdcmd(0x01)
time.sleep(0.0005)
def lcdcmd(ch):
gpio.output(RS, 0)
gpio.output(D4, 0)
gpio.output(D5, 0)
gpio.output(D6, 0)
gpio.output(D7, 0)
if ch&0x10==0x10:
gpio.output(D4, 1)
if ch&0x20==0x20:
gpio.output(D5, 1)
if ch&0x40==0x40:
gpio.output(D6, 1)
if ch&0x80==0x80:
gpio.output(D7, 1)
gpio.output(EN, 1)
time.sleep(0.005)
gpio.output(EN, 0)
# Low bits
gpio.output(D4, 0)
gpio.output(D5, 0)
gpio.output(D6, 0)
gpio.output(D7, 0)
if ch&0x01==0x01:
gpio.output(D4, 1)
if ch&0x02==0x02:
gpio.output(D5, 1)
if ch&0x04==0x04:
gpio.output(D6, 1)
if ch&0x08==0x08:
gpio.output(D7, 1)
gpio.output(EN, 1)
time.sleep(0.005)
gpio.output(EN, 0)
def lcdwrite(ch):
gpio.output(RS, 1)
gpio.output(D4, 0)
gpio.output(D5, 0)
gpio.output(D6, 0)
gpio.output(D7, 0)
if ch&0x10==0x10:
gpio.output(D4, 1)
if ch&0x20==0x20:
gpio.output(D5, 1)
if ch&0x40==0x40:
gpio.output(D6, 1)
if ch&0x80==0x80:
gpio.output(D7, 1)
gpio.output(EN, 1)
time.sleep(0.005)
gpio.output(EN, 0)
# Low bits
gpio.output(D4, 0)
gpio.output(D5, 0)
gpio.output(D6, 0)
gpio.output(D7, 0)
if ch&0x01==0x01:
gpio.output(D4, 1)
if ch&0x02==0x02:
gpio.output(D5, 1)
if ch&0x04==0x04:
gpio.output(D6, 1)
if ch&0x08==0x08:
gpio.output(D7, 1)
gpio.output(EN, 1)
time.sleep(0.005)
gpio.output(EN, 0)
def lcdclear():
lcdcmd(0x01)
def lcdprint(Str):
l=0;
l=len(Str)
for i in range(l):
lcdwrite(ord(Str[i]))
def setCursor(x,y):
if y == 0:
n=128+x
elif y == 1:
n=192+x
lcdcmd(n)
def enrollFinger():
lcdcmd(1)
lcdprint("Enrolling Finger")
time.sleep(2)
print('Waiting for finger...')
lcdcmd(1)
lcdprint("Place Finger")
while ( f.readImage() == False ):
pass
f.convertImage(0x01)
result = f.searchTemplate()
positionNumber = result[0]
if ( positionNumber >= 0 ):
print('Template already exists at position #' + str(positionNumber))
lcdcmd(1)
lcdprint("Finger ALready")
lcdcmd(192)
lcdprint(" Exists ")
time.sleep(2)
return
print('Remove finger...')
lcdcmd(1)
lcdprint("Remove Finger")
time.sleep(2)
print('Waiting for same finger again...')
lcdcmd(1)
lcdprint("Place Finger")
lcdcmd(192)
lcdprint(" Again ")
while ( f.readImage() == False ):
pass
f.convertImage(0x02)
if ( f.compareCharacteristics() == 0 ):
print "Fingers do not match"
lcdcmd(1)
lcdprint("Finger Did not")
lcdcmd(192)
lcdprint(" Mactched ")
time.sleep(2)
return
f.createTemplate()
positionNumber = f.storeTemplate()
print('Finger enrolled successfully!')
lcdcmd(1)
lcdprint("Stored at Pos:")
lcdprint(str(positionNumber))
lcdcmd(192)
lcdprint("successfully")
print('New template position #' + str(positionNumber))
time.sleep(2)
def searchFinger():
try:
print('Waiting for finger...')
while( f.readImage() == False ):
#pass
time.sleep(.5)
return
f.convertImage(0x01)
result = f.searchTemplate()
positionNumber = result[0]
accuracyScore = result[1]
if positionNumber == -1 :
print('No match found!'
lcdcmd(1)
lcdprint("No Match Found")
time.sleep(2)
return
else:
print('Found template at position #' + str(positionNumber))
lcdcmd(1)
lcdprint("Found at Pos:")
lcdprint(str(positionNumber))
time.sleep(2)
except Exception as e:
print('Operation failed!')
print('Exception message: ' + str(e))
exit(1)
def deleteFinger():
positionNumber = 0
count=0
lcdcmd(1)
lcdprint("Delete Finger")
lcdcmd(192)
lcdprint("Position: ")
lcdcmd(0xca)
lcdprint(str(count))
while gpio.input(enrol) == True: # here enrol key means ok
if gpio.input(inc) == False:
count=count+1
if count>1000:
count=1000
lcdcmd(0xca)
lcdprint(str(count))
time.sleep(0.2)
elif gpio.input(dec) == False:
count=count-1
if count<0:
count=0
lcdcmd(0xca)
lcdprint(str(count))
time.sleep(0.2)
positionNumber=count
if f.deleteTemplate(positionNumber) == True :
print('Template deleted!')
lcdcmd(1)
lcdprint("Finger Deleted");
time.sleep(2)
begin()
lcdcmd(0x01)
lcdprint("FingerPrint ")
lcdcmd(0xc0)
lcdprint("Interfacing ")
time.sleep(3)
lcdcmd(0x01)
lcdprint("Circuit Digest")
lcdcmd(0xc0)
lcdprint("Welcomes You ")
time.sleep(3)
flag=0
lcdclear()
while 1:
gpio.output(led, HIGH)
lcdcmd(1)
lcdprint("Place Finger")
if gpio.input(enrol) == 0:
gpio.output(led, LOW)
enrollFinger()
elif gpio.input(delet) == 0:
gpio.output(led, LOW)
while gpio.input(delet) == 0:
time.sleep(0.1)
deleteFinger()
else:
searchFinger()
Conclusion
In this case, biometric authentication was implemented. To verify the identity of a user, fingerprint authentication uses an automated comparison of their fingerprint with a fingerprint template. In the next tutorial, we will discuss how to interface a Heartbeat Sensor with Raspberry Pi 4. Stay tuned. Have fun!!!