Interfacing Soil Moisture Sensor with Raspberry Pi 4


Hello everyone, I hope you all are doing great. Today, we are going to share the second chapter of Section-III in our Raspberry Pi programming course. The previous guide covered how to interface an LDR Sensor with Raspberry Pi 4. This tutorial will cover the basics of hooking up a soil humidity sensor to a Raspberry Pi 4 to get accurate readings. Next, we'll write a Python script to collect the data from the sensors and display it on a Serial monitor.
Are you aware that you can utilize a Raspberry Pi 4 to track the water absorbed by the soil around your houseplants or garden? This helpful guide will show you how to install a soil humidity sensor that will send you a text message when your plant needs watering. A Pi 4, a soil humidity sensor, and a few low-priced components are required. All right, let's get going!
Project Description
Today, we are going to interface Soil Moisture with Raspberry Pi 4. We will design a simple irrigation system, where we will measure the moisture of the soil and depending on its value, will turn ON or OFF the water pump. We will also use a 20x4 LCD to display values/instructions.
- Here's the video demonstration of this tutorial:
Components Required
- Raspberry Pi 4.
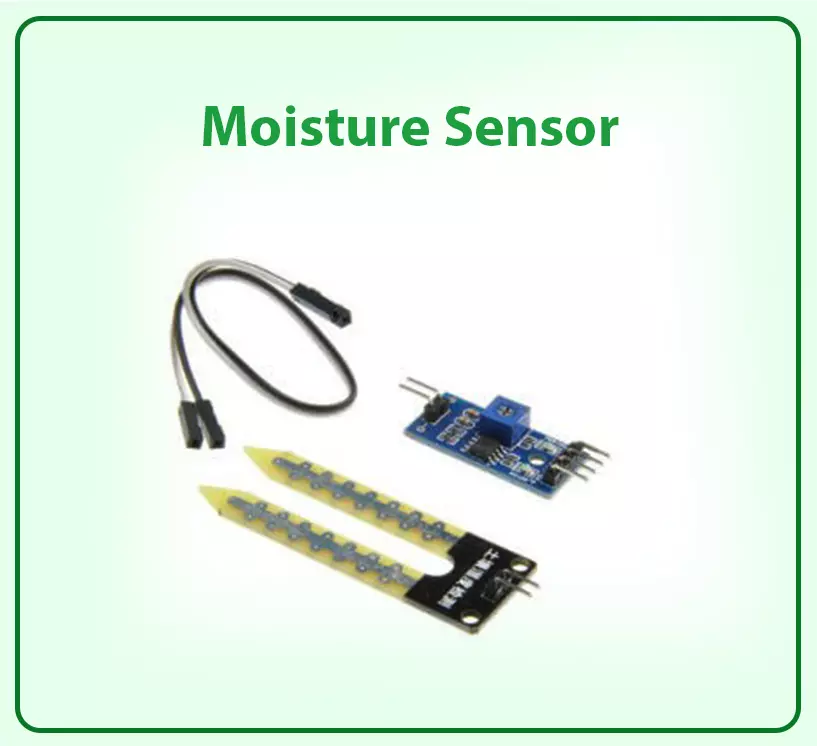
- Soil humidity sensor.
- Breadboard.
Soil Moisture Sensor
One way to assess soil conditions is with a soil moisture sensor. The electromagnetic signal that the sensor emits travels through the soil. The sensor then evaluates the moisture level based on the signal's reception.
We can use soil moisture sensor has numerous purposes. Saving water is one of them. Adjustments to the watering system can be made based on readings from the sensor that measures the soil's moisture level. This could cut down on both water consumption and waste. Plant health can be enhanced by employing a soil moisture monitor, another perk. We can use this sensor to set off a relay to begin watering the plant if the soil moisture level drops off a given threshold.
Soil Moisture Sensor Working Principle
The two exposed wires on the fork-shaped probe function as a variable resistor whose resistance changes with the soil's moisture level.

The above figure demonstrates how to use a soil moisture sensor to detect moisture levels. When water is poured into the soil, the voltage of the sensor immediately reduces from 5V to 0V. The module has a potentiometer(blue) that adjusts how sensitively the digital pin changes state from low to high when water is introduced into the soil.
There are typically two components that make up a soil moisture sensor.
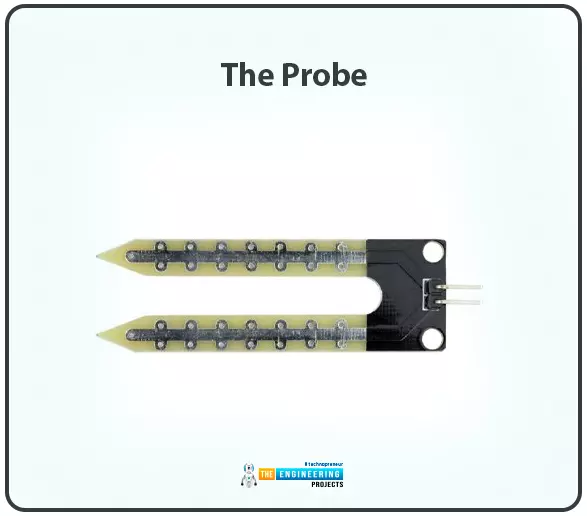
The Probe
Two exposed conductors on a fork-shaped probe are put wherever moisture levels need to be determined. As was previously mentioned, its a variable resistor whose resistance changes as a function of soil moisture.
The Module
The sensor also has an electronic module that is interfaced with the microcontroller. The module produces a voltage proportional to the probe's resistance and makes it available through an Analog Output pin. The same signal is then sent to a Digital Output pin on an LM393 High Accuracy Comparator.
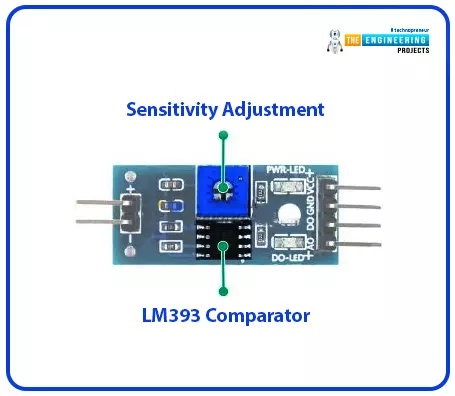
The module features a potentiometer (DO) for the fine-tuning of digital output sensitivity. It can be used to establish a threshold i.e. at which threshold the module will output a LOW signal and a HIGH otherwise.
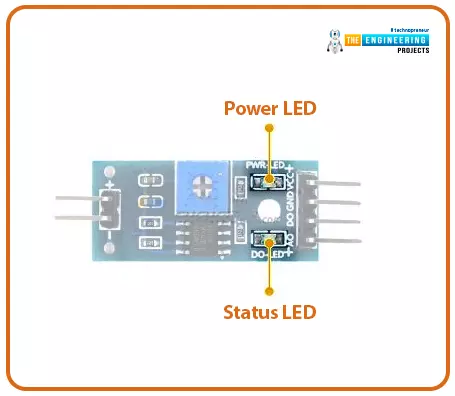
In addition to the IC, the module has two LEDs. When the component is activated, the Power LED will light up, and the Condition LED will light up if the moisture level is above the setpoint.
Soil Moisture Sensor Pinout
Four pins are included on the FC-28 soil moisture sensor.

- Vcc: Power Pin(+5V).
- A0: An analog output Pin.
- D0: Digital output Pin.
- GND: Ground
Soil Moisture Sensor Applications
Among the various uses of Moisture Sensors, I am sharing a few here:
- Soil moisture monitoring for efficient watering schedules.
- Tracking the severity of the drought.
- Methods for Assessing Irrigation System Performance.
- Estimating Harvest Success.
- Compaction of soil detection For environmental reasons, the SMS can be used to do things like: keep an eye on soil moisture levels to make sure water supplies are being used efficiently.
- Monitoring irrigation systems for leakage.
Soil Moisture Sensor with Raspberry Pi 4
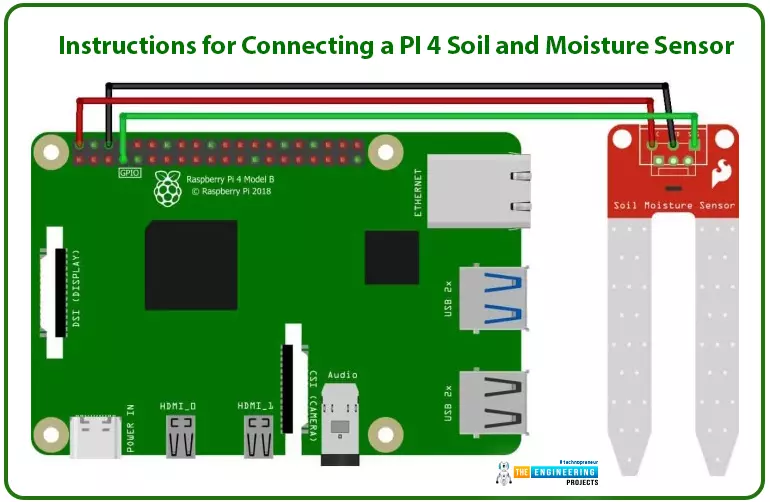
As with most things involving the Raspberry Pi, connecting a soil humidity sensor is child's play. we need to connect the soil moisture sensor with Pi 4 GPIO header. This connection requires three wires.
- The yellow(data) line will be connected to the Raspberry Pi 4 GPIO Pin4, and the red(power) wire will go to the Raspberry Pi's 5V pin.
We can now start coding our project because all the pieces are in place. Now is the time to begin.
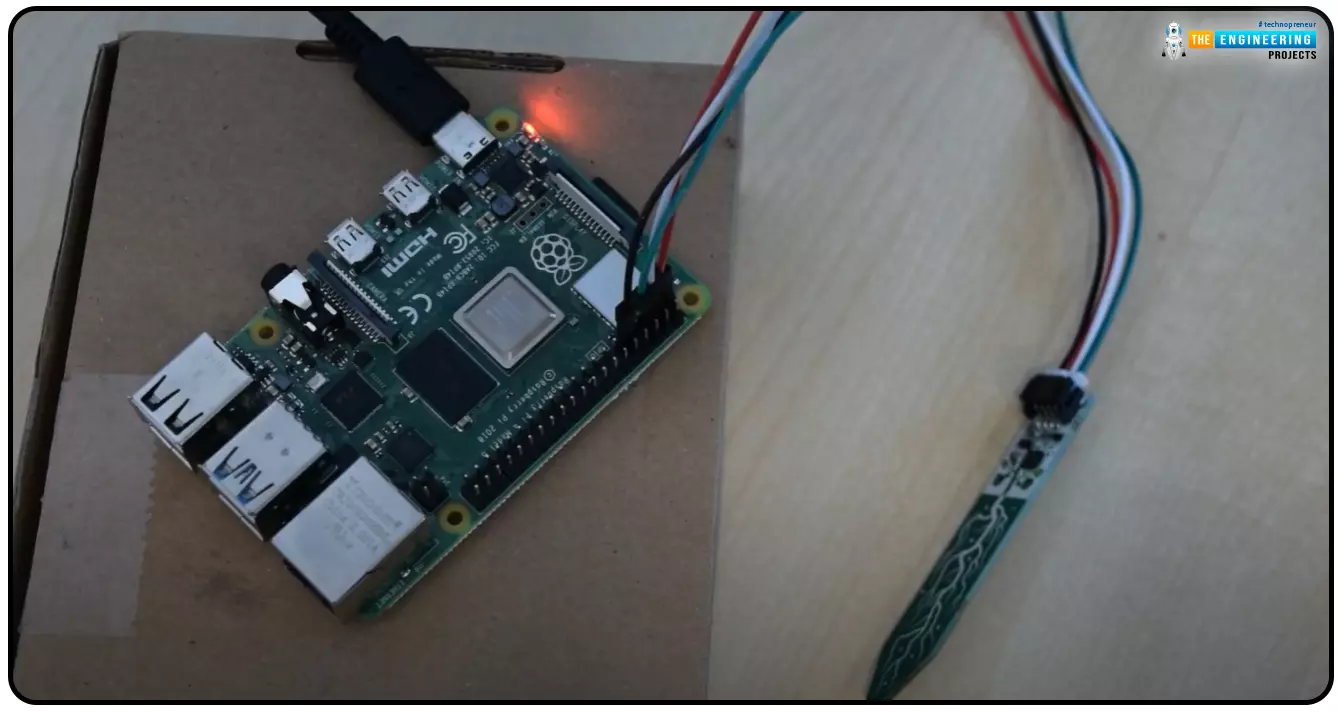
Here's our hardware setup having soil Moisture Sensor with RPi4:
Here's the Pin's Mapping:
VCC -> 5V
GND -> GND
DATA-> GPIO4
Python script for Soil Moisture Probe with RPi4
After the sensor has been hooked up, testing it requires the creation of some code. The following code can be copied and pasted into a text editor, then saved as a .py file.
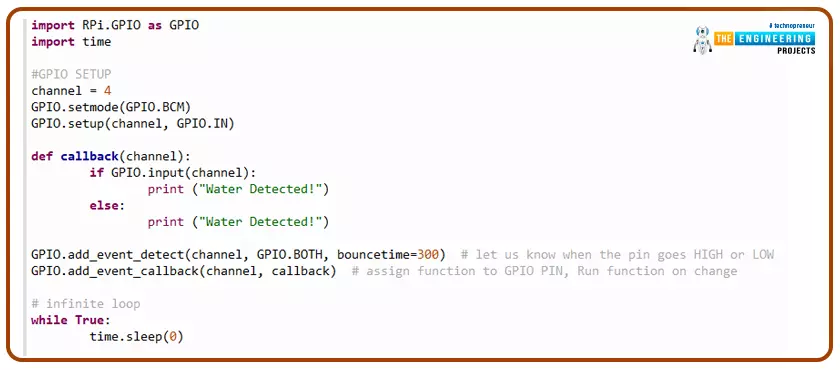
import RPi.GPIO as GPIO
import time
#GPIO SETUP
channel = 4
GPIO.setmode(GPIO.BCM)
GPIO.setup(channel, GPIO.IN)
def callback(channel):
if GPIO.input(channel):
print ("Water Detected!")
else:
print ("Water Detected!")
GPIO.add_event_detect(channel, GPIO.BOTH, bouncetime=300)
GPIO.add_event_callback(channel, callback)
while True:
time.sleep(0)
- The script should be copied into the Python IDLE on the raspberry pi.
- To execute the script, type "python soil.py" and press Enter.
- The following command is used to execute the code once it has been saved: "python yourfilename.py"
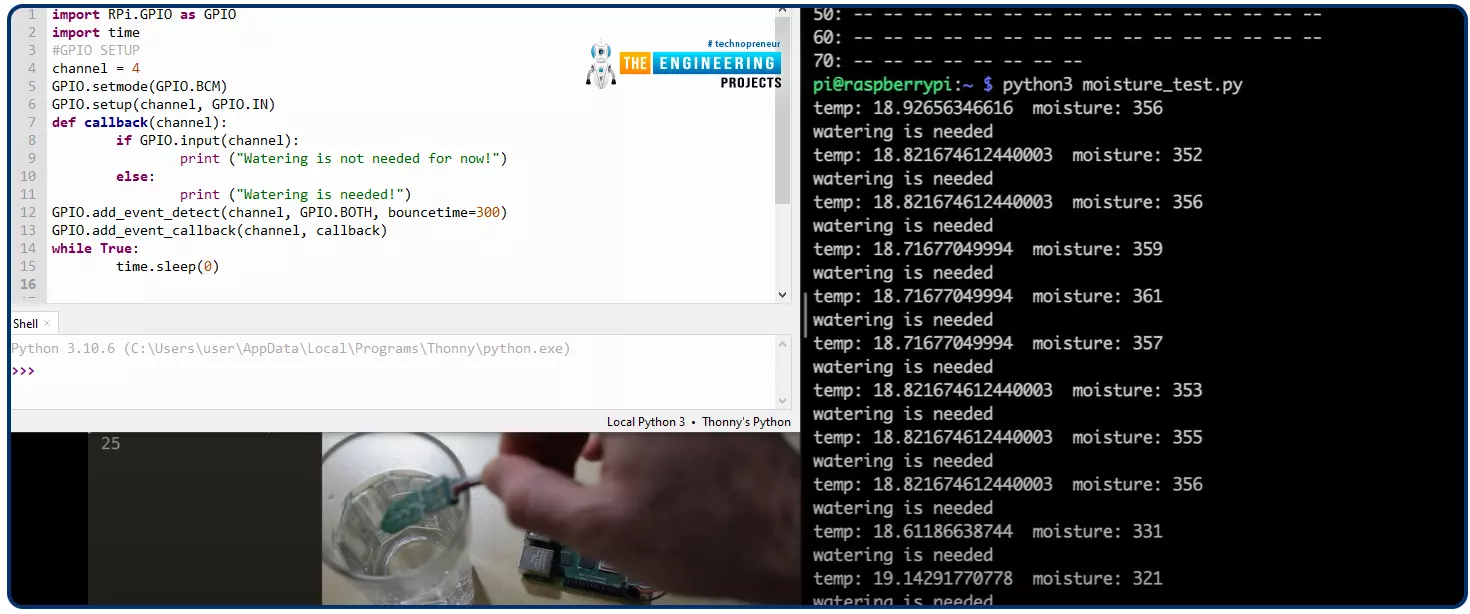
The below output should be observed if the sensor is operating correctly:
Output
Conclusion
So, there's been a moisture detection! You can change the code to perform any action you like. Once the humidity level is detected, you could activate a motorized or audible alarm, for instance. In the next tutorial, we will Interface a Sharp IR Sensor with RPi4. Stay tuned. Have a good day.