Control DC Motor with Raspberry Pi 4 using Python


Hello friends, I hope you all are doing well. Welcome to the 9th tutorial of our Raspberry Pi programming course. In the last chapter, we generated a PWM signal from our Raspberry Pi to control the brightness of an LED. We also studied different functions used in Python to perform PWM. In this chapter, we'll get a bit advanced with PWM and use it to control the speed and direction of a DC motor with the help of a motor driver IC.
To control the speed & direction of the DC Motor, we will:
- Design a Circuit Diagram.
- Write Python code.
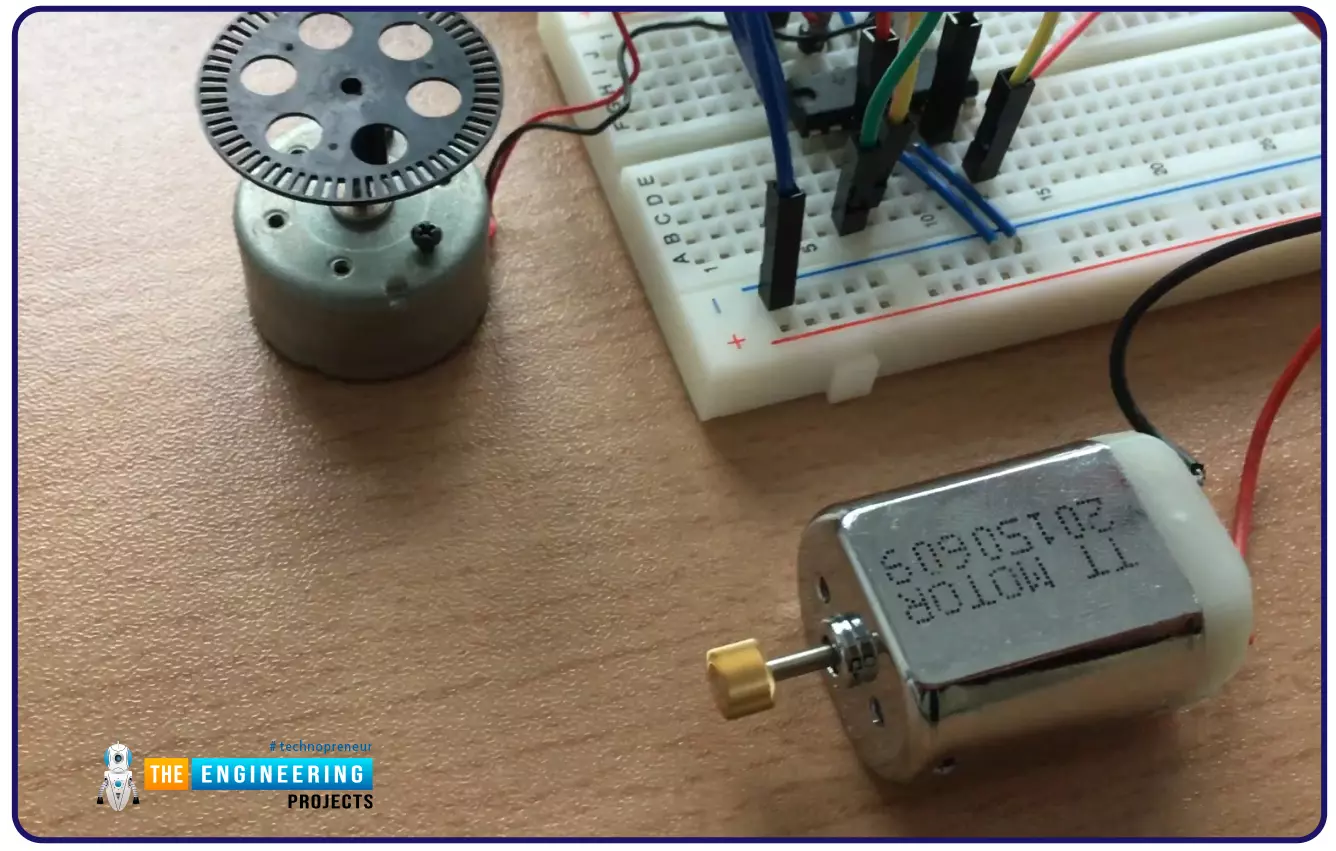
Components Required
We will use the following components to control the DC motor speed:
- Raspberry Pi 4.
- DC Motor.
- Motor driver IC(L293D).
- Breadboard.
- Jumper wires.
Controlling DC Motor speed with Raspberry Pi 4
- In order to control the DC motor with any microcontroller, we need to use the motor drivers i.e. L298, ULN2003 etc.
- In our project, DC motors are controlled by the L293D motor driver, an intermediate integrated circuit.
- Raspberry Pi 4 will send the signal to the motor driver, which in turn will control the speed or direction of the DC motor.
- To regulate the DC motor's speed, we will write Python programs in Raspberry Pi, to control the GPIO pins and will send signals to the motor driver IC.
Control DC motor using PWM
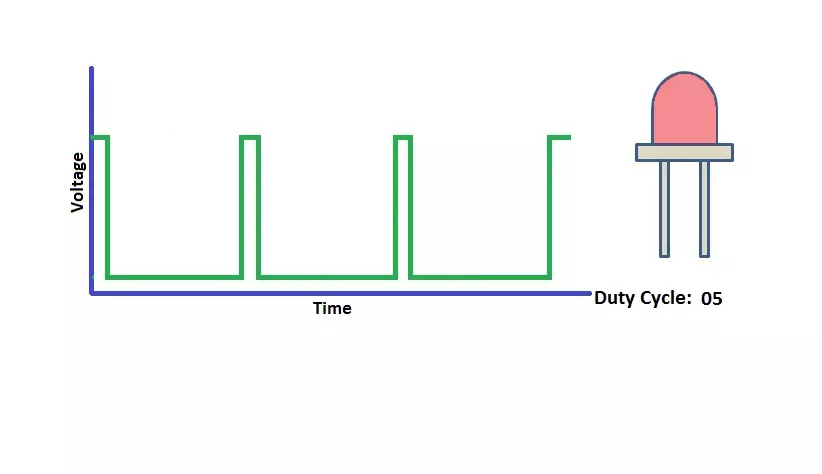
Pulse Width Modulation(we studied in the previous tutorial) will be used to regulate the speed of a DC motor. A quick recall, a PWM signal is used to generate a variable voltage at the output depending on the duty cycle. The duty cycle refers to the length of time during which the signal is kept at a high level and determines how much power is given to the signal.
As a result of the PWM signal, the speed of a DC motor can be controlled in a non-resistive or non-dissipative manner.
Motor Driver L293D
- We will use the L293D Motor driver, it will get the signals from Raspberry Pi through its GPIO pins and will control the motor.
- The Raspberry Pi's low-current signal is amplified by this motor driver into a high-current signal used to drive a motor.
L293D Pinout
The L293D pinout is shown in the following diagram.
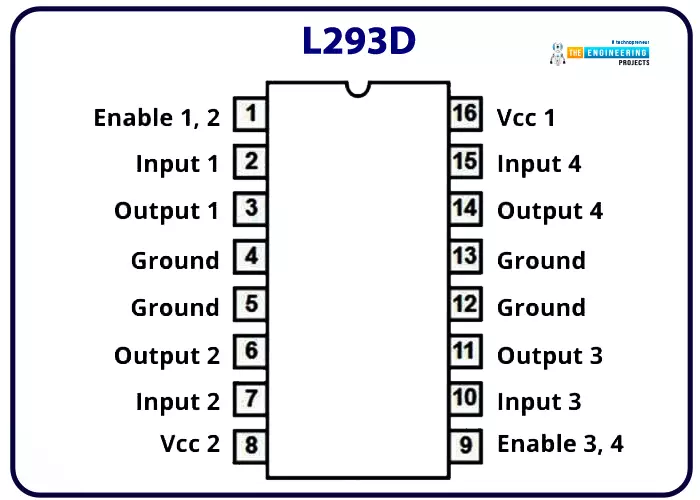
- As you can see in the L293D pinout, it has 4 input/output channels.
- In order to control the speed of 1 DC motor, we need to use 2 channels of L293D.
- So, a single L293D IC can control 2 DC motors at a time.
- It also has 2 Enable Pins and are used as master control pins for these channels.
- Enable Pin 1 is used to control the first two channels(left side), while Enable Pin 9 is used to control the last two channels(right side).
- Vss(Pin16) is the reference voltage pin, it should be provided with 3.3V or 5V. It's the reference to the signals provided at Input pins. In our case, we are using RPi4 and its GPIO pins provide 3.3V, so we will give 3.3V at Vss pin.
- Vs(Pin8) is the source voltage pin, normally a 9V or 12V power is applied at this pin. The voltage at Vs pin is provided to all the output pins by the L293D.
Why do we need a Motor Driver L293D?
The microcontrollers provide either 5V or 3.3V at their GPIO Pins, in the case of RPi4, it's 3.3V. The current rating of these GPIO pins is normally 10-50mA, which is quite low and it's justifiable as their sole purpose is to send the signal.
Now if we talk about DC Motors, they normally operate at 5V-48V and have a current rating from 100mA to 10A. So, we can't connect a DC motor directly to a microcontroller's pin. We need a motor driver to amplify the voltage and current.Moreover, DC motors also produce back EMF, which may burn the GPIO, so in order to protect the board, we should have a motor driver in between.
L293D Working
- The PWM signal generated by the Raspberry Pi will be provided to Input1 and Input2.
- If Input1 is at a High state, while Input2 is at a LOW state, the motor will rotate in one direction, let's say clockwise.
- If we changed the states i.e. Input1 at a LOW state, while Input2 at a HIGH state, the motor will change its direction and will rotate in the anti-clockwise direction.
- The motor won't run if you simultaneously supply highs or lows to both inputs.
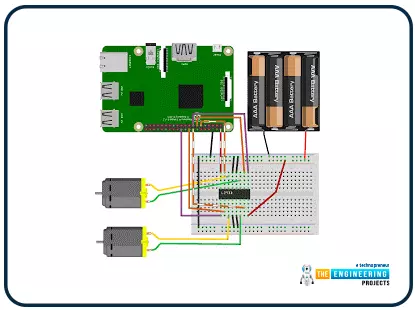
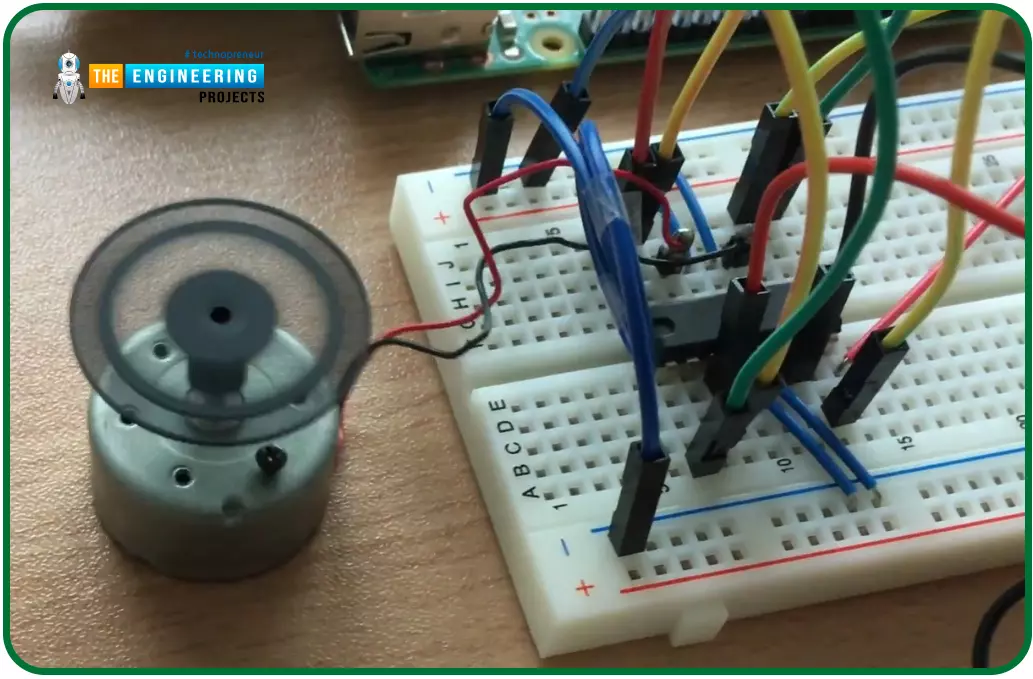
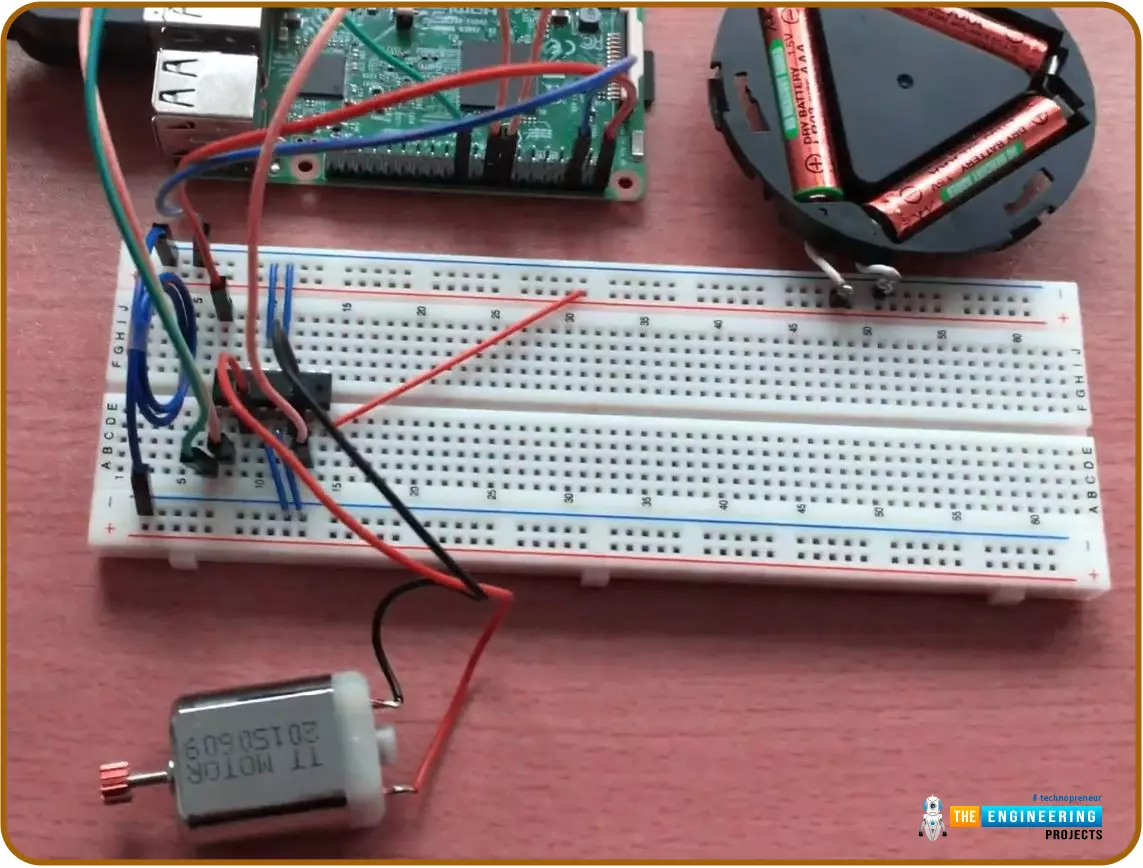
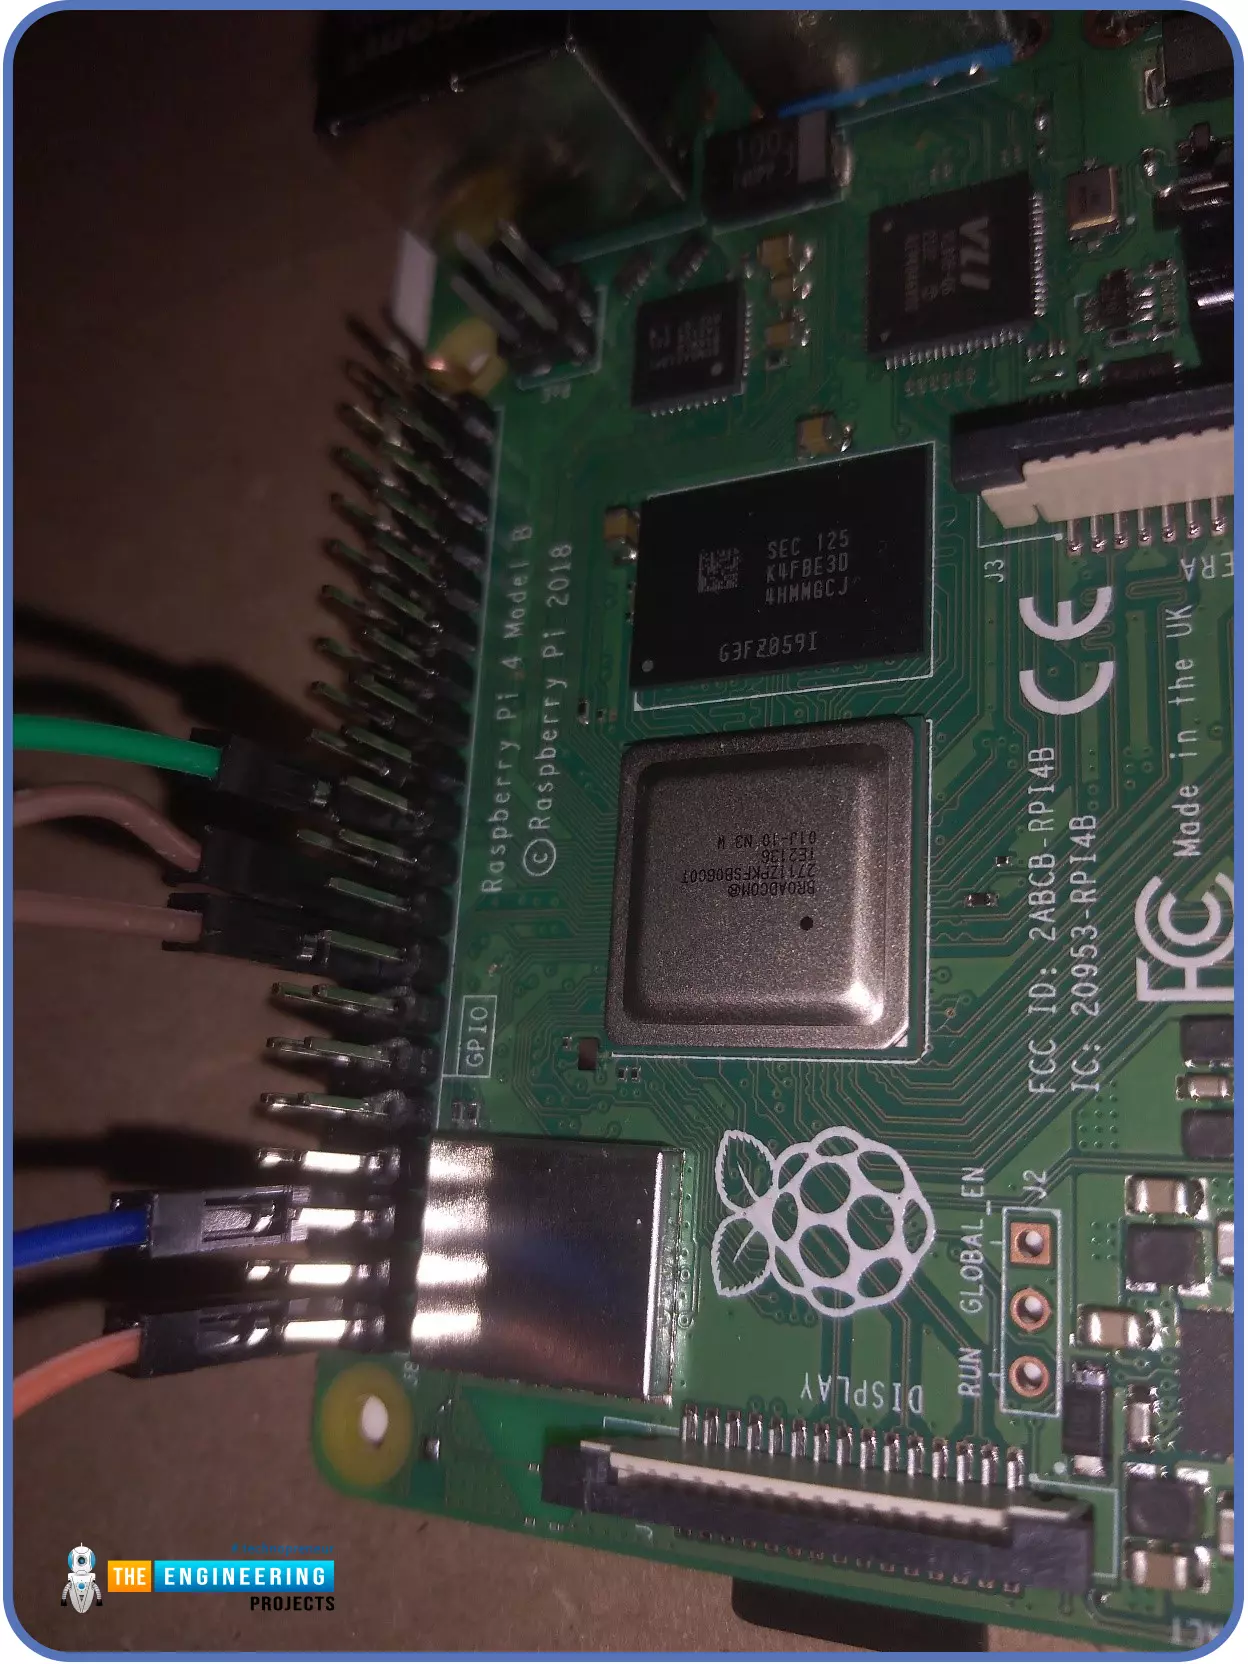
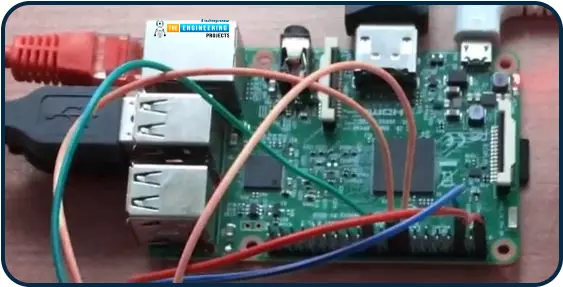
Controlling DC Motor with Raspberry Pi4
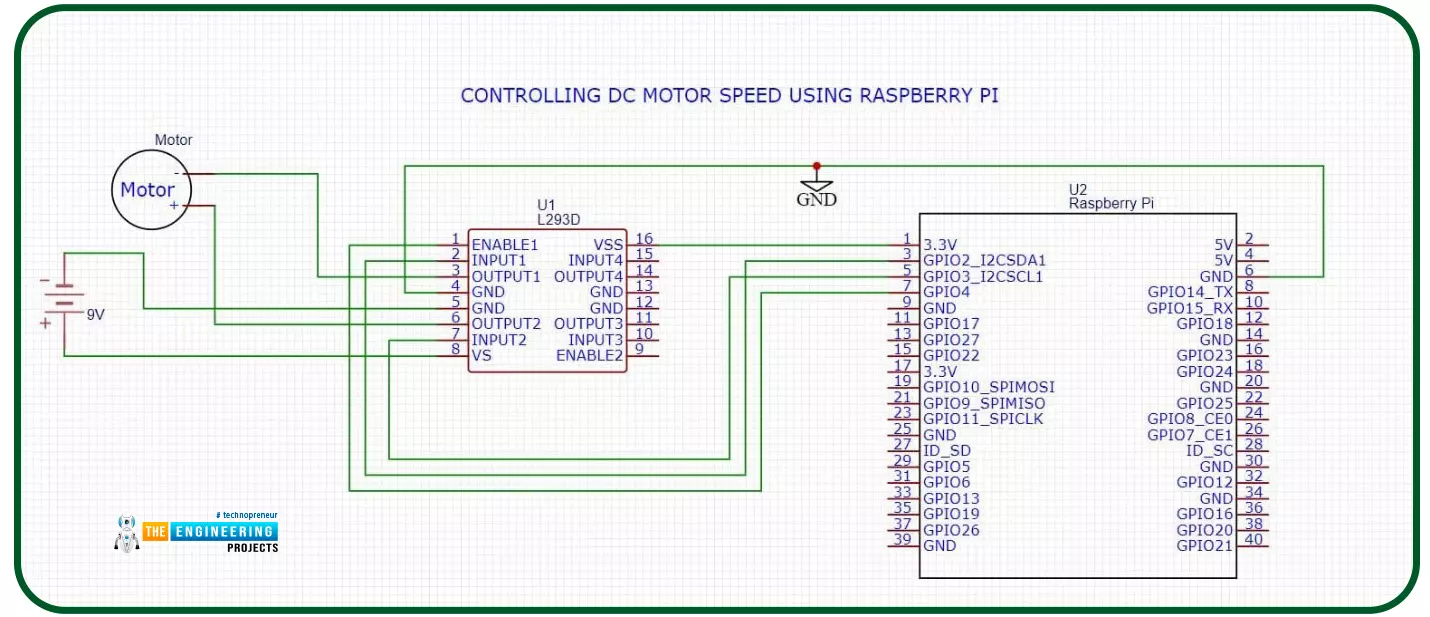
- As shown in the above figure, we will use three GPIO pins of Raspberry Pi 4, connected to Enable1, Input1 and Input2 of the L293D motor driver.
- Vss Pin of L293D is provided with 3.3V from RPi4.
- We will also connect the GND of L293D with that of RPI4(Pin6).
- Vss of L293D is provided with +9V from the battery and that will be provided at the output and will control the motor's speed.

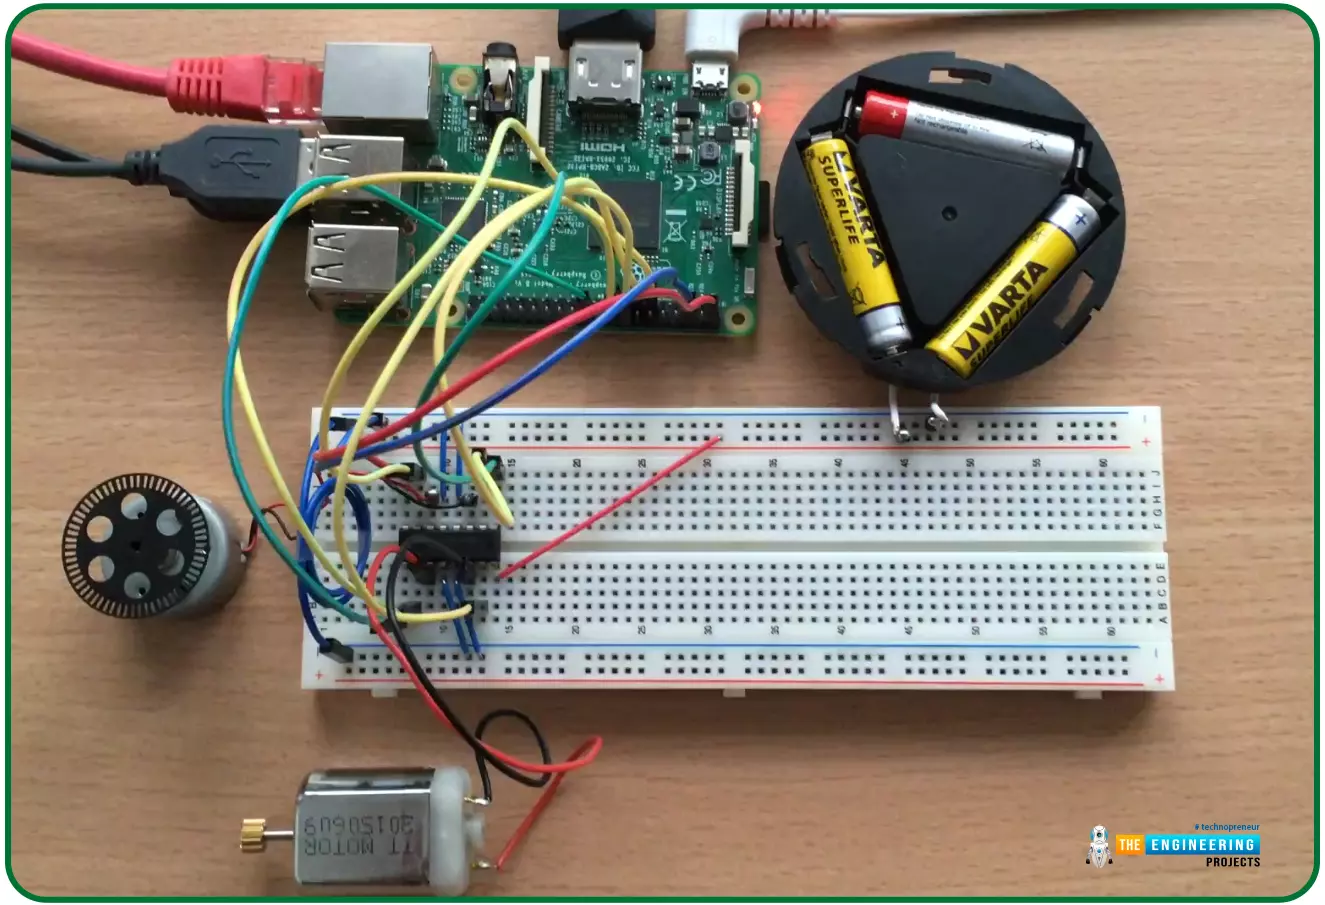
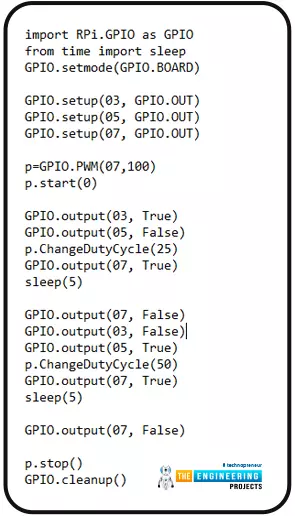
Python Code for DC Motor Speed Control
We have designed the circuit in the above section and now it's time to get our hands on Python code. We will be using the Thonny IDE in Raspberry Pi 4.
In this code, we will write a simple code to drive the motor forward for 5 seconds, then backward for another 5 seconds at a 50% duty cycle. You can alter any of these values as you see fit.
I will explain the code line by line for better understanding:
- To use the GPIO pins, you must first import the GPIO module using the import command.

- We also need to include a sleep instruction, required while making changes to the PWM duty cycle or the direction of the motors.

- To access the GPIO pins, you'll first need to put them into board mode. To do so, run this command.

- As we need to send PWM signals to the motor driver, so we need to make these pins OUTPUT, using the below command:

- Let's create a PWM object by using the PWM GPIO pin, using the below command:

- LEt's start the PWM object with a 0% duty cycle.

- Initiating a clockwise movement of the motor by making the first pin HIGH and the second one LOW.

- Setting the 25% duty cycle to the PWM object:

- Setting the Enable Pin HIGH:

- Delay of 5 seconds:

- Enable Pin is set to LOW to stop the motor.

- Reverse the motor's polarity:

- By setting the duty cycle to 50%, the motor will now run at 50% speed in the opposite direction.

- The enable pin should be set to HIGH.

- Keep the code running for another five seconds:

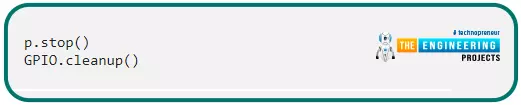
- Reset the Enable pin to turn off the motor.

- After that, clean up and reset the GPIO channels after disabling the PWM object. It's always recommended to clean up the GPIO pins so that the next program could use them without getting an error, saying the pin you selected is not available to use.
- If you followed all of the steps correctly, your engine will run for five seconds in the forward direction and then for five seconds in the reverse direction.
- A variable whose value changes with each iteration of the loop is called an iterative variable. You may adjust the duty cycle such that your motor's speed grows in steps as you observe it.

- Now as we lowered the duty cycle to 25%, the DC motor speed gets lowered as well.
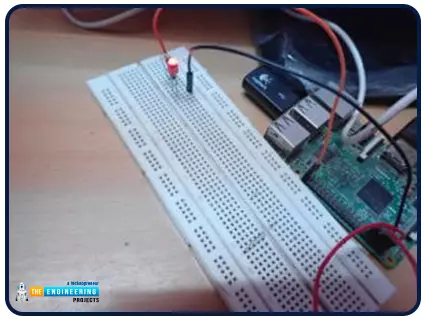
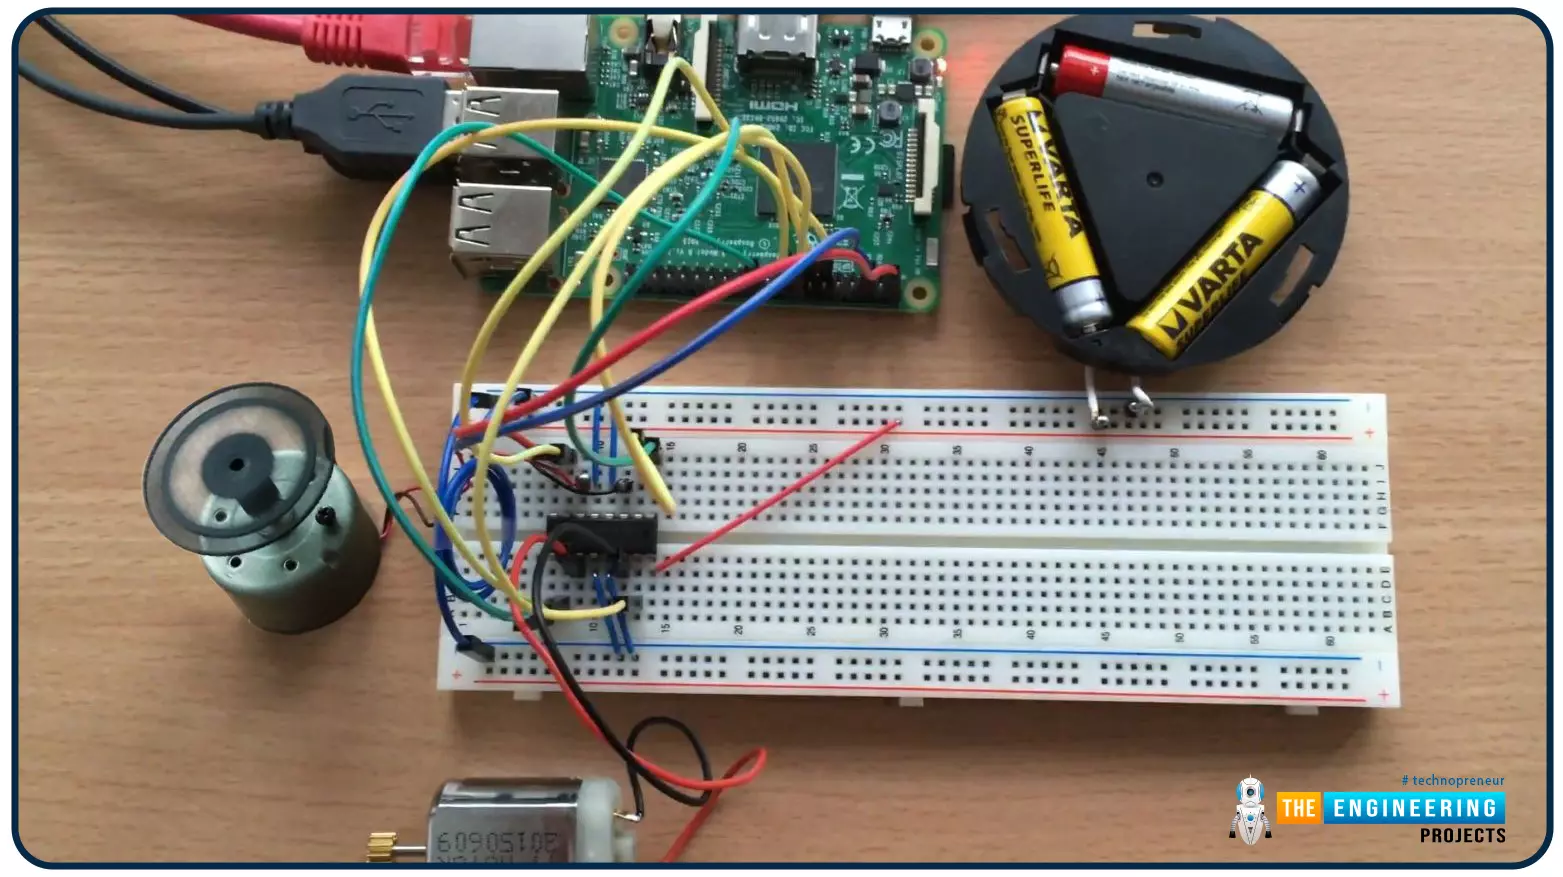
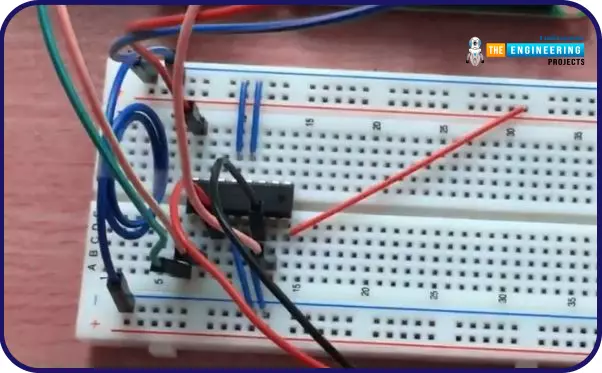
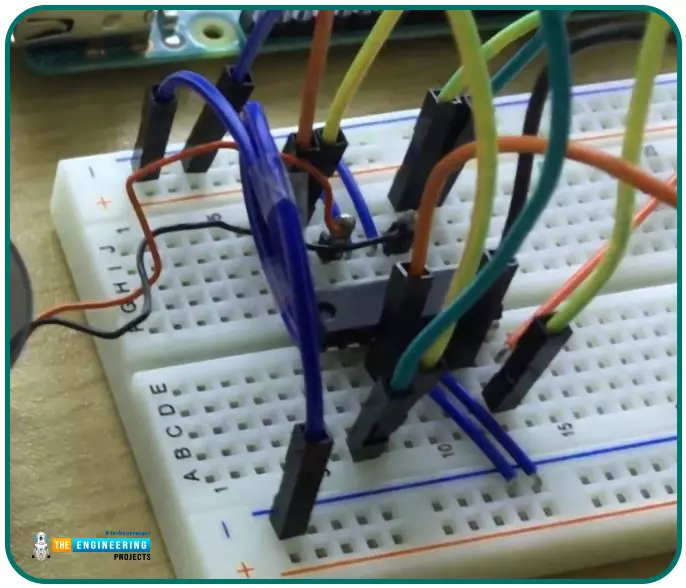
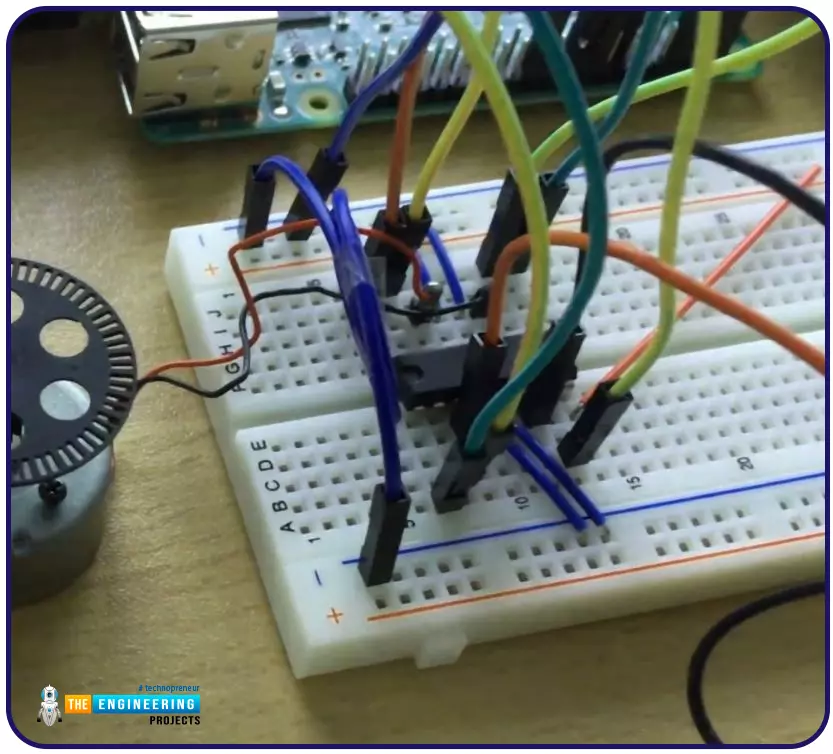
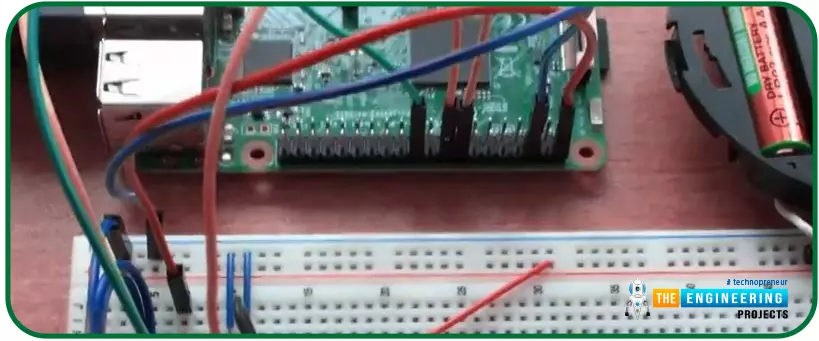
- Here's the complete code and the hardware images:


Application of DC motor control systems
DC Series Motor:
Motors from the DC series are commonly employed in electric locomotives and fast transit systems, as well as trolley vehicles. Because of their high starting torque, they're also found in cranes, hoists, and conveyors.
DC Shunt motor:
The use of DC shunt motors in rolling mills is due to their ability to accurately manage speed. They're used for driving lathes at a fixed speed, used in reciprocating and centrifugal pump drives, and also used in blowers, machines, and reciprocating pumps.
Synchronous Motors:
They can be found in a wide variety of machinery, including elevators, conveyors, heavy planers, shears, and punches, as well as intermittently high torque loads and air compressors.
Conclusion
Congratulations! You have made it to the end of this tutorial. We have seen how PWM is used with a motor driver IC to control a DC motor's speed and direction. In the next tutorial, we will have a look at how to Control a Stepper Motor with Raspberry Pi 4 using Python. Till then, take care. Have fun !!!