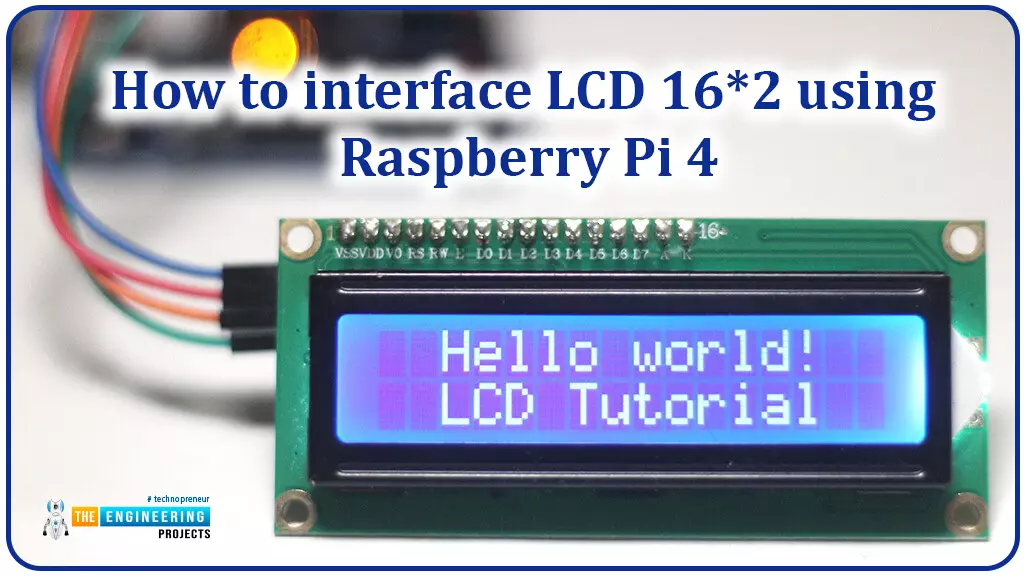
Interface LCD 16x2 with Raspberry Pi 4


Hello friends, I hope you all are doing great. Today, I am going to share the 6th lecture in the Raspberry Pi 4 Programming series. We're glad you could join us for another lesson in our comprehensive Raspberry Pi programming guide. In today's guide, I'll show you how to interface a 16x2 LCD screen with Raspberry Pi 4.
So, let's get started:
Interface LCD 16x2 with Raspberry Pi 4
Today, we are going to interface a 16x2 LCD screen with Raspberry Pi 4. At first, we will print the "Hello World" text on the LCD, and in the last section, we will implement the scrolling and blinking of text on the LCD.
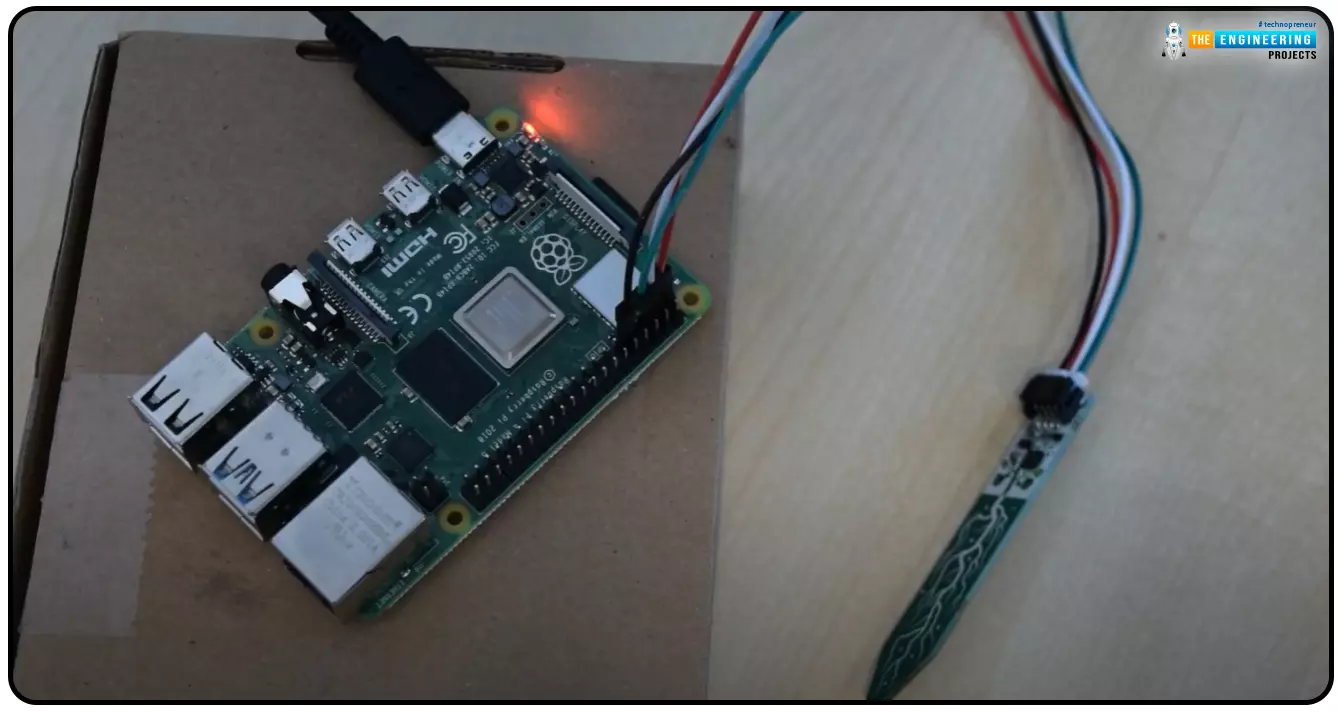
- Here's the video tutorial on LCD interfacing with Raspberry Pi 4:
Components Required
We will need the following components for today's project:
- Raspberry Pi 4.
- Micro SD Card.
- 16x2 LCD.
- Breadboard.
- Jumper wires.
LCD 16x2 Display
- A liquid crystal display, or LCD, is a versatile electronic display module. The 16x2 LCD module is used in electronic gadgets and circuits to display data normally sensor values.
- LCD 16x2 has 16 columns and 2 rows, which means we can write 32 characters on it.
- This LCD uses a 5x7 pixel matrix to show each character and 224 distinct characters/symbols can be displayed on the 16x2 programmable alphanumeric dot matrix display.
- The Command register and Data register are the two command types in this LCD.
- Simple LCD screens use a controller from the HD44780 family.
- LCDs have supplanted CRTs (Catalyst Ray Tubes) in the screen manufacturing industry because CRTs are bulkier, heavier, and consume more energy than LCDs. LCD screens are more slender than their CRT counterparts.
- Since LCDs are based on a light-blocking rather than a light-dissipating technology, they require less electricity than LED panels.
- LCDs are everywhere, from CD, DVD players and digital watches to computers and televisions.
LCD 16×2 Pinout
- LCD 16x2 has 16 pins in total, where 8 pins are used for data transmission, while the remaining 8 pins are used to control LCD.
- LCD 16x2 Pinout is shown in the below figure:
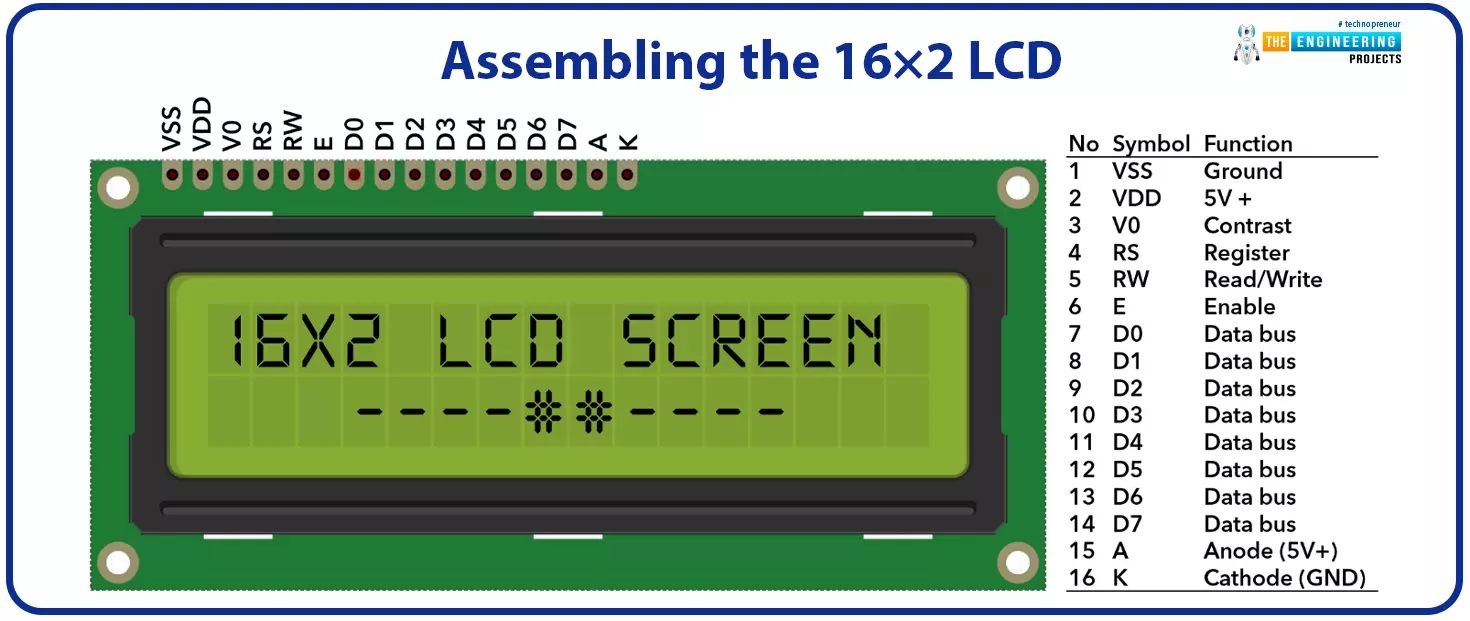
- Pin 1 and 2 are power pins and we need to provide GND and +5V to these pins respectively.
- Pin 3 is Contrast Pin and controls the brightness of LCD, so we normally place a potentiometer at this pin, to get the desired brightness.
- Pin 4 is the register select pin, used to select the Command Register or Data Register.
- Pin 5 is the Read/Write Pin, it needs to set LOW if you want to write on the LCD and needs to set HIGH if you want to read from the LCD.
- Pin 6 is Enable Pin, used to enable the LCD by setting it HIGH.
- Pins 7-14 are data pins(labeled D0-D7) and are used to get data for the LCD.
- Pin 15 & 16 are power pins and are used for the backlight of the LCD.
- Below you'll find a diagram depicting a standard LCD board's pin configuration.
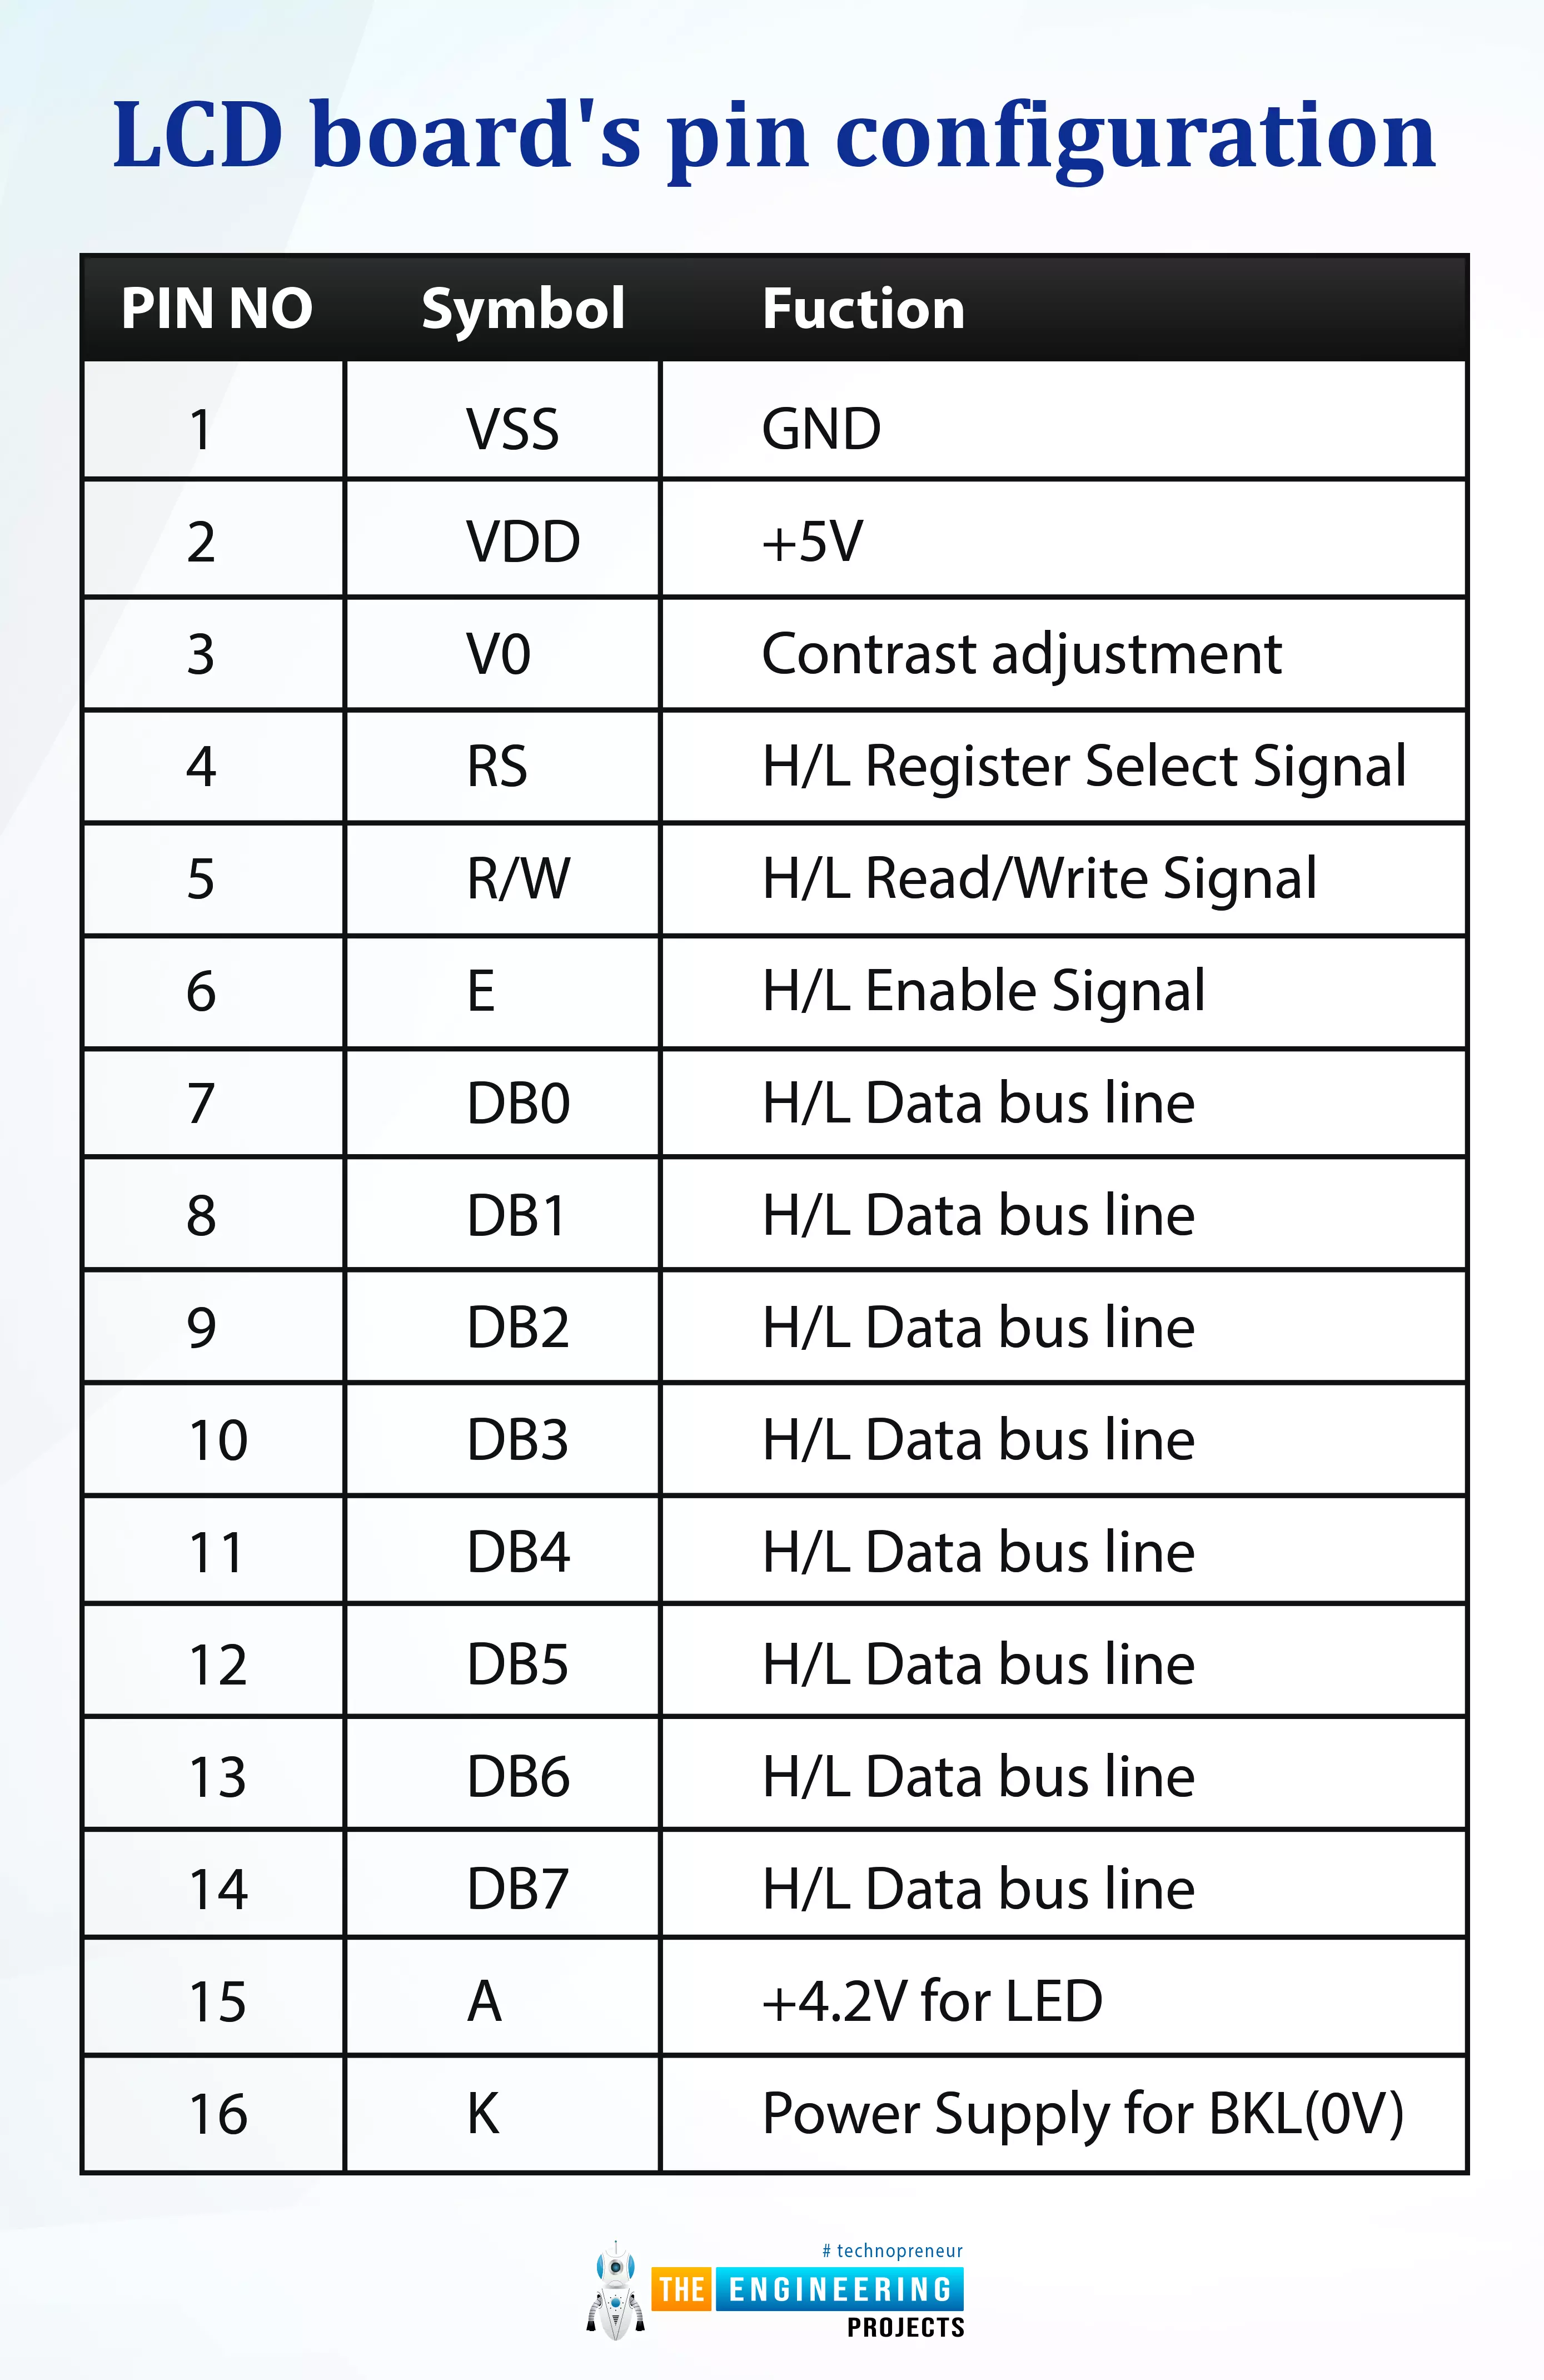
The header pins of 16x2 monitors are not pre-soldered. Normally a male header pin is soldered to the LCD pin holes.
Modes of Communication
We can perform 2 types of communication modes in LCDs, named:
- 8-Bit Mode.
- 4-Bit Mode.
In 8-Bit mode, all 8 data pins are used to send data, while in 4-Bit mode, the last 4 pins(D4-D7) are used for data transmission.
LCD Registers
LCDs employ two distinct registers:
- Data register.
- Command register.
You can use the RS pin on LCD to alter the register. If RS is High, we are accessing the data register and if it's Low, we are accessing the command register.
The LCD's command register keeps track of the user's command. Pre-display data is saved in the data register. In order to manipulate the display, one must first load the instruction register with commands and then load the data registers to display the data. If you're working on a Raspberry Pi project and want to avoid learning low-level commands, you can use the Liquid Crystal Library instead.
LCD Brightness
The screen's brightness can be adjusted from Pin 3, normally a potentiometer is placed at Pin 3 to adjust the brightness. You can also use a resistor if you don't have a potentiometer. If a resistor is used, try one between 5k-10k ohms. You should experiment with a few different values to get the optimal resistance.
Working Principle
LCD works on the principle of light transmission from one layer to the next via molecules. These units vibrate and align themselves in a way that the polarized sheet gets at an angle of 90 degrees, allowing light to pass through. In other words, these molecules inspect the information on every pixel. Every single pixel uses the light absorption technique to display the digits. It is necessary to adjust the molecular orientation to the incident light angle in order to show the value.
Circuit Diagram of RPi4 with LCD
The 16x2 LCD screen can easily be connected to the Raspberry Pi 4. There will be a lot of cables to connect because LCD has 16 pins, but nothing too complicated. Here's the schematic of the pin connections between RPi4 and LCD:
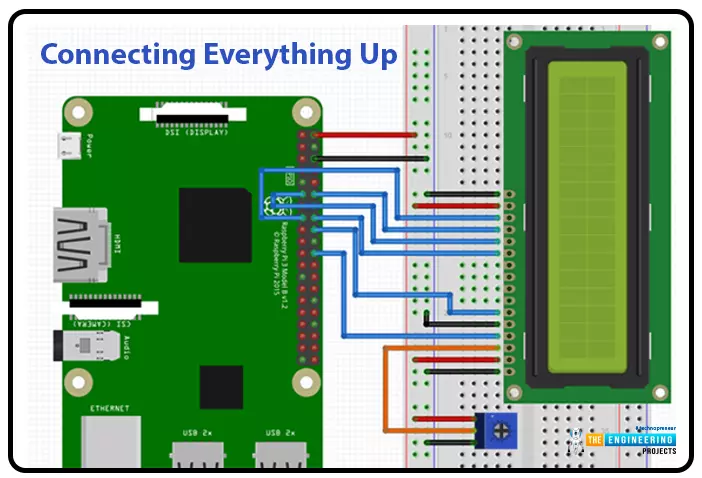
- Connect Pin 1, 5(R/W Pin) and 16 of the LCD module to the Ground(GND).
- Connect Pin 2 and 15 of the LCD screen to Vcc(+5V).
- Connect Pin 3 to the Potentiometer's middle Pin, while the remaining two pins of the potentiometer need to connect to Vcc and GND.
- Connect Pin 4 of the LCD screen to the GPIO25(Pin 22) of Raspberry Pi 4.
- Connect Pin 6 of the LCD module to the GPIO24(Pin 18) of Raspberry Pi 4.
- Pin 11(D4) is connected to GPIO23(Pin 16).
- Pin 12(D5) is connected to GPIO17(Pin 11).
- Pin 13(D6) is connected to GPIO18(Pin 12).
- Pin 14(D7) is connected to GPIO22(Pin 15).
Having done so, the screen should power up and establish a connection with the RPi.
Python Code for Rpi4 with LCD 16x2
The newest Raspbian release has all the necessary packages loaded out of the box to allow for GPIO communication. But we need to install the Liquid Crystal Library to work on the LCD. Let's do that:
Python Library for LCD
- We will install the Adafruit LCD library.
- It was made with Adafruit LCD boards in mind, but it can also be used with boards from other manufacturers. If the controller on your display board is an HD44780, you shouldn't have any problems.
- First of all, use the below command to clone the necessary git directory onto the Raspberry Pi:
git clone https://github.com/pimylifeup/Adafruit_Python_CharLCD.git

- After that, navigate to the directory where the clone was created and double-click the setup file or use the below commands to install the library:
cd ./Adafruit_Python_CharLCD
sudo python setup.py install

After the installation, you can use the Adafruit library from any Python program on the Pi. Just paste this line into the beginning of your Python file to make use of the library.
import Adafruit_CharLCD as LCD

Interacting with the LCD Screen
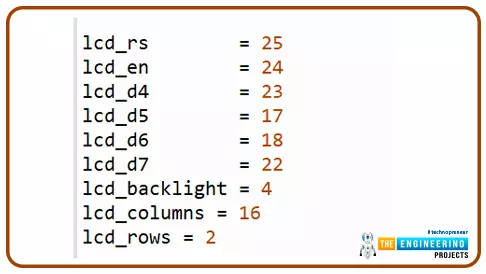
The Adafruit LCD library makes it simple to display data from Raspberry Pi to LCD screen. The library package also has several working examples of utilizing the LCD. Before running any of these examples, make sure the pin parameters at the top of the program reflect your setup. My Circuit should yield the following results.
lcd_rs = 25
lcd_en = 24
lcd_d4 = 23
lcd_d5 = 17
lcd_d6 = 18
lcd_d7 = 22
lcd_backlight = 4
lcd_columns = 16
lcd_rows = 2
- Enter the below commands to access one of the sample files:
cd ~/Adafruit_Python_CharLCD/examples/
sudo nano char_lcd.py

Change the values in this section to match the ones described above for the pin configuration. To save the code, hit CTRL+X+Y on your keyboard. To execute this code, open a terminal and type Python followed by the name of the file (including the extension).
python char_lcd.py

Functions and Python Code
In this session, I'll go over the fundamental Python methods for interacting with the screen. To initialize the pins, it is necessary to invoke the following class. Before calling the class, make sure all the parameters have been defined.
lcd = LCD.Adafruit_CharLCD(lcd_rs, lcd_en, lcd_d4, lcd_d5, lcd_d6, lcd_d7, lcd_columns, lcd_rows, lcd_backlight)

After that, you can adjust the screen to your liking. In this short guide, I'll give you a taste of what you can do with the Adafruit library.
- By calling "home()", you can return the cursor to its original position in the first column of the first line.
- The command "clear()", wipes the LCD clean, making it completely blank.
- Set the current cursor position using "set cursor(col, row)". The column, as well as row numbers, are supplied as arguments, which determine the location i.e. "set cursor (1,4)".
- The display can be turned on or off with the enabled "display(enable)" function.
- The cursor can be displayed or hidden with the "cursor(show)" function. If you wish to see the pointer, set this to true.
- The cursor blinks on and off with the "blink(blink)" command. Setting this to true will cause the cursor to blink.
- The move left() and move right() functions, shift the pointer to the left and right by one cell.
- The cursor direction can be changed using set right to the left() or set left to right().
- If "autoscroll" is true, the text will right align from the cursor. The text will be aligned to the left if this option is false.
- Message (text) - Outputs the given text on the screen. Include new lines (n) in your message if you'd like.
The Ardafruit CharLCD.py file in the Adafruit CharLCD folder of the Adafruit Python CharLCD folder will list all the accessible methods.
sudo nano ~/Adafruit_Python_CharLCD/Adafruit_CharLCD/Ardafruit_CharLCD.py

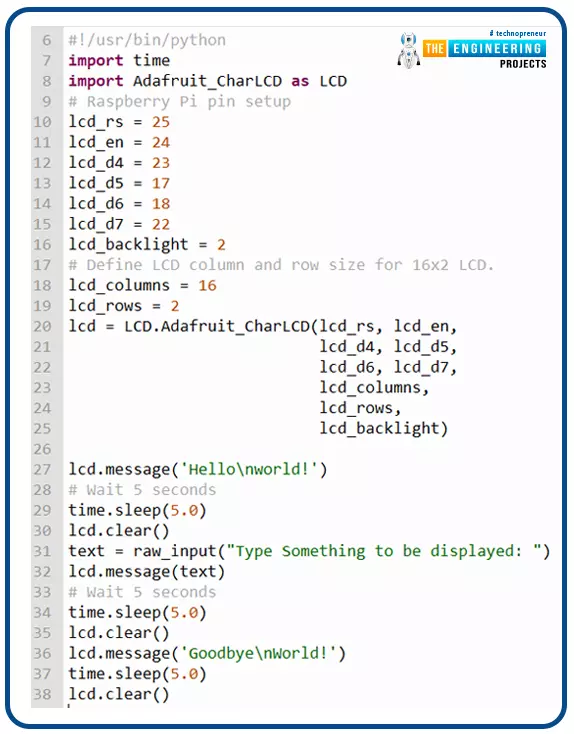
My simple script for displaying user-entered text is included below.
#!/usr/bin/python
# Example using a character LCD connected to a Raspberry Pi
import time
import Adafruit_CharLCD as LCD
# Raspberry Pi pin setup
lcd_rs = 25
lcd_en = 24
lcd_d4 = 23
lcd_d5 = 17
lcd_d6 = 18
lcd_d7 = 22
lcd_backlight = 2
# Define LCD column and row size for 16x2 LCD.
lcd_columns = 16
lcd_rows = 2
lcd = LCD.Adafruit_CharLCD(lcd_rs, lcd_en, lcd_d4, lcd_d5, lcd_d6, lcd_d7, lcd_columns, lcd_rows, lcd_backlight)
lcd.message('Hello\nworld!')
# Wait 5 seconds
time.sleep(5.0)
LCD.clear()
text = raw_input("Type your name in the terminal ")
LCD.message(text)
# Wait 5 seconds
time.sleep(5.0)
LCD.clear()
lcd.message('Goodbye\nWorld!')
time.sleep(5.0)
LCD.clear()
If everything's fine, you will get something printed on your screen, as shown in the below figure:
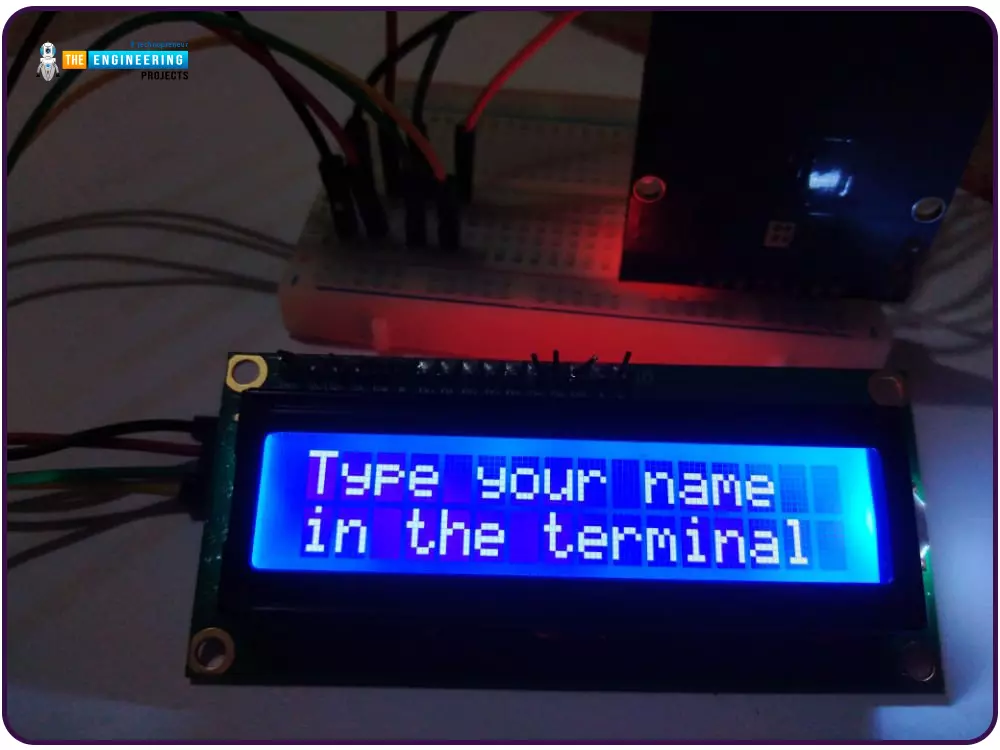
If your Python script isn't producing any output on the screen, it's probably due to incorrectly configured pins.
Conclusion
This guide walked you through connecting the Pi 4 to a 16x2 LCD. You can accomplish so much more with this sleek screen. You may set up a script to run at boot time and show useful information like the IP address, time, temperature, and more.
You can also incorporate a wide variety of interesting sensors with this screen. A temperature sensor like the DS18B20 would be ideally suited for use with the screen. Refresh the screen every few seconds to reflect the current temperature.
Please let me know how successful you were in putting up a Pi 4 with LCD 16x2 display with the help of this tutorial. In the next tutorial, we will interface Keypad 4x4 with Raspberry Pi 4. Till then, take care. Have fun !!!