Heartbeat Monitoring System with ADS1115 & Raspberry Pi 4


Hello friends, I hope you all are doing great. Welcome to the 11th lecture of Section-III in the Raspberry Pi 4 Programming Series. In the previous tutorial, we discussed the interfacing of the Fingerprint sensor with Raspberry Pi 4. Today, we are going to discuss another sensor named the Pulse rate sensor and will interface it with Raspberry Pi 4.
The field of healthcare monitoring has long been seen as a potential use case for IoT i.e. examining the health instead of regular checkups and local doctors. Using sensors, your vital signs can be monitored and transmitted in real time, allowing a physician on the other side or even an AI to analyze the data and provide an accurate diagnosis. That does seem somewhat futuristic. However, we are making steady progress in that direction and will soon have an autonomous IoT robotic arm operating on us.
Project Description
In today's tutorial, we'll design a heart rate monitor to keep tabs on a patient's heart rate, using Pulse Rate Sensor and Raspberry Pi. We will display the data(ECG graph) in the Processing IDE.
Components Required
Here is all, you'll need to put together a Raspberry Pi-based patient monitoring system yourself:
- Raspberry Pi 4
- Pulse Sensor
- ADS1115 ADC board
- Jumper wires
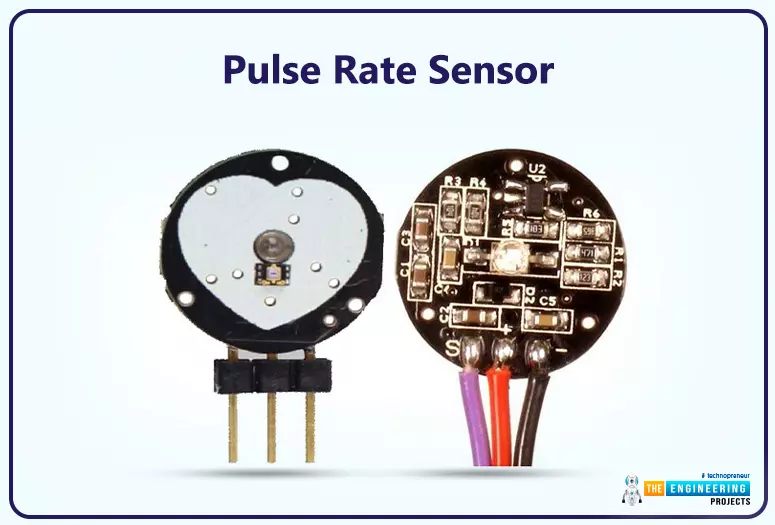
Pulse Rate Sensor
- The Pulse Rate sensor is used to measure the heartbeat of a person, it has an LED, a Light Photo sensor(APDS-9008) and an op-amp(MCP6001) in its construction.
- Pulse Rate Sensor gives an analog output and using that output one can easily design its ECG waveform.
- The LED should be placed on the vein, normally it's placed at the tip of the finger. The LED throws a red/green light on the vein.
- The Light sensor absorbs the reflected LED light and based on its intensity delivers the output.
- The op-amp receives the output, amplifies it and forwards it to the microcontroller.
- A simple circuit is embedded for noise reduction.
A human vein is positioned directly in front of the sensor's LED. The tip of your finger or the inside of your ear can serve this purpose, but it must be positioned directly over a vein.
Heart Rate Sensor Pinout
The sensor outputs three wires:
- Signal (S).
- Vcc (3–5 V).
- GND.
We'll use the 3.3V pin on the Raspberry Pi 4 to power up the sensor.
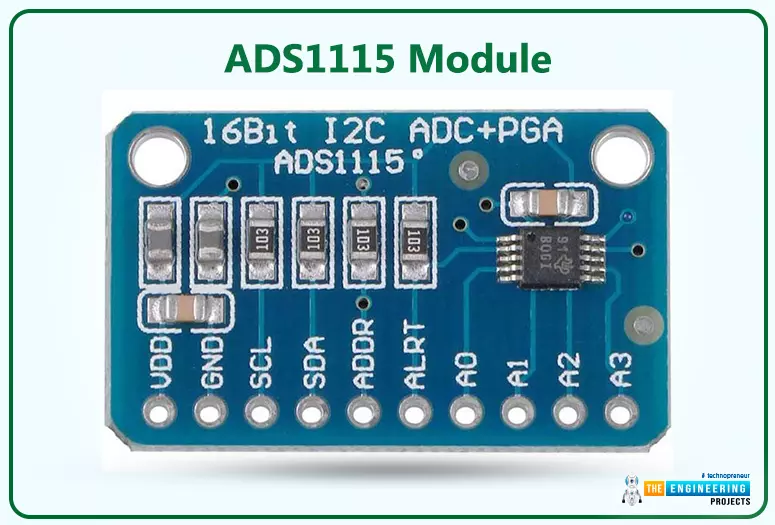
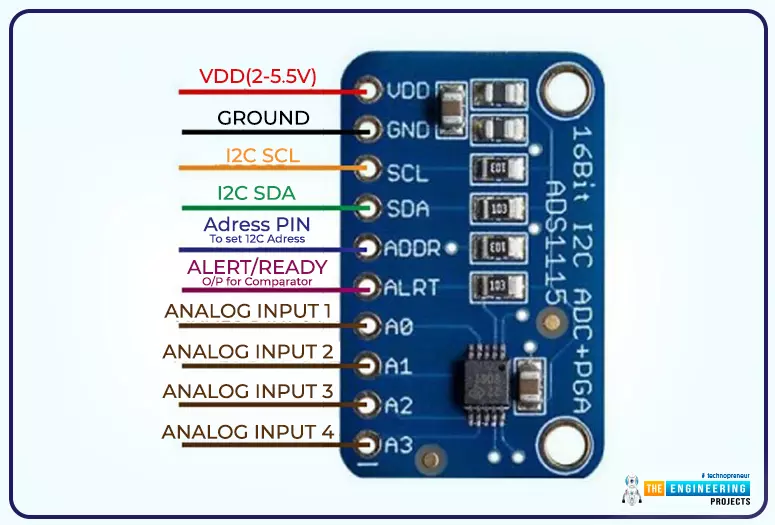
ADS1115 Module
- ADS115 is used to convert the analog signal into a serial signal and transmit it using I2C Protocol.
- The 16-bit ADC ADS1115 has four analog signal channels.
- This chip's I2C interface allows for serial data exchange with a host microcontroller or computer.
We will use ADS115 to transmit the analog signal from Heart Rate Sensor to Raspberry Pi 4, as the Pi can't read analog signals. Both ADS1015 and ADS1115 are high-precision, low-power analog-to-digital converters. These chips are commonly used with the Raspberry Pi because they operate at 3V3.
Any value from 8-860 samples/sec can be entered into ADS1115's sampling rate field. The shorter time an ADC needs to capture and transform an analog signal, the higher its sampling rate. A gain amplifier is included in the chip and can boost low-voltage signals by a factor of two to sixteen.
Here's the pinout diagram of ADS1115:
Here's the ADS1115's functional block diagram shown below:

A multiplexer takes the analog signals from the inputs and routes them to a programmable gain amplifier. An I2C bus transmits the results of the ADC's conversion of the amplified signal to a microcontroller.
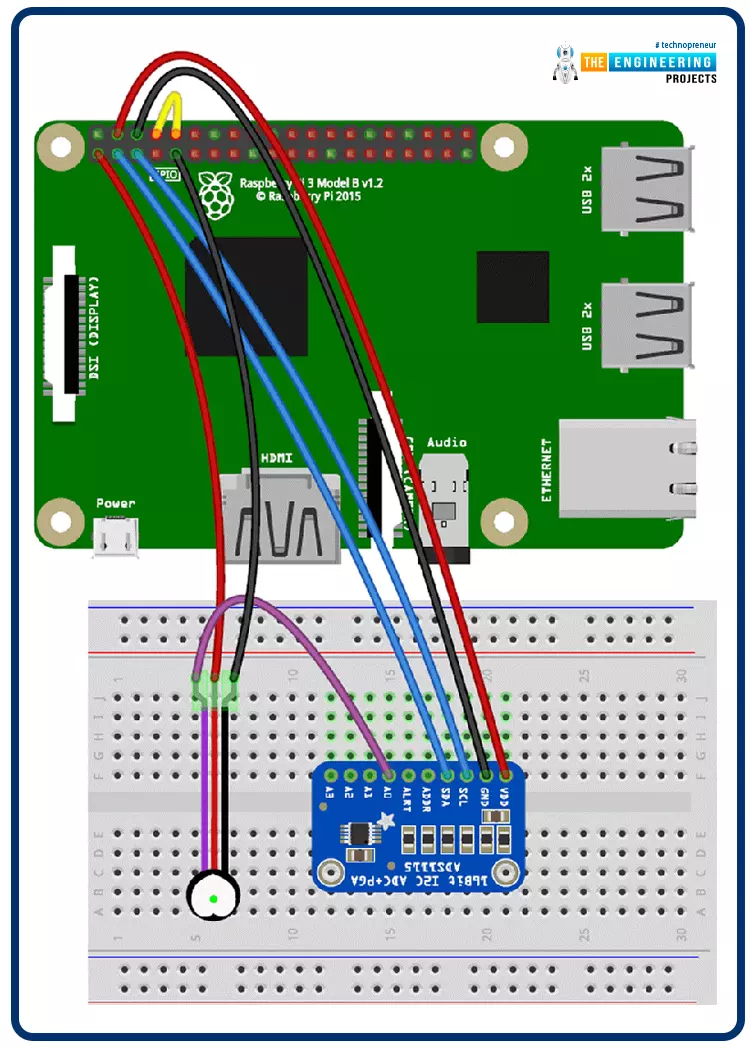
Circuit Diagram of Pulse Rate Sensor with Raspberry Pi 4
- As discussed above, the pulse rate sensor provides analog output, so we need to use ADS1112 to convert the analog signal into an I2C signal, which is then fed to the Raspberry Pi board.
- Here's the circuit diagram of Raspberry Pi Interfacing with Pulse Rate Sensor:
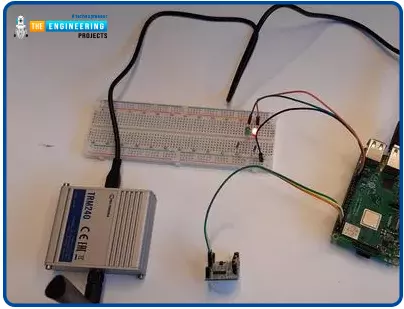
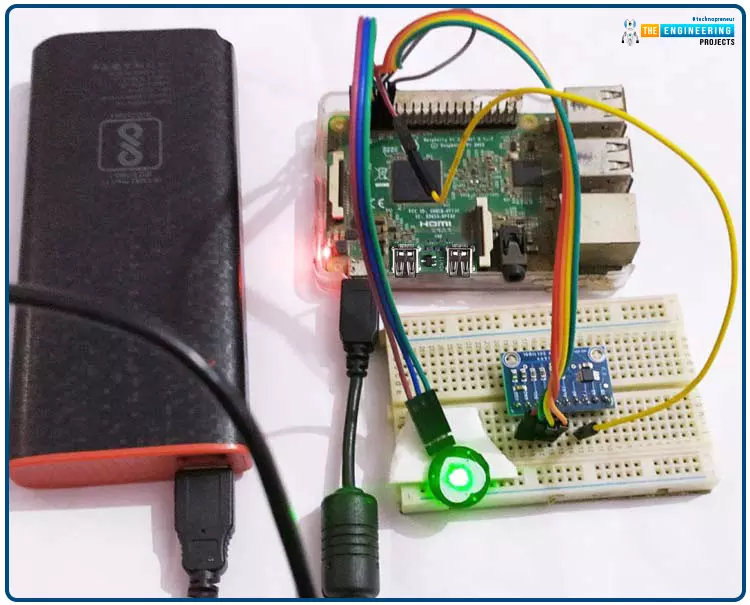
- Here's our hardware setup with RPi4, ADS1115 and Pulse Rate sensor:
Here are the pin connections of the above circuit:
- Pulse Rate Sensor's Signal Pin ===> A0 of ADS1115.
- 3.3V from Raspberry Pi ====> pulse sensor's Vcc pin.
- Connect the pulse sensor's GND pin to the Pi's GND.
- Connect RPI's Ground to the Ground of the ADC Module
- Connect the ADC module's supply voltage to the RPI's +5V.
- Connect the ADC module's SCL and SDA to the RPI's SCL and SDA
Installing Modules in Raspberry Pi
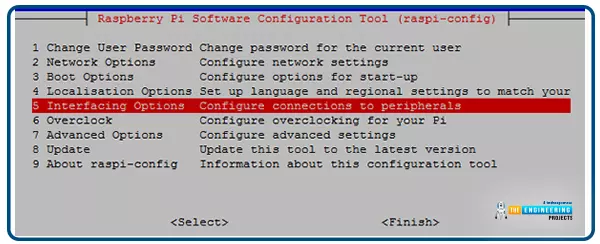
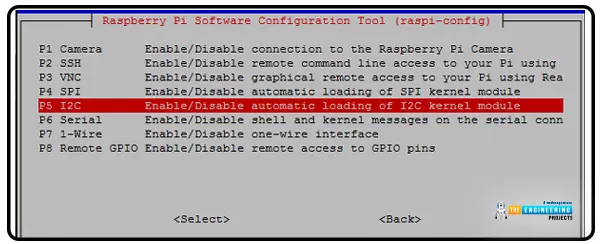
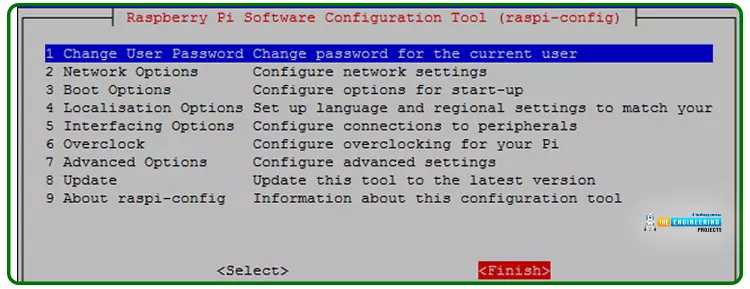
Since the Analog-to-digital module uses I2C for communication, and we'll be using UART for serial communication, we'll need to activate UART and I2C on the Raspberry Pi by running raspi-config in the terminal.

To proceed, click the Interfacing Options button.
Select I2C and hit Enter.
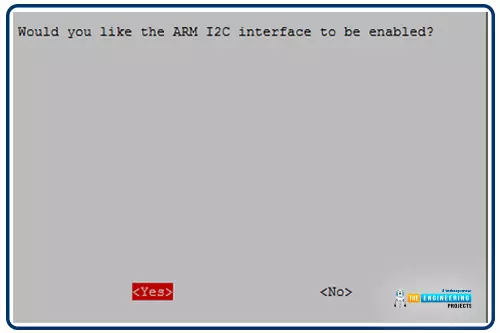
Now, click the Yes button and hit Enter.
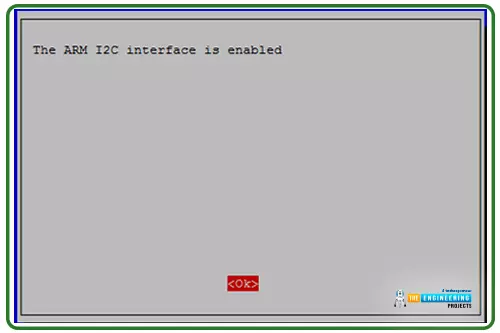
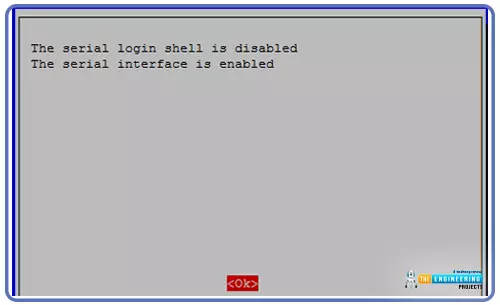
Now, select Ok to proceed.
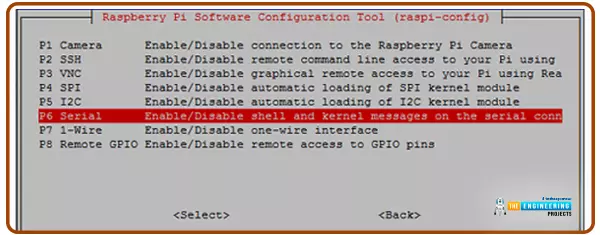
Pressing the Enter key after selecting Serial will activate the serial port.
Select "no" and hit "enter" to turn off the serial login shell.

To activate the serial, click Yes and then hit Enter.

Choose ok and hit enter to continue.
Click Finish and hit Enter to confirm.
When prompted, type "Yes" and hit enter to reboot.

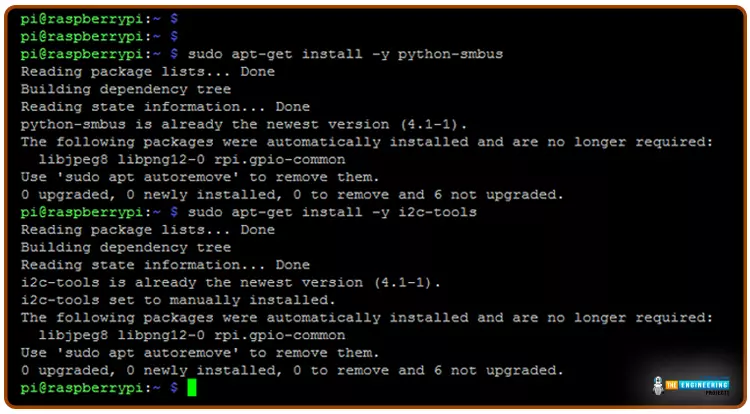
Now proceed to install the i2c packages.

sudo apt-get install -y python-smbus
sudo apt-get install -y i2c-tools
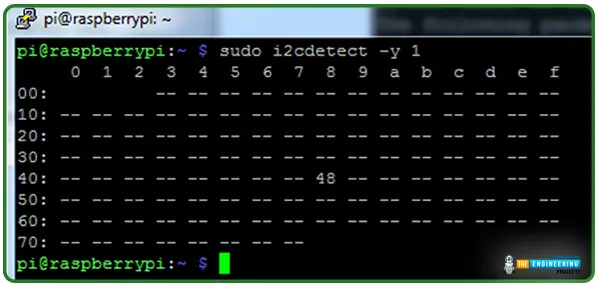
To determine which device is currently connected and to obtain its I2C address, run the following command:

sudo i2cdetect -y 1
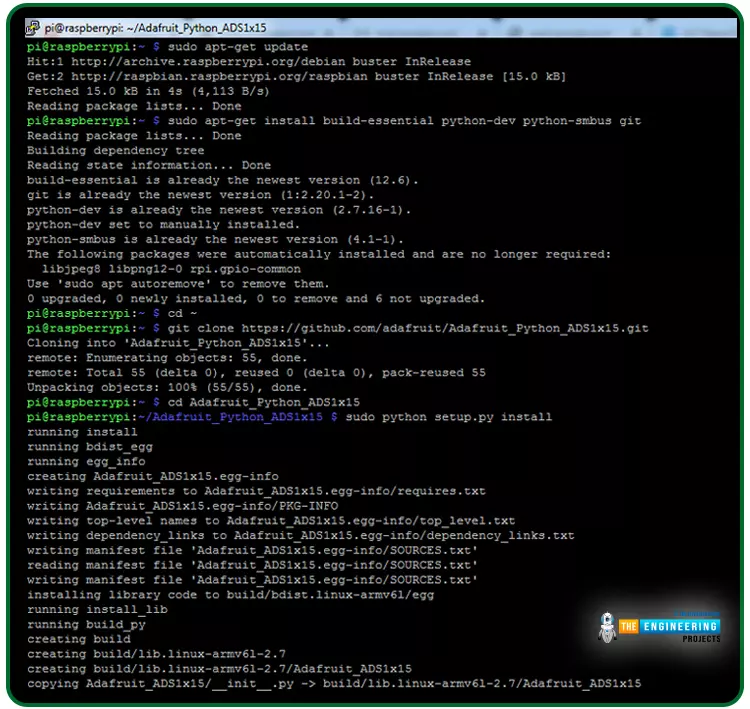
Follow the below lines to install the Python library for the ADC module.

sudo apt-get update
sudo apt-get install build-essential python-dev python-smbus git
cd ~
git clone https://github.com/adafruit/Adafruit_Python_ADS1x15.git
cd Adafruit_Python_ADS1x15
sudo python setup.py install
Processing Installation in Raspberry Pi 4
Now, use the following command to add Processing to your current installation:

curl https://processing.org/download/install-arm.sh | sudo sh
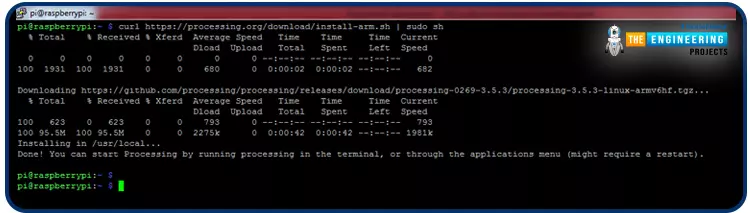
We can now access Processing from the Raspberry Pi's main menu:


We'll use Python and processing codes for the pulse sensor to get the job done.
Python Code for Heart Rate Monitor
This code uses I2C communication to connect an ADC module that provides analogue pulse sensor output. Once the pulse sensor's analogue raw production is obtained, the sensor's higher maximum and minimum peak are located. Then calculate the beats per minute by subtracting the times of two extremes. Additionally, the BPM and raw analogue output are transmitted to a serial port, which is then read by the processing IDE. The complete python code for the heartbeat sensor on the Raspberry Pi is provided below.
While developing this code, we used several modules that we imported at the outset for various applications.

import Adafruit_ADS1x15
import serial
import time
We now have variables upon which to perform analyses and take appropriate measures. Also, we made a serial object.

rate = [0]*10
amp = 100
GAIN = 2/3
curState = 0
statechanged = 0
ser = serial.serial("/dev/ttys0",9600)
Now we use this chunk of code to transmit information to the processor.

def send_to_prcessing(prefix,data):
ser.write(prefix)
ser.write(str(data))
ser.write("\n")
Now we have a pre-programmed function to read the pulse sensor and calculate the heart rate.
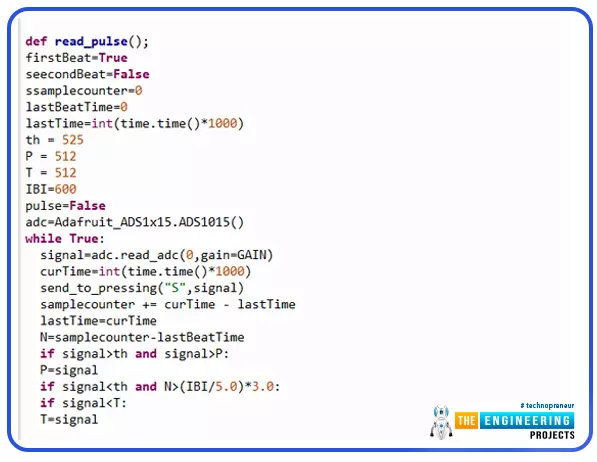
def read_pulse();
firstBeat=True
seecondBeat=False
ssamplecounter=0
lastBeatTime=0
lastTime=int(time.time()*1000)
th = 525
P = 512
T = 512
IBI=600
pulse=False
adc=Adafruit_ADS1x15.ADS1015()
while True:
signal=adc.read_adc(0,gain=GAIN)
curTime=int(time.time()*1000)
send_to_pressing("S",signal)
samplecounter += curTime - lastTime
lastTime=curTime
N=samplecounter-lastBeatTime
if signal>th and signal>P:
P=signal
if signal(IBI/5.0)*3.0:
if signal
T=signal
The complete Python script for this post is provided for you at the end.
Raspberry Pi Heartbeat Value Graphical Display Code Written with Processing
As we saw above, the python code sends a loopback signal to the serial port of raspberry, and the processing code receives that signal. Now we can see the unprocessed analogue input and the beats per minute. Also, the BPM value will be displayed alongside the analogue-value-based graph. We've loaded a few crucial library modules into the processing code.

import processing.serial.*;
PFont font;
serial port
A few factors have been taken into account after this.
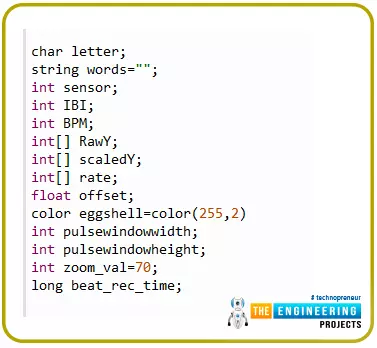
char letter;
string words="";
int sensor;
int IBI;
int BPM;
int[] RawY;
int[] scaledY;
int[] rate;
float offset;
color eggshell=color(255,2)
int pulsewindowwidth;
int pulsewindowheight;
int zoom_val=70;
long beat_rec_time;
Then, we set up the serial port and the default graph in the setup method.

void setup()
{
size(500,400); // stage size
PulseWindowWidth=Width -20;
PulseWindowHeight=height -70;
frameRate(100);
textAlign(CENTER);
rectMode(CENTER);
ellipseMode(CENTER);
RawY=new int[PulseWindowWidth];
scaledY=new int[PulseWindowHeight];
We have parsed the received information at this point in the serialEvent method.
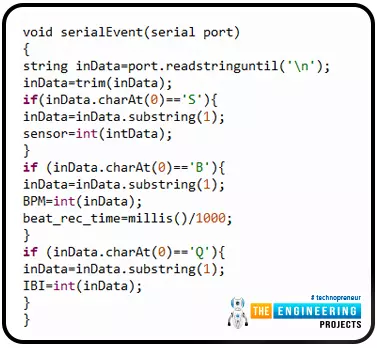
void serialEvent(serial port)
{
string inData=port.readstringuntil('\n');
inData=trim(inData);
if(inData.charAt(0)=='S'){
inData=inData.substring(1);
sensor=int(intData);
}
if (inData.charAt(0)=='B'){
inData=inData.substring(1);
BPM=int(inData);
beat_rec_time=millis()/1000;
}
if (inData.charAt(0)=='Q'){
inData=inData.substring(1);
IBI=int(inData);
}
}
We've plotted the graph by mapping the incoming numbers to the graph's dimensions in the draw function.
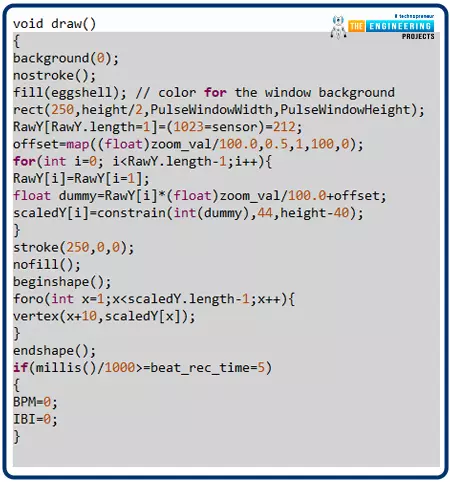
void draw()
{
background(0);
nostroke();
fill(eggshell); // color for the window background
rect(250,height/2,PulseWindowWidth,PulseWindowHeight);
RawY[RawY.length=1]=(1023=sensor)=212;
offset=map((float)zoom_val/100.0,0.5,1,100,0);
stroke(250,0,0);
nofill();
beginshape();
endshape();
if(millis()/1000>=beat_rec_time=5)
{
BPM=0;
IBI=0;
}
The following lines of code are required to display the BPM over the graph.
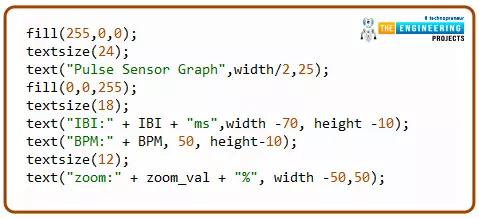
fill(255,0,0);
textsize(24);
text("Pulse Sensor Graph",width/2,25);
fill(0,0,255);
textsize(18);
text("IBI:" + IBI + "ms",width -70, height -10);
text("BPM:" + BPM, 50, height-10);
textsize(12);
text("zoom:" + zoom_val + "%", width -50,50);
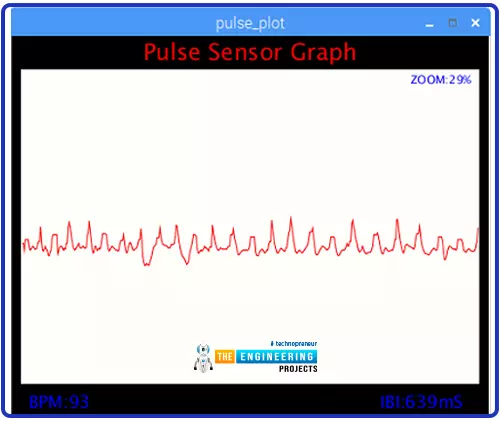
Here, the code also includes a zoom function, allowing the user to selectively enlarge or reduce the size of the shown plot. The pulse plot can be panned around by pressing - to zoom out and + to zoom in. To adjust the setting, we must first click anywhere on the graph and then use the minus and plus buttons.

void Keytyped()
{
if(key == '+')
{
zoom_val++;
printIn(zoom_val);
}
else if(key == '-')
{
zoom_val--;
printIn(zoom_val);
}
if(zoom_val>100)
zoom_val=100;
else if(zoom_val<=0)
zoom_val=0;
}
Thus, using a Raspberry Pi, one may monitor a patient's heart rate and graph the results. This serial data can also be sent to IoT platforms like ThingSpeak for global data sharing if necessary.
Complete Code
import Adafruit_ADS1x15
import serial
import time
rate = [0]*10
amp = 100
GAIN = 2/3
curState = 0
stateChanged = 0
ser = serial.Serial ("/dev/ttyS0", 9600)
def send_to_prcessing(prefix, data):
ser.write(prefix)
ser.write(str(data))
ser.write("\n")
def read_pulse():
firstBeat = True
secondBeat = False
sampleCounter = 0
lastBeatTime = 0
lastTime = int(time.time()*1000)
th = 525
P = 512
T = 512
IBI = 600
Pulse = False
adc = Adafruit_ADS1x15.ADS1015()
while True:
Signal = adc.read_adc(0, gain=GAIN)
curTime = int(time.time()*1000)
send_to_prcessing("S",Signal)
sampleCounter += curTime - lastTime
lastTime = curTime
N = sampleCounter - lastBeatTime
if Signal > th and Signal > P:
P = Signal
if Signal < th and N > (IBI/5.0)*3.0 :
if Signal < T :
T = Signal
if N > 250 :
if (Signal > th) and (Pulse == False) and (N > (IBI/5.0)*3.0) :
Pulse = 1;
IBI = sampleCounter - lastBeatTime
lastBeatTime = sampleCounter
if secondBeat :
secondBeat = 0;
for i in range(0,10):
rate[i] = IBI
if firstBeat :
firstBeat = 0
secondBeat = 1
continue
runningTotal = 0;
for i in range(0,9):
rate[i] = rate[i+1]
runningTotal += rate[i]
rate[9] = IBI;
runningTotal += rate[9]
runningTotal /= 10;
BPM = 60000/runningTotal
print("BPM:" + str(BPM))
send_to_prcessing("B", BPM)
send_to_prcessing("Q", IBI)
if Signal < th and Pulse == 1 :
amp = P - T
th = amp/2 + T
T = th
P = th
Pulse = 0
if N > 2500 :
th = 512
T = th
P = th
lastBeatTime = sampleCounter
firstBeat = 0
secondBeat = 0
print("no beats found")
time.sleep(0.005)
read_pulse()
Output
Conclusion
By collecting data from a wide variety of sources and transmitting it across a global network of the internet as well as other communication devices that are, in turn, linked to cloud services, the system improves the quality of care provided to patients. It allows doctors to respond to medical emergencies more quickly. In the suggested system, a doctor can do a checkup on a patient at any time, from any location. If the patient's value rises over the level, they should see a doctor, and an urgent message will be sent to them through email. Paralyzed patients and those ordered strict bed rest can benefit from this method since it allows their doctors to keep an eye on them from afar using a Raspberry Pi camera. More sensors can be integrated into the system, and the Internet of Things can be expanded so that everything can be accessed instantly. The model can be improved upon and made available as a mobile application so that users anywhere in the world can access it with minimal effort. In the following lesson, we will learn how to connect a PIR sensor to a Raspberry Pi 4.