USART is the acronym for Universal Synchronous-Asynchronous Receiver-Transmitter, and is the advancement of the old UART that was unable to handle synchronous communications; in computers, it deals with the management of communication via the RS-232 interface.
Generally, in the communication between devices, there is a transmitter and receiver that can exchange data bidirectionally, thus it happens for example in the communication between the microcontroller and third-party peripherals.
| Where To Buy? | ||||
|---|---|---|---|---|
| No. | Components | Distributor | Link To Buy | |
| 1 | STM32 Nucleo | Amazon | Buy Now | |
In serial communications, the transmitting device sends information (bitstream) through a single channel one bit at a time. Serial communications are distinguished from parallel communications where the bitstream is sent over several dedicated lines altogether. Over the years, serial communication has become the most used as it is more robust and economical. On the other hand, serial communication requires, compared to the parallel case, a more complex management and control architecture, think for example how a trivial loss of a bit during a communication could irreparably corrupt the content of the final message. To this end, various communication protocols have been introduced over the years in order to improve speed, reliability and synchronization. In detail, three different communication modes can be found: synchronous, asynchronous, and isochronous.
/* Private variables ---------------------------*/ TIM_HandleTypeDef htim2; UART_HandleTypeDef huart2;
/* Private function prototypes -----------------------------------------------*/ void SystemClock_Config(void); static void MX_GPIO_Init(void); static void MX_TIM2_Init(void); static void MX_USART2_UART_Init(void);
Ladder Logic Programming has been derived from relay logic electrical circuits. This language of PLC programming is called ladder logic or LD as it looks like a ladder of many rungs. Each rung represents a line of logic by connecting inputs logically to form a condition on which the output is determined to be on or off. By completing this article, you will have enjoyed understanding the basics of the LD programming language. Consequently, you will have been able to read a ladder logic code and translate the logic in your mind or the electrical circuit between your hand into ladder rungs.
Relay logic control was the old fashion classic control in which input switches and sensors are connected between the hot voltage and relays’ coils to energize these coils and in turn, activate their contacts and thereby connect or disconnect the actuators i.e., motors, lamps, valves etc. You cannot imagine how complicated that control was besides its limitation in functionalities. In addition, it has a huge number of wires and components to achieve a simple logic. Furthermore, there are no chances to change the logic or the sequence of operation without destroying, rebuilding, and rewiring everything from scratch. When it comes to troubleshooting and maintenance, you should be very patient and generous for your time and efforts to pay to keep tracking hundreds of wires and checking up a bunch of components to figure out the problem.
To image the difference between old fashion classic control and PLC, figure 1 shows the case of a very simple process that contains four motors, and four sensors that are connected via four relays and a timer for performing a very simple logic. Let’s say we need to run motor 1 at the start and after a while, we plan to run motor 2 and 4, and at last run motor 3 considering one constraint that no more than two motors can run simultaneously. In addition, sensors will be used as protection to emergency stop motors at any time. Now on the left of the figure, you can see the relay logic control. you can imagine how many components and punch of wiring work for connecting sensors, timers, relays, and motors. On the other hand, PLC-based control shown on the right, you can notice only the PLC and input devices and output actuators are connected to the PLC. To sum up, the number of wires is reduced significantly, the effort of wiring is immensely reduced. In addition, when it comes to modification of logic or process sequence you need to destroy all old wiring and start over rewiring according to the new requirements while you can do this by modifying the program in PLC without touching the wiring. To sum up, PLC reduced the number of components, wires, time of implementation. In addition, the processing is faster thanks to PLC processing and modification becomes programmatically.
Before opening the door to enter our tutorial on ladder logic programming, let’s have a brief idea about how PLC works and what ladder logic program has to do with PLC. Well! Let me briefly say that PLC has input modules, output modules, and a processor. The input modules are connected to input switches and sensors while the output modules are connected to actuators i.e., motors, valves, lamps. And for sure processor runs the ladder logic program that we going to learn here! In the below figure, I have tried to clear it visually.
The processor works in scan cycles, in each scan cycle, it gazes into all inputs and records them in its memory and then executes the ladder logic to determine the new status of outputs and update them and go to the next cycle, and so on. So now you can tell me what ladder logic has to do with this? That is great to hear you say that it is the logical connection between inputs to determine the output status. I really can not wait to go ahead and hit the nails on the head and open the door to let us get started with our tutorial about ladder logic programming. In the below figure, I have shown PLCs of different manufacturers:
Each programming language has a structure and building blocks. The building block of a ladder program is a rung. Yes, rungs of a ladder go step by step to do the designed logic and repeat every scan cycle. Each rung forms a complete piece of logic like one complete circuit. so let us go to know how to form this rung and get to know what components of these rungs and how they are connected logically.
In the above section, we have designed a simple ladder logic program, where we have used just a single input to control our output. These contacts/inputs in their two configurations can be connected in series (AND logic), parallel (OR logic), or negation (NOT) to form logical combinations. In the below figure, I have designed three rungs of Ladder Logic, let's understand them one by one:
In the below figure, you can see a slightly complex Ladder Logic Program, having different components, let's discuss them one by one:
If we define the ladder and its building blocks which are rungs how about the word “logic” the second word in ladder logic? Well! Table 1 reviews the logic gates and their truth table. For you to expect the incoming status of your output based on the status of the inputs and the logical combination pattern. to decide the results logic output ( RLO) which is the status of the logical combination of contacts that precede the output coil. For instance, the AND gate/logic function is applied between two or more inputs when all of the inputs should be true to get the output to be true. On the other hand, the OR gate/logic function between two or more inputs is used when we need at least one of the inputs to be true to get the output to be true.
Let’s see one simple example to understand the reading ladder logic program. Figure 3 shows a very simple complete ladder logic rung that connects a normally open pushbutton to start a motor and another normally closed pushbutton to stop the motor. You can see each component of the inputs and outputs should have an address to be uniquely identified by PLC. For instance:
Now, how do you see your progress so far? I can see you are doing progressively and that’s great. However, we still have a lot to learn to master ladder logic programming. However, we need to set up the environment for simulating a Ladder logic program to be able to validate our programs and enjoy seeing its execution typically as if we have a PLC controller and to verify how far our designed ladder performance matches the real-time execution on the simulator.
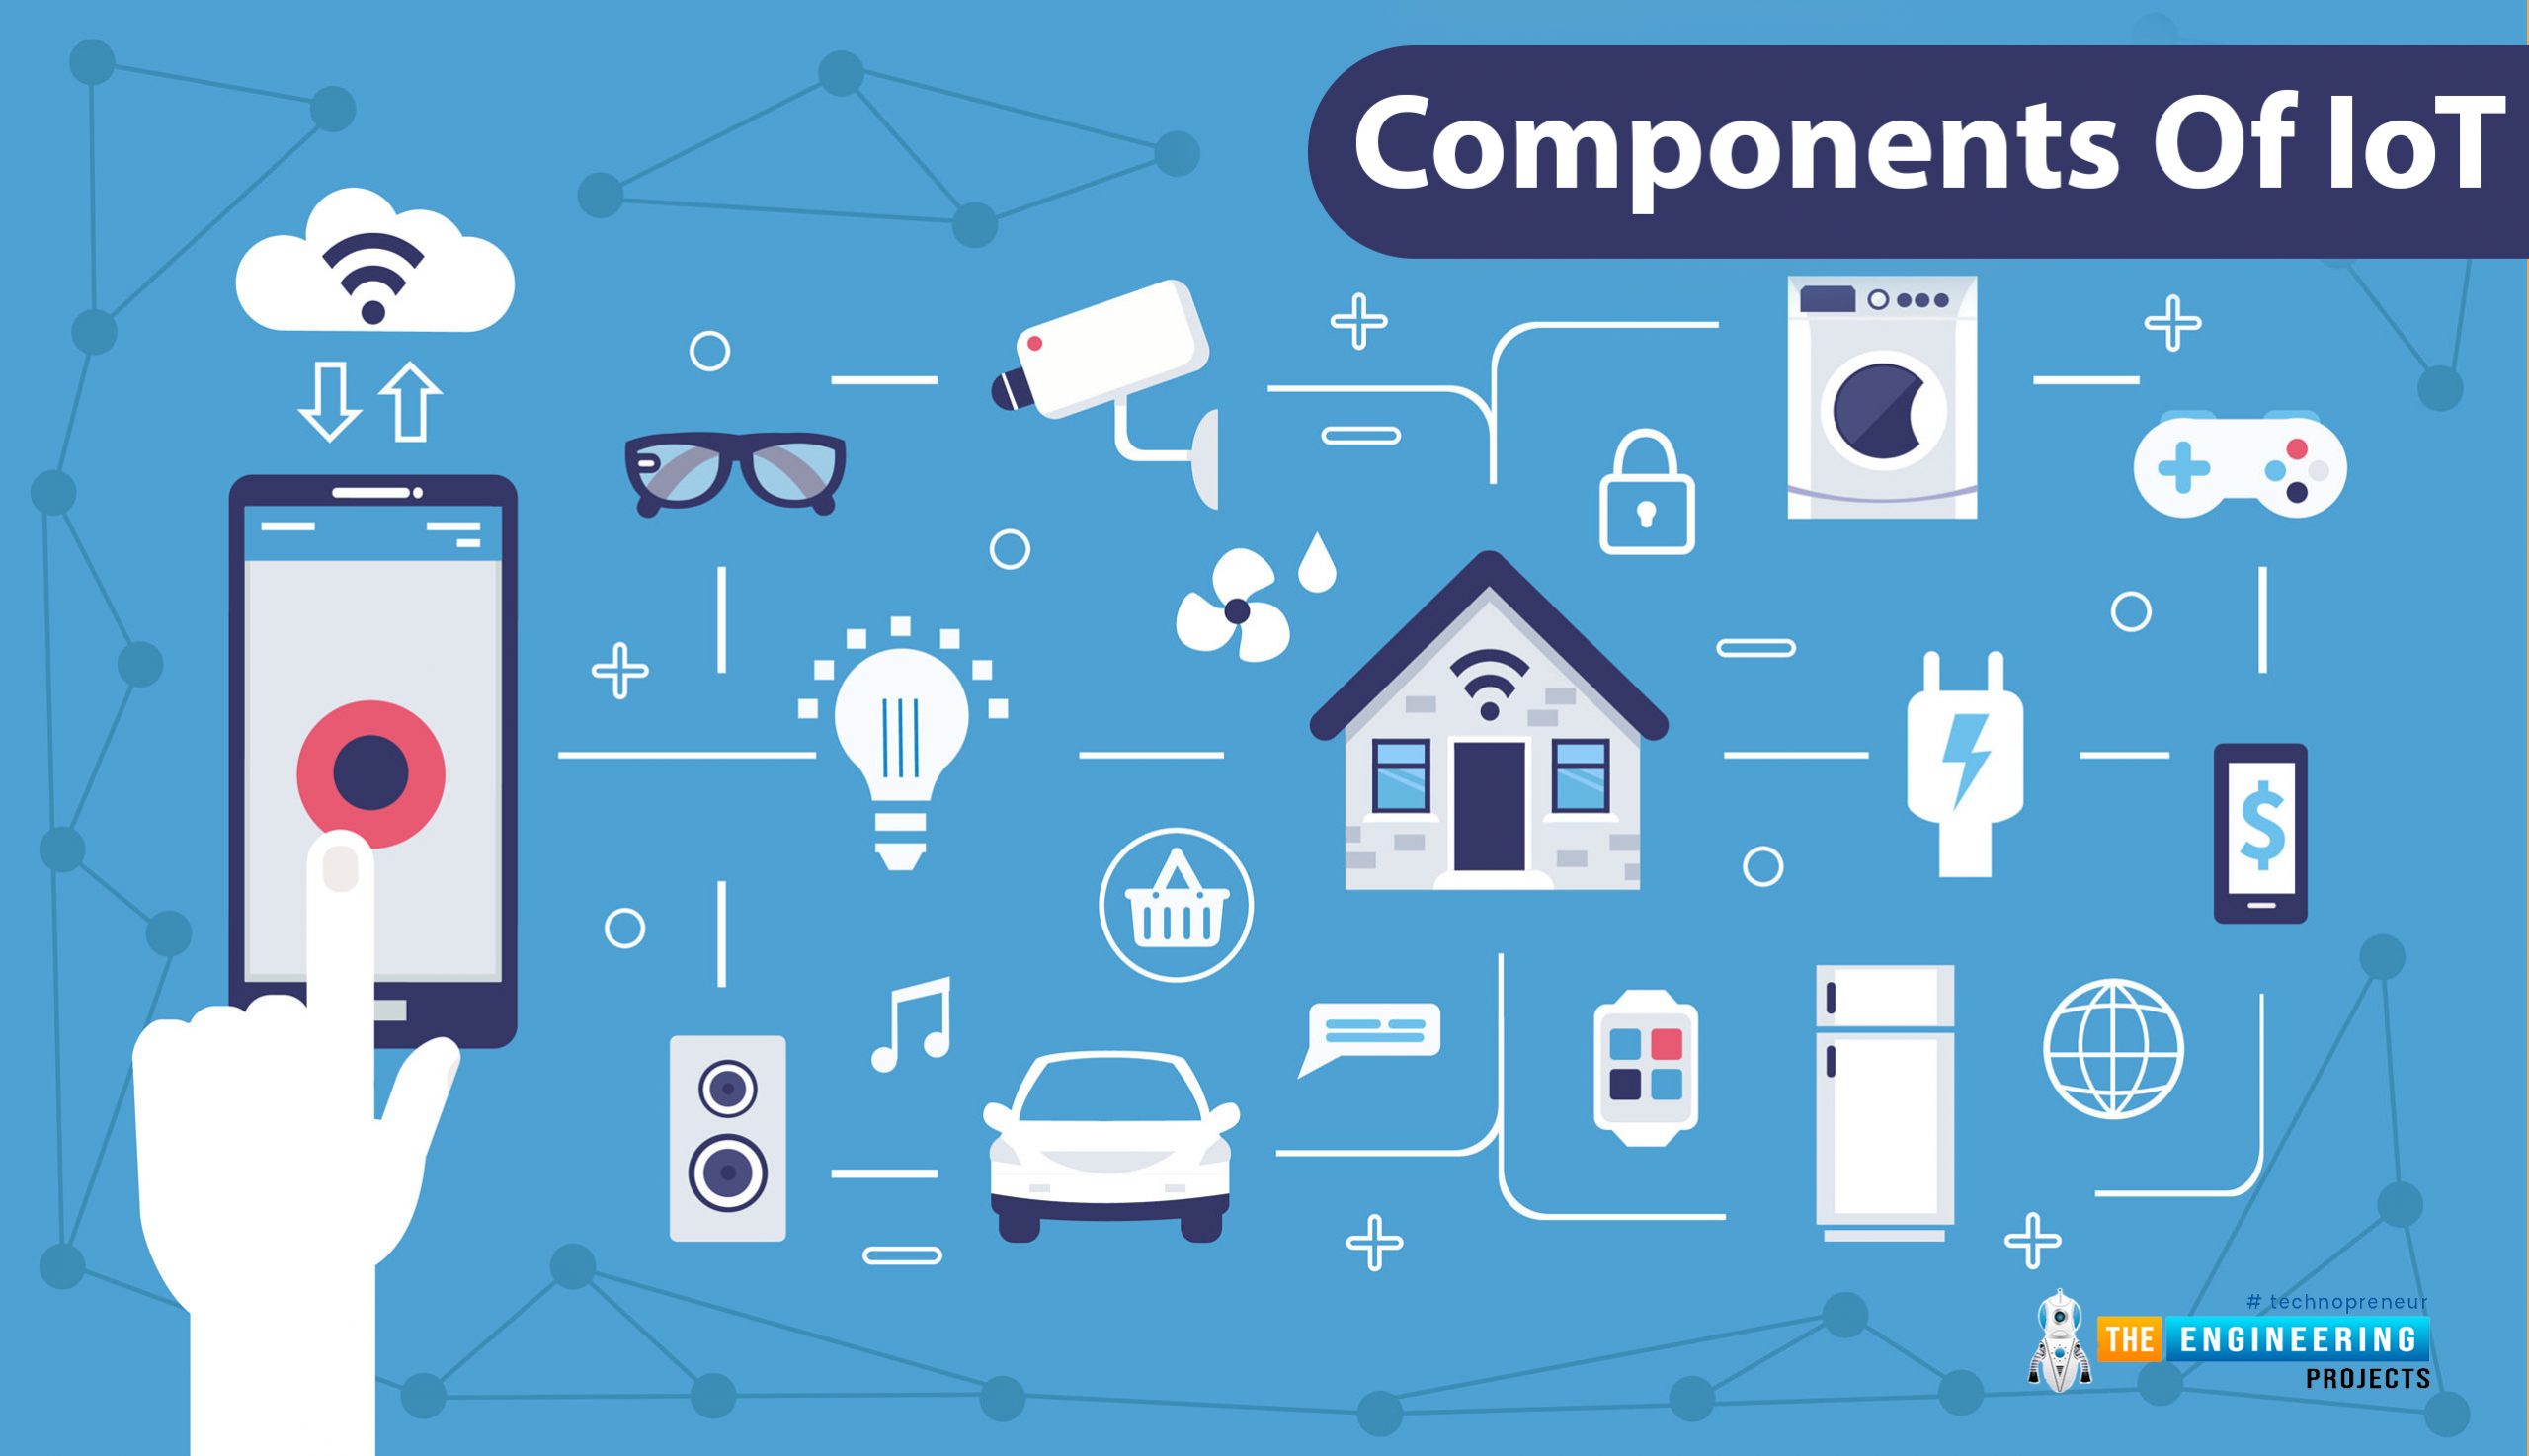
We’ll define what each suggests that within the sections below and the way they are available along to create an entire IoT system. every one of those sections also will function the structure of the remainder of this e-book, and we’ll dive into these parts a lot deeper within the chapters to follow.
First, sensors or devices collect information from their setting. This information may be as easy as a temperature reading or as complicated as a full video feed. We use “sensors/devices,” as a result of multiple sensors may be bundled along or sensors may be a part of a tool that will over simply sense things. as an example, your phone could be a device that has multiple sensors (camera, measuring instrument, GPS, etc), however, your phone isn't simply a detector since it also can perform several actions. However, whether or not it’s a standalone detector or a full device, during this commencement information is being collected from the setting by one thing.
The latest techniques within semiconductor technology are capable of manufacturing small good sensors for varied applications.
A Temperature sensing element senses associate degreed measures the temperature and converts it into an electrical signal. they need a serious role in the atmosphere, Agriculture, and Industries. as an example, these sensors will find the temperature of the soil, which is a lot useful within the production of crops. There square measure many sorts of temperature sensors and therefore the common use is square measure NTC semiconductor unit, Resistance Temperature Detectors RTDs, Thermocouples, and Thermopiles. they're economical, simple to put in and reliable that respond to human action. The RTDs work on the correlation between the metals and therefore the temperature because the resistance of the device is directly proportional to the temperature. The wide used DHT eleven is that the temperature and wetness sensing element, that is that the basic, low-cost, digital, and electrical phenomenon sensing element. No analog pins are needed for this sensing element. you'll get the sensing element from Adafruit that has several offers on this.
A pressure sensing element senses the pressure applied id est, force per unit space, associate degreed it converts into an electrical signal. it's high importance in prediction. Their square measure varied Pressure sensors obtainable within the marketplace for several functions. as an example, if there square measure any water leaks within the residential or industrial areas, a pressure sensing element must be put in to see if there square measure any leaks and measures the pressure. Another e.g., all smartphones, wearables have these air pressure sensors integrated into them.
Next, that information is shipped to the cloud, however, it desires the way to induce there!
The sensors/devices may be connected to the cloud through a range of ways including cellular, satellite, Wi-Fi, Bluetooth, low-power wide-area networks (LPWAN), connecting via a gateway/router, or connecting on to the net via LAN (don’t worry, we’ll justify a lot of regarding what these all mean in our property section). Each possibility has tradeoffs between power consumption, range, and information measure. selecting that property possibility is best comes all the way down to the particular IoT application, however, all of them accomplish an equivalent task: obtaining information to the cloud.
IoT entranceway manages the bidirectional information traffic between completely different networks and protocols. Another operate of the entranceway is to translate completely different network protocols and conformability of the connected devices and sensors.
IoT cloud may be a subtle high-performance network of servers optimized to perform high-speed processing of billions of devices, traffic management, and deliver correct analytics. Distributed management systems square measure one in all the foremost vital parts of the IoT cloud.
Once the info gets to the cloud (we’ll cowl what the cloud suggests that in our processing section)), the package performs some reasonable process on that. This could be easy, like checking that the temperature reading is among an appropriate vary. Or it may even be complicated, like victimization laptop vision on the video to spot objects (such as intruders on a property). But what happens once the temperature is simply too high or if there's an associate trespasser on the property? That’s wherever the user comes in.
So however will processing work? the method typically follows a cycle that consists of 3 basic stages: input, processing, and output.
To keep this text straightforward, we tend to don't seem to be progressing to dive deep into the technical details of the stages of the knowledge process. Instead, we’ll offer you a general and straightforward rationalization of every stage.
Input is that the 1st stage of the info process cycle. it's a stage within which the collected information is born-again into a machine-readable type so a laptop will method it. this is often a vital stage since the info process output is captivated with the input file (“garbage in – garbage out”).
In the process stage, a laptop transforms the information into data. The transformation is administered by victimization completely different information manipulation techniques, such as:
Information is classed into completely different teams.
Analytics is that the method of changing analog information from billions of good devices and sensors into helpful insights which may be taken and used for careful analysis. good analytics solutions square measure inevitable for IoT system for management and improvement of the complete system.
In the previous discussion, we've got lined however information is collected by sensing element devices, sent to a cloud service via a network answer, and reworked into helpful data. The very last thing we'd like to try to do is to deliver the data to the tip user. this is often done via program (UI).
The program consists of the options by that a user interacts with an automatic data processing system. This contains screens, pages, buttons, icons, forms, etc. the foremost obvious samples of user interfaces square measure software and applications on computers and smartphones.
A program doesn’t essentially need a screen, however. as an example, a TV remote contains a program that consists of varied buttons, and devices like Amazon Echo will be controlled with voice commands. A term that relates closely to the program is that user expertise (UX). The distinction between the 2 is that, whereas UI should do with the items a user truly sees and interacts with, a married woman is that the overall expertise a user has with a product. It includes the website, application, packaging of hardware, installation, etc. married woman may not even be concerning your UI style.
There square measure some ways by that a user will act with associate degree IoT answer. Again, as we tend to see with sensing element devices and property, the selection depends on the utilization case. Here, we’ll take a glance at a number of the foremost usual choices. The most usual case in IoT applications is that we would like to receive notifications or alerts if one thing uncommon happens. as an example, if a producing machine’s temperature exceeds a threshold limit, we might prefer to get notified of this. the data may be delivered via email, SMS, phone call, or push notification.
We might wish to be ready to monitor data proactively. as an example, if we tend to have an associate degree plus chase answer keeping track of our vehicles, we would wish to observe the vehicles’ location even though nothing uncommon happens. we tend to might use a mobile or laptop application to observance the data.
The program also can enable the user to regulate the IoT system remotely. as an example, the user might modify lights or put off heating via a mobile application. this might even be done mechanically by applying itself in step with the rules given thereto.
It is a challenge to make associate degree intuitive UI (and UX) for one app alone, however, IoT applications take the complexness to an entirely new level. Let’s take a glance at a number of the problems we've got to require into consideration once planning UIs for IoT.
An IoT system consists of sensors/devices that “talk” to the cloud through some reasonable property. Once the info gets to the cloud, package processes it so may conceive to perform associate action, like causing associate alert or mechanically adjusting the sensors/devices while not the necessity for the user. But if user input is required or if the user merely desires to visualize in on the system, a computer program permits them to try to thus. Any changes or actions that the user makes area unit then sent within the other way through the system: from the computer program to the cloud, and back to the sensors/devices to create some reasonable modification.
Our “How IoT Works” series is returning to associate degree finish, however, let’s take an additional example that covers the total method.
Let’s imagine we tend to square measure managing the grocery cold chain. we would like to form positive our groceries square measure unbroken in a very appropriate temperature, and that we conjointly wish to trace the placement of the truck transporting the groceries. The steps (1–4) of our IoT workflow square measure are pictured below.
First, we tend to collect information concerning the temperature and therefore the location with our sensing element devices (step 1). at the moment we tend to use a network answer to send the info to a cloud service (step 2), wherever the info is reworked into helpful information via processing (step 3). Finally, the data is delivered to the tip user via the program (step 4).
We hope you have got enjoyed our “How IoT Works and its component” series!
Before discussing the double layer PCB. we must have an idea about what’s PCB.
PCB is an abbreviation of printed circuit boards. PCB may be a sleeky chip created by compound epoxy glass fiber or laminated completely different substances. It includes a plate of insulated substantial and a sheet of copper foils coated to the substrate.
PCBs are classified according to their number of layers and holes on them. There are three types of PCB depending on the number of their layers.
Now to move our attention back to our article which is double layer PCB
A double-sided PCB is also known as a Two-layer PCB is a kind of PCB that has a copper layer on both sides aboard. Here copper layers means the conductive layers. Simply we can say that it Comes with two conductive patterns on two sides of the base material which is called the substrate. The pattern on the sides is connected using a connection bridge which is known as VIA.
Via is a hole in the vertical direction on the PCB board which is filled with metal foils due to which we connect the writing patterns.
There are two types of double-layer PCB.
Following steps are included in making a PCB:
Double-sided circuit boards are one of the foremost well-liked kinds of PCBs. They allow makers to supply a lot of advanced circuits which may have profit uses in higher technology applications.
In the end, we concluded that double-layer PCBs have two layers than a single layer which has one layer. Due to advanced technology requirements, we need double-layer PCBs. Double layer PCBs are less costly but they have innovative features than single layer PCBs. This worthy feature is the demand of the modern era. Double layer PCBs have worthy applications. It also has some drawbacks which demanded that we have to develop PCBs that are effective than double-layer PCBs. You always need to opt for which kind of PCBs you would need.
That’s all for today’s article. I hope you've got enjoyed the article and built a grip on the understanding points. However, if you continue to face any skepticism concerning double-sided PCB then please be at liberty to depart your queries within the comment section. I'll give a solution to those inquiries to the simplest of my data and researching skills. Also, give North American country along with your innovative feedbacks and suggestions you improve the standard of our work and supply you content in keeping with your wants and expectations. keep tuned! thanks for reading this text.
There are a few necessary things to remember especially for those parents who would like to be involved in the engineering homework help of their kids themselves. And these are important not only from the psychological perspective but also from the perspective of mutual work and family cooperation when it comes to attention. Here are these tips:
Finally, in my opinion, it is always more effective to hire an expert rather than do the homework with a kid. To know where to hire such a person, you have to find a website that would give you guarantees, good offers, and enough information to trust.
There are the main pros one will avail oneself of while choosing to apply for online engineering homework help at AssignEngineering.
Regarding the process of forming an order, it is simple and quick. You have to go online and fill in the data about your future order. There, you have to mention the academic level, the number of pages, the type of expert, and so on. You will see these fields when you click on “order” on the website. Keep in mind that the deadline, the type of writer, and the volume of the assignment you would like to order will influence the final price. That is why think of it beforehand and prioritize what is actually important for you in the future order.
Still, a small tip: the closer the date of the deadline is, the more expensive a task will cost. Enjoy this service and know this to feel even more comfortable!
We know that you already have a great understanding of the C# programming language. But, we want to begin the article with a brief introduction to the C# so that you have no confusion regarding anything.
C# is an exceptional, object-intended programming language that allows programmers to create a wide range of secured and reliable programs that run on the.NET platform. Programmers may develop Windows consumer applications, different programming elements, XML online assistance, and data technologies. It assists pointers, harmful software, and interoperability function for storage management. Also, C# language facilitates the client in performing all tasks comparable to that of a C++ program.
Some of the many features of the C# programming language are listed below:
The most awaited section of the article is here: OOP in C# programming language. What Is OOP, and what is its importance? All the answers to your queries are here. So, please start taking notes!
OOP means Object-Oriented Programming. Object-oriented programming is basically a coding structure in which systems are arranged around components rather than action and reasoning. It is a creative approach that employs a unique collection of computer languages like C#. Mastering OOP principles can assist you in deciding how to develop a program and which programming language to utilize. Every component within OOP is organized as self-contained Objects. The term Object shall be described in the upcoming sections.
The concept of OOP has high importance in computer science. It has exceptional features that have been benefitting us for several years. Please note down every point discussed in this section. Let us have a look at the features of OOP:
The above features are just an overview of what OOP programming languages like C# can offer the programmers. More details are on the way in this article. So, get ready precious readers!
Objects are the fundamental components of a C# OOP system. A collection of datasets and procedures is referred to as an Object. The files and the strategies are named members of an OOP object. Objects are created within an OOP framework. Methods allow these items to interact with one another. Every object has the ability to accept and transmit messages, as well as execute data.
While a class is a group of values and actions, it is a template that specifies the dataset and functionality of a form. Unless a class in OOP does not define a constant, you must build an example of the category that explains the operations that may be executed on it. In simple words, Objects are examples of an OOP class. The strategies and factors that comprise a category are referred to as members of that class.
We may describe a C# class utilizing the class magic word and the class content surrounded by a set of curly brackets, as seen below:
The main building components of the OOP C# class are depicted in the image below:
The main section of the entire article is here: OOP Concepts In the C# Programming Language. Mastering the OOP Concepts is not a child’s play if you are a beginner. That is why you must pay extra attention to this section. If you do so, we promise that you will not face any difficulty. Let us begin:
There are four main OOP concepts in the C# programming language:
The details of each concept are:
Encapsulation is a principle within object-oriented C# coding that enables developers to enclose data and script excerpts. You may isolate the representatives of a particular class from some other category by utilizing encapsulation software. It is the equivalent of packing a rational object within a bundle. Only pertinent information is accessible and viewable from the outside, just to particular people.
Access Specifiers are used to enforce encapsulation. In the C# programming language, the Access Specifier is utilized to specify the category member's transparency and ease of access. The access Specifiers within the C# programming are as follows.
The accessibility and its properties are determined by these specifiers. It enables you to keep the data accessible in one section of the script while hiding it from the other parts. Private and Public are the two most prevalent types.
Polymorphism comes from the Greek word, which implies various forms. Morph denotes different forms, and Poly indicates numerous. It enables many implementations of the identical class to exist within C#. Polymorphism is classified into two categories:
Let us discuss each in detail:
Static polymorphism is another name for compile-time polymorphism. Compile-time polymorphism can be implemented in a number of methods, one of which is procedure overloading. It is named after the fact that the procedure calling choice is made during the compilation process.
It is accomplished by using a similar method title but giving different variables. In method stacking, the software first verifies the argument used and then selects which way to execute depending on the collection of parameters. An example code is as follows:
An applicable example of Compile-type Polymorphism is also mentioned below so that you can have a better understanding.
The second category of Polymorphism is Run Time Polymorphism. If both the procedure title as well as the procedure declaration contain similar title and inputs, it is known as dynamic polymorphism or Runtime polymorphism. This type of polymorphism is exemplified through procedure overriding. It enables the developer to design an abstract type with the only limited implementation of the standard. An example code to explain Runtime polymorphism is as follows:
We would receive the following result if we execute the above software:
The OOP approach in the C# includes Inheritance as the main component. We establish parental relationship categories within inheritance. The kid category can acquire all the strategies, items, and attributes of the parent category. A kid category may also include its own design and operations. The parent category is also called a foundation class. The example is:
In the above script, we feature a class called Program that has only one operation. Then we have an additional category Execute, which is derived from Software. Rather than establishing an object example for the Program, we have produced one for the category Execute. As a result, the outcome will be:
Many inheritances are not supported in the C# programming inheritance. Therefore, one category cannot gain from multiple categories. But, one category may descend from another category.
Last but not least is Abstraction. Abstraction enables the coder to show the public only the information that is required whilst disguising the rest. The Abstract category and method in the C# language are used to accomplish abstraction. The Abstract prefix may be used to define a category as an abstract data type. In the C#, the Abstract category is typically the hierarchy's root class. They are distinguished from the remaining classes by the fact that they may not be created. Inheritance is required for a C# abstract data type.
An example of Abstraction is:
We understand that all the above concepts might be a little challenging for you in the beginning. But, we will make you an expert, and all of this will be a piece of cake for you.
The most common question asked the C# novice beginners is that why is OOP required in the C#? The answer to this is quite simple but, we want you to have crystal clear concepts regarding OOP. That is why we added this small section.
The idea of OOPs is required if you wish to symbolize real-world items inside coding languages like C#. It helps to manage a company by accomplishing Reusability, Expandability, Elegance, and Supportability. OOPs establish basic ideas, and by applying them, we may create real-world items in a computer language that are reusable, extensible, simple, and maintainable. Objects include both live and non-living objects. So, utilizing the OOP principle, real-world things like people, animals, bicycles, computers, etc may be created in object-oriented coding languages. It is also the main reason why developers prefer C# instead of other languages.
Now, you might have this question in your mind as well. So, we have the answer right here. Real-world items are required in a program because they are a major component of our company. We should construct business-associated real-world items in the initiative because we are creating programs (technology) for managing the organization.
To organize the Bank Company, for instance, you will need to generate real-world items like a client, a director, a receptionist, an administration officer, a brand manager, a laptop, a copier, and furniture. In addition to the Bank property, you should also build all of the banking items because it is impossible to operate a Banking company without the items. The above items are referred to as commercial objects in scientific terms.
In this article, we discussed the most crucial topic in the C# programming: OOP concepts in the C#. From the definition and features to the four fundamental OOP concepts, we discussed each detail thoroughly. We know that the concepts might be complicated for you in the beginning. But, you will be an expert in no time. With passion, hard work, and sheer determination, you can achieve everything in this world. If you feel that the concepts are still unclear, you can always read the article again. It is available for all our precious readers on our website 24/7. Best of luck!
C# is a Microsoft-developed, overall object-intended coding language that has been certified by the ECMA and the Global Standards Organization. C# is developed for the Standard Language Environment. It includes executable software and an execution context that enables the operation of greater-level languages on many computer systems.
C# is a frequently utilized commercial language for the following causes:
These are the reasons why the C# programming language is used worldwide.
Although C# is an object-intended coding language, the features closely resemble classic high-level dialects like C++ and C. It shares a lot in common with the Java language and has a lot of powerful coding capabilities that make the C# appealing to a lot of developers all over the world. The list below consists of some of the features of C#:
In simple terms, it has made our lives a lot easier in every respect, thanks to Microsoft and the inventor Anders Hejlsberg for this long-term discovery.
The most awaited section of the article is here: Data Structures in C#. Please read thoroughly if possible, note everything down to have a better understanding of the topic. Let us begin:
The data structure is indeed the core of any coding language. All advanced data structures were manually programmed within the C programming era like the stack, linked lists, queues, etc. Developing code necessitated not just a thorough understanding of the data structures, but additionally, a significant amount of time spent implementing and evaluating them. Now, with advanced coding languages, these are all usable in a few minutes.
So, Data Structure is basically a method to save and organize data within the system so it could be utilized quickly and productively. It is primarily about ways to develop, evaluate, and apply "optimal" algorithms. As a result, the data structure is among the most primitive and core idea within computer science for solving computer issues. It is crucial in the creation of programming logic.
A structure declaration begins with the prefix Struct and features the structure title. The structure's content is then surrounded by curly brackets. It can comprise a variety of data elements of various types. The following is the format for a structure description:
In simple terms, the method to execute a data structure is to create its ADTs initially, then proceed with the operation of the data items. We may state that we must first create a scientific and conceptual model before implementing it over data items. We know you might be thinking that it is quite complicated. But, it would be a piece of cake if you try it once. We will take a closer look at it in our upcoming sections.
We discussed the term ADT in the above section. ADT is a new term for you. So, you might think what is ADT? Abstract Data Types (ADT) is the data and actions that make up the data format. The best thing about ADT is that we do not provide any execution of data types or methods. ADT, we might conclude, offers Data Abstraction. It is more concerned with "what a database format does" rather than "how well a data structure is doing it."
Finally, there is another concept related to the data structure, and it is the execution. It refers to a practical version of a collection in which components can be stored, retrieved, and modified. It is just a term that you should know about C# programming.
Now, it is time for you to know about the types of Data Structure in the C# programming language. Make sure to take notes of all the points mentioned in this section. There are mainly two types of Data Structure:
Let us discuss each type in detail. So, start taking notes!
The primitive data structure can be effectively handled by machine instructions. It is why the platform and processor have established it. Primitive data structures come in many types, as depicted in the diagram above. Some of these are:
A few of the most common primitive data types and their value ranges are:
The code script for the declaration of primitive type variables is:
Now, let us move to the second type of data structure in C#.
The second type is the Non-primitive data structure. The non-primitive data format cannot be effectively managed by machine operations. The Primitive data structure type is the foundation for the Non-primitive one. Non-primitive data structures come in two forms:
Now, we will discuss both of these in detail:
The first type is the linear data structure. Linear data structures are the structures where data components are saved and arranged in a linear way, with each data unit linked to the next as a path. For instance, linked list, array, stack, and queue. We will discuss these examples in detail below.
Non-linear data structures are the opposite of the linear data structure. The structures where the data components are not arranged in a continuous pattern are called non-linear data structures. A data item may be linked to any particular data item. Examples are graphs and trees.
When we study the C# programming language, we must study each term and its types in detail. These may seem a bit complicated to you at the moment. Once you start operating in the C# programming, you will say it is not rocket science at all. So, below are some of the subtypes of non-primitive data structures:
A Stack is basically a data architecture that uses the LIFO (last in, first out) technique. The components that were submitted lastly would become the main ones to appear in the display. There are two actions on the stack which are:
The Push strategy utilizes a component and places it within currentIndex and collection. It tracks the component's current address. When currentIndex approaches the span of the collection, the capacity of the collection is grown by one. It can be seen in the script below:
The pop technique eliminates the component that was placed initially. Whereas, the currentIndex and the pointer are changed to the preceding component. Also, the set is made smaller. The script is as follows:
The queue is generally a data model executed within the .NET Platform in two forms. The FIFO (first-in, first-out) concept governs queue systems, with the first item input and output.
The code script utilizes the simplest queue System. Collections class is as follows:
The next subtype is the Linked List. The Linked List is a data model that is represented as a generalized dataset in System.Collections.Generic within the.NET Platform. These architectures work on the concept that every component in the collection has a connection to the subsequent node, with the exception of the end. It is because the end has no connection to the subsequent node.
Hashtable is another data structure used in the C# that is represented in two different forms within the.NET Platform:
It is advisable that you utilize Dictionary rather than Hashtable because the operating premise of both is to create a hash that is inserted within a collection utilizing polynomials. The difficulty of exploring inside a Hashtable or Dictionary is duration O(1).
Some of the applications of Hashtable are:
The above subtypes might look complicated and confusing. But, they are among the easiest things in C# programming.
We want our readers to be the best programmers out there that is why we added this brief section of Data Structure Operations in the C# programming language. Many data structure actions are utilized to handle the data within a data model. These are listed below:
These were some of the operations of Data Structures in the C# programming language. We hope that you have noted these down. Now, you are ready to operate your C# programs without any errors.
In this article, we have discussed Data Structures, their types, and subtypes in the C# programming language. We have also added some operations of Data structures so that you do not have any confusion regarding the terms and types of Data Structures within the C# programming.
We understand that all of this might be tough for you in the beginning, and you can also face some problems. But, you can always visit our website and read all the articles regarding the C# programming language. We promise to help you in every way, and in no time, your name will be on the list of the best C# programmers in the world. Best of Luck!
Happy C# Programming!
C# (short for "C Sharp") is a type-secure, object-intended coding language. C# allows programmers to create a wide range of safe and robust .NET programs. It is a programming language related to the C series of programming dialects and is closely associated with Java, C++, JavaScript, and C developers. It is a component-intended coding language and language structures that closely enable these notions, making C# programming a simple language for developing and deploying programs. C# has evolved to accommodate new loads and program design methods.
The C# programming language may be utilized to create a wide range of programs and applications like smartphone apps, Microsoft Store, and Business applications in addition to Desktop and Online programs. It can also help you create reports, tasks, and extensions from the SQL Administration system. Some applications that the C# can develop are listed below:
The above are a few examples of the C# programming language applications. It has benefitted us a lot. In fact, the program where I am typing right now (Microsoft Word) is an excellent application of C# programming.
The most awaited section of the article is here: Loops and Arrays. You might be thinking about these terms and their importance in the C# programming language. In simple words, it is crucial to understand and know about loops and arrays because they are a key to the C# programming language. Some programmers who learn to program online do not have a great understanding of these terms. As a result, they make errors and mistakes in their codes. But, we want you to know everything about C# programming so that you can work efficiently. Please start taking notes now!
You might find yourself in a situation where you have to run a section of code multiple times. Generally, the lines in a program are performed in order: the initial code statement runs first, then the next, etc. Different command structures are available in coding languages, allowing for more sophisticated execution routes. So, loops are one of those command structures.
Loops are utilized to repeat the execution of one or even more expressions until a requirement is met. There are various loops in the C# programming language that is:
Let us discuss the loop types in detail:
The For Loop processes one or many statements numerous times as far as the looping requirement is fulfilled. The content of the For loop is processed if the iteration state is true. Or else, the command flow switches to the subsequent sentence following the For loop.
Below is a chart that illustrates the execution of the For loop:
The setup is finished first, as shown in the above figure. If some loop values are present, it defines and configures them. After that, the situation is analyzed. The loop core runs if this value is true. However, if it is untrue, execution moves to the subsequent statement following the For loop content. Following the operation of the looping body, the loop values are modified. The state is then double-checked, and the process proceeds.
The syntax of the For Loop is next:
The outcome of the above code is:
The next type is the While Loop. Loops run single or multiple statements indefinitely as far as the sequencing condition is satisfied. The content of the For loop runs if the iteration value is satisfied. If not, then the command transfers to the subsequent statement. An illustration that proves the stream within the while loop is:
From the above illustration, the criterion is verified initially. The loop content is performed if the applied condition is correct. Control moves to the succeeding declaration if somehow the condition applied is untrue. The most important feature of the while loop is that it would never execute its operation if the stated condition is not true in the first round of evaluation. Just like the For Loop, the command jumps over the iteration and moves to the new sentence.
Below is the format code of the While Loop:
The following is a script that explains the While Loop:
The following is the result:
So, While Loop is of great importance in the C# programming language.
The next type that we are discussing is the Do-while Loop. Like other loop types in the C# programming, the Do-while Loop runs more than one statement numerous times if the looping requirement is met. It is identical to the preceding While loop, except that the While loop's evaluation state is always at the beginning of the cycle but, the Do-while loop's evaluation state is always at the conclusion. So it runs once invariably. The below chart explains the Do-while Loop execution.
As seen in the picture above, the initial timed loop element executes immediately. It is because the trial requirement is at the end. The situation is examined. If accurate, the loop content runs once more, and if not, then action flows onto the subsequent statement. The following is the code for the Do-while Loop:
The outcome is:
The next one on our list is the Nested Loop. It is different as compared to the others. Nested loops are the loops that are stacked inside each other. While loops, Do-while loops, and For loops may all be used to form Nested loops. The following is the format for Nested loops:
The result of the above-mentioned script is:
Last but not least is the Foreach Loop. This type is completely different from the ones discussed above. The Foreach loop runs a single or multiple statements for every component in an example of the class Systems.Collection.IEnumerable or Systems.Collection.Generic.IEnumerable<T> interconnection. The following is a script that displays the Foreach Loop:
The result of the above software code is:
We understand that the Loop types are a bit confusing for novice programmers but, you will find these a piece of cake once you become a professional. You must note all the points we discussed above to avoid any errors.
Now that you know everything about the loops in C#, it is time to move to the next section: Arrays in the C# Programming Language. So, grab your paper and pen to note every detail!
An array is a method of saving data that you may access as far as you remember its location within the arrays. These are zero-indexed. It implies that if you want to return to the placement of a number saved, you begin at zero and work your way till the end. There are many arrays in the C# programming language.
Some of them are listed below:
Let us discuss these as follows:
The first type of array on our list is the One Dimensional or 1-D Arrays. They are composed of a unified row with several pieces as desired. The code below can be used to define these arrays:
Let us explain the terms:
The following is the script for initializing the array:
The same is the case with the above script.
Assigning numbers in an array can be done in a variety of ways. The following are a few of them:
Now that you know the terms used in the array codes, let us have a look at the program defining 1-D arrays below:
The outcome is:
The next one is the Two-dimensional arrays. 2-D arrays comprise columns as well as rows. Every component is named as arr[i,j], in which j is the sequel of column and I is of row indexes. Arr is the title of the 2-D array.
This syntax is used to define 2-D arrays:
The terms are defined below:
Let us have a look at the code script that explains the 2-D arrays in the C#:
The result of the software is mentioned below:
Param arrays are utilized when the quantity of parameters is not specified in a code. As a result, the client can provide as many parameters as they like. The following is a script that shows Param arrays:
The following is the conclusion:
Now that you know about the types of arrays used in the C# programming language, it is time to dig more. Get Ready!
Arrays may be transferred as constants to operations. Consider the following:
The array (arr) is given to the operator func() in the above case. The following is a script that shows how to send arrays to operations:
The result is as follows:
You have learned how to send arrays to programs in the previous section. So, we have added a section of a few examples of array operational processes:
The input code script is:
The output is:
The Intersect() function in C# can be used to intermingle two arrays. The input code is as follows:
The result is:
The third example is the hybrid arrays. In the C# programming, hybrid arrays are a perfect fusion of multiple dimensions and irregular arrays. These are presently deprecated, as the .NET 4.0 upgrade eliminated them. The following is a script that displays mixed arrays:
The result is as follows:
We understand that you might be a little scared when you first look at the codes. But, everything becomes a piece of cake once you take control of it. We also added some examples of array functions. You can get a better understanding of arrays usage in the C# programming.
Loops and Arrays work together. The reason is that the Loops are required to represent or save the data within a particular array. You might construct a term for every value you wish to save, or you might create your script more effectively by using a single variable to hold multiple values. It is why we discussed loops and arrays together in a single article so you know the relation between them.
In this article, we have explained Loops and Arrays used in the C# programming language. We discussed the types as well as some examples of them. Most programmers do not bother to look into these two in detail. But, we want our readers to be the best developers out there.
We believe that you have no confusion regarding the topic, and now you can start programming in the C# productively. Just keep the points in your mind, and we are sure you will do great. Best of Luck!
Project managers have the demanding task of effectively managing human and non-human resources for the success of ongoing projects. In resource planning, project managers strategize on how to utilize the resources available to teams for the achievement of project goals and objectives. Members within managed teams are assigned tasks based on their skills and capacity to deliver the required results in each project milestone. The lack of effective resource planning can result in wastage of available resources and eventually lead to failure of the entire project.
Resource planning involves the management of available resources in a project with the aim of achieving project efficiency. Successful projects depend on the use of selected tools for the implementation of effective resource planning strategies in the project. For example, project managers can determine whether the project remains within the budget in resource planning at a small or enterprise project management scale. The Sirvez resource planner is one of the valuable tools that project managers can use to strategize and manage the activities associated with resource planning in their projects. Sirvez makes it easy to manage resources according to tasks and subtasks within the project.
As project managers use manual processes and tools such as spreadsheets to carry out resource planning tasks, errors will likely emerge from the process. The result is additional time and resource wastage across the different stages of a project. The elimination of errors and an accurate view of your team's capacity to plan resources and schedule tasks are some of the benefits of using resource planning software such as Sirvez.
Figure: Tools used for resource planning within Sirvez
Automated processes using resource planning software enable the project manager to view how human resources are distributed within different areas and stages of a project. For example, a project manager can design a visual project schedule using Gantt charts to show the duration of tasks. Project managers can make adjustments through resource allocation across the project in a timely and accurate way.
In the estimation of essential components of a project, project managers use different techniques in the process. The structured estimating technique is one of the useful techniques that help project teams come up with an accurate estimation of resource needs in entire projects. Project teams involved in Agile projects can use the structured estimation technique at the beginning of the project and each sprint marked in the project. Structured estimation as conducted in enterprise project management on aspects such as time and cost at each sprint ensures accuracy at different levels of the project. Hence, project teams can develop accurate figures that are difficult to get using techniques such as back-of-the-envelope calculations.
The use of enterprise resource planning offers project managers the support they need to improve efficiency in their projects. Enterprise resource planning allows the integration of different business and project processes to create consistency in infrastructure and business operations. The benefits of using enterprise resource planning include reporting and accessing data from various business processes on a single platform. Some of the additional ways that enterprise resource planning improves business value include:
Project managers can use enterprise resource planning to achieve their projects' specific resource planning goals and objectives.
Resource planning for teams takes into account the resource needs of all teams involved in tasks and subtasks of a project. At the start of a project, the tasks are allocated according to the human and non-human resources available for the project. Hence, project teams receive an allocation of resources that will enable them to achieve optimal project outcomes. The resource planning process follows specific steps. The steps in the process include:
Using a resource planning tool can help keep track of all variable inputs for each sprint and the entire project.
As a roadmap that helps project managers map the tasks and subtasks of a successful project, the project planning phase ensures that all the project steps are highlighted at the start of the project. Activities such as determining project requirements, costing, scheduling and listing deliverables, resource planning, and approval for progress to the next phase are part of the project planning phase and contribute to success. In addition, the project tasks outlined from the start enable the project teams to complete all tasks on time.
Deciding on how to allocate resources to your project teams effectively might be a challenge. In this case, using Sirvez's resource planning capabilities, you can skip the risk and uncertainty of using manual processes and tools for resource planning activities. Through Sirvez's automated processes, you can increase the level of efficiency in the resource planning process. Whether you aim to manage resources at the start of the project or each sprint in the project, you can rely on Sirvez's capabilities to achieve your project's goals and objectives.
While there are certain devices on the market that may considerably help protect your house, some of them are excessively costly and need constant maintenance. Many devices regarding smart home security systems are available in the market but these are not user friendly according to the budget, the device we designed provides the user with a better interface with the help of LCD. We have used enough sensors that make sure the security protocol.
So in this way, we designed a reasonable security system that has the features of gas and flame detection with the help of MQ-2 Gas Sensor and flame sensor respectively and also have installed a Motion detector sensor known as PIR sensor to detect the intruder's motion. For a better user interface an LCD and Alarm are installed to alert the user. The whole system is programmed using Arduino UNO. A proteus circuit is designed for this project as shown below:
| Where To Buy? | ||||
|---|---|---|---|---|
| No. | Components | Distributor | Link To Buy | |
| 1 | LCD 20x4 | Amazon | Buy Now | |
| 2 | SIM900 | Amazon | Buy Now | |
| 3 | Flame Sensors | Amazon | Buy Now | |
| 4 | MQ-2 | Amazon | Buy Now | |
| 5 | PIR Sensor | Amazon | Buy Now | |
| 6 | Arduino Uno | Amazon | Buy Now | |
For the home security system, we have used 3 sensors which are briefly explained as follows:
So, let's design our Proteus Simulation for Smart Home Security System:
So, now we are going to design the Arduino Code for this simulation:
We have designed the circuit in our Proteus Simulation and next, we need to design its Arduino Code, in order to make it work.
It deters the crime and notifies the user about the gas or fire problem. Home security systems are mostly utilized for safety reasons in residences, businesses, and educational facilities. Another option is to use a mobile device or the internet to send data to a remote location. Other modules, such as a wind sensor or a fire sensor, might be added to the system in the future. Voice alarm modules may also alert you to an intruder or a gas leak if you use them. We can increase the number of sensors to make it better. We can use the latest technology of the Internet of Things that makes our system wireless. A growing number of devices and goods are being connected to the Internet, which is referred to as the Internet of Things by the phrase. We can use the Internet of Things to produce a low-cost security system for residential and industrial applications that is especially useful for home security. When the door is opened or an unauthorized entry is detected, the system will send an alert to the owner. The user may take action after getting the notification. ESP8266 Wi-Fi module will connect to and interact with the Internet, while an Arduino Uno microcontroller keeps track of the system's status, as well as a magnetic Reed sensor for sounding the alarm. The principal advantages of this system are ease of installation, low costs, and low maintenance requirements.
So, that was all for today. I hope you have enjoyed today's project. If you have any questions, ask in the comments. Thanks for reading. Take care !!! :)