Real View
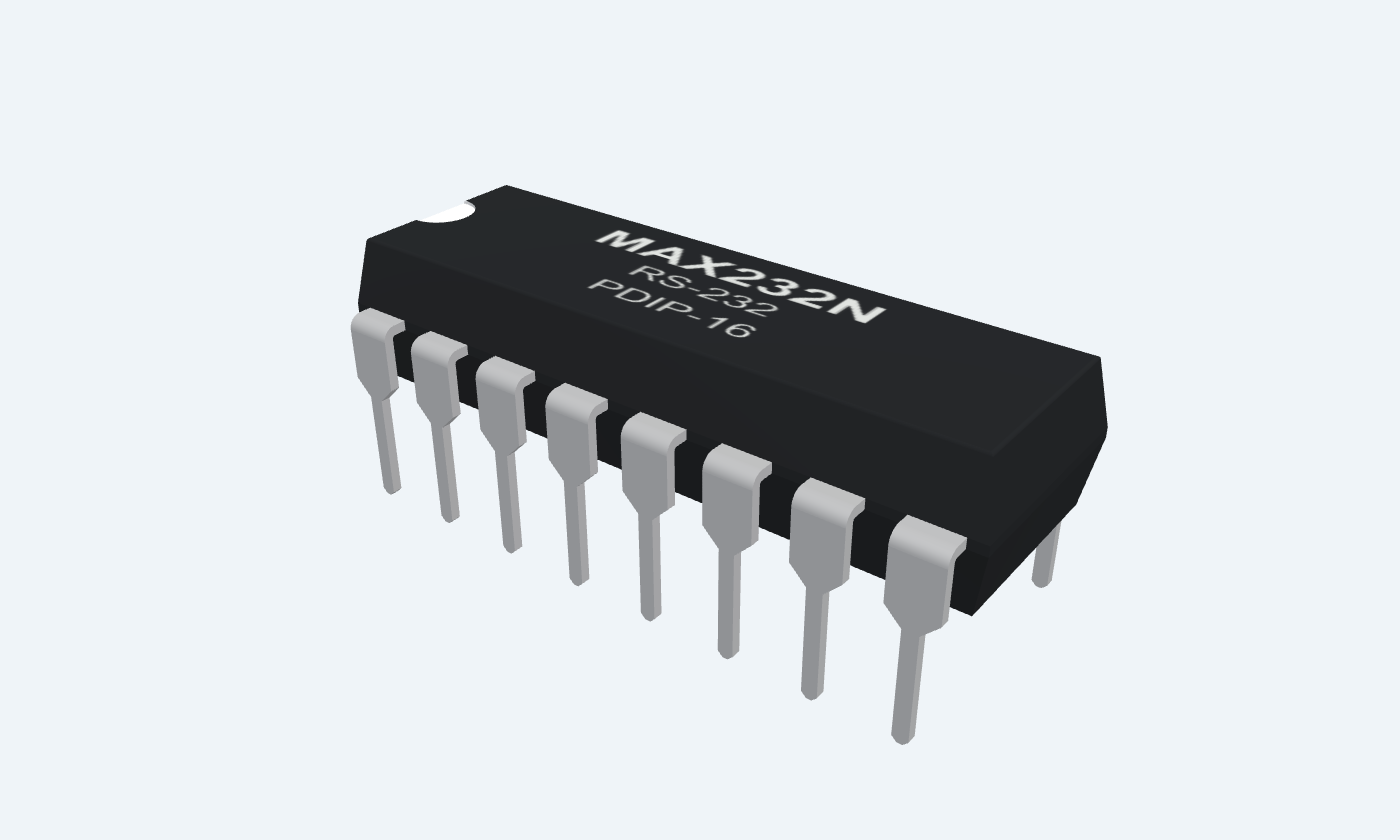
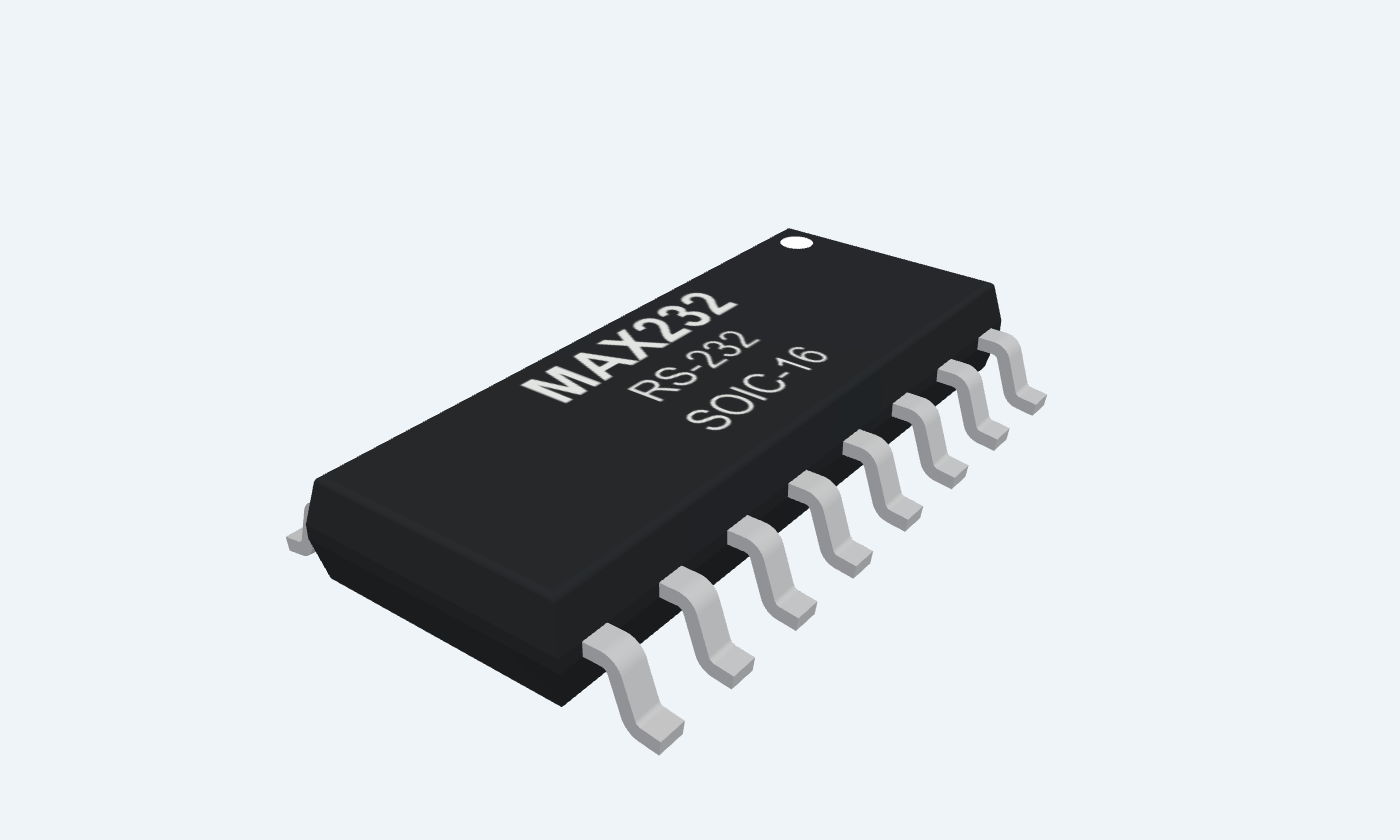
Connect your microcontroller’s logic to the serial world.
MAX232 is a 16-pin serial interface IC that connects a microcontroller’s TTL/CMOS logic to an RS-232 device. Two transmitters and two receivers translate and invert the signals in both directions. It runs from a single 5 V supply; a charge pump and four external capacitors generate the driver’s positive and negative rails.
MAX232: RS-232 level translator — the working circuit from our online simulator, running on this page.
Select a pin to explore its connection
Click a lead or use the arrow keys. The notch marks the top; pin 1 is at the upper left.
Positive connection of the flying capacitor C1.
Connect C1 (1 µF) between pins 1 and 3; positive terminal to pin 1 if polarized.
Use 1 µF flying capacitors for this MAX232. Ceramic capacitors avoid polarity concerns; follow the marked +/− connections for polarized parts.
Positive voltage reservoir of the internal charge pump.
Connect the positive reservoir capacitor as shown in the manufacturer’s typical application. This is not a general-purpose supply.
Positive charge-pump reservoir. Use it for the reservoir capacitor, not as an external power output.
Negative connection of the flying capacitor C1.
Connect to the other side of C1 at pin 1.
Use 1 µF flying capacitors for this MAX232. Ceramic capacitors avoid polarity concerns; follow the marked +/− connections for polarized parts.
Positive connection of the inverting capacitor C2.
Connect C2 (1 µF) between pins 4 and 5; positive terminal to pin 4 if polarized.
Use 1 µF flying capacitors for this MAX232. Ceramic capacitors avoid polarity concerns; follow the marked +/− connections for polarized parts.
Negative connection of the inverting capacitor C2.
Connect to the other side of C2 at pin 4.
Use 1 µF flying capacitors for this MAX232. Ceramic capacitors avoid polarity concerns; follow the marked +/− connections for polarized parts.
Negative voltage reservoir of the internal charge pump.
Connect the negative reservoir capacitor to ground; observe capacitor polarity. Not a general-purpose supply.
Negative charge-pump reservoir. For a polarized reservoir capacitor, the positive terminal goes to ground.
Channel 2 transmit output at RS-232 voltage levels.
Connect to the remote receiver. Inverts the logic applied to T2IN (pin 10).
Bipolar RS-232 output. Typical levels are about ±7 V at 5 V supply, 25 °C and a 3 kΩ load. Keep it off microcontroller GPIO inputs.
Channel 2 receive input from an RS-232 line.
Connect to the remote transmitter. Its converted logic appears at R2OUT (pin 9).
RS-232 input only; specified input range is −30 to +30 V. The paired logic output is inverted.
Channel 2 receive output at TTL/CMOS logic levels.
Connect to the local UART receive input; paired with R2IN (pin 8).
Logic-level output for the local UART. A negative RS-232 input produces HIGH; a positive input produces LOW.
Channel 2 transmit input from TTL/CMOS logic.
Connect to the local UART transmit output; paired with T2OUT (pin 7).
LOW: 0.8 V or below. HIGH: 2 V or above. The paired RS-232 output is inverted; do not apply RS-232 voltage to this logic input.
Channel 1 transmit input from TTL/CMOS logic.
Connect to the local UART transmit output; paired with T1OUT (pin 14).
LOW: 0.8 V or below. HIGH: 2 V or above. The paired RS-232 output is inverted; do not apply RS-232 voltage to this logic input.
Channel 1 receive output at TTL/CMOS logic levels.
Connect to the local UART receive input; paired with R1IN (pin 13).
Logic-level output for the local UART. A negative RS-232 input produces HIGH; a positive input produces LOW.
Channel 1 receive input from an RS-232 line.
Connect to the remote transmitter; paired with R1OUT (pin 12).
RS-232 input only; specified input range is −30 to +30 V. The paired logic output is inverted.
Channel 1 transmit output at RS-232 voltage levels.
Connect to the remote receiver. Inverts the logic applied to T1IN (pin 11).
Bipolar RS-232 output. Typical levels are about ±7 V at 5 V supply, 25 °C and a 3 kΩ load. Keep it off microcontroller GPIO inputs.
Common ground reference for logic and the transceiver.
Connect to circuit ground and the serial connector’s signal ground.
0 V reference. Connect the local logic ground and the remote interface’s signal ground.
Positive supply input: 5 V nominal.
Use a regulated 4.5–5.5 V supply. Place the supply bypass capacitor close to VCC and GND.
5 V nominal; keep the supply within 4.5–5.5 V. Use a common supply with the connected logic circuit.
The charge pump creates the positive and negative voltages RS-232 needs, using a single 5 V supply.
MAX232N · PDIP-16
| Property | Details |
|---|---|
| Manufacturer | Texas Instruments |
| Part number | MAX232N |
| Package | PDIP-16 |
| Connections | 16 pins |
| Mounting | Through-hole |
| Lead pitch | 2.54 mm |
| Package code | N |
| Thermal reference | 60.6 °C/W |
Texas Instruments MAX232N · PDIP-16 · Reference values
Scroll sideways to see all columns.
| Parameter | Value | Conditions / notes |
|---|---|---|
| Supply voltage | 4.5–5.5 V | 5 V nominal; recommended operating range |
| Maximum data rate | 120 kbit/s | One transmitter output switching; see datasheet test conditions |
| Transmit / receive channels | 2 / 2 | Two drivers and two receivers |
| Supply current | 8 mA typ. / 10 mA max. | VCC = 5.5 V, outputs open, ambient = 25 °C |
| Driver output | +7 V / −7 V typical | VCC = 5 V, ambient = 25 °C, 3 kΩ load to GND; +5 V / −5 V guaranteed limits |
| Logic input HIGH / LOW | ≥ 2 V / ≤ 0.8 V | T1IN and T2IN; values between thresholds are undefined |
| Receiver input range | −30 to +30 V | R1IN and R2IN only |
| Receiver hysteresis | 0.5 V typical | At VCC = 5 V |
| Operating temperature | 0 to +70 °C | MAX232N commercial grade; MAX232I has a different range |
| Charge-pump capacitors | 4 × 1 µF | Plus supply bypass; follow the typical application, section 8 |
| Package | PDIP-16, 16 leads | TI N package; 2.54 mm lead pitch |
| Junction-to-ambient | 60.6 °C/W | PDIP-16; datasheet thermal characterization conditions |
| Supply absolute maximum | −0.3 to +6 V | Stress rating only, not an operating range |
| Maximum junction temperature | 150 °C | Absolute maximum, not the ambient operating rating |
No specifications match. Try a parameter name or a unit.
Reference: TI SLLS047N, sections 4–8 and package drawings. Check the exact manufacturer and suffix before substituting MAX232A, MAX3232 or another family member. Verify a production footprint against your ordered part.
Select a pin for its function, connection guidance and electrical notes.
Follow the labeled connections and functional stages
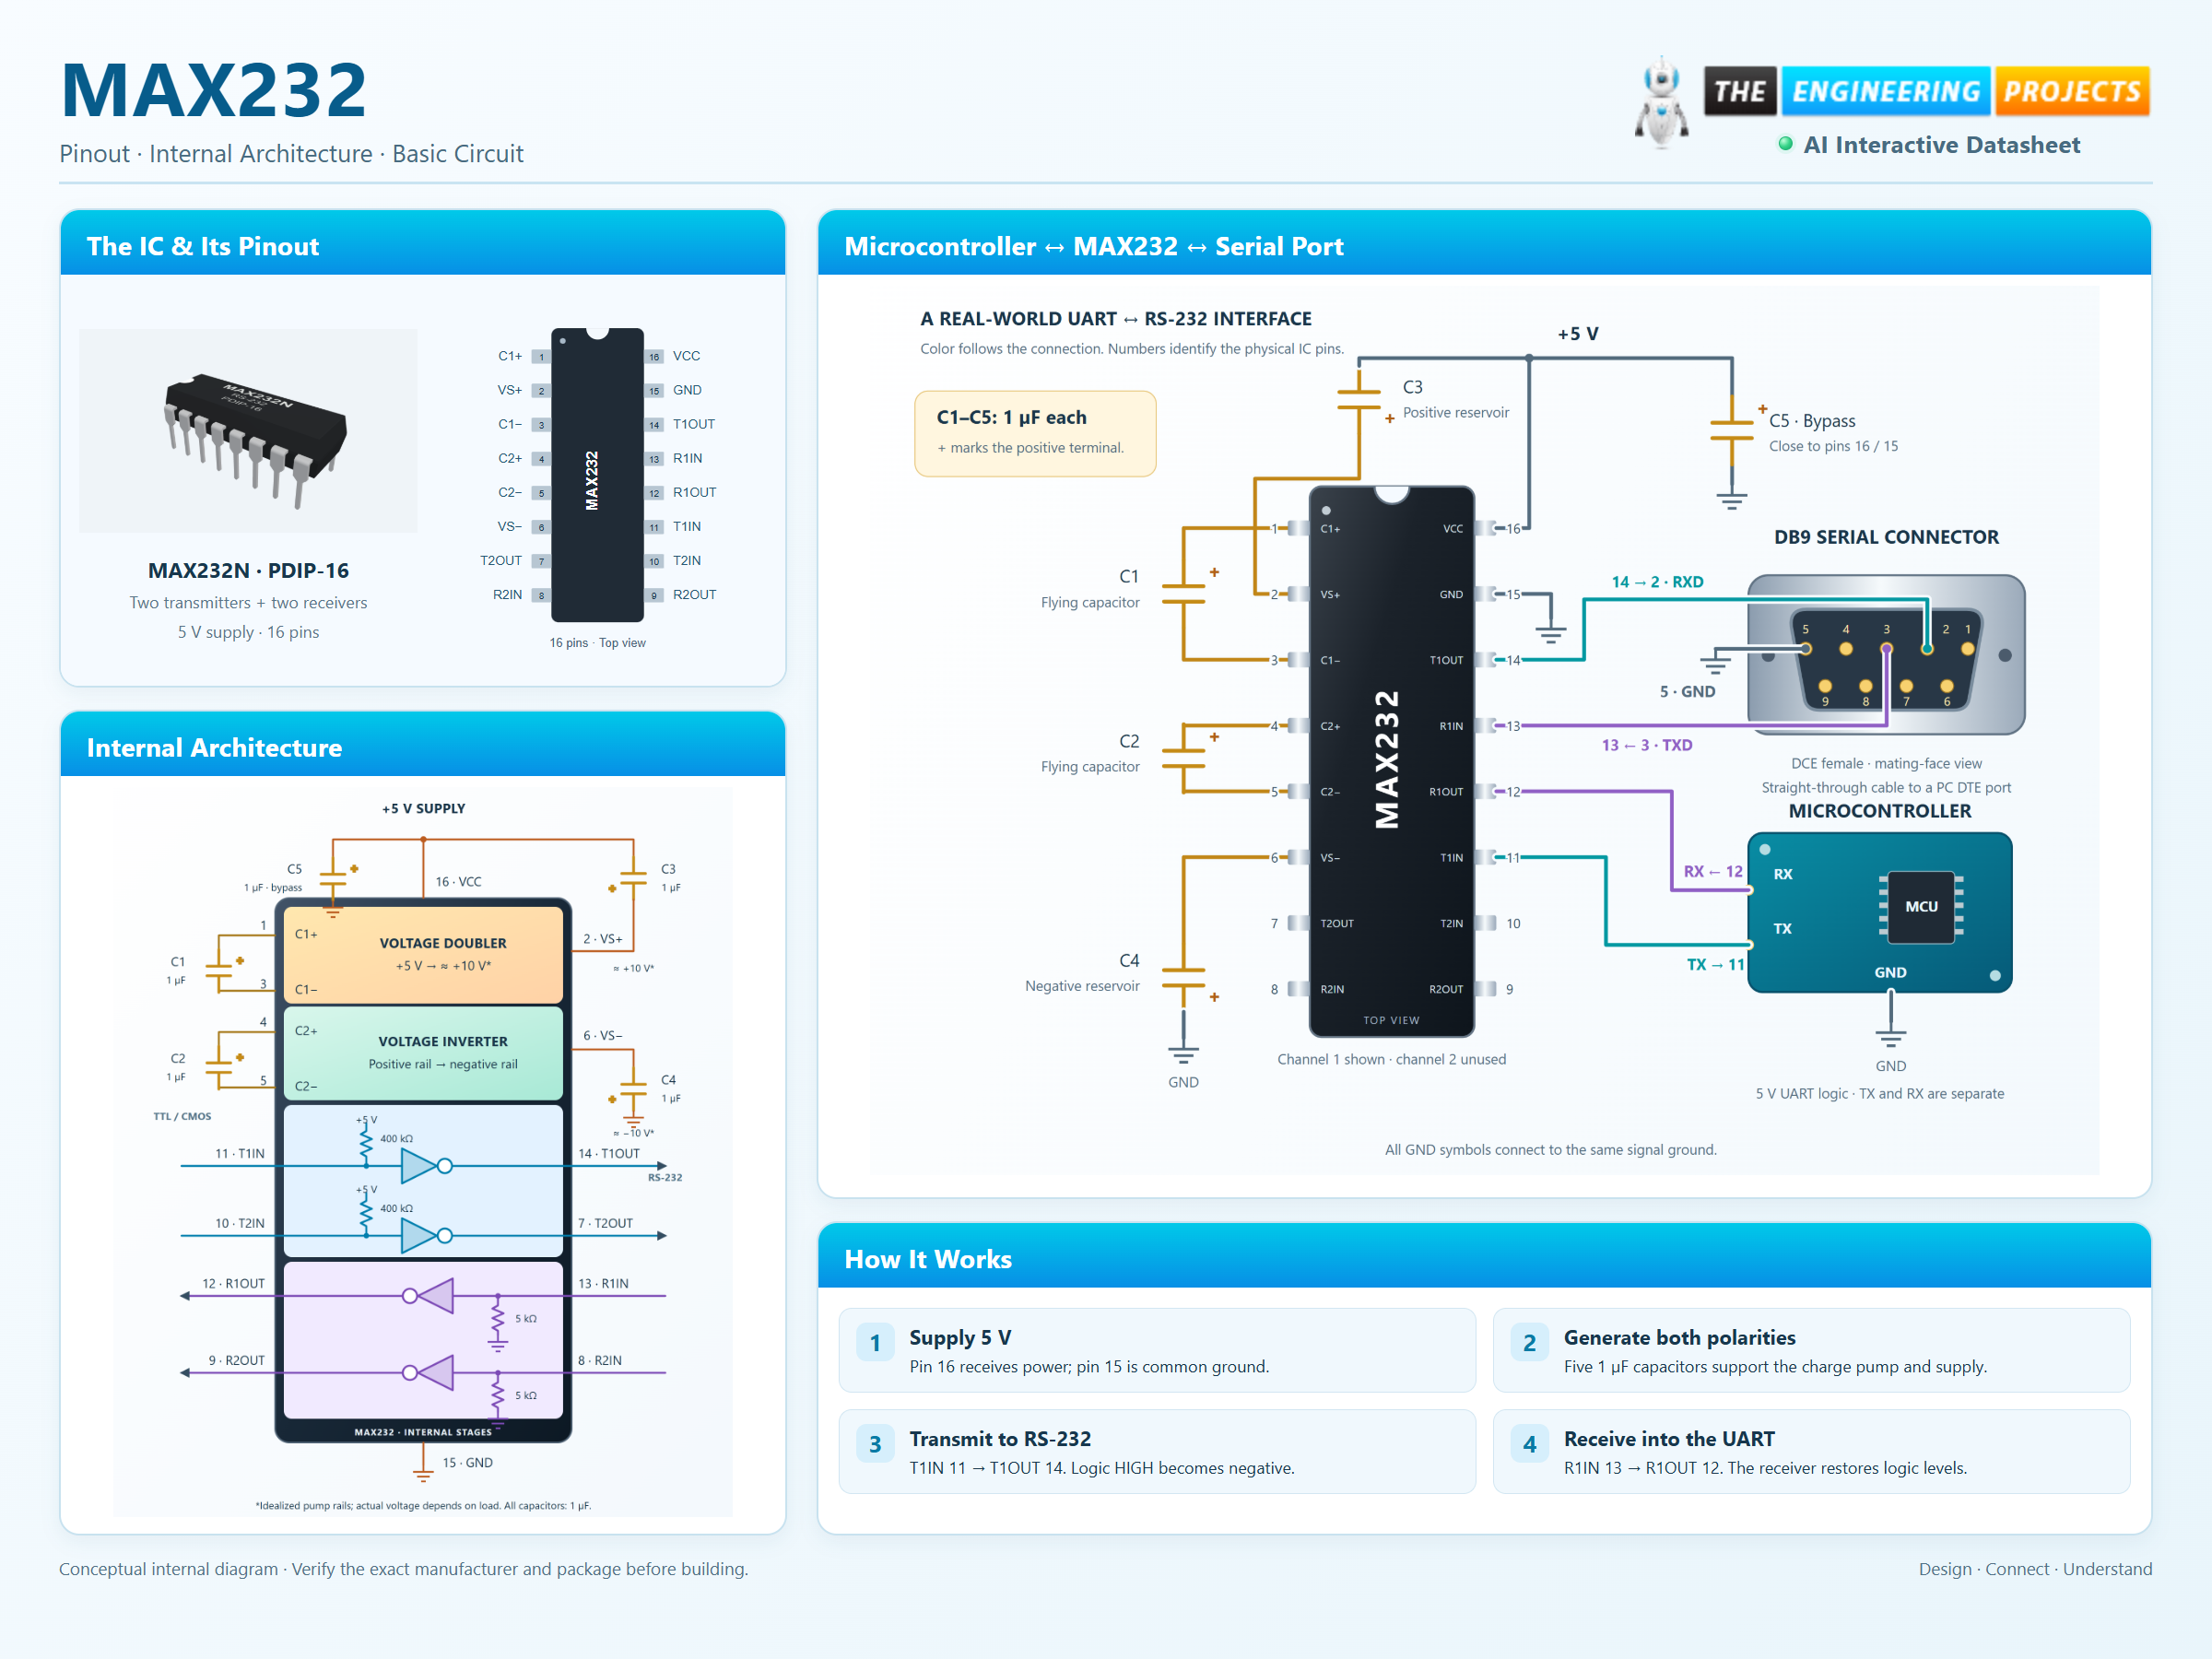
5 stages · Explore one step at a time
A microcontroller’s UART uses logic levels, while an RS-232 port uses positive and negative voltages. The MAX232 translates between them. It changes voltage levels and polarity; it does not create a baud rate or decode the data.
Connect pin 16 to 5 V and pin 15 to ground. C1 transfers charge in the voltage doubler; C2 supports the inverter. C3 and C4 hold the positive and negative rails, and C5 bypasses the supply. This MAX232 circuit uses 1 µF for all five capacitors.
The diagram’s approximately ±10 V rails explain the unloaded charge-pump action. Actual rails and output swing depend on supply, load and losses.
Microcontroller TX feeds T1IN, pin 11. T1OUT, pin 14, drives the serial line with an inverted bipolar signal: logic HIGH becomes a negative RS-232 voltage, and logic LOW becomes positive. Channel 2 works the same way through pins 10 and 7.
The remote transmitter reaches R1IN, pin 13. The receiver converts the RS-232 signal into a logic output at R1OUT, pin 12, for the microcontroller’s RX input. A negative input gives logic HIGH; a positive input gives LOW. The second receiver uses pins 8 and 9.
The Basic Circuit shows a DCE female DB9 connector from its mating face: pin 2 carries the MAX232’s output, pin 3 accepts the PC’s transmit signal, and pin 5 is signal ground. A straight-through cable joins it to a PC DTE port. TX and RX operate independently, allowing two-way communication.
Choose a channel, change its input and read the output polarity.
Converts the local logic output into an inverted bipolar RS-232 signal.
A HIGH logic input produces a negative RS-232 output. A LOW input produces a positive output.
A second independent transmit path, powered by the same internal charge pump.
A HIGH logic input produces a negative RS-232 output. A LOW input produces a positive output.
Accepts an RS-232 line signal and provides an inverted logic-level output for the local UART.
A positive RS-232 input produces a LOW logic output. A negative input produces a HIGH output.
The second receive path works independently of receiver 1. Both use the common ground reference.
A positive RS-232 input produces a LOW logic output. A negative input produces a HIGH output.
5 V supply · Charge-pump capacitors · UART ↔ RS-232
Follow the component values and pin connections
Pin 16 → regulated 5 V. Pin 15 → common ground. Put a 1 µF bypass close to these pins.
C1: 1–3. C2: 4–5. C3: 2–VCC. C4: GND–6. All are 1 µF; the + signs show polarized-capacitor orientation.
TX → T1IN (11). RX ← R1OUT (12). These are the logic-side connections.
T1OUT (14) → DB9 pin 2. DB9 pin 3 → R1IN (13). Pin 5 → common ground. This DCE female connector uses a straight-through cable to a PC’s DTE port.
Use the second channel in the same way: T2IN (10) → T2OUT (7), and R2IN (8) → R2OUT (9).
C3 may return to VCC or ground; this guide uses VCC, matching the featured circuit. Ceramic capacitors are acceptable. Follow the datasheet for the exact part and layout.
Charge pump · Line drivers · Line receivers
Select a stage to see its role and connections
The first switched-capacitor stage doubles the 5 V supply. The second stage inverts that positive rail, giving the transmitters both polarities from one supply. C1 and C2 transfer charge; C3 and C4 store it. C5 keeps the supply stable.
Converts the local logic output into an inverted bipolar RS-232 signal.
This stage inverts the signal polarity.
A second independent transmit path, powered by the same internal charge pump.
This stage inverts the signal polarity.
Accepts an RS-232 line signal and provides an inverted logic-level output for the local UART.
This stage inverts the signal polarity.
The second receive path works independently of receiver 1. Both use the common ground reference.
This stage inverts the signal polarity.
The 400 kΩ pullups and 5 kΩ receiver loads show the internal equivalent in Maxim’s reference diagram. They are not extra parts you need to connect.
Signal names, electrical functions and connection guidance
Scroll within the table to see all columns and rows.
| Pin | Signal | Type | Function & connection |
|---|---|---|---|
| C1+ | Capacitor | Positive connection of the flying capacitor C1.Connection guidanceConnect C1 (1 µF) between pins 1 and 3; positive terminal to pin 1 if polarized. Use 1 µF flying capacitors for this MAX232. Ceramic capacitors avoid polarity concerns; follow the marked +/− connections for polarized parts. | |
| VS+ | Output | Positive voltage reservoir of the internal charge pump.Connection guidanceConnect the positive reservoir capacitor as shown in the manufacturer’s typical application. This is not a general-purpose supply. Positive charge-pump reservoir. Use it for the reservoir capacitor, not as an external power output. | |
| C1− | Capacitor | Negative connection of the flying capacitor C1.Connection guidanceConnect to the other side of C1 at pin 1. Use 1 µF flying capacitors for this MAX232. Ceramic capacitors avoid polarity concerns; follow the marked +/− connections for polarized parts. | |
| C2+ | Capacitor | Positive connection of the inverting capacitor C2.Connection guidanceConnect C2 (1 µF) between pins 4 and 5; positive terminal to pin 4 if polarized. Use 1 µF flying capacitors for this MAX232. Ceramic capacitors avoid polarity concerns; follow the marked +/− connections for polarized parts. | |
| C2− | Capacitor | Negative connection of the inverting capacitor C2.Connection guidanceConnect to the other side of C2 at pin 4. Use 1 µF flying capacitors for this MAX232. Ceramic capacitors avoid polarity concerns; follow the marked +/− connections for polarized parts. | |
| VS− | Output | Negative voltage reservoir of the internal charge pump.Connection guidanceConnect the negative reservoir capacitor to ground; observe capacitor polarity. Not a general-purpose supply. Negative charge-pump reservoir. For a polarized reservoir capacitor, the positive terminal goes to ground. | |
| T2OUT | Output | Channel 2 transmit output at RS-232 voltage levels.Connection guidanceConnect to the remote receiver. Inverts the logic applied to T2IN (pin 10). Bipolar RS-232 output. Typical levels are about ±7 V at 5 V supply, 25 °C and a 3 kΩ load. Keep it off microcontroller GPIO inputs. | |
| R2IN | Input | Channel 2 receive input from an RS-232 line.Connection guidanceConnect to the remote transmitter. Its converted logic appears at R2OUT (pin 9). RS-232 input only; specified input range is −30 to +30 V. The paired logic output is inverted. | |
| R2OUT | Output | Channel 2 receive output at TTL/CMOS logic levels.Connection guidanceConnect to the local UART receive input; paired with R2IN (pin 8). Logic-level output for the local UART. A negative RS-232 input produces HIGH; a positive input produces LOW. | |
| T2IN | Input | Channel 2 transmit input from TTL/CMOS logic.Connection guidanceConnect to the local UART transmit output; paired with T2OUT (pin 7). LOW: 0.8 V or below. HIGH: 2 V or above. The paired RS-232 output is inverted; do not apply RS-232 voltage to this logic input. | |
| T1IN | Input | Channel 1 transmit input from TTL/CMOS logic.Connection guidanceConnect to the local UART transmit output; paired with T1OUT (pin 14). LOW: 0.8 V or below. HIGH: 2 V or above. The paired RS-232 output is inverted; do not apply RS-232 voltage to this logic input. | |
| R1OUT | Output | Channel 1 receive output at TTL/CMOS logic levels.Connection guidanceConnect to the local UART receive input; paired with R1IN (pin 13). Logic-level output for the local UART. A negative RS-232 input produces HIGH; a positive input produces LOW. | |
| R1IN | Input | Channel 1 receive input from an RS-232 line.Connection guidanceConnect to the remote transmitter; paired with R1OUT (pin 12). RS-232 input only; specified input range is −30 to +30 V. The paired logic output is inverted. | |
| T1OUT | Output | Channel 1 transmit output at RS-232 voltage levels.Connection guidanceConnect to the remote receiver. Inverts the logic applied to T1IN (pin 11). Bipolar RS-232 output. Typical levels are about ±7 V at 5 V supply, 25 °C and a 3 kΩ load. Keep it off microcontroller GPIO inputs. | |
| GND | Ground | Common ground reference for logic and the transceiver.Connection guidanceConnect to circuit ground and the serial connector’s signal ground. 0 V reference. Connect the local logic ground and the remote interface’s signal ground. | |
| VCC | Supply | Positive supply input: 5 V nominal.Connection guidanceUse a regulated 4.5–5.5 V supply. Place the supply bypass capacitor close to VCC and GND. 5 V nominal; keep the supply within 4.5–5.5 V. Use a common supply with the connected logic circuit. |
No pins match these filters. Try another signal name or reset the filters.
Texas Instruments MAX232N · PDIP-16 · Reference values
Scroll within the table to see all columns and rows.
| Parameter | Value | Conditions / notes |
|---|---|---|
| Supply voltage | 4.5–5.5 V | 5 V nominal; recommended operating range |
| Maximum data rate | 120 kbit/s | One transmitter output switching; see datasheet test conditions |
| Transmit / receive channels | 2 / 2 | Two drivers and two receivers |
| Supply current | 8 mA typ. / 10 mA max. | VCC = 5.5 V, outputs open, ambient = 25 °C |
| Driver output | +7 V / −7 V typical | VCC = 5 V, ambient = 25 °C, 3 kΩ load to GND; +5 V / −5 V guaranteed limits |
| Logic input HIGH / LOW | ≥ 2 V / ≤ 0.8 V | T1IN and T2IN; values between thresholds are undefined |
| Receiver input range | −30 to +30 V | R1IN and R2IN only |
| Receiver hysteresis | 0.5 V typical | At VCC = 5 V |
| Operating temperature | 0 to +70 °C | MAX232N commercial grade; MAX232I has a different range |
| Charge-pump capacitors | 4 × 1 µF | Plus supply bypass; follow the typical application, section 8 |
| Package | PDIP-16, 16 leads | TI N package; 2.54 mm lead pitch |
| Junction-to-ambient | 60.6 °C/W | PDIP-16; datasheet thermal characterization conditions |
| Supply absolute maximum | −0.3 to +6 V | Stress rating only, not an operating range |
| Maximum junction temperature | 150 °C | Absolute maximum, not the ambient operating rating |
No specifications match. Try a parameter name or a unit.
Reference: TI SLLS047N, sections 4–8 and package drawings. Check the exact manufacturer and suffix before substituting MAX232A, MAX3232 or another family member. Verify a production footprint against your ordered part.
No matching rowsTry a pin name, parameter, unit or test condition, or reset the filters.
Route UART TX to T1IN (11), then T1OUT (14) to the remote receiver. Bring the remote transmit line into R1IN (13), with R1OUT (12) returning to UART RX.
Use a common signal ground. Check the remote connector’s DTE/DCE pin assignment.
Manufacturer application guideUse the four 1 µF pump capacitors and a local supply bypass as shown in the reference circuit. Keep these connections short and check polarity when using polarized capacitors.
VS+ and VS− serve the charge pump; they are not supply rails for other components.
Manufacturer application guideFind MAX232 in the Components Library to place its schematic symbol and connect its pins.
Schematic available · Simulation model pendingOpen ProTech