


C# PictureBox Control


C# PictureBox Control
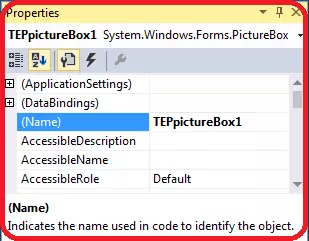
It's simple image box which allows you to add images in your desktop application. You can simply add PictureBox by drag the PictureBox object from the toolbox of design tab. PictureBox can't be received the inputs because it's not the selectable control tool like C# ListBox Control, C# Button Control, C# Label Control and C# TextBox Control etc. You can only add the images and perform any specific action with there event handlers. Suppose that you are wanted to add the PictureBox in your application, then simply drag and drop. Then in the main code call by the object name which is by default pictureBox1. To show the image within PictureBox we have used the image property which will set the path of the image to be previewed in C# PictureBox. In the following code, you can be observed how we have set the path of the image for PictureBox.using System;
using System.Drawing;
using System.Windows.Forms;
namespace TEP
{
public partial class Form1 : Form
{
public Form1()
{
InitializeComponent();
}
private void Form1_Load(object sender, EventArgs e)
{
pictureBox1.Image = Image.FromFile("c:\\testImage.jpg");
}
}
}
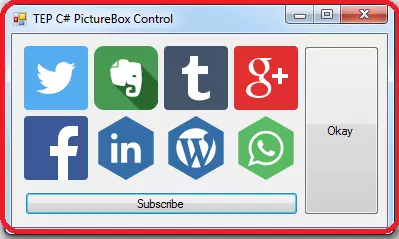
First, you have to declare the PictureBox image property then you have to define the path from the constructor of Image.FromFile as mention in above code. In the following image, you can preview that how we have set the TestImage inside PictureBox.

C# PictureBox Events
C# PictureBox Events will allow you to perform the specific task or functionality according to the requirements on specific actions done by the end-user. There are many Events which you can use with the PictureBox to make your desktop application more interactive. Here is the list of those events which we will discuss further in this tutorial.- C# PictureBox Click Events
- C# PictureBox DoubleClick Events
- C# PictureBox MouseEnter Events
- C# PictureBox MouseHover Events
- C# PictureBox MouseLeave Events
C# PictureBox Click Events
Click event is used to handle the click of the user on the PictureBox. Supposed you are wanted to perform any specific functionality when user will click on the PictureBox then you have to use the Click Event handler of PictureBox. You just need to declare the functionality within the click event. Whenever the user will click the picture box, click event capture the click and get executed. In the following code, you can observe that we have used simple message box within the Click event handler. So that when user will click on the PictureBox it will show the message prompt.using System;
using System.Collections.Generic;
using System.ComponentModel;
using System.Data;
using System.Drawing;
using System.Linq;
using System.Text;
using System.Threading.Tasks;
using System.Windows.Forms;
namespace TEPArticle
{
public partial class Form1 : Form
{
public Form1()
{
InitializeComponent();
}
private void TEPpictureBox1_Click(object sender, EventArgs e)
{
MessageBox.Show("You Just Click On the TEP PictureBox");
}
}
}
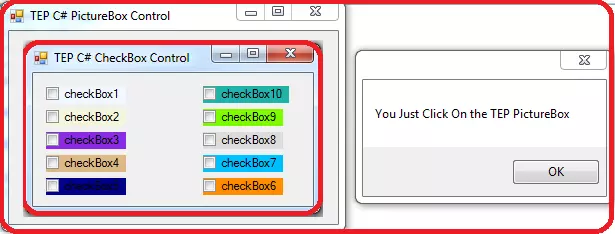
You can declare any kind of functionality within the click event handler according to your desire, we just used the message box to minimize the code and save our time. The main purpose is to share the basic logic of click event handler. In the following image, you can observe that when we have to click the PictureBox it's prompt the message.
C# PictureBox DoubleClick Events
This event occurs when user will click twice on the PictureBox. Sometimes we have required performing any functionality when user will DoubleClick on the PictureBox. You just have to activate the DoubleClick event handler and declare the functionality which you want to perform. So that when user will click twice on the picture box that functionality get executed. In the following code, you can observe that how we have declared the message box in the double click event handler. When user will click twice on the picture box a prompt message appears.using System;
using System.Collections.Generic;
using System.ComponentModel;
using System.Data;
using System.Drawing;
using System.Linq;
using System.Text;
using System.Threading.Tasks;
using System.Windows.Forms;
namespace TEPArticle
{
public partial class Form1 : Form
{
public Form1()
{
InitializeComponent();
}
private void TEPpictureBox1_DoubleClick(object sender, EventArgs e)
{
MessageBox.Show("You Just DoubleClick On the TEP PictureBox");
}
}
}
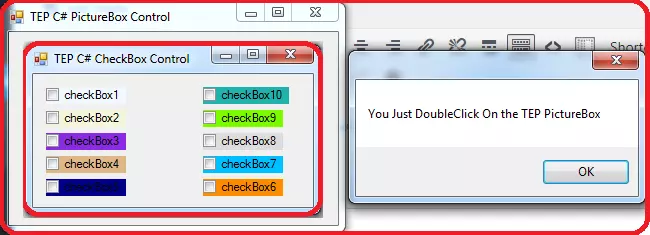
We have declared the message box in DoubleClick event handler. You can declare any other functionality within double click event handler. In the following image, you can be observed that how message prompt when user will click twice on the C# PictureBox.
C# PictureBox MouseEnter Events
This event handler is used to perform any action when the mouse cursor enters the boundaries of C# PictureBox. Supposed you are required to perform any functionality when even user will enter the mouse cursor in the boundaries of PictureBox. For this case, we will use the MouseEnter Event handler. We will declare a message box within the MouseEnter Event handler. Whenever you will enter the mouse to the visible part of PictureBox it will prompt the message box. In the following code, you can observe the whole scenario.using System;
using System.Collections.Generic;
using System.ComponentModel;
using System.Data;
using System.Drawing;
using System.Linq;
using System.Text;
using System.Threading.Tasks;
using System.Windows.Forms;
namespace TEPArticle
{
public partial class Form1 : Form
{
public Form1()
{
InitializeComponent();
}
private void TEPpictureBox1_MouseEnter(object sender, EventArgs e)
{
MessageBox.Show("You Just Enter in visible part of TEP PictureBox");
}
}
}
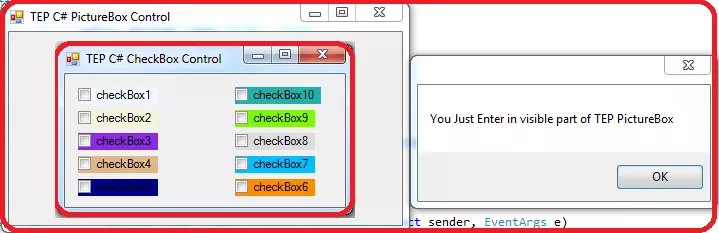
We have declared the message box within the MouseEnter event handler. Now when user will enter the mouse cursor to visible part message prompt. In the following image, you can observe the output of the above code.
C# PictureBox MouseHover Events
This event handler will occur whenever user will hover the mouse cursor for a while on PictureBox. There is a very little difference between MouseEnter and MouseHover Event handler. Until user will hover the mouse cursor this event will not be executed. Supposed that you are required to change the image of picture box whenever user will hover the mouse. For this scenario, we have created the code which you can get from the following.using System;
using System.Collections.Generic;
using System.ComponentModel;
using System.Data;
using System.Drawing;
using System.Linq;
using System.Text;
using System.Threading.Tasks;
using System.Windows.Forms;
namespace TEPArticle
{
public partial class Form1 : Form
{
public Form1()
{
InitializeComponent();
}
private void TEPpictureBox1_MouseHover(object sender, EventArgs e)
{
TEPpictureBox1.Image = Image.FromFile("C: \\Users\\Public\\Pictures\\test.jpg");
}
}
}
In the above code, you can observe that we have used the test.jpg as the image when the MouseHover event will be executed. You can declare any kind of functionality as you are required. You can replace the path of the image and set MouseHover event to your C# PictureBox. When you will execute the code and hover the mouse cursor on the PictureBox it will change the image.
C# PictureBox MouseLeave Events
This event is executed whenever the mouse cursor leaves the boundaries of PictureBox or the visible area. If you are wanted to perform any action when user will leave the PictureBox then you can use the MouseLeave event handler with C# PictureBox. In the following code, we have used MouseHover Event handler too along with the MouseLeave Event handler. We have declared pic1 for MouseHover and pic2 for MouseLeave event. When user will hover the mouse PictureBox set to pic1 and when leaving the PictureBox it will set to pic2. You can get the code from the following.using System;
using System.Collections.Generic;
using System.ComponentModel;
using System.Data;
using System.Drawing;
using System.Linq;
using System.Text;
using System.Threading.Tasks;
using System.Windows.Forms;
namespace TEPArticle
{
public partial class Form1 : Form
{
public Form1()
{
InitializeComponent();
}
private void TEPpictureBox1_MouseHover(object sender, EventArgs e)
{
TEPpictureBox1.Image = Image.FromFile("C: \\Users\\Public\\Pictures\\pic1.jpg");
}
private void TEPpictureBox1_MouseLeave(object sender, EventArgs e)
{
TEPpictureBox1.Image = Image.FromFile("C: \\Users\\Public\\Pictures\\pic2.jpg");
}
}
}
When you will execute above code, and hover the PictureBox the image get changed and when left the PictureBox image get change again. By this, you can create animated effects in your desktop application. Remember if you will copy the above code you have to add these event handlers to the C# PictureBox.
We have tried to give you basic to advance information about C# PictureBox. In this tutorials, you have learned many different techniques which are used in the professional development of desktop application along with the usage of Event handlers. After this, you can go for C# ListBox Control, C# Button Control, C# Label Control and C# ComboBox Control. In all of this, don't forget to subscribe our YouTube Channel "TheEngineeringProjects" and C# Video Tutorial PlayList.
×
![]()


