Hello friends! Today, we will create a PIC project in MPLAB and understand the files and settings needed before writing the main application. We have already covered installing MPLAB and installing the C compiler. Now we will bring those tools together in one project.
The title of this older lesson refers to an MPLAB compiler, but the IDE and compiler have separate jobs. The IDE manages the project and invokes the selected language tools. The compiler and linker produce the firmware image. Understanding that distinction makes missing-file and build errors much easier to diagnose.
The original screenshots show legacy MPLAB IDE with C18. We will retain that sequence for readers maintaining an older PIC18F452 project, while also explaining the corresponding decisions in MPLAB X with XC8. Do not mix files from the two toolchains merely to reproduce the appearance of an old project tree.
What Is an MPLAB Project?
A project records more than the source text. It identifies the target device, the source files to compile, the selected compiler, include paths, build options and programming or debugging configuration. Saving a C file in a folder does not necessarily add it to the project's build.
Microchip's MPLAB X project documentation explains the project-based workflow. Even a program with one source file needs the surrounding target and tool settings so the build system knows what image to create.
| Project item | Question it answers |
|---|---|
| Device selection | Which exact microcontroller will execute the firmware? |
| Compiler selection | Which toolchain and version translate the source? |
| Source list | Which implementation files belong to this application? |
| Include paths | Where can included headers be found? |
| Build configuration | Which options apply to this build? |
| Hardware tool | Which supported programmer or debugger communicates with the target? |
Prepare the Project Folder
Create a separate directory for the exercise and choose a descriptive project name. Keep source files, project metadata and notes together. Avoid placing the project inside the compiler's installation directory, which serves a different purpose and may be protected from ordinary writes.
For this series, record PIC18F452 as the target. Do not select PIC18F4520 simply because it appears nearby in a device list. The device selection determines register definitions and configuration options, while package pin numbering remains a separate hardware consideration.
Before creating the project, confirm that the required compiler is available. A new XC8 project and an old C18 project can share general C concepts, but their compiler-specific setup should remain consistent with the chosen toolchain.
Open the Development Environment
The original MPLAB window is shown below. Its menus and project view belong to the historical interface. In MPLAB X, use the current new-project workflow and select the appropriate standalone application project for the target.
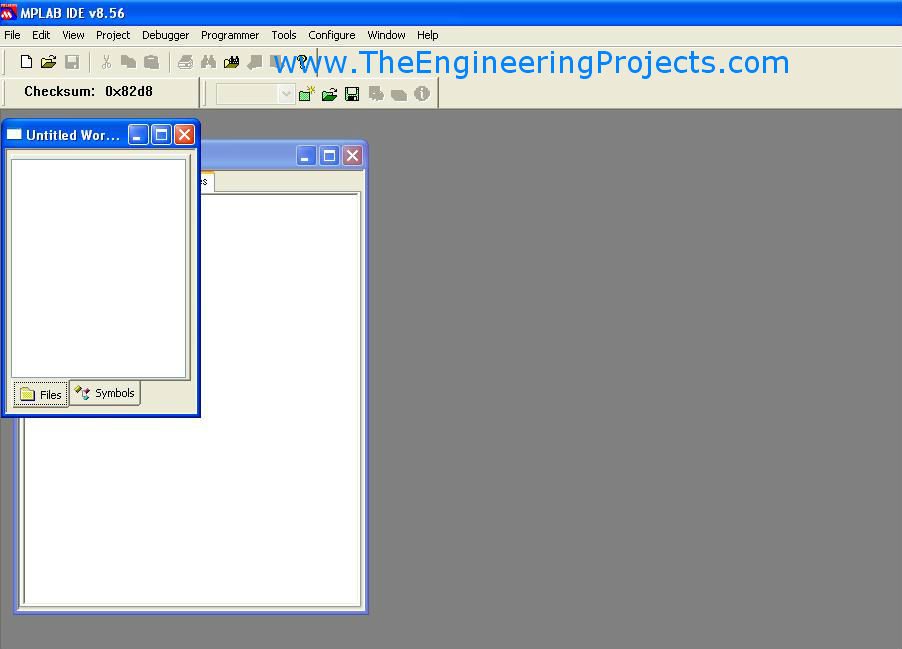
If several IDE versions are installed, confirm which one you opened. Similar icons and shortcuts can lead to an old project being opened in an unintended environment. Keep a migration copy when changing the development environment of a working application.
Create a New Project
In the legacy interface illustrated here, the project is created from the Project menu. The exact route can vary with the version and whether you use a project wizard.

Enter the project name and location. Use the directory created for this exercise so the source and project settings do not become mixed with another program.

For MPLAB X, the project wizard also asks you to identify the device, supported hardware tool and compiler. Review these selections rather than accepting the first available entry. Microchip's project settings reference explains how those selections affect the project.
A simulator selection can be useful when the target and required features are supported, but it does not turn an unsupported peripheral into a complete hardware model. For a physical test, select the actual supported programming or debugging tool.
Show the Project Tree
The legacy View menu exposes the project window. If the newly created project seems to have disappeared, check whether its project view is simply hidden.

The project tree organizes files into categories. At first, it may be empty because you have created the project but have not added application source.

These categories are a logical view of the build. They do not necessarily correspond one-to-one with directories on disk. A file can physically exist beside the project while remaining absent from its source list.
Create and Add a C Source File
Create a new source file and save it with a .c extension, such as main.c. Check the actual filename if Windows hides extensions; a file accidentally named main.c.txt is not the same thing.

In the legacy workflow, add the saved file under Source Files. In MPLAB X, use the corresponding new-source or add-existing-file action. Confirm that the file appears in the project's source list afterward.

A useful first check is to make a harmless source edit and rebuild, then inspect whether the compiler processes that file. If nothing changes, investigate project membership or the selected main project before editing more code.
One Application Entry Point
For a small standalone C application, begin with one main function. Adding two example files that both define main causes a duplicate-definition problem. If you want to compare examples, keep them in separate projects or deliberately exclude the inactive implementation from the build.
void main(void) {
    while (1) {
        // Add the application after confirming the project builds.
    }
}
This minimal source checks the build structure. It does not initialize the PIC's clock, configuration bits or peripherals and should not be presented as a complete hardware program.
Understand Headers Instead of Copying Them Blindly
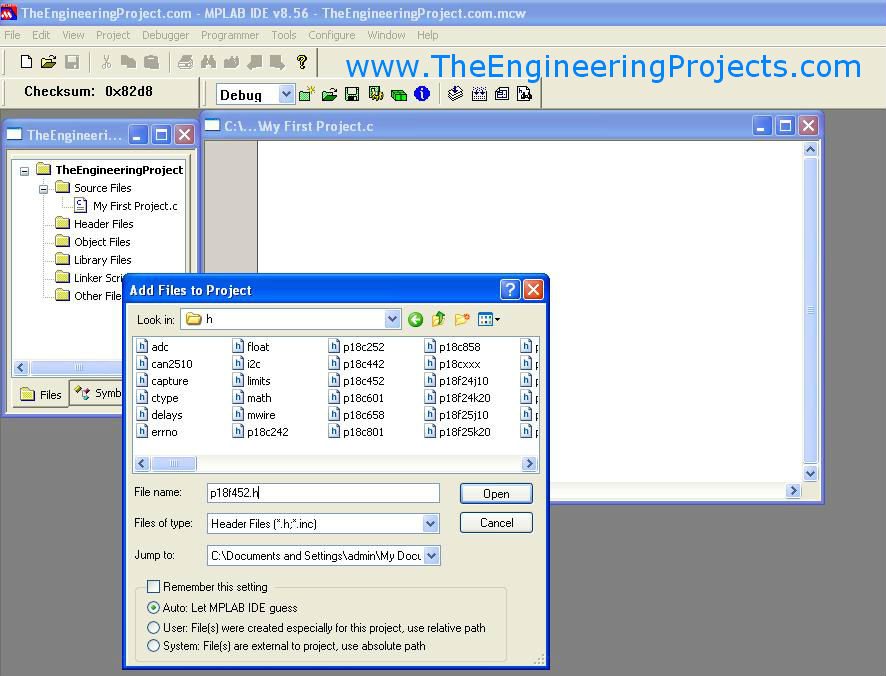
The original C18 project added the PIC18F452 header from the compiler installation. That header provides device-specific names used by C18 source.
In a historical C18 source file, an include such as <p18f452.h> may be appropriate. An XC8 project commonly includes <xc.h>, with the target selection determining the device definitions. Use the form documented for the chosen compiler.
Adding a header to the project view does not copy its definitions into every C file. A source file must include the declarations it needs, and the compiler must be able to locate them. Likewise, a header declaration does not automatically provide the implementation of an application function.
Libraries and Linker Files in the Legacy Project
The original final project tree includes the source, device header, library and linker-related files selected for C18. Those files must match the target and compiler configuration.

A linker combines compiled objects and resolves references between them. In the legacy workflow, a device linker script can describe the memory layout used by the build. Choosing a script for a different device can create errors or an inappropriate memory layout even when the source compiles.
Do not manually add old C18 linker scripts or prebuilt libraries to an XC8 project merely because the screenshot shows them. Use the modern toolchain's device support and documented options. Microchip's C18-to-XC8 migration overview explains why changing toolchains requires more than copying the visible project files.
Add Configuration Bits for the Real Circuit
Before programming hardware, define configuration bits appropriate to the exact PIC and circuit. These settings can select oscillator behavior, watchdog operation and programming-related options. They are not ordinary application variables that the main loop happens to initialize later.
Use the development environment's device-specific configuration facility or compiler documentation to generate and review the settings. Keep the resulting source definitions with the project when that is the supported workflow. Avoid maintaining one unexplained set in source and a conflicting set in a programmer dialog.
For the external-crystal circuit in this series, the oscillator selection must agree with the installed crystal arrangement. A clock-frequency macro used by a delay function describes an assumption; it does not physically select the oscillator mode.
Build the Project and Read the Output
Save the source and invoke the intended build operation. Microchip's build-process documentation explains how MPLAB X uses the project information to invoke the compiler, assembler and linker as required.
- Confirm the correct project is selected for the operation.
- Check the target device and compiler version.
- Save modified source files.
- Build and read the first meaningful error if the operation fails.
- Review warnings rather than treating a successful final line as the only useful result.
- Locate the output artifact for the selected configuration.
A normal incremental build recompiles what the build system considers changed. A clean build regenerates intermediate output and can help when testing a configuration change, but it is not a substitute for fixing missing files or invalid source.
Compilation and Linking Failures
If a source file uses an undeclared identifier, the compiler needs the declaration or a corrected name. If a function is declared but has no linked implementation, the failure occurs later. Knowing which stage reported the error prevents unrelated changes to hardware settings.
| Symptom | Likely explanation |
|---|---|
| The edited source is never compiled | It may not belong to the active project or configuration |
| Device registers are unknown | Wrong target or incompatible header |
| Function is declared but unresolved | Its source or library is missing from the link |
| main is defined twice | Multiple example entry points were added |
| Output image is larger than expected | Additional libraries or changed build options may be included |
| Program exceeds memory | Inspect the actual code and data allocation report |
Keep the complete build log when asking for help. The final failure line often contains less useful information than the first compiler or linker diagnostic. Include the selected device and toolchain version so another person can reproduce the context.
Locate the Correct Firmware Image
A production build and a debug build serve different purposes. For standalone programming, locate the intended production image rather than choosing the first HEX file found anywhere under the project folder.
Microchip's HEX-file guide describes the production output under the project's dist directory in MPLAB X. The exact subdirectory and filename reflect the project and configuration. Inspect the build output to identify the artifact produced by your own project.
Do not assume that a filename ending in HEX means it contains the latest source. Check its path and relationship to the completed build. Keeping several copies called final.hex in unrelated directories is an easy way to program an outdated image.
Organize a Small Multi-File Project
Once the one-file example builds, you can separate related functions into modules. For example, main.c can coordinate the application, led.c can implement an LED interface, and led.h can declare that interface. Add the implementation source to the project and include the header where the declarations are needed.
A declaration tells the compiler how a function is called. A definition supplies its body. Keep global object definitions in one appropriate source file rather than placing ordinary definitions in a header included by several files.
/* led.h */
#ifndef LED_H
#define LED_H
void led_init(void);
void led_set(unsigned char on);
#endif
The include guard prevents repeated inclusion within one translation unit from repeatedly processing the header's declarations. It does not make a missing implementation appear, and it does not automatically resolve multiple global definitions placed in different compiled files.
Prefer clear names over needless fragmentation. A five-line experiment does not need a large framework, but separating a reusable peripheral driver from application decisions becomes helpful as the project grows.
Use Build Configurations Deliberately
A configuration can collect related options for a particular build. If you maintain more than one hardware revision, keep pin mapping and clock assumptions explicit rather than changing unrelated source constants by hand before every build.
For example, two boards using different oscillator frequencies need consistent delay and serial settings. The firmware must select the assumptions for the actual board. A successful build for board A does not establish correct timing on board B.
Record the selected configuration with a released image. If an issue later appears, you need to know which source and options produced the program, not merely which IDE happened to be installed on the computer.
Review Memory Use Before Adding Features
The PIC18F452 has limited RAM, so inspect the build's memory report while the project is small. A buffer's size is determined by its element count and representation, not by the number of lines used to declare it.
For example, 200 unsigned 16-bit samples require 400 bytes for the samples alone. Adding a second copy for processing doubles that allocation to 800 bytes before other application state and stack requirements. A streaming design may avoid the second complete copy if the algorithm permits it.
Likewise, library calls can add supporting code to the final image. When code size changes unexpectedly, compare the linked features and build options. Do not remove warnings or memory checks simply to obtain a successful build message.
Save More Than the Workspace Layout
A workspace layout remembers how the development environment is arranged, while source and project metadata define the application. Save the files that matter to rebuilding, and keep a reliable backup or version-controlled copy.
Include a short note with the device, clock, compiler version, device support and programming method. Keep locally generated temporary output separate from a deliberately released firmware image. This makes the project easier to move to another computer and reduces dependence on hidden settings.
Check a Project Copy
When preparing to share a project, inspect whether its source references point outside the project directory. A build can work on your computer because it finds a header in a personal folder that the recipient will not have. Use appropriate relative project paths and include the files you are authorized to distribute.
Keep manufacturer toolchains as dependencies rather than copying random installed files into the source tree. Document the required versions and installation sources. That gives the next developer a coherent setup instead of a collection of unexplained binaries.
Review and Next Experiment
We now have a project structure that connects source files to a target device and selected compiler. We also know why adding a file to a folder is not enough, why a header differs from an implementation, and why the output image must match the intended build configuration.
Return to the PIC minimum circuit and continue with the LED-blinking project. Begin with one known output before adding sensors and communication features.
Frequently Asked Questions
Why is my C file visible on disk but absent from the build?
It may not be included in the project's source list or active configuration. Add the file through the project workflow and inspect the build output to confirm that it is compiled.
Must every header appear in the project tree?
The compiler primarily needs a valid include statement and search path. Showing a header in the tree can help navigation, but it is not the same as including it in the source.
Can I use C18 libraries with XC8?
Do not assume binary compatibility. Review the migration documentation and obtain compatible source or libraries. Matching function names alone does not establish that prebuilt objects can be linked safely.
Why does the program build but not run on the board?
Compilation is one stage. The programmed image, configuration bits, target power, reset state and clock must also be correct. Diagnose those stages separately.
Should I add every example to one project?
Keep independent examples separate unless you deliberately integrate them. Multiple main functions and conflicting peripheral initialization are common consequences of combining unrelated examples without a plan.