C# Checked ListBox Control

Hey, everyone, hope you are doing great. In today's article, we are going to explore C# Checked ListBox Control. In the previous article, we discussed in details about C# TextBox, C# Label, C# ListBox, C# ComboxBox and C# Button. C# Checked ListBox plays very important role in Point Of Sale applications. In some words, we can say this is a combination of check boxes and list. C# Checked ListBox is used to gain specific information from end-user. It's mostly used in survey-based application to gain the voting for a specific purpose. We will work with Checked ListBox same as we have worked with ListBox & ComboBox. You can use C# Checked ListBox for multiple purposes. You can use this as the attendance taker to mark the attendance of students.

C# Checked ListBox Control

The C# Checked ListBox is simple list box with the combination of checks. It provides you the list and checks to mark them as you select the items. The user can select the single and multiple checks. According to the need, you can set the checks enabled and disabled. You can create conditional statements on which C# Checked ListBox will become enabled and disabled. When professional programmers used Checked ListBox they will also use the Conditional Statements. They make sure that checked boxes will become enabled only when user will fill up or proceed the above instructions. A live example of checkbox usage is the terms & condition form of any organization. If you are getting started with YouTube they will be asked you to read their terms and checked in the last that you are agreed or not. If you will check the box only then you can process forward. Same is the case will C# Checked ListBox, developers make the conditional check for inputs gained from C# Checked ListBox. If you are wanted to add the Checked ListBox, then go to the toolbox in design tab. Drag the C# Checked ListBox on the form. Now the CheckListBox is added to the form. The default name of first drag Checked ListBox is as CheckedListBox1. You can change this name from the property tab on the right-hand side. Supposed you are wanted to add values in C# Checked ListBox, then you have to write items after the default name and select the add method. In the following code, you can be observed how we inserted the values inside C# Checked ListBox.
using System;
using System.Drawing;
using System.Windows.Forms;

namespace TEPNet
{
    public partial class Form1 : Form
    {
        public Form1()
        {
            InitializeComponent();

        }

        private void button1_Click(object sender, EventArgs e)
        {
            checkedListBox1.Items.Add("TEP 1");
            checkedListBox1.Items.Add("TEP 2");
            checkedListBox1.Items.Add("TEP 3");
            checkedListBox1.Items.Add("TEP 4");
        }
    }
}
We have used the button. When user will click the button, C# Checked ListBox values appears. It depends on your logic that how you wanted to process the codes. I have used the button if you don't want to use the button you can simply copy the code after the InitializeComponent function. It will generate the following output when a button is clicked.

C# Checked ListBox Properties

If you are looking to change the default styles, color scheme, font size etc then there are many properties which you can use to modify the Checked ListBox. Default Checked ListBox is simple in appearance, you can make that attractive by customising the properties. In the following part of an article, we will discuss, how to change foreground color and background color of a checked list box. How to change the font size and make checked and uncheck marks on checked ListBox items. If you are wanted to make the Checked ListBox items marked check when executing the program, then you have to use the CheckState attribute. There are three values which you can use for CheckState attribute.
  • Checked
  • UnChecked
  • Indeterminate
In the following code, we have used all the above values for CheckState attribute. By default all the Checked ListBox items are UnChecked so you don't need to write the UnChecked values.
using System;
using System.Drawing;
using System.Windows.Forms;

namespace TEPNet
{
    public partial class Form1 : Form
    {
        public Form1()
        {
            InitializeComponent();

        }

        private void button1_Click(object sender, EventArgs e)
        {
            checkedListBox1.Items.Add("TEP 1", CheckState.Checked);
            checkedListBox1.Items.Add("TEP 2", CheckState.Indeterminate);
            checkedListBox1.Items.Add("TEP 3", CheckState.Unchecked);
            checkedListBox1.Items.Add("TEP 4");
        }
    }
}
We don't use the CheckState for the 4th item because by default it's unchecked. If you will execute the code, you observed that Check will be marked, Indeterminate is Check but can't edit and uncheck is unmarked. If you can't understand then the below image will the exact output of the above code. If you are looking to change the background color then you have to use the backColor property. BackColor property is applicable on all tools which are available in ToolBox. In the following code, we are going to change the background color of Checked ListBox from white to AliceBlue. We will use the Color property to set the color. You can get the idea from the code.
using System;
using System.Drawing;
using System.Windows.Forms;

namespace TEPNet
{
    public partial class Form1 : Form
    {
        public Form1()
        {
            InitializeComponent();
            checkedListBox1.BackColor = Color.AliceBlue;
            checkedListBox1.Items.Add("TEP 1");
            checkedListBox1.Items.Add("TEP 2");
            checkedListBox1.Items.Add("TEP 3");
            checkedListBox1.Items.Add("TEP 4");
        }

       
    }
}
If you are wanted to change the foreground color or color of the font, then you have to use the ForeColor property to set the colors. We will be used the Color property to set the value of color which is assigned to the foreColor. In the following code, we have used BlueViolet color and set it for the foreground or for the font.
using System;
using System.Drawing;
using System.Windows.Forms;

namespace TEPNet
{
    public partial class Form1 : Form
    {
        public Form1()
        {
            InitializeComponent();
            checkedListBox1.ForeColor = Color.BlueViolet;
            checkedListBox1.Items.Add("TEP 1");
            checkedListBox1.Items.Add("TEP 2");
            checkedListBox1.Items.Add("TEP 3");
            checkedListBox1.Items.Add("TEP 4");
        }

       
    }
}
If you are wanted to change the font size, then you have to used to set the font property. We have to call the font constructor and passed two parameters. The first parameter is Font.FontFamily and the second parameter is the size of the font. In the following code, you can observe that how we changed the font size for Checked ListBox. The first parameter is the prototype and the second parameter is the font style property.
using System;
using System.Drawing;
using System.Windows.Forms;

namespace TEPNet
{
    public partial class Form1 : Form
    {
        public Form1()
        {
            InitializeComponent();
            checkedListBox1.Font = new Font(Font.FontFamily, 12);
            checkedListBox1.Items.Add("TEP 1");
            checkedListBox1.Items.Add("TEP 2");
            checkedListBox1.Items.Add("TEP 3");
            checkedListBox1.Items.Add("TEP 4");
        }

       
    }
}
If you are wanted to change the text style into italic, then you have to use the FontStyle property. We have to use the font constructor and passed two parameters. The first parameter is the prototype and the second one is the FontStyle.Value which is set to Italic in the following code. We have passed the CheckedListBox1.Font as the prototype parameter.
using System;
using System.Drawing;
using System.Windows.Forms;

namespace TEPNet
{
    public partial class Form1 : Form
    {
        public Form1()
        {
            InitializeComponent();
            checkedListBox1.Font = new Font(checkedListBox1.Font, FontStyle.Italic);
            checkedListBox1.Items.Add("TEP 1");
            checkedListBox1.Items.Add("TEP 2");
            checkedListBox1.Items.Add("TEP 3");
            checkedListBox1.Items.Add("TEP 4");
        } 
    }
}
If you are wanted to bold the text, then you have to use the font constructor and passed the Font style as the bold. In the following code, we have changed the text of checkedListBox items to bold.
using System;
using System.Drawing;
using System.Windows.Forms;

namespace TEPNet
{
    public partial class Form1 : Form
    {
        public Form1()
        {
            InitializeComponent();
            checkedListBox1.Font = new Font(checkedListBox1.Font, FontStyle.Bold);
            checkedListBox1.Items.Add("TEP 1");
            checkedListBox1.Items.Add("TEP 2");
            checkedListBox1.Items.Add("TEP 3");
            checkedListBox1.Items.Add("TEP 4");
        }

       
    }
}
If you are wanted to change the font family style then you have to use the font constructor and passed the font family name and size as the parameter. The first parameter is the name of font family and the second parameter is the font size. In the following code, we have used the "Times New Roman" and the size as 20.
using System;
using System.Drawing;
using System.Windows.Forms;

namespace TEPNet
{
    public partial class Form1 : Form
    {
        public Form1()
        {
            InitializeComponent();
            checkedListBox1.Font = new Font("Times New Roman",20);
            checkedListBox1.Items.Add("TEP 1");
            checkedListBox1.Items.Add("TEP 2");
            checkedListBox1.Items.Add("TEP 3");
            checkedListBox1.Items.Add("TEP 4");
        }

       
    }
}
If you are wanted to check that what the value you have selected, then you have to use the SelectedItem. In the following code, I have used the button and message box to show the selected item value. If you will execute the code, then you have to select the items first then click the button and it returns the selected item value in the message box.
using System;
using System.Drawing;
using System.Windows.Forms;

namespace TEPNet
{
    public partial class Form1 : Form
    {
        public Form1()
        {
            InitializeComponent();
            checkedListBox1.Items.Add("TEP 1");
            checkedListBox1.Items.Add("TEP 2");
            checkedListBox1.Items.Add("TEP 3");
            checkedListBox1.Items.Add("TEP 4");
        }

        private void button1_Click(object sender, EventArgs e)
        {
            MessageBox.Show(checkedListBox1.SelectedItem.ToString());
        }

       
    }
}
If you are wanted to verify that, which items are marked or check, then you have to use the foreach loop. In the following code, we have used the foreach loop to get the value from checkedListBox1.CheckedItems into an object-based variable which is itemCheck. Then we have to use message box to show the value of itemCheck in each step of a loop by converting the object type value into a string by calling the ToSting method.
using System;
using System.Drawing;
using System.Windows.Forms;

namespace TEPNet
{
    public partial class Form1 : Form
    {
        public Form1()
        {
            InitializeComponent();
            checkedListBox1.Items.Add("TEP 1");
            checkedListBox1.Items.Add("TEP 2");
            checkedListBox1.Items.Add("TEP 3");
            checkedListBox1.Items.Add("TEP 4");
        }

        private void button1_Click(object sender, EventArgs e)
        {          
         foreach (object itemChecked in checkedListBox1.CheckedItems)
            {           
                MessageBox.Show(itemChecked.ToString());
            }
        }   
    }
}
If you are wanted to change the border style of Checked ListBox, then you have to use the BorderStyle property and set the style according to your need. There are three styles which you can apply, all those styles are mention in the following code. You can check them one by one, if you will execute all of these styles at once then only the last one is getting executed and other above will get ignored by the compiler.
checkedListBox1.BorderStyle = BorderStyle.Fixed3D;
checkedListBox1.BorderStyle = BorderStyle.FixedSingle;
checkedListBox1.BorderStyle = BorderStyle.None;

C# Checked ListBox Events

C# provides various events to utilize with GUI tools. We can be used events to Checked ListBox and enhanced its features. Events are introduced to create conditional checks for the users to perform specific functionalities at specific times. You can change any attribute when user will click on the listed or checked items. Changed the color when items mark checked. It depends on the requirement of the software in which you will use the CheckedListBox. Following are some events which we are going to demonstrate with Checked ListBox.
  • Checked ListBox Click Event
  • Checked ListBox MouseHover Event
  • Checked ListBox MouseLeave Event
  • Checked ListBox BackColorChanged Event
  • Checked ListBox ForeColorChanged Event
  • Checked ListBox FontChanged Event
There are many other events, which we can use. Each event has its own logic of occurrence. Some events are common across the GUI Tools and some events are specifically used by GUI Tools. Checked ListBox Click Event This event will be executed when the user clicks within the boundaries of Checked ListBox. Whatever user will click on any listed item, checkbox or border it will get executed. To get the concept of the click event, suppose that you are wanted when someone clicks on CheckedListBox then the message will pop up and show notification of click. In the following program, we have created the code, which can execute in your compiler too.
using System;
using System.Drawing;
using System.Windows.Forms;

namespace TEPNet
{
    public partial class Form1 : Form
    {
        public Form1()
        {
            InitializeComponent();
            checkedListBox1.Items.Add("TEP 1");
            checkedListBox1.Items.Add("TEP 2");
            checkedListBox1.Items.Add("TEP 3");
            checkedListBox1.Items.Add("TEP 4");
        }

       
        private void checkedListBox1_Click(object sender, EventArgs e)
 {
 MessageBox.Show("You have Clicked !!");
 }  
    }
}
An output of the above code is given in the following image. You can perform any functionality as you required. For the demonstration purpose just used the message box to reflect any action. In the above code, we have to use the click event, if you want to activate the click event then simply click on the CheckedListBox in the design tab and it will create automatically click function. There is another option to do this, first, create any simple function and then set that function to the click event. In the following image, you can observe that when you click on CheckedListBox _Click function is set to click event.   Checked ListBox MouseHover Event This event will be executed when mouse will hover the boundaries of Checked ListBox. To clear the concept in the following code we are going to perform mousehover function. When user will hover the mouse on the boundaries event will get executed and show the message popup.
using System;
using System.Drawing;
using System.Windows.Forms;

namespace TEPNet
{
    public partial class Form1 : Form
    {
        public Form1()
        {
            InitializeComponent();
            checkedListBox1.Items.Add("TEP 1");
            checkedListBox1.Items.Add("TEP 2");
            checkedListBox1.Items.Add("TEP 3");
            checkedListBox1.Items.Add("TEP 4");
        }

        private void checkedListBox1_MouseHover(object sender, EventArgs e)
        {
            MessageBox.Show("Mouse is Hover !!");
        }   
    }
}
The above function is builtin and if you want to set the user define function then you can set by your own in the event property. You can perform any kind of functionality, we have used the message box, if you wanted to change anything then you can change such as the color, font family, and size of the text. In the following image, you can view the output of the above code. Checked ListBox MouseLeave Event This event will be executed when the cursor of the mouse will leave the boundaries of Checked ListBox. Once you have to hover the boundaries and slightly left the boundaries suddenly the popup shown on the screen and remind you that MouseLeave Event is get executed. In the following code, you can be observed the above concept.
using System;
using System.Drawing;
using System.Windows.Forms;

namespace TEPNet
{
    public partial class Form1 : Form
    {
        public Form1()
        {
            InitializeComponent(); 
        }
        private void button1_Click(object sender, EventArgs e)
        {
            checkedListBox1.Items.Add("TEP 1");
            checkedListBox1.Items.Add("TEP 2");
            checkedListBox1.Items.Add("TEP 3");
            checkedListBox1.Items.Add("TEP 4");
        }
        private void checkedListBox1_MouseLeave(object sender, EventArgs e)
        {
            MessageBox.Show("Mouse is Leave !!");
        }       
    }
}
MouseLeave is the default function which you can use after the name of CheckedListBox object name. You can set any user define function also as the alternative of the default function. When you will click the button it will be inserted the values in the CheckedListBox and when you hover the mouse cursor and leave the boundaries it will be executed the MouseLeave method. If you will not click the button, in this case, MousLeave method worked also. The following image is the screenshot of output. Checked ListBox BackColorChanged Event This event will occur when you will change the backColor or Background color of CheckListBox. Supposed you are wanted to perform any functionality when the user changed the backColor. Then we will code the functionality in the builtin BackColorChanged event. Instead of performing any functionality we are going to show a message box. In the following code, you can observe we have used the button to change the backColor of checkedListBox. When button will be clicked, the back color will be changed and BackColorChange Event will get executed.
using System;
using System.Drawing;
using System.Windows.Forms;

namespace TEPNet
{
    public partial class Form1 : Form
    {
        public Form1()
        {
            InitializeComponent();
            checkedListBox1.Items.Add("TEP 1");
            checkedListBox1.Items.Add("TEP 2");
            checkedListBox1.Items.Add("TEP 3");
            checkedListBox1.Items.Add("TEP 4");
           
        }

        private void button1_Click(object sender, EventArgs e)
        {
            checkedListBox1.BackColor = Color.AliceBlue;
        }

        private void checkedListBox1_BackColorChanged(object sender, EventArgs e)
        {
            MessageBox.Show("BackColor Is Changed !");
        }  
    }
}
In the above code, we have inserted the values in CheckedListBox during the form initialization phase. Then we have declared the Alice Blue as the backColor of the CheckedListBox within button click event. When user will click on the button, a background color of checkedListBox is get changed and the backColorChanged event gets executed. In the following image, you can preview the output of the above code. Checked ListBox ForeColorChanged Event This event is get executed when user will change the ForeColor of CheckedListBox. There are many ways to change ForeColor programmatically. Suppose we have created a button and add instruction to change the ForeColor of CheckListBox. To execute the ForeColor method we have to change the foreColor and best solution is to add foreColor change instruction into button click event. In the following code, you can be observed the above case.
using System;
using System.Drawing;
using System.Windows.Forms;

namespace TEPNet
{
    public partial class Form1 : Form
    {
        public Form1()
        {
            InitializeComponent();
            checkedListBox1.Items.Add("TEP 1");
            checkedListBox1.Items.Add("TEP 2");
            checkedListBox1.Items.Add("TEP 3");
            checkedListBox1.Items.Add("TEP 4");

        }

        private void button1_Click(object sender, EventArgs e)
        {
            checkedListBox1.ForeColor = Color.Red;
        }

        private void checkedListBox1_ForeColorChanged(object sender, EventArgs e)
        {
            MessageBox.Show("ForeColor Is Changed !");
        }   
    }
}
In the above code, we have inserted the demo values in the initialization phase of the form. Then we have used the button click event to change the foreColor of the CheckedListBox. Then we have used message box as the functionality which is performed when ForeColor is changed. In the following image, you can observe the output of the above code. Checked ListBox FontChanged Event This event will be executed when the font changed. There are several ways to change the fonts, such as you can change the font on the runtime or changed by the events. In the following code, we will create button event and write instruction to change the font the user click. Then used the message box to show interrupt when the font is getting changed. When any kind of change occurs in the font then this event will be executed, whatever you change the font size or font family. In the code, we just change the size of the font for demonstration.
using System;
using System.Drawing;
using System.Windows.Forms;

namespace TEPNet
{
    public partial class Form1 : Form
    {
        public Form1()
        {
            InitializeComponent();
            checkedListBox1.Items.Add("TEP 1");
            checkedListBox1.Items.Add("TEP 2");
            checkedListBox1.Items.Add("TEP 3");
            checkedListBox1.Items.Add("TEP 4");

        }

        private void button1_Click(object sender, EventArgs e)
        {
            checkedListBox1.Font = new Font(Font.FontFamily, 12);
        }

        private void checkedListBox1_FontChanged(object sender, EventArgs e)
        {
            MessageBox.Show("Font Is Changed !");
        }   
    }
}
If you want to execute above code in your compiler, then you have to drag the button and CheckedListBox. Then activate the button click and FontChanged Event. Then copy paste the above code into a compiler and you will be able to execute the program. Below is the output image of above code. In this tutorial, we have tried to give you a basic overview of advanced knowledge of C# Checked ListBox. All the above codes are added after the testing. You can do anything with C# Checked ListBox according to your requirements and ideas. If you face any kind of problem let us know. You can also get similar concepts from C# ListBox and C# ComboBox. You can also get the latest updates of C# Video tutorials from our YouTube Playlist (C# Video Tutorials). Don't forget to share it with your friends.

C# CheckBox Control

Hello, everyone, I hope you are doing great. In this tutorial, I am going to explain you about C# checkbox control, in my previous tutorials I have already explain you, C# RadioButton Control, C# ListBox Control, C# Button Control and C# Checked ListBox Control. C Sharp checkboxes have their own values in point of sale mission and desktop application development. Checkboxes are basically used to retrieve the specific data from the user. C# CheckBox allows the user to give specific input. It's mostly used where we have to retrieve the specific data from the user such as the gender selection, terms and condition agreement, and age-restricted data. You can simply use a single object C# CheckBox or multiple objects it totally depends on your requirement of developing a desktop app.

C# CheckBox Control

C# CheckBox is a simple checkbox along with the text which is the name of the checkbox. It will allow a user to make a multiple and specific selection. If the user will click first time on the checkbox then the small tick sign is marked on a checkbox. When user will click again on the checkbox it will get uncheck. Its mean user can select and deselect the checkbox. If you want to add the checkbox into your desktop application then you have to simply search for it from a toolbox, available in Visual Studio. Then drag the checkbox to your desktop application. Now you are able to use this checkbox. In the following image, you can observe that we have used 15 checkboxes. We just drag one instance of checkbox and replicate that to 14 Times. You will observe that each checkbox have the default name such as checkbox1, checkbox2, checkbox 3 and so on. You have two options to change the name of a checkbox. The first method is that go to the design tab, click on any of the checkboxes. On the right bottom, the property tab gets activate from where you can change the text of checkbox. In the following image, you can observe the property tab from where you can change the text of checkboxes. The second method is to change the name programmatically. You can access the same properties which are available in property tab with the help of programming attributes. Programmatically change the name of checkboxes we have to use text property. In the following code, we have used text property and assign a string value. A string value now becomes the text of checkbox when desktop application is executed.
using System;
using System.Drawing;
using System.Windows.Forms;

namespace TEP
{
    public partial class Form1 : Form
    {
        public Form1()
        {
            InitializeComponent();
            checkBox1.Text = "TEP CheckBox1";
            checkBox2.Text = "TEP CheckBox2";
            checkBox3.Text = "TEP CheckBox3";
            checkBox4.Text = "TEP CheckBox4";
            checkBox5.Text = "TEP CheckBox5";
        }  
    }
}
In the above code, you have observed that we have used text property right after initializecomponent() method. Because we are setting checkbox text dynamically and it will only happen when we will declare this code in the initialization phase of a desktop application. In the following image, you can observe the output of above code.

C# CheckBox Properties

There are several propertie are available, which you can override. In this section, we will discuss all those properties which we can be used to customize C# CheckBox. Such as the Text Color, Text Size, Text Font family etc. The default tools are looks very simple and common. To increase the interactivity of the user we have to create attractive applications and forms. For this purpose, we have to override the default properties. Supposed that you are wanted, if the program is executed Checkbox is by default marked checked. Then we will use the Checked property to mark it true. In the following code, you can observe that we have used three checkboxes to marked them true.
using System;
using System.Drawing;
using System.Windows.Forms;

namespace TEP
{
    public partial class Form1 : Form
    {
        public Form1()
        {
            InitializeComponent();
            checkBox1.Checked = true;
            checkBox2.Checked = true;
            checkBox3.Checked = true;
        }  
    }
}
In the above code, we only marked check first three checkboxes. By this, you can mark check and uncheck the checkboxes by default. In the following image, you can observe the output of above code. Supposed that you are wanted to change the background color of Checkbox. Then you have to use the backColor property available for CheckBox. There are many colors available which you can easily be used for your checkboxes. In the following code, you can be observed the different color for each of the checkboxes.
using System;
using System.Drawing;
using System.Windows.Forms;

namespace TEP
{
    public partial class Form1 : Form
    {
        public Form1()
        {
            InitializeComponent();
            checkBox1.BackColor = Color.AliceBlue;
            checkBox2.BackColor = Color.Beige;
            checkBox3.BackColor = Color.BlueViolet;

            checkBox4.BackColor = Color.BurlyWood;
            checkBox5.BackColor = Color.DarkBlue;
            checkBox6.BackColor = Color.DarkOrange;

            checkBox7.BackColor = Color.DeepSkyBlue;
            checkBox8.BackColor = Color.Gainsboro;
            checkBox9.BackColor = Color.LawnGreen;
            checkBox10.BackColor = Color.LightSeaGreen;
        }  
    }
}
There are ten checkboxes in the above code, each checkbox has a unique color. Color combination is the major part of designing phase. The client basically focused on the front end of the desktop app that's why coloring matters a lot. In the following image, you can be observed that what right color mean to the eye and whats the wrong color means to an eye, its the output of above code. Supposed you are wanted to change the color of font or the foreground then you have to use the ForeColor property. By using the ForeColor property we can change the font color. By using the BackColor we have changed the background color and ForeColor property is the inverse. In the following code we just simply changed the BackColor into ForeColor and all the above color which we used for the background now used as the foreground.
using System;
using System.Drawing;
using System.Windows.Forms;

namespace TEP
{
    public partial class Form1 : Form
    {
        public Form1()
        {
            InitializeComponent();
            checkBox1.ForeColor = Color.AliceBlue;
            checkBox2.ForeColor = Color.Beige;
            checkBox3.ForeColor = Color.BlueViolet;

            checkBox4.ForeColor = Color.BurlyWood;
            checkBox5.ForeColor = Color.DarkBlue;
            checkBox6.ForeColor = Color.DarkOrange;

            checkBox7.ForeColor = Color.DeepSkyBlue;
            checkBox8.ForeColor = Color.Gainsboro;
            checkBox9.ForeColor = Color.LawnGreen;
            checkBox10.ForeColor = Color.LightSeaGreen;
        }  
    }
}
In the above code, some colors are very light in shade and some are dark. We can't judge the color by their names. Because there are many colors to be used. If you want to select any color then you can to try all the color first. In the following image, you can observe the output of the above code. Some colors are the light that's why you can't clearly saw the output. Supposed that you are wanted to change the size of the checkbox text. Then you have to use the font property to assign the text size. We will be used font constructor and passed the two parameters. The first parameter is the prototype and second is the size. In the following code, you can be observed how we set the font size for checkboxes.
using System;
using System.Drawing;
using System.Windows.Forms;

namespace TEP
{
    public partial class Form1 : Form
    {
        public Form1()
        {
            InitializeComponent();
            checkBox1.Font = new Font(Font.FontFamily, 5);
            checkBox2.Font = new Font(Font.FontFamily, 6);
            checkBox3.Font = new Font(Font.FontFamily, 7);

            checkBox4.Font = new Font(Font.FontFamily, 8);
            checkBox5.Font = new Font(Font.FontFamily, 9);
            checkBox6.Font = new Font(Font.FontFamily, 10);

            checkBox7.Font = new Font(Font.FontFamily, 11);
            checkBox8.Font = new Font(Font.FontFamily, 12);
            checkBox9.Font = new Font(Font.FontFamily, 13);
            checkBox10.Font = new Font(Font.FontFamily, 14);
        }  
    }
}
We have used Font.FontFamily as the prototype and integer value as the size of the font. You can also change the font family by using the font constructor. In the following image, you can observe the output of above code. You will also observe that as much integer value is small the size gets decreased and as much the value is incremented the size get increased. If you are wanted to change the font family of C# CheckBox text then you have to use the font constructor. We will pass two parameters the first parameter will be a name of font family and the second parameter will be the size of the text. On the note, you must have to know that font constructor does not allow single parameter. In the following code, you can be observed the name of font families.
using System;
using System.Drawing;
using System.Windows.Forms;

namespace TEP
{
    public partial class Form1 : Form
    {
        public Form1()
        {
            InitializeComponent();

            checkBox1.Font = new Font("Times New Roman", 11);
            checkBox2.Font = new Font("Century", 11);
            checkBox3.Font = new Font("Arial", 11);
            checkBox4.Font = new Font("Comic Sans MS", 11);
            checkBox5.Font = new Font("Copperplate Gothic Light", 11);
            checkBox6.Font = new Font("Georgia", 11);
            checkBox7.Font = new Font("Impact", 11);
            checkBox8.Font = new Font("Lucida Console", 11);
        }  
    }
}
All the above font family names are the default fonts which are available in the windows. If you want to use the special kind of font then you have to install that first before use. You have also mentioned the size along with the font family name. In the following image, you can be observed the output of the above code, and what font effects on the desktop application. If you are wanted to validate which checkbox is checked or not then you can simply be used the conditional statements. In the following code, I have used the button in which we have used a conditional statement. We used simple checks that which checkbox is marked will return the message box on the button click. When user will check any checkbox and click on the button it will return the message boxes with the named of marked checkboxes.
using System;
using System.Drawing;
using System.Windows.Forms;

namespace TEP
{
    public partial class Form1 : Form
    {
        public Form1()
        {
            InitializeComponent();

            
        }

        private void button1_Click(object sender, EventArgs e)
        {
            if (checkBox1.Checked == true)
            {
                MessageBox.Show(checkBox1.Text);
            }
            if (checkBox2.Checked == true)
            {
                MessageBox.Show(checkBox2.Text);
            }
            if (checkBox3.Checked == true)
            {
                MessageBox.Show(checkBox3.Text);
            }
            if (checkBox4.Checked == true)
            {
                MessageBox.Show(checkBox4.Text);
            }
            if (checkBox5.Checked == true)
            {
                MessageBox.Show(checkBox5.Text);
            }
            if (checkBox6.Checked == true)
            {
                MessageBox.Show(checkBox6.Text);
            }
            if (checkBox7.Checked == true)
            {
                MessageBox.Show(checkBox7.Text);
            }
            if (checkBox8.Checked == true)
            {
                MessageBox.Show(checkBox8.Text);
            }
            if (checkBox9.Checked == true)
            {
                MessageBox.Show(checkBox9.Text);
            }
            if (checkBox10.Checked == true)
            {
                MessageBox.Show(checkBox10.Text);
            }
        }  
    }
}
You can observe the output of the above code in the following image. In which we have to click the button after the selection of checkbox3 and it returns the message box with its name. If you are wanted to set any image as the background of C# checkBox then you have to use the image property and have to set the path of an image. In the following code, we are going to set the image for just checkbox1. Remeber that don't use large images for the background because it will disturb your whole layout.
using System;
using System.Drawing;
using System.Windows.Forms;

namespace TEP
{
    public partial class Form1 : Form
    {
        public Form1()
        {
            InitializeComponent();
            checkBox1.Image = Image.FromFile("C:\\Users\\Jade\\Pictures\\brownImage.jpg");
        }  
    }
}

C# CheckBox Event

C# provides many built-in functions which get executed on certain condition. Each condition is nominated as the event. Such as the TextChange Event. When user will change the text of any tool this event is getting executed. We can create a user define functions and assign them to event handlers. There are many events which we can use to enhance the interaction of C# CheckBox. Following are the basic C# CheckBox Events which we will use in a further section of this tutorial.
  • C# CheckBox BackColorChanged Event
  • C# CheckBox CheckedChanged Event
  • C# CheckBox Click Event
  • C# CheckBox ForeColorChanged Event
  • C# CheckBox MouseHover Event
  • C# CheckBox MouseLeave Event
  • C# CheckBox TextChanged Event
All the above event have their own condition on which they get executed. In the following part, we will discuss them one by one. We will also create example codes to learn their execution reasons and flow.

C# CheckBox BackColorChanged Event

This event raised when someone changed the background color of Checkbox or change color by any sort of code. The main thing behind the execution of this event is changing the background color. If we create a program in which we first change the color of the background and used this event then it will get executed right after background color gets changed. In the following code, you can get the idea. We have used the button click event handler in which we declared the background color for C# CheckBox. Then we have declared the BackColorChanged Event for C# CheckBox. When user will click on the button, background color gets changed and BackColorChanged Event gets executed.
using System;
using System.Drawing;
using System.Windows.Forms;

namespace TEP
{
    public partial class Form1 : Form
    {
        public Form1()
        {
            InitializeComponent();   
        }

        private void button1_Click(object sender, EventArgs e)
        {
            checkBox1.BackColor = Color.AliceBlue; 
        }

        private void checkBox1_BackColorChanged(object sender, EventArgs e)
        {
            MessageBox.Show("BackColorChanged Executed!");
        }  
    }
}
We have used AliceBlue color for the background. You can use other colors too, there are varieties of colors are available. In the following image, you can observe the output of above code. We have executed just message box when the color changed, you can perform any kind of functionality.

C# CheckBox CheckedChanged Event

This event is get executed when user will be changed the selection. Supposed you have marked check any checkbox and if you uncheck that CheckedChanged event is get executed. Every time you change the selection it will get executed. In the following code, you can observe that we have used CheckedChanged Event just of the checkBox1. So if a user will change the selection of checkbox1 then only it's get executed.
using System;
using System.Drawing;
using System.Windows.Forms;

namespace TEP
{
    public partial class Form1 : Form
    {
        public Form1()
        {
            InitializeComponent();
            
        }

        private void checkBox1_CheckedChanged(object sender, EventArgs e)
        {
            MessageBox.Show("CheckedChanged Executed!");
        }  
    }
}
You have to create a CheckedChange event for each of the C# CheckBox. We have just created for the first checkBox. In the following image, you can observe that we only mark checked the first checkbox and it returns the message popup.

C# CheckBox Click Event

This event will be executed when user will click on the text or on the checkbox. Supposed that you are wanted to perform any functionality when user will click any specific checkbox then you will be used the Click Event. This event is mostly used with buttons. In the following code you can be observed that we have added this event with the first checkbox so when user will click on the text of the first checkbox or click on the checkbox it will get executed.
using System;
using System.Drawing;
using System.Windows.Forms;

namespace TEP
{
    public partial class Form1 : Form
    {
        public Form1()
        {
            InitializeComponent();       
        }

        private void checkBox1_Click(object sender, EventArgs e)
        {
            MessageBox.Show("Click Executed!");
        }  
    }
}
In the above code, we just declare click event for checkbox1 only, if you will copy paste it multiple times and rename as checkbox2 and checkbox3 then it would not work. Because you have also assigned the event to the event property which is on the right bottom of visual studio. In the following image, you can be observed the output after execution of the code.

C# CheckBox ForeColorChanged Event

This event is executed when user will change the ForeColor or foreColor is get changed. Supposed if you have created the button click event and declare the foreColor for any specific C# Checkbox and used ForeColorChanged Event just for that specific CheckBox. Then we can execute this event properly. Because on the click of user ForeColor get changed and the ForeColorChanged event gets executed. In the following code, you have observed the above scenario.
using System;
using System.Drawing;
using System.Windows.Forms;

namespace TEP
{
    public partial class Form1 : Form
    {
        public Form1()
        {
            InitializeComponent();

            
        }

        private void button1_Click(object sender, EventArgs e)
        {
            checkBox1.ForeColor = Color.AliceBlue;

        }

        private void checkBox1_ForeColorChanged(object sender, EventArgs e)
        {
            MessageBox.Show("ForeColorChanged Executed!");
        }  
    }
}
When user will click the button, ForeColor of first C# CheckBox is get changed from Black to AliceBlue. After color get changed ForeColorChanged event get executed the return the message popup. In the following image, you can be observed the output that C# CheckBox1 foreColor gets changed.

C# CheckBox MouseHover Event

This event is executed when user will hover the mouse on C# CheckBox. Supposed you are wanted to perform any kind of functionality when user will hover the mouse on CheckBox then you have to use the CheckBox MouseHover event. In the following code, we have used ForeColor to be changed when user will hover the mouse on CheckBox.
using System;
using System.Drawing;
using System.Windows.Forms;

namespace TEP
{
    public partial class Form1 : Form
    {
        public Form1()
        {
            InitializeComponent();

            
        }

        private void checkBox1_MouseHover(object sender, EventArgs e)
        {
            checkBox1.ForeColor = Color.BlueViolet;
            MessageBox.Show("ForeColorChanged Executed!");
        }  
    }
}
This is a quite good example to demonstrate the MouseHover event. When user will hover the mouse cursor on the CheckBox1 then ForeColor is get changed into Blue Violet. In the following image, you can get the main idea how it looks after the execution.

C# CheckBox MouseLeave Event

This event is executed when user will hover the mouse and then left the mouse cursor from the boundaries of CheckBox. In short, this event is the inverse of MouseHover event. Now we are going to create animation via MouseLeave and MouseHover event. We will declare the BlueVoilet color for the font when user will hover the mouse and Black color for the font when user will leave the checkBox. Let's have a look at the code and observe its flow of execution.
using System;
using System.Drawing;
using System.Windows.Forms;

namespace strnull
{
    public partial class Form1 : Form
    {
        public Form1()
        {
            InitializeComponent();

            
        }

        private void checkBox1_MouseHover(object sender, EventArgs e)
        {
            checkBox1.ForeColor = Color.BlueViolet;
            
        }

        private void checkBox1_MouseLeave(object sender, EventArgs e)
        {
            checkBox1.ForeColor = Color.Black;
           
        }  
    }
}
If you want to execute the above code, then you have to drag one checkbox on your windows form. Then add mouse leave and mouse hover event. Copy the above code and inserted into your compiler and executed. When you will hover the mouse on the checkbox1 its font color gets changed and when leaving the checkbox then fore color get to default.

C# CheckBox TextChanged Event

This event is get executed when Text of checkbox is get changed. You can change the text simply write a code. Its depend on your logic and condition of the program. We simply going to change the text when user will click the button. We have used the simple message box to show the prompt that TextChanged event is get executed. In the following code, you can be observed the above scenario.
using System;
using System.Drawing;
using System.Windows.Forms;

namespace TEP
{
    public partial class Form1 : Form
    {
        public Form1()
        {
            InitializeComponent();           
        }

        private void button1_Click(object sender, EventArgs e)
        {
            checkBox1.Text = "Changed !";

        }

        private void checkBox1_TextChanged(object sender, EventArgs e)
        {
            MessageBox.Show("Text Changed !!");
        }  
    }
}
For each checkbox, you have to declare the separate TextChanged event handler. In the above code, we declared it just for the checkbox1. So when the default text of checkbox1 is get changed, TextChanged event get raised. In the following image, you can be observed the output. We have tried to explain you about the C# CheckBox from the beginning to its depth. By using the various examples. We have tried to give the touch of professional usage of events used with C# CheckBox with generic coding. All the above codes are tested first then uploaded, you can also check the executed output in the images which are given right after the codes. If you have any kind of problem regarding C# CheckBox you can share it with us, we will try to resolve your problems at first priority. You can also check our previous tutorials like C# ListBox ControlC# Button ControlC# Label Control and C# TextBox Control.

C# RadioButton Control

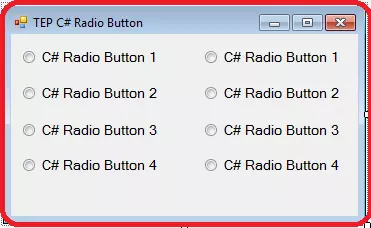
Hello folks, hope you are doing good. Today in this article I'm going to explain you all about C# RadioButton Control. In my previous articles, we discussed C# Checked ListBox & C# ListBox Control. C# RadioButton is also known as the OptionButton. The radio button allows the user to select the specific values as the input. When user will click on the radio button, it will get activated, a user can select only one radio button at the same time. Radio buttons have mostly used in the point of same applications and signup forms. You have mostly seen the radio button for the gender selection in the forms. Radio button makes easier for a user to give input. You can make specific input values. You can create any kind of application with the help of Radio Button. Even that you can create the polling desktop application by using a Radio button.

C# RadioButton Control

C# RadioButton has its own importance in desktop applications. Mostly point of sale applications used a Radio button to retrieve the specific input values. Such as the payment method is cash or credit. C# RadioButton enables the user to checked just one option at the same time and other options remain unchecked or unselected. If you are wanted to add C# RadioButton in your desktop application then you have to use the ToolBox in the design tab. Just search for the RadioButton and drag it to your application. In the following image, you can be observed that we have added the 8 RadioButtons and only one is selected. Because you can't select more than one RadioButton at the same time. You also observed that the name of radio buttons are the default names. If you want to change their name then you have two options. The first option is to change the name from the property section which is at the right side of visual studio development environment. We have changed the name of the first column radio buttons by this method. In the following image, you can be observed how we changed the name of radio buttons. The second method to change the name of a radio button is programmatically. In the source code, you have to set the radio button name with the help of Text property of radio button. After the name of radio button object call the text property and set the value. In the following code, you can be observed that how we set the value of radio button text property.
using System;
using System.Drawing;
using System.Windows.Forms;

namespace TEP
{
    public partial class Form1 : Form
    {
        public Form1()
        {
            InitializeComponent();
            radioButton5.Text = "TEP Code RB5";
            radioButton6.Text = "TEP Code RB6";
            radioButton7.Text = "TEP Code RB7";
            radioButton8.Text = "TEP Code RB8";
        }
    }
}
It depends on your ease, you can use the both method to set the name of radio buttons. For your better understanding, we have attached the screenshot of output along with the code.

C# RadioButton Properties

If you are wanted to override the default properties of C# RadioButton. Then you have to know about all properties,  such as you can change the color of radio button text, changed the size of text, a color of background and foreground etc. Supposed that you are wanted to change the state of RadioButton, by default every radio button is unchecked, you can be checked any radio button during the execution of a desktop application. In the following code, we have used the Checked property and make that true.
using System;
using System.Drawing;
using System.Windows.Forms;

namespace TEP
{
    public partial class Form1 : Form
    {
        public Form1()
        {
            InitializeComponent();
            radioButton1.Checked = true;
        }
    }
}
If you will add more radio buttons checked true then the only last radio button will be checked. Because you can only be checked one radio button at the same time. In the following image, you can preview that only radio button1 is checked. If you are wanted to change the background color of any RadioButton then you have to use the BackColor property and set the color. There are varieties of color which you can use to set as the background color. In the following code, we have used different colors for each of the buttons.
using System;
using System.Drawing;
using System.Windows.Forms;

namespace strnull
{
    public partial class Form1 : Form
    {
        public Form1()
        {
            InitializeComponent();
            radioButton1.BackColor = Color.AliceBlue;
            radioButton2.BackColor = Color.AntiqueWhite;
            radioButton3.BackColor = Color.Aqua;
            radioButton4.BackColor = Color.Aquamarine;
            radioButton5.BackColor = Color.Azure;
            radioButton6.BackColor = Color.Beige;
            radioButton7.BackColor = Color.Bisque;
            radioButton8.BackColor = Color.BlueViolet;
        }
    }
}
You must have to use the Color object to set any color. For the better understanding, we have taken the screenshot of output along with the code which is overriding the color properties. If you are wanted to change the forecolor or the color of the text then you have to use the ForeColor properties. It's same as the BackColor. In the following code, we have used the dark colors to dominate them on a windows form.
using System;
using System.Drawing;
using System.Windows.Forms;

namespace TEP
{
    public partial class Form1 : Form
    {
        public Form1()
        {
            InitializeComponent();
            radioButton1.ForeColor = Color.YellowGreen;
            radioButton2.ForeColor = Color.Tomato;
            radioButton3.ForeColor = Color.Violet;
            radioButton4.ForeColor = Color.Turquoise;
            radioButton5.ForeColor = Color.SteelBlue;
            radioButton6.ForeColor = Color.Sienna;
            radioButton7.ForeColor = Color.SeaGreen;
            radioButton8.ForeColor = Color.BlueViolet;
        }
    }
}
We used the Color object to set the color. In the following image, you can observe that how the color changes the appearance and interface. By using the color schemes you can make eye attractive windows form and make easier for the user to identified usable features of your app. If you are wanted to change the font size for radio button text then you have to use the Font property. To set the size we have to pass the font family prototype and font size as the parameter in font constructor. In the following code, you can observe that how we changed the font size of a radio button.
using System;
using System.Drawing;
using System.Windows.Forms;

namespace TEP
{
    public partial class Form1 : Form
    {
        public Form1()
        {
            InitializeComponent();
            radioButton1.Font = new Font(Font.FontFamily,10);
            radioButton2.Font = new Font(Font.FontFamily, 11);
            radioButton3.Font = new Font(Font.FontFamily, 12);
            radioButton4.Font = new Font(Font.FontFamily, 13);
            radioButton5.Font = new Font(Font.FontFamily, 12);
            radioButton6.Font = new Font(Font.FontFamily, 11);
            radioButton7.Font = new Font(Font.FontFamily, 10);
            radioButton8.Font = new Font(Font.FontFamily, 9);
        }
    }
}
In the above code, we have used a different size for each RadioButton. The first four RadioButton size is increased and other four RadioButton size get a decrease. In the following image, you can observe the size of radio buttons. If you are wanted to change the font family then you have to use the same font property which is used to change the font size. There are two parameters which we used to change the font family, the first parameter is the name of font and second parameter is the size of the text. Font constructor doesn't allow single parameter that's why we passed the size. In the following code, we have used the different fonts for each C# RadioButton.
using System;
using System.Drawing;
using System.Windows.Forms;

namespace TEP
{
    public partial class Form1 : Form
    {
        public Form1()
        {
            InitializeComponent();
            radioButton1.Font = new Font("Times New Roman", 11);
            radioButton2.Font = new Font("Century", 11);
            radioButton3.Font = new Font("Arial", 11);
            radioButton4.Font = new Font("Comic Sans MS", 11);
            radioButton5.Font = new Font("Copperplate Gothic Light", 11);
            radioButton6.Font = new Font("Georgia", 11);
            radioButton7.Font = new Font("Impact", 11);
            radioButton8.Font = new Font("Lucida Console", 11);
            
        }
    }
}
All the above-used fonts are the default font which is available in Windows. If you don't know which font you have to used then used Google Font. It will help you to select the best font for your desktop application. In the following image, you can observe how font changes the appearance of your desktop application. If you are wanted to validate which of the Radio Button is selected as the option then you can use the Checked property after the name of RadioButton Object name. You have to use the If Conditional Statement to create the logic if radio button object is checked then show the popup message. In the following code, we have demonstrated the functionality. Each radio button contains a logical statement to return the value in the message box if it is checked.
using System;
using System.Drawing;
using System.Windows.Forms;

namespace TEP
{
    public partial class Form1 : Form
    {
        public Form1()
        {
            InitializeComponent(); 
        }
        private void button1_Click(object sender, EventArgs e)
        {
            if (radioButton1.Checked == true)
            {
                MessageBox.Show(radioButton1.Text);
            }
            else
            if (radioButton2.Checked == true)
            {
                MessageBox.Show(radioButton2.Text);
            }
            else
            if (radioButton3.Checked == true)
            {
                MessageBox.Show(radioButton3.Text);
            }
            else
            if (radioButton4.Checked == true)
            {
                MessageBox.Show(radioButton4.Text);
            }
            else
            if (radioButton5.Checked == true)
            {
                MessageBox.Show(radioButton5.Text);
            }
            else
            if (radioButton6.Checked == true)
            {
                MessageBox.Show(radioButton6.Text);
            }
            else
            if (radioButton7.Checked == true)
            {
                MessageBox.Show(radioButton7.Text);
            }
            else
            if (radioButton8.Checked == true)
            {
                MessageBox.Show(radioButton8.Text);
            }
        }
    }
}
If you want to try the above code in your own compiler, then you have to add button click event first then you can execute the above code. It will allow you to select an option, and when you press the button it will generate the popup message and return the value of selected radio button. In the following image, you can observe the output of the above code. If you are wanted to use the image as the background for the radio button then you have to use the image property. We will be used the image property to set the path of an image as the background. Don't use the large image as the background because it will extend to screen automatically. In the following code, you can be observed how you can set any image as the background.
using System;
using System.Drawing;
using System.Windows.Forms;

namespace TEP
{
    public partial class Form1 : Form
    {
        public Form1()
        {
            InitializeComponent();
            radioButton1.Image = Image.FromFile("C:\\Users\\Jade\\Pictures\\brownImage.jpg");
        }  
    }
}

C# RadioButton Event

C# allows us to enhance the functionalities according to our requirements. Every desktop application has their own needs and uniqueness. If you want to perform any specific function on the certain time or on the certain action, then we used the C# Events. C# Events are simple as the other common functions, which are provided by the visual studio. You can use any user define a function and set it as the event handler. It depends on the developer ease. Mostly developer used the builtin events. There are several C# Events which are common among all the C# Tools. Some Events are specific to C# Tools, mean you can't use all the events for all the tools. Following are the C# Events which we will be used with RadioButton to enhance the interaction of the end-user.
  • C# RadioButton BackColorChanged Event
  • C# RadioButton CheckedChanged Event
  • C# RadioButton Click Event
  • C# RadioButton ForeColorChanged Event
  • C# RadioButton MouseHover Event
  • C# RadioButton MouseLeave Event
  • C# RadioButton TextChanged Event
We have already mentioned that there are several C# Events which you can use with RadioButton. We just used the above events with RadioButton to give the major concepts behind every event and logical usage.

C# RadioButton BackColorChanged Event

This event will occur only when the background color of a radio button is changed. Supposed we want to show a message or perform any functionality when background color of radio button changed, then we will use BackColorChanged Event. There is two method by which we can set this event for RadioButton. The first method is to activate this event from the property section of radio button via events. The second method is to create a user-defined function and set as the BackColorChanged Event in the event properties. In the following image, you can compare the both method.
First Method Second Method
In the following code, we have used the button and it clicks event. We set the backColor to AliceBlue. When user will click the button, background color set to the AliceBlue. You also observed there is BackColorChanged Event in which we have used just a message box to just demonstrate that something is performed.
using System;
using System.Drawing;
using System.Windows.Forms;

namespace strnull
{
    public partial class Form1 : Form
    {
        public Form1()
        {
            InitializeComponent();

        }

        private void button1_Click(object sender, EventArgs e)
        {
            radioButton1.BackColor = Color.AliceBlue;
        }

        private void radioButton1_BackColorChanged(object sender, EventArgs e)
        {
            MessageBox.Show("BackColor is changed to " + radioButton1.BackColor.ToString());
        }
        
    }
}
In the above code, when the background color of the radio button is changed. Message prompt with the name of color which is set as the background. In the following image, you can observe the output of the above code.

C# RadioButton CheckedChanged Event

This event will occur and executed when user will change the option, such as user have select A first and then select the B then this event will be executed. In the following code, we are going to demonstrate the above scenario.
using System;
using System.Drawing;
using System.Windows.Forms;

namespace TEP
{
    public partial class Form1 : Form
    {
        public Form1()
        {
            InitializeComponent();
           
        }

        private void radioButton1_CheckedChanged(object sender, EventArgs e)
        {
            MessageBox.Show("Option changed.");
        }
        
    }
}
In the above code, we have used two radio button. Whenever you will change the radio buttons value or option CheckedChanged event gets executed. In the below image you can observe the output

C# RadioButton Click Event

This event will occur when user will click on the radio button, whatever user will click to check the option or just click in the text of radio button. Supposed that you have required performing any kind of functionality when user will click on the radio button or the text of radio button then you can used Click event which will fulfill your requirement for this scenario. In the following code, we have demonstrated the above scenario.
using System;
using System.Drawing;
using System.Windows.Forms;

namespace TEP
{
    public partial class Form1 : Form
    {
        public Form1()
        {
            InitializeComponent();
           

        }

        private void radioButton1_Click(object sender, EventArgs e)
        {
            MessageBox.Show("You Clicked!");
        }
        
    }
}
In the above code, we have used two radio buttons and just added the click event to the first radio button. If you will click the radio button1 then you will observe the popup message but if you clicked in the radio button2 then nothing will happen except that radio button2 get selected. It's because we have added the Click event just for the radio button1. In the following image, you can observe the output of above code.

C# RadioButton ForeColorChanged Event

This event gets executed when user will change the font color or fore color of the radio button. Supposed that you have created a button and set fore color changed the code in button click function. So that when user will click the button, fore color get changed and after this ForeColorChanged event performed on the changing of the fore color. In the following code, you can observe the above scenario.
using System;
using System.Drawing;
using System.Windows.Forms;

namespace TEP
{
    public partial class Form1 : Form
    {
        public Form1()
        {
            InitializeComponent();
           

        }

        private void button1_Click(object sender, EventArgs e)
        {
            radioButton1.ForeColor = Color.BlueViolet;

        }


        private void radioButton1_ForeColorChanged(object sender, EventArgs e)
        {
            MessageBox.Show("ForeColor Is changed to " + radioButton1.ForeColor.ToString());
        }
        
    }
}
In the above code, we have set the ForeColor ti BlueViolet when user will click the button. Then ForeColorChanged Event executed and prompt the message which color is selected as the ForeColor. In the following image, you can observe the output of the above code.

C# RadioButton MouseHover Event

This event is executed whenever the user hovers the cursor of the mouse on the radio button. If you will hover the mouse on radio button text then its also executed because that's also included in the boundaries of a radio button. In the following code, we are going to demonstrate the above scenario.
using System;
using System.Drawing;
using System.Windows.Forms;

namespace TEP
{
    public partial class Form1 : Form
    {
        public Form1()
        {
            InitializeComponent();
           

        }

        private void radioButton1_MouseHover(object sender, EventArgs e)
        {
            MessageBox.Show("Mouse Hover to " + radioButton1.Text.ToString());
        }
        
    }
}
In the above code, we have set the prompt message when user will hover the first radio button. You can declare any kind of functionality which you want to perform. In the following Image, you can be observed the output.

C# RadioButton MouseLeave Event

This event occurs when mouse cursor will leave the boundaries of the radio button, it's opposite to the mouseHover event. We are going to demonstrate this scenario in the following code along with the MouseHover Event. So that we can be observed both events at once.
using System;
using System.Drawing;
using System.Windows.Forms;

namespace strnull
{
    public partial class Form1 : Form
    {
        public Form1()
        {
            InitializeComponent();
        }

        private void radioButton1_MouseHover(object sender, EventArgs e)
        {
            MessageBox.Show("Mouse Hover to " + radioButton1.Text.ToString());
        }

        private void radioButton1_MouseLeave(object sender, EventArgs e)
        {
            MessageBox.Show("Mouse Left " + radioButton1.Text.ToString());
        }
        
    }
}
In the above code, you cab observed the MouseHover and MouseLeave both events. When user will hover the mouse a prompt message show that user is hover mouse cursor on radiobutton1 and when a user left the radiobutton1 boundaries its show prompt message again. In the below image you can observe the output of above code.

C# RadioButton TextChanged Event

This event will execute when user will change the text. To perform its functionality we have to create a button click event in which we declared to change the radio button text. When user will click the button, a text of radio button is get changed and cause of change text, TextChanged Event get executed. In the following code, we have demonstrated the above scenario. We used the simple message box to pop the message when TextChanged Event gets executed.
using System;
using System.Drawing;
using System.Windows.Forms;

namespace TEP
{
    public partial class Form1 : Form
    {
        public Form1()
        {
            InitializeComponent();

        }

        private void button1_Click(object sender, EventArgs e)
        {
            radioButton1.Text = "New Text";
        }

        private void radioButton1_TextChanged(object sender, EventArgs e)
        {
            MessageBox.Show("Radio Button Text changed to " + radioButton1.Text.ToString());
        }
        
    }
}
You can observe in the above code, there are two events. The button click event changed the text of radio button and TextChanged event get executed when text gets changed. In the following image, you can be observed the output. You also observed that when button event is executed radio button text doesn't change but the value is set to new text. After the execute of textChanged Event, it's get changed. It's because all the events have same priority or execution, so first events get executed then their effects applied. We hope you will learn a lot of things from this C# Tutorial. We are looking forward from you about your experience with C# RadioButton. If you want to learn more on C# then you can subscribe our YouTube Channel and Playlist of C# Tutorials. We tried our best to provide you all possible solutions and concepts which you can use with C# RadioButton to enhance your desktop application development. Don't forget to share it with your friends. You can also check C# ListBox ControlC# Button ControlC# Label Control and C# TextBox Control.
Syed Zain Nasir

I am Syed Zain Nasir, the founder of <a href=https://www.TheEngineeringProjects.com/>The Engineering Projects</a> (TEP). I am a programmer since 2009 before that I just search things, make small projects and now I am sharing my knowledge through this platform.I also work as a freelancer and did many projects related to programming and electrical circuitry. <a href=https://plus.google.com/+SyedZainNasir/>My Google Profile+</a>

Share
Published by
Syed Zain Nasir