Raspberry Pi Zero W Library for Proteus

Hello friends, I hope you all are doing great. As we are working on Raspberry Pi libraries for Proteus these days, so today, I am going to share another awesome library i.e. Raspberry Pi Zero W Libary for Proteus. We have already shared the Raspberry Pi Pico, Raspberry Pi 3 & Raspberry Pi 4 Libraries for Proteus, I hope you have already installed these libraries.

We have only designed the exterior look of this module, it won't be able to read the Python code. You can use this module to design circuit diagrams of your projects or to demonstrate your project in the presentation. Although, just for fun, we have added the Arduino UNO firmware to it. So, you can add the Arduino hex file in it. Something is better than nothing.

So, let's install the Proteus Library and simulate Raspberry Pi Zero:

Where To Buy?
No.ComponentsDistributorLink To Buy
1Battery 12VAmazonBuy Now
2LEDsAmazonBuy Now
3ResistorAmazonBuy Now
4Raspberry Pi ZeroAmazonBuy Now

Raspberry Pi Zero W Library for Proteus

  • First of all, we need to download the Proteus Library zip file of Raspberry Pi Zero, by clicking the below button:

Raspberry Pi Zero W Library for Proteus

Adding Proteus Library Files

  • Extract the content of the Proteus Library zip file.
  • Here, you will find a folder named "Proteus Library Files".
  • Open this folder and you will find below two library files in it:
    • RaspberryPiZeroTEP.IDX
    • RaspberryPiZeroTEP.LIB
  • Place these two files in the Library folder of your Proteus software.
  • You will find the Library folder at this location: C > ProgramFiles > LabCenter Electronics > Proteus8.

Note: For a better understanding, you should read How to Add a New Library File in Proteus.

Raspberry Pi 4 in Proteus

  • So, after adding the Raspberry Pi Zero Library Files, open your Proteus software and if it's already open, then restart it so that it could index components from the newly-added Library.
  • Now, open the Proteus components search box by clicking the "P" button.
  • Here, make a search for Raspberry Pi Zero and you will get the below results:
  • Now, double-click on this Raspberry Pi Zero module to add it in your project list.
  • Place the Raspberry Pi Zero W module in your Proteus workspace and it will look like this:

  • We have tried to keep it small in size so that other components could easily add up in the workspace.

Raspberry Pi Zero Simulation in Proteus

As I mentioned earlier, this RPi Zero module in Proteus won't be able to read the Python code. So, just for fun, we have added the Arduino firmware inside. I know it's not that helpful but that's all we have right now. I hope we will design the real Raspberry Pi Zero simulator one day. So, let's add the Hex File in Raspberry Pi Zero W:

LED with Raspberry Pi Zero W

  • Now, let's design a simple circuit, as shown in the below figure:

  • I have simply attached an LED along with a resistor with Pin # 13 of the Raspberry Pi Zero W.
  • The LED attached has an analog Model Type and we need to change it to Digital, so open its Properties Panel by double-clicking on it.
  • In the Properties Panel, you will find "Model Type", change it from Analog to Digital.

Code for Raspberry Pi Zero

Let's clear this thing up one last time, we can't add Python code in this simulated Raspberry Pi Zero, so just to have some interaction, we have added the Arduino Hex file in it. So, we need to get the Arduino hex file.

  • So, open the Arduino IDE and open its LED Blink example from the File > Examples > Builtin.
  • Compile the code to get its HEX file, which we will add in the Raspberry Pi Zero.

Add Hex File in Proteus

  • Double-click Raspberry Pi zero in the Proteus software, to open its Properties Panel.
  • In the Program Files Section, paste the Hex File Location, as shown in the below figure:

Raspberry Pi Zero Simulation Results

  • Now let's run the simulation to get the results.
  • So, click on the RUN button of Proteus software and if everything worked fine, you will get similar results:

So, that was all for today. I hope you will enjoy this Raspberry Pi Zero W Library for Proteus. If having any difficulty, ask in the comments. Thanks for reading. Have a good day.

Raspberry Pi 4 Library for Proteus

Hello friends, I hope you all are doing great. Today, I am going to share the Raspberry Pi 4 Library for Proteus. In our previous tutorial, we shared the Raspberry Pi 3 Library for Proteus and as we mentioned in that tutorial, these Raspberry Pi libraries will have dummy modules i.e. We have just designed the exterior but these boards won't be able to read the Python code. Although just for fun, we have added the Arduino firmware in these boards, so we can upload the Arduino code in it. As the legends say, something is better than nothing. We have given these boards an unofficial name "Arduino Pi".

You can use these Pi boards to design your circuit diagram or can also use it in your presentation/demonstration of your projects. I hope you will enjoy these simulated Raspberry Pi boards. Before going forward, let's first have a brief overview of Raspberry Pi 4:

Where To Buy?
No.ComponentsDistributorLink To Buy
1Battery 12VAmazonBuy Now
2LEDsAmazonBuy Now
3ResistorAmazonBuy Now
4Raspberry Pi 4AmazonBuy Now

What is Raspberry Pi 4?

  • Raspberry Pi 4 is an advanced microcontroller board, designed by Raspberry Pi Foundation and is used in IoT and embedded projects.
  • You should have a look at this Raspberry Pi 4 Pinout to get an in-depth understanding of this board.

So, now let's have a look at How to add this Proteus library and simulate Raspberry Pi 4 in Proteus.

Raspberry Pi 4 Library for Proteus

  • First of all, we need to download the Proteus Library zip files by clicking the below button:

Raspberry Pi 4 Library for Proteus

Adding Proteus Library Files

  • Extract the files from the Proteus Library zip file and open the folder named "Proteus Library Files".
  • You will find two library files in this folder, named:
    • RaspberryPi4TEP.IDX
    • RaspberryPi4TEP.LIB
  • Place these two files in the Library folder of your Proteus software. You will find the Library folder at this location: C > ProgramFiles > LabCenter Electronics > Proteus8.
  • If you are having difficulty finding the Library folder, you should read How to Add a New Library File in Proteus.
  • An LED Blinking Proteus Simulation of Raspberry Pi 4 is also present in this zip file.

Raspberry Pi 4 in Proteus

  • After adding the Library Files, open your Proteus software and if it's already open then restart it, so that it could read the components from the newly added library.
  • Click on the "Pick from Libraries(P)" button in Proteus and make a search for Raspberry Pi 4.
  • If you have added the RPi4 library correctly, you will get the below result:

  • Double-click on this Rpi4 board to add it to your project's components list.
  • Place the Raspberry Pi 4 board in the Proteus workspace and it will look like this:

  • I hope you will enjoy its look, as we put real effort into designing it and as you can see it resembles a real RPi4 board.

Raspberry Pi 4 Simulation in Proteus

Now let's design the Simulation of Raspberry Pi 4 in Proteus. As I mentioned earlier, we can't feed Python code to this RPi4 board. So, we have added the Arduino firmware to it. Thus, we need to upload the Arduino hex file in it. Let's attach an LED with Raspberry Pi 4:

LED with Raspberry Pi 4

  • I have attached a Green LED along with a resistor to Pin # 13 of the Raspberry Pi 4, as shown in the below figure:

  • Double-click on the LED to open its Properties panel, here you will find the "Model Type".
  • Change the Model Type from Analog to Digital, otherwise, it won't glow.

Code for Raspberry Pi 4

  • As it's important, so let's clear it up one more time. The Pi board won't read the Python code, instead, it will work on Arduino Code.
  • So, open your Arduino IDE and get the LED Blinking Code from the Examples.
  • Select Arduino UNO in the Tools > Boards section.
  • Compile the code and get its hex file, as shown in the below figure:

Add Hex File in Proteus

  • We need to add the hex file in Raspberry Pi 4, so double-click it to open its Properties Panel.
  • In the Properties Panel, you will find a section named "Program Files".
  • Add the hex file location in this Program Files section, as shown in the below figure:

Raspberry Pi 4 Simulation Results

  • Now, let's run the simulation of Raspberry Pi 4 by clicking the RUN button in Proteus.
  • If everything's correct, the LED will start blinking, as shown in the below figure:

So, that was all for today. I hope you will enjoy this Raspberry Pi 4 Library for Proteus and will use it in your projects. Let me know your feedback. Have a good day. Take care!!!

Raspberry Pi 3 Library for Proteus

Hello friends, I hope you all are doing great. In today's tutorial, I am going to share a new Proteus Library for Raspberry Pi 3 module. In my previous tutorial, I shared the Raspberry Pi Pico Library for Proteus. Similar to Pico Library, this RPi3 LIbrary won't operate on the Python code. We have just designed the front look to use in the circuit design. Although, we can upload Arduino code to these simulated Raspberry Pi boards.

This Raspberry Pi Proteus Library will have only the Raspberry Pi 3 board in it. We will design the other Pi boards soon. So, let's have a look at How to simulate Raspberry Pi in Proteus:

Where To Buy?
No.ComponentsDistributorLink To Buy
1Battery 12VAmazonBuy Now
2LEDsAmazonBuy Now
3ResistorAmazonBuy Now
4Raspberry Pi 3AmazonBuy Now

Raspberry Pi 3 Library for Proteus

First of all, we need to download the Raspberry Pi library files, by clicking the below button:

Raspberry Pi 3 Library for Proteus

Adding Proteus Library Files

  • This Proteus Library zip file will have a folder in it, named "Proteus Library Files".
  • Open this folder and you will find these two files in it:
    • RaspberryPi3TEP.IDX
    • RaspberryPi3TEP.LIB
  • Next, we need to add these library files to the library folder of the Proteus software. So open C > PRogramin Files > Labcenter Electronics > Proteus 8 > Library folder and copy-paste these files into it.
  • This zip file also has a Proteus simulation of the Raspberry Pi 3 board.

Note: Look at How to add a new Library in Proteus 8, if you are having any issues.

Raspberry Pi 3 in Proteus

  • After adding the library files, open your Proteus software or restart it, if it's already open.
  • In the components search box, make a search for Raspberry Pi 3 and you will get the below results:

  • So double-click on this Raspberry Pi board to add it to your project.
  • Place the Pi board in your Proteus workspace, as shown in the below figure:

Simulate Raspberry Pi 3 in Proteus

Now we are going to simulate this Raspberry Pi 3 board in Proteus. We will attach a simple LED to one of its pins. As I told earlier, we have just designed the exterior of this board. It won't read the Python code. We can use it to design circuit diagrams for our project. But just for fun, we have added the Arduino firmware to it. So, we can upload the Arduino hex file in this Pi board.

LED with Raspberry Pi 3

  • I have connected a simple LED with resistance on Pin # 13 of the Pi board, as shown in the below figure:

  • In the Properties panel of LED, change the Model Type from analog to digital, otherwise, it won't work.

Code for Raspberry Pi 3

  • As I mentioned earlier, this Rpi3 board in Proteus won't read the Python code. We can only upload Arduino code in it.
  • So, I am going to use the LED Blinking code and will select Arduino UNO in the boards' section, as shown in the below figure:

Add Hex File in Proteus

  • In order to add this hex file, double-click on the Raspberry Pi 3 board to open its Properties Panel.
  • In the Properties Panel, you will find a section named Program Files.
  • Paste the hex file location in the Program Files section and click OK to close the panel.

Now, let's run our simulation to get the results:

Raspberry Pi 3 Simulation Results

  • So, now let's run the simulation and you will see that the LED on the board will start blinking, as shown in the below figure:

So, that was all for today. I hope you will use this Raspberry Pi Library to design your projects. In the next tutorial, I will share the Raspberry Pi 4 Proteus Library. Till then, take care. Have fun!!!

Raspberry Pi Pico Library for Proteus

Hello friends, I hope you all are fine. In today's tutorial, I am going to share the Raspberry Pi Pico Library for Proteus. It's a dummy library, we have just designed the display. We can't add the Python Code to it, but we can make it work with Arduino code. A mixture of Arduino and Raspberry Pi, I have given it an unofficial name "Arduino Pi". It's better to have something than nothing. You can design circuit diagrams using this library and can also demonstrate your project in presentations by designing simulations.

So, let's have a look at How to simulate Raspberry Pi Pico by adding this Proteus Library:

Where To Buy?
No.ComponentsDistributorLink To Buy
1Battery 12VAmazonBuy Now
2LEDsAmazonBuy Now
3ResistorAmazonBuy Now
4Raspberry Pi PicoAmazonBuy Now

Raspberry Pi Pico Library for Proteus

  • First of all, we need to download the zip file of Proteus Library for Raspberry Pi Pico, by clicking the below button:

Raspberry Pi Pico Library for Proteus

Adding Proteus Library Files

  • The Proteus zip file will have a folder named "Proteus Library File".
  • Open this folder and you will get two library files, named:
    • RaspberryPiPicoTEP.IDX
    • Raspberry PiPicoTEP.LIB
  • Now, open the Library folder of your Proteus software, normally present at C > Program Files > LabCenter Electronics > Proteus 8, and copy-paste these 2 library files into it.
  • The zip file of Proteus Library will also have a simulation of Raspberry Pi Pico in it.

Note: Look at How to add a new Library in Proteus 8, if you are having any issues.

Raspberry Pi Pico in Proteus

  • After adding the library files, restart your Proteus software so that it could index the components of the newly added library.
  • Open the Proteus components section and make a search for "Raspberry Pi Pico".
  • If you have added the library correctly, you will get the below result:

  • So our Pico board is now available in the Proteus components list.
  • Double-click on the Pico board to add it to your project.
  • Close the components section and drag-&-drop the Pico board in the Proteus workspace, as shown in the below figure:

We have tried to keep it small in size so that other components could get more space.

Simulate Raspberry Pi Pico in Proteus

As I told earlier, we can't program this Pico board with Python, which is the actual programming language of this board. But just for fun, we have enabled it to read the Arduino code. Let's design a simple blink example to see how it works:

LED with Raspberry Pi Pico

  • First, we need to design a simple LED circuit in Proteus, as shown in the below figure:

  • Double-click on the LED to open its Properties panel and here, we need to change the Mode Type of LED from Analog to Digital.

Code for Raspberry Pi Pico

  • Let's mention it one more time(as it's important), we can't program this board with Python code. We can only upload the Arduino Code in it.
  • So, here's the LED blink code and as you can see in the below image, I have selected Arduino UNO.

Add Hex File in Proteus

  • Now, we need to add this hex file to the Pico board of Proteus.
  • So, double-click the Raspberry Pi Pico to open its Properties Panel.
  • In the Properties Panel, there's a section called Program File, add the Hex file location here, as shown in the below figure:

Now let's run our simulation to check the results:

Raspberry Pi Pico Simulation Results

  • If everything goes fine, the LED attached to the Pico board will start blinking, as shown below:

So, that was all for today. I hope you will enjoy this Raspberry Pi Pico Library for Proteus and will use it in your simulations. If you have any suggestions, use the below comment form. Thanks for reading. Take care!!!

ESP32 Library for Proteus

Hello friends, I hope you all are doing well. In today's tutorial, I am going to share a new Proteus Library of ESP32 embedded module. ESP32 is a microcontroller board used mostly in IoT projects. It's a successor of ESP8266 or NodeMCU. We have already shared the NodeMCU Library for Proteus and I hope you guys have enjoyed it.

Proteus software is not capable of handling WiFi or BLE technology, thus we can't implement these technologies in the ESP32 board. Though, you can use its input/output pins to interface embedded sensors and modules. You can also use it to design the Circuit Diagram of your Project.

So, let's have a look at How to simulate ESP32 board in Proteus:

Where To Buy?
No.ComponentsDistributorLink To Buy
1Battery 12VAmazonBuy Now
2LEDsAmazonBuy Now
3ResistorAmazonBuy Now
4ESP32AmazonBuy Now

ESP32 Library for Proteus

  • First of all, download the zip file of Proteus Library for ESP32 board, by clicking the below button:

ESP32 Library for Proteus

Add Proteus Library Files

  • In this Proteus Library zip file, open the folder named "Proteus Library File".
  • In this folder, you will find two library files, named:
    • ESP32TEP.IDX
    • ESP32TEP.LIB
  • We need to add these library files in the Library folder of the Proteus software.

Note: Look at How to add new Library in Proteus 8, if you don't know already.

ESP32 in Proteus

  • Now open your Proteus software and if it's already open, then restart it. (it's necessary for Proteus to read the library files)
  • Open the components Library of Proteus and search for "ESP32".
  • If everything's fine, you will get the ESP32 board in the results section, as shown in the below figure:

  • We need to double-click on this module to add it in our project.
  • Now drag and drop the ESP32 board in the Proteus workspace, as shown in the below figure:

  • We have tried our best to keep it as small as we can, so that you get more space for other components.

So, using this ESP32 Library, we have added the board in Proteus software. Now, let's simulate ESP32 in Proteus:

Simulate ESP32 in Proteus

We are going to simulate the ESP32 board by running Blink LED Example. As I told earlier, we can't add WiFi and BLE capabilities in this simulated ESP32 board. So, we are going to select Arduino UNO in the board section of Arduino IDE to get the hex file.

LED with ESP32

  • First of all, design this simple circuit, where we have placed an LED at Pin # 13 of ESP32, as shown in the below figure:

  • In the Properties Panel of this LED, change the Model Type from Analog to Digital.

Code For ESP32

  • Open Arduino IDE and in the File>Examples, open the Blink LED example code, given below:

  • As you can see in the above figure, I have selected Arduino UNO in the Tools>Boards section of Arduino IDE.
  • Now compile the Arduino Code and get its hex file. Read this resource: How to Get the Hex File from Arduino IDE.

Add Hex File in Proteus

  • Open the Properties Panel of the ESP32 board by double-clicking on it in the Proteus software.
  • In the Program File section of the Properties Panel, add the hex file location, as shown in the below figure:

  • Now, close the Properties Panel by clicking the OK Button.

ESP32 Simulation Results

  • If you did no mistake, you will get results as shown in the below figure:

So, that was all for today. I hope you have enjoyed simulating ESP32 board in Proteus software. If you have any questions, ask in the comments. Till the next tutorial, take care. Have fun !!!

NodeMCU Library for Proteus

Hello friends, I hope you all are doing great. In today's tutorial, I will share a Proteus Library of another embedded module i.e. NodeMCU. NodeMCU is a microcontroller board and if you are new to this board, you should read Introduction to NodeMCU to get your hands dirty. NodeMCU is not present in the components library of Proteus and using this library you can easily simulate NodeMCU in Proteus.

We can't add WiFi and BLE capabilities to our module in the Proteus software, that's why it will just perform the basic functions i.e. sensors interfacing, PWM, I/O control etc. So, you can use it for simple code testing and can also use it to design circuit diagrams of your projects.

So, let's have a look at How to download NodeMCU Proteus Library and simulate it:

Where To Buy?
No.ComponentsDistributorLink To Buy
1Battery 12VAmazonBuy Now
2LEDsAmazonBuy Now
3ResistorAmazonBuy Now
4ESP8266AmazonBuy Now

NodeMCU Library for Proteus

  • First of all, download the Proteus Library zip file, by clicking the below button:

NodeMCU Library for Proteus

Add Library Files in Proteus

  • Extract the zip file and open the "Proteus Library Files" folder.
  • You will find two files in this folder, named:
    • NodeMCUTEP.IDX
    • NodeMCUTEP.LIB
  • Place these two files in the Library Folder of your Proteus Software.

Note: Look at How to add new Library in Proteus 8, if you don't know already.

NodeMCU in Proteus

  • After adding the NodeMCU files to the Library folder, open your Proteus software or restart it, if it's already running.
  • In the components list, make a search for "NodeMCU".
  • If you have added the Library files correctly, you will get the below result:

  • Double-click on this NodeMCU module to add it in the list of your project components.
  • Now place it in the Proteus workspace and it will look like:

  • We have kept its size small as we got a lot of requests after Arduino Library to reduce the boards' sizes. I hope you will like this one.

So, we have successfully added the NodeMCU module to our Proteus software. Now let's simulate NodeMCU and for that, I am going to use the blink example:

Simulate NodeMCU in Proteus

LED with NodeMCU

  • First of all, we need to attach an LED with Pin # 13 of NodeMCU, as shown in the below figure:

  • Make sure to change the LED Model Type from analog to digital in its Properties Panel, otherwise, it won't work.

Code for NodeMCU LED Blinking

  • Now it's time to get the NodeMCU LED Blinking code, given below:

Note: As you can see in the above code, we have selected Arduino UNO in the boards' section. As I have told earlier, this NodeMCU module is only going to use its pins, we can't add WiFi or BLE capabilities in the Proteus software. So, while compiling the code, select Arduino UNO board. Something is better than nothing.

Adding Hex File in Proteus

  • Double-click on the NodeMCU module in Proteus software to open its Properties Panel.
  • Add the Hex file from Arduino IDE in the "Program File" section of the Properties Panel.

  • Click OK to close the panel.
  • Now run the Proteus simulation and if everything goes fine, you will get results as shown in the below figure:

So, that's how you can easily simulate NodeMCU in the Proteus software. If you have any questions, please ask in the comments. I will resolve them as soon as possible. In the next tutorial, we will share the ESP32 Library for Proteus. Till then take care and have fun!!!

Slicing of Sequences in Python

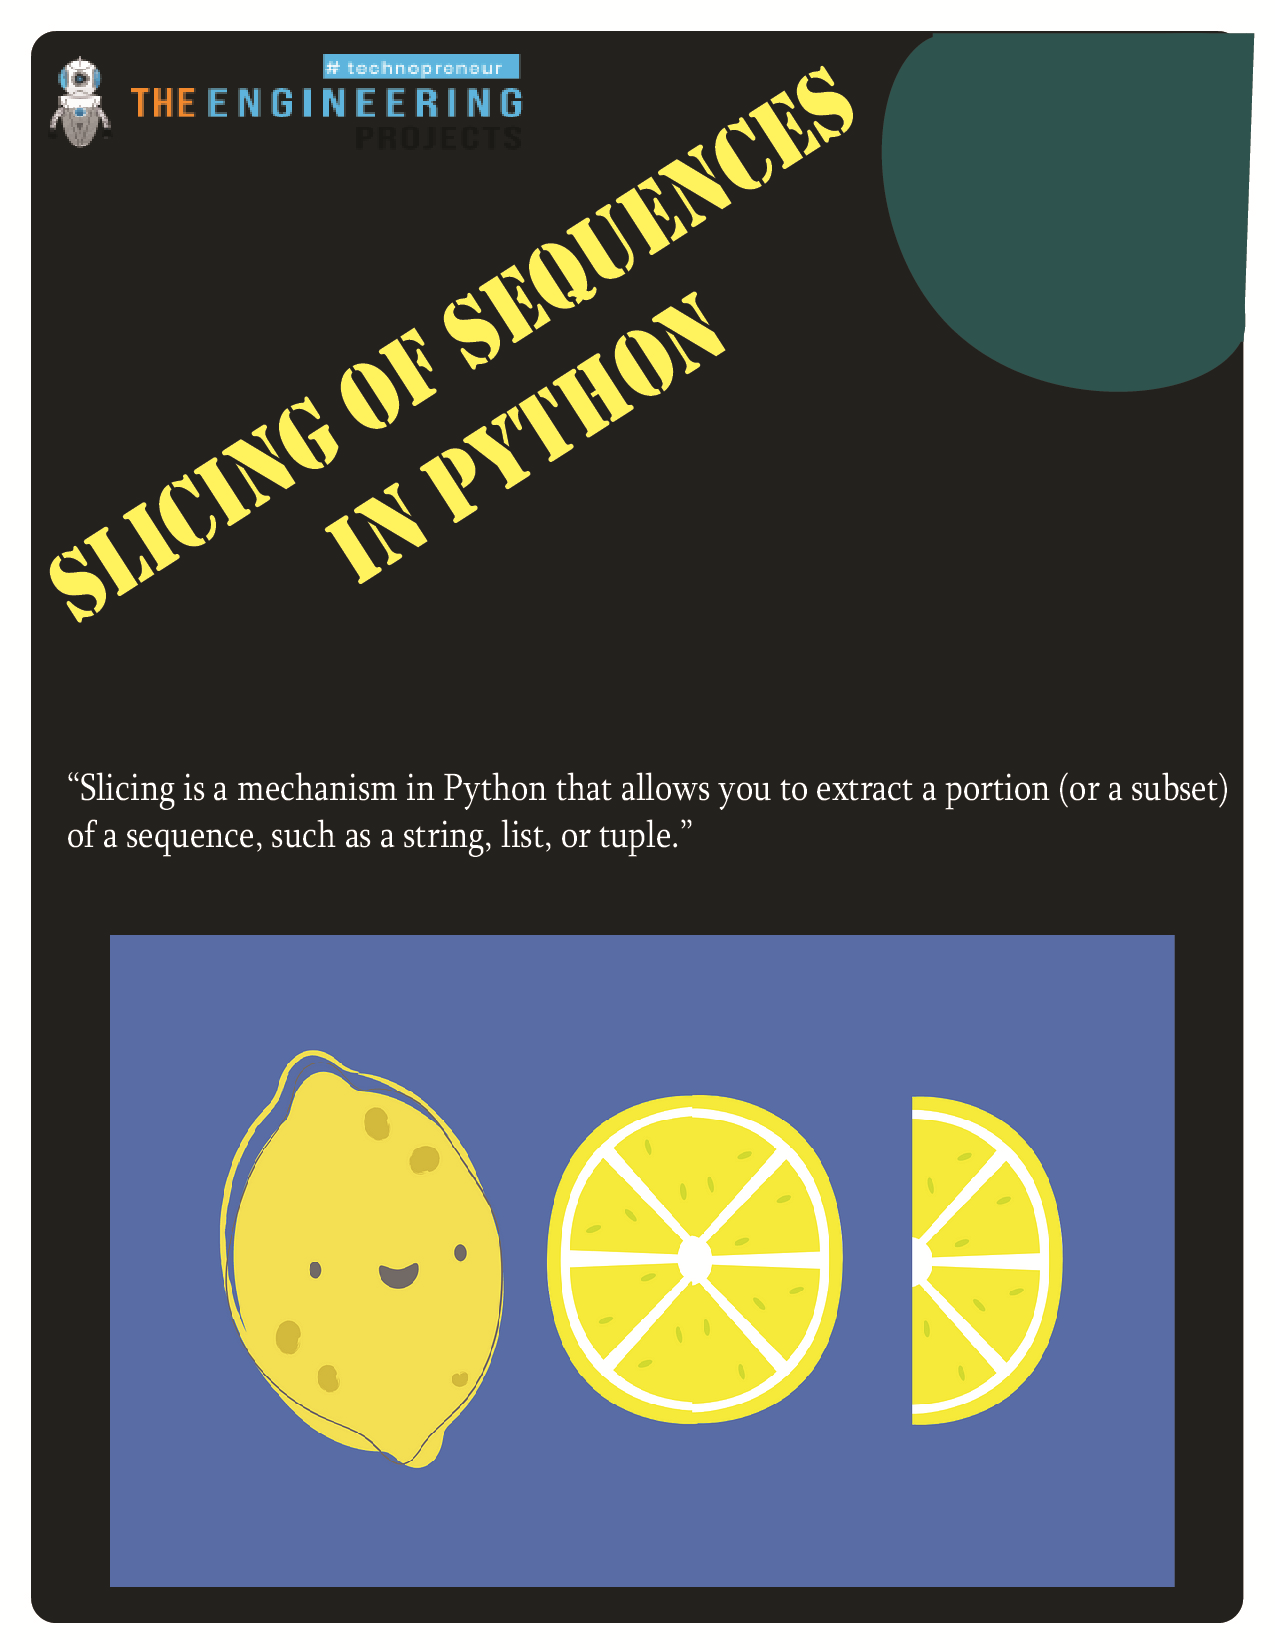
Hey learners! Welcome to the following lecture on Python, where all the examples are practically explained with the help of the Jupyter notebook. We have been working with the data types for a long time, and now we know all the basics about them. There are certain concepts that are applicable to almost all sequences, but there are some rules for performing this function. Python has many concepts that are unique and simple, and if we talk about the slicing of the data type, other high-level languages such as C++ have the same concept, but Python gives the easiest way to do so. How we will work on different data types to check whether they support the slicing or not. In this way, we can revise the concept that we have been working on so far. Nevertheless, before that, you have to check the list of content given next:

  • What is "slicing" in Python?

  • Can we slice any sequence?

  • What are the methods to use for the slicing process?

  • How do we use the colon to slice the lists?

  • Describe the process of using the colon in different ways and slice the sequence.

  • How do we use the slicing function on the arrays?

  • Can we use Numpy to slice the sequence?

  • How do you slice the tuple for slicing the sequences?

What is the Slicing of Sequence in Python?

We are all familiar with the slicing of bread, and the same concept is related to the slicing of a sequence with the help of different procedures. As we sliced the things and then picked the required ones for our usage, in this lecture we will slice the sequences(that are mutable or immutable in different ways). It is an important concept in programming especially if we talk about Python. There are different ways to introduce the slicing of data types:

"Slicing is a mechanism in Python that allows you to extract a portion (or a subset) of a sequence, such as a string, list, or tuple."

Slicing allows you to extract a portion of a sequence by specifying the start and end indices, allowing you to extract a contiguous portion of the sequence. There are different ways of slicing the data types, and we will go through all the important types that we have learned in this course. 

Methods of Slicing Data Types

There are certain ways to perform the same operation in a different way while you are programming. This is a plus point of Python it provides programmers to work in uncomplicated ways. People with prior experience in programming will find it super easy to slice the data types. There are two options for using the slicing mechanism mentioned below:

  1. Slicing through colon

  2. Slicing through function

There are still more types and ways to perform these functions, and we will try our best to perform all of you to show you the perfect way for every type of slicing you want according to your requirements. Moreover, it becomes easy to perform the complex problems when you know more than one solution in programming.

Slicing of Lists in Python

The first data type that will be sliced here is the list. We know lists are described by square brackets, and in Python, slicing of the list is a common practice because a large amount of data is stored in the lists; therefore, to perform efficient operations, we need the slicing often. The first example of the slicing of sequences is given next:

Slicing With Colon

This is the first style of slicing a sequence with the help of a colon. It is the simplest way to use the colon for slicing a long sequence, and the following syntax is used in it:

Name=[start;end]

Where,

name = "Name of the sequence declared before using this function."

start= It denotes the starting point for our sequence.

end: The point at which our chosen area must come to an end.

So let's try the example to check the results. 

Code:

#starting a new list to be sliced

myList = [22,8,11,9,44,11,22,89,4,90]

#slicing the list from the first to the fourth element

result=myList[1:4]

#printing the results

print("The sliced list= ", result)

Output:

Hence, only a small portion is obtained as expected. 

Slicing of List with Colon and Step Size:

We have seen a simple example till now but what if we want the variation? Programming is not an easy job and not every time do we need to simply put the portions of a list into different programs, but most of the time we have to pick the specific entries of the lists. For this, Python has another option for programmers. Simply by adding another parameter to the previous case, we can get the variations in the results according to our choice in the following way:

Code:

#starting a new birthday party list to be sliced

myList = ["balloons", "party hats", "cake", "candle", "drinks", "plates"]

#slicing the list to get from the first six elements at the step size of two elements

result=myList[1:6:2]

#printing the results

print("The sliced list= ", result)

Output:

Hence, in this case, we have seen the list in which the items from the birthday party were saved, and we wanted to get a final list that had the items from the parent list by ignoring the odd indexed elements and printing only the even indexed elements. We have taken this simple example to make sure you get the concept of the difference between the types of slicing discussed so far. 

Using the Double Colon in Python

If you have run the previous code, has the question popped into your mind as to what the other way to do so is? Well, yes, as we always say, programming gives you multiple options. If, in any case, the programmer is not able to use the start and end points and wants the whole sequence with steps, the other way to do so is to use the double colon. The simple code is given next:

Code:

#starting a new list with a string message in it to be sliced

myList = ["Hello", "we", "are", "programmers"," and", "we", "are", "interested", "in", "Python"]

#slicing the list to get the whole set with three steps till the end.

result=myList[::3]

#printing the results

print("The first four elements= ", result)

Output:

Here the procedure is simple and we are getting the required elements according to the need.

Slicing of the Sequence with Negative Indices

Another method to get the same results as in the first case is to use the negative indices. This option may seem different and weird, but in programming, having more options for the same task gives programmers more opportunities to use their creativity in a different way. Let’s prove this with an example:

Code:

#starting a new list with the floats in it to be sliced

myList = [23.8,44.8, 120.7, 226.90, 11.7, 118.90,12.55,1.3,77.3,119.1,23.90,31.66,119.4,12.65,11.4]

#slicing the list to get the 6th to 1st element from the end.

result=myList[-6:-1]

#printing the results

print("The sliced list= ", result)

Output:

Hence, the programmers can access the data from any side of the sequence easily, according to their needs. This way to slice the arrays has many interesting and fantastic applications in image processing.

Slicing the Sequence with Only One Value

The next type to be discussed is the one where only one number and one column are enough to slice the element. The limitation of this method is that the output contains all the elements from the side we started to the ending point, or, as we can say, this is the best way to get the left or right part of the sequence by using merely the starting or ending point and using the colon. The syntax to do this is

  1. Name[start:]

  2. Name[:end]

Here, two cases are discussed. Take the example of a long list where the requirement is to obtain the first five elements only, then the following code will be used:

Code:

#starting a new list with a string message in it to be sliced

myList = ["Hello", "we", "are", "programmers"," and", "we", "are", "interested", "in", "Python"]

#slicing the list to get the first four elements from the end.

result=myList[:4]

#printing the results

print("The first four elements= ", result)

Output:

As you might expect, the next case is diametrically opposed to the one just discussed. If a person wants to get the second half of the same message, then we have to count ourselves and enter the number of elements that we want to print from the end. 

Code:

#starting a new list with a string message in it to be sliced

myList = ["Hello", "we", "are", "programmers"," and", "we", "are", "interested", "in", "Python"]

#slicing the list to get the last five elements from the end.

result=myList[5:]

#printing the results

print("The first four elements= ", result)


Output:

Hence, the result we wanted to get is here on the screen. This gives a quick and easy way to print the entire length of the sequence. 

Slicing with Function

To slice the sequence, there is a special function that we have also mentioned in this lecture. Using the function is uncomplicated; just feeding the data is in the function's syntax, and the programmers do not need any special declarations before it. The procedure is the same as what we have discussed so far, and therefore, to make things simple, we will use the single code for different types of applications in the slice function. 

Code:

#importing the double array from the NumPy library

import numpy as NumPy

#decalring the new array

myArray = NumPy.array([[1, 2, 3, 4, 5], [6, 7, 8, 9, 10]])

#Printing the first to the fourth index of the array using the slice function

result=myArray[0, 1:4]

print("Result= ", result)

#slicing both arrays at the same time and printing output

result=myArray[0:2, 1:5]

print("Result= ", result)


Output:

The following points are an extraction of the contents of this code:

  • The library in NumPy can be used to slice the sequences.

  • The double array is possible to import from NumPy.

  • The slicing of an array is possible using NumPy.

  • It is up to the programmer if he wishes to get the result from the single array or both of the arrays.

  • The index is used in the slice function, but not the position.


Slicing the Tuple Using Slice()

A tuple is another sequence that can be sliced. The procedure is the same, but we will use different ways to use the function in this example. 

Code:

#creating a new tuple having different data types in it

tuple = ("apple", "balloons", 32.2, "cat",12, "dog", "ear",23,"fruits","guitar","hen",1)

#using the slice function to get the third and fifth elements only

x = slice(3, 5)

print("Element at index three and five= ", tuple[x])

#using the slice function with the steps to get the required output

x = slice(1, 7, 3)

print("Sliced the tuple to get the result using step function= ", tuple[x])


Output:

Hence, tuples can easily be sliced using the function, and we have used it here because we wanted to save multiple types of data in the same sequence. 

Consequently, it was an informative lecture with a lot of examples and concepts. The start was full of an introduction to the slicing process and why we need the slice function in Python programming. After that, we learn different ways to use the colon for slicing. Although the concept was sometimes discussed in the previous lectures as well as here, we purely focused on the slicing, and it was interesting to see the examples of different data types such as sets, arrays, and tuples. We have a lot to learn in Python, so stay with us for the next lecture.

String Array using Jupyter Notebook in Python

Hey peeps! Welcome to the Engineering Projects where you are learning the basics of Python in detail. We are working a lot with the arrays as these are important concepts in most of the high-level programming languages till now, the numeric data was used in the arrays but for our practice, we are moving towards the next step where the focus will be on the string data type. The practice is done on the Jupyter notebook and every step is going to be explained well without skipping any concepts but to keep things easy, we are not emphasising unnecessary details and concepts. So, before going deep into the topic, have a look at the list of the contents that will be discussed in this lecture:

  • What are the strings?

  • How do we use the string in arrays?

  • What is the list?

  • How do we extract the characters from a simple string through indexing?

  • How do you relate the string array with the list?

  • How can we get more than one character from a string message without using the array?

  • How do we add more than one message together by using the concatenation?

  • What is the best way to access the elements of the string array through indexing?

  • Can we add more elements of the string array into the already declared array?

  • How do we remove the elements from the string array?

  • What is the relation between the string and character in Python and how do you extract the single alphabets from the string using the list method?

All these concepts will be discussed in detail and will be understood by using the coding in Jupyter Notebook. 

What is the String Array in Python?

Here is a quick revision of the concept we have learned so far in this series but it is important to understand the basic definition so that we may understand the difference between all of some basic data types. The string is the sequenced order of the characters. It means that all the meaningful conversations between people and even this lecture are in the form of string. So, in this way, the array, containing all the elements in the form of the string is called the string array. We define it as:

"The string arrays are the specific type of arrays in which all the elements are in the form of string which means it contains the collection of characters in such a way that every element is a meaningful word."

We use the string in our daily life during the conversation and there is no need to explain more because we have used the string many times in our series of these lectures. 

Getting the Character of String Through Indexing

If we start from the basics then we have to mention that as the string is a collection of different characters, then extracting the characters from the strings it is quite simple and easy. Why we are associating this method with the arrays? It is because the compiler can read all the characters by indexing them one after the other and that is the reason why we can fetch the characters in Python by using the indexing method. So, have a look at the code for doing this simple task:

Code:

#Declaring and printing the string message

str="We are learning Python"

#printing the single character from the message 

print("The string message = ", str)

print("The second character is " ,str[1])

print("The tenth character is ", str[11])

Output:

Getting More than one Character from String

Code:

#Declaring and printing the string message

str="We are learning Python"

#printing the single character from the message 

print("The string message = ", str)

#More than one character

print("The characters from second to ninth index are: " ,str[1:8])

#using only semicolons

print("The first ten index characters are :  " ,str[:10])

#out of the range characters

print("The out of the range characters are :  ", str[:45])

Output:

Here, the following points are to be understood:

  • More than one character can be extracted from the string using the index.

  • The starting and the ending number of the range you want to print are to be given in the index with a separation using the colon. 

  • If the programmer wants to print the elements from the start to a certain number, there is no need to mention the zero, and we can start directly from the colon. 

  •  By the same token, if the colon comes second and then the number is before it, the compiler will print the character at the index starting from the number till the end of the series of the characters.

  • In case, the programmer gives the numbers that are out of range then the compiler, instead of throwing the error, prints the whole string with its intelligent working. 

Adding String Arrays in Jupyter Notebook

We all have been working with the addition of numbers in our tutorials, but today, the good thing about the string array in Python is, the addition of the arrays, even if they have strings in them, is as easy as the other types of “addition processes." The process of concatenation is used for this. We define it as:

"The concatenation is a specific process used for the string to join two or more strings together in a specific manner."

The At this level, there is no need to explain more. Have a look at the following code:

#decalring the arrays with string words

A=["hi", "we", "are", "learning", "Python"]

B=["It", "is", "easy", "with", "theengineering.com"]

#Using the concatenation for the addition

print(A+B)

Output:

Arrays as List of String in Python

In Python, the concept of a string array can be associated with the list because it becomes easy for the programmers to deal with the string as the list has the following feature:

  • These contain the specific order of the elements, and for the string, if we want to have a specific message, the order is important and it makes our task easy. 

  • It allows frequent changes in the elements so that we may change the message according to our requirements.

  • Duplication of the element is possible in the list, and in the passing of the message, we observe the same words in single sentences. 

Similar concepts are being used here that we have seen when we were learning the numerical problems, but this time, it will be interesting to know the difference between the results with the help of shortcodes. 

Accessing the Strings in Different Ways

Once you have declared your string, the extraction of single or multiple strings from the same array is fun. The programmer just has to specify the location, and the element is popped on the output. But there are different ways to do so, and some of them are shown in the code next. 

Code:

#initializing the array containing the name of programming languages

languages=["C++", "C#", "MATLAB", "ASP.NET", "FLutter"]

#printing the arrays using the index in two ways.

print("\bAccessing the data through index: ",languages[3] )

print("\bAccessing the data through negative index: ",languages[-3] )

#getting the whole array of strings through for loop

print("\bPrinting the whole series using loop")

for lan in languages:

    print(lan)

Output:

Updating the String Array

Once the array is made, the good thing is that it can be updated according to the will of the programmer. Let’s say we had an array containing the names of the students in the class; if a new student gets admission or the previous one changes the class, it can be updated easily. In other programming languages, the arrays do not allow the updating of the elements. 

Code:

#initializing the array containing the name of programming languages

languages=["C++", "C#", "MATLAB", "ASP.NET", "Flutter"]

#appending the new element at the end 

languages.append("java")

#getting the whole array of strings through for loop

print("\bPrinting the whole series using loop after appending")

for lan in languages:

    print(lan)

#deleting the element from the array of string

languages.pop(2)

#getting the whole array of strings through for loop

print("\bPrinting the whole series using loop after deleting")

for lan in languages:

    print(lan)

Output:

Hence, the update process is easy to use in arrays. The point that must be cleared here is, the pop function is sued to remove the element from the array and the programmer can not use a string in this place otherwise the compiler will show the error. Only the number of the element can be used in this function, and you must have noticed that it is not the position of the element that we have mentioned here but the index of that particular element. 

Converting String into the List of Characters

In other programming languages, characters are separate data types that contain single alphabets and have their own identity and existence. In this way, there must be a specific way to initialize the characters and the strings. Usually, in languages such as C++ and C#, the ways to declare the string and characters are different. Strings are denoted by double quotation marks, and the characters are defined by using single quotation marks around the alphabet. The point that I want to make here is, in Python, there is no concept of single characters, but the declaration of the words or characters, when single or double quotation marks are used, means the string, no matter if it is a single alphabet or the whole message. 

In case the programmer needs to convert the string into a single alphabet (the data type is still a string), he uses a simple and uncomplicated function to do so. The code and the output of this specific program with an example are given next:

Code to Convert String into Alphabets:

#initialization and printing of the string message.

myMsg = " Python is easy. "

print("The message before conversion= ",myMsg )

#conversion of the string into alphabets.

myMsgList = list(myMsg)

print("The message after conversion= ",myMsgList )

#removing the white spaces from the result.

myMsgList2 = list(myMsg.strip())

print("The message without white spaces =", myMsgList2)


#printing the message without any single space

myMsgList3 = list(myMsg.replace(" ", ""))

print("The message without any single space =", myMsgList3)

Output:

Here, the following points must be known to understand all the operations performed. 

  • The string message is initialized simply, and after that, the programmers can convert it into a list for useful functions. 

  • To convert the whole string message into a single alphabet, the “list” function is used, and the characteristics of the string are converted into the list. Now, you do not have the string on the screen but the list. 

  • In this case, the compiler reads even the blank spaces between the alphabet and shows them in the form of a single character with single quotation marks. 

  • To remove the starting and end spaces, there is a method called "stripping" that eliminates the extra spaces from the message, and as a result, we get only the alphabets with the necessary spaces between them. 

  • Another method called “replace” is used in Python which replaces all the spaces between the message and easily converts the whole message into a series of alphabets with no spaces between them. 

There are other such methods that deal with the string in different ways. For example, the conversion of the string into single words is also possible, but for now, we are not discussing it. This is all for today, and we hope you learned a lot from this lecture. The beginning of this lecture included a very basic introduction to the string, and we saw how we can use strings in arrays. Moreover, using our concepts, we have learned many built-in functions, and with the usage of the string, it was easy to understand the concepts. We have seen the concatenation and other ways through which we can modify the strings according to our requirements. We will talk more about the string in our next lecture; until then, happy coding. 

Types and Operations on Array using NumPy in Python

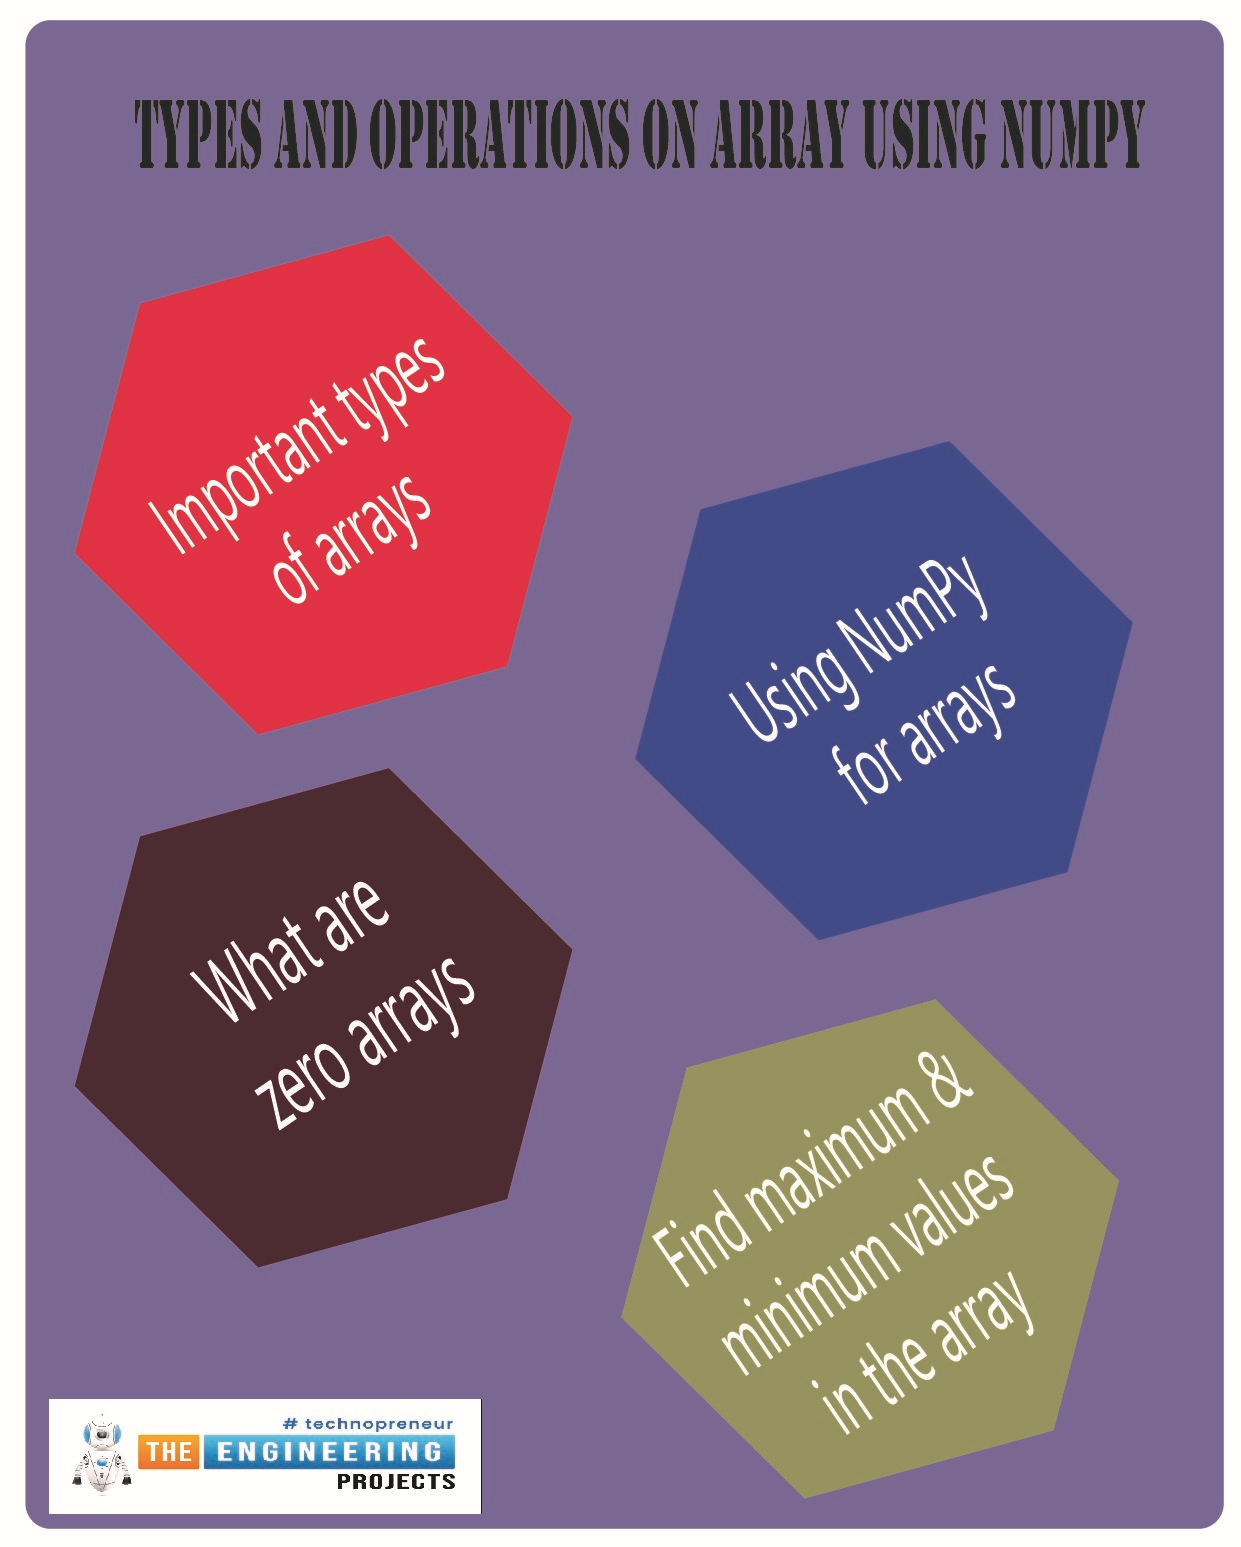
Hello students! Welcome to the next episode of NumPy, where we are working more on arrays in detail. NumPy is an important library for Python, and for concepts like integer arrays, it has many useful built-in functions that help programmers a lot. In the previous lecture, the installation and basic functions were discussed and this time, our focus is on the general operations and types of arrays that usually the programmers need during the coding. It is an interesting and basic lecture, and you will learn the following concepts in this lecture:

  • What are some important types of arrays?

  • Why are we using NumPy for arrays?

  • What are zero arrays?

  • What is the random array?

  • How can we use the ones array using NumPy?

  • Is it easy to perform the identity array in Numpy?

  • Practically perform the arithmetic operations in an array.

  • How do we find the maximum and minimum values in the array?

    Important Types of Array with NumPy

    If we talk about arrays, it is a vast concept, and many points are important to discuss. It is one of the reasons why we are using the library of numPy and it becomes super easy to work on the arrays using it. There are different types of arrays that we have learned about in our mathematics classes, and some of them are so important that NumPy has special functions for them so that programmers who want to use them do not have to write the whole code manually, but instead, using some important instructions, the array is formed and used automatically according to the instructions.

    Zeros Array in Python

    Understanding the zeros array is not as difficult as its name implies; it is the array that has all the entries set to zero. In other words, the array does not contain any other value than zero. The size and shape of the array are not restricted by any rules; therefore, any size and shape of the array can be declared as a zero array.

    By the same token, the code for some types of arrays is simple and easy, so here we want to show you how some programmers can add random numbers to their arrays by using this simple instruction. So have a look at the syntax, and then we will use it in the code:

    For the zero arrays:

    myArray =zeros((numbers of rows, numbers of columns))

    For adding more details to your array, you can use the following syntax:

    myArray = np.zeros( shape , dtype , order )

    We are using the zeros array for the first time, therefore, to keep things simple, we will use the first method in our program.

    Random Elements of Arrays:

    random.rand(numbers of rows, numbers of columns)

    Both of these require less effort, but with the help of these built-in functions, the programmers feel the convenience of getting the best result instead of using multiple lines of code to get the required results:

    Code:

    import numpy as NumPy

    #using the zeros method to print the zero array 

    print("\bZero array with two rows and three columns " )

    zeroArray=NumPy.zeros((2,3))

    print(zeroArray)

    #using the random method to print the array 

    print("\bThe random array with two rows and three columns ")

    randomArray=NumPy.random.rand(2,3)

    print(randomArray)

    Output:

    Here, if you have not noticed the syntax, you must see that both of these have similar syntax, but the numbers of brackets are different. If the programmers do not follow the same syntax for each case (for the simple syntax and for the detailed syntax of zero error), then they will face errors.

    Now, here is the task for you, check the other syntax mentioned above about the zeros array and try to find out how you can use the other details in your zeros array. 

    Ones Array using NumPy

    The next program to perform is also easy to understand if you know the previous one discussed above. This time, all the entries in the array are one. It means, no other entry other than 1 is the shape of the array can be rectangular, square, or any other according to the requirement of the programmer. 

    Syntax:

    myArray =ones((numbers of rows, numbers of columns))

    Code:

    #using the ones method to print the ones array 

    print("\bZero array with two rows and three columns " )

    onesArray=NumPy.ones((2,4))

    print(onesArray)

    # Declaring the array as a tuple

    # declaring their data types and printing the results

    onesArray = NumPy.ones((2, 3), dtype=[('x', 'int'), ('y', 'float')])

    print("\bDetailed ones array= ")

    print(onesArray)

    print("\bData type of ones array= ")

    print(onesArray.dtype)

    Output:

    Hence, in this way, we have seen two ways to print our ones array to compare the best method that programmers can use according to their requirements. 

    Identity Array Using NumPy

    The identity array is another important type of matrix or array that is used in multiple instructions, and programmers dealing with numbers must know its formation and applications. We know that the diagonal entries in a matrix or array are the ones that have the same value for row and column. In simple words:

    i=j

    Where,

    i=positions of the row

    j=position of the column

    So, for the identity array, these rules are followed:

    • All the diagonal elements are one.

    • All the elements other than the diagonal are zero. 

    • No other number is used in the diagonal array.

    • The shape of the diagonal matrix is always square, which means the numbers of rows are equal to the number of columns. 

    Now it's time to move towards its code and output.

    Syntax of Identity Array

    myArray=NumPy.identity(integer)

    As you can see, only one number is required for this type of array because it is decided that the numbers of rows and columns are equal. 

    Code for Identity Array

    import numpy as NumPy

    #declaring an identity array with four rows and four columns.

    #printing the simple identity array

    print("\bsimple identity matrix")

    myArray=NumPy.identity(4)

    print(myArray)

    #Multiplying the whole array with three.

    print("\bAfter the multiplication of the identity matrix with three")

    myArray2=3*myArray

    print(myArray2)

    Output

    In this way, we have learned that the multiplication of an array is possible in the code, and it is a simple process just as we do it manually in our mathematical problems. 

    Mathematical Operations on 2D Arrays

    When dealing with the arrays, there are certain points that are pros of choosing this data type to manage our data. One of the most prominent advantages is the mathematical operations that can be performed on the arrays by following simple and uncomplicated syntax. Here is the list of the operations that you are going to observe in just a bit on the arrays:

    Arithmetic Operations on Arrays

    This topic is interesting, and you are going to love it because it is simple to perform and easy to understand but is an important concept in Python, especially when using arrays. We all have been working with addition, subtraction, multiplication, and division since our childhood, and now is the time to use them in arrays. There is no need to explain more, so let’s move towards the code.

    Code for Arithmetic Operations on Array

    import numpy as NumPy

    #Declaring two arrays for the arithmetic operations.

    print("\bElements in arrays")

    A=NumPy.array([[12,45,11,7],[23,8,11,90],[12,55,1,90]])

    print("A= \n", A)

    B=NumPy.array([[76,43,1,90],[43,99,14,11],[12,90,22,55]])

    print("B= \n", B)

    #Performing the arithmetic operations.

    print("\bAddition of arrays \n", A+B)

    print("\bSubtraction of arrays\n", A-B)

    print("\bMultiplication of first array with the second\n", A*B)

    print("\bMultiplication of second array with the first\n", B*A)

    print("\bDivision of first array with the first\n", A/B)

    print("\bDivision of second array with the first\n", B/A)


    Output

    As you can see, we have a long list of outputs, and all the operations that we have discussed are self-explanatory. Here, we have seen that all the arithmetic operations can be done from array to array. Moreover, if you look at both types of multiplication and division, the answers are different, and it makes sense because these arrays do not follow the commutative law when dealing with arrays. Mathematically,

    A*B!=B*A

    Similarly,

    A/B!=B/A

    In addition to this, you must know that scaler arithmetic operations can be performed on the array that means, an integer or the float can be added, multiplied, divide and subtracted from the whole matrix, and the effect of that number will be observed on all the entries of that particular array.

    Maximum and Minimum of An Array

    The next operation in which we are interested in finding the maximum and minimum values in the array. These work great when dealing with image processing and related concepts. These are two different operations, and keep in mind, it seems easy to find the maximum and minimum values in the simple and small arrays, but when talking about the arrays with the order 1000*1000, it becomes almost impossible to find the required value. So without using more time, have a look at the code given next:

    The Syntax for Maximum and Minimum Value

    maximum_value=numPy.max(Name of the array)

    minimu_value=numPy.min(Nmae of the array)

    Code for Maximum and Minimum Value

    import numpy as NumPy

    #Declaring two arrays for the arithmetic operations.

    print("\bElements in arrays")

    A=NumPy.array([[12,45,11,7],[23,8,11,90],[12,55,1,90]])

    print("A= \n", A)

    #Finding the maximum Value

    maximum=NumPy.max(A)

    print("Maximum Value in array = ", maximum)

    #Finding the minimum Value

    minimum=NumPy.min(A)

    print("Minimum Value in array = " ,minimum)


    Code:

    Hence, as you can see, the maximum value occurs more than once in that array, but the compiler only gives us one value. The reason why I am mentioning it is that if NumPy is not used in this case and the programmer does not associate it with the array, the compiler throws the error that there must be another function that has to be used with your particular operation because it takes the array as a tuple. These small details are important to observe because many times, the programmers are stuck into such problems and do not get the reason behind the array. 

    Syntax of Determinant in NumPy


    Determinant=numPy.linalg.det(Name of array)

    Code:

    import numpy as NumPy

    #Declaring two arrays for the arithmetic operations.

    print("\bElements in arrays")

    A=NumPy.array([[12,45,11,7],[23,8,11,90],[12,55,1,90],[11,33,66,1]])

    print("A= \n", A)

    #Getting the determinant of the array

    determinant =NumPy.linalg.det(A)

    print(determinant)

    Output:

    If you are confused with the keyword that we have just used here, let me tell you that linalg is the method in Python that is associated with the determinant of the square array. In other words, as we have used ”random” with the rand function above, there must be the use of linalg with the det function. Moreover, never use these functions with other types of arrays. The determinant can only be used with the square matrix. 

    Hence, it is enough for today. We have seen a lot of information about the arrays in this lecture, and all of these were performed on the NumPy library. At the start, we saw the types of arrays that the programmers used often in the coding. After that, we saw the mathematical operations such as the arithmetic and general operations in the NumPy. We tried our best to use similar arrays for different operations to make the comparison in our minds. All of these were uncomplicated, and throughout this lecture, we revised the basic concepts of the matrices and arrays that we learned years ago during our early education of computers and mathematics.

    Installation and Functions of NumPy in Python

    Hey, peps! Welcome to the new tutorial on the Jupyter notebook. As we are moving towards a higher level of Python, therefore, it is important to understand other ways of doing the same task. As we read in the previous lecture about 2D arrays, this time it is going to be done with the help of a famous library in Python. This time, you are going to learn different, engaging, and advanced-level concepts that not only help you deal with the 2D array but also the installation and working of the unique library of Python, which is NumPy. This lecture is going to be very useful and interesting, and therefore, we suggest you have a glance at all the goals of this lecture.

    • Getting the introduction to NumPy

    • Successfully installation of NumPy and knowing different methods for it

    • Using the arrays with the help of NumPy

    • Creation, indexing, flattening, and appending of the arrays using NumPy

    • Knowing the different ways in detail to use these methods.

    All of these concepts will be clear to you, and we will move on to more details in the next lecture but for this lecture, it is important to learn the basics.

    What is NumPy?

    NumPy is a fantastic library for dealing with numeric data. You must know that a library in Python is a collection of modules that add functionality to a Python program. Libraries are typically distributed in the form of packages, which can be installed with package managers such as pip. If you remember, at the very first lecture of this course, we installed the packages by using pip. The same is the case with NumPy, and this will be clear in just a bit, but for now, you must know that they said that they could include modules that define functions, classes, and variables, as well as algorithms and other services.

    NumPy, Pandas, matplotlib, and sci-kit-learn are some of the most commonly used Python libraries. They can be used for a variety of tasks, including data analysis and visualization, machine learning, and web development. Python programmers can take advantage of pre-existing code by using libraries, which can save time and effort when compared to writing everything from scratch.

    "NumPy (Numerical Python) is a Python library that adds support for large, multi-dimensional arrays and matrices, as well as a large collection of high-level mathematical functions for operating on these arrays."

    It is a fundamental Python package for scientific computing. The good thing here is, Python provides programmers with several ways to perform the same task so that every person may use the best way according to the requirements and expertise of the programmers. In the previous lecture, a simple method was used to perform the two-dimensional arrays, but you must know that NumPy is the second way to do so, which is the reason why we arranged this lecture.

    Installation of NumPy in Python

    Here comes the action. We are going to work with NumPy, and therefore, the installation process is necessary. The good news is, the programmers do not have to follow the prerequisites when you need to install the NumPy but only Python is enough. So if you are following our previous course, you are good to go with the Numpy. There are two ways to install NumPy:

    1. Installation with the Conda (Advanced level)

    2. Installation with the pip (Beginner’s level)

    Difference between Conda and Pip


    conda

    pip

    It is preferred by professional programmers.

    It is best for the students and learners. 

    It is a cross-language therefore, it can install non-python tools and libraries such as compilers and CUDA.

    It only installs the particular Python on the system. It can not install other libraries rather than Python.

    The source through which the conda installs libraries is its own channel so the resources are owned by the conda itself for the installation. Examples of the channels are defaults and conda-forge. 

    The installation is done from the Python Packaging Index (PyPI). Here it is important to understand that PyPI is the largest collection of packages and therefore, it has many features that create ease for Python programmers. 

    Conda is considered an integrated solution that is used to manage different types of dependencies and environments. It does not need other tools to manage the packages. 

    pip method has to get help from different types of tools to manage and arrange the dependencies and packages.


    Installation of NumPy Using Conda

    Installation with the help of Conda also has different types of methods and for the convenience of all types of users, we are discussing all the basic instructions here.

    The best practice for such installations is to use an environment. It means, instead of using the “install” method, the programmers will create the new environment.

    conda create -n my-env

    Once the environment is created, it's time to activate that particular environment.

    conda activate my-env

    Another option to perform the same option is to use conda-forge. Many professional programmers prefer this method because conda-forge provides a wide range of software packages, and in our case, NumPy is one of them. If you want to install from conda-forge then the following command is needed:

    conda config --env --add channels conda-forge

    The methods given above were a little bit tricky, and if the programmer prefers the simplest way, then they must only write the command given next:

    conda install numpy

    Pip Method for the NumPy

    Now, for the installation process at the beginner level, you have to follow the steps listed next. You have to understand that it is recommended to be at this level because all the requirements of this course are designed according to easy and effective ways to code. Hence, the steps given next are enough for all of you:

    • In the window’s search panel, write the Anaconda prompt.

    • Here, write the following command:

    pip install numpy

    • Wait for the installation and loading of the library on your personal computer. 

    • Now, to check if your NumPy is working well, go to your Jupyter Notebook.

    • For this, fire up your Jupyter Notebook by searching for it in your window applications. 

    • Go to the new Python project and wait for the new tab to be opened in your browser.

    Note: It is essential to notice that every time the programmers want to use Numpy, they have to import it into the code, and that is the first step of every program where the programmer needs to get help from NumPy. 

    Using the Arrays with NumPy

    The typical easy-to-deal-with arrays are similar when we talk about the Jupyter notebook and MATLAB etc. Yet, with the advancement of techniques, better and updated methods have been introduced. The NumPy is a numeric library and to learn its usage, the best way is to deal with the arrays. We hope you know the basics of arrays and their fundamental information; therefore, we are directly starting the practice of arrays. In this way, the students will learn the details of 2D arrays and NumPy side by side. 

    Creating 2D Array Using NumPy

    Creating the array is as simple as what the students have seen in the previous lecture. All the steps are easy, and the comments explain the function of each line.

    #importing the numpy

    import numpy as numPy

    #creating the new array from the imported NumPy library

    myArray = numPy.array([[34,8,12,4],[90,5,12,78]])

    #printing result

    print("The 2D array \n ", myArray)

    The output of this code is as expected:

    Getting Basic Information of Array with NumPy

    If you want to make an array automatically with the minimal information provided by you, then it can be done with the help of NumPy (such as declaring the shape and size of the array). There are other ways to do so, but using NmuPy gives the programmers relief. It is because NumPy has built-in functions; they just have to associate their array with that particular function and get the desired output. 

    #importing the numpy

    import numpy as numPy

    #creating the new array from the imported NumPy library

    #using the reshape and arrange functions

    myArray = numPy.arange(9).reshape(3,3)

    #printing the result

    print("The 2D array \n ", myArray)

    Output:

    Here, the important points to be noticed are

    • The arrange function is used to provide information about the total number of elements in the array. But this must be declared by keeping the shape of the array in mind. 

    • The reshape method has the following syntax:

    reshape(numbers of rows, number of columns)

    • The total number of elements must match the shape so that the compiler may arrange the numbers easily; otherwise, the programmer observes the error. 

    • All of the information is connected with the dot operator in the code. 

    • The values in both these functions are enclosed in parentheses.

    • The arrangement of both functions is important because if the reshape method comes before the arrange method, there will be a long list of errors and the program will not run.

    Indexing and Flattening Using NumPy

    The indeed method is not new to us. We all know that the index always starts at zero. But in the case, we are discussing, one must know that when an array is declared, the index is not for only the elements but for the whole set of the row. 

    Moreover, flatting is a special method in NumPy in which the output of the resultant elements in an array is not shown in the form of brackets and single rows, but the programmer gets the real form of the array that we have used in our mathematics and other cases of the array. If these two are not clear to you now, do not worry because after looking at the code given next, all things will be clear.

    #importing the numpy library

    import numpy as numPy

    #declaring my array

    myArray=numPy.array([[12,56,33,90],[3,89,12,45],[34,89,12,90],[56,12,9,221]])

    #using the flatten function

    output=myArray.flatten()

    print("The array is now = ", output)

    #using the index method to get the third-row

    a=myArray[2]

    print("The third row= ", a)

    The output of this program is given next:

    Hence, in this way, we have learned two functions in one code. Here you must know that there are many simple and important concepts about arrays. If we start discussing them in separate codes, then it will become boring and lengthy to learn the small functions and methods. 

    Appending the Elements in Array 

    Once the array is declared, the elements can then be modified. This concept is not applicable to other programming languages, such as C++. Yet, Python gives us this convenience, which is useful for programmers. The appending method is simple and easy, and this code will justify this:

    #importing the numpy library

    import numpy as numPy

    #declaring my array

    myArray=numPy.array([[12,56],[3,89],[34,89],[56,12]])

    print("\bThe array before appending  \n", myArray )

    #declaring the second array to be appended

    myArray2=numPy.array([[23,89],[12,90],[78,9],[78,11]])

    #appending the second array with the first one and printing the result

    print("\bThe result of two matrices \n ", numPy.append(myArray,myArray2,axis=1))

    Hence, both of these arrays are merged by simply appending them to each other. Moreover, the “axis=1” instruction tells the compiler that the rows of both of these arrays are to be joined in the respective manner; otherwise, the whole array is fixed after the second one. You should check it on yourself.

    Consequently, we have learned a lot today. From the introduction of NumPy to the installation of this library, all the steps were discussed here in detail. Moreover, this library was tested by using the array in different ways, such as creating, changing the dimensions, indexing, flattening, and appending the elements. All of these concepts were discussed thoroughly, and there are many more operations on the arrays. Hence, stay with us for more details in the next lecture.

    Syed Zain Nasir

    I am Syed Zain Nasir, the founder of <a href=https://www.TheEngineeringProjects.com/>The Engineering Projects</a> (TEP). I am a programmer since 2009 before that I just search things, make small projects and now I am sharing my knowledge through this platform.I also work as a freelancer and did many projects related to programming and electrical circuitry. <a href=https://plus.google.com/+SyedZainNasir/>My Google Profile+</a>

    Share
    Published by
    Syed Zain Nasir