| Where To Buy? | ||||
|---|---|---|---|---|
| No. | Components | Distributor | Link To Buy | |
| 1 | HC-06 | Amazon | Buy Now | |
HC-06 Bluetooth Module
- HC-06 is a Bluetooth module which is designed to work on serial communication. When we paired it with Bluetooth working devices such as smarts phones and tablet, its use becomes easier for device users.
- Its working depends on the wireless system, for sending and receiving data, it uses transceiver module RS 232 TTL. We do not use any cable for sending and receiving data for this module.
- The main feature of this Bluetooth module is that it can easily achieve serial wireless data transmission protocol.
- The frequency band at which it operates is 2.4 GHz ISM frequency.
- HC-06 adopts famous 2.0+EDR Bluetooth standard. The benefit of this standard is that data can be sent in less time interval. It can send data in 0.5 seconds of an interval. By this feature, the workload on Bluetooth chip can be reduced and a large amount of data can be sent in small time.
| PIN Name | PIN No | Description | Pad type | Note |
| GND | 13 21 22 | Ground pot. | Vss | |
| 1V8 | 14 | Integrated 1.8 V (+) supply with On-chip linear regulator output within 1.7-1.9 V. | Vdd | |
| AIO0. | 9 | Programmable input/output line. | Bi-Directional | |
| AIO1 | 10 | Programmable input/output line. | Bi-Directional | |
| PIO0 | 23 | Programmable input/output line, control output for LNA (if fitted) | Bi-Directional RX EN | |
| PIO1 | 24 | Programmable input/output line, control output for PA(if fitted) | Bi-Directional TX EN | |
| PIO2 | 25 | Programmable input/output line. | Bi-Directional | |
| PIO3 | 26 | Programmable input/output line. | Bi-Directional | |
| PIO4 | 27 | Programmable input/output line. | Bi-Directional | |
| PIO5 | 28 | Programmable input/output line. | Bi-Directional | |
| PIO6 | 29 | Programmable input/output line. | Bi-Directional | CLK_REQ |
| PIO7 | 30 | Programmable input/output line. | Bi-Directional | CLK_OUT |
| PIO8 | 31 | Programmable input/output line. | Bi-Directional | |
| PIO9 | 32 | Programmable input/output line. | Bi-Directional | |
| PIO10 | 33 | Programmable input/output line. | Bi-Directional | |
| PIO11 | 34 | Programmable input/output line. | Bi-Directional | |
| RESETB | 11 | CMOS Input with weak intemal pull-down | ||
| UART_RTS | 4 | UART request to send, active low. | CMOS output, tri-stable with weak internal pull-up | |
| UART_CTS | 3 | UART clear to send, active low. | CMOS input with weak internal pull-down | |
| UART_RX | 2 | UART Data input. | CMOS input with weak internal pull-down | |
| UART_TX | 1 | UART Data output. | CMOS output, Tri-stable with weak internal pull-up | |
| SPI_MOSI | 17 | Serial peripheral interface data input. | CMOS input with weak internal pull-down | |
| SPI_CSB | 16 | Chip select for the serial peripheral interface, active low | CMOS input with weak internal | |
| Vcc | 12 | 3.3V |
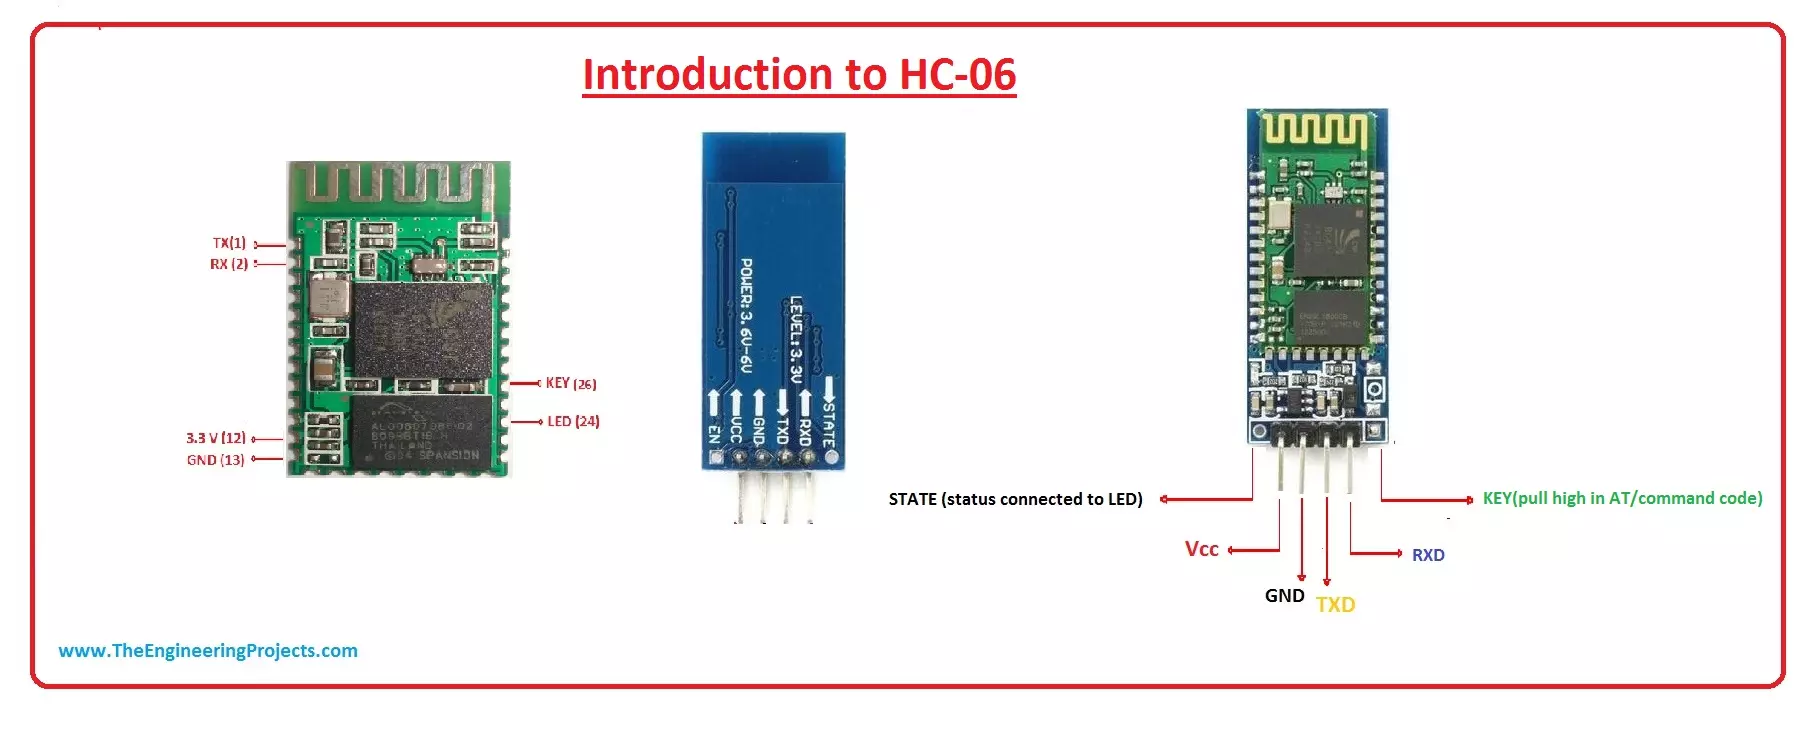
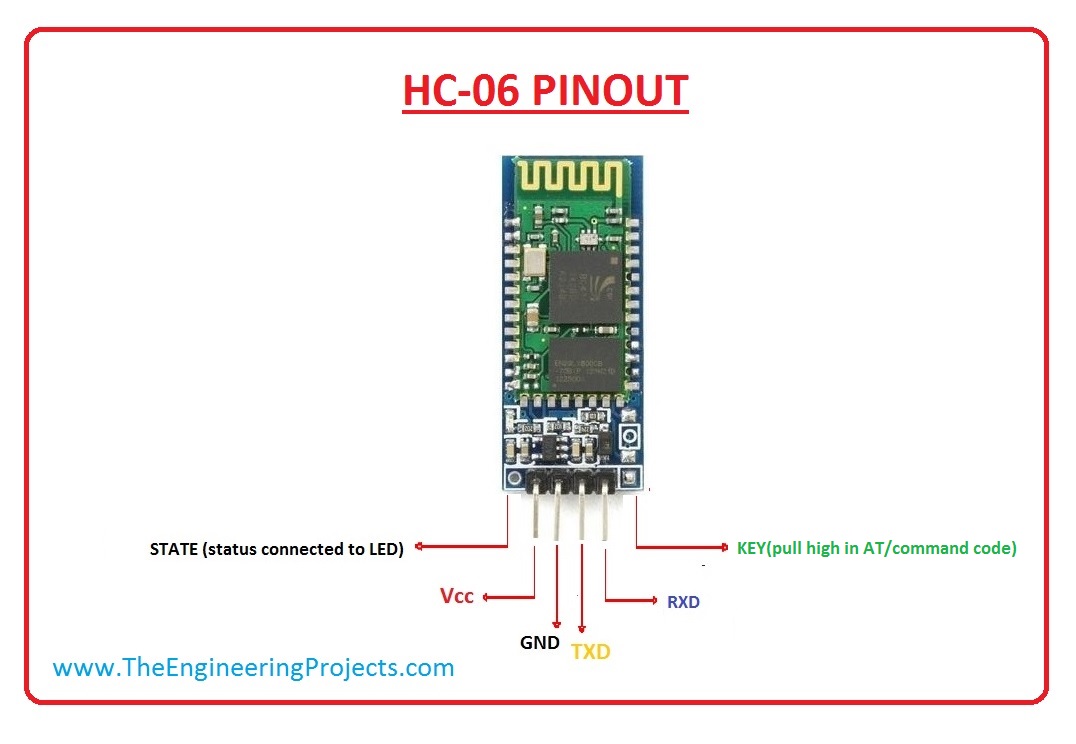
HC-06 PINOUT
- There is four main pinout of HC-06, now we discuss each one by one and their function.
- Vcc: This pin is used for input supply. At this pin, we provide an input voltage to HC-06.
- GND: This pin use for ground.
- TXD: By this pin, data is transmitted by the serial interface.
- RXD: The purpose of this pin is to receive data by a serial interface.
- For better understanding lets have a look at the pinout diagram of HC-06.
Features of HC-06
- These are some features of HC-06.
- Bluetooth protocol which we connect with it is Bluetooth 2.0+ EDR. 2.0+ EDR is a standard Bluetooth protocol which is used.
- It is at the Bluetooth class 2 power level.
- USB protocol used for it is USB v 1.1/2.0.
- The frequency on which it operates is a 2.4 GHz ISM frequency band.
- The modulation mode which is used in this module is Gauss frequency Shift Keying.
- Its transmitting power is = 4 dBm.
- Its sensitivity rate is =-84 dBm at 0.1% Bit Error Rate.
- The speed at which it transmits data is 2.1 Mbps (Max)/160 kbps (Asynchronous) and 1 Mbps/1 Mbps (Synchronous).
- The Safety feature which it provides is authentication and encryption.
- Its supported configuration is based on Bluetooth serial port (major and minor).
- Its supply voltage is 3.3 V DC and operating current is 50 mA.
- Its operating temperature is 20 to 55?.
- The weight of this module is 4g.
- The dimensions of this module are 36.5*16 mm.
- Its Default baud rate is 9600.
- This module can also be used in SMD.
- This module is made through ROHS process.
- Board of this module PIN is half hole size.
- It based upon CSR BC 04 Bluetooth technology.
- It has a high-performance wireless transceiver system.
- It is a Low-Cost module.
- It has the external 8 Mbit flash.
- It has a built-in 2.4 GHz antenna, the user does not need a test antenna.
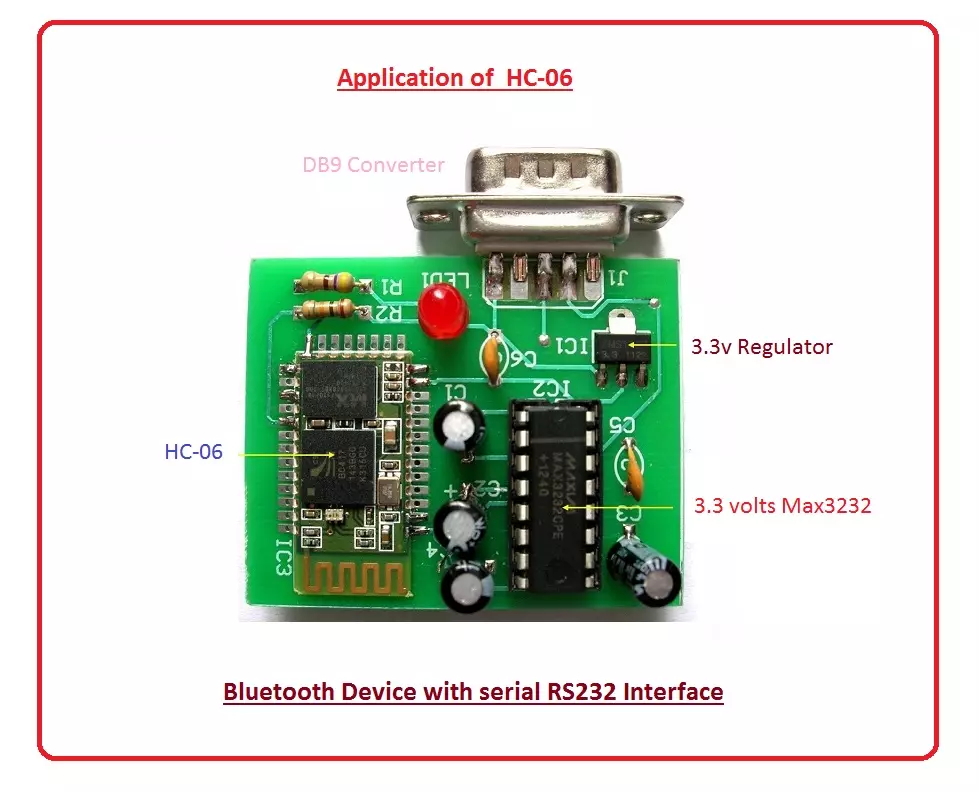
Application of HC-06
These are some applications of HC-06- HC-06 is a Bluetooth module, it is used in different electronic devices such as a mobile, laptop, personal computer, etc.
- It can also use in different industrial projects for sending and receiving data, Let's see pictures of HC-06 use in projects.