Ultrasonic Thickness Gauges: 3 Ways to Use Them and How They Work

The field of industrial ultrasonic testing has a lot of useful tools. At the top of the list is an ultrasonic thickness gauge, the best instrument for non-destructive investigation. It has been in use since 1967, and has only gotten better with time.
What Are They?
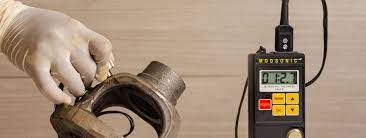
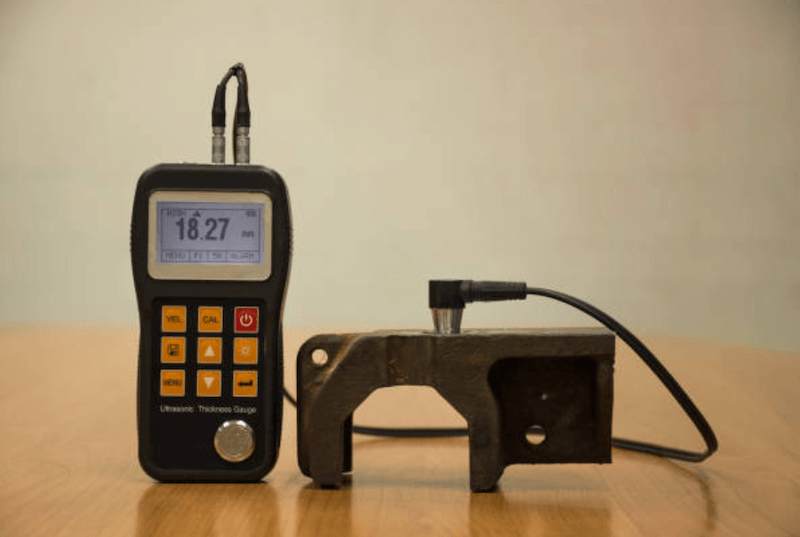
Ultrasonic thickness gauges use ultrasonic waves to determine the thickness of materials. This is one of the top reasons it comes recommended as an NDT measurement tool by Coltraco Ultrasonics . Without the proper tools, nondestructive testing techniques would be replaced with traditional analysis methods. Altering materials for an evaluation isn’t exactly the best way to use a company’s resources, and can even change the timeline for starting a project. With a UTG, the investigator can collect all of the necessary data without having a negative impact on the project. This is not only cost-effective but less time-consuming than the previous testing methods.
Types
The three main types of traditional thickness gauges are material, coating and wire/sheet. These measuring instruments are the foundation that paved the way for its UTG counterpart. With the built-in ultrasonic transducer, a pulse sound wave is emitted into the material. As it pulses, information is sent back to the transducer that automatically calculates the return time for an accurate measurement. You only need access to one side of the material, so it’s handy to have in limited or tight spaces. When there is a lot of ground to cover, a UTG can speed things up by a considerable amount.

Ship Hull Inspection and Measurement
A protective coating can provide a false sense of security that shows a healthy outside while hiding major damage on the inside. You can’t eyeball a modern ship to judge its hull integrity. Even with careful inspection of its exterior health, a lot of small details can slip through the cracks. For an inspector to do their due diligence, it becomes essential to get accurate data without having to remove this coating . With a UTG, you can analyze the hull to find corrosion spots that would escape the eye test. Since a UTG ignores the irrelevant protective coating, the actual data used to determine the integrity will always be up to date. After multiple echoes from the tool, you’ll be able to make the necessary adjustments for present or future maintenance.
Pipe and Tube Wall Thickness Measurement
It is well documented how easy it is to measure pipe and tube wall thickness with a UTG. Pipes in particular are mazelike and can lead to inaccessible areas by normal means. You don’t need full accessibility to the pipes accessible ends to get a good measurement. This alone will prevent a lot of incorrect data that comes from estimates. It will also prevent you from having to shut down or cut pipes for a good thickness measurement. Something that isn’t mentioned enough about this method is the pain it can be when a current process relies on something that needs to be measured. With a nondestructive inspection, the fear of shutting an entire department for a test is no longer an issue.

Induction
Long-term corrosion is a problem that the industry is always looking to resolve. Up to date maintenance is still the answer, but that comes with a heavy reliance on monitoring possible corrosion. Weathering steel structures are pretty easy to maintain when you stay on top of your evaluations. In order to make the process painless for everyone involved, a UTG is used to measure the residual steel thickness. This is all done without the need for a couplant to help with the transmission of ultrasonic energy. The data returned measures both the original steel thickness and the thickness of the rust layer. For companies that have missed a few checks, a UTG can provide a ton of useful information for maintenance.
Materials
The ultrasonic waves work with metals, plastics, composites, ceramic lass, fiberglass and more. Things get even more interesting when you factor in how well it works with coatings, rust and other surface materials. For advanced testing, rubber and liquid level measurements have proven to be quite successful when there is trouble accessing both sides of the material. This versatility in analyzing data makes it essential since it covers pretty much all of the important materials used in industrial maintenance and inspection. With safety and quality standards on the rise, the use of a UTG will become mandatory.
Predicting The Future
In order for everything to work properly, the device needs to be calibrated. This is a quick task for a UTG since it depends on the speed of sound energy bouncing off of the tested material. By getting the echo timing precise, you guarantee the best accuracy when measuring. Gauge calibration for specific materials can be recalled to speed up the entire process. New calibrations should be set as necessary, especially when the testing material changes temperature. For critical applications, it is a small price to pay to get the readings right. A UTG is still an incredible tool, but it is only as good as the effort put into its calibrations.
Notable Accidents
The sinking of the Erika was an event that happened on December 1999. A Maltese tanker broke in half and spilled close to 19,800 tons of oil by the coast of Brittany France. Bad maintenance led to corrosion, and that corrosion was magnified by traveling in severe weather. It is a good example of a tanker that passed the eye test but could have been saved by the readings of an ultrasonic thickness gauge. Multiple stories caused by this type of corrosion occurs in several industries per year. As the disasters rise, inspections are ramping up their protocols and making safety a top priority.
An Important Tool
When you look at all of the advantages of an NDT measurement tool, it would be catastrophic to go without it. An ultrasonic thickness gauge is a standard that won’t be bested anytime soon. For inspection, induction and measurement processes, this is the only way to go.


