


Getting Started with Cayenne - Arduino


Cayenne is an online project building platform using drag and drop. Currently it supports Arduino and Raspberry Pi. In simple words, you can design any of your Arduino or Raspberry Pi project simply by drag and drop different components. You don't need to write any code, you just need to place your blocks and upload it to your Arduino board. Its also known as the Graphical coding.
I came to know about Cayenne a few days ago and I have really enjoyed working on it so I thought to share it with you guys so that you can also get benefit from it. In today's tutorial, I am just gonna give an overview of Cayenne and we will design a simple Arduino LED project on it. In the coming tutorials I will share different projects on Cayenne, which will help you guys in your projects. Moreover, first we will cover the Arduino Project on Cayenne and later we will work on Raspberry Pi as well. So, let's have a look at Getting Started with Cayenne.
Getting Started with Cayenne
- First of all, what you need to do is to open this myDevices Cayenne Website.
- Now on this myDevices Cayenne Website you have a to create a free account so click on the Green Button which says Get Started for Free.

- So, fill out the form on the Registration page and then it will ask you which one you want to use as shown in below figure:
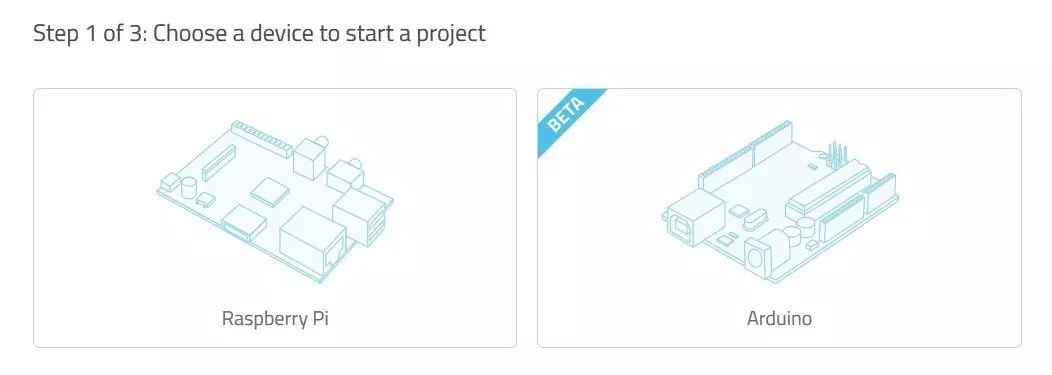
- Now as we are gonna work on Arduino so I will select Arduino among them.
- You must have the Arduino IDE installed on your computer and you should also install the Cayenne Library for Arduino.
- When I first started working on Cayenne, I had an older version of Arduino software and when I compiled the code then it generated errors, so I updated my Arduino software and it worked fine.
- So, you just make sure to have the latest Arduino IDE.
- Next thing you need is the Arduino Ethernet or Arduino Wifi Shield, which will be used for uploading the code to Arduino board from Cayenne website.
- So, now plug your Ethernet or Wifi shield on the Arduino board.
- I have plugged Arduino Wifi shield with Arduino UNO.
- So, now once you selected the Arduino then on the nex page you will get some instructions, which I have already disscused.
- Now you should plug your Arduino board with your computer and click Next.
- In this step you need to select your device as shown in below figure:
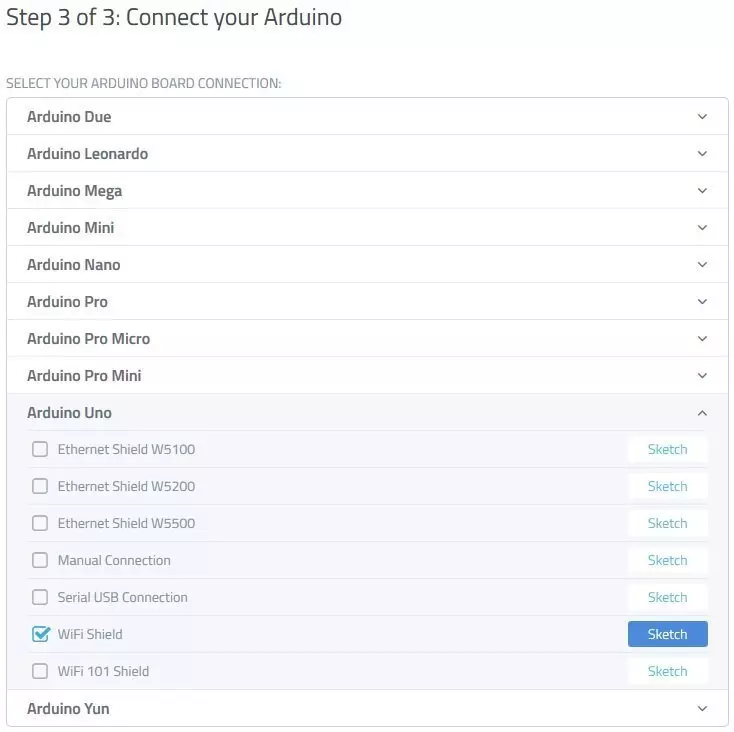
- In the above figure, you can see first of all, I have selected the Arduino UNO shield becasue I want to upload the code in this shield and then I have selected the Wifi Shield using which the code will be uploaded.
- Now when you click on the Sketch button you will get a small sketch which you need to upload in your Arduino board.
- This is the only code which you need to upload, this code is acting as a bridge between Arduino and Cayenne.
- Once you uploaded that code then Cayenne will automatically detect your board, you just need to wait.
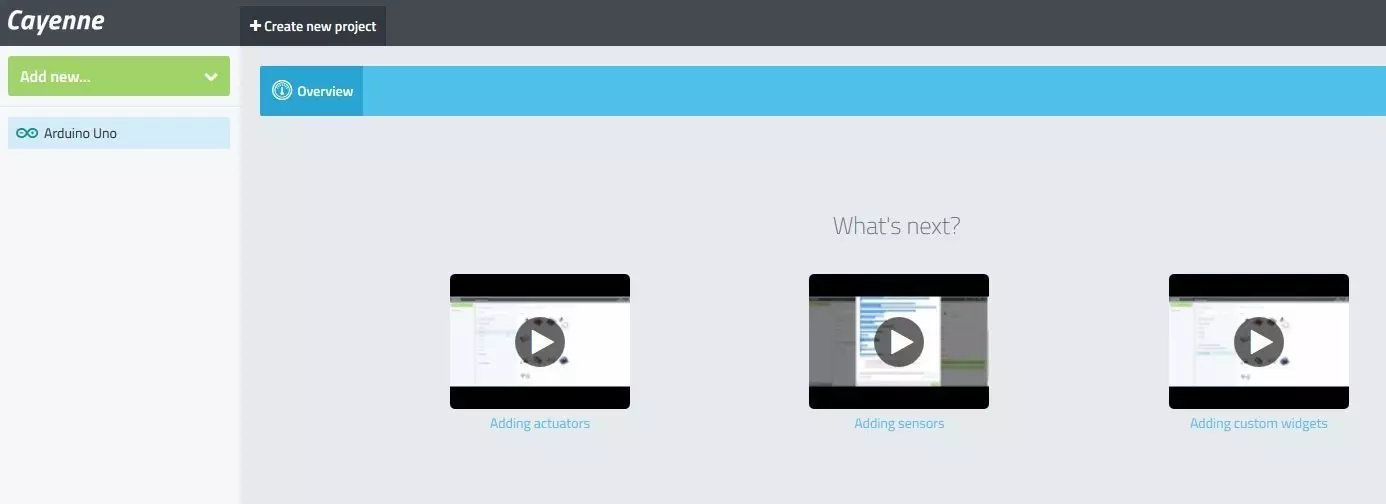
- As soon as your board is detected, you will be redirected to your Dashboard, where you can design your first project as shown in below figure. :)
Arduino LED Blinking Project in Cayenne
- Now Click on the Create new Project button and give it a name, I have given it Arduino LED and click OK.
- The new project will be created, now we need to add the LED Control in it.
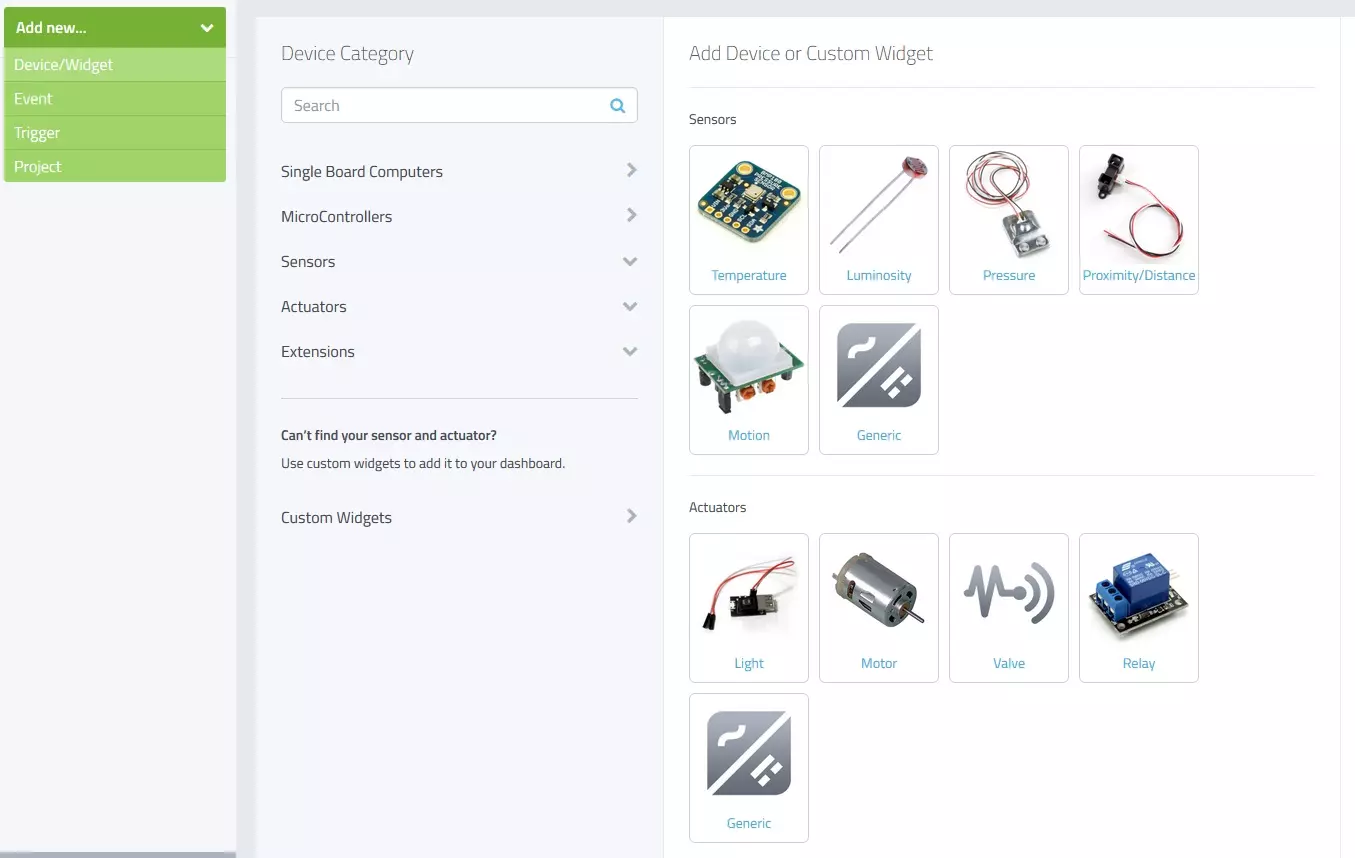
- So, in order to do so you need to click on the Add new button and then Device/ Widget as shown in below figure:
- You can see in the above figure, that all the devices are now visible.
- As we are working on the LED, so you need to click the Light icon, which is among Actuators.
- When you click it you will get something as shown in below figure:
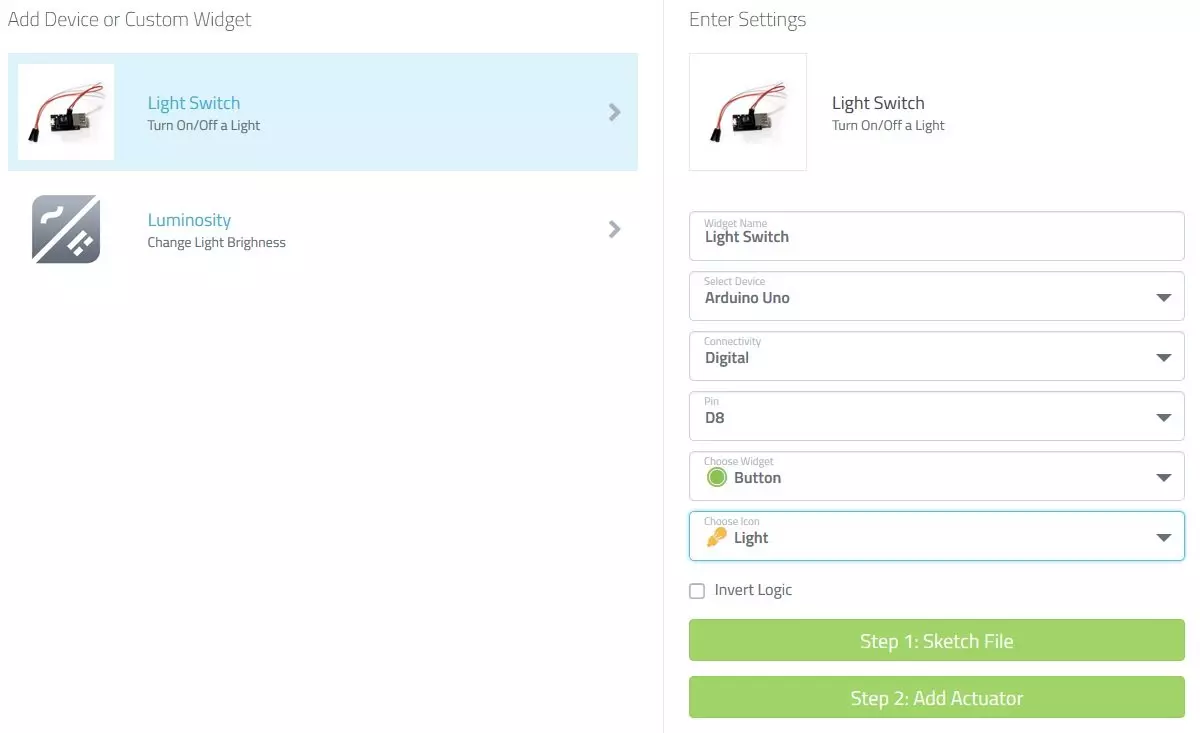
- So, I have selected the Light switch and in its properties, I have selected the D8 which is 8th digital Pin of Arduino.
- Now click on the Add Actuator button and you are done.
- You first LED Blinking Project is done on Cayenne and it will look something as shown in below figure:

- So, now when you click this light switch your LED on pin 8 will go ON and if you click it again then it will go OFF.
- I have plugged an LED on Pin # 8 on my hardware.
- In the below video, I have explained this Arduino LED project in more detail, so must watch it:


