Introduction to C# Windows Forms


I will continue with this C# console projects but first we have to discuss a little about C# Windows Forms. Microsoft Visual Studio is a very vast software so we can design different types of projects in it and also can use different languages. So, when talking about C#, we not only can design console applications but can also design C# Windows Forms in it. C# Windows Forms projects are much more easier than Console applications because in them you have a clear GUI in which you can drag and drop your components and can write the background code quite easily. So, let's get started with C# Windows Forms.
Introduction to C# Windows Forms
- First of all create a new project in Microsoft Visual Studio and in the settings select C# Windows Forms as shown in below figure:

- So, you can see in the above figure that all the steps are same as we did for creating a Console Application in Introduction to C# tutorial.
- But the only difference here is that instead of selecting Console application, we are selecting Windows forms Applications.
- Now, when you click OK then a new Project will open up as shown in below figure:

- So, now our project is ready and we can design any kind of project on it, but first let's discuss its features.
- If you have a look at it then you can see that it has three parts.
- The center part is where we have our Form1, we will change its name later.
- The on the left side we have a Toolbox which has all the components which can be used in this C# Windows Forms.
- On the right side, we have this Solution Explorer and below it we have Properties panel.
- So, let's discuss each of them separately.
Toolbox in C# Windows Forms
- Here's an image of all the components in the toolbox of C# Windows Forms:
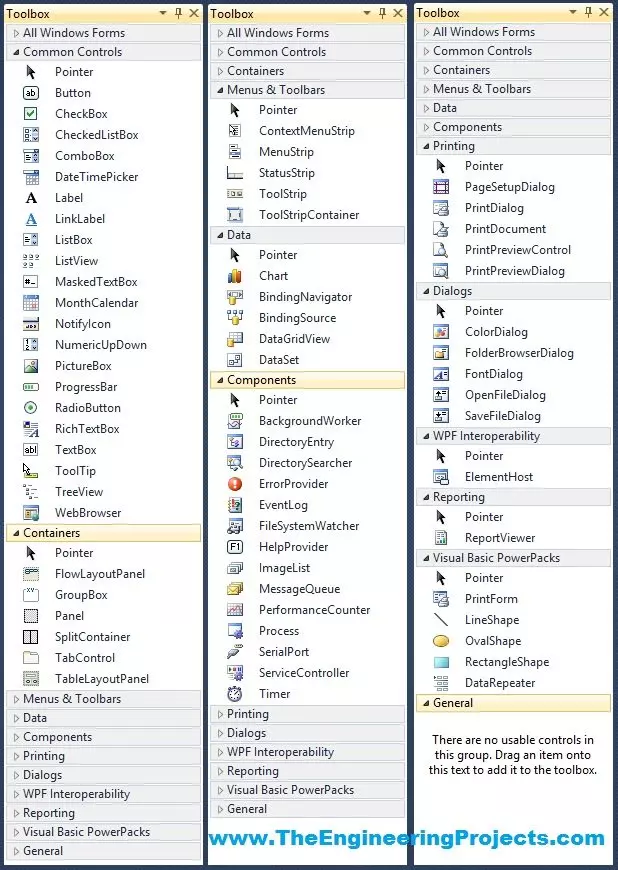
- First of all there are categories like Common Controls etc and each of these categories has components in it which I have shown in detail by expanding these categories.
- So, these all controls can be used in C# Windows Forms and it depends on your application, which one you want to use.
- Most commonly used are buttons and text boxes etc which are in Common Controls section.
Solution Explorer in C# Windows Forms
- Here's an image of the Solution Explorer in C# Windows forms:

- This Solution Explorer shows all the files used in your C# Windows Forms Project.
- First of all, we have the Properties folder which has the AssemblyInfo.cs file, it contains the basics things about your project like name and copyrights etc.
- Then we have the References section, which has all the system library files.
- Next we have the Form1.Designer.cs file which contains out Form1 design.
- Finally we have the Program.cs file which has the back end code for our Form1.
- All the code we are gonna write for our C# Windows forms Project is gonna be add in this Program.cs file.
Properties in C# Windows Forms
- Here's an image of the Properties panel in C# Windows Forms:

- Now when you select any component on your C# Windows Forms then its properties open up.
- Rite now, I have selected the Main Form and its properties are appearing here.
- Now from these properties you can change many attributes of your project.
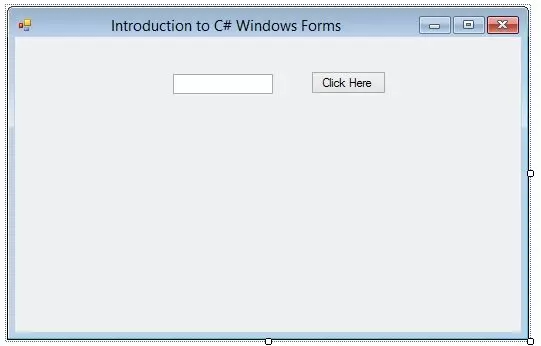
- Like for Form1, it says the name is Form1, so let me change the Text of it to something else as shown in below figure:

- Now you can see in the above figure that I have changed the Text of this Form1 to Introduction to C# Windows Forms.
- So, it will change the text of your Form to that as shown in below figure:
- Now you can see the Name of our Form has changed to the text which we have written in the Text section of its properties.
So, that's all about the Introduction to C# Windows form. In the coming tutorials, we are gonna add controls from the toolbox in this C# and then we will add some back end code to make them work. So, till then take care and have fun !!! :)