How to Add C# Controls in Windows Form ???


So, I am assuming that you have read Introduction to C# Windows Forms and you have your first project created and ready to use. So, if you have dne exactly as I have shown in my previous tutorial then you have a for as shown in the below figure:

How to add C# Controls ???
- In our previous tutorial, we have discussed the Toolbox, which is available on the left side of your project.
- All the components in the toolbox are shown in the below figure:
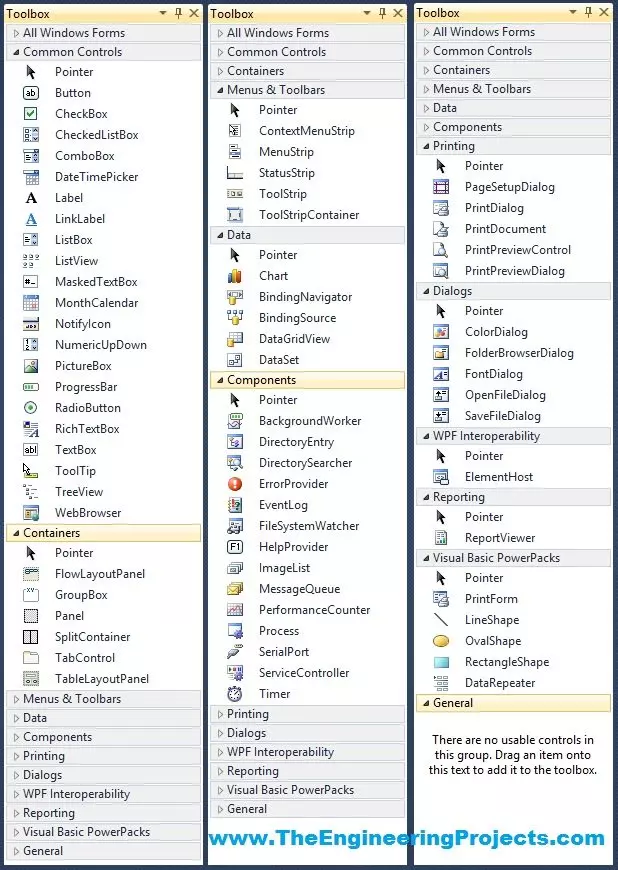
- These are a lot of controls and we will cover most of them in our coming tutorials but rite now we are just interested in knowing How to add these C# Controls in Windows Form we created in our previous tutorial.
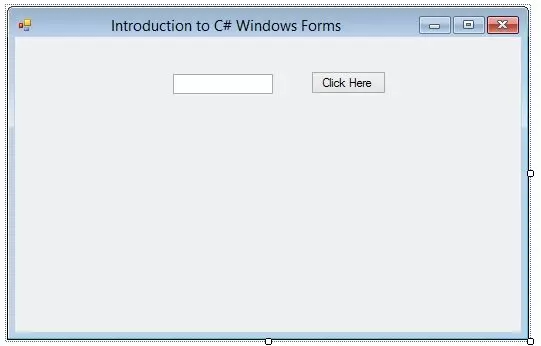
- So, the first C# Control I am gonna use is the Text Box, which is present in the Common Controls category.
- So, what you need to do is to drag this Text Box from toolbox to your Windows Form and then it will be placed on your Windows Form as shown in below figure:

- Now you can see in the above figure that our Form has a new C# Control in it which is a Text Box.
- Now when you select this Text Box then its Properties will open up in the Properties Section.
- From its Properties you can change many of its attributes.
- The two main attributes in Properties of any C# Controls are Name and Text.
- Name is the name of that Control with which we call it when we writing the code for that control.
- Text is the text which appears on that Control for user to view.
- Let me add another C# control on this Windows Form i.e. Button and then show you the difference between this Text and Name Property.
- So, drag a Button from the Toolbox and place it on this Windows Form as shown in below Figure:
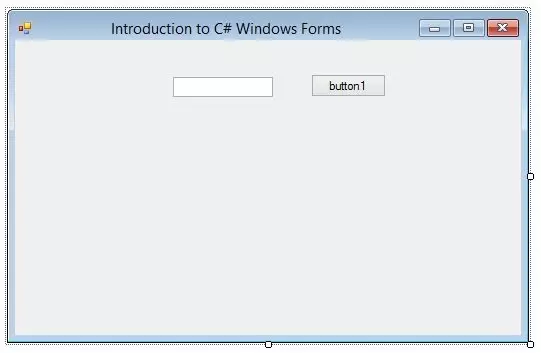
- So, now we have two C# Controls on our Windows Form.
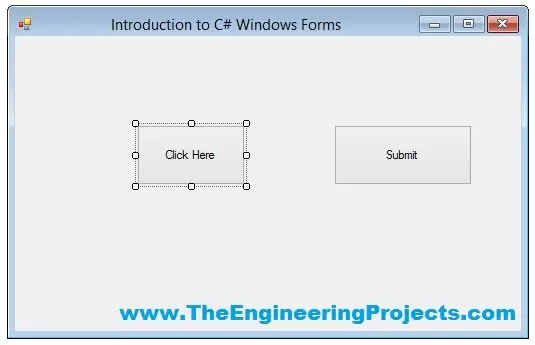
- Now I will select the Button and then its Properties will open up in the Properties Section and I am gonna change its Text to Click Here as shown in below figure:

- Now, lets see in the Form, what's written on the Button. :P
- Wow the magic happened :D and what we have written in the Text Section of the Properties of this Button has appeared on it.
- So, that's How the Text Property works. Whatever you written in the Text Section is appeared on that C# Control.
- The Name of Button Control is still button1 so whenever I am gonna call this button in the back end code I will use that Name.
- We are gonna do this in the next tutorial.