C# ListView Control


C# ListView Control
- C# ListView Control is used to display list of items by using various views available in the control.
- It is very useful in developing the applications where you want the data to be arranged in the form of list.
- Creating a ListView Control in Windows Form Application is very easy.
- Simply open the windows form application and drag the listview control from the ToolBar to Form.
- You can also create it by double clicking the listview control on the ToolBar, it will automatically place the listview control on the Form. Once you create the listview control it will look like the figure below.

- You can change its location with the help of mouse.
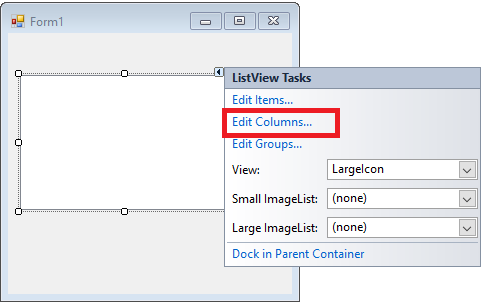
- Once you click on the little arrow available on the top right corner, it will appear like the figure below.

- Here you can see the ListView Tasks from where you can add items, columns, groups in the list and can change the view of the list that comes with different view options including largeicon, smallicon, list, title.
ListView Properties
- LlistView control comes with lots of different properties which you can modify manually.
- In order to open the properties window, right click on the listview control on the Form and go to properties windows.

- Once you open the properties windows, it will appear like the figure below which comes with different available properties.

Name
- Go to properties window and find property "Name" which specifies the unique name of the control which is used to access it in the the main code.
Location and Size Properties
- Location property represents the starting point of the listview control on the main Form. In other words, it represents the coordinates of the upper left corner of the control relative to the upper left corner of the container.
- Size property defines the size of listview control on the main Form. You can put the width and length on the size property or you can increase the size of the control by clicking the lower right corner of the control and expanding it towards right side.
ForeColor and BackColor Propeties
- ForeColor represents the forecolor of the listview control on the main Form.
- BackColor property represents the background color of the listview control.
- You can change both forecolor and backcolor manually by simply going to the properties window by right clicking on the listview control or you can change them by the help of code. Following lines can be used to change fore and back color in the code.
            listView1.BackColor = Color.Brown;
            listView1.ForeColor = Color.Blue;
View, GridLines, FullRowSelect Properties
- View property comes with 5 options to view the data on the list. FullRowSelect Property allows the cursor to select all add appearing in single row.
- Similarly, if you set GridProperty property as true, it will put the grid lines on the listview control. Following lines can be used to access these properties in the code.
listView1.View = View.Details;
listView1.GridLines = true;
listView1.FullRowSelect = true;
Items and CheckBoxes Properties
- Items property is very useful in this control that allows you to add items one by one. You can add items manually through this control but better way is using proper code to add items in the listview control.
- You can use these lines to add items in the code
  ListViewItem lv1 = new ListViewItem("Adnan Aqeel");
            lv1.SubItems.Add("123 main street");
            lv1.SubItems.Add("25");
            listView1.Items.Add(lv1);
- First we create three columns naming name, address and age and set the view to details. Then we add above lines in the main code by double clicking the listview control.
- CheckBoxes property allows you to add checkbox in the listed item. By default checkboxes property is false, set this property as true in order to add checkboxes of items in the control.
LabelEdit and HoverSelection Properties
- LabelEdit is very handy as it allows you to change the text of the items available in the list.
- Set this property as true in order to change the text of the items manually.
- However, you can also change text of the items dynamically in the code.
- HoverSelection property is used to make the item selected when someone hover the mouse on it.
- Set this property true in order to make the item selected over hovering the mouse over it.
HotTracking and Alignment Properties
- HotTracking property allows you to underline the text of the item and make it prominent when someone hovers mouse over the item in the list. Set this property as true in order to make this property useful.
- Alignment property is very useful that allows you to align the items in the list properly. It comes with four options including default, left, top, SnapToGird.
Columns and Groups Properties
- Columns property is very important property of the control that allows you to add the columns in the list. This property becomes handy when you are using the Details view of the control.
- Groups property allows you to distinguish the classes of items distinctively.
How to Add Columns in the ListView Control
- There are two ways to add columns in the listview control. First method is adding the columns manually in the list or other methods is adding columns with the help of code.
- In order to add column manually, click on the arrow appearing on the top right corner of the listview control and click on "Edit Columns".
-
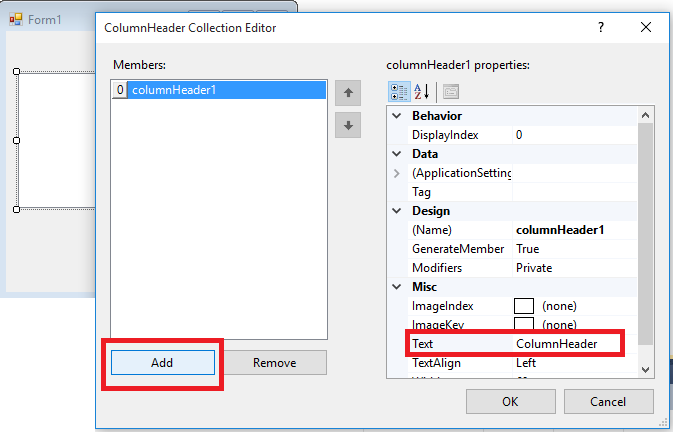
- Once you click on the Edit Columns, following figure will appear.
- Click on the add button in order to add column in the listview.
- In the "text" property you can set the name of your own choice that will appear on the column of listview control.
- Or you can add the column using following lines in the code.
-
listView1.Columns.Add("ProductName", 100); - From the lines above, you can see this code comes with two arguments in which first arguments represents the column heading and other represents the column width.


Example 1
- Let's create a code for which we add items on the list step by step by the add button, then we remove the selected data from the delete button and then clear all data from the clear button in the windows form application.
- When we add one panel, three buttons, three textboxes, three labels and one listview on the main form, it will look like a figure below.

- Following is the code to run this application to add items in the list step by step and remove it or clear it completely.
using System;
using System.Collections.Generic;
using System.ComponentModel;
using System.Data;
using System.Drawing;
using System.Linq;
using System.Text;
using System.Windows.Forms;

namespace WindowsFormsApplication20
{
    public partial class Form1 : Form
    {
        public Form1()
        {
            InitializeComponent();
        }

        private void btnAddRecord_Click(object sender, EventArgs e)
        {
            ListViewItem lv1 = new ListViewItem(txtStudentName.Text);
            lv1.SubItems.Add(txtFatherName.Text);
            lv1.SubItems.Add(txtRegistrationNo.Text);

            lvRecord.Items.Add(lv1);
        }

        private void btnDeleteSelected_Click(object sender, EventArgs e)
        {
            lvRecord.Items.Remove(lvRecord.SelectedItems[0]);
        }

        private void btnClearAll_Click(object sender, EventArgs e)
        {
            lvRecord.Items.Clear();
        }
    }
}
- Following figure shows the code in Visual Studio.

- Here's a short video in which I have shown How to use C# ListView Control:
×
![]()