C# CheckBox Control


C# CheckBox Control
- C# CheckBox Control is used to select the single or multiple options from the given list of options.
- In order to create CheckBox in design time, drag the CheckBox from the ToolBox located at the left side and drop it to the form1 main screen.
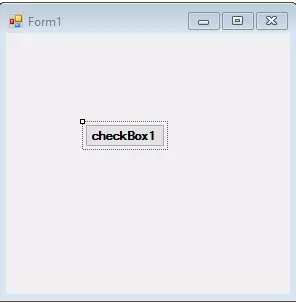
- As you create the CheckBox, it will look like the figure below.

- You can also create CheckBox in design time by simply double clicking on the CheckBox control.
- As you double click on the CheckBox control, it will create a CheckBox on the form1.
CheckBox Properties
- As you drag and drop the CheckBox on Form1, next step is to check the properties of the CheckBox.
- You can check the properties of the CheckBox by right clicking on the CheckBox then go to properties option.
- Properties Window will look like below figure.
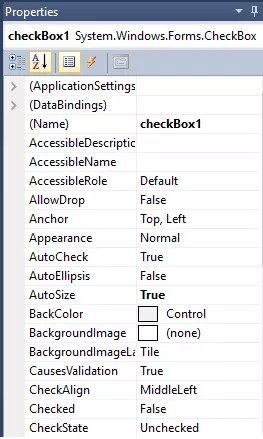
Location and Size Properties
- Location property defines the starting point of check box with respect to x axis and y axis on the form1.
- You can simply click on the CheckBox and change the location of the box.
- Similarly, size property defines the size of the CheckBox control.
BackColor, BackgroundImage, ForeColor Properties
- BackColor is used to define the background color of the CheckBox.
- You can simply go to BackColor property in the property menu of the CheckBox and choose the color of your own choice.
- BackgroundImage is used to select the background image of the CheckBox.
- Go to the BackgroundImage property and choose the image of your own choice.
- ForeColor defines the foreground color of the checkbox.
- In the first figure forecolor of the checkBox1 is black.
- You can go to the ForeColor property of the properties list and choose the color of your own choice.
Name, Font, Appearance Properties
- Name defines the unique name of the CheckBox control which is used to access the CheckBox control in the main code.
- In the first figure, name of the CheckBox is checkBox1.
- Font property is used to select the font of the text the appears on the CheckBox control. As you click on the Font property, you can choose the desired font from the available list of font styles.
- From appearance property, you can select between two appearance options i.e. normal or button. Normal checkbox will look like as shown in the first figure. While button option will appear like the figure below.
Text, TextAlign and CheckAlign Properties
- Text property of the CheckBox is used to change the text that appears on the CheckBox.
- In the first figure, text that appears on the CheckBox is checkBox1.
- The TextAlign property defines the text alignment of the text that can be from TopLeft to BottomRight.
- CheckAlign property represents the alignment of the check mark in the CheckBox control.
- In the first figure the alignment of the check mark is MiddleLeft.
CheckState and Checked Properties
- CheckState define the state of the checkbox which can be checked, unchecked and intermediate.
- CheckBox control will be checked if check mark on the CheckBox control is checked and it will be unchecked if the check mark of the CheckBox control is unchecked.
- CheckState is directly connected with the Checked property of the CheckBox control.
- If CheckState is Checked or Intermediate then Checked property will be true and if CheckState is Unchecked then Checked property will be false.
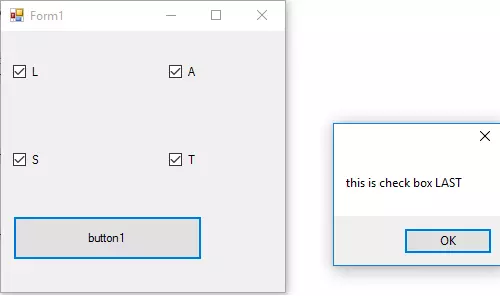
Example 1
- This example will clearly elaborate the use of check box.
- Simply open the windows form application in C#.
- Then drag and drop a button and four check boxes from the Toolbar to Form1.
- Change the name of each check box by right clicking on each checkbox separately and then go to the properties of the checkbox and find "text" property. And change the name of the button to "Combine" by similar process.
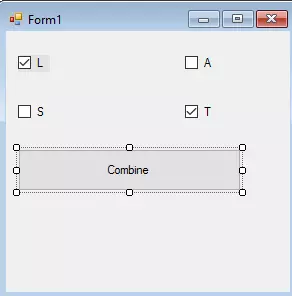
- In next step, change the Checked property of both L and T checkboxes and set it to true.
- As you set the Checked property to true it will automatically change the CheckState and set it to as Checked.
- Now double click on the combine button it will take you to the window like below.
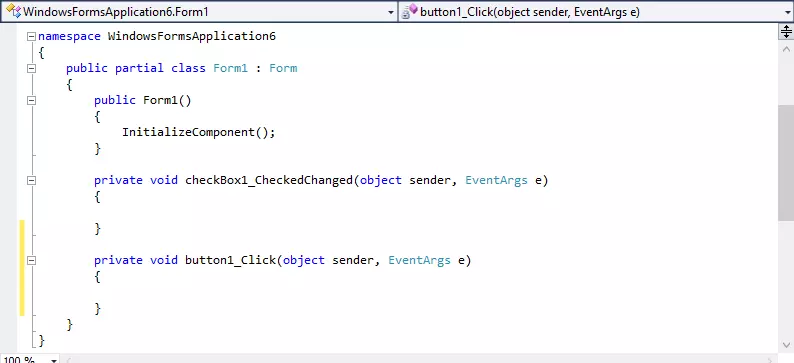
- In the figure above button1_Click function which will be get called when the button will be clicked in Windows form application.
- Now copy and paste the code below in your button function.
 private void button1_Click(object sender, EventArgs e)
        {

            String last = "this is check box ";
            if (checkBox1.CheckState == CheckState.Checked)
            {
                last += "L";

            }
            if (checkBox2.CheckState == CheckState.Checked)
            {
                last += "A";

            }
            if (checkBox3.CheckState == CheckState.Checked)
            {
                last += "S";

            }
            if (checkBox4.CheckState == CheckState.Checked)
            {
                last += "T";

            }
            MessageBox.Show(last);
        }
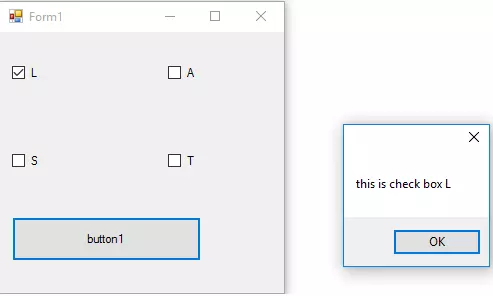
- There are four condition of this code.
- If first condition will be true i.e. CheckState of the checkBox1 is checked and it will go to next step and call the word last with addition of "L" which is a string and is equal to "this is a check box".
- So when first condition will be true, output of the code will be shown like below.
×
![]()