Hi readers! I believe you are doing fine and continuing to learn something new every day. This day marks the discussion about the diagnosis of a faulty MAP (Manifold Absolute Pressure). A MAP sensor is an important component in the engine management system of a vehicle, functioning to determine the absolute pressure inside the intake manifold and reporting back the real-time pressure to the Engine Control Unit (ECU), which then does the math to achieve an exact air-fuel mixture and timing of injection, allowing combustion to be smoother with all the variables at play and reduced emissions.
The MAP sensor detects the changes in air pressure inside the inlet manifold. The data relative to this pressure is used by the ECU to calculate fuel injection and ignition timing. The MAP sensor enables the fuel to be delivered correctly at higher altitudes or different loads.
Some far-reaching performance problems that can be caused by a bad MAP sensor include below-par fuel economy, engine misfires, rough acceleration hesitation, idle roughness, and increased emissions. The faulty sensor ultimately leads the ECU to over or under-fuel the engine, which gives rise to inefficient burning and drivability hitches. Thus, consistent checking, cleaning, and replacement of a faulty MAP sensor can avoid these issues and keep the performance and efficiency of the engine at their best.
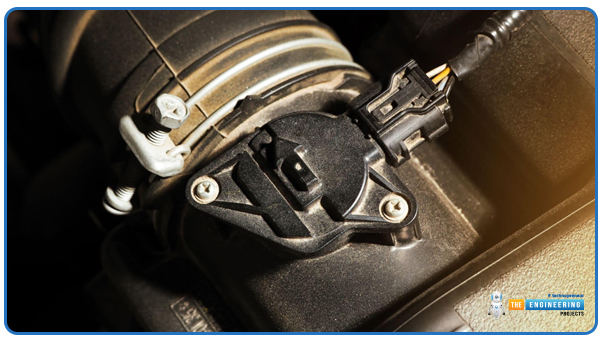
You will find a step-by-step guide for diagnosing bad MAP sensors including symptoms, causes, testing procedures, replacement, and temporary solutions.
Steps to Diagnose a Bad MAP Sensor:
1. Read Trouble Codes with an OBD-II Scanner:
Connect an OBD-II scanner to the vehicle's diagnostic port.
Read any error codes concerning the MAP sensor:
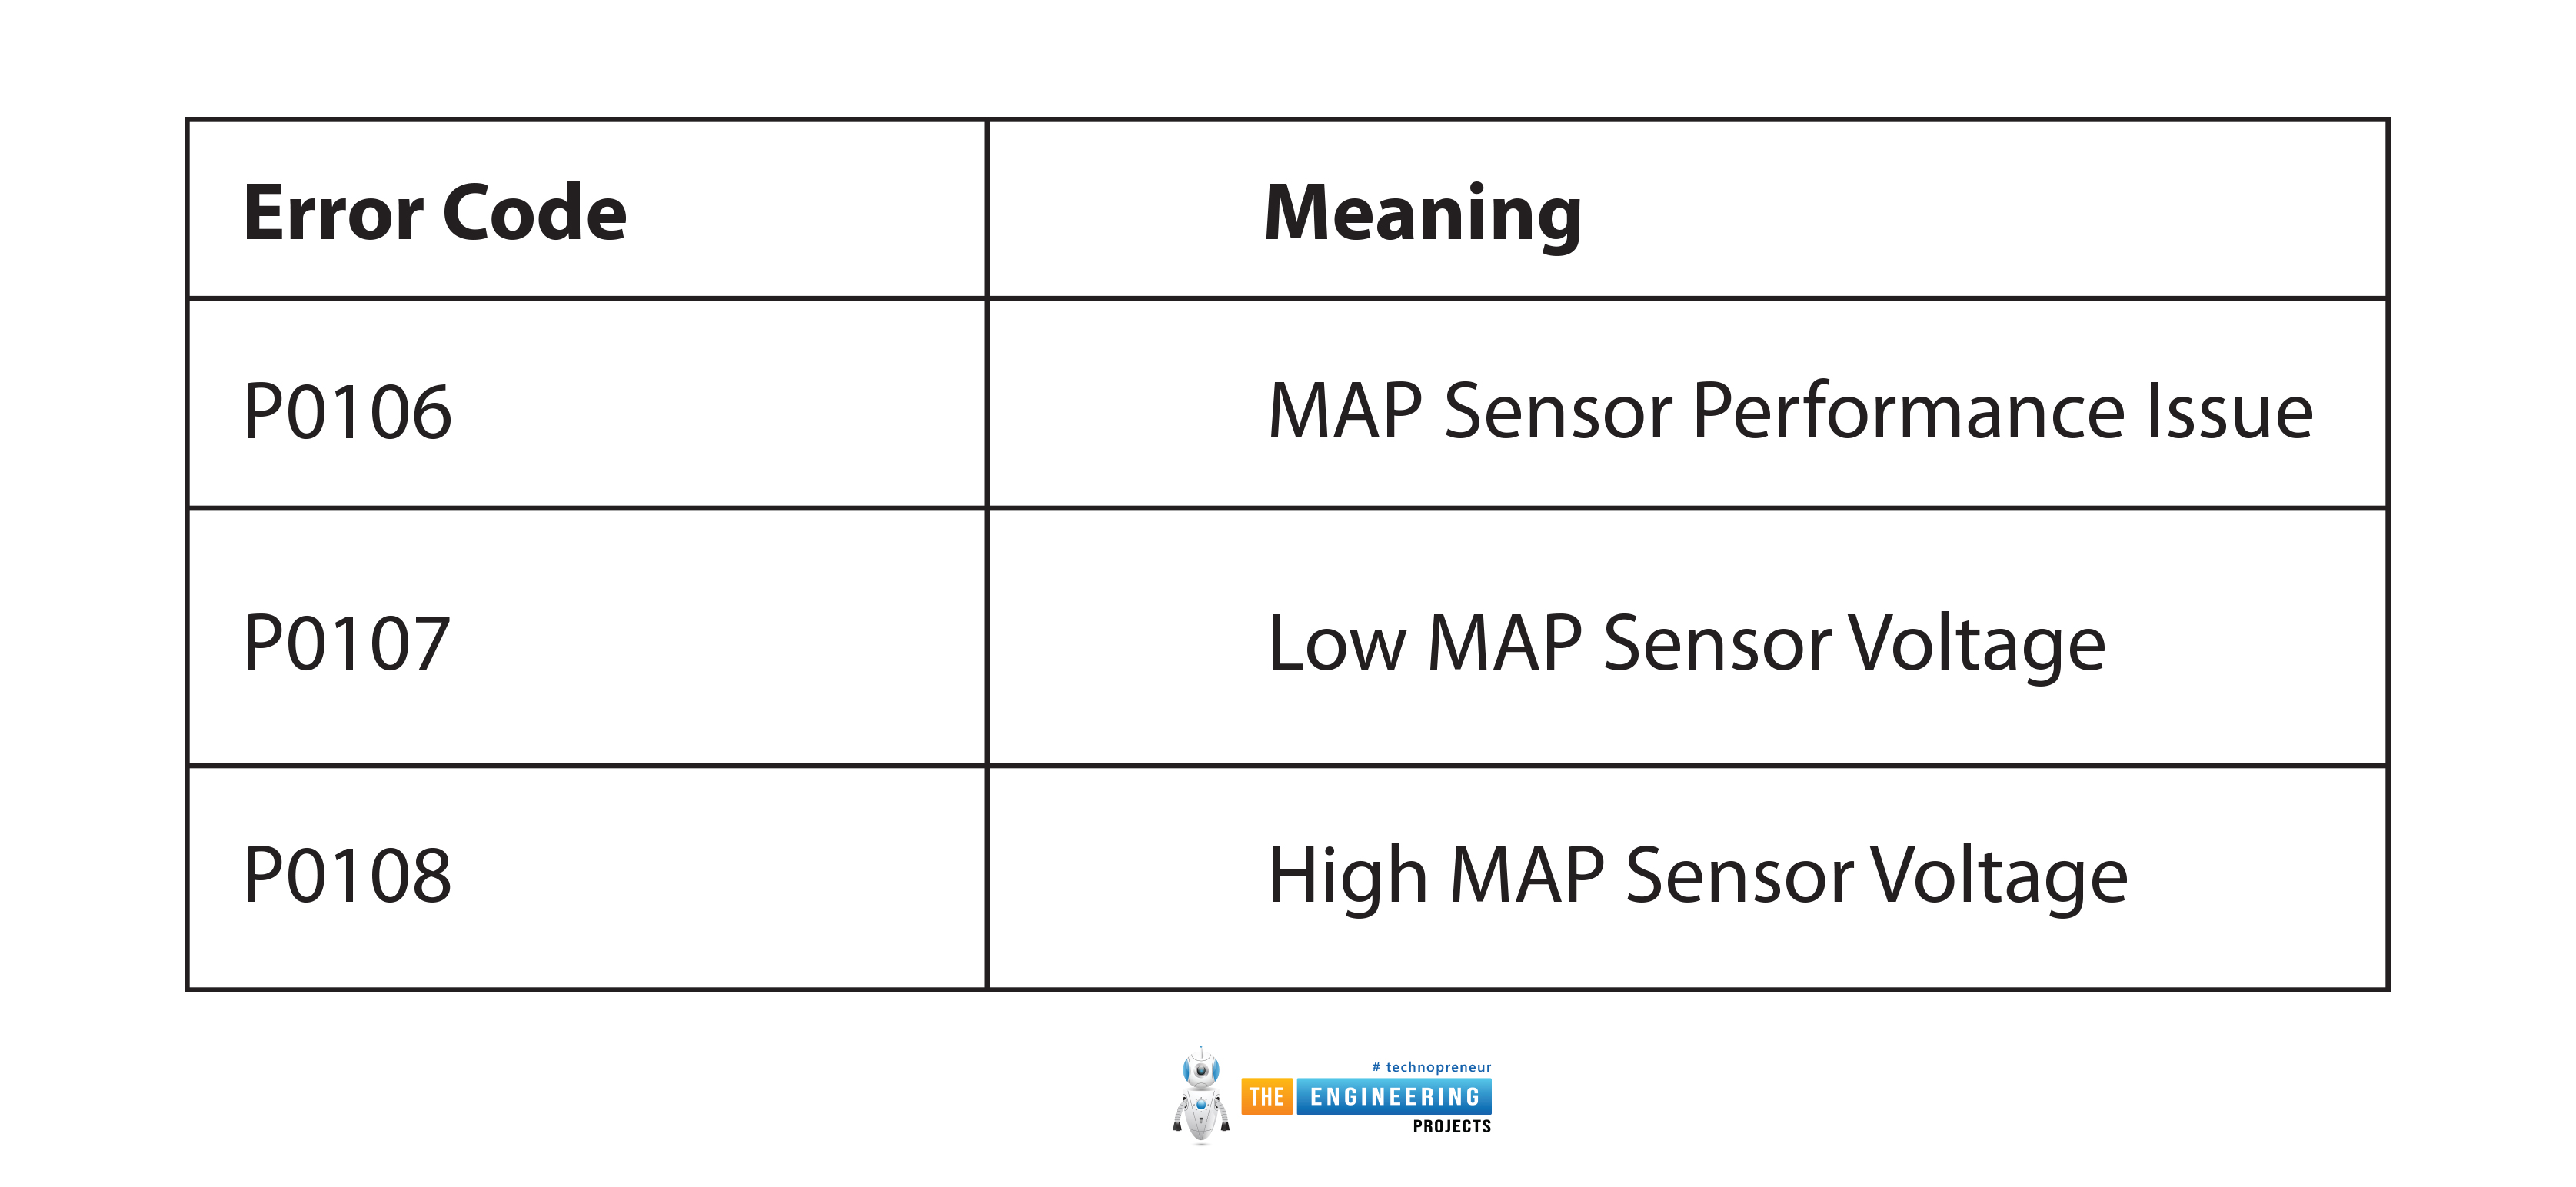
Error Code |
Meaning |
P0106 |
MAP Sensor Performance Issue |
P0107 |
Low MAP Sensor Voltage |
P0108 |
High MAP Sensor Voltage |
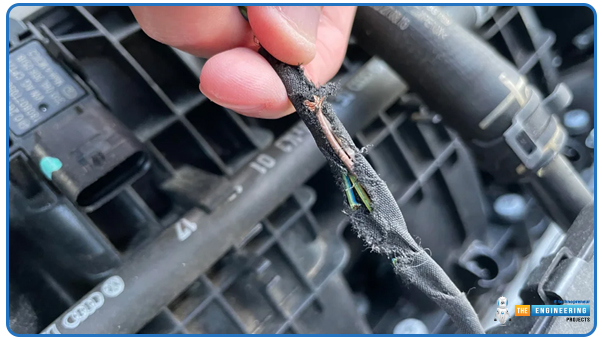
2. Check the MAP Sensor & Wiring:
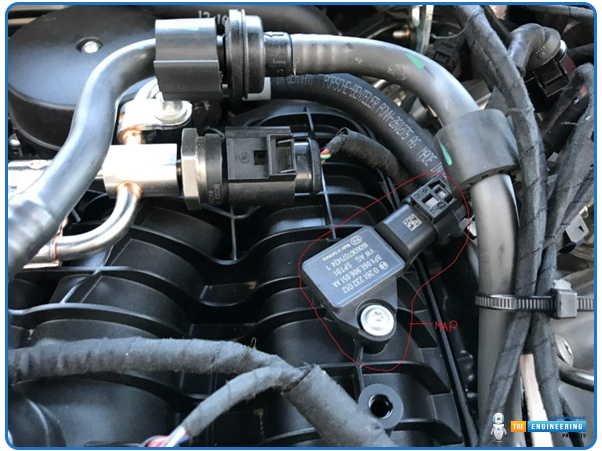
Find the MAP sensor (typically bolted to the intake manifold).
Look for loose electrical connections or frayed wires.
Check the vacuum hose for cracks or leaks.
3. Test the MAP Sensor with a Multimeter:
Set the multimeter to DC voltage mode.
Locate the three sensor wires:
Power wire (5V supply from ECU)
Ground wire
Signal output wire
With ignition ON (engine OFF):
Voltage should be between 4.5V and 5V on the power wire.
The signal wire should indicate 0.5V to 4.5V.
With the engine running:
Voltage should drop as the vacuum rises.
No voltage change means the MAP sensor is faulty.
4. Test the MAP Sensor Using a Vacuum Pump:
Disconnect the vacuum hose from the sensor.
Connect a hand-held vacuum pump to the port of the sensor.
Apply vacuum pressure and monitor for voltage changes:
If the voltage does not change, the MAP sensor is faulty.
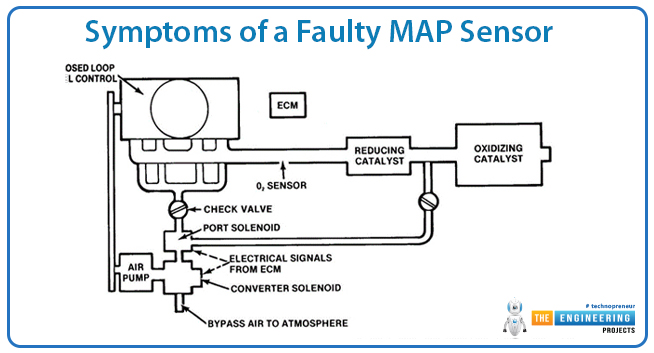
Symptoms of a Faulty MAP Sensor:
Any malfunction in the MAP sensor will generate multiple performance problems that affect fuel economy and result in engine misfires. Early detection of these symptoms prevents additional damage to the vehicle as well as reduces repair costs.
Check Engine Light Activation:
Finding a defective MAP sensor often results in self-diagnosis illumination through the Check Engine Light (CEL). A faulty reading or missing input from the sensor causes the ECU to activate an error code by using the provided real-time pressure data. The diagnostic process begins when mechanics use OBD-II scanners to obtain error codes so they can validate a MAP sensor failure.
Poor Fuel Economy:
The ECU will incorrectly measure engine air-fuel ratios when a defective MAP sensor provides inaccurate pressure data. Higher fuel expenditure combined with reduced mileage comes from this malfunction. The issue results in an engine operating with insufficient fuel and poor combustion quality, which creates worse fuel consumption problems.
Rough Idling and Engine Stalling:
The failure of the MAP sensor affects air-fuel balance, which results in intense vibrations during idle and engine stoppages. A failing MAP sensor makes the engine work unpredictably by causing unstable RPMs, which can produce engine vibrations. The engine becomes incapable of operating properly when left stationary due to severe MAP sensor failure, which leads to the vehicle stopping at stoplights.
Hard Starting or No Start Condition:
The engine starts with greater difficulty when incorrect data from the MAP sensor reaches the ECU. The engine will flood and become unable to start when excessive fuel enters the combustion chamber. Insufficient fuel injection will prevent the engine from starting after crank initiation. People become more likely to observe these difficulties during periods of cold weather and when they have been inactive for long durations.
Engine Hesitation and Power Loss:
Engine hesitation, together with sluggish vehicle performance, occurs when the MAP sensor fails during engine operation while accelerating. A faulty calculation of fuel mixture by the ECU can result in delays in power delivery to the engine. Engine acceleration as well as hill climbing and heavy load towing operations, become difficult because of this malfunction. Failure of boost pressure along with turbocharged engine systems leads to decreased power delivery.
Excess Exhaust Emissions and Black Smoke:
A defect in the MAP sensor causes the ECU to administer excessive fuel, which produces incomplete combustion. The incomplete combustion produces black smoke from the exhaust pipe and the strong fuel odor becomes more prominent during periods of idling. The vehicle gets unacceptable emission test results because of the higher hydrocarbon and carbon monoxide levels created by excessive emissions.
Engine Misfires and Jerky Acceleration:
A broken MAP sensor that delivers the wrong air-fuel combination will trigger engine misfires resulting in sluggish acceleration and disturbed ride quality. When misfires occur they result in abnormal exhaust noises which include popping sounds and backfiring effects. Repetitive misfires which occur without maintenance might destroy the catalytic converter which will result in considerable maintenance expenses.
Causes of a Faulty MAP Sensor:
A malfunctioning MAP sensor creates numerous performance problems with your engine system. Knowledge about MAP sensor failure origins will help avoid vehicle breakdowns together with expensive maintenance costs.
Dirt and Debris Buildup:
The MAP sensor allows the accumulation of dirt, oil, and carbon deposits during regular operation. The sensor gets affected in its ability to read accurate pressure measurements because of this buildup. The MAP sensor encounters frequent contamination through exposure to air and fuel vapors because this device faces such conditions in older vehicles alongside engines that produce large amounts of blow-by gases.
Engine Overheating:
The internal electrical system of the MAP sensor can be damaged by running engines at extremely high temperatures. Thermal damage occurring from an engine operating at excessively high-temperature levels throughout a prolonged duration will disable the sensor either intermittently or permanently. The function of engine cooling devices together with faulty thermostats or obstructed radiators leads to this issue.
Vacuum Leaks:
A MAP sensor serves as the instrument for measuring vacuum pressure levels in automobile intake manifolds. The sensor can misunderstand pressure measurements whenever there exists a vacuum leak such as damaged gaskets cracked hoses or loose connections. The ECU fails to determine the correct air-fuel ratio because of this condition which produces several negative engine behaviors including engine dysfunction and stall situations and engine alterations during idle conditions.
Faulty Wiring or Electrical Issues:
The installation of electrical pathways between the MAP sensor and ECU allows the device to transfer information. Wire damage together with corrosion and loose wirings triggers sensor malfunction. Common electrical problems include:
Broken wires develop because of engine vibrations coupled with normal wear and tear.
Corroded connectors from moisture exposure.
Improper signal transmission occurs due to short circuits or when open circuits interrupt the signal pathway.
Sensor Age and Wear:
The MAP sensor faces degradation as an electronic device because normal usage combined with extreme heat and frequent vibrations causes the sensor to age. The aging process turns sensor elements less responsive before causing them to fail which produces faulty readings of pressure levels. A MAP sensor normally works for several years yet vehicles with high mileage experience increased risk for sensor breakdown.
Water or Oil Contamination:
The entry of water or oil into the sensor affects its electrical circuits which eventually leads to damage of internal components. The PCV system failure allows oil vapors to enter the air intake when it develops problems. An engine sensor failure can occur when coolant enters the device through an injured intake gasket.
Incorrect Installation or Aftermarket Modifications:
MAP sensor failure results from improper installation because an insecure connection between the sensor and intake manifold will generate incorrect pressure data. Performance tuning and turbocharger installations among other aftermarket engine modifications might necessitate using different types of MAP sensors. Air-fuel mixture calculations will become inaccurate when using sensors that are incompatible with the system.
Exposure to Harsh Chemicals:
Cleaning an engine with harsh chemicals, solvents, and high-pressure sprays can damage the MAP sensor. Any chemicals that end up on components of the MAP sensor can strap its components or the protective coatings so that the MAP sensor will fail.
Easy Fixes for a Faulty MAP Sensor:
Cleaning the MAP Sensor:
The MAP sensor shows signs of malfunction because debris including carbon deposits oil residue and dust has accumulated in the sensor. A valve sensor contaminated by pollutants will produce faulty data that triggers engine failure and reduces fuel usage. Sensor cleaning recovers operational functionality thus making a high-priced replacement unnecessary.
To prevent electrical breakdown disconnect the battery before turning off the engine power.
You will find the MAP sensor attached to the intake manifold or throttle body housing.
Before cleaning the sensor you must detach its electrical connector and then remove the sensor from the vehicle.
A sensor-safe solution of either a Mass Air Flow (MAF) sensor cleaner or an electronic contact cleaner should be utilized to eliminate dust and debris from the sensor. You should never employ brake cleaner as this chemical will damage the sensing element.
Let the sensor achieve complete dryness before replacing it in position.
The engine maintenance schedule includes periodic cleaning of the sensor to maintain accurate measurement and prevent buildup from occurring.
Checking Vacuum Hoses and Connections:
Vacuum leaks result in wrong MAP sensor measurements that produce adverse effects on engine performance. Poor engine response occurs due to vacuum system leaks which interrupt correct pressure measurement by the MAP sensor since it operates within the intake manifold.
Check for cracks and wear and look for disconnections in all vacuum hoses that lead to the MAP sensor.
Replace all hoses that show signs of damage or brittleness because this prevents vacuum leakage.
Position the MAP sensor sensor with snug mounting on the intake manifold and establish reliable connections.
Inspecting Electrical Wiring:
Whenever MAP sensors communicate with the ECU through electrical signals, their performance is impeded by damaged wiring or loose electrical connections.
Check the wiring harness and connectors for worn wires, rust, or loose terminals.
Checking the voltage supply to the sensor with a multimeter; usually, there should be a reading of 5V from the ECU.
Make certain that the ground connection is good, clean, and free of rust.
If these repairs do not rectify the concern, the MAP sensor might have to be replaced.
How to Replace a MAP Sensor:
Gather Tools and Materials:
Before you start replacing, you will need:
A new MAP sensor (OEM or high-quality aftermarket replacement)
A screwdriver or socket wrench (depending on the vehicle)
Safety gloves and a cloth
Locate the MAP Sensor:
The MAP sensor is usually on the intake manifold or near the throttle body. It is slightly differently positioned in some vehicles, so looking at the repair manual for the vehicle can easily locate it.
Disconnect the Battery:
Before working on any electrical component, disconnect the battery to prevent short circuits or ECU malfunctions.
Remove the Old MAP Sensor:
Unplug the electrical connector from the sensor carefully.
If vacuum hoses are attached, gently disconnect them to avoid damaging the fittings.
Unscrew or unclip the sensor from its mounting location. Some sensors may be held in place with bolts, clips, or rubber seals.
Install the New MAP Sensor:
Place the new MAP sensor in the exact location of the previous one.
If necessary, reattach the vacuum hose firmly.
Secure the sensor with bolts or clips so that it has a tight fit.
Reattach the electrical connector securely to prevent loose connections.
Reconnect the Battery and Test:
Reattach the vehicle's battery terminals.
Turn on the engine and let it run for a few minutes to allow the ECU to adjust to the new sensor.
Scan with an OBD-II scanner to determine if there are any codes and clear any stored codes previously associated with the MAP sensor.
Test Drive the Vehicle:
Take the car for a few miles to test that the engine is smooth. Observe to determine if hesitation, loss of power, or rough idling persists. Re-scan for diagnostic trouble codes if the Check Engine Light remains on and make sure that the installation was proper.
Conclusion:
A bad MAP sensor is capable of engine performance problems such as poor fuel economy, rough idle, hesitation on acceleration, stalling of the engine, and elevated emissions. Because the MAP sensor is basically in charge of establishing the right air-fuel mix, any malfunction will be synonymous with poor combustion and thus higher consumption.
Some maintenance measures include cleaning the sensor, inspecting vacuum hoses for other leaks, and ensuring correct electrical connections. These can all help prevent a case of failure. With a set of OBD-II scanners and a multimeter, one could diagnose the failure of the faulty MAP sensor, with the fault codes from the MAP indicating how good the sensor is.
Generally, bad MAP sensor replacement is cheap and easy. By ensuring the proper working order of the MAP sensor, smooth engine performance is assured, thereby guaranteeing fuel economy, minimal emissions, and prevention from expensive engine damage in the future.


 Embedded Sensors
 xeohacker
 0 Comments


