Getting Started with Raspberry Pi Pico


Before moving towards the detailed study of the Raspberry Pi Pico module, let’s first understand the traditional Raspberry Pi Computers.
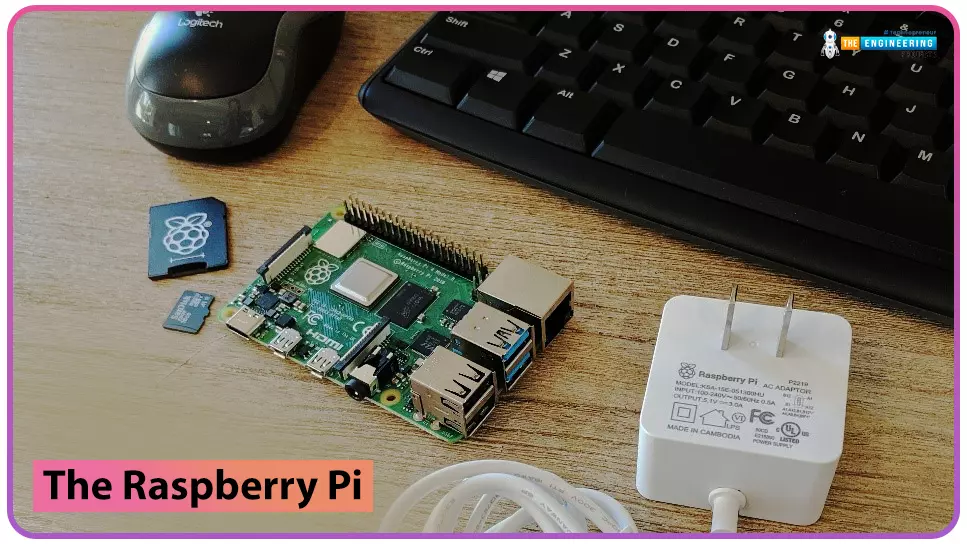
What is Raspberry Pi?
Raspberry Pi is a single-board computer or a minicomputer. It was created with the goal of making computing knowledge more accessible to those who cannot afford laptops or desktop computers, as well as developing programming skills at a lower cost. The Raspberry Pi organization designed it.
The Raspberry Pi is a low-cost computer that includes some GPIOs (General Purpose Input-Output) for connecting to and controlling peripherals. Despite the fact that the Raspberry Pi's processing speed is much slower than that of desktop computers and laptop computers, it is still a computer with all of the processing and interfacing capabilities and low power consumption.
A Raspberry Pi can be used to create hardware, home automation, industrial applications etc.
There are various Raspberry Pi models available and Raspberry Pi Pico is one of them.

Fig. 1 Raspberry Pi Pico Vs Raspberry Pi Computer (Pi 0)
Raspberry Pi Pico
Raspberry Pi Pico is a completely different model or device than traditional Raspberry Pi models. Raspberry Pi Pico is not a Linux computer, but it is a microcontroller like various available Arduino boards.
It is a cost-effective development platform designed by Raspberry Pi which has enough processing power to handle complex tasks. It is a low-cost yet powerful microcontroller board with an RP2040 silicon chip.
Like the Raspberry Pi computer, Raspberry Pi Pico is also featured with a processing unit, GPIO (so it can be used to control and receive inputs from various electronic peripherals) etc. but it does not offer any wireless connectivity feature.
Other available Raspberry Pi boards like Raspberry Pi 0, Raspberry Pi 4, 3 etc. are similar to a traditional desktop computer. This means they have all the features to work as a computer like, an HDMI port to connect a monitor, USB ports for mouse and keyboard, SD card slot for OS etc.
But, Raspberry Pi Pico does not have any of the above features or capabilities, neither an HDMI port nor the USB for keyboard and mouse connectivity and instead of using an SD card for storage Pico model is featured with ‘Onboard flash memory’ to store programs.
So now you might have a doubt, that whether one can run a Raspberry Pi OS on a Raspberry Pi Pico or not? The answer is, NO. Unlike traditional Raspberry Pi modules, Raspberry Pi Pico doesn’t run a full desktop OS (operating system) but it runs code directly without a desktop interface.
If you have an Apple, Linux or Windows computer or even a different Raspberry Pi board (Pi 0, 4 or 3 etc.) then, you just need to plug the Raspberry Pi Pico into a computer to program the board for a specific task or project. Once the Pico is programmed successfully, it will run that code every time the board is powered ON.
So we can say that Raspberry Pi Pico is more like an Arduino board than a traditional Raspberry Pi model.
Features of Raspberry Pi Pico
Fig. 2 Raspberry Pi Pico development board
Some key features of the Raspberry Pi Pico board are:
- Dual-core processor (ARM Cortex-Mo+), 133Mhz
- DMA controller
- It supports 16MB of Flash memory via QSPI bus
- 264kB of on-chip static RAM(SRAM)
- SP2040 microcontroller chip designed by Raspberry Pi organization
- A micro USB (type B) port for powering and programming the board
- AHB crossbar
- 2 on-chip phase-locked loops or PLLs to generate USB and core clocks
- Programmable on-chip LDO to generate a core voltage
- 26 GPIO pins with 23 GPIO pins are digital-only and the rest 3 pins are having ADC capabilities
- 3 pin ARM SWD (Serial wire debug) port
- 2MB onboard QSPI Flash
- Raspberry Pi Pico board operates at a range of 1.8 – 5.5V DC power supply.
- Operating temperature: -20°C - +85°C
- Raspberry Pi Pico board also supports drag-and-drop programming using mass storage over a USB.
- RP2040 also offers on-chip floating-point libraries.
- Built-in temperature sensor.
- Multiple digital peripherals supported by RP20400 are:
- 1 real-time counter
- 2 UART channels
- 2 I2C
- 2 SPI (Serial Peripheral Interfaces) channels
- 16 PWM (Pulse width Modulation) channels
- High quality and performance at a very low price
- It also supports low power sleep mode and dormant mode
This module also offers an onboard buck-boost SMPS (switch mode power supply), which provides a flexible option for powering the board via a micro USB port, batteries or external supplies.
Along with various available peripheral interfacing modules and data communication capabilities, the Raspberry Pi Pico also offers, 8 PIO state machines, a USB 1.1 controller.
The Raspberry Pi Pico development board has been designed to use either a soldered 0.1" pin-headers or can also be used as a surface-mountable device (SMD) or module, as the user IO (input/output) pins are also castellated.
Microcontroller (RP2040)
Raspberry Pi Pico comes with a dual-core microcontroller RP2040 chip, the chip is completely designed in-house at Raspberry Pi.

Fig. 3 RP2040 Microcontroller
RP2040 is the first microcontroller from Raspberry Pi. It is manufactured on a 40nm process node, which provided low power consumption capability and a variety of low power modes to offer extended duration operation on battery power.
The RP2040 microcontroller board consists of total of 36 GPIO pins but only 26 GPIO pins are exposed for control and interfacing.
Now let’s understand why this microcontroller is named so!
- In RP2040, RP stands for Raspberry Pi.
- The first digit ‘2’ represents the number of processing cores.
- The second digit ‘0’ represents the type of processor i.e., Mo+
- ‘4’ represents the amount of RAM, from the functional floor (log2 (RAM/16kB)
- The last digit represents the amount of non-volatile storage and ‘0’ indicates no non-volatile storage.

Fig. 4 RP2040 microcontroller
Communication protocols
Some of the communication protocols or methods supported by the raspberry Pi Pico model are:
- UART ( It offers 2 UARTs)
- 2 SPI (Serial peripheral interface) controllers
- 2 I2C controllers
GPIOs
Like a Raspberry Pi computer, Raspberry Pi Pico also featured with GPIO pins to control & interface peripherals or to communicate data with peripherals and even to receive inputs and control signals from those peripherals.

Fig. 5 Raspberry Pi Pico Pin-out
The Raspberry Pi Pico pin-out reveals that it has 40 pins in total, including the power supply pins ( GND and VCC pins). PWM, ADC, UART, GPIO, SPI, I2C, debugging pins, and system control pins are the different types of pins.
Unlike the Raspberry Pi computer board series, the Pico board's GPIO pins serve multiple purposes and in total Raspberry Pi Pico has 26 multifunctional pins. These 26 multi-functional pins are marked as GP0, GP1, GP2 and so on. They can be used to perform both digital input and digital output functions.
For example, if we consider the GP4 and GP5 pins, they can be used as either a digital input or digital output, as can I2C1 (SDA and SCK pins) or UART1 (Rx and Tx). But, only one function can be used at a time by selecting a particular pin and providing the respective instructions in the code.
- PWM pins: Raspberry Pi Pico has 16 PWM output channels. Actually, it has 8 PWM blocks and each PWM block provides two PWM outputs and hence a total of 16PWM channels.
- ADC pins: Raspberry Pi Pico board has 4 ADC pins to read analog inputs from peripherals (sensors) out of which only 3 ADCs and usable.
A 12- bit ADC is supported by the RP2040 Pico board and thus the ADC range can go from 0 to 4095.
The MicroPython code, on the other hand, can scale the ADC values to a 16-bit range. As a result, we have a range of 0 to 65535. Because the microcontroller operates at 3.3 V, an ADC pin will return a value of 65535 when 3.3 V is applied to it or 0 when no voltage is applied. When the voltage applied or the input voltage is in the range of 0 to 3.3 V, we can obtain all of the in-between values.
- UART pins: if you have previously worked with any microcontroller board or development board then you might have used this protocol because this is the most commonly or frequently used serial communication protocol. Raspberry Pi Pico module also offers two UART channels, namely UART0 and UART1 and dedicated GPIO pins are available to implement this protocol.

Fig. 6 Raspberry Pi Pico Communication protocols
- I2C pins: I2C is a bidirectional serial bus (Two Wire) that is used to communicate data among I2C enabled devices but over a short distance. In raspberry Pi Pico there we have two I2C controllers, which are easily accessible via GPIO pins.
- SPI pins: SPI stands for Serial peripheral interface and it is used to communicate data between SPI enabled devices over a dedicated or available GPIO pins. Raspberry Pi offers 2 SPI channels for peripheral interface.
- Power Supply Pins: Some power supply pins are also available to power up the board:
- SMPS: This pins is used to generate the 3.3V for the Pico board and its GPIOs
- VSYS: This is the primary input voltage and can be varied in 1.8v to 5.5.V supply range.
- VBUS: The micro USB input voltage connected to the pin1 of micro-USB port.
- GND pin
Some other features of Raspberry Pi Pico are:
Labeling
The silkscreen labeling on the top side of the board provides an orientation for 40 pins, while a full pin-out is printed on the rear.
USB
Raspberry Pi Pico comes with a USB 1.1 controller. This USB port is used to power up the board and program the Raspberry Pi Pico.
Bootsel
A BOOTSEL button is available on the Raspberry Pi Pico development board which means Boot Select. This button is used to put the board into USB mass storage mode while powering up the Pico board. This allows the user to drag and drop programs into the RPI-RP2 mounted drive.
Debugging
An SWD which stands for Serial Wire Debug is provided for hardware debugging and letting the user quickly track the problems down in the program.
Programming the Flash
As we mentioned earlier, the Raspberry Pi Pico offers 2MB of on-board QSPI flash memory which can be programmed or reprogrammed via using either the SWD (or Serial Wire Debug) port or using a special USB mass storage device mode.
An Internal Temperature sensor
Raspberry Pi Pico module comes with an inbuilt temperature sensor. The sensor is internally connected to the ADC or analog to digital converter pins of the Raspberry Pi Pico board. These ADC pins, supports a range of values and that is determined by the input voltage applied to the pins.
Programming Raspberry Pi Pico(2040)

Fig. 7 Programming Raspberry Pi Pico
There are multiple development environments available that support different programming languages to program the RP2040 microcontroller.
But, before writing a program for Raspberry Pi Pico you should have all the software and hardware components required to program the board.
Components required to program Raspberry Pi Pico:
The first thing required is a Micro-USB Cable, which allows the user to connect it to a computer or a Raspberry Pi for programming and powering up the Pico board.
The next component is the development environment required to compile and upload the program into the Raspberry Pi Pico development.
If you need to interface a peripheral with your Pico board using a breadboard then, you also need a set of Pico Headers.
RP2040 supports multiple programming languages like C/C++, Circuit python, MicroPython cross-platform development environments. Raspberry Pi Pico module consists of a built-in UF2 bootloader enabling programs to be loaded by drag and drop and floating-point routines are baked into the chip to achieve ultra-fast performance.
There are multiple development environments to program a Raspberry Pi Pico board like Visual Studio Code, Thonny Python IDE and Arduino IDE etc.
In our next tutorial, we will discuss the installation of the development environment for Raspberry Pi Pico and get started with the respective development environment.
So, this concludes the tutorial. I hope you found this of some help and also hope to see you soon with a new tutorial on Raspberry Pi.