

Hello readers, I hope you all are doing great. This is the second tutorial of the Raspberry Pi programming series. In our previous tutorial, we discussed the basic features and hardware architecture of Raspberry Pi Pico.
In this tutorial, we will discuss the various available development environments for programming the Raspberry Pi Pico. Later, in this tutorial, we will also discuss the installation of Visual Studio Code for Pi Pico programming.
Fig. Raspberry Pi Pico
RP2040 supports multiple programming languages like C/C++, Circuit python, and MicroPython cross-platform development environments. Raspberry Pi Pico module consists of a built-in UF2 bootloader enabling programs to be loaded by drag and drop and floating point routines are baked into the chip to achieve ultra-fast performance.
There are multiple development environments to program a Raspberry Pi Pico board like Visual Studio Code, Thonny Python IDE and Arduino IDE etc.
We need to download and install some tools before installing the Visual Studio Code for programming Raspberry Pi Pico which includes:
- CMake
- ARM GCC embedded tool-chain package
- Python
- Git open source project
- Build tools for VS code
CMake
Fig. CMake
CMake is an open-source system developed/designed to fulfill the need of powerful cross-platform build environment which is responsible for managing the build process in a compiler independent manner and in an OS (operating system. It is designed to work in conjunction with the native build environment.
CMake is responsible for generating a build environment for compiling a source code, building executables, creating libraries and generating wrappers.
It also supports dynamic and static library builds. It can handle complex hierarchies and applications dependent on several libraries. CMake can also handle projects with multiple toolkits or libraries, where each library is further having multiple directories.
CMake is open-source tool which is easy to use and also having a simple yet extensible design which can be extended (as per the requirements) to support new features.
Installing CMake in Windows
- Go to https://cmake.org/download/
- In the Platform section, download the .msi file from windows 62-bit installer
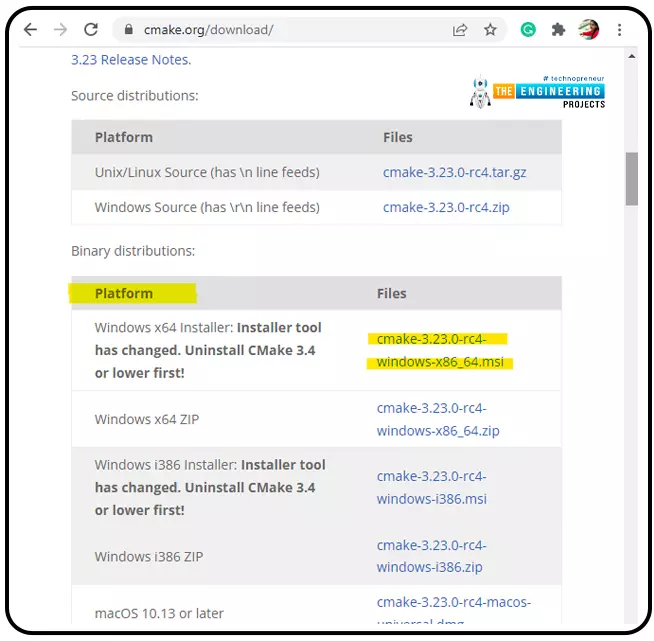
Fig. 3 Windows 64-bit installer
- Open the downloaded .msi file for installation.
Fig. 4 Press Next
- Accept the terms and conditions and press next.
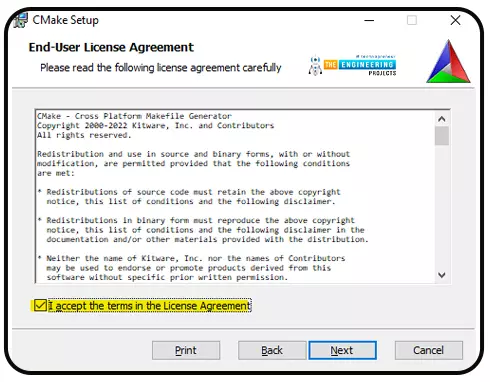
Fig. 5 Accept Agreement
- Select the ‘Add CMake to the system path for all users’ option and press next to continue the installation process.
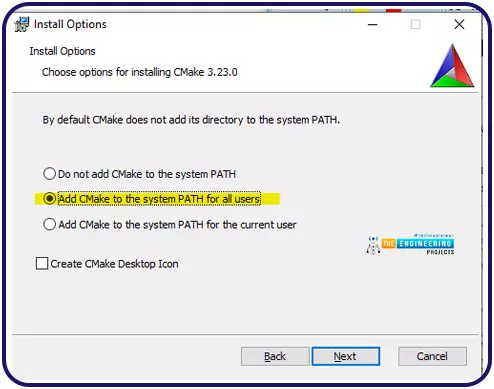
Fig. 6 Add path
- Select the destination location and then press next.
ARM GCC Compiler
The GCC ARM tool-chain is compatible with devices that are based on 32-bit Arm Cortex-A, Cortex-M, Cortex-R processors.
Installing ARM GCC Compiler (in Windows)
- To install the “ARM GCC Compiler”, follow the given link: https://developer.arm.com/tools-and-software/open-source-software/developer-tools/gnu-toolchain/gnu-rm/downloads
- Download the latest version of the executable for respective OS.

Fig. 7 Downloading ARM GCC tool-chain
- Install the “ARM GCC tool-chain” by double-clicking on the downloaded executable file.
- Follow the default installation procedure to continue the installation process.
- At the end select/check the “Add path to environment variable” and press the Finish button.
Python
Installing Python (Windows PC)
- Follow the link to download the Python installation file. https://www.python.org/downloads/
- Download the installation setup for Windows.
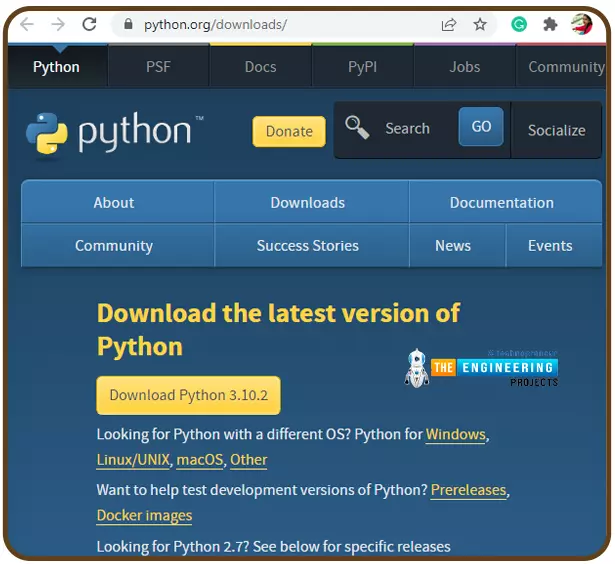
Fig. 8 Download Python
- If the Python installation file is downloaded successfully start the installation process by double clicking in the downloaded file.
- Enable/check the “Add Python 3.10 to Path” at the bottom and click on “Install Now”.
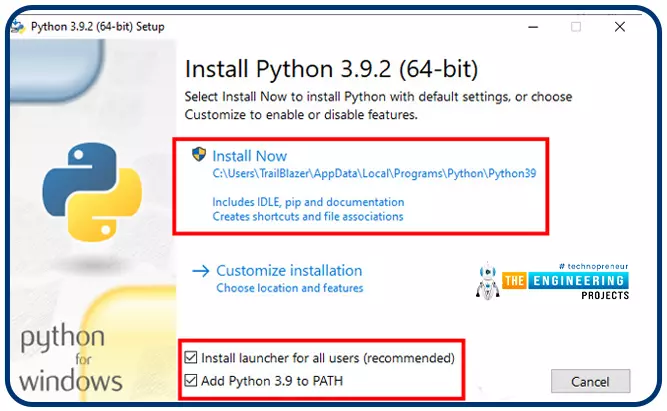
Fig. 9 Add path and install
- Click ‘OK’ once it (python) is installed successfully.
Build Tools for Visual Studio Code
The next task is downloading and installing ‘Build Tools’ for Visual Studio Code. This tool is responsible for the command-line interface.
- Open the given link https://visualstudio.microsoft.com/downloads/?q=build+tools, scroll down and download the Build Tools for Visual Studio.
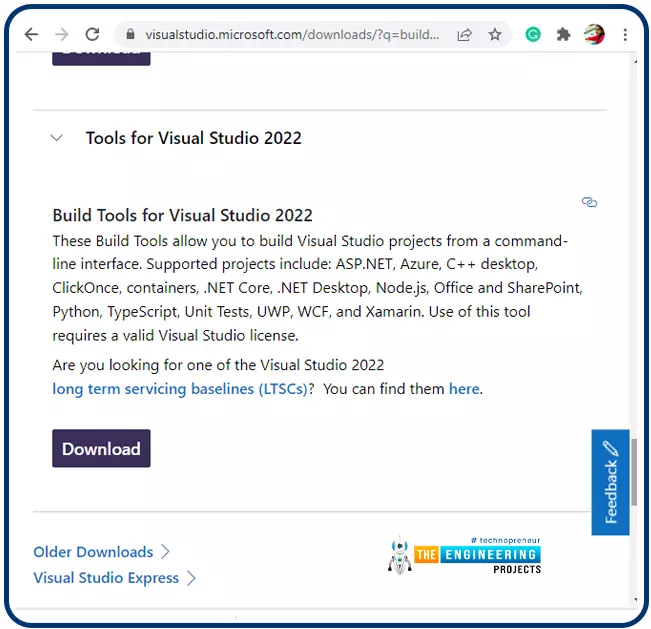
Fig. 10 Download Tool chain
- Open the downloaded executable file to initialize the installation process.
- During installation process, select Desktop development with C++ and also enable the “Windows 10SDK ” option from included tool list and click on install.
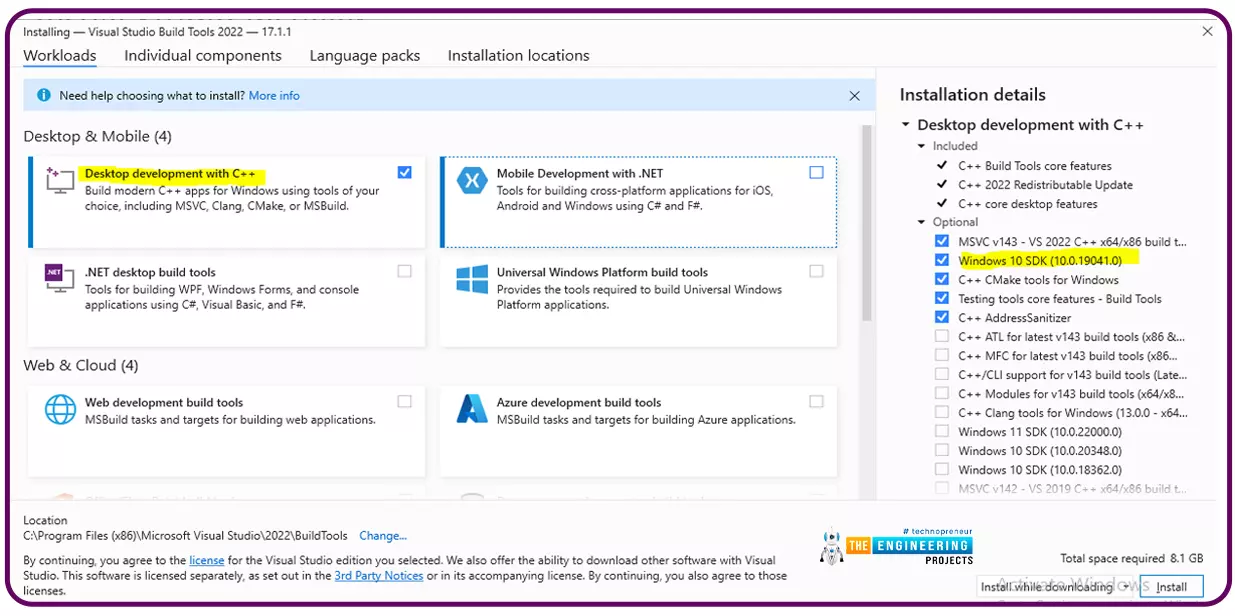
Fig. 11 select the necessary tool
- The installation process will take some time as the installation is significantly large (1.85 GB).
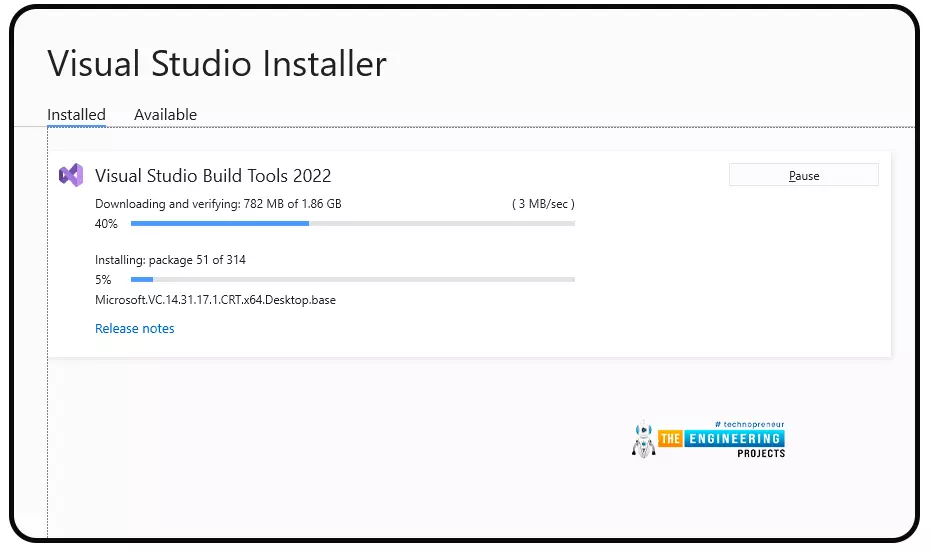
Fig. 12 installation
Git
Git is an open-source tool responsible for code management. The main purpose of using Git is to track the changes in the source code or any set of files, which helps multiple developers work together on non-linear development. In simple words, we can say that Git makes a team of people or developers work together and that is too using common/same files. Toptal is a marketplace for top coders. Top companies and startups Hire Toptal’s freelance coders for their mission-critical software projects.
Download and Installing Git
- To download Git, follow the given link: https://git-scm.com/download/win
- Download the respective setup file i.e., the “ 64-bit Git For Windows setup” executable file.

Fig. 13 Download Git for Windows
- Start the installation process by double clicking on the downloaded executable file.
- Next task is selecting the necessary components.
- All the necessary components are already checked so just press Next.
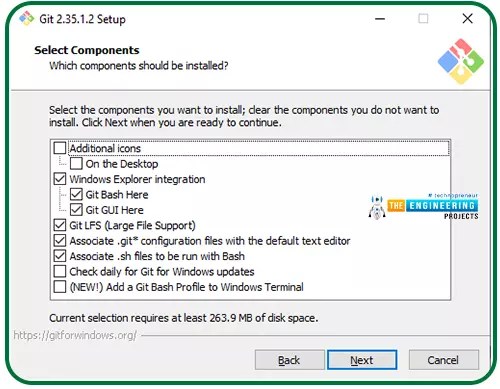
Fig. 14 Select necessary components
- While adjusting the name of the initial branch in new respositories, select the “Let Git decide” option and press Next.
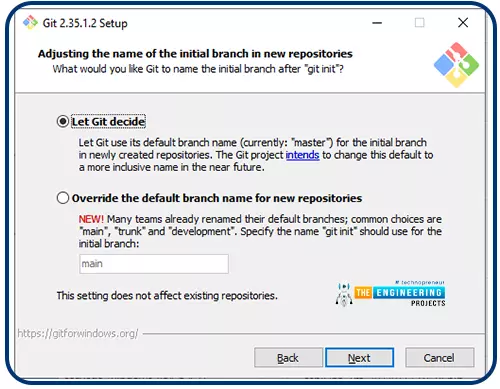
Fig. 15
- Next, adjust the path environment.
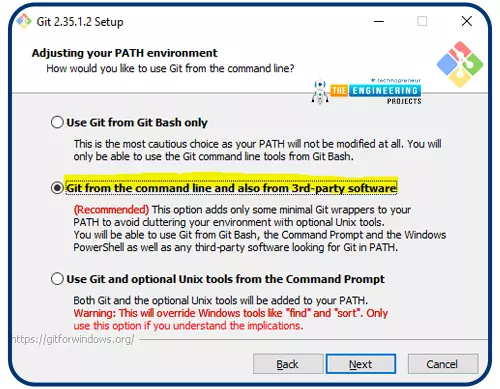
Fig.16 Select the above highlighted choice
- Next step in installation process is configuring the line ending conversion by selecting the “Checkout as-is, commit as-is.
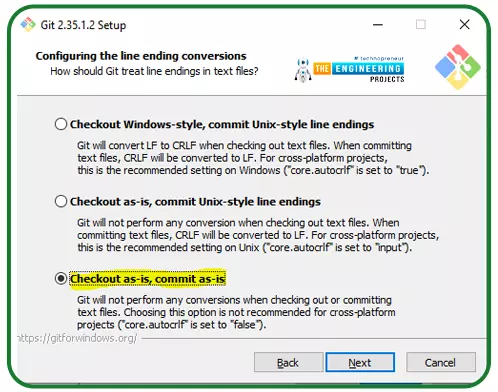
Fig. 17 “configure line ending conversions”
- Next, thing is to configure the ‘terminal emulator’, for that select the “Use Windows default console window”.
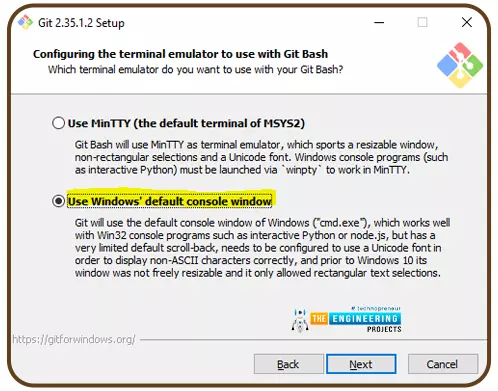
Fig. 18 configure terminal emulator
- Next, select the “Enable file system cashing”

Fig. 19 “configure extra option”
- Enable the “select experimental support for pseudo console” option and press install.
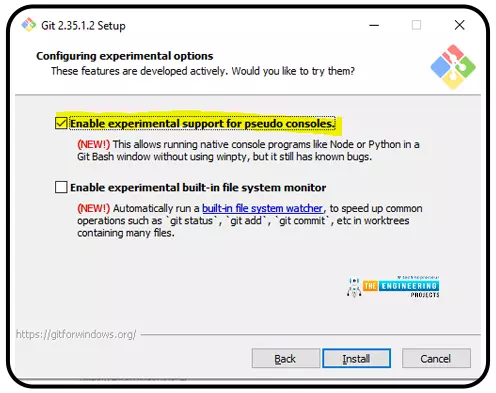
Fig. 20 “Experimental support for pseudo consoles”
Downloading Pico SDK
Once all the necessary tools (mentioned above) are successfully installed, we can download the Raspberry Pi Pico SDK and respective examples.
Before downloading the Pico SDK and Pico examples, we need to create a folder or directory to save the SDK and pico examples. So, we are creating a folder “RPi Pico” in C:\ drive.
- Open the command prompt.
- Next task is to create a new new directory in ‘C’ drive using “mkdir” command to download and save the SDK and pico examples.
- To download/clone the raspberry pi Pico SDK type : “git clone –b master https://github.com/respberrypi/pico-sdk.git” in the command prompt and press enter.
- Make sure your system is connected to internet.
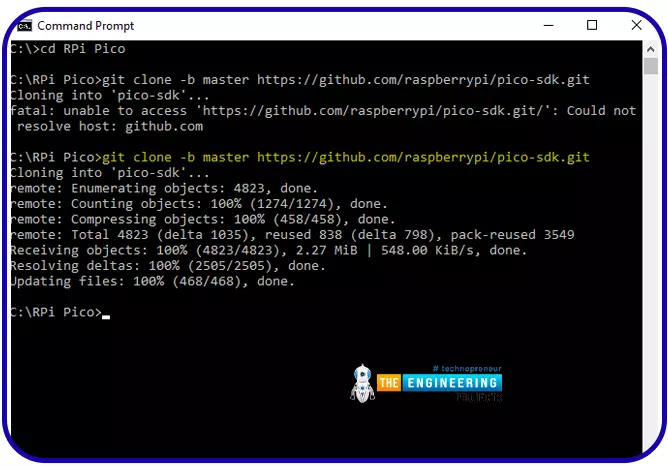
Fig. 21 download Pico SDK
- After completing the cloning process, go to the ‘pico-sdk’ directory using ‘cd pico-sdk’ command and type “git submodule update –init” and press enter to add the tinyUSB submodule.
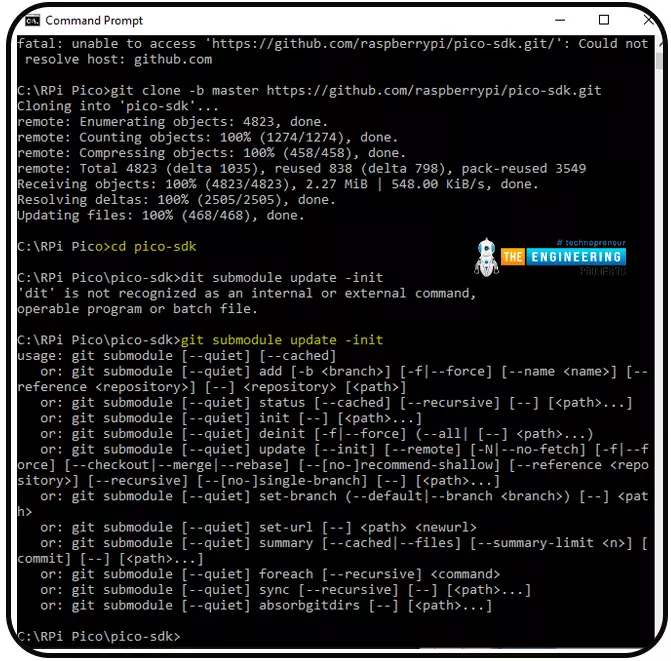
Fig. 22
- Now got to the previous directory (where you downloaded the SDK) using command “cd ..” that is ‘RPi Pico’ in our case.
- Download the raspberry pi Pico examples using “git clone -b master https://github.com/raspberrypi/pico-examples.git”.
Now we are ready to program Raspberry Pi Pico using Command Prompt.
Programming the Raspberry Pi Pico using Command prompt for Visual Studio Code
- To program the Raspberry Pi Pico with Developer command prompt, click on Start button and search for Visual Studio 2022.
- Click on the Developer Command Prompt for VS 2022.
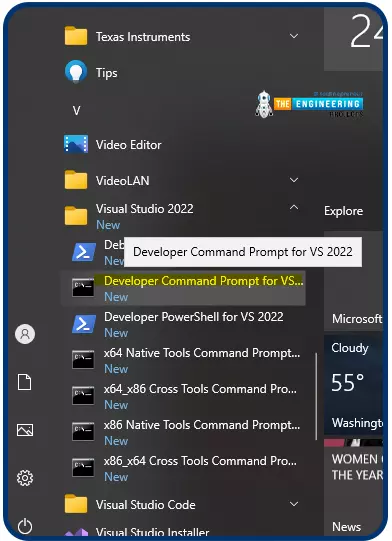
Fig. 23 Developer Command prompt
- Go to RPi Pico
- Next thing to do is, to set the path for SDK use the following command; setx PICO_SDK_PATH "..\..\pico-sdk" and press enter key to set the path.
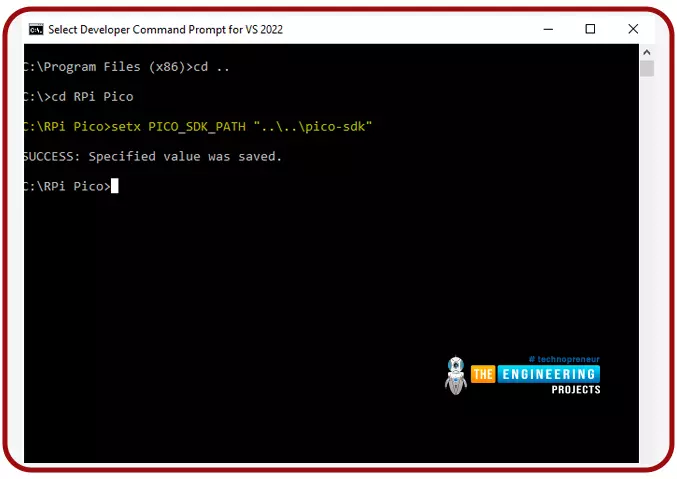
Fig. 24
- After setting the path, exit from the command prompt.
- Restart the same Developer Command Prompt for VS 2022.
- In the RPi Pico directory create a new directory with name ‘build’.
- Go to ‘build’ directory you just created.
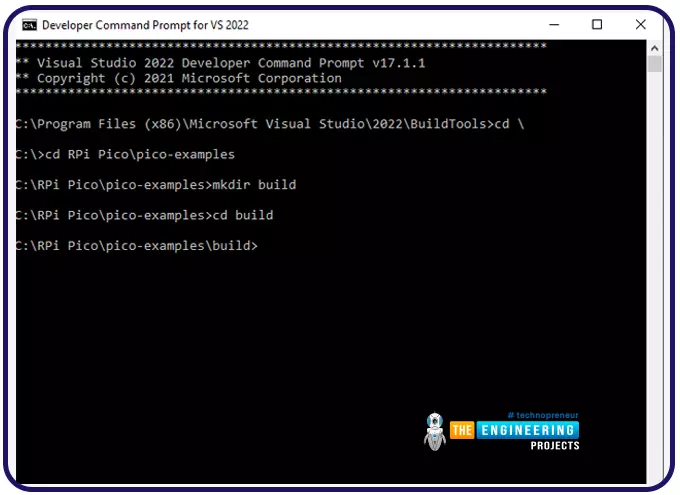
Fig. 25 create build directory
Using CMake to build the Makefiles:
- To create Makefiles use the command “cmake –G “NMake Makefiles” ..”.
- Now we are ready to build projects using nmake The nmake command will build all the available projects and the process is time consuming.
Download and Install Visual Studio Code in Windows
Visual Studio Code is tool developed by Microsoft for source code editing.
- Download Visual Studio Code
- Follow the given links to download the Visual Studio Code https://code.visualstudio.com/
- Download the installation setup for Windows by clicking on “Windows x64 User Installer”.
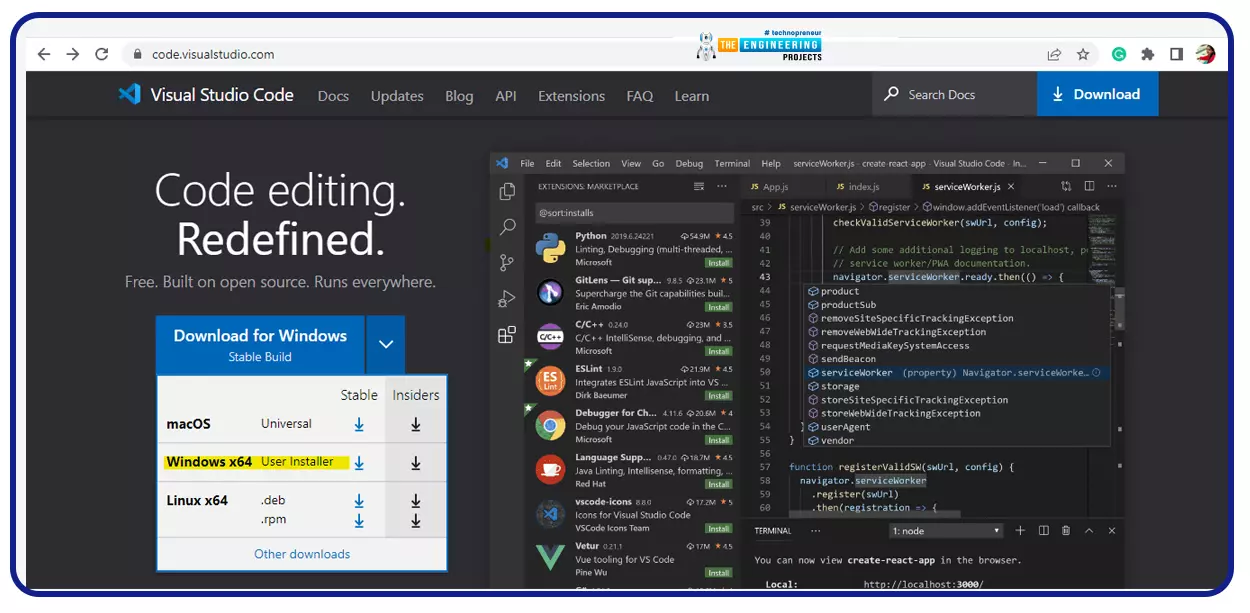
Fig. 26 Download Visual Studio Code
Installation of Visual Studio Code
- Once the package is downloaded successfully, we are ready to install.
- Start the installation process and the first step while installing the setup is to accept the agreement and press next.
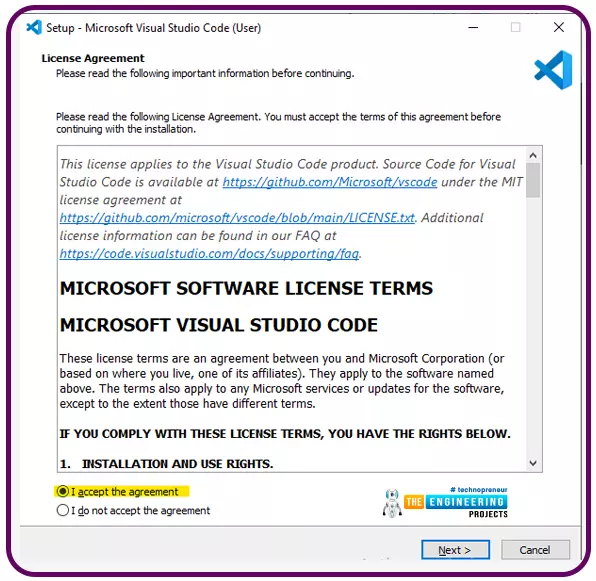
Fig. 27 Accept the agreement
- Select the destination location where you want to store the installed files.
- Next, select the start menu folder.
- In Additional Task, check the “Create a desktop icon” icon of you want to create one and then check the “Add to path” option (as shown below) and then press next.

Fig. 28 Add to path
- Now we are all set to install the software. Press the install button.
- Do not check the “Launch Visual Studio” icon, press finish.
- To launch the Visual studio Code, go to Developer Command prompt.
- Open the RPi Pico
- Type code and press enter.
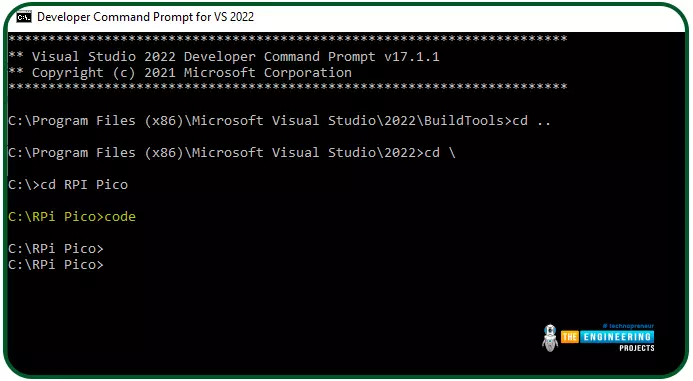
Fig. 29 Launch the Visual Studio code
- Once the Visual Code studio is launched successfully, a “Get started- Visual Studio” screen will pop-up automatically, as shown below:
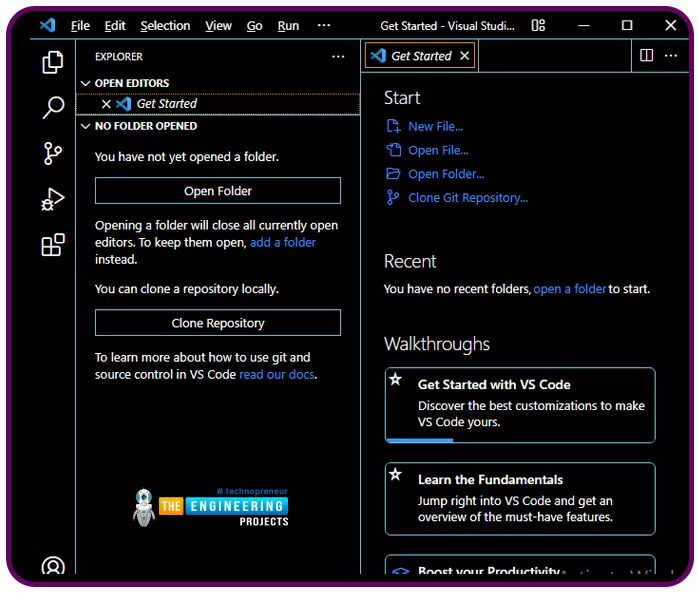
Fig. 30 Visual Studio Code launched successfully
Installing CMake in Visual Studio Code
After successfully installing the Visual Studio Code, the next thing to do is to install CMake in VS code.
Steps to install CMake in Visual Studio Code are:
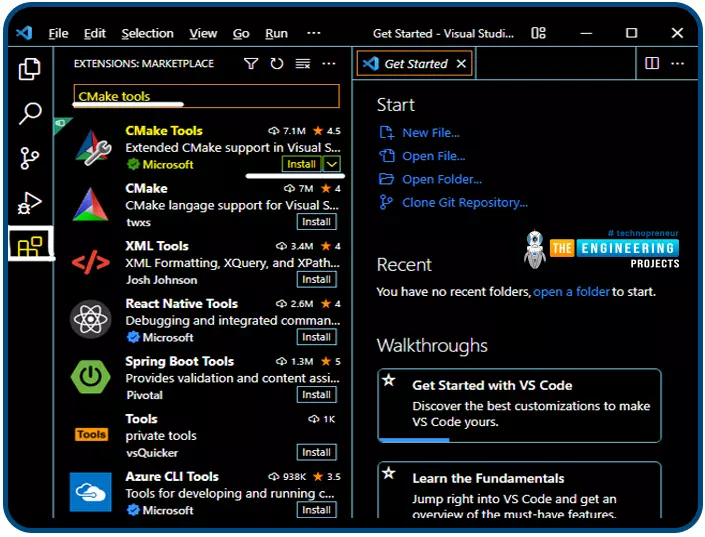
- Open the Visual Studio Code on the left menu list, click on.
- Search for Cmake and install the tool.
Fig. 31
- On the bottom left menu list, press Setting icon and select “Setting” option.
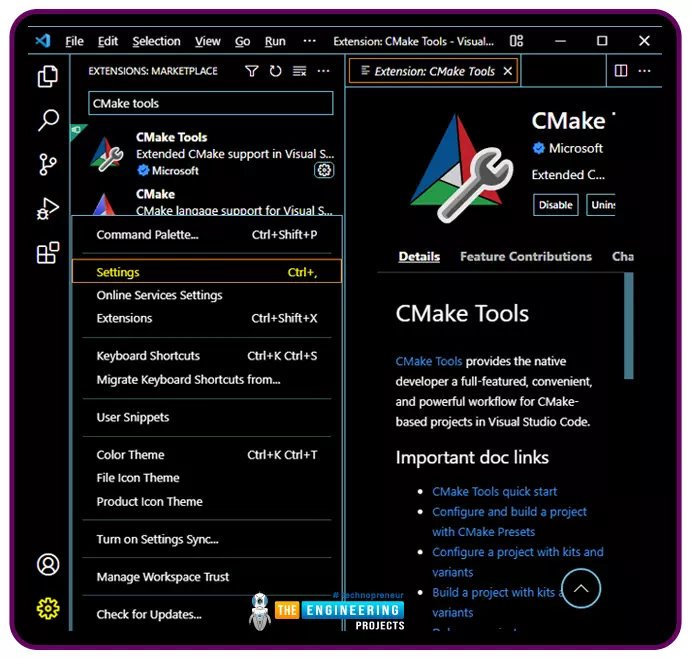
Fig.32 setting
- Click on the Extension icon and select on the CMake Tool Configuration
- Again the in User list expand Extension and select CMake
- A new list will appear on right side of user list.
- Scroll down to the list and click on the “CMake Configuration environment” and set item as “PICO_SDK_PATH” and Values as “..\..\pico-sdk” and press “OK”.
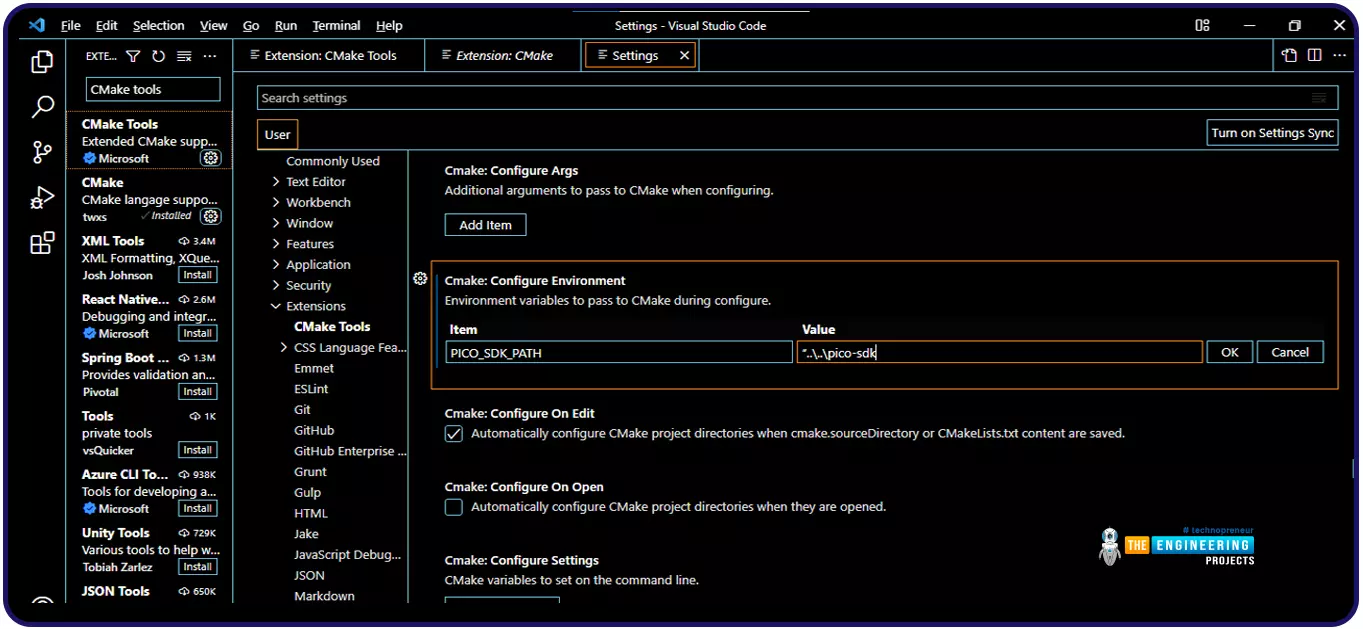
Fig. 33 CMake Configure Environment
- Make sure your system is connected with internet.
- Again go down in the list and click on “CMake: Generator” and fill the space with “NMake Makefiles” and close the settings window.
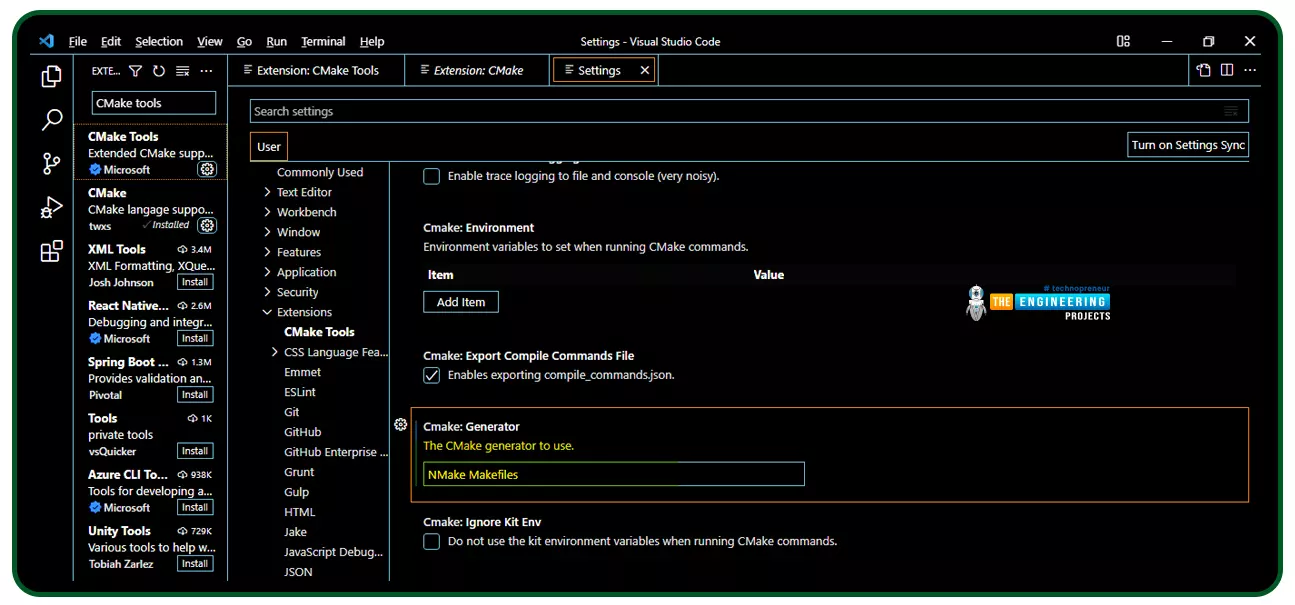
Fig. 34 CMake generator
- Next, go to the Explore icon (top left of the screen) and select Open Folder
- Search for pico-example by writing “:\RPi Pico\pico-examples\” in the search bar and then select the pico-example

Fig. 35 Open folder
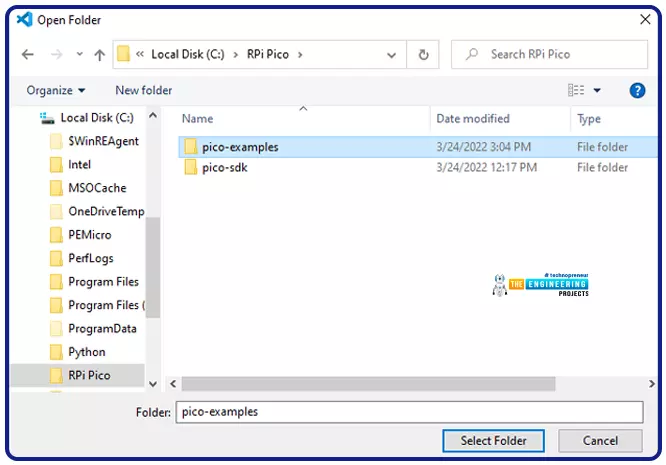
Fig. 36 Select ‘pico-examples’ folder
- Select the “GCC for arm-none-eabi” from the list.
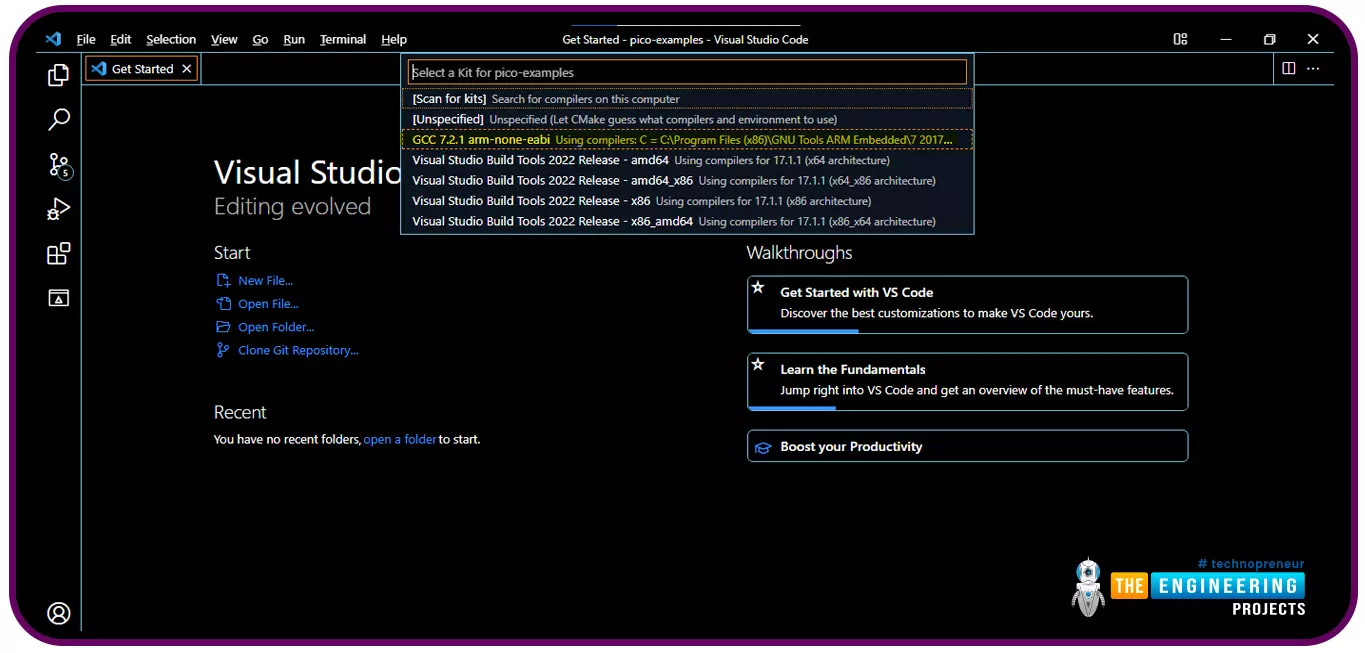
Fig. 37 GCC fro arm-none-eabi
- After this, the CMake tool will initialize building the Makefiles for all projects.
- From the bottom blue menu tab, by selecting the build button, you can build other projects as well.
- So now we are all set to upload a program into raspberry pi pico.
Before writing a program for Raspberry Pi Pico make sure you have all the necessary hardware components along with the software and compilers (installed) required to program the Pico board.
Components required to program Raspberry Pi Pico are:
- The first thing required is a Micro-USB Cable, which allows the user to connect it to a computer or a Raspberry Pi for programming and powering up the Pico board.
- Next component is the development environment required to compile and upload the program into the Raspberry Pi Pico development.
- If you need to interface a peripheral with your Pico board using a breadboard then, you also need a set of Pico Headers.
Conclusion
This concludes the installation procedure for Visual Studio Code in Windows ( for Raspberry Pi Pico programming) which includes the installation of various tools and compilers necessary for programming Raspberry Pi Pico.
In our next tutorial, we will discuss the installation procedure of Python Thonny IDE for programming the Raspberry Pi Pico. We will also continue the programming part with Python Thonny IDE with MicroPython programming language.
I hope you found this tutorial of some help and also hope to see you soon with a new tutorial.
