LED Blinking Project Using 8051 Microcontroller in Proteus ISIS
- I am gonna first design the simulation of LED Blinking Project using 8051 Microcontroller in Proteus ISIS, as you all know Proteus is my favorite simulation software.
- After designing the simulation, we will design the programming code for 8051 Microcontroller.
- In order to design the code we are gonna use Keil micro vision compiler and the version I have rite now is 4. So its keil micro vision 4 compiler for 8051 Microcontrollers.
- So let's first design the Proteus Simulation for LED Blinking PRoject Using 8051 Microcontroller.
Proteus Simulation for LED Blinking Project
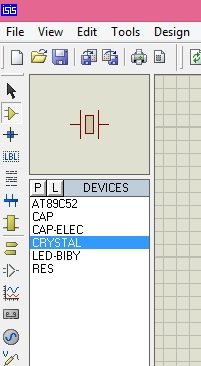
- So, get these components from Proteus components library and place it in your workspace, these components are shown in below figure:

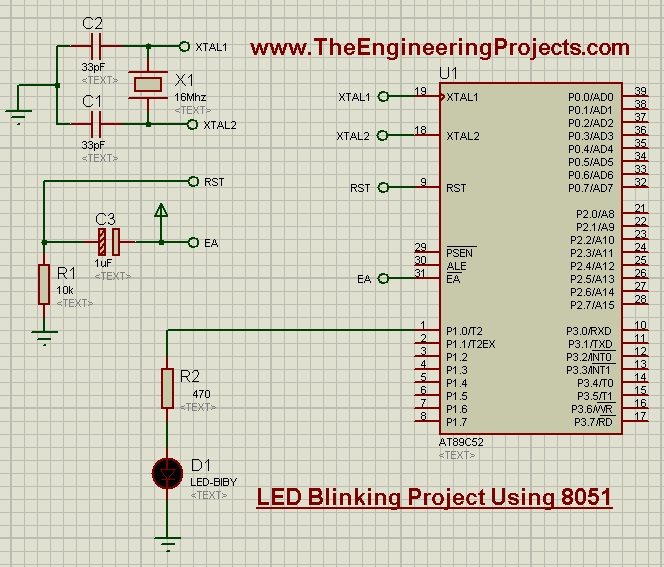
- So, now I hope you have got all these components, now design a circuit in your Proteus software as shown in below figure:

- Now you can see in the above image, I have used crystal oscillator of 16MHz which is used to provide frequency to 8051 Microcontroller.
- After that we have placed a 10k resistance in path of our Reset pin.
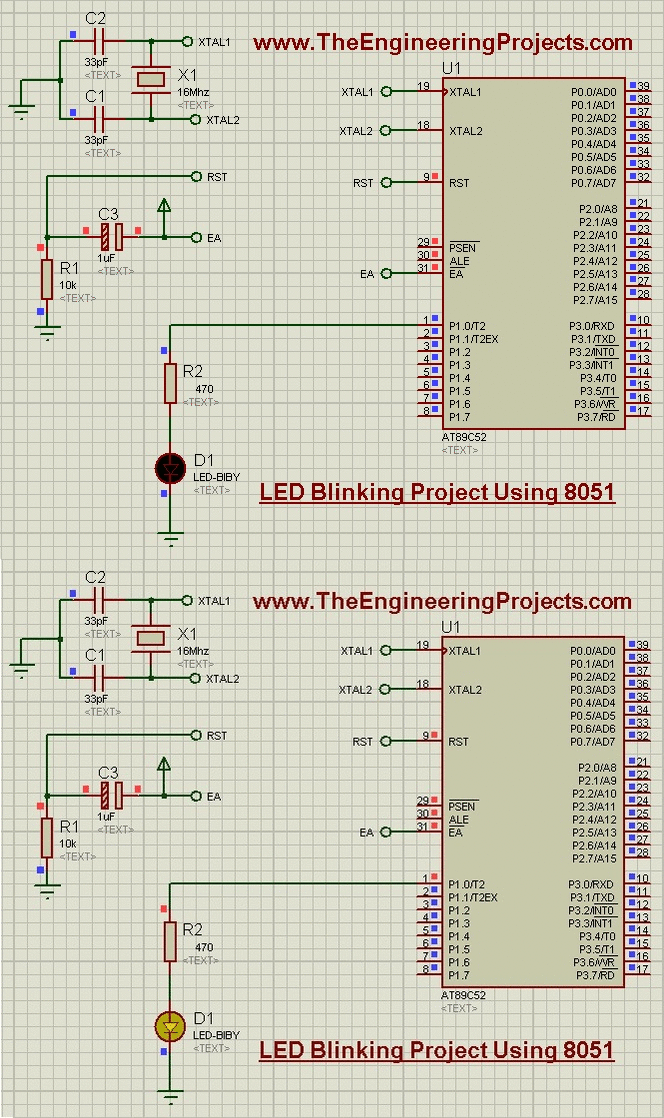
- LED is connected to first pin of Port 1 which is P1.0.
- So, now let's design the programming code for 8051 Microcontroller as we are done with the Proteus Simulation.
Keil Programming Code for LED Blinking Project
- Now as I have mentioned earlier, the compiler I have used for designing the programming code for LED Blinking Project is Keil micro vision 4.
- So I hope you have this installed on your computer and if not then must install it as otherwise you wont be able to compile this code, but I have also placed the hex file so that you can run the simulation easily.
- You can download them easily by clicking the Download buttons present at the end of this post.
- So now create a new project in your keil compiler and paste the below code in your c file.
#include<reg51.h>

sbit LED = P1^0;

void cct_init(void);
void delay(int a);


int main(void)
{
   cct_init();

   while(1)
   {
       LED = 0;
       delay(30000);
       LED = 1;
       delay(30000);
   }
}

void cct_init(void)
{
    P1 = 0x00;
}

void delay(int a)
{
   int i;
   for(i=0;i<a;i++);
}
- Now let me explain this code a bit, first of all, I declare the pin1.0 as LED so that its easy to use it in our code in future.
- After that I declared two functions. One of them is the delay function which is just adding the delay, while the second function is for initialization of Port 1 as output port.
- While in the Main function, we have used the LED blinking code in which LED is ON and then OFF continuously and so that make it blink.
- Now after adding the code in your Keil software, compile it and get the hex file.
- Upload this hex file into your 8051 Microcontroller which I have used is AT89C52 and hit the RUN button.
- If everything's goes fine then you will get results as shown in below figure:

- Now click the below button to get the simulation and the programming code and let me know did it work for you. :)
Download Proteus Simulation & Keil Code
That's all for today, will come soon with new tutorial on 8051 Microcontroller so stay tuned and have fun. Cheers !!! :)


