Hello everyone, I hope you're all doing well. In the previous lecture(Chapter 0: ESP32 Pinout), we discussed the ESP32 features & specs in detail. Today, we are officially starting this ESP32 Programming Series. In this ESP32 Programming Series, we will start with basic concepts and will gradually move towards complex topics. I will try to keep this ESP32 series as simple as I can. But still, if you encounter any issues, please ask in the comments, will try to resolve the issues as soon as possible.
As ESP32 has numerous features & applications, so I have divided this series into different sections. I have named the 1st section "ESP32 IDEs". In this section, we will discuss different IDEs used to program ESP32 boards. In each Chapter of this section, we will install one of these ESP32 IDEs and will test a simple LED Blinking Code in it. We will set up the ESP32 Development Environment for Windows, Mac, and Linux users.
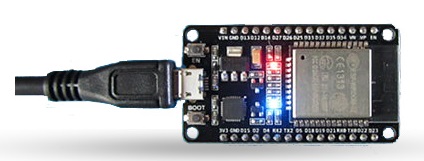
As I am sharing the 1st Chapter today, so first we will unbox the ESP32 board, set up the most commonly used ESP32 IDE i.e. Arduino IDE, and test a simple WiFi Scan Code on the ESP32.
Here's a video lecture for better understanding:
ESP32 IDEs
IDE is an abbreviation of Integrated Development Environment. IDE is a software package used to write & compile the code. As ESP32 is one of the most popular microcontroller boards, there are numerous third-party IDEs available to program it, and each IDE supports its own programming language. So, if you are a C# developer or an Arduino expert, you can quickly and easily get your hands dirty with ESP32. The below table shows the most commonly used ESP32 IDEs along with their supported programming language:
| ESP32 IDEs | ||||
|---|---|---|---|---|
| No. |
ESP32 IDEs |
Programming Language |
||
| 1 |
Arduino IDE |
Arduino C |
||
| 2 |
Thonny IDE |
MicroPython |
||
| 3 |
Visual Studio Code |
Arduino C |
||
| 4 |
PlatformIO IDE |
C++ |
||
| 5 |
ESP-IDF(official IDE by EspressIF) |
C |
||
| 6 |
nanoFramework |
C# |
||
In today's lecture, we will install the Arduino IDE and configure it for ESP32 Programming. So, let's get started:
Install ESP32 in Arduino IDE
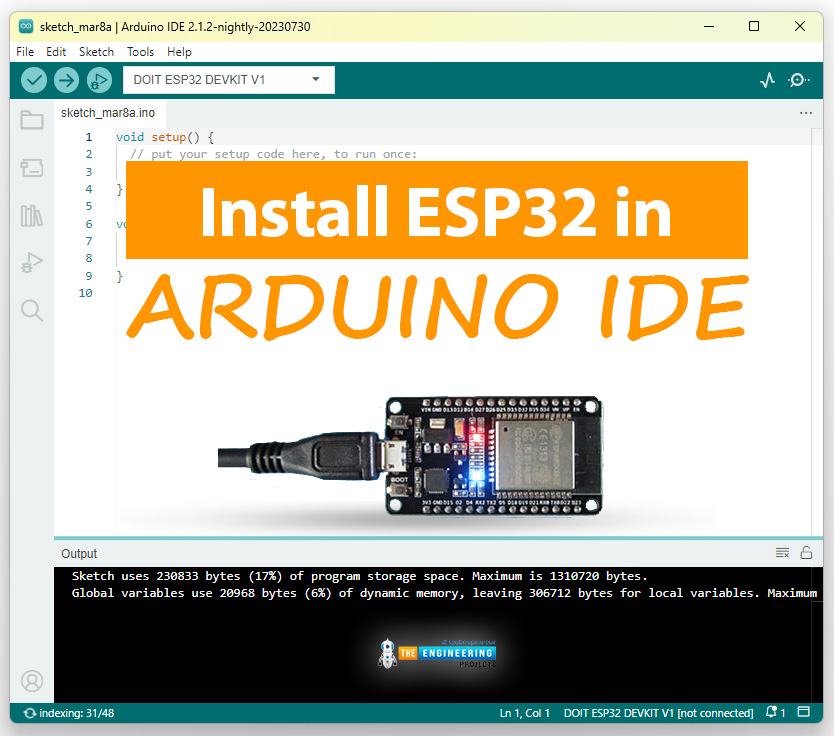
First of all, we need to install the Arduino IDE itself. To program ESP32 with Arduino IDE, we need to install the ESP32 Boards in Arduino IDE. Before installing the ESP32 Boards, we first need to add a JSON File containing information about ESP32 Boards. JSON format is used to share information between two computers. So, this JSON file will add the information of ESP32 boards in the Arduino IDE. So, let me summarize these 3 steps in proper order:
- Installing Arduino IDE
- Adding ESP32 JSON File
- Installing ESP32 Boards
- Installing COM Port Driver for ESP32(if COM Port not detected automatically)
Installing Arduino IDE
We need to first download & install the Arduino IDE.
- Download Arduino IDE from its official website, make sure to download the latest version.
- Installing Arduino IDE is quite simple, but if you are having issues, have a look at this Arduino IDE Installation Guide.
After installing the Arduino IDE, we need to add the ESP32 JSON File in it. So, follow the below steps:
Adding ESP32 JSON File in Arduino IDE
Steps to install ESP32 JSON File in Arduino IDE:
- Here's the link to the ESP32 JSON file: https://images.theengineeringprojects.com/software/esp32.json
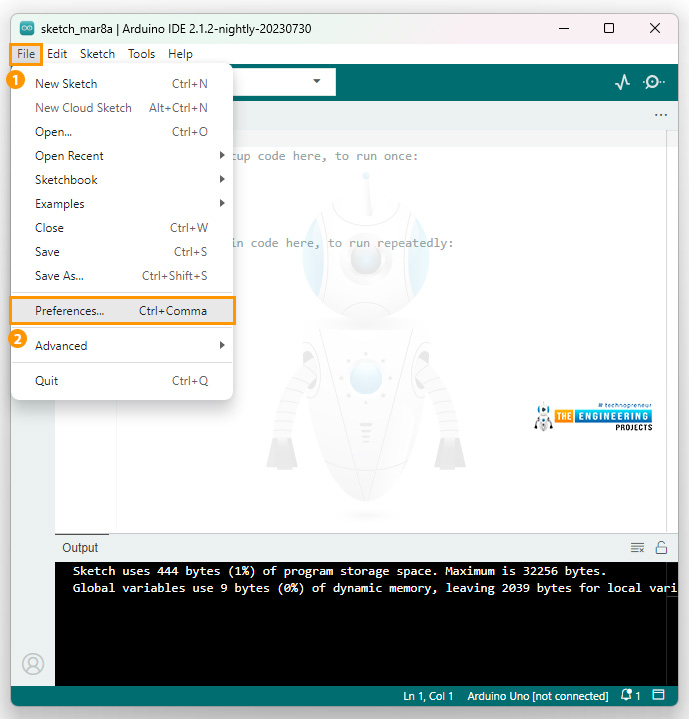
- Open Arduino IDE and navigate to "File > Preferences", as shown in the below image:
- In the Arduino Preferences Window, you will find a textbox named "Additional boards Manager URL".
- Add the ESP32 JSON File link(provided above) in it, as shown in the below figure:
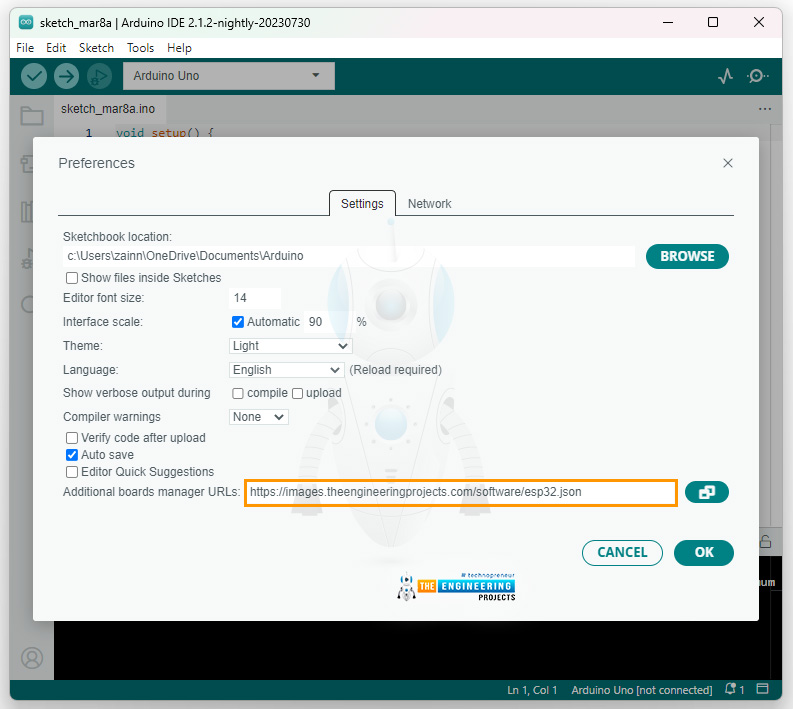
- If you have already added any third-party board URLs, then add a comma (,) between the JSON links OR click on the button and it will open up a new window, add URL in the new row, as shown below:
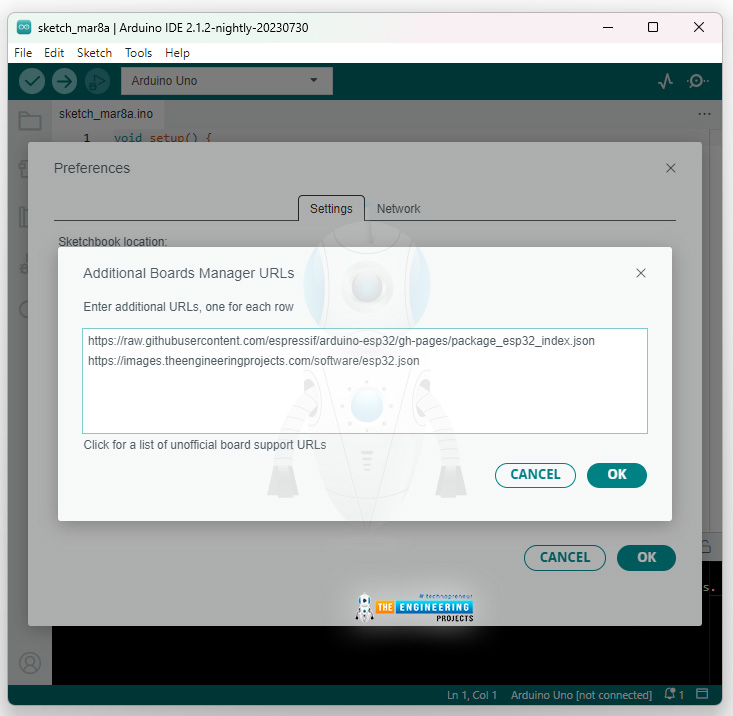
- Click "OK" to close the Preference Window.
- Once you close the Preference Window, Arduino IDE will extract the information of all ESP32 boards by downloading the ESP32 JSON file.
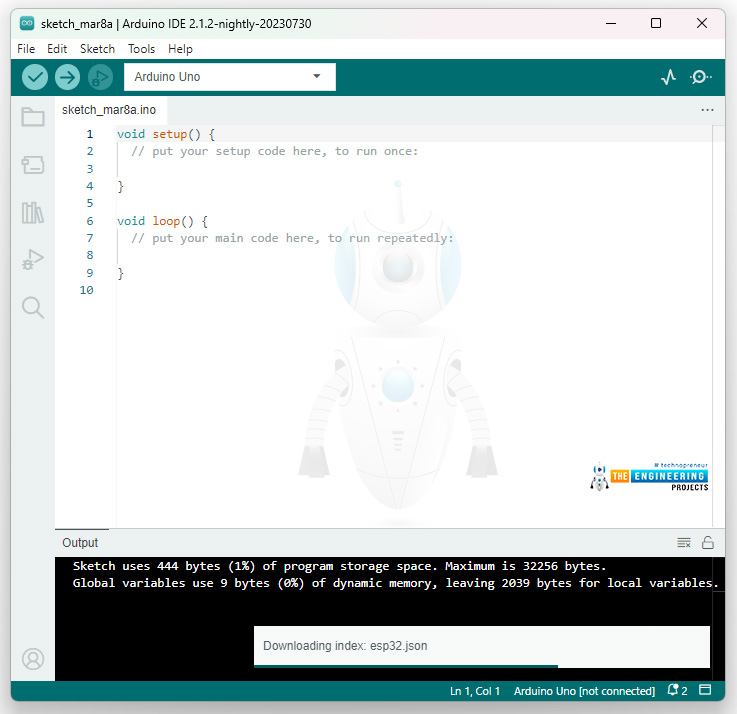
Now, we are ready to install the ESP32 Boards in Arduino IDE:
Installing ESP32 Boards in Arduino IDE
- In the Arduino IDE, click on "Tools > Board > Board Manager", as shown in the below figure:
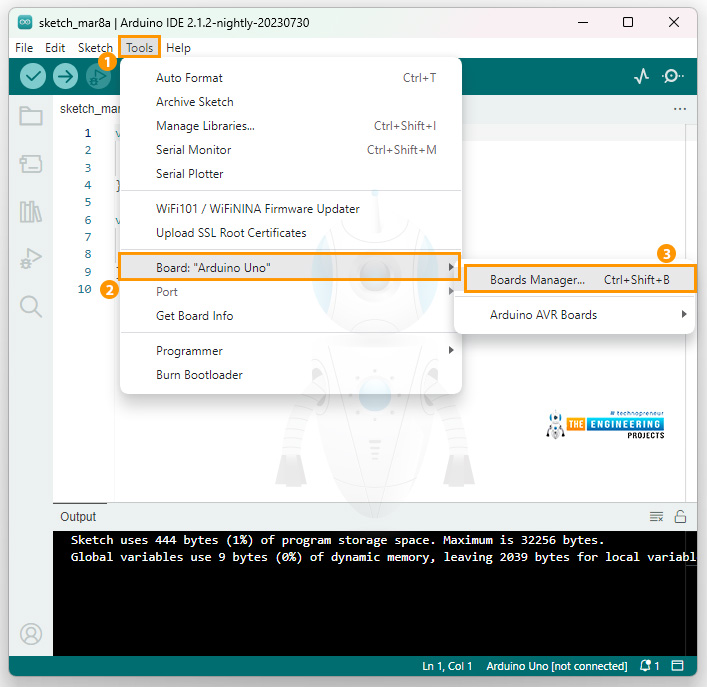
- It will open up a Board Manager Window in Arduino IDE.
- From this Board Manager, we can install the packages for third-party modules.
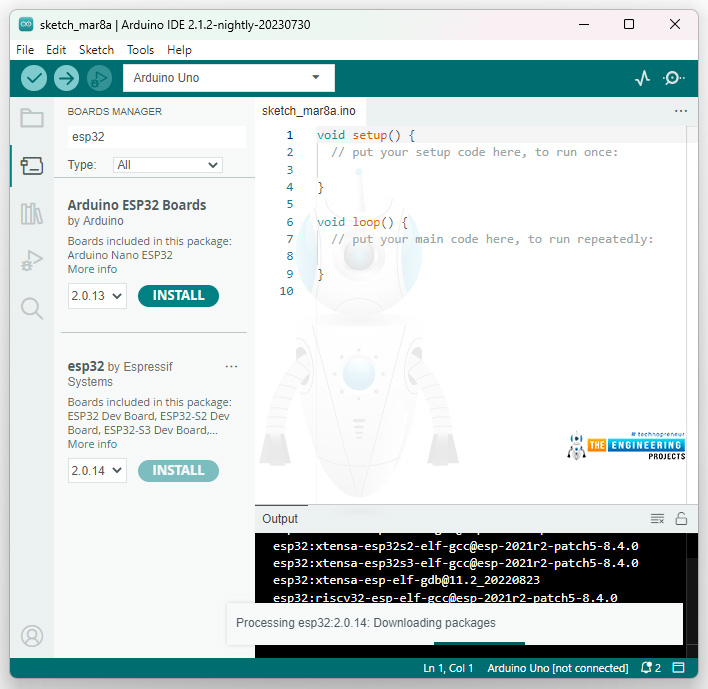
- In the Board Manager, make a search for "ESP32" and you will get many third-party ESP32 packages.
- Here, we need to install the "ESP32 by Espressif Systems" as it's the official package, I have highlighted it in the below image:
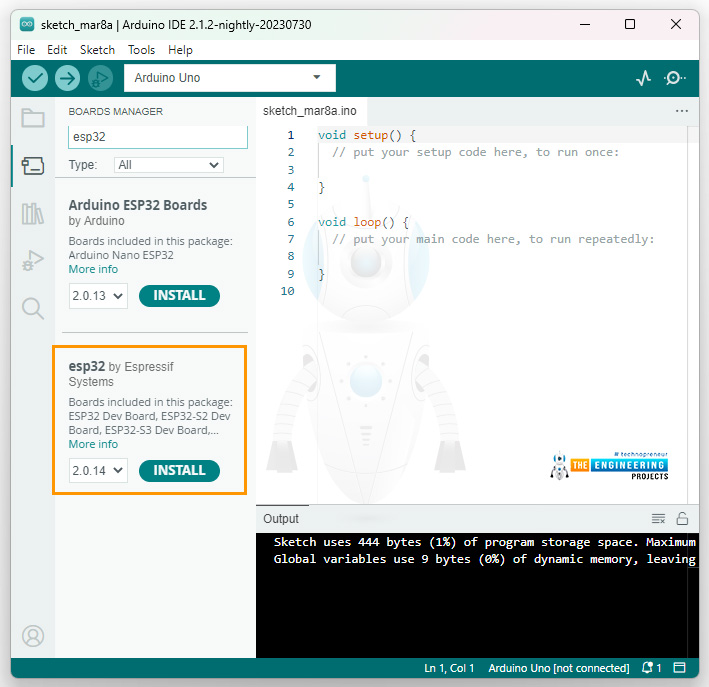
- So, click on the Install button to install ESP32 boards in Arduino IDE.
- Arduino IDE will take some time to install the ESP32 package.
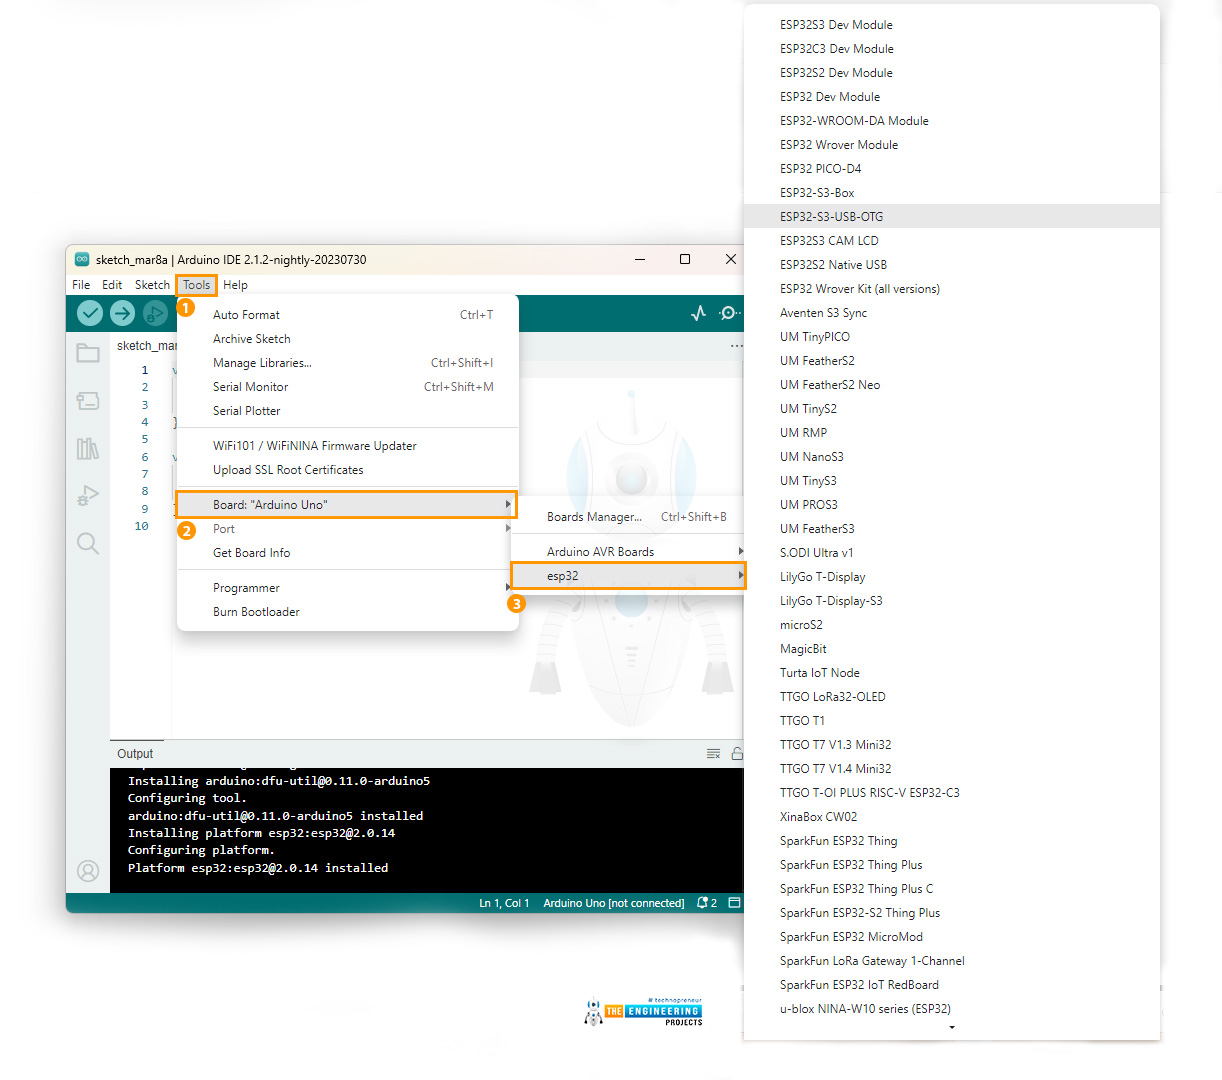
- Once installed, click on "Tools > Boards > esp32" and you will find a list of newly added ESP32 boards, as shown in the below figure:
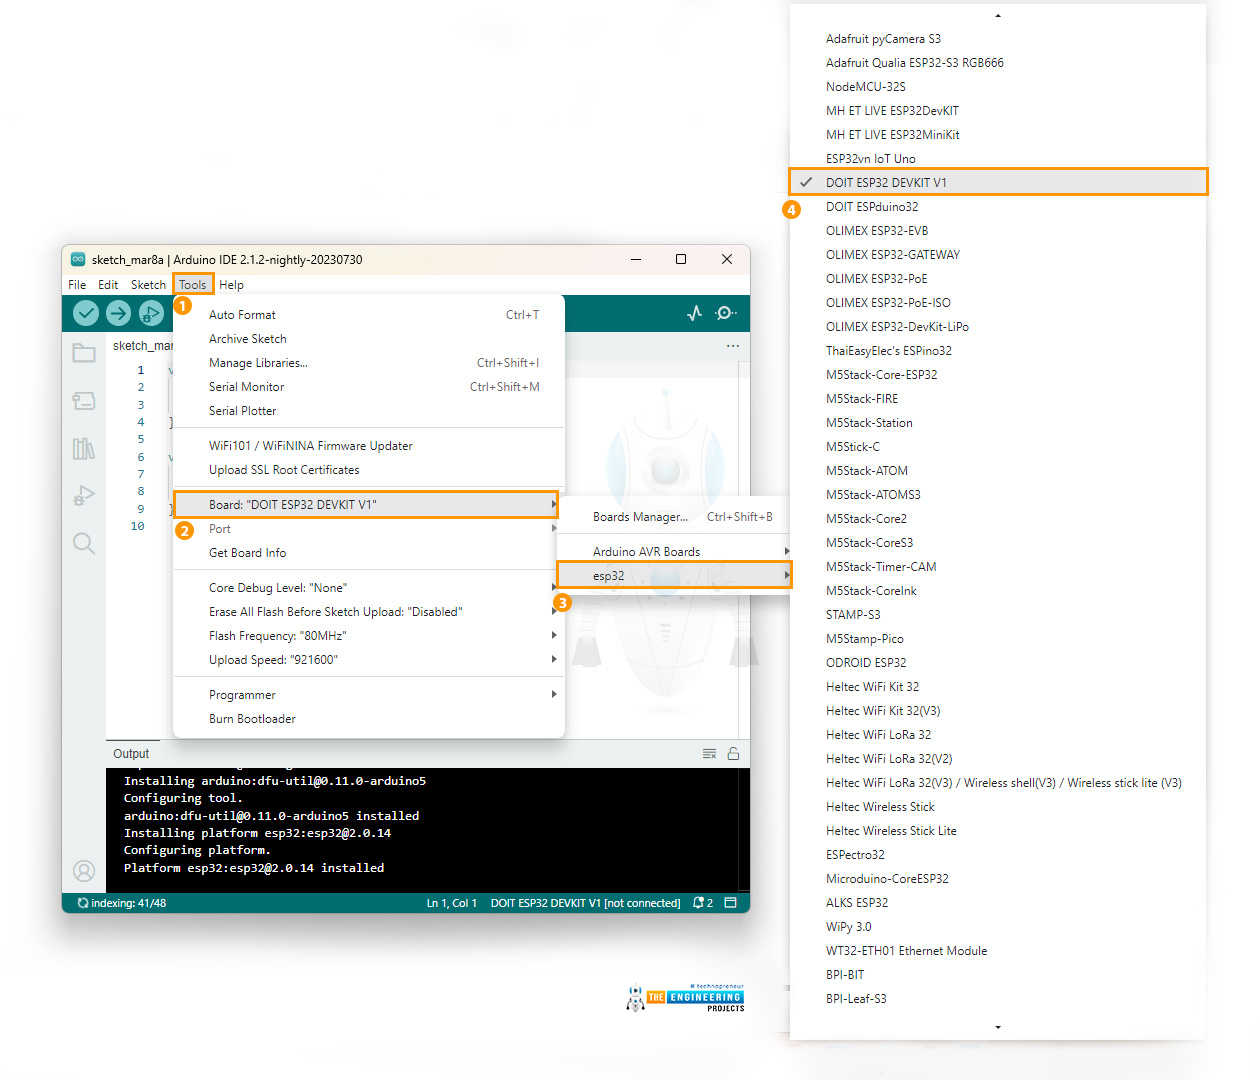
- From this list, we will select "ESP32 DEV KIT V1", it's the most commonly used ESP32 board.
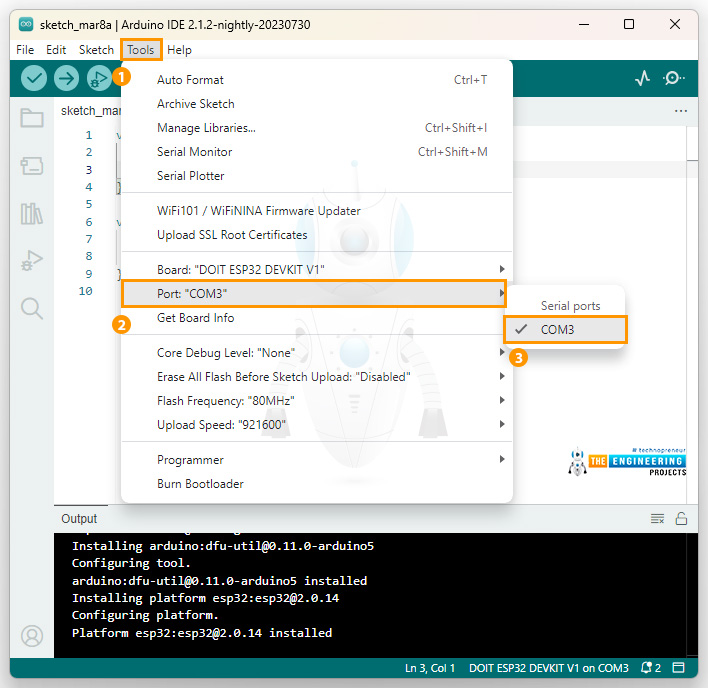
- In the COM Port, select the available COM Port, in our case, it's COM5:
In some cases, the Arduino IDE won't automatically detect the ESP32 COM Port, so here we need to install the COM Port driver for ESP32. Let's do it:
Installing ESP32 COM Port in Arduino IDE
If you don't find the ESP32 COM Port in the Port Section of Arduino IDE, then you need to install the COM Port Driver manually. So, follow the below steps:
- Download the Windows COM Port Driver by clicking the below button and install it on your computer:
- If you are using 32-bit Windows, then install the x86 version and if working on 64-bit Windows, then install the x64 version.
After installing this COM Port Driver, restart your Arduino IDE and it's recommended to restart your computer as well.
So, we have successfully installed the ESP32 Boards in the Arduino IDE. Now, let's upload a simple LED Blinking Code in the ESP32:
Code Upload to ESP32 from Arduino IDE
Now that the Arduino IDE is ready to handle the ESP32 Dev Kit module, you can write the code for the ESP32 module. We will just upload a simple WiFi Scan Code to verify that our ESP32 installation is correct.
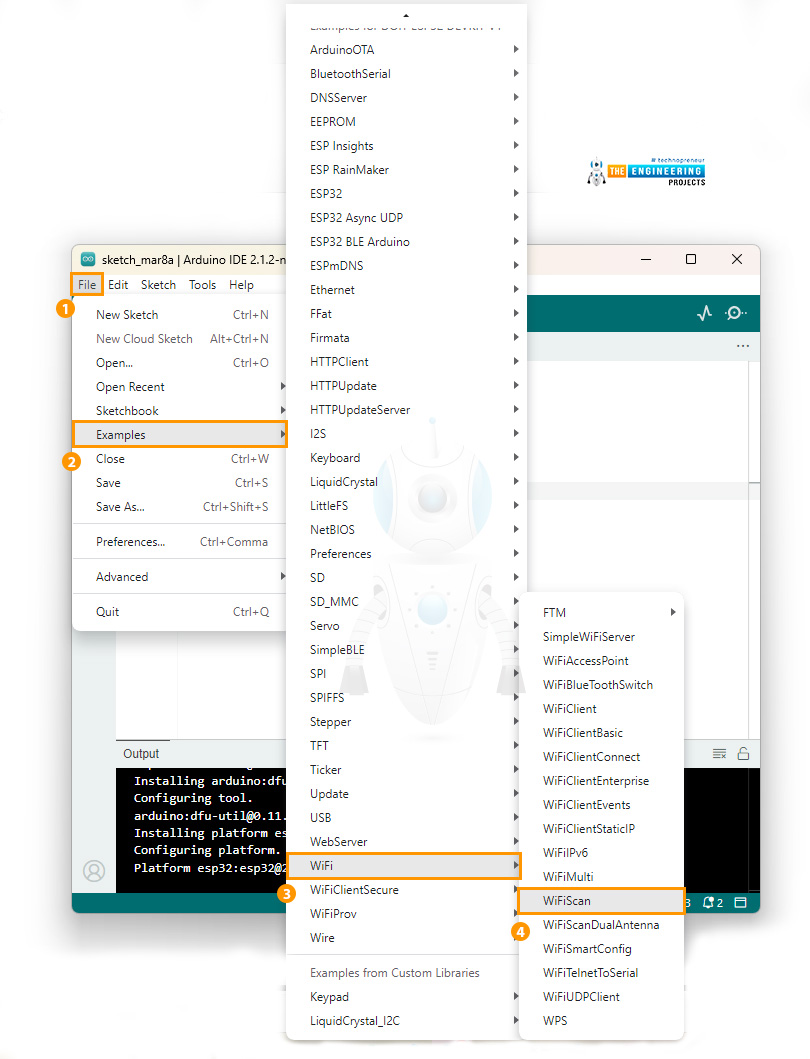
- Open Arduino IDE and navigate to "File > Examples > WiFi > WiFiScan".
- Click on the Tools and verify that you have selected the correct ESP32 board and the COM Port.
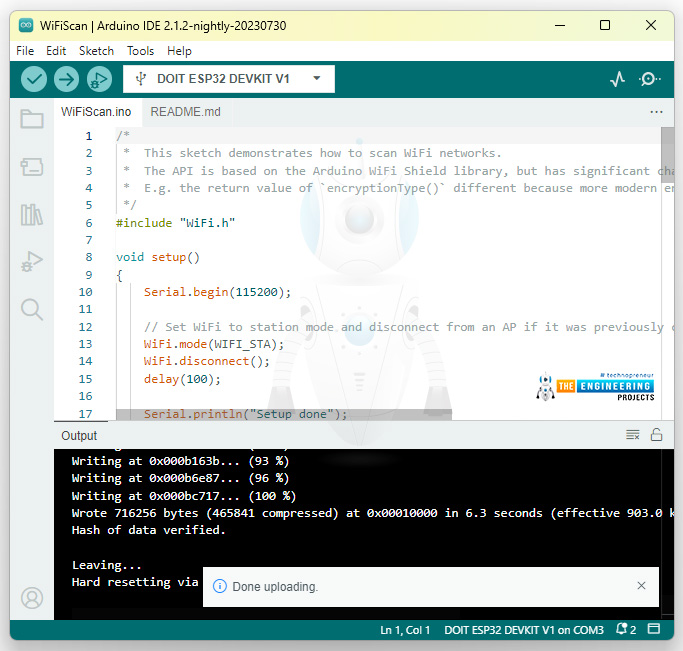
- Now, click the "Upload " button to upload the code to the ESP32 board.
- If the code is uploaded successfully in the ESP32 board, you will get the confirmation message in the Output pane, as shown in the below figure:
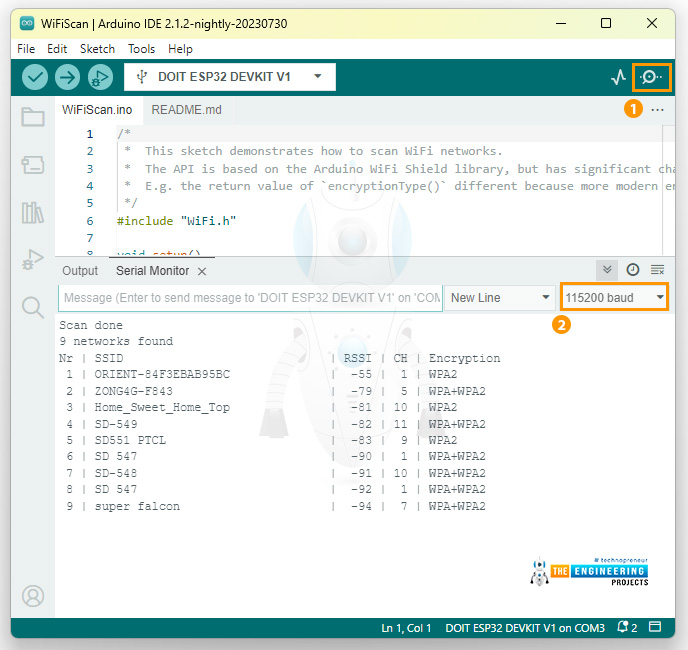
That concludes today's discussion. We hope you found this post informative. In the next tutorial, we will install the ESP32 Boards in the Visual Studio Code. If you have any questions, please ask in the comments. Take care. Have a good day.


 ESP32 Projects
 syedzainnasir
 0 Comments


 2.3k
2.3k
 953
953
 921
921
 2.1K
2.1K

