


ESP32 OTA (Over The Air) Programming


Hello readers, hope you all are doing great. In this tutorial, we are going to discuss a mechanism that allows users to update the ESP32 with a new program wirelessly or over the air (without using a USB cable to upload a new program).
Over-The-Air (OTA) programming
- OTA programming is the mean by which a product manufacturer or product service provider can update the features or functionality of the device wirelessly or over the air, after the device has been deployed in the field where connecting a cable or uploading the code serially is difficult.
- One key advantage of OTA is that a single central node can send an update to multiple ESPs on the same network.
- The device must have a provisioning client capable of receiving, processing, and setting parameters in order to receive, process, and set parameters in a mobile device over the air.
Applications of OTA programming
Mobile Phones:
- In order to improve the compatibility with hardware and enhance the stability of software and applications, software updates are required.
- OTA updates are intended to improve the underlying operating system, time zone rules, read-only apps installed on the system partition these updates have no effect on user-installed applications.
IoT (internet of things) application:
- The ability to wirelessly download an application, configuration, or firmware to internet-enabled devices, also known as IoT, is referred to as over-the-air (OTA). It works in the same way that our computers, laptops, tablets, and phones do.
- Application, where sensor nodes are frequently placed in remote or difficult-to-reach locations OTA programming can be used.
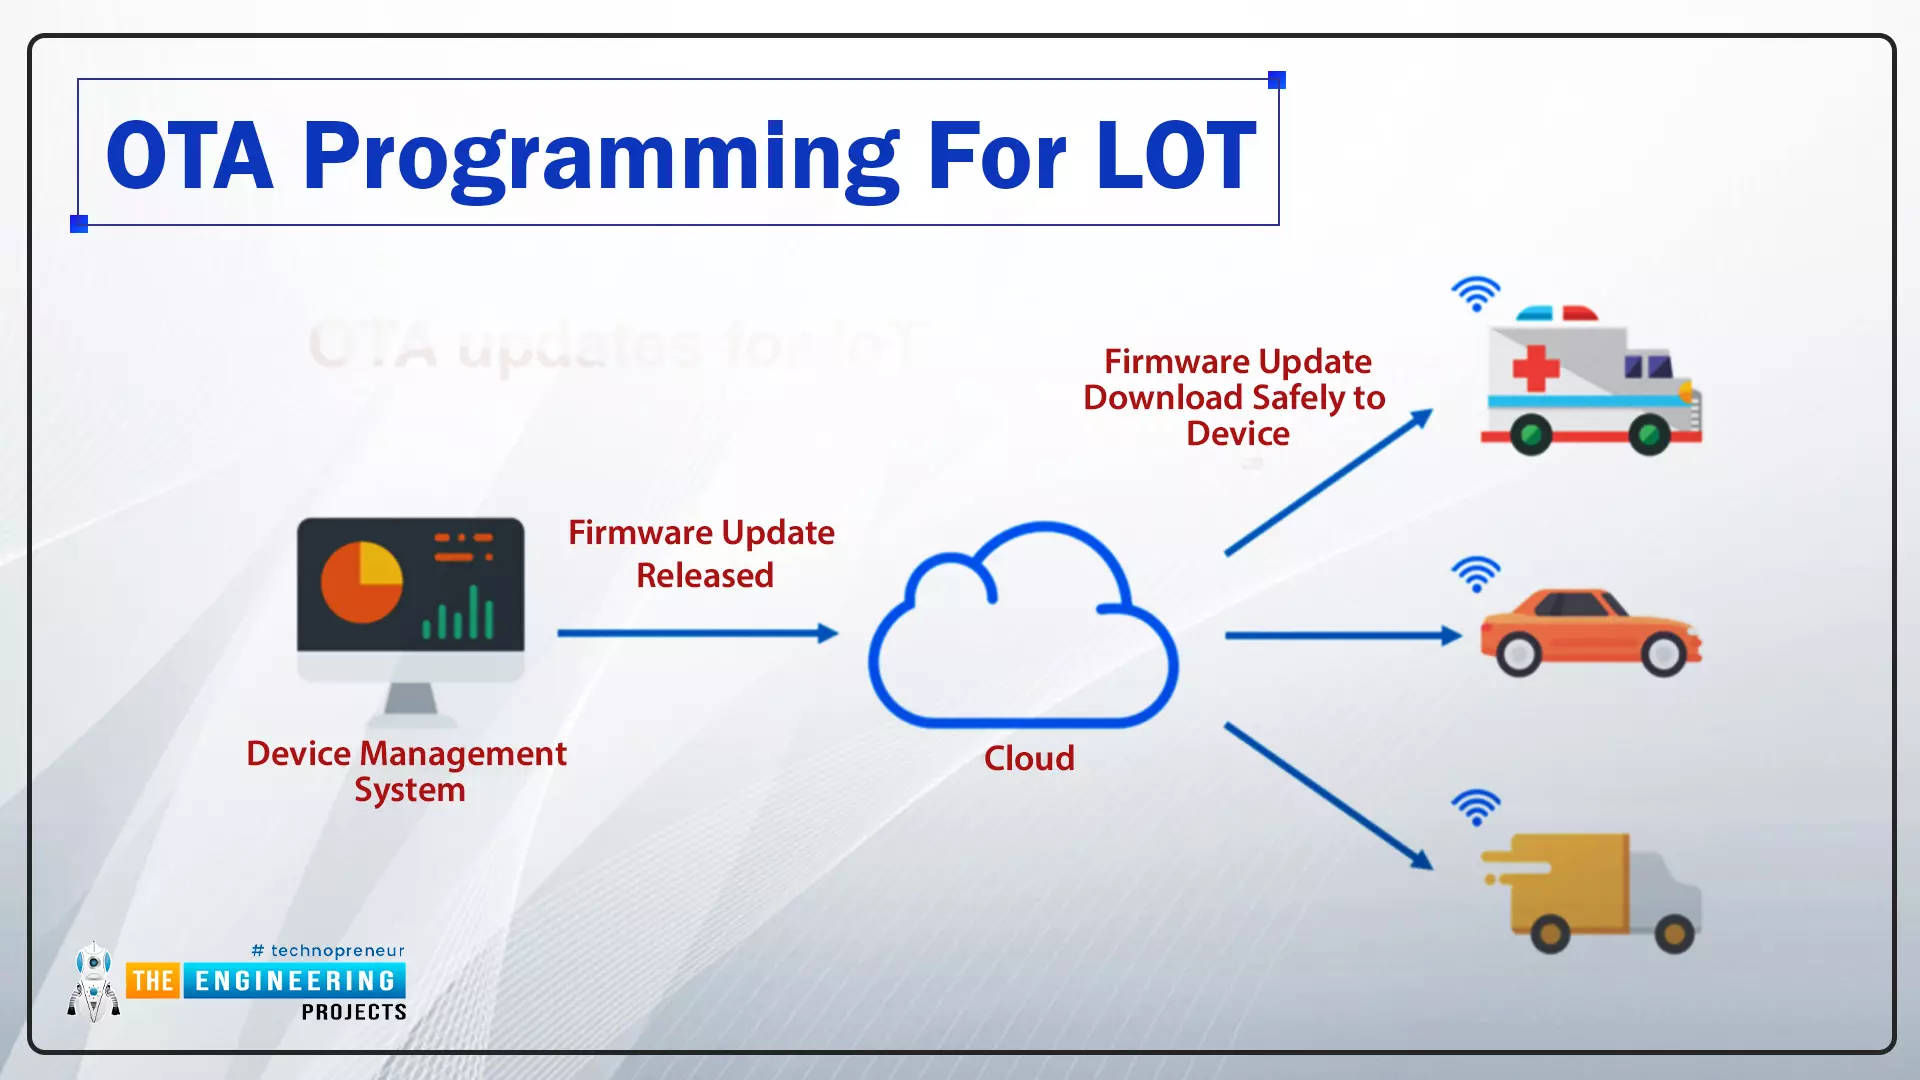
Fig. 2 OTA programming for IoT
How does OTA programming work?
There are two methods of OTA implementation.
- Basic OTA: In the basic OTA method the program is updated into ESP32 over the air using Arduino IDE.
- OTA web updater: In web updater OTA the program is updated over the air using a web browser.
Implementing OTA Update feature using ESP32
In this tutorial, we will discuss only the basic OTA method using Arduino IDE and ESP32 module.
If you want to know more about the basics of ESP32 and how to get started with Arduino IDE, then follow the tutorial Introduction to ESP32 Programming Series.
- For Basic OTA programming with ESP32, it is required to install the python 2.7.x version in your system.
- Follow the link to download python: https://www.python.org/downloads/
- Install the python into your system.
- Upload the basic OTA code into ESP32 using the serial port.
- Upload the new ESP32 test code over the air using the network port into esp32 module.
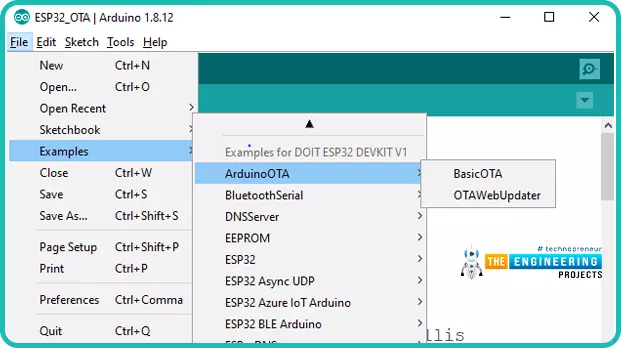
To implement the Basic OTA method, an example is available is Arduino IDE.
- You can find the code through File> Examples> ArduinoOTA> BasicOTA.
- An image has been attached below for reference:
Arduino IDE Code
- It is required to first upload the basic OTA code serially (using serial com port).
- Because in default mode the ESP32 is not ready for OTA updates (as there is no inbuilt OTA firmware available inside the ESP32 board).
- Only after that you can access the OTA feature
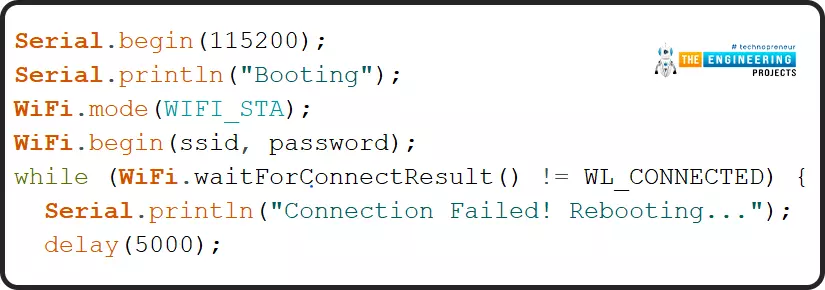
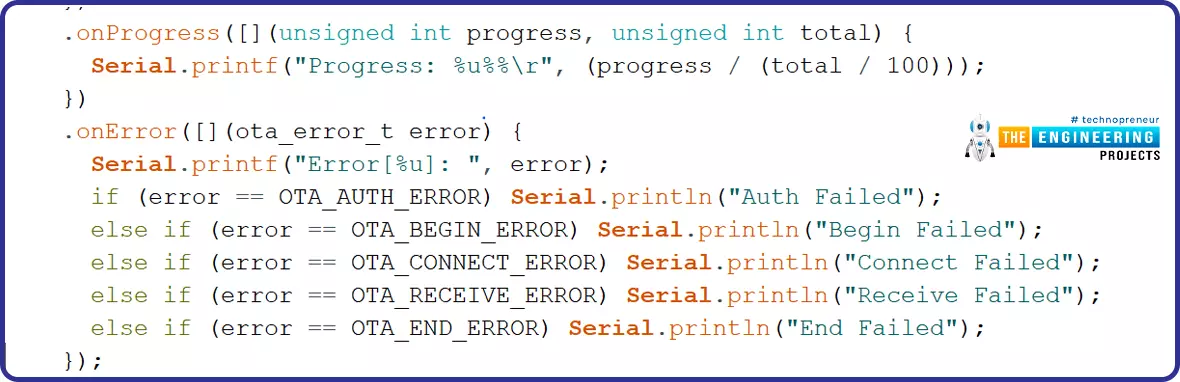
#include <WiFi.h> #include <ESPmDNS.h> #include <WiFiUdp.h> #include <ArduinoOTA.h> const char* ssid = "SSID"; const char* password = "Password"; void setup() { Serial.begin(115200); Serial.println("Booting"); WiFi.mode(WIFI_STA); WiFi.begin(ssid, password); while (WiFi.waitForConnectResult() != WL_CONNECTED) { Serial.println("Connection Failed! Rebooting..."); delay(5000); ESP.restart(); } ArduinoOTA.onStart([]() { String type; if (ArduinoOTA.getCommand() == U_FLASH) type = "sketch"; else // U_SPIFFS type = "filesystem"; // NOTE: if updating SPIFFS this would be the place to unmount SPIFFS using SPIFFS.end() Serial.println("Start updating " + type); }) .onEnd([]() { Serial.println("\nEnd"); }) .onProgress([](unsigned int progress, unsigned int total) { Serial.printf("Progress: %u%%\r", (progress / (total / 100))); }) .onError([](ota_error_t error) { Serial.printf("Error[%u]: ", error); if (error == OTA_AUTH_ERROR) Serial.println("Auth Failed"); else if (error == OTA_BEGIN_ERROR) Serial.println("Begin Failed"); else if (error == OTA_CONNECT_ERROR) Serial.println("Connect Failed"); else if (error == OTA_RECEIVE_ERROR) Serial.println("Receive Failed"); else if (error == OTA_END_ERROR) Serial.println("End Failed"); }); ArduinoOTA.begin(); Serial.println("Ready"); Serial.print("IP address: "); Serial.println(WiFi.localIP()); } void loop() { ArduinoOTA.handle(); }
Code Description
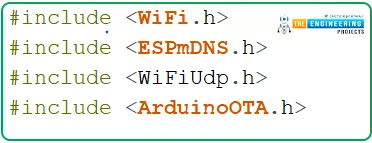
- The first step is to add all the necessary header files. Here we are using four header files.
- WiFi.h: This header file allows the ESP32 board to connect to the internet. It can serve either as a server or a client.
- ESPmDNS.h: This library is used to implement multicast DNS query support for the ESP32 chip. A multicast UDP service is used to provide local network service.
- WiFiUdp.h: This is a library for Arduino wifi shield. It is used to send data to a UDP host over a wireless network.
- ArduinoOTA.h: this library allows users to update the code in the ESP32 board using wifi instead of using the serial port.

- Next, you need to add your wifi credentials. Enter the SSID and password.

Arduino Setup() Function
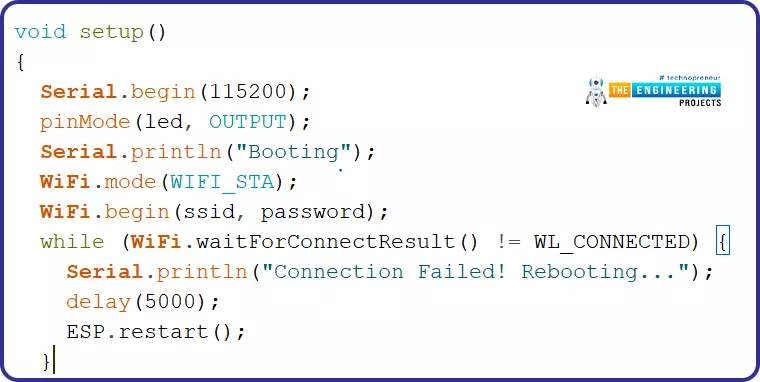
- Inside the setup () function, the first task is to begin the serial monitor at a 115200 baud rate so that, you can print the results and other required details on the serial monitor for verification purposes.
- Set ESP32 Wi-Fi module in station mode(esp32 will act as a client device) using WiFi.mode() function.
- Enable ESP32’s Wi-Fi module using WiFi.begin() function which is using SSID and password as arguments.
- Wait until the ESP32 is not connected with the wifi network.
- ESP.restart() function will reset the ESP32. ESP.restart() function tells SDK to reboot.

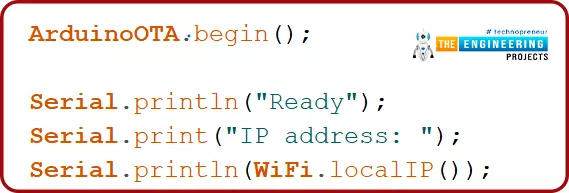
- If an error occurred in OTA programming, print the error on the serial monitor
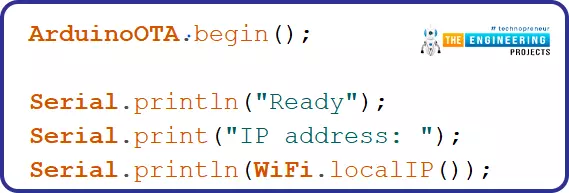
- ArduinoOTA.begin() function is used to initialize the OTA updater.
- Wi-Fi.lockIP() is used to fetch the IP address.
- Print the IP address on the serial monitor.
Arduino Loop() Function
- Inside the loop() function, ArduinoOTA.handle() function is used for updating the ESP32 code over the air using the network port instead of the serial port.

- Compile the code and upload serially using serial com port.
- Open the serial monitor, set the baud rate to 115200.
- You can see the IP address on the serial monitor once the ESP32 is connected to the Wi-Fi network.
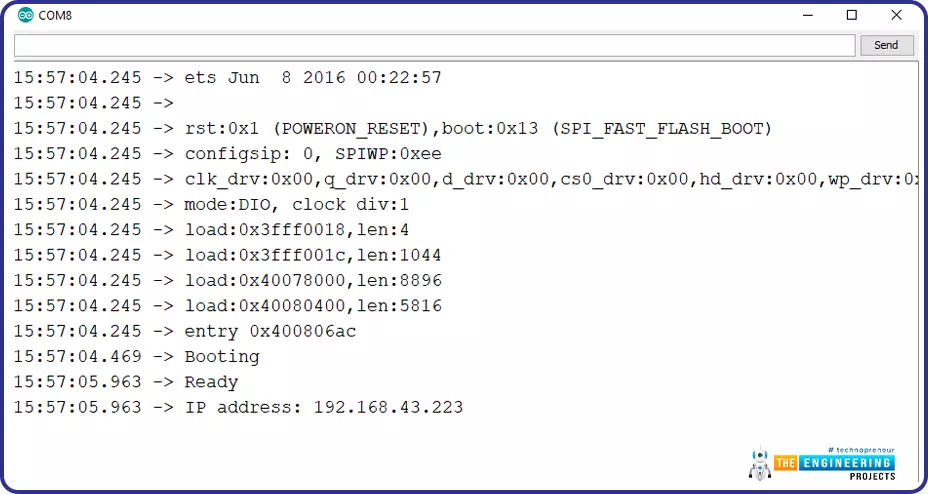
Fig. 11 Serial monitor
Uploading new program into ESP32 module Over the Air
Code
#include <WiFi.h> #include <ESPmDNS.h> #include <WiFiUdp.h> #include <ArduinoOTA.h> const char* ssid = "public"; const char* password = "ESP32@123"; //variabls for blinking an LED with Millis const int led = 2; // ESP32 Pin to which onboard LED is connected unsigned long previousMillis = 0; // will store last time LED was updated const long interval = 1000; // interval at which to blink (milliseconds) int ledState = LOW; // ledState used to set the LED void setup() { pinMode(led, OUTPUT); Serial.begin(115200); Serial.println("Booting"); WiFi.mode(WIFI_STA); WiFi.begin(ssid, password); while (WiFi.waitForConnectResult() != WL_CONNECTED) { Serial.println("Connection Failed! Rebooting..."); delay(5000); ESP.restart(); } ArduinoOTA .onStart([]() { String type; if (ArduinoOTA.getCommand() == U_FLASH) type = "sketch"; else // U_SPIFFS type = "filesystem"; // NOTE: if updating SPIFFS this would be the place to unmount SPIFFS using SPIFFS.end() Serial.println("Start updating " + type); }) .onEnd([]() { Serial.println("\nEnd"); }) .onProgress([](unsigned int progress, unsigned int total) { Serial.printf("Progress: %u%%\r", (progress / (total / 100))); }) .onError([](ota_error_t error) { Serial.printf("Error[%u]: ", error); if (error == OTA_AUTH_ERROR) Serial.println("Auth Failed"); else if (error == OTA_BEGIN_ERROR) Serial.println("Begin Failed"); else if (error == OTA_CONNECT_ERROR) Serial.println("Connect Failed"); else if (error == OTA_RECEIVE_ERROR) Serial.println("Receive Failed"); else if (error == OTA_END_ERROR) Serial.println("End Failed"); }); ArduinoOTA.begin(); Serial.println("Ready"); Serial.print("IP address: "); Serial.println(WiFi.localIP()); } void loop() { ArduinoOTA.handle(); //loop to blink without delay unsigned long currentMillis = millis(); if (currentMillis - previousMillis >= interval) { // save the last time you blinked the LED previousMillis = currentMillis; // if the LED is off turn it on and vice-versa: ledState = not(ledState); // set the LED with the ledState of the variable: digitalWrite(led, ledState); } }
- In the test code, which we are going to upload using a wireless network port over the air, a LED blinking function is added just to test whether the OTA functionality is working fine or not.
Note: It is required to upload the OTA programming handler code every time you upload a new code into ESP32 over the air. So that, OTA programming remains enabled for future use.
Code Description
- Add the required header files.
- Enter Wi-FI credentials over which you are going to upload the code wirelessly.

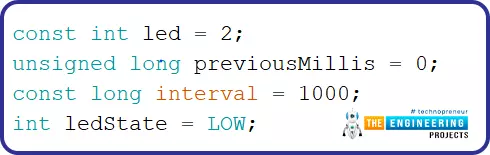
- Define the GPIO pin to which LED is connected.
- GPIO 2 is connected to the inbuilt LED.
- To add delay, we are using timers instead of delay() function.
- The variable interval is defining the time delay.
- Set LED’s state to low.
Arduino Setup() Function
- Although in the example code serial monitor is initialized but it is not required anymore as we are using the network port for communication.
- Initialize ESP32 Wi-Fi in station mode using WiFi.mode() function.
- Wait until esp32 is connected to the Wi-Fi network.
- ArduinoOTA.begin() function is used to initialize the OTA updater.
- Wi-Fi.lockIP() is used to fetch the IP address.
- Print the IP address on the serial monitor.
Arduino Loop() Function

- Blink the LED after every 1000ms or 1sec delay as defined in variable ‘interval’.

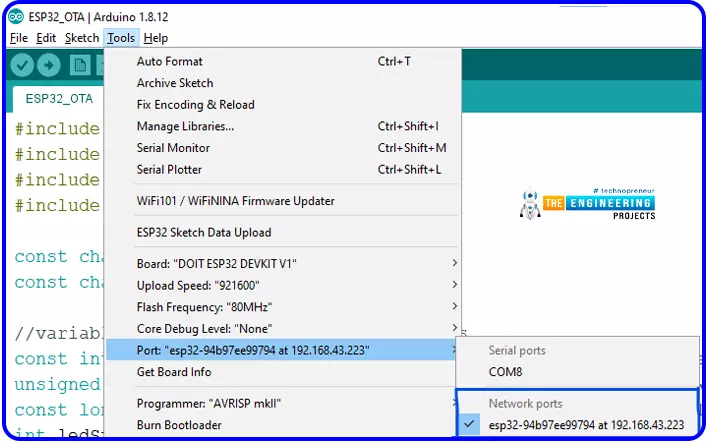
- Compile the above code.
- Go to the Tools menu, then click on port and select the network port as shown in the image below.
This concludes the tutorial. I hope you found this helpful. In the next tutorial, we will discuss the OTA web updater in ESP32.


