ESP-NOW Protocol with ESP32 and ESP8266


Hello readers, I hope you all are doing great. In this tutorial, we will learn about the ESP-NOW protocol and how to communicate data between two ESP modules through ESP-NOW protocol and that is too without Wi-Fi connectivity.
What is ESP-NOW Protocol?
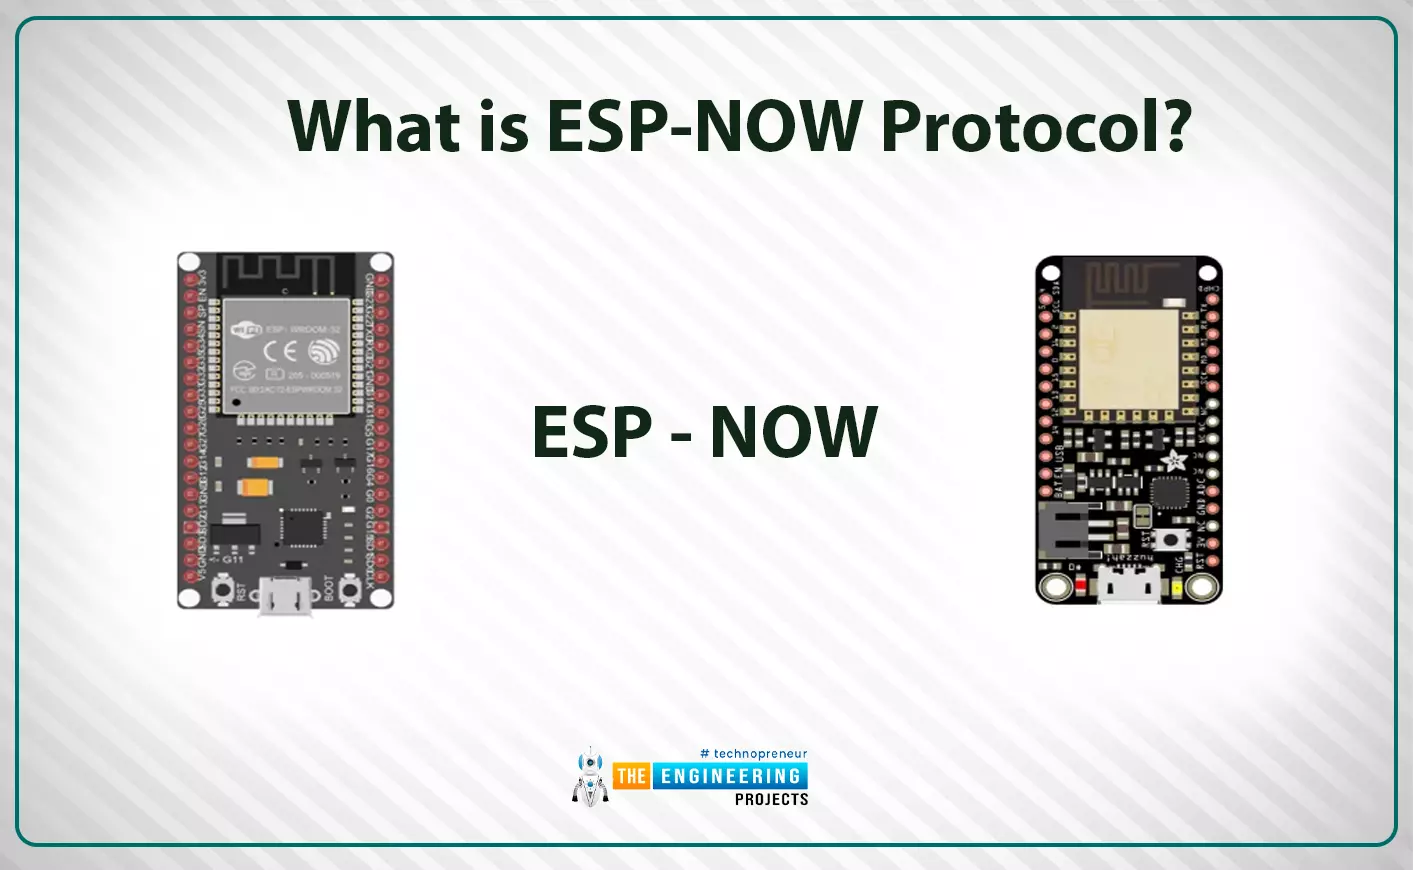
Fig. 1: ESP-NOW Protocol
ESP–NOW is a connectionless communication protocol that is used for sharing small data packets between two ESP boards. This protocol is developed by Espressif.
Features of ESP-NOW Protocol:
- It is a low-power wireless protocol, which makes two or more ESP devices communicate directly with each other without using Wi-Fi.
- ESP-NOW protocol does not require a handshake for establishing a connection but, they require pairing and once the devices are paired they can exchange data.
- ESP-NOW offers a persistent connection between ESP nodes. This means, once two ESP nodes are connected with each other (wirelessly) and suddenly one of the ESP devices loses power or restarted, the device will again (automatically) establish a connection with the other node to which it was connected before the power reset.
- ESP- NOW protocol offers encrypted communication and hence, it is a secure method of wireless communication.
- To check the success and failure of message delivery a callback function is used to send the information regarding the communication status. Before initializing the ESP-NOW, we need to enable the Wi-Fi for wireless connectivity but it is now required to connect the ESP devices with the internet.
ESP-NOW Protocol Limitations:
- This protocol is only supported by ESP devices.
- Only 10 (maximum) encrypted peers are supported in station mode and a maximum of 6 devices in access point mode.
- The maximum payload size supported by ESP-NOW protocol is 250 bytes only.
Although, ESP-NOW protocol can communicate only small data packets ( maximum 250 bytes), but it is a high-speed protocol for wireless communication.
ESP devices can communicate over ESP-NOW protocol in different network topologies which makes it a very versatile protocol. The communication can be a point to point or point to multipoint (broadcast).
Different Scenarios in Which ESP Devices Can Communicate
Peer to peer or one to one communication
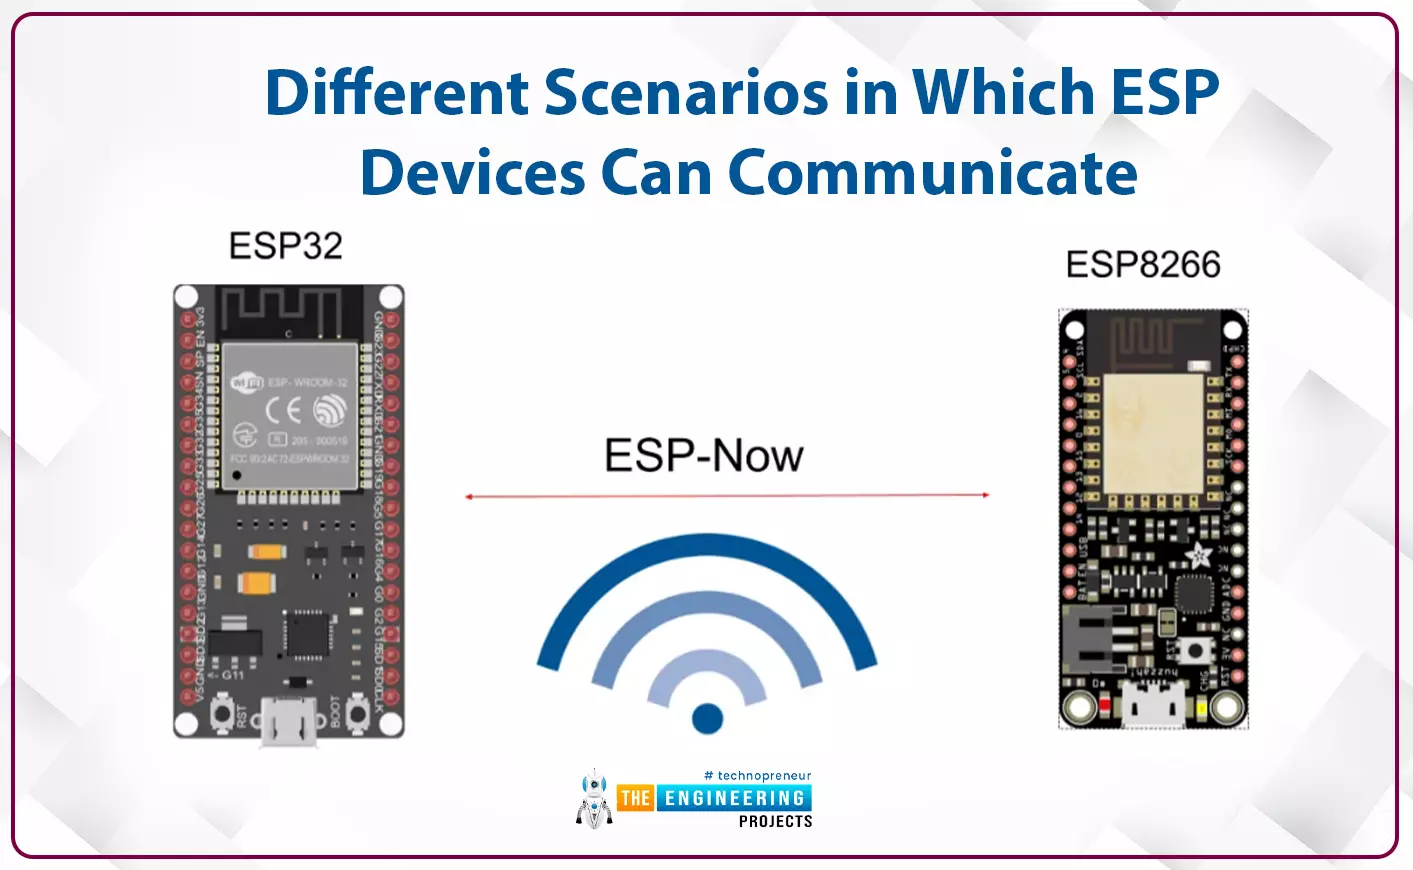
Fig. 2: Point to Point Communication
In peer-to-peer communication, only two ESP (either ESP32 or ESP8266) devices can connect with each other for data exchange. Each ESP device can act as a master device, a slave device or both master and slave at the same time.
Broadcast or one to many (master and slave)
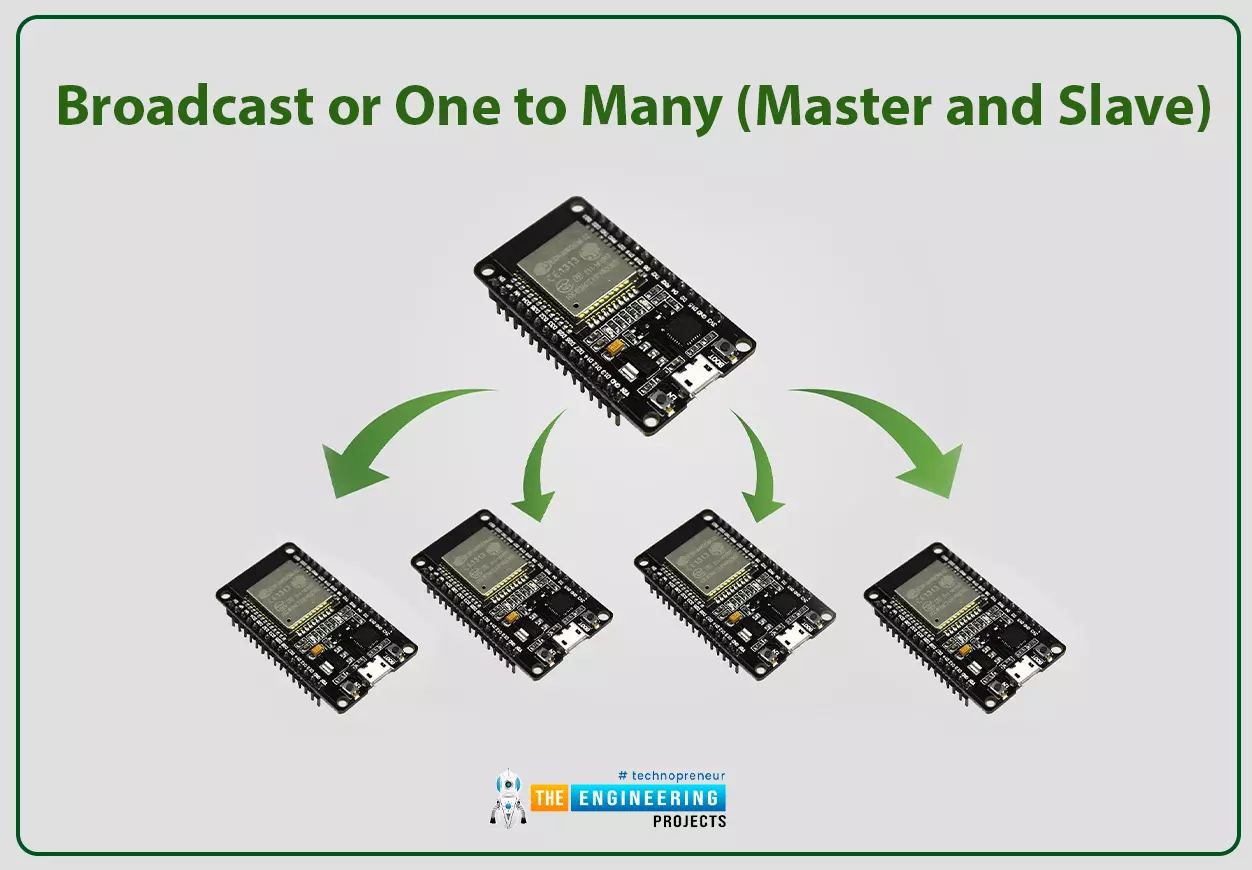
In broadcast one ESP device (known as a broadcaster) act as a master device and broadcast the data to ESP devices acting as slave devices. Data is shared with all the slave devices simultaneously.
This communication method is used when users want to control multiple slave devices at a time.
Many to one. (Gateway)
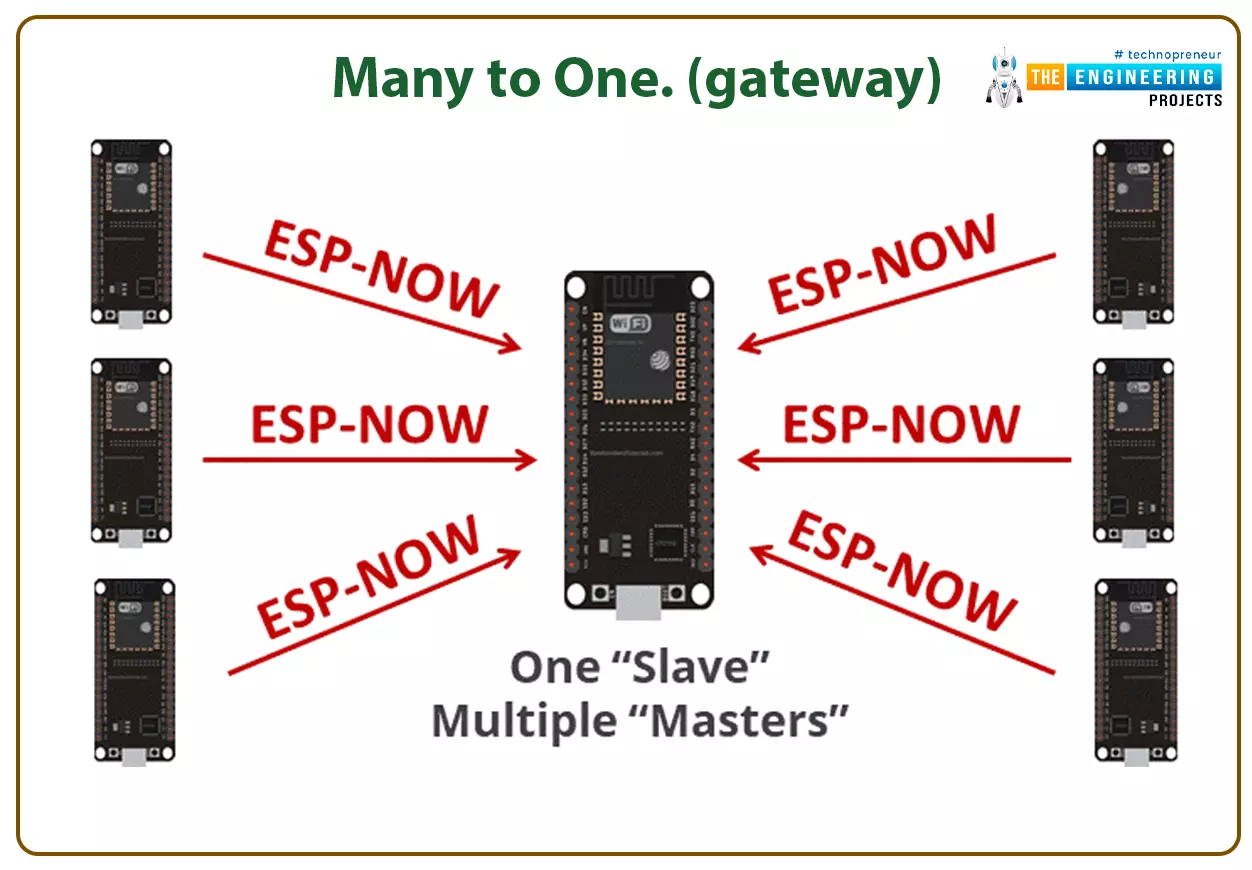
Fig. 4: Many to One Communication
In many to one communication scenarios, there will be a central node or gateway which collects all the data from its nearby connected ESP devices.
This scenario can be applied when you need to collect sensor data from various sensor nodes to a single collector or central device, which is connected to all the nearby sensors.
Application of ESP-NOW Protocol
- ESP-NOW protocol is used when users need to communicate data between two or more ESP devices without using a Wi-Fi router (whether it is ESP32 or ESP8266).
- This protocol can be used for industrial or residential automation applications. Where we need to transmit small data or instructions like to turn ON and OFF equipment without using Wi-Fi. For example smart lights, sensors, remote control devices etc.
MAC Address to Identify The Receiver
MAC address or Media Access Control address is a six-byte hexadecimal address, that is used to track or connect with devices in a network. It provides the user with a secure way to identify senders and receivers in a network and avoid unwanted network access.
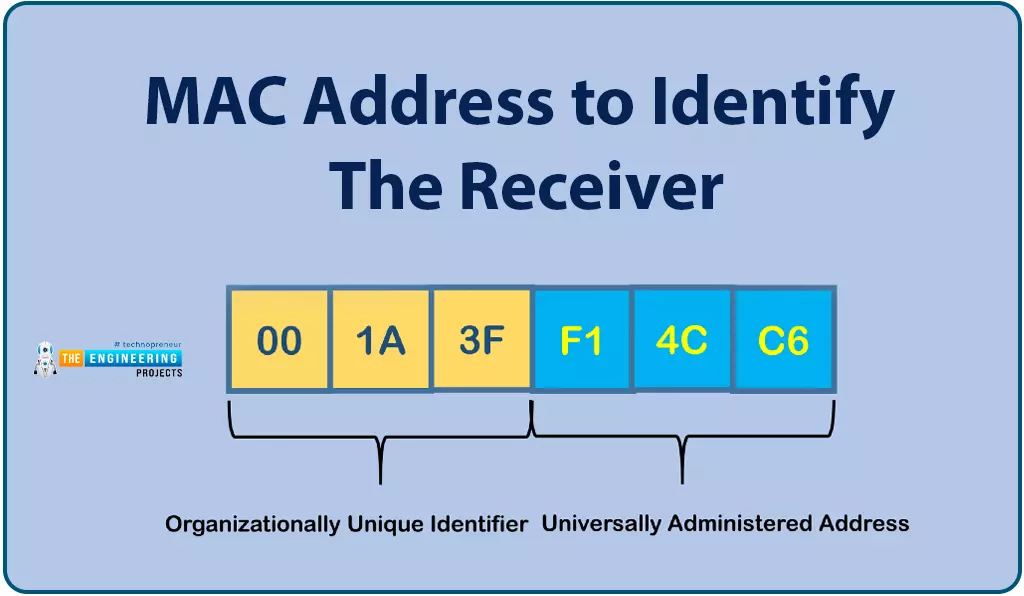
Fig. 5: MAC Address
Each ESP device has a unique MAC address.
So, before sharing the data between two or more ESP devices the MAC address of the receiver device should be known to the sender device.
Implementing ESP-NOW protocol with ESP32 in Arduino IDE
Both, the ESP32 and ESP8266 modules support the ESP-NOW protocol.
In this tutorial, we will connect the ESP32 and ESP8266 using the ESP-NOW protocol.
- We are using Arduino IDE as a compiler and upload into the ESP32 module. To know more about Arduino IDE and how to use it, follow our previous tutorial i.e., on the ESP32 programming series.
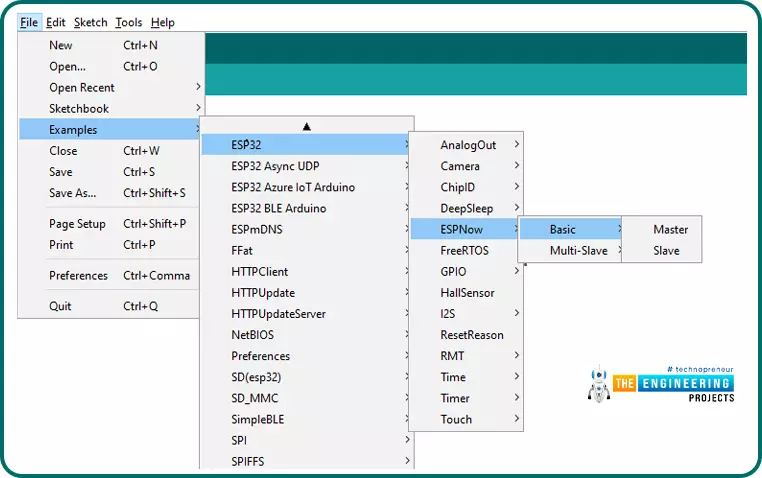
Fig. 6: ESP-NOW Example Code in Arduino IDE
Library file Required to implement ESP-NOW Protocol:
- Download the library from the given link: https://github.com/yoursunny/WifiEspNow
- In this example, we are using two ESP devices where one is ESP32 and another is ESP8266.
- We will make ESP32 to act as a Master device and ESp8266 as slave device.
Sender (ESP32) Source Code
#include <esp_now.h>
#include <WiFi.h>
// REPLACE WITH YOUR RECEIVER MAC Address
uint8_t broadcastAddress[] = {0xEE, 0xFA, 0xBC, 0xC5, 0xA4, 0xBF};
typedef struct struct_message {
char a[32];
int b;
float c;
bool d;
} struct_message;
// Create a struct_message called myData
struct_message myData;
// callback when data is sent
void OnDataSent(const uint8_t *mac_addr, esp_now_send_status_t status) {
Serial.print("\r\nLast Packet Send Status:\t");
Serial.println(status == ESP_NOW_SEND_SUCCESS ? "Delivery Success" : "Delivery Fail");
}
void setup() {
// Init Serial Monitor
Serial.begin(115200);
// Set device as a Wi-Fi Station
WiFi.mode(WIFI_STA);
// Init ESP-NOW
if (esp_now_init() != ESP_OK) {
Serial.println("Error initializing ESP-NOW");
return;
}
// get the status of Trasnmitted packet
esp_now_register_send_cb(OnDataSent);
// Register peer
esp_now_peer_info_t peerInfo;
memcpy(peerInfo.peer_addr, broadcastAddress, 6);
peerInfo.channel = 0;
peerInfo.encrypt = false;
// Add peer
if (esp_now_add_peer(&peerInfo) != ESP_OK){
Serial.println("Failed to add peer");
return;
}
}
void loop()
{ strcpy(myData.a, "THIS IS A CHAR"); // Send message via ESP-NOW esp_err_t result = esp_now_send(broadcastAddress, (uint8_t *) &myData, sizeof(myData)); if (result == ESP_OK) { Serial.println("Sent with success"); } else { Serial.println("Error sending the data"); } delay(2000); }
Code Description
- The first step is including the required libraries or header files.

- Replace the string with the MAC address of the receiver ESP device.

- The next step is creating a structure that contains the type of data you want to share with the receiver node or device. We are using four different data variables which include char, int, float, and bool. You can the data type according to your requirements.
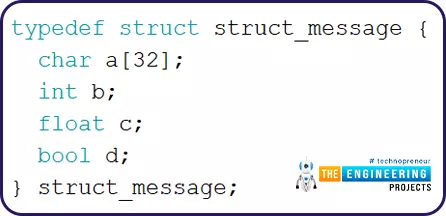
- Create a variable of struct_message type to store the variable values. We created myData

- onDataSent() function is a callback function which will be executed when a message is sent. This function will print a string on serial monitor to show that the message is successfully sent.

Setup()
-
- Inside the setup function, the first task is the usual one i.e., initializing the serial monitor for debugging purpose.
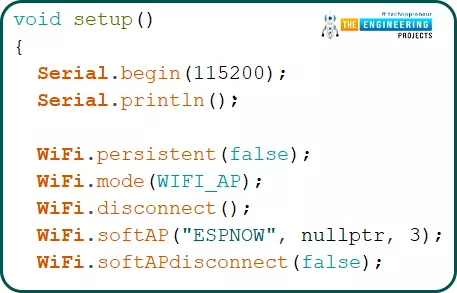
- Set the ESP device in STA mode or in Wi-Fi station mode before initializing ESP-NOW.
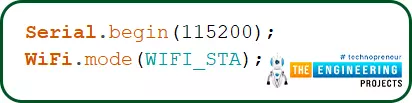
Fig. 12: Serial monitor and Wi-Fi Initialization
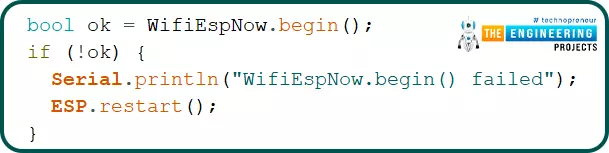
- Next step is, initializing ESP-NOW.
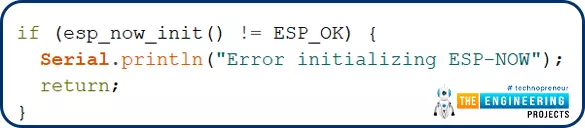
Fig. 13
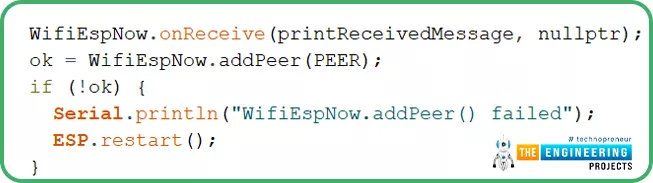
- A callback function is registered which will be called when a message is send (after initializing the ESP-NOW successfully).

Fig. 14
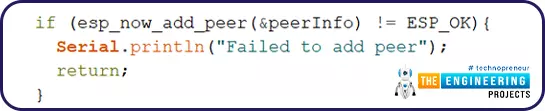
- The next thing is pairing with another ESP-NOW device to communicate data.
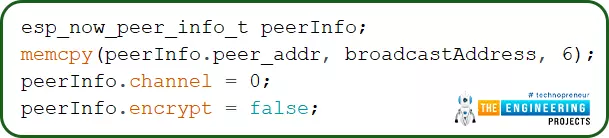
- esp_now_add_peer () function is used to pair with the receiver.
- This function is passing a parameter called This parameter contains the MAC address of the receiver (ESP8266) to which the sender want to connect and communicate data.
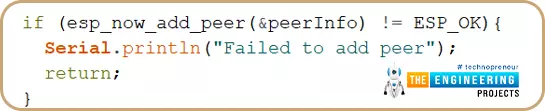
- If somehow the sender is not able to pair with the receiver ESP device, the result will be printed on the serial monitor.
Loop()
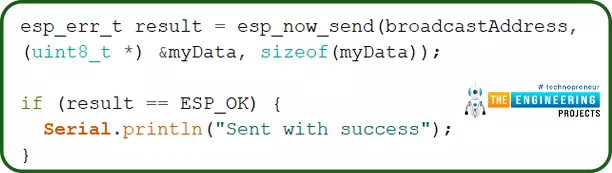
- In the loop() function, the message will be sent.
- We have globally declared a structure variable myData.
- In the loop function values or message that we want to share with the receiver ESP device (ESP8266) is assigned to the variables.

- If the ESP32 (or sender) is successfully connected/paired with the receiver (ESP8266) send the message and once the message is sent, print the result on the Serial monitor.
- Esp_now_send() function is used to send data to receiver (i.e., ESP8266) over ESP-NOW protocol.
- This function is passing two parameters. First is the broadcastAddress i.e. the MAC address of the receiver and another is the data stored in the variables.
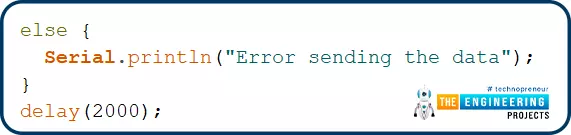
- If there is some error in message sending then print the respective details on the serial monitor.
- The next message will be sent with a delay of 2 sec (or 2000ms).
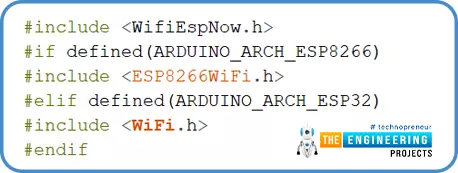
ESP8266 (Receiver) Code
#include <WifiEspNow.h>
#if defined(ARDUINO_ARCH_ESP8266)
#include <ESP8266WiFi.h>
#elif defined(ARDUINO_ARCH_ESP32)
#include <WiFi.h>
#endif
// The recipient MAC address. It must be modified for each device.
static uint8_t PEER[]{0x02, 0x00, 0x00, 0x45, 0x53, 0x50};
void printReceivedMessage(const uint8_t mac[WIFIESPNOW_ALEN],
const uint8_t* buf, size_t count, void* arg)
{
Serial.printf("Message from %02X:%02X:%02X:%02X:%02X:%02X\n", mac[0], mac[1], mac[2], mac[3],
mac[4], mac[5]);
for (int i = 0; i < static_cast<int>(count); ++i) {
Serial.print(static_cast<char>(buf[i]));
}
Serial.println();
}
void setup()
{
Serial.begin(115200);
Serial.println();
WiFi.persistent(false);
WiFi.mode(WIFI_AP);
WiFi.disconnect();
WiFi.softAP("ESPNOW", nullptr, 3);
WiFi.softAPdisconnect(false);
Serial.print("MAC address of this node is ");
Serial.println(WiFi.softAPmacAddress());
uint8_t mac[6];
WiFi.softAPmacAddress(mac);
Serial.println();
Serial.println("You can paste the following into the program for the other device:");
Serial.printf("static uint8_t PEER[]{0x%02X, 0x%02X, 0x%02X, 0x%02X, 0x%02X, 0x%02X};\n", mac[0],
mac[1], mac[2], mac[3], mac[4], mac[5]);
Serial.println();
bool ok = WifiEspNow.begin();
if (!ok) {
Serial.println("WifiEspNow.begin() failed");
ESP.restart();
}
WifiEspNow.onReceive(printReceivedMessage, nullptr);
ok = WifiEspNow.addPeer(PEER);
if (!ok) {
Serial.println("WifiEspNow.addPeer() failed");
ESP.restart();
}
}
loop()
{
char msg[60];
int len = snprintf(msg, sizeof(msg), "hello ESP-NOW from %s at %lu",
WiFi.softAPmacAddress().c_str(), millis());
WifiEspNow.send(PEER, reinterpret_cast<const uint8_t*>(msg), len);
delay(1000);
}
Code Description
- This code can be used for both ESP8266 as well as ESP32 receivers.
- The first task is adding the required libraries.
- h is for enabling wireless connectivity in ESP8266 and WiFi.h is for ESP32 module (if you are using this device).
- h is to enable the ESP-NOW protocol and its respective function is the ESP device.
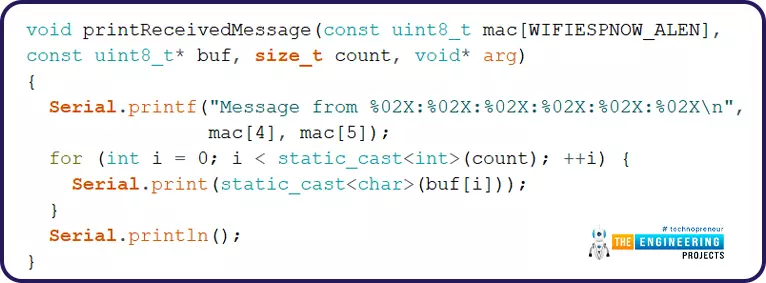
- printReceivedMessay() function is used to fetch the message details transmitted by ESP32 (sender node), and the MAC address of the transmitter.
- If you are receiving data from multiple sender nodes then a unique MAC address will be fetched from multiple sender nodes along with the message received.
Setup()
- Initialize the serial monitor with a 115200 baud rate for debugging purposes.
- Wi-Fi should be enabled to implement the ESP-NOW protocol and wireless connectivity. It could be either AP or STA mode and does not require to be connected.
- Print the MAC address of the sender on the serial monitor.

- Initialize the ESP-NOW using begin() function.
- If somehow the ESP device is unable to initialize the ESP then print the respective details on the serial monitor.
- Once ESP-NOW and Wi-Fi are successfully initialized, the ESP receiver (ESP8266) is ready to receive the data packets from sender.
- Testing (Receiving a message in ESP8266 from ESP32 )
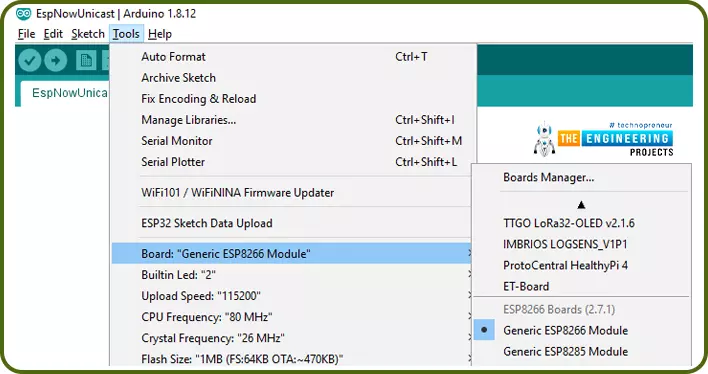
- Select the ESP8266 development board you are using in Arduino IDE.
- For that, go to Tools >> Boards and select the right development board.
- We are using the ESP8266 Generic module as shown below:
- Upload the Receiver code in the ESP8266 module.
- Open the serial monitor with a baud rate of 115200.
- Press the reset (Rst) button from the ESP8266 development board.
- MAC address of the receiver will be printed on the serial monitor as shown below:

- Copy the MAC address of the receiver and paste into the sender (ESP32) code.
- Again change the development board from ESP8266 to ESP32.
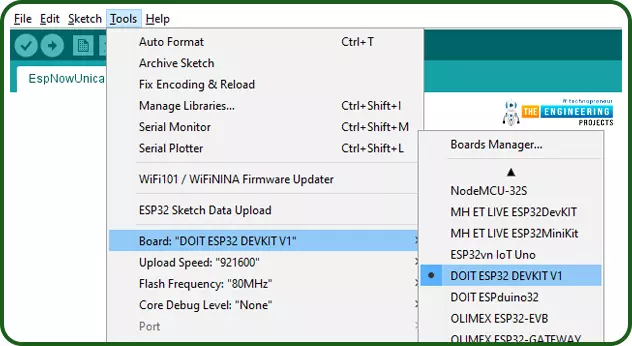
- Upload the code into sender (ESP32).
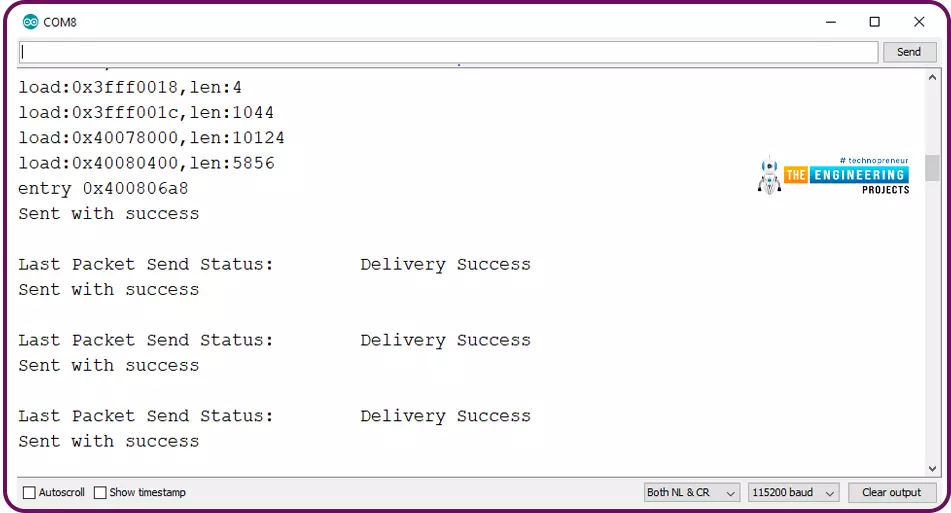
- Open the serial monitor with a 115200 baud rate.
- Press the enable (EN) button from the ESP32 development board.
- Results are shown below:
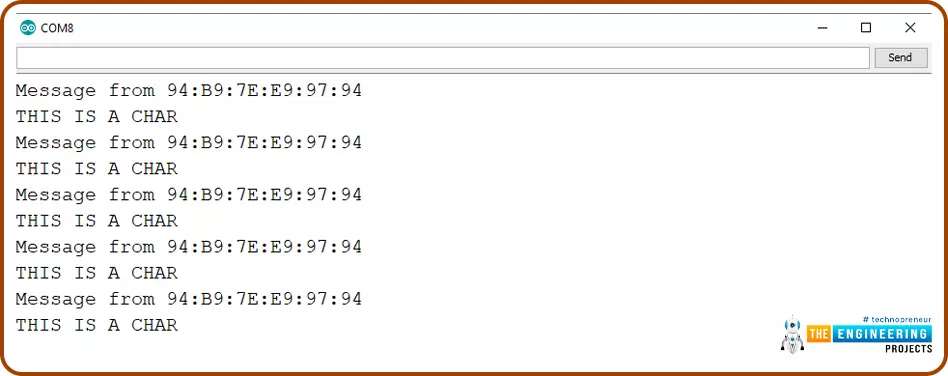
- If you want to read the data received at ESP8266, remove the ESP32 and power it with a different power source.
- Connected the ESP8266 with a laptop.
- Again select the ESP8266 development board on Arduino IDE’s Tools >> Boards
- Open the serial monitor with a 115200 baud rate.
- Press the reset (RST) button from the ESP8266 developments board.
- Results are shown below:
This concludes the tutorial. I hope, you found this helpful and I hope to see you soon for the new ESP32 tutorial.