Temperature Sensing in LabVIEW


Temperature Sensing in LabView
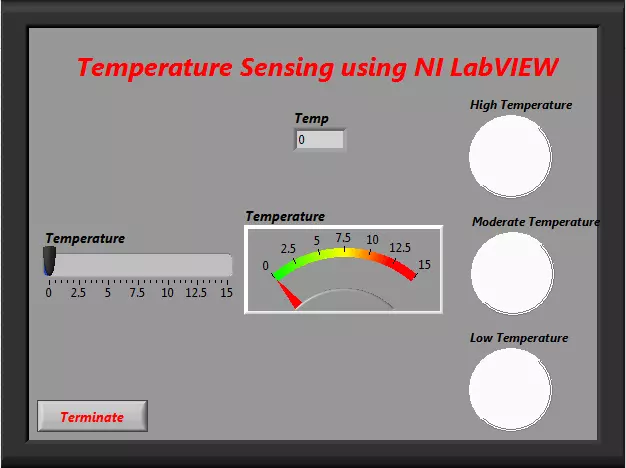
Here,I am going to elaborate the steps, which help in designing a "Temperature Sensing using NI LabVIEW" program. The program basically consists of three LED's which play a vital role in temperature level sensing. Three different threshold ranges are adjusted for sensing low, moderate and high temperature level. You can change theses threshold ranges manually. Thresholds have usually different values for the different environment.Horizontal Pointer Selection
- First of all, you can download the simulation Temperature Sensing in LabView by clicking the below button:
- Go to the "Front Panel" and press "Right Click".
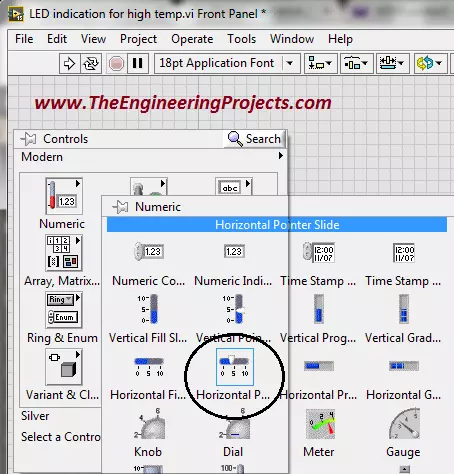
- Now, go to Controls-> Modern-> Numeric-> Horizontal Pointer Slide, you can see different pointers. Select the encircled pointer.
- The figure below shows, which pointer we have to select.
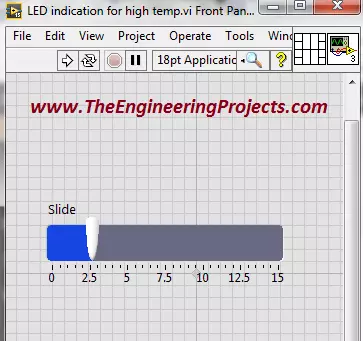
- Select the encircled block and place it on the "Front Panel".
- Change it range from "10" to "15".
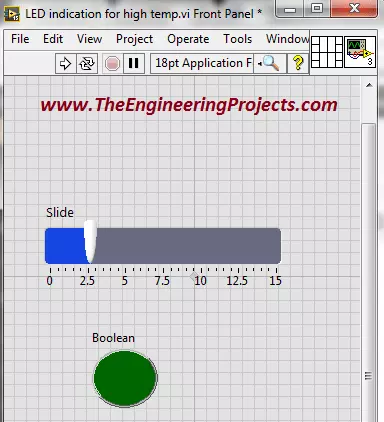
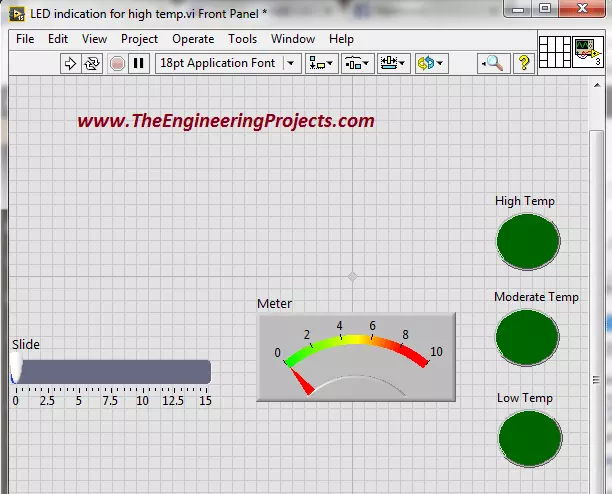
- You can stretch this block after placing, you can see it looks like a figure below.
Round LED Selection
- Go to the Controls-> Classic-> Classic Boolean-> Round Light
- You can see the different types of lights and LED's.
- Select the encircled block and place it on the "Front Panel".
- You can see the figure below looks like your screen.
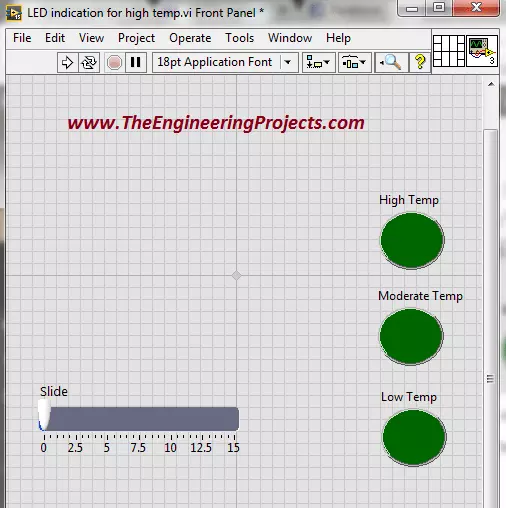
- Similarly select three "Round Lights" and place it on the "Front Panel".
- Change their names to "Low Temp", "Moderate Temp" and "High Temp" respectively.
- The figure presents the above steps clearly.
Changing Properties of Round LED
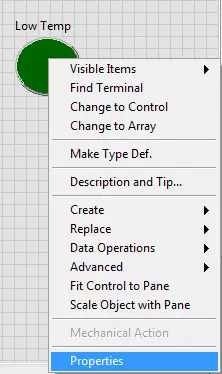
- Now, put your cursor on the "Round Light" and press "Right Click" and go to the "Properties" menu.
- The figure below gives a bit illustration of the above steps.
- As you go to the "Properties" menu you can see the window below on your screen.
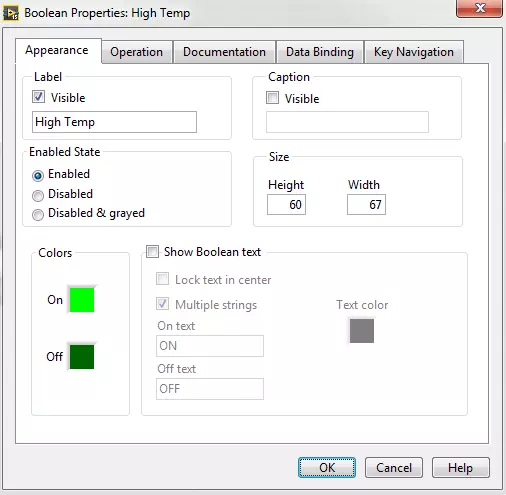
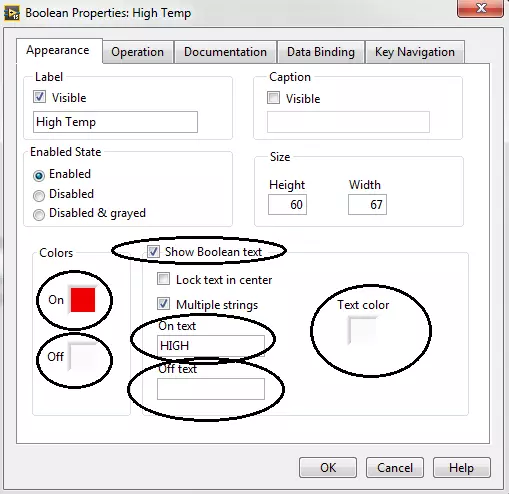
- Change the properties of this window for the high temperature indication, according to the steps in the figure below.
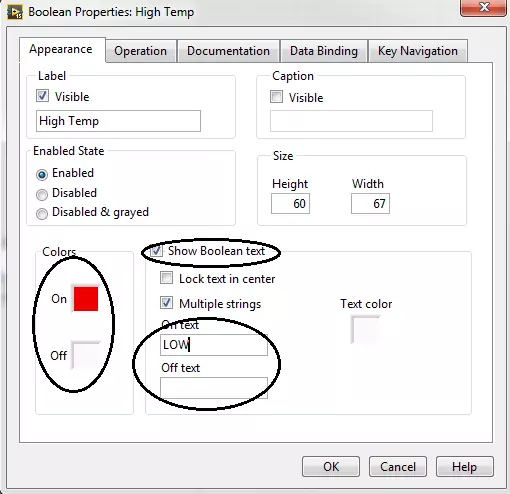
- Now, change the properties of this window for the low temperature indication purpose according to the figure below.
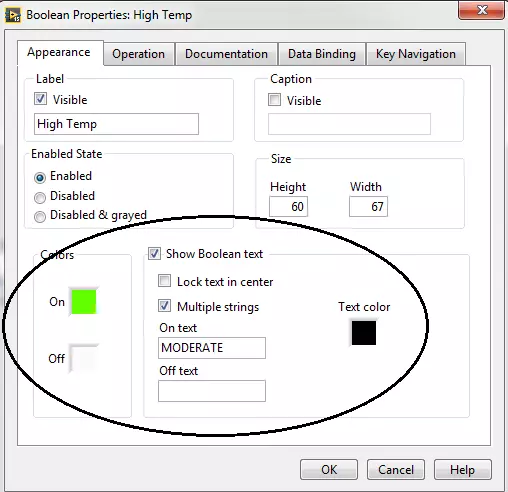
- For the moderate temperature indication you can change the properties of this window by following the steps of the figure below.
- Now we have to show the digital and analog values for the manually adjusted temperature.
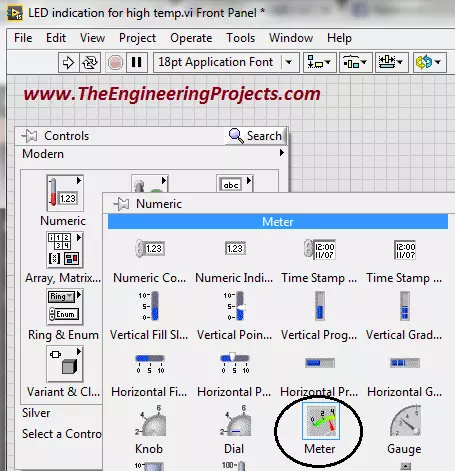
- Go to Controls-> Modern-> Numeric-> Meter. You can see different numeric blocks here.
- Select the desired one. The figure below shows the desired block.
- Select the encircled block and place it on the "Front Panel".
- You can see the figure below on your screen now.
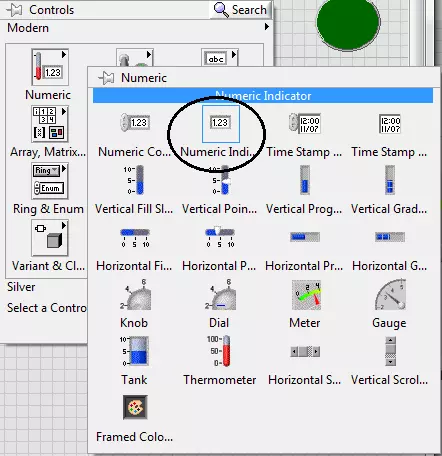
- Now again go to Controls-> Modern-> Numeric-> Numeric Indicator. Select the encircled block.
- The figure below displays the desired block.
- Select this block and place it on the "Front Panel" and you can see that the "Front Panel" looks like the figure below.
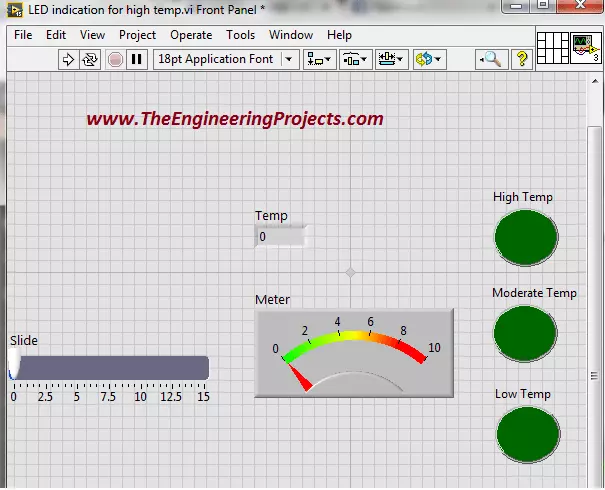
- This block is used to show the digital values of the temperature.
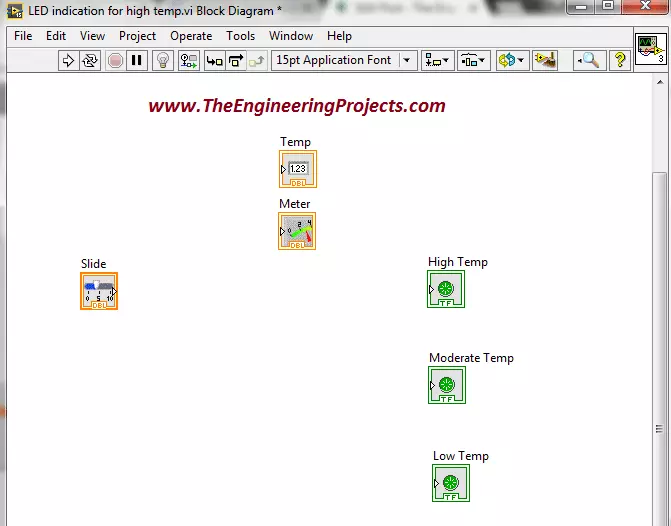
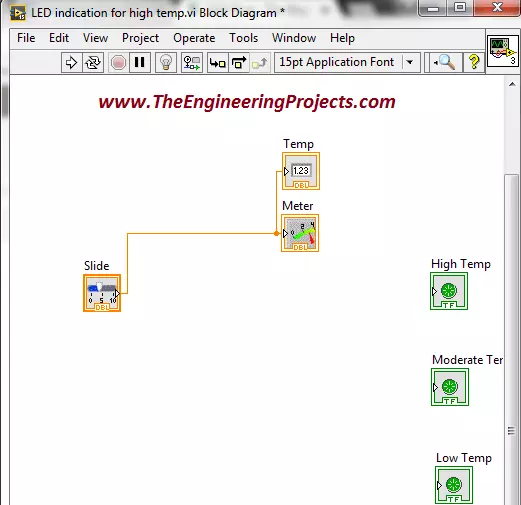
- Now, go to the "Block Diagram" window. You can see that this window in looking like a figure below.
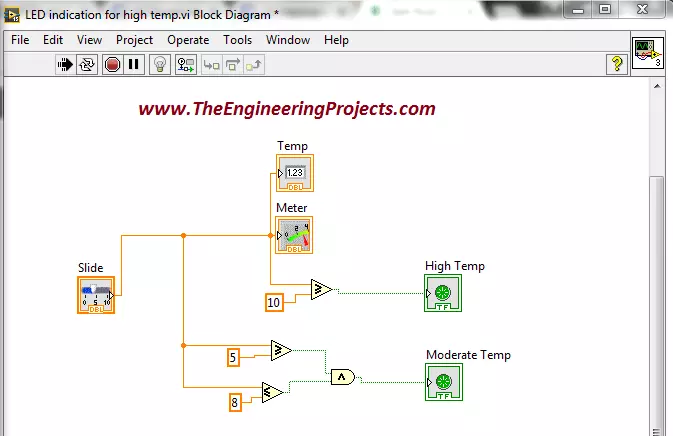
- Connect the output of the "Slide" block with input terminals of the both "Meter" and "Temp" blocks.
- The figure below shows this connection.
- Now we have to make the logic for the different temperature level indications e.g. high, moderate and low temperatures.
High Temperature Indication
- Go to the "Block Diagram" window and press "Right Click". You see a new window on your screen.
- Go to Functions->Programming-> Comparison-> Greater or Equal.
- You can see here different comparison blocks.
- Select the encircled block. The figure shows the desired block.
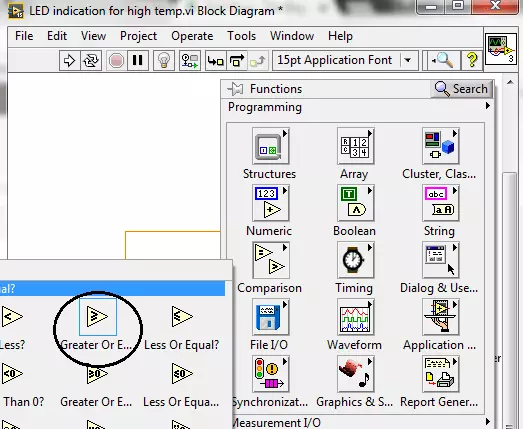
- Select this block and place it on the "Block Diagram" window.
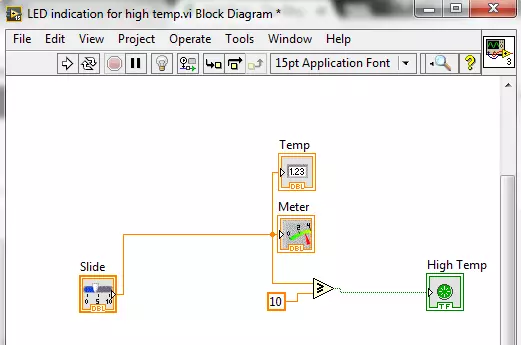
- Connect one first input terminal of this block with the "Slide".
- Press "Right Click" on the second input terminal and go to Create-> Constant.
- We have to set this constant in order to indicate the high temperature.
- I have adjusted its vale as "10" i.e. when the temperature exceeds the threshold of "10" LED indicates the that the temperature is high now.
- The figure shows the logic for the "High Temperature Indication".
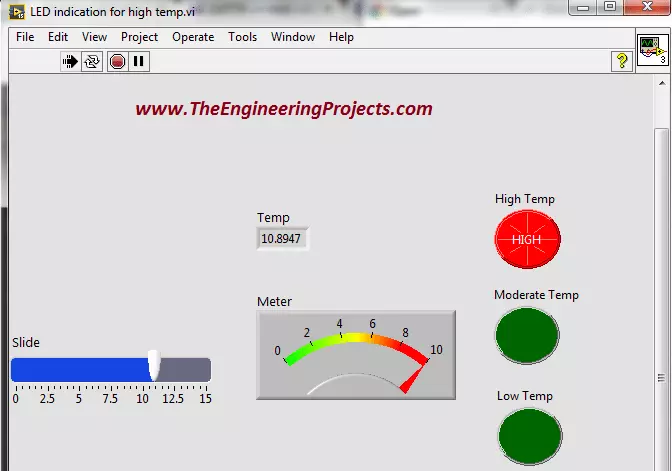
- Now, go to the "Front Panel" and "Run" the program.
- You can see when the temperature exceeds the threshold LED gets turned "ON".
- The figure below shows the illustration of all of the above steps.
Moderate Temperature Indication
- Go to the "Block Diagram" window and press "Right Click". You see a new window on your screen.
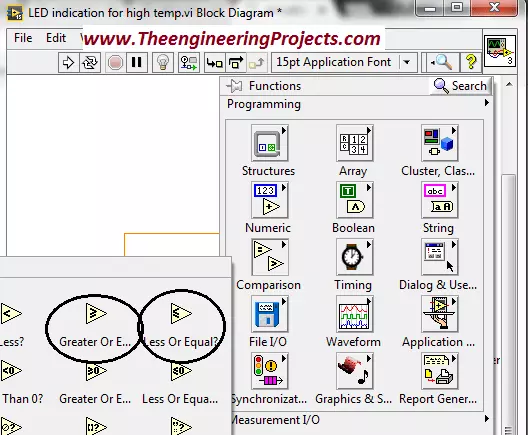
- Go to Functions->Programming-> Comparison.
- You can see here different comparison blocks.
- Select the encircled blocks. The figure shows the desired blocks.
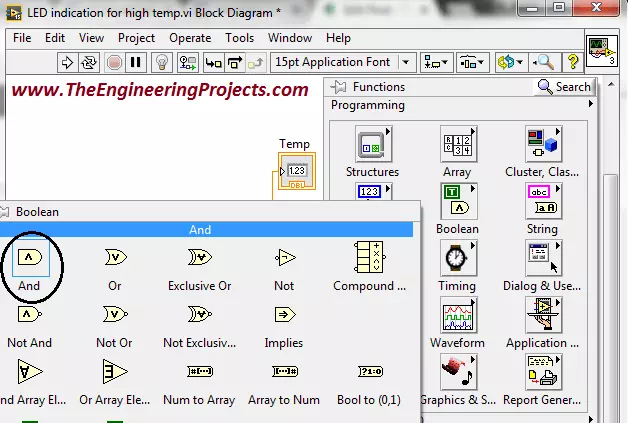
- Now, go to Functions->Programming-> Boolean. You can see different blocks here.
- Select the encircled block named as "And" and place it on the "Block Diagram" window.
- The "Block Diagram" window looks like the figure below by following the above steps.
- Now, we have create a logic for moderate temperature level indication.
- I am adjusting the parameters in such a way that if temperature is between "5" and "8" then there should be "Moderate" indication.
- The figure below the logic for this purpose.
- Now, go to the "Front Panel" and "Run" the program.
- You can see that when the temperature is in between "5" and "8" the LED indicates the moderate temperature.
- The figure below elaborates the above steps.
Low Temperature Indication
- Go to the "Block Diagram" window and press "Right Click". You see a new window on your screen.
- Go to Functions->Programming-> Comparison-> Less or Equal.
- You can see here different comparison blocks.
- Select the encircled block. The figure below shows the desired block.
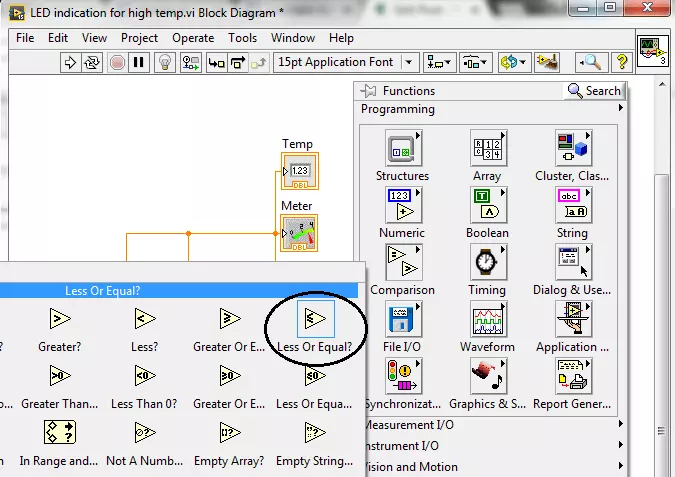
- Select this block and place it on the "Block Diagram" window.
- Connect one first input terminal of this block with the "Slide".
- Press "Right Click" on the second input terminal and go to Create-> Constant.
- We have to set this constant in order to indicate the low temperature.
- I have adjusted its vale as "2" i.e. when the temperature exceeds the threshold of "10" LED indicates the that the temperature is high now.
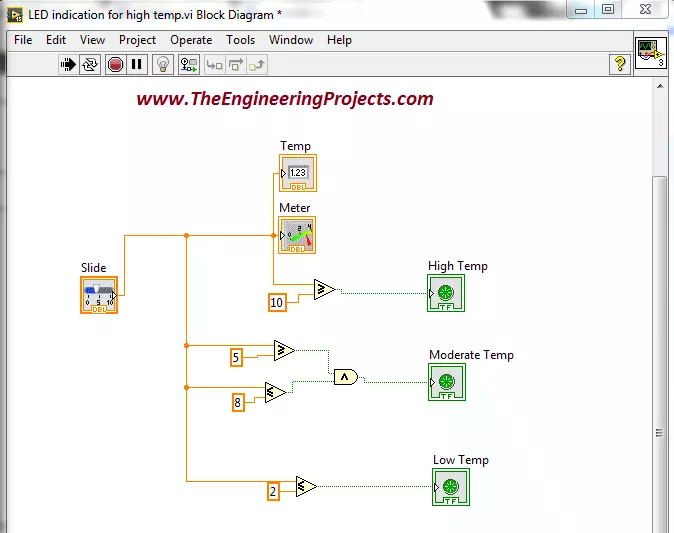
- The figure shows the logic for the "Low Temperature Indication".
- Now, go to the "Front Panel" and "Run" the program.
- You can see that when the temperature is less than "2" the LED indicates the low temperature.
- The figure below illustrates the above steps.
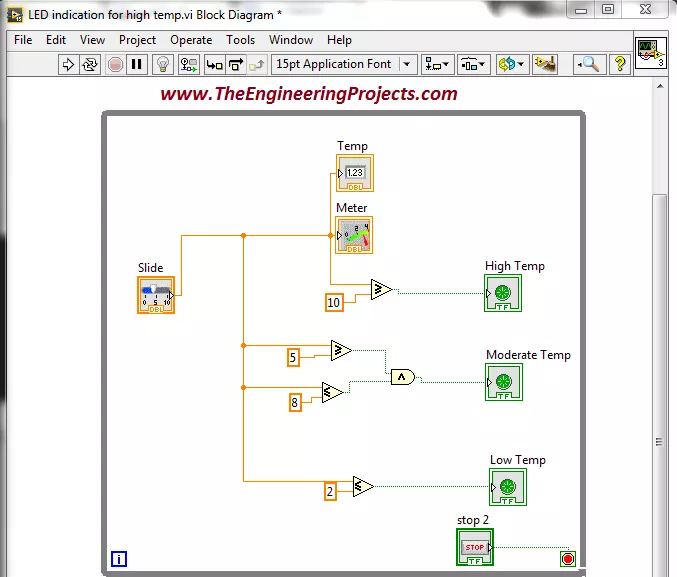
- Now put the whole program inside the "For Loop".
- The complete Virtual Instrument (VI) is shown in the figure below.
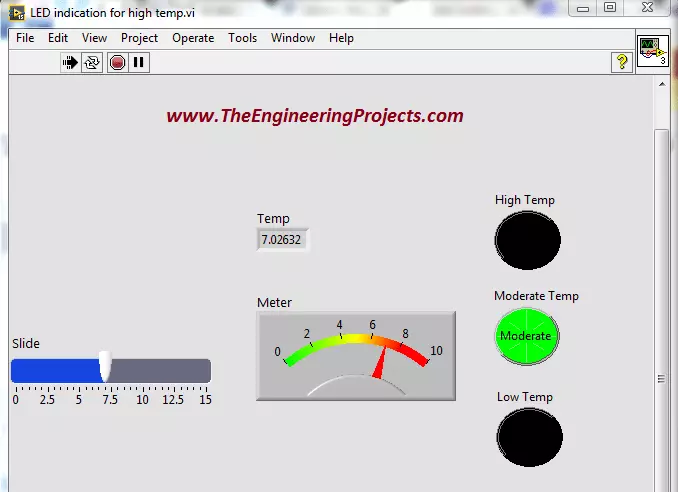
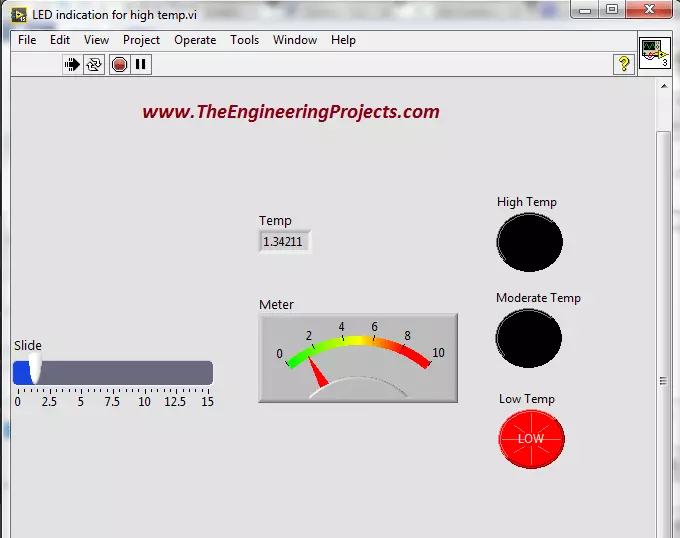
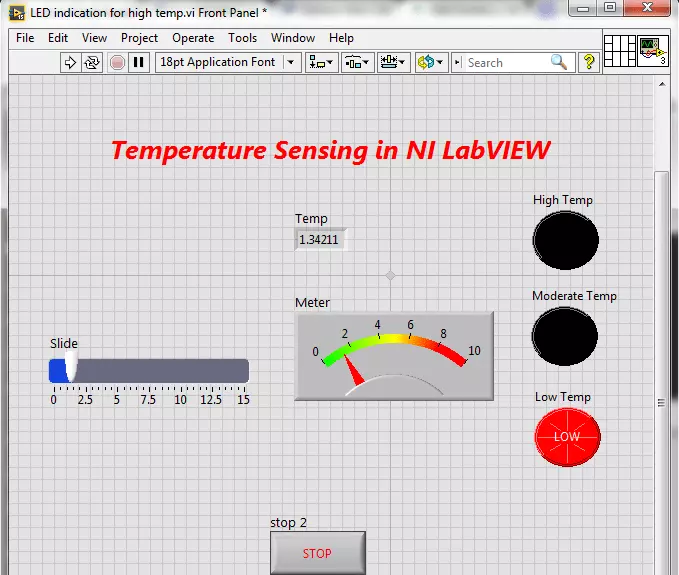
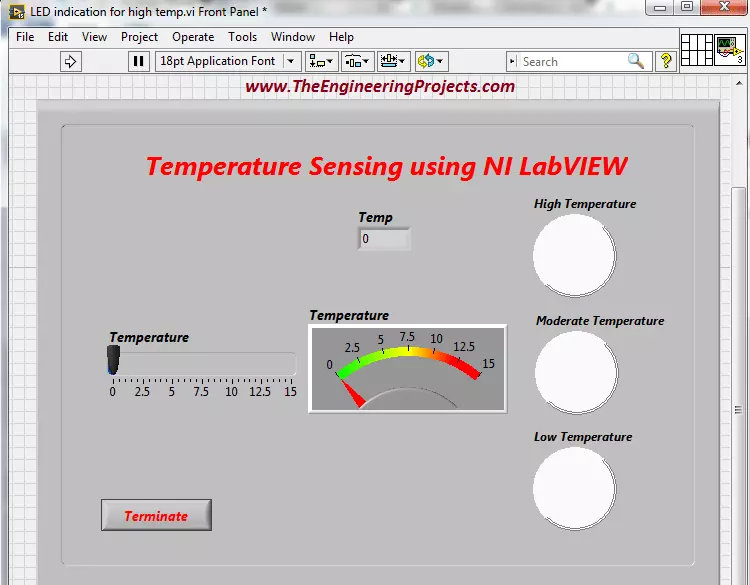
- Now go to the "Front Panel" and here you can see the output of the whole program.
- The figure below shows the complete output of the "Temperature Sensing using NI LabVIEW".
Decorations of the Output
- You can provide better external look to the output using decorations tool of the LabVIEW.
- Let's make its look better. Follow the steps given below.
- Go to the "Front Panel" and press "Right Click" you can see here different options.
- Go to Controls-> Modern-> Decorations, here you can see different decorations blocks.
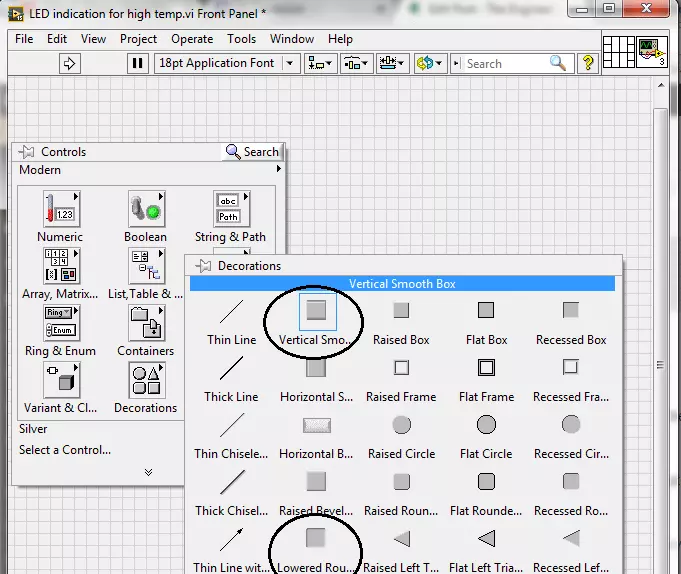
- Select the encircled blocks and place them on the front panel and arrange like the figure below.
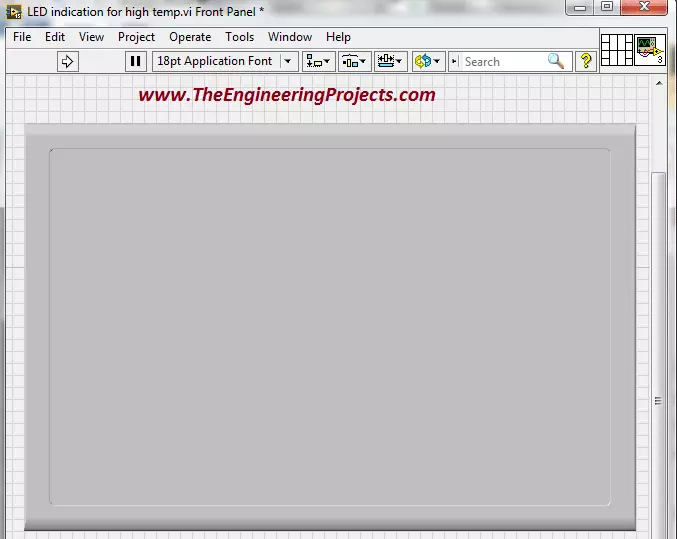
- You can see the "Front Panel" is looking like the figure below.
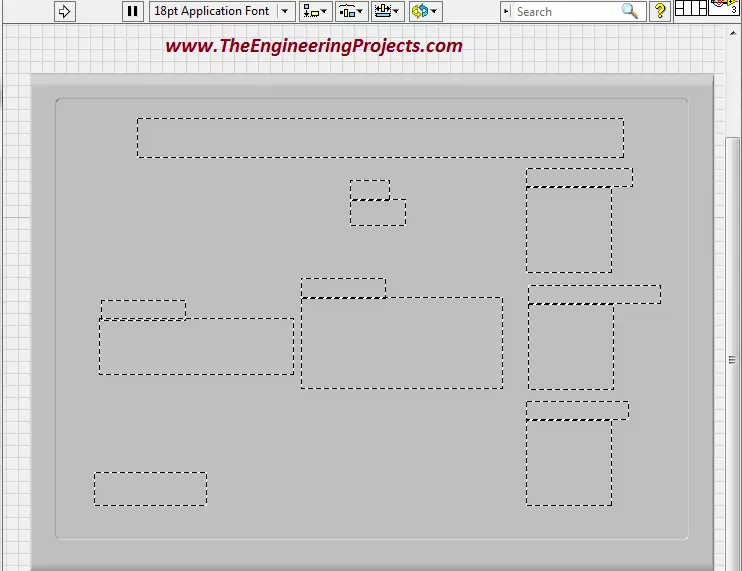
- Now copy the entire program and drag it on the "Decoration" box as shown in the figure below.
- Now, go to the upper toolbar of the LabVIEW and go to Reorder-> Move to Front
- The figure below illustrates all of the above steps.

- You can see that when you press Move to Front the output is looking like the figure below on your screen.
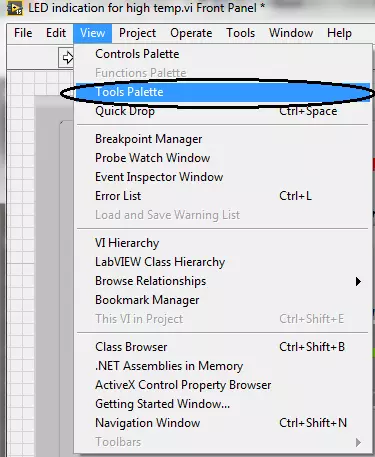
- You can also change the color of each item you want by using tool palette.
- Go to the View->Tool Palette and select this option
- The elaboration of the above step is shown in the figure below.
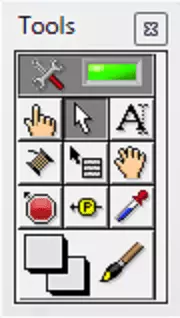
- As you go to this option and press "Right Click" on it a new window named as "Tool Palette" will be appeared on your screen.
- The figure below shows the "Tool Palette" window.
- I have changed the colors of different item according to my choice.
- You can do it, as you want. The figure below shows the complete output with much better look as compared to the earlier.
- Here's the video in which I have explained hoe to use this LabView VI:
×
![]()