
Let's start today's post, in today's post we will receive data from serial port and show it in LabView software. In order to do so, first of all you need to download LabView software, you can easily download it from their official website. They offer a trial period of around 45 days for the students and after that you have to buy it. Now, follow the below steps carefully and if you find any trouble anywhere, let me know in comments and I will try my best to sort them out.
Steps to Follow
- First of all, you need to download the NI VISA driver.
- NI VISA driver is used for serial communication, without downloading this software you can't communicate with the serial port of your computer in LabView.
- LabView has extensive list of drivers, whenever you want to communicate with any hardware in LAbview then you have to download its driver, NI VISA is the driver for communicating with serial port.
- After downloading this driver, install it and now run your LabView software.
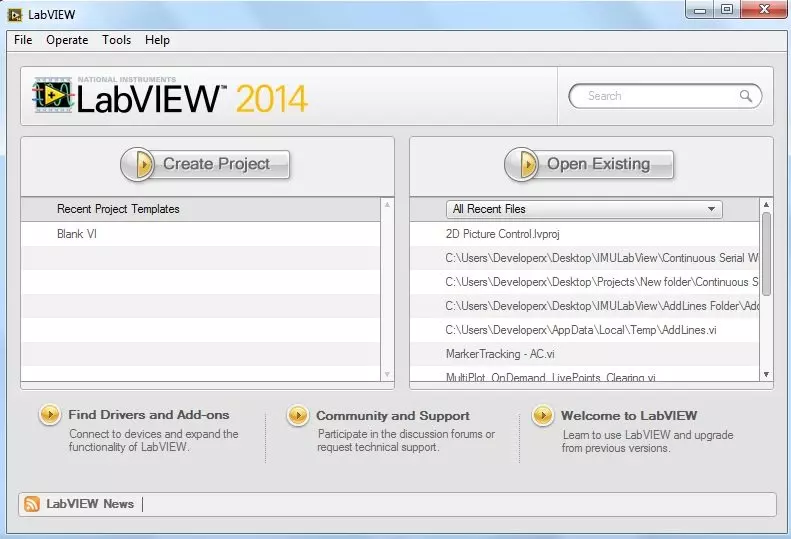
- When you run LabView, it will appear as shown in the below figure:
- I have given the complete working vi to download at the end but I suggest that you should design it by yourself so that you learn how to design.

- Now, click on the Create Project Button and the below Window will pop up.

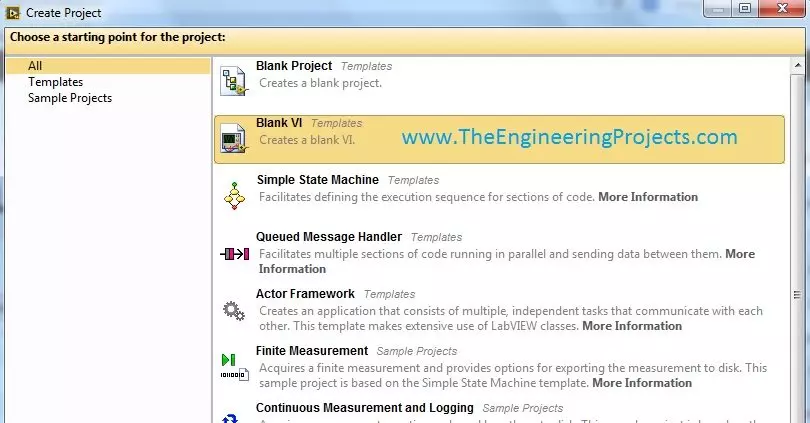
- Now click on the Blank VI Template and click Finish.
- A blank vi will open up, we will design the complete project in this vi.
- These are two windows, one is called the Block Diagram, where we will place all the components and the second one is Front Panel, where user can interact with LabView i.e. the Serial data coming will be displayed in the Front Panel.
- Another small window will also be there, this window is used for getting blocks.
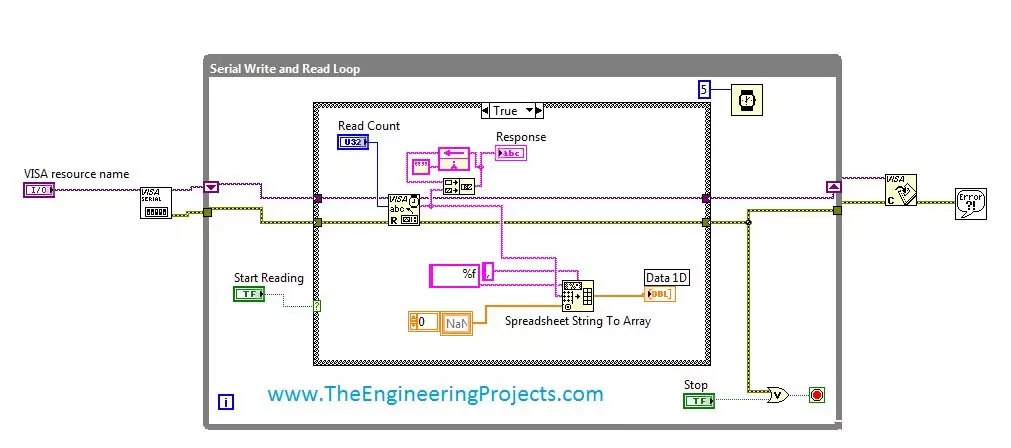
- Now design a vi as shown in the below figure:

- In this vi, we are receiving data from Serial port and then separating it on the basis of "," character and then placing it in a Data 1D and as well as in Response box.
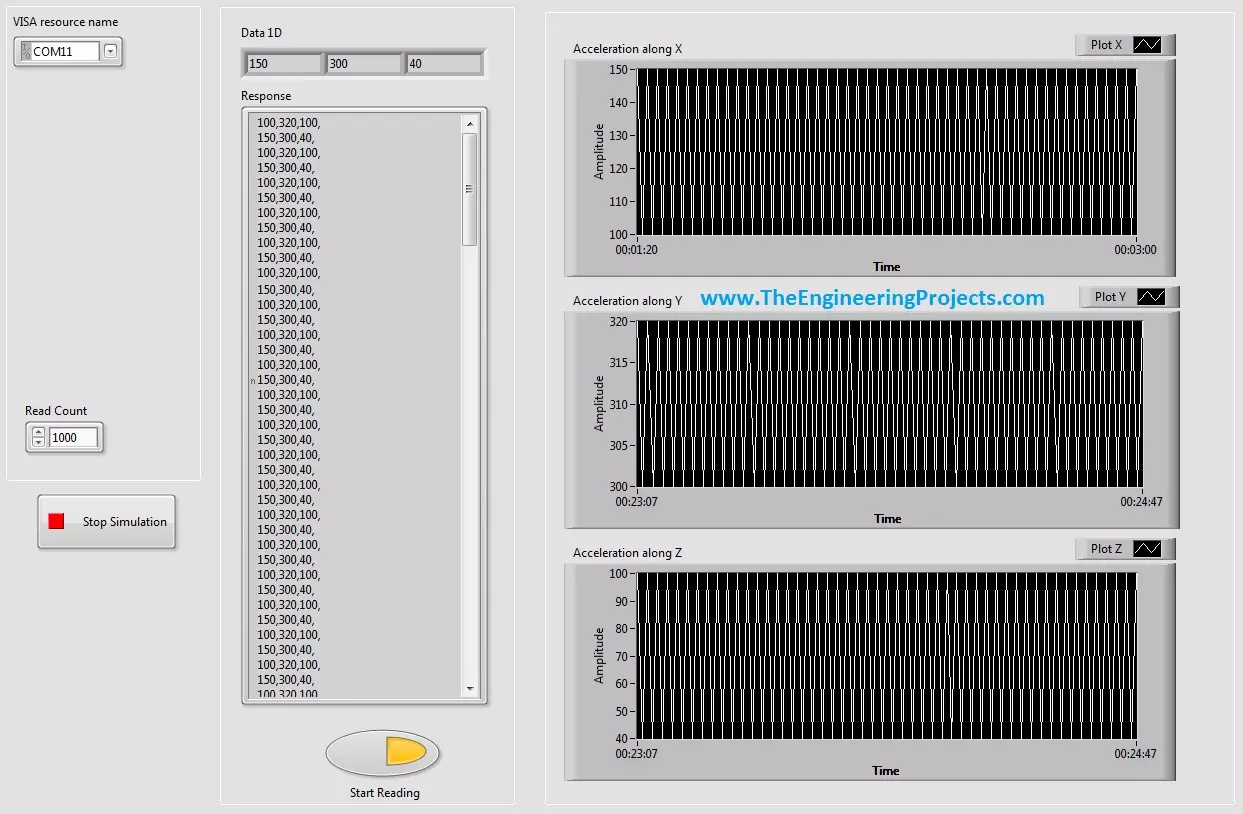
- The Front Panel is shown in the below figure:

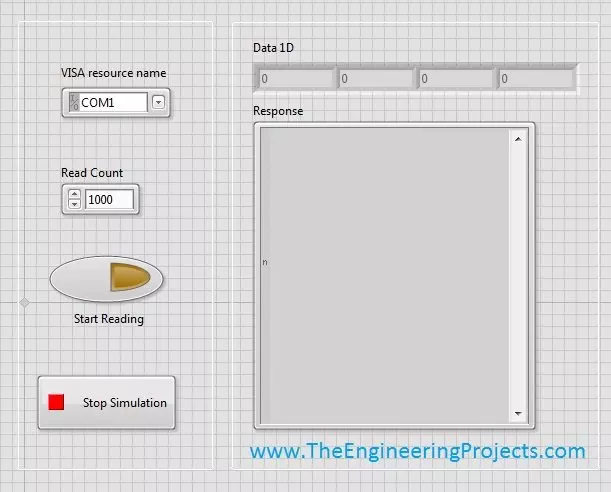
- Before running the vi, first of all select the COM Port from which your data is coming.
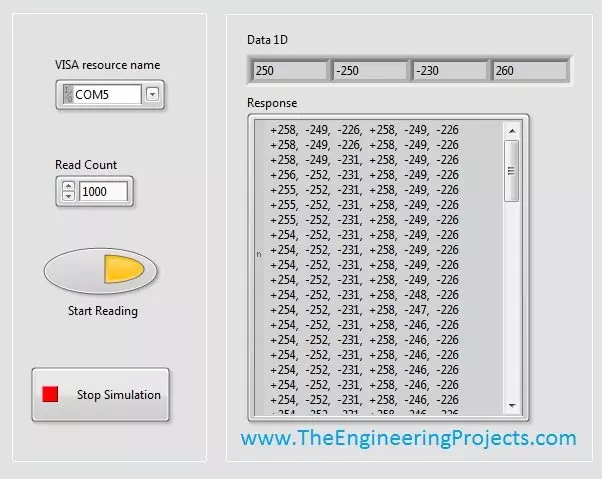
- Now click on RUN button in top toolbar, but still you won't receive anything, now hit the Start Reading button and you will start receiving the data, as shown in the below figure.
- If you don't select the correct Com Port then it will give error and won't run so select the correct COM Port name.

- Now, the COM Port I am using is COM5 and you can see Start Reading button is also ON.
Response is showing the complete data whatever is coming from the Serial Port, while the Data 1D is splitting the data and showing each data in each box and the separation character I selected is "," (comma).That's all for today, now play with the vi and I hope you will find it really amusing. In order to download the complete working vi click on the below button.
In the next post, I have discussed how to Display Serial Data on Real Time Graph in Labview.Displaying data on graph is usually required in most of the projects. So have a look at it.
Leave a Reply
Leave a Reply
You must be logged in to post a comment.
Comments on ‘’Get Continuous Data From COM Port in LabView‘’
( 29 )
Page not found error while trying to download LabVIEW vi
Hi, Yeah there was small error in the link, I’ve corrected it now you can download it easily. Its in a rar file named Get Continuous Data From Com Port in Labview so don’t forget to extract it. Thanks for mentioning :))
Hey…..greetings from México, can you suggest any book to lear LAB-VIEW.
Search online, you will find a lot of tutorials on Labview. moreover, also check the Help of LabView its quite awesome. Thanks.
same. this link is broke, please fix.
Hi Mr Syed Zain Nasir
I need file Get Continuous Datafrom Com Port in with LabView version 2009
can you help me,
Thanks,
hello sir.
thank you for this good explaination.
i have a question.
when i run the labview program it runs correctly,but when i wanna change some values from the coms,there is no response and give me error…………so if i want to insert a new values,i must stop the run simulation and the program does not work online.
hope you help me
hi
i am trying to read lidar data using your vi,
i am getting framing error,
can you suggest solutions
Thank you
Hi reader!
I have a question. In labview ,we get the datain form of string.In my application, I need to send an array of 6000 double data type numbers and receive this array in LabVIEW.can you modify the above code according to my needs.Thankyou
yeah, add me on skype and we will discuss it in detail. My skype id is theenggprojects.
Thanks.
The download link for this vi simply returns me to the home page. I’ve tried the link in Chrome and in IE with no luck.
I think the link’s broken, I will check it out. Thanks for informing.
Hi sir
i am a labview new user and i want to make this serial communication between arduino and labview but actually cant make such a code
can you upload the labview file please
OH sorry i didnt notice it but the link is not working
can you please fix it up
not able to download it
i cant get option of selecting com port. it shows only option of refresh. please tell me what can i do? Thanx
You should connect some COM Port with your computer that will appear in this box.
Nice blog man! Learnt many things here! Thanks a lot for sharing your knowledge.. 🙂
Best wishes
Sir,
Content is good.I am using the same procedure to analyse the output of the microcontroller PIC 16F628A by feeding the output signals Rx & Tx from microcontroller directly to the pins 2 & 3 of Max-232 and then into the read buffer, now its not showing any error but meanwhile i am not able to view the result (as indicated in the attachment).So,please suggest me accordingly.
Hi,
Bro add me on Skype and I will check your hardware and will let you know the problem. My skype id is theenggprojects.
Thanks.
Hi Mate,
I downloaded your VI and it’s quite nice. However, i’m trying to read on 3 sets from the index, but the vi read only from index 0, I was wondering why there’s noting on the other indexes 1 and 2.
I’m reading from COM3, also my code it good, and i’m trying to read a force of my hand ,then I want to do some extra calculation to read it in different measurement. I noticed that i may need to do extra steps to read my calculations.
any idea will be helpful.
Cheers,
Anthony
is it possible to measure 232/422 logic levels of recieved data
HELLO,+I+got+the+output+sir.+Thank+you+for+your+tutorial,+i+need+to+add+the+date+and+time+to+the+output+which+is+continuously+running+can+u+help+me+out.
Hey Nasir, There’s some problem with the link for the VI as well as the one for the next tutorial.. It says service unavailable .. Could you please fix this ? Or maybe send me the VI via email ?
Hey Nasir, Love the tutorial. Can you please fix the link to download the VI ? It takes me to the homepage and does nothing. Or if possible, can you email it to me ?
Hey Nasir, Can you please fix the link to download the VI ? It takes me to the homepage and does nothing. Or if possible, can you email it to me ? my mail id rbajajece@gmail.com
same here It takes me to the homepage and does nothing.
hello, may I have your VI file. My email is ntr_hieu@yahoo.com. I cannot download it from your link. Many thanks.
Hello! This is very useful, but can you upload images of the false portion of the loop as well as have all of the components be viewed as icons? I had a little trouble following the tutorial since I am new to LabVIEW and am not as familiar as to what should go in each spot intuitively.
Also could you update download link again? It seems to be broken.
Thank you so much!