

Servo Motors are among the most important actuators in robotics, with applications ranging from RC planes to automated door locks.
| Where To Buy? | ||||
|---|---|---|---|---|
| No. | Components | Distributor | Link To Buy | |
| 1 | ESP32 | Amazon | Buy Now | |
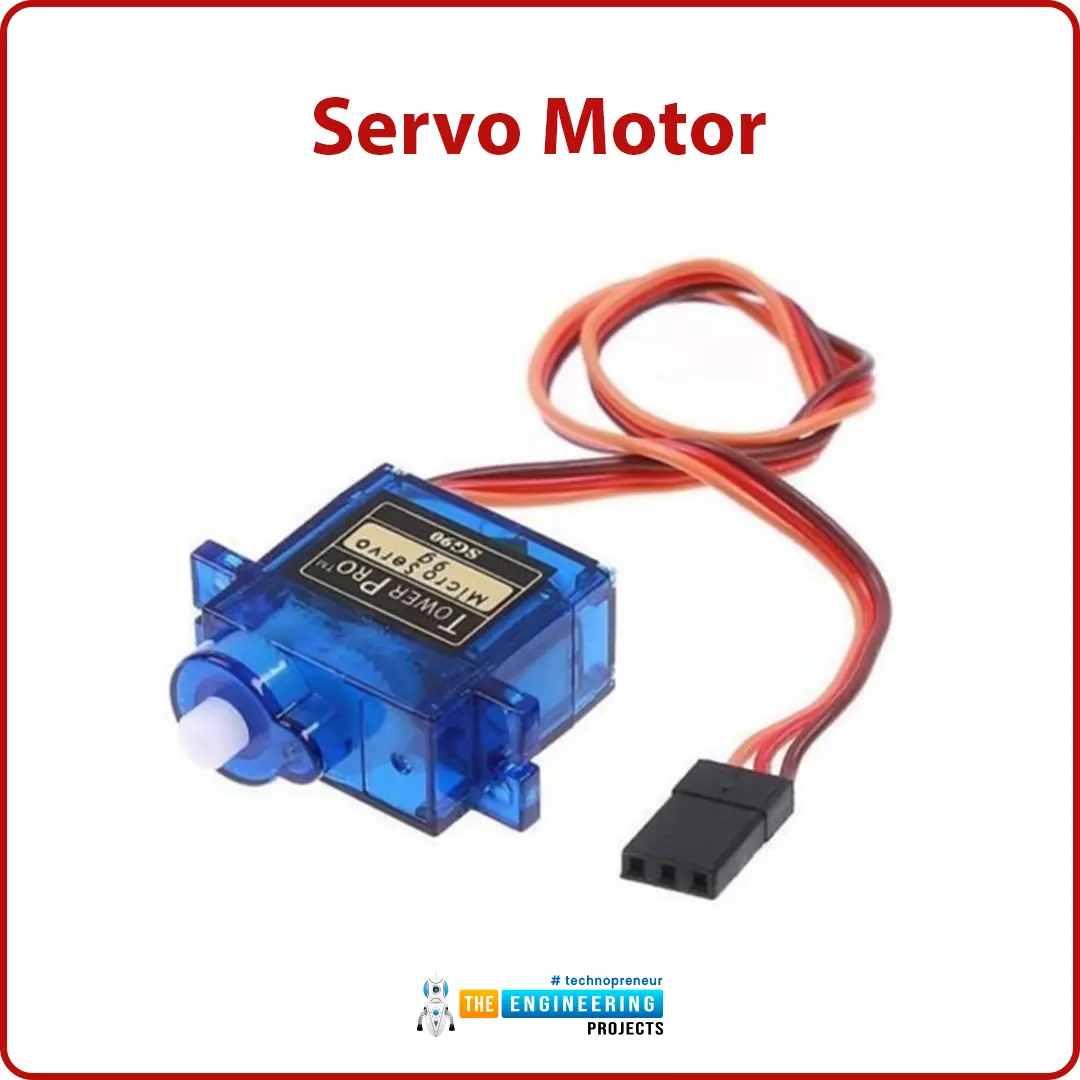
Hardware components required
- A servo motor
- ESP32 development board
- Connecting wires
- Breadboard
Servo Motor
There are several specific types of electric motor applications in which the motor must rotate only at a specific angle. For such applications, we need a special type of motor with such a special arrangement that causes the motor to rotate at a specific angle for a given electric signal (input). The servo motor comes into effect for this purpose.
A servo motor is a linear or rotary actuator that enables accurate control of linear or angular position, acceleration, and velocity. It is made up of a motor and a sensor for position feedback. It also necessitates a fairly sophisticated controller, which is frequently a dedicated module designed specifically for use with servo motors.
The primary reason to use a servo motor is that it offers angular precision, which means that it will only rotate as far as we want it to before stopping and waiting for the next signal to take action. The servo motor, unlike a standard electric motor, begins to turn as soon as we apply input power to it and continues to rotate until we turn off the power. We cannot restrict the rotational progress of an electric motor, but we can control its speed and turn it on and off. Small servo motors are included in numerous beginner Arduino launcher kits since they are simple to use in small electronic projects and applications.
Interfacing Servo Motor with ESP32

When compared to an Arduino, interfacing a servo motor to the ESP32 is extremely difficult because it does not support analogWrite(). However, it employs a variety of frequencies and timers, allowing all digital pins to be used as PWM pins and to send signals much faster than any Arduino.
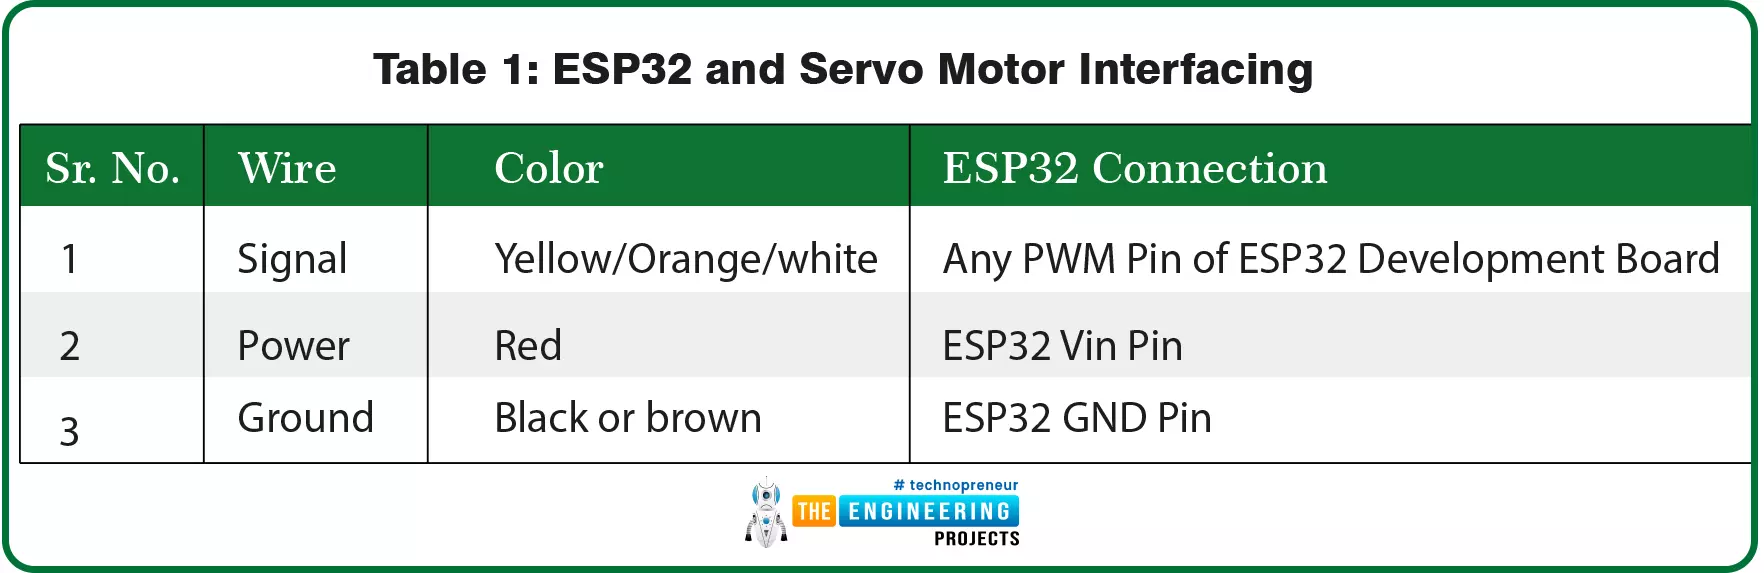
Connections:
Servo motor consists of three wires;
Controlling servo motor
A servo motor is controlled by sending a PWM or pulse width modulated signal. A servo motor can only turn for a total of 180-degree movement (90 degrees in either direction).
The PWM signal sent to the motor specifies the position of the shaft, and the rotor will turn to the desired position depending on the duration of the pulse sent through the control wire.
Arduino IDE programming
We are using Arduino IDE to compile and upload code into the ESP32 module. To know more about Arduino IDE and how to use it, follow our previous tutorial i.e., on the ESP32 programming series.
- Installing Required Libraries
- Download the library from the given link:
https://github.com/RoboticsBrno/ServoESP32
- Open the Arduino IDE.
- Go to Sketch >> Include Library >> Add .ZIP library.
- Select the zip file you have downloaded from the above link.

Arduino IDE Code
- We are using the example code that comes with the library file we have downloaded for the above link.
- To access the example code, go to Files >> Examples >> Servo ESP32 and select the required example code.
- In this tutorial, we are using a simple servo example code.
#include <Servo.h>
static const int servoPin = 4;
Servo servo1;
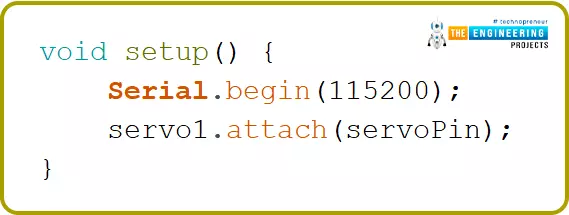
void setup()
{
Serial.begin( 115200 );
servo1.attach( servoPin);
}
void loop() {
for(int posDegrees = 0;
posDegrees <= 180;
posDegrees++)
{
servo1.write( posDegrees );
Serial.println( posDegrees );
delay( 20);
}
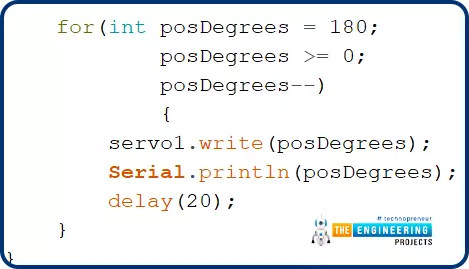
for(int posDegrees = 180;
posDegrees >= 0;
posDegrees--)
{
servo1.write( posDegrees);
Serial.println( posDegrees);
delay(20);
}
}
Code Description
-
- The first task is adding the required library files or header files.

- Define the GPIO pin which you are going to use for controlling the servo motor.

- Create an object Servo, which is called

Setup()
- Inside the setup() function, the first task is to initialize the serial monitor with a 115200 baud rate for debugging purposes.
- Attach the GPIO pin you have assigned to the variable servoPin (in the global declaration) to the servo object.
Loop()
- As we mentioned earlier, a servo motor can only rotate between 0 to 180 degrees. So in this code, we are changing the position of the servo motor from 0 degree to 180 degrees and then back to 0 degree from 180 degrees.
- We have defined a variable postDegree to store the position or angle of the servo motor.
- We are using the for() loop, which will change the position of servo motor from 0 to 180 degrees.
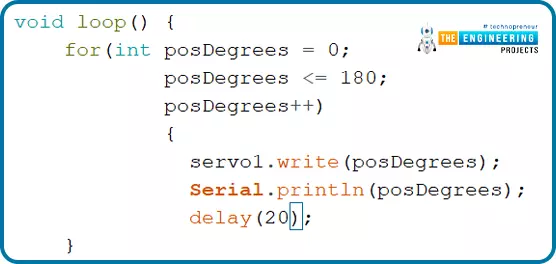
Fig.
- Another for() loop is used to change the position back to 0 degrees from 180 degrees.
Testing
- Select the right development board from Tools >> Boards >> DOIT ESP32 DevKit V1 in Arduino IDE.
- Compile and upload the code into ESP32 using Arduino IDE.
- Open the serial monitor with a 115200 baud rate as defined in the Arduino code.
- Press the EN button from the ESP32 development board.
- Now you should see the servo motor’s shaft rotating as per the instructions provided.
- You can observe the variation on shaft’s angle on the serial monitor as well, as shown below:
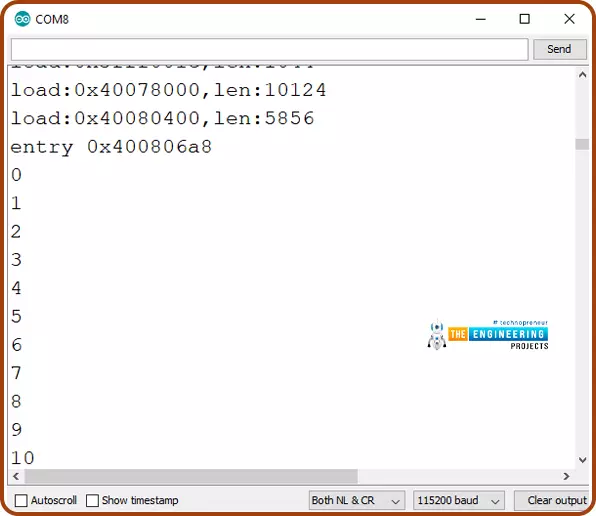
Fig. Serial monitor output

Fig. ESP32 and servo motor
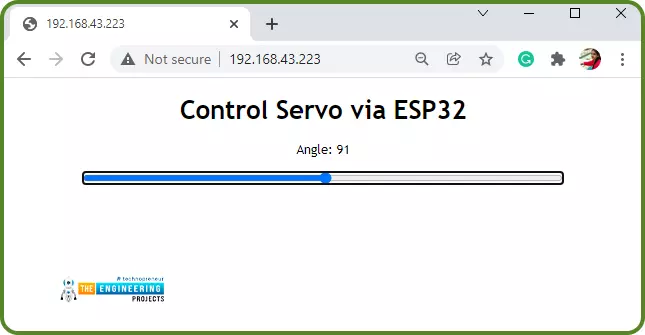
Creating a web server to control servo motor with ESP32
Let’s create a web server to control the position of the servo motor. We will create a web page containing a slider to control the angle/position of the servo motor’s shaft.
We have also created a tutorial on creating a simple web server with ESP32.
Arduino IDE Code
#include <WiFi.h>
#include <Servo.h>
Servo servo1; // create servo object to control a servo
// twelve servo objects can be created on most boards
// GPIO the servo is attached to
static const int servoPin = 13;
// Replace with your network credentials
const char* ssid = "SSID";
const char* password = "PASSWORD";
// Set web server port number to 80
WiFiServer server(80);
// Variable to store the HTTP request
String header;
String valueString = String(5);
int angle_x = 0;
int angle_y = 0;
// Current time
unsigned long currentTime = millis();
// Previous time
unsigned long previousTime = 0;
// Define timeout time in milliseconds (example: 2000ms = 2s)
const long timeoutTime = 2000;
void setup() {
Serial.begin(115200);
servo1.attach(servoPin); // attaches the servo on the servoPin to the servo object
// Connect to Wi-Fi network with SSID and password
Serial.print("Connecting to ");
Serial.println(ssid);
WiFi.begin(ssid, password);
while (WiFi.status() != WL_CONNECTED) {
delay(500);
Serial.print(".");
}
// Print local IP address and start web server
Serial.println("");
Serial.println("WiFi connected.");
Serial.println("IP address: ");
Serial.println(WiFi.localIP());
server.begin();
}
void loop(){
WiFiClient client = server.available(); // Listen for incoming clients
if (client) { // If a new client connects,
currentTime = millis();
previousTime = currentTime;
Serial.println("New Client."); // print a message out in the serial port
String currentLine = ""; // make a String to hold incoming data from the client
while (client.connected() && currentTime - previousTime <= timeoutTime) { // loop while the client's connected
currentTime = millis();
if (client.available()) { // if there's bytes to read from the client,
char c = client.read(); // read a byte, then
Serial.write(c); // print it out the serial monitor
header += c;
if (c == '\n') { // if the byte is a newline character
// if the current line is blank, you got two newline characters in a row.
// that's the end of the client HTTP request, so send a response:
if (currentLine.length() == 0) {
// HTTP headers always start with a response code (e.g. HTTP/1.1 200 OK)
// and a content-type so the client knows what's coming, then a blank line:
client.println("HTTP/1.1 200 OK");
client.println("Content-type:text/html");
client.println("Connection: close");
client.println();
// Display the HTML web page
client.println("<!DOCTYPE html><html>");
client.println("<head><meta name=\"viewport\" content=\"width=device-width, initial-scale=1\">");
client.println("<link rel=\"icon\" href=\"data:,\">");
// CSS to style the slider
// Feel free to change the background-color and font-size attributes to fit your preferences
client.println("<style>body { text-align: justify; font-family: \"Trebuchet MS\", Arial; margin-left:auto; margin-right:auto;}");
client.println(".slider { width: 600px; }</style>");
client.println("<script src=\"https://ajax.googleapis.com/ajax/libs/jquery/3.3.1/jquery.min.js\"></script>");
// Styling Web Page
client.println("</head><body><h1>Control Servo via ESP32</h1>");
client.println("<p>Angle: <span id=\"servoPos\"></span></p>");
client.println("<input type=\"range\" min=\"0\" max=\"180\" class=\"slider\" id=\"servoSlider\" onchange=\"servo(this.value)\" value=\""+valueString+"\"/>");
client.println("<script>var slider = document.getElementById(\"servoSlider\");");
client.println("var servoP = document.getElementById(\"servoPos\"); servoP.innerHTML = slider.value;");
client.println("slider.oninput = function() { slider.value = this.value; servoP.innerHTML = this.value; }");
client.println("$.ajaxSetup({timeout:2000}); function servo(pos) { ");
client.println("$.get(\"/?value=\" + pos + \"&\"); {Connection: close};}</script>");
client.println("</body></html>");
//GET /?value=180& HTTP/1.1
if(header.indexOf("GET /?value=")>=0) {
angle_x = header.indexOf('=');
angle_y = header.indexOf('&');
valueString = header.substring(angle_x+1, angle_y);
//Rotate the servo
servo1.write(valueString.toInt());
Serial.println(valueString);
}
// The HTTP response ends with another blank line
client.println();
// Break out of the while loop
break;
} else { // if you got a newline, then clear currentLine
currentLine = "";
}
} else if ( c != '\r' ) { // if you got anything else but a carriage return character,
currentLine += c; // add it to the end of the currentLine
}
}
}
// Clear the header variable
header = "";
// Close the connection
client.stop();
Serial.println("Client disconnected.");
Serial.println(" ");
}
}
Code Description
- Replace SSID and PASSWORD with your network credentials.

- As we are creating a web server, we need to assign a port to it and normally we use port 80 for a local webserver.
- So, in the below code, we have assigned port 80 to the web server and then initialized a few variables:

Fig.
- header variable is used to store the HTTP requests.
- Variables angle_x and angle_y are used to store the position/angle of servo motor’s shaft.
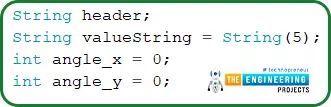
Fig.
- Variables to store timer values for a delay of 2sec or 2000ms.
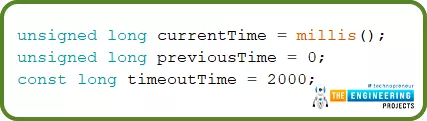
Fig.
Setup()
- Inside the setup() function, servoPin is being attached to the servo1 object.

Fig.
- Wi-Fi.begin() is used to initialize the ESP32’s wi-fi module.
- IP address of the device will be fetched once ESP32 is successfully connected to the wi-fi network.
- begin() function is used to initialize the webserver mode in ESP32.
Loop()
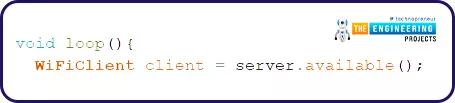
- After the webserver has been initialized successfully, the ESP32 server will be continuously waiting for the client connection.
Fig
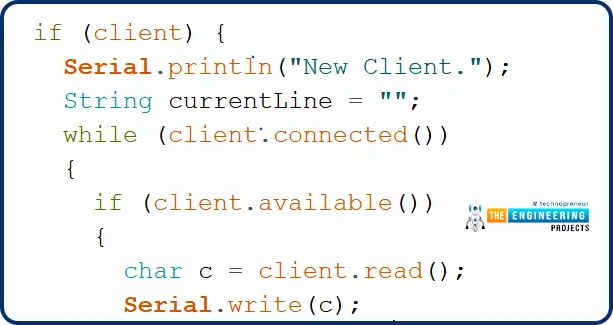
- Once the connection is established between the access point and the client device, the access point will wait for the data input.
- A string type variable called currentLine has been defined to hold the incoming data from the client.
- If there is a byte to be read from the client, then it will be stored inside the char type variable
HTML to display a web page
- The ESP32 will respond to your browser with HTML (hypertext markup language) code that will be used to construct the web page.
- HTTP header always starts with a response code e.g.: HTTP/1.1 200 ok
- An HTML page will be created on the client’s browser, from where the client device can control the position of the servo motor.
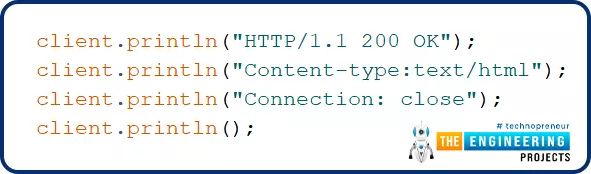
Fig.
- The next line, which signals that we are transmitting HTML, should always be the first thing we send.
- Make the web page responsive in any web browser.

Fig.
- The next task is styling the webpage and the slider.
- The maximum and minimum angles are 180 and 0 degrees respectively.
- valueString variable is containing the current angle/position of the slider, fetched from the HTTP request.
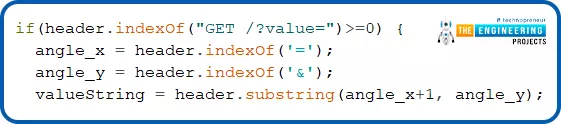
Fig.
- Close the web connection and clear the header that was used to store the HTTP request header.
- Print information about the closed web connection on the serial monitor.
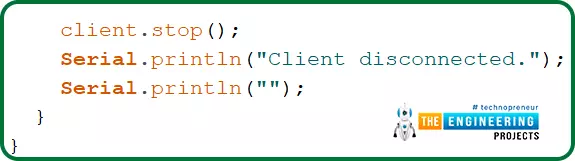
Fig. Close the connection
Testing
- Enter the Wi-Fi or network credentials in the code.
- Compile and upload the code into ESP32 using Arduino IDE.
- Make sure you have selected the right development board and com port before uploading the code.
- Open the serial monitor with a 115200 baud rate as defined in the Arduino code.
- Press the EN button from the ESP32 development board.

Fig. Serial Monitor
- Copy the IP address from the serial monitor.
- Open the web browser.
- Paste the IP address. A webpage to control the position/angle of servo motor will be displayed, as shown below:
Fig. Web Page
This concludes the tutorial. I hope you found this of some help and also to see you soon with a new tutorial on ESP32.
