Hello friends, I hope you all are doing great. Today, I am going to share the Adafruit ESP32 Feather V2 Library for Proteus. The Feather is one of the best known board families among makers: a slim board with the same pins in every version, a battery socket and a charger on board. The ESP32 Feather V2 puts Espressif's ESP32 on it, with a NeoPixel, a STEMMA QT socket and USB-C. With this library it runs your ESP32 Arduino sketch in Proteus 8.5 and joins our virtual Wi-Fi network.
Adafruit ESP32 Feather V2 Library for Proteus
Latest version: V1.0 (November 2026, this tutorial)
Other ESP32 boards and modules: ESP32 DevKit V1 · ESP32-DevKitC V4 · ESP32-S3 DevKitC-1 · ESP32-C3 SuperMini · ESP32-C6 DevKitC-1 · TTGO T-Display · T-Display S3 · XIAO ESP32-C3 · XIAO ESP32-S3 · QT Py ESP32-S3 · ESP32-C5 DevKitC-1 · Olimex ESP32-POE · FireBeetle 2 ESP32-E · T-Call SIM800L · T-SIM7600 · T-Beam Supreme · M5StickC PLUS2 · ESP32-2432S028 CYD · M5Stack AtomS3 · M5Stack Core2 · LilyGO T-Deck · LOLIN S2 Mini · Heltec WiFi LoRa 32 V3 · LilyGO T-Beam · ESP32-CAM · ESP32-WROOM-32 · AirLift WiFi Shield · AirLift ESP32 Breakout · WT32-ETH01
Light sensors: LDR · BH1750 · TCS34725
Modules: Micro SD · MAX485 RS485 · MCP2515 CAN · DS3231 RTC · DFPlayer Mini
Helping Tools
- Laptop WiFi Monitor: a laptop on the Wi-Fi of your design: a browser, a TCP / UDP terminal and ping
- Mobile WiFi Monitor: a smartphone that opens the pages of your board and sends it commands
- Serial Monitor Advance: a serial terminal window for the UART of your board
For the demo we built a grow-light controller for a greenhouse shelf. A BH1750 light sensor measures the light on the plants, a relay switches the lamp when the daylight is not enough, the board's NeoPixel shows what is going on at a glance, and a phone and a laptop follow it all on the board's web page.
NOTICE: Proteus has no ESP32 model, so our team has put a lot of effort into building this board ourselves: the Feather's pins, LEDs, NeoPixel, buttons and Wi-Fi are all our own model, and your sketch compiles with our free TEP Boards for Proteus add-on. Your feedback is the fuel that keeps us going, so please tell us what you think in the comments below or in the Adafruit ESP32 Feather V2 board of our forum. And if our free libraries help you, you can buy us a coffee. So, let's get started with the Adafruit ESP32 Feather V2 Library for Proteus:
What is the Adafruit ESP32 Feather V2?
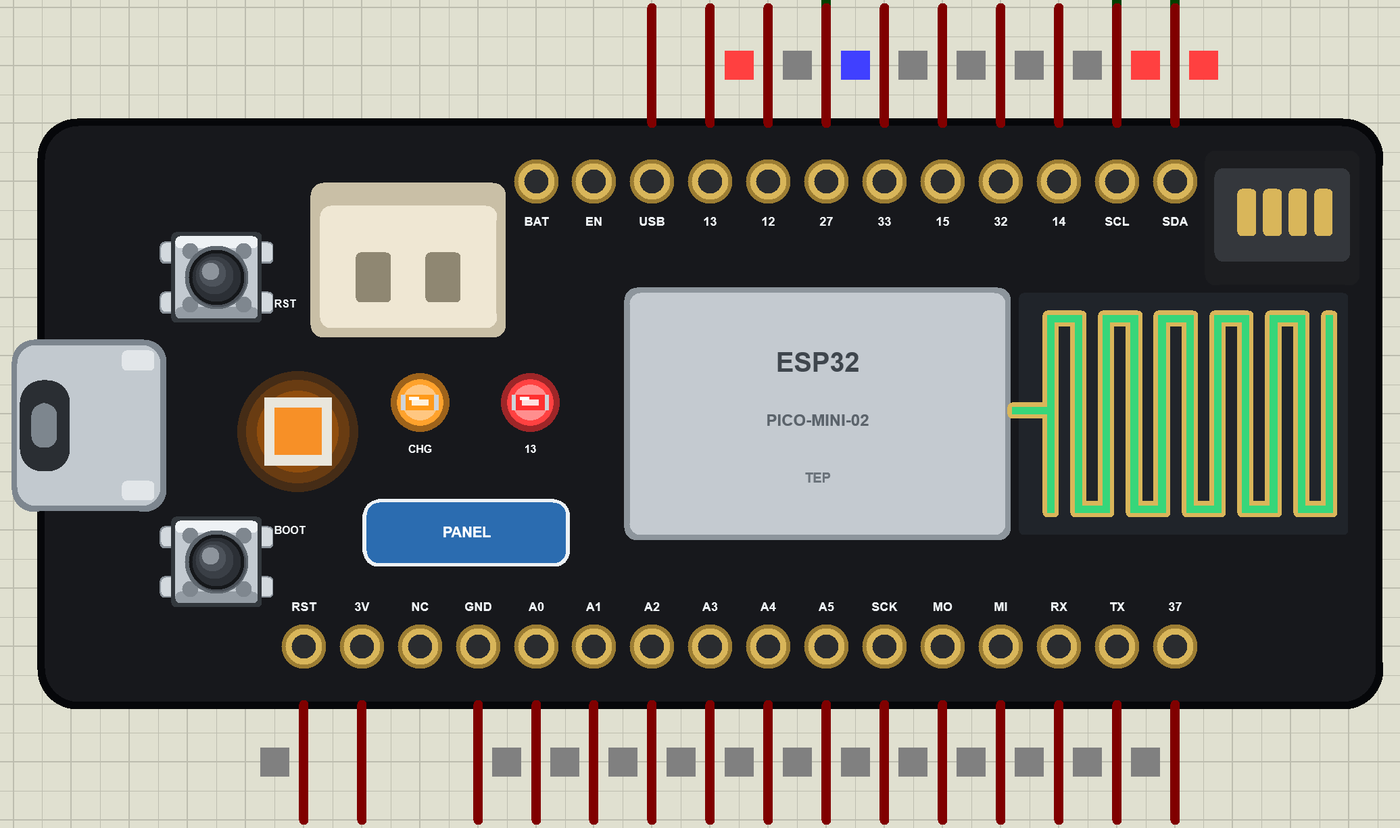
Feather is Adafruit's family of slim development boards. They all share one outline and one pinout, so the shields called FeatherWings fit any of them. The ESP32 Feather V2 carries the ESP32-PICO-MINI-02 module: a dual-core ESP32 at 240 MHz, 8 MB of flash and 2 MB of PSRAM, Wi-Fi 4 and Bluetooth, with a PCB antenna at the end of the board. Around it are a USB-C port, a JST socket and charger for a LiPo cell, a STEMMA QT socket for I2C modules without soldering, a NeoPixel, a red LED on GPIO13, and the RESET and BOOT buttons.
| ESP32 Feather V2 | ESP32 DevKit V1 | |
|---|---|---|
| Module | ESP32-PICO-MINI-02 | ESP-WROOM-32 |
| Memory | 8 MB flash, 2 MB PSRAM | 4 MB flash |
| Size | 52.3 x 22.8 mm | about 55 x 28 mm |
| Pins | 16 + 12, Feather layout | 15 + 15 |
| Battery | JST socket and charger | - |
| Extras | NeoPixel, STEMMA QT socket | a blue LED |
Why the ESP32 Feather V2?
Pick a Feather when the project has to run from a battery and leave the bench. The charger is already on the board, so a LiPo cell plugs straight in. The STEMMA QT socket takes a sensor with one cable and no soldering, and the Feather pinout means a display or a motor Wing simply stacks on top. It is also a neat board for a first ESP32 project in a box, because everything you normally wire up by hand - a status light, a button, a battery - is already there.
Features of the ESP32 Feather V2 Library for Proteus
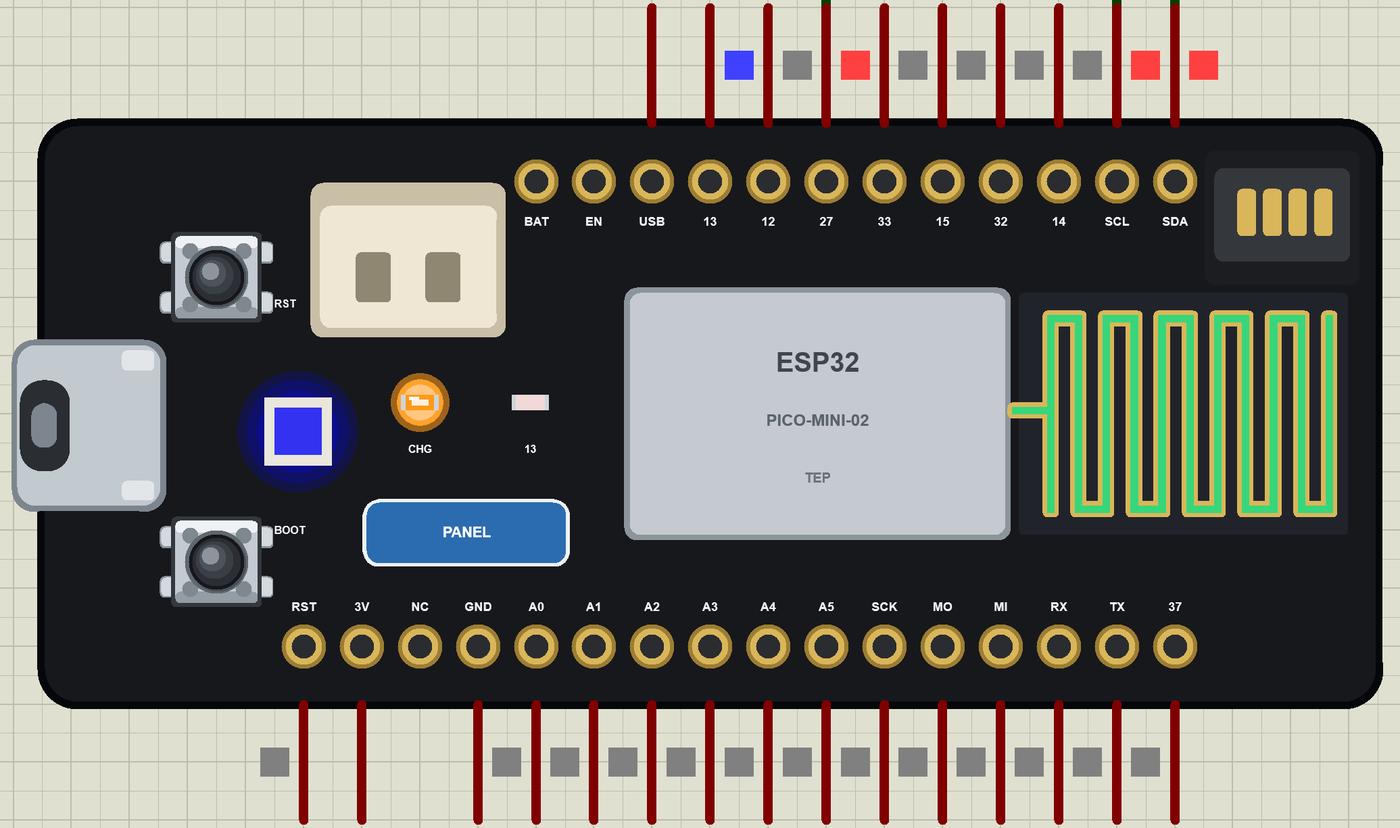
- The board as it looks: the black Feather with USB-C, RESET and BOOT, the JST and STEMMA QT sockets, the NeoPixel, the LEDs, the PICO module and its PCB antenna, drawn at its real proportions.
- Your sketch: a .hex for "ESP32 Feather V2 (TEP Proteus)" with the Feather's names - A0 to A5, 13, 12, 27, 33, 15, 32, 14 - analogRead 0 to 4095, analogWrite and ledc PWM, attachInterrupt, Serial, Serial1 on RX / TX, Wire and SPI.
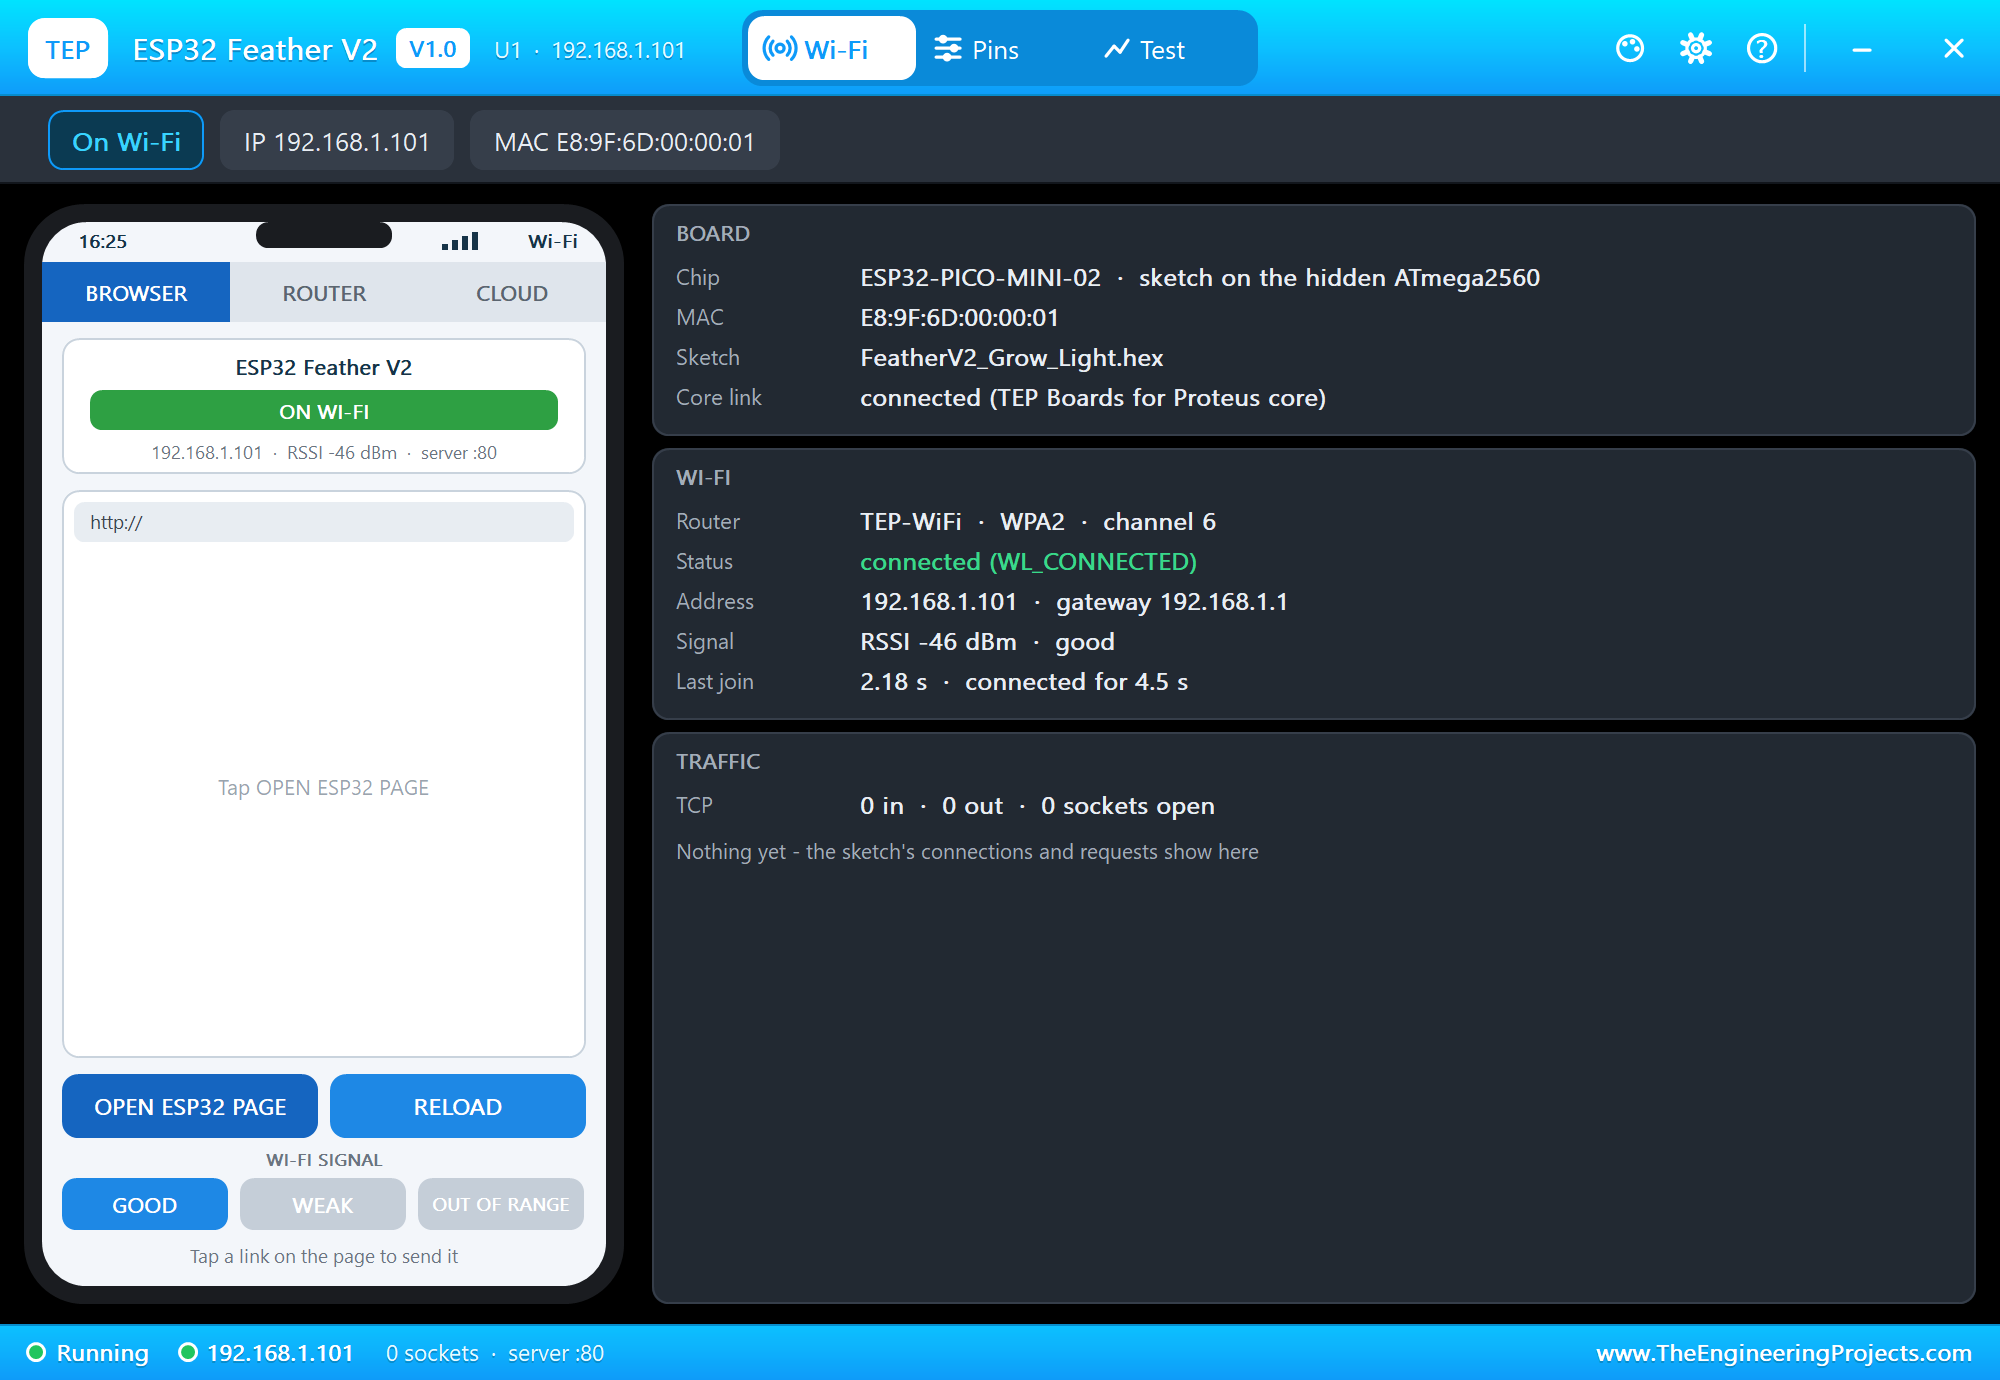
- Wi-Fi: WiFi.begin, WebServer, HTTPClient, mDNS and NTP on our virtual router TEP-WiFi; the board is 192.168.1.101 in the demo.
- The NeoPixel, LEDs and buttons work: rgbLedWrite colours the NeoPixel on the part, LED_BUILTIN lights the red LED, BOOT pulls GPIO38 LOW and RST resets the board.
- The panel and the serial monitor: the board's panel (Wi-Fi, Pins, Test) and the built-in serial monitor with Monitor, Plotter and Board tabs - our TEP header, no Windows title bar.
- A complete package: about 3.8 MB with the board, the add-on, the BH1750, relay and monitor libraries and the demo, without the source code of the models.
The ESP32 Feather V2 in Proteus
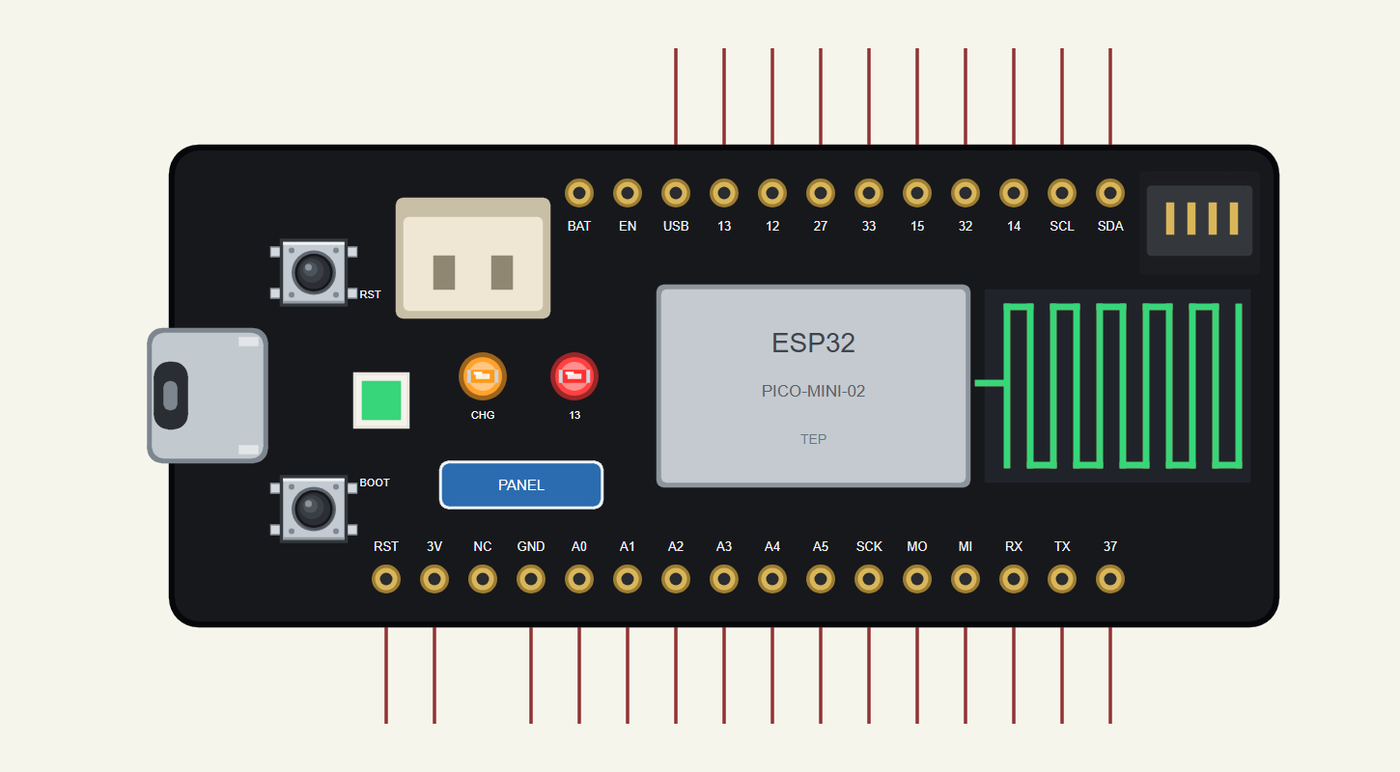
Search FEATHER in Pick Devices; the device ESP32 FEATHER V2 is in TEPFEATHERV2.LIB (Microprocessor ICs, ESP32 Boards), with the prefix U. The board lies with the USB-C port on the left. Click the USB-C port to open the serial monitor and the PANEL pad (or the module) to open the board's panel. One ESP32 Feather V2 can be placed in a design.
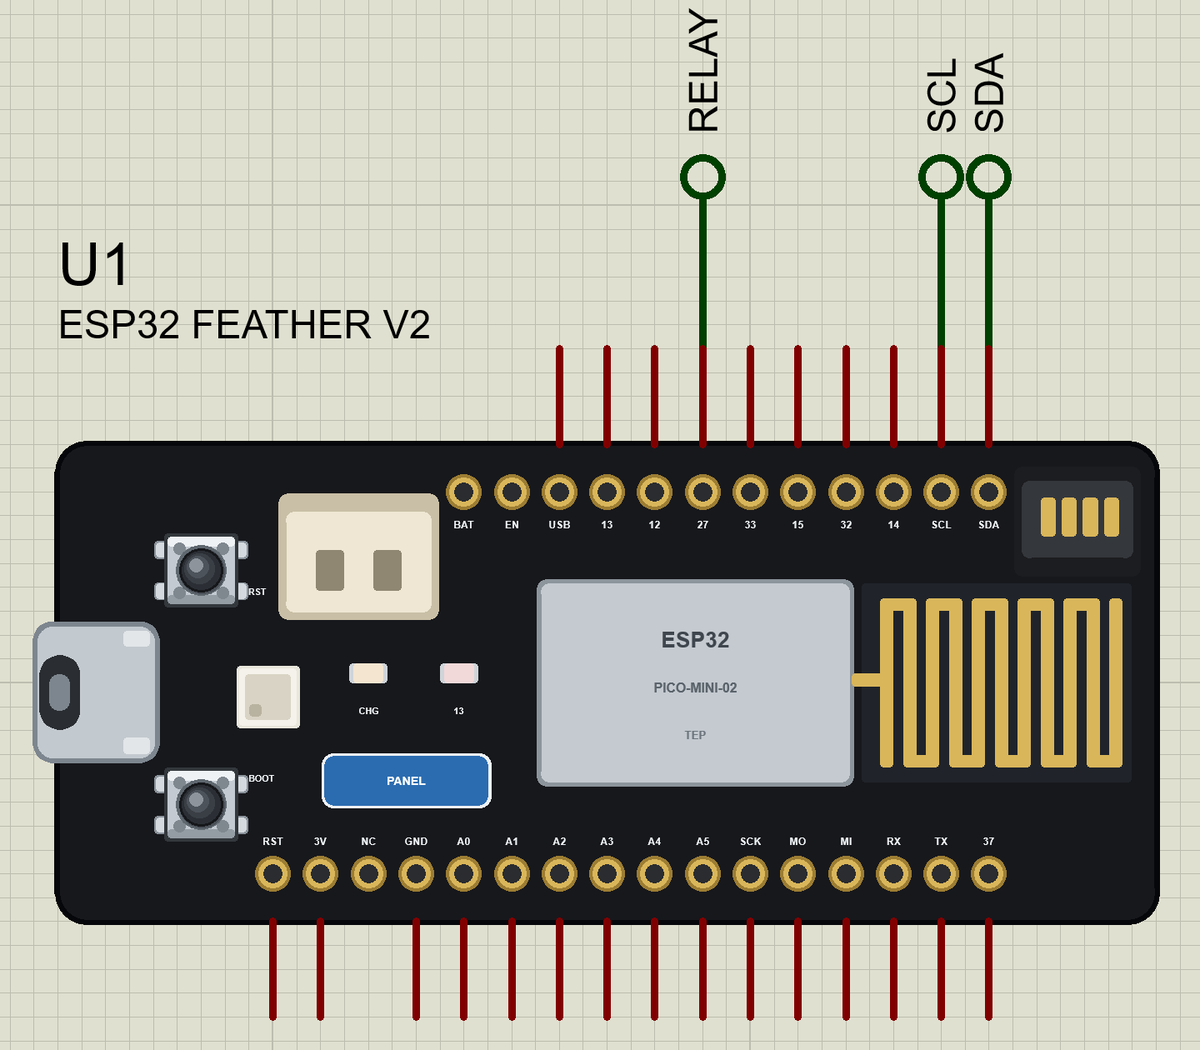
The Pins
| Pins | GPIO | What the library does with them |
|---|---|---|
| A0 to A5 | 26, 25, 34, 39, 36, 4 | analogRead, GPIO (34, 39 and 36 are inputs only) |
| 13, 12, 27, 33, 15, 32, 14 | the same numbers | GPIO, analogRead, PWM, interrupt; 13 is the red LED too |
| SDA / SCL | 22 / 20 | Wire |
| SCK / MO / MI | 5 / 19 / 21 | SPI |
| RX / TX | 7 / 8 | Serial1 |
| RST, 3V, USB, GND | - | reset, 3.3 V, 5 V, ground |
| On the board | 38, 0 and 2 | the BOOT button, the NeoPixel and its power switch |
BAT, EN and NC are drawn as on the real board, but they have no pin in the part: the simulation has no battery. Serial is the USB port, which in Proteus means the built-in serial monitor, so RX and TX stay free for a GPS or a GSM module.
Download Adafruit ESP32 Feather V2 Library for Proteus
Click the button below to download Adafruit-ESP32-Feather-V2-Library-for-Proteus-v1.0.zip (about 3.8 MB, without the source code of the models):
Adafruit ESP32 Feather V2 Library for Proteus V1.0- README.txt: installation, the demo, the pins, the properties, troubleshooting and the limits.
- Proteus Library Files:
TEPFEATHERV2.LIBand the demo's parts:TEPBH1750.LIB,TEPRELAY.LIB,TEPLAPTOP.LIBandTEPMOBILE.LIB. - Proteus Model Files:
TEPNET.DLL(the board, the laptop, the phone and the network),TEPBH1750.DLLandTEPRELAY.DLL. - Arduino Code: the demo sketch and the TEP Boards for Proteus add-on 1.41.0.
- Proteus Simulation: the demo project, its HEX file and copies of the DLLs.
No Proteus yet? Read How to Download and Install Proteus 7 and 8. New to libraries? Follow How to Install a New Library in Proteus.
How to Install Adafruit ESP32 Feather V2 Library for Proteus
- Close Proteus and extract the whole zip file, for example to your Desktop.
- Copy the files from Proteus Library Files into the LIBRARY folder of Proteus.
- Copy the DLLs from Proteus Model Files into the MODELS folder, replacing an older TEPNET.DLL.
- Delete
TEPFEATHERV2.IDXfrom the LIBRARY folder if it is there. - For your own sketches, copy Arduino Code\TEP Boards for Proteus\hardware into your Arduino sketchbook (Documents\Arduino) and restart the Arduino IDE; the board is ESP32 Feather V2 (TEP Proteus). Install BH1750 by Christopher Laws from the Library Manager.
- Start Proteus, press P and search for FEATHER.
Demo: a Grow-Light Controller
Plants need a certain amount of light every day, and in winter or on a shelf away from the window the daylight is often not enough. A grow lamp makes up the difference, but running it all day wastes power, and a timer knows nothing about the weather. A better way is to measure the light on the plants and switch the lamp only when it is needed. That takes a light sensor, a relay and a small board, and a Feather can do it from a battery-backed supply.
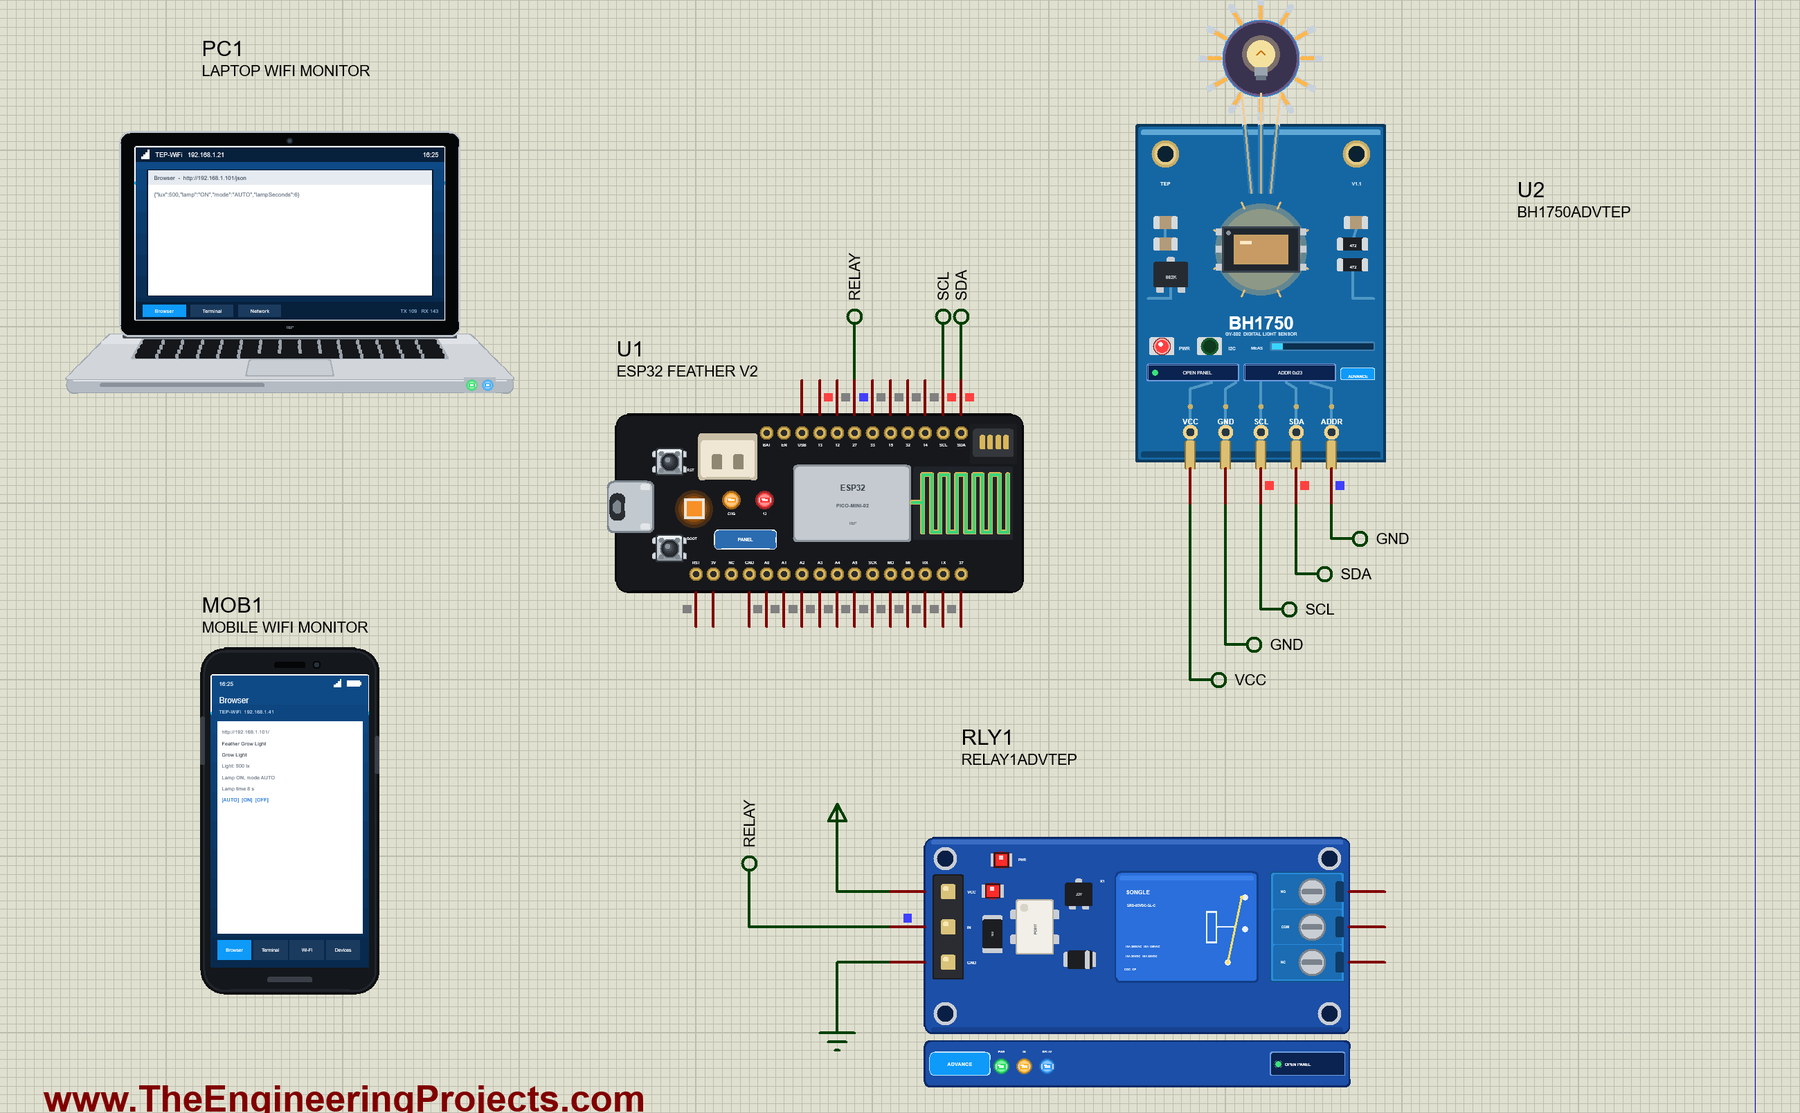
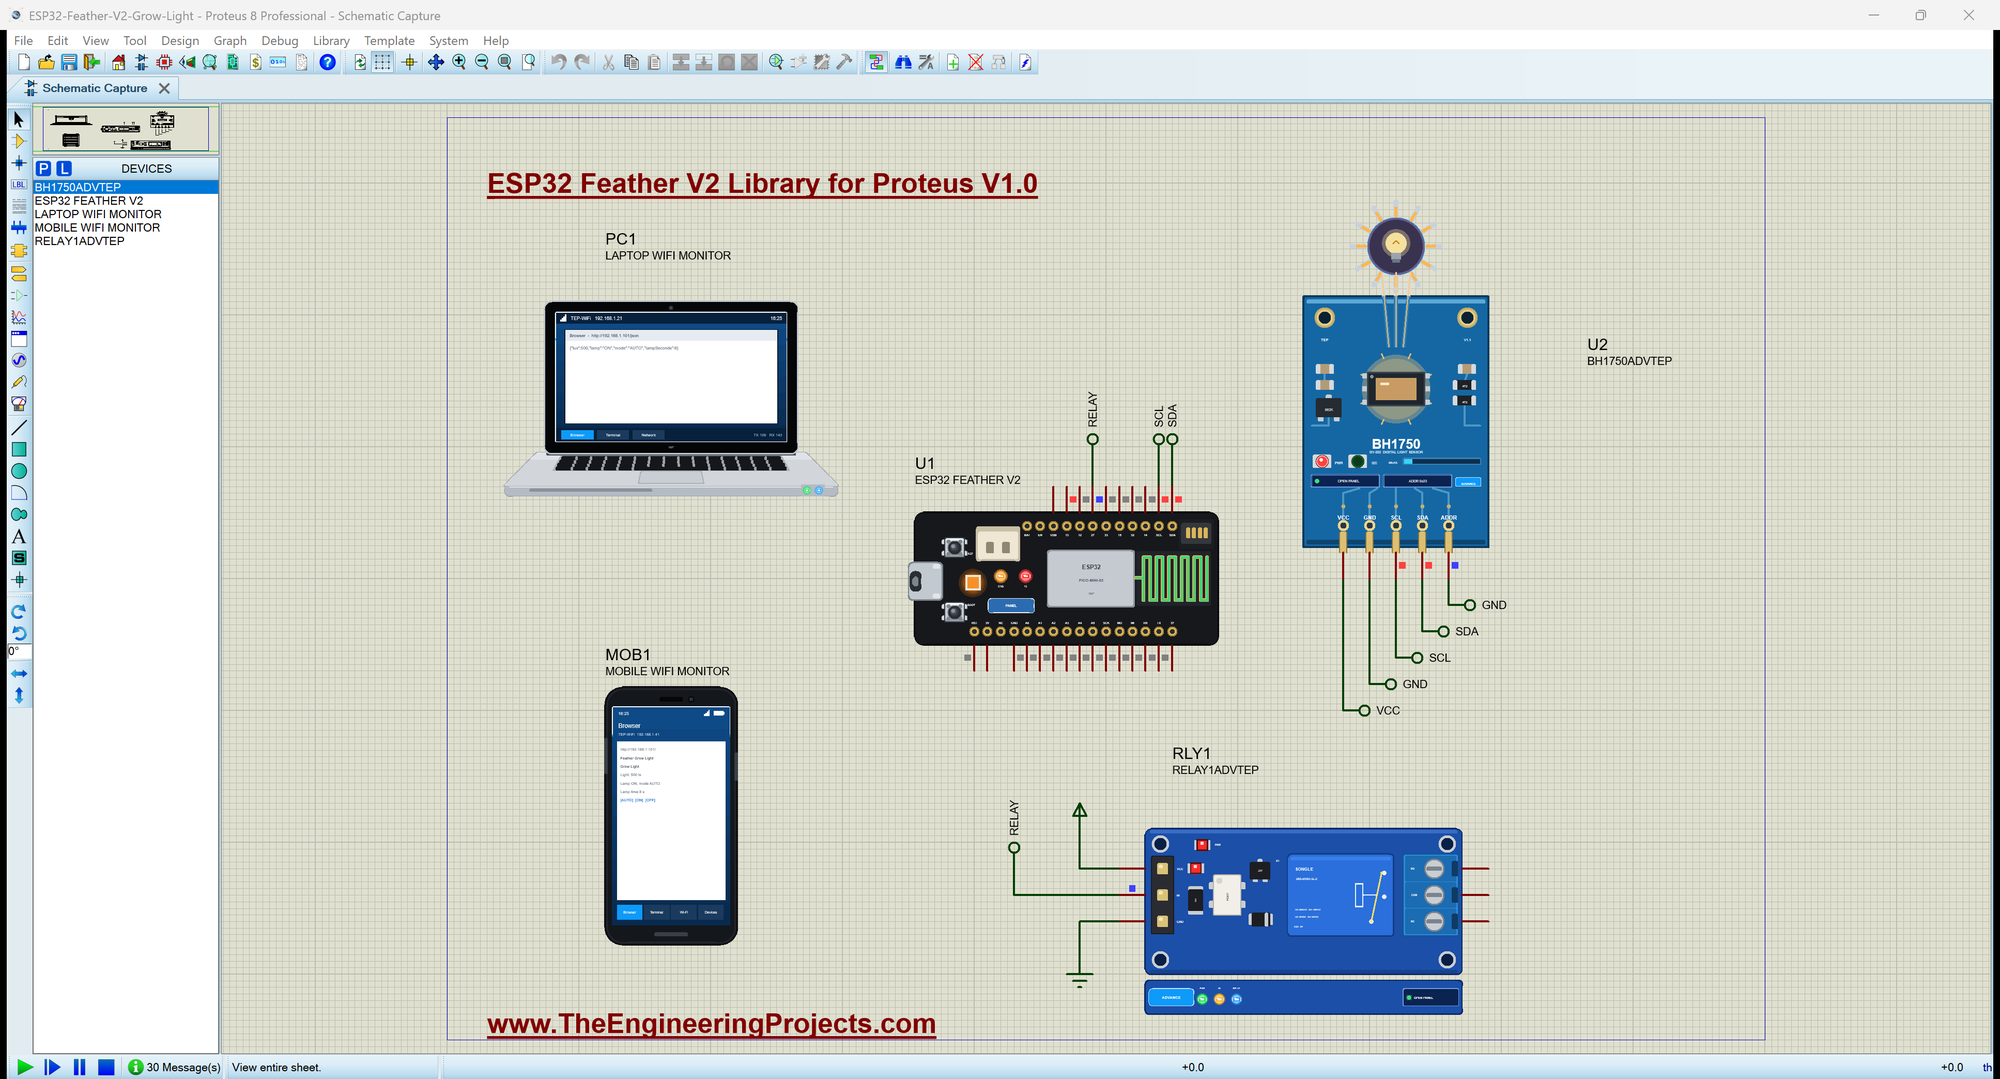
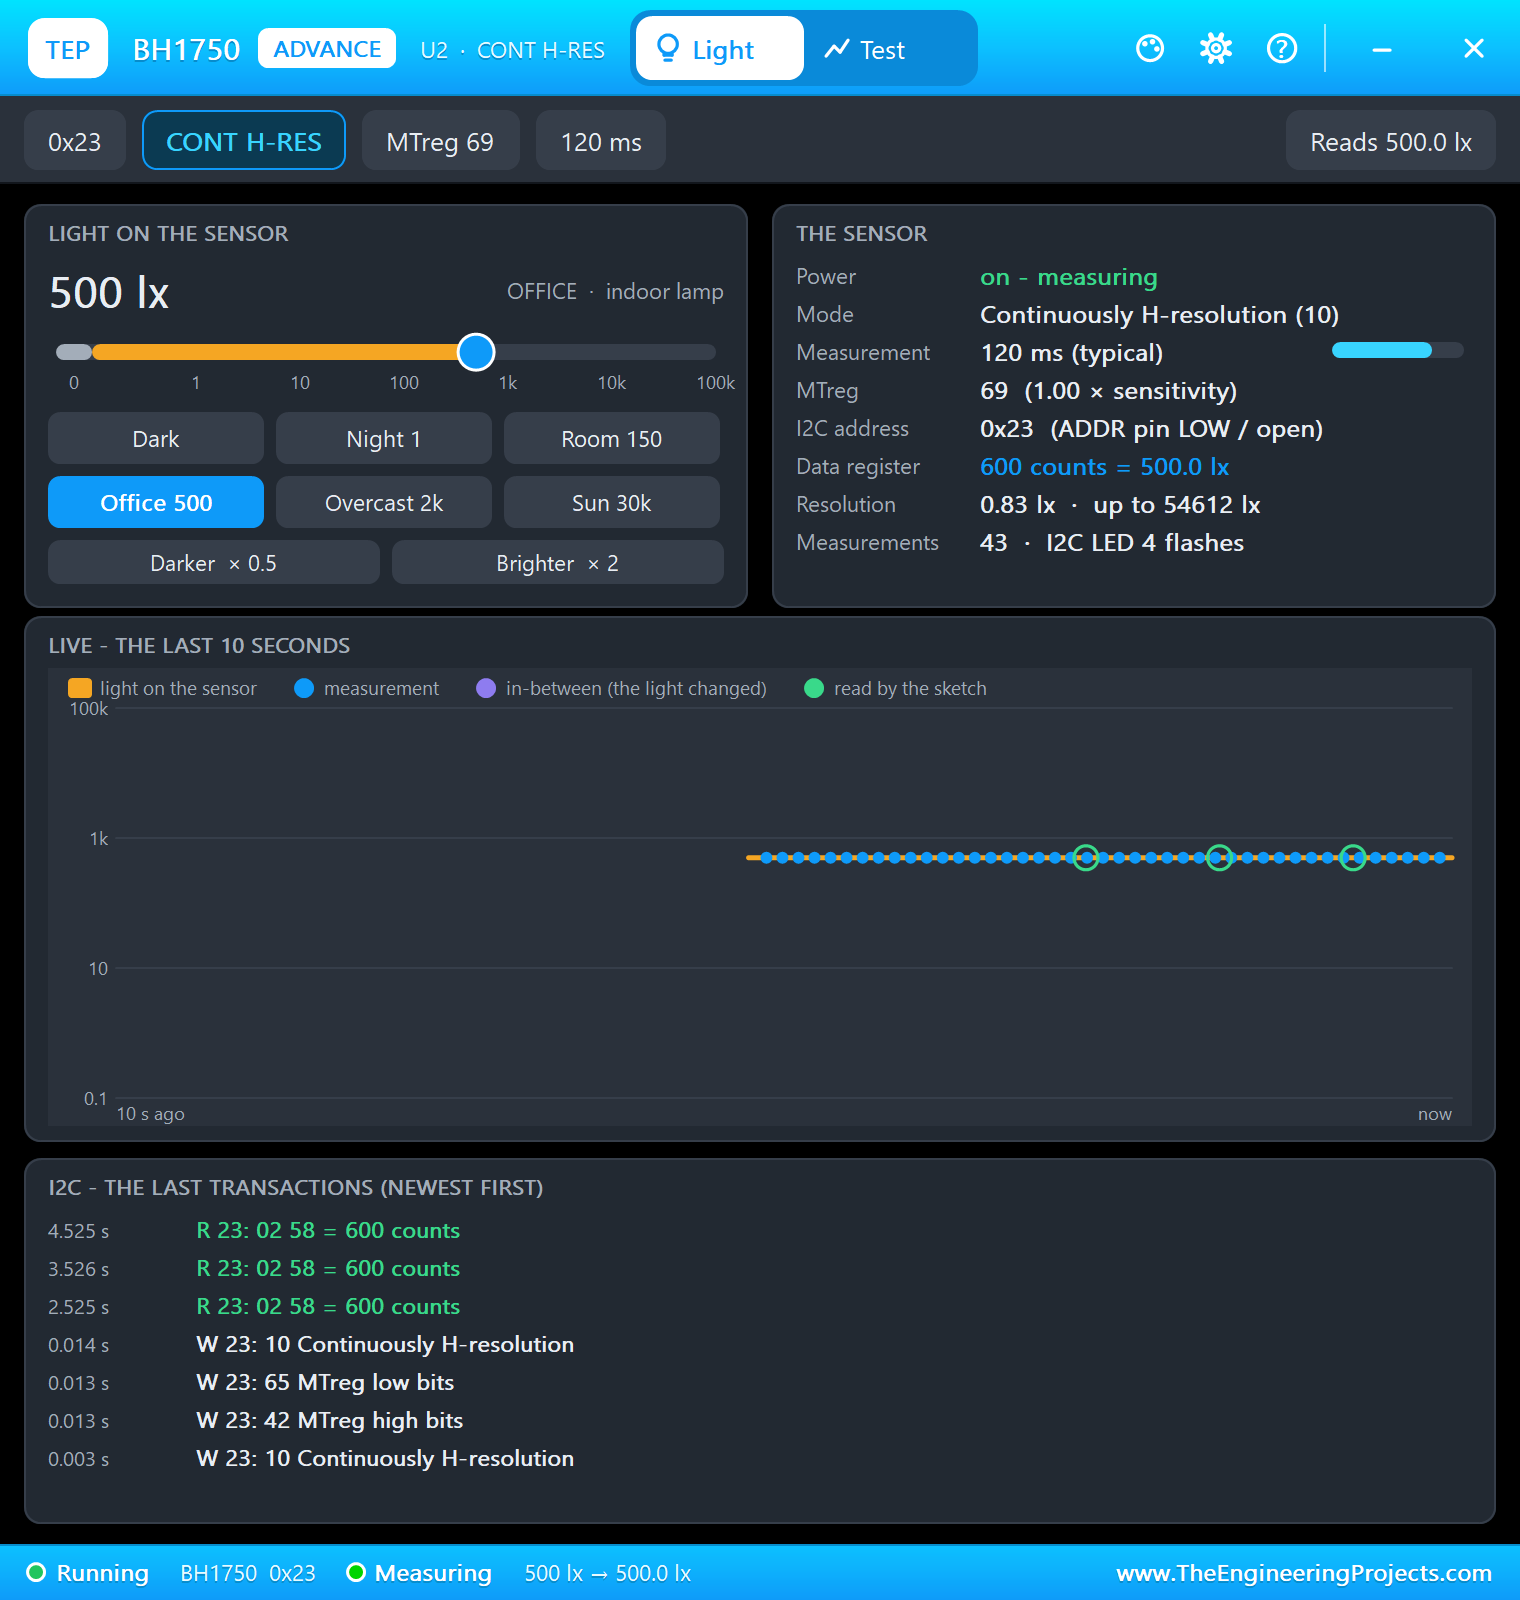
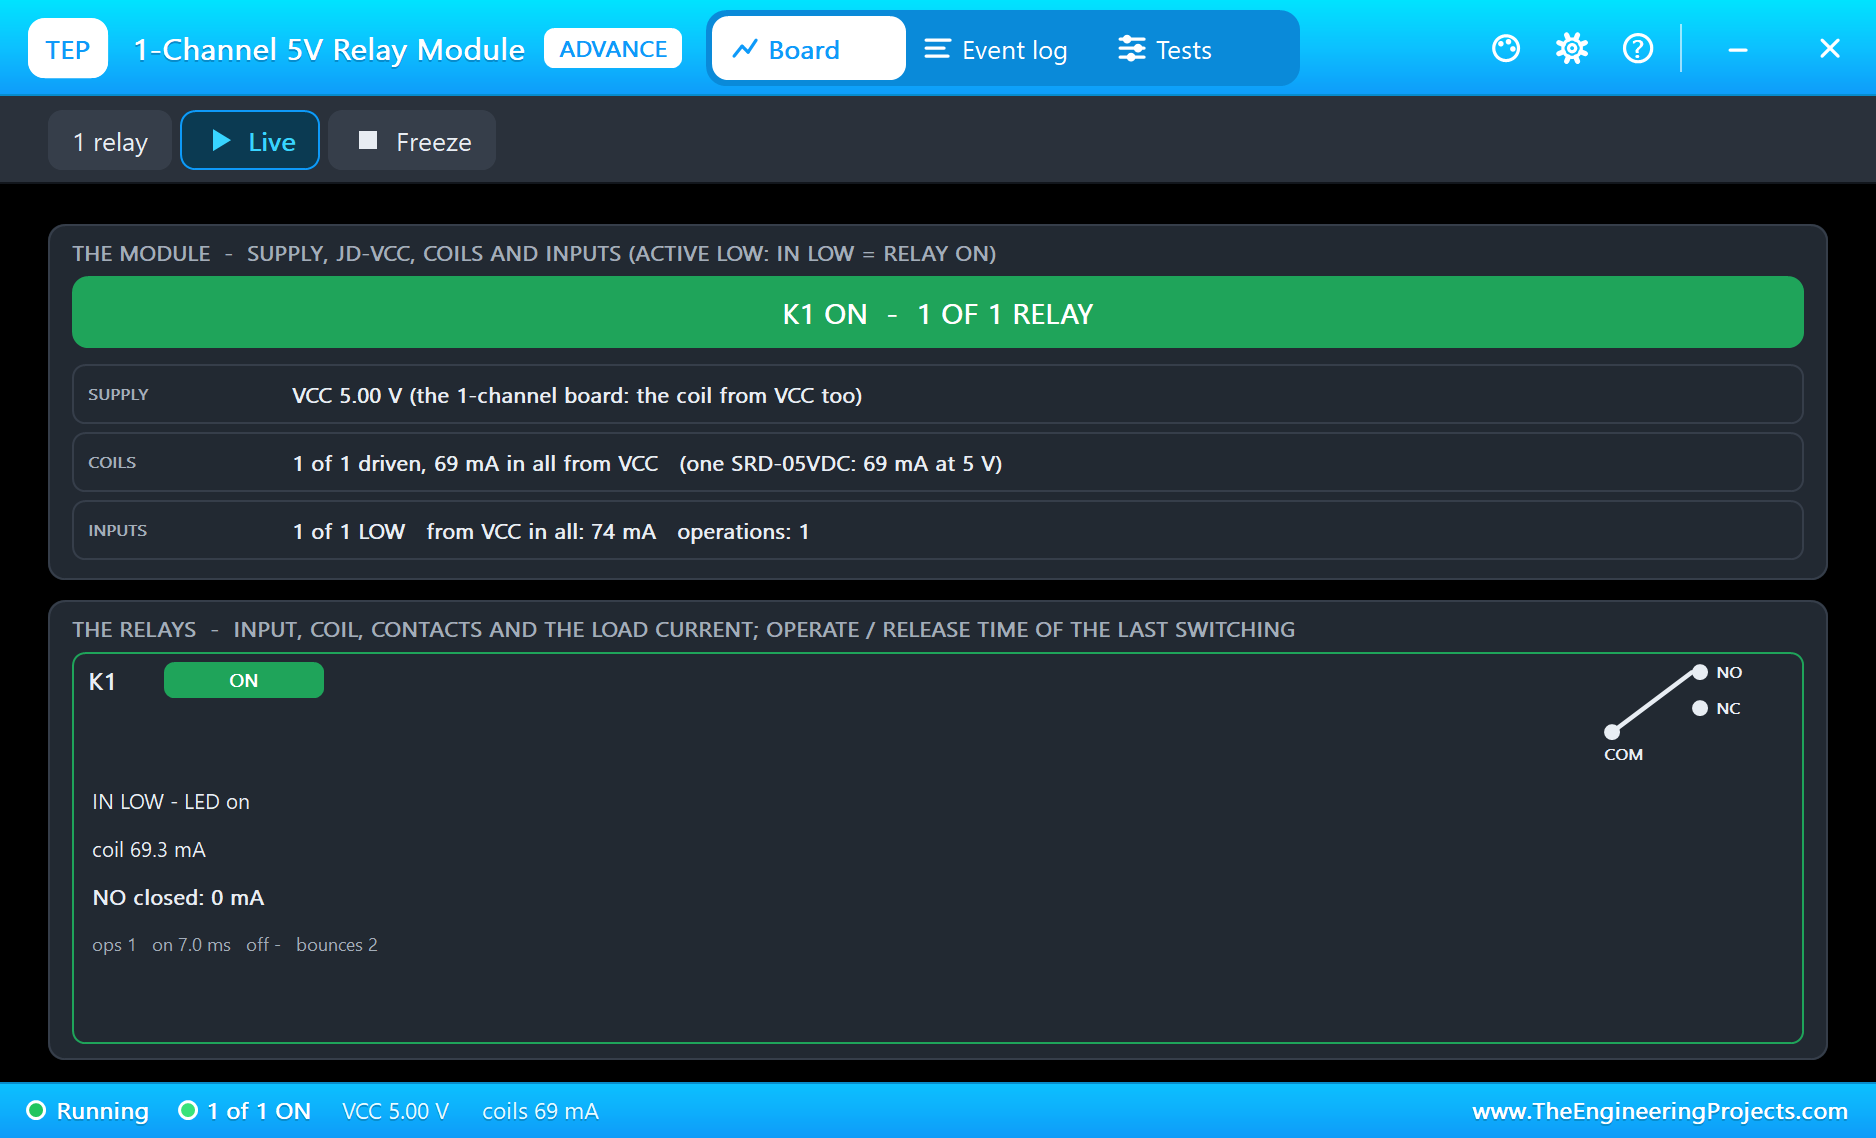
Open ESP32-Feather-V2-Grow-Light.pdsprj. U1 runs FeatherV2_Grow_Light.hex. U2 is the BH1750 from our BH1750 Light Sensor Library for Proteus and RLY1 the relay from our Relay Module Library for Proteus - both in the Advance version: they open their pop-up windows at Run, with the light to set and the contacts to watch. PC1 is the Laptop WiFi Monitor and MOB1 the Mobile WiFi Monitor.
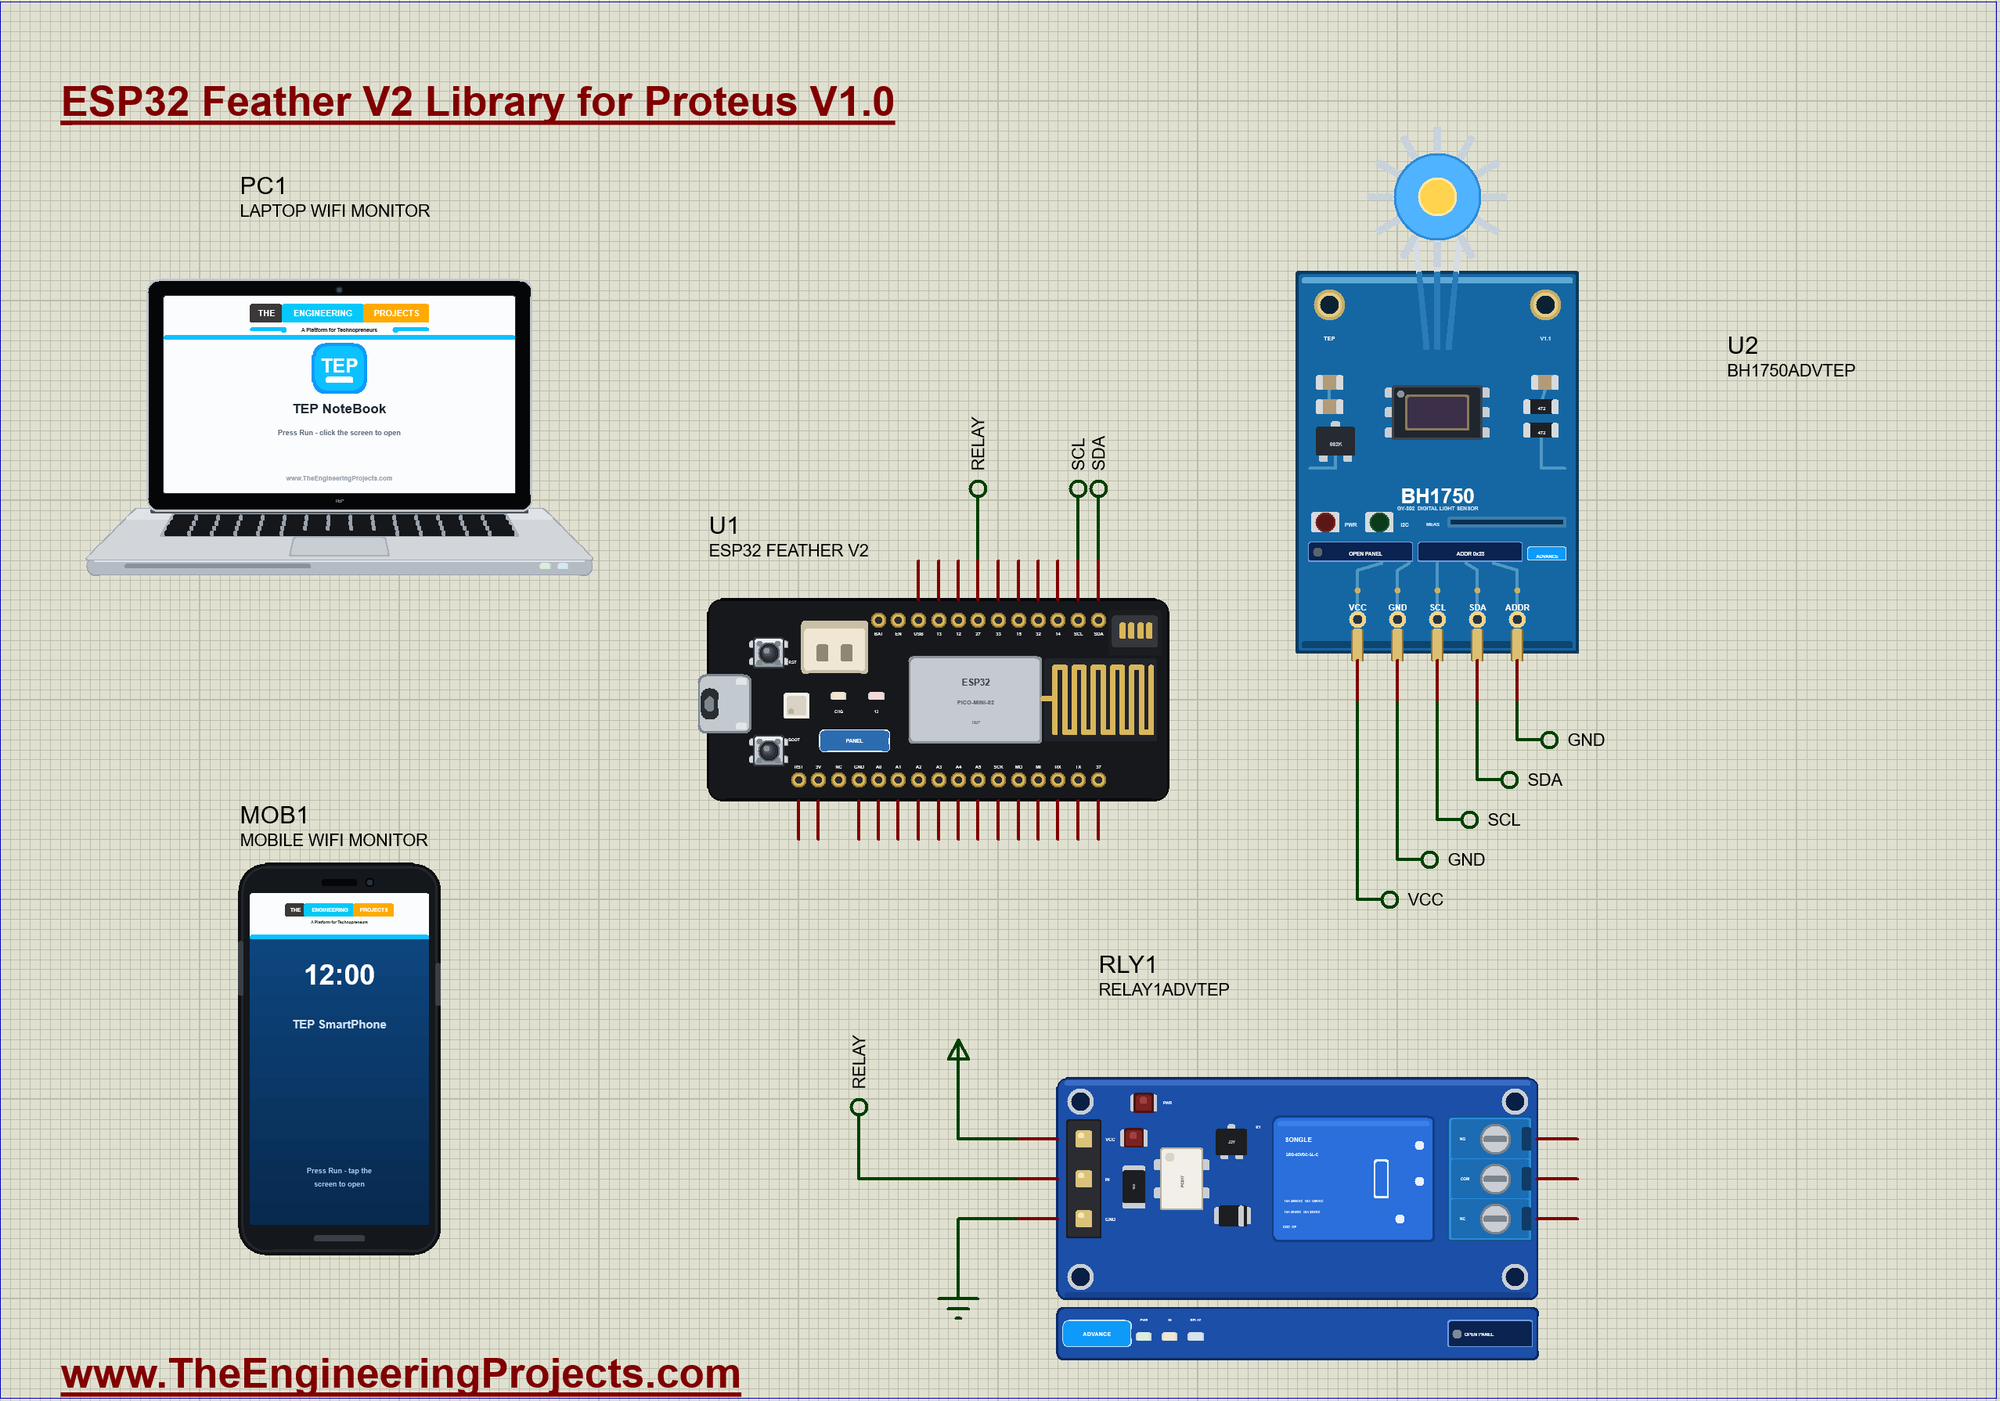
| Module pin | Net label | Feather pin | What it does |
|---|---|---|---|
| BH1750 SDA, SCL | SDA, SCL | SDA, SCL | I2C, the address 0x23 |
| BH1750 ADDR | GND | GND | the address 0x23 |
| BH1750 VCC, GND | VCC, GND | 3V, GND | the supply |
| Relay IN | RELAY | 27 | LOW = the lamp on |
| Relay VCC, GND | - | USB, GND | the coil's supply |
Measuring Light in Lux
The lux is the unit of light falling on a surface. A living room is around 150 lx, an office 500, an overcast day about 2000 and full sun 30000 or more. The BH1750 has a photodiode shaped to see light the way the human eye does, and it gives the result directly in lux over I2C, so there is no calibration and no resistor divider. Leafy plants stop growing well below about 800 lx, and that is the number the sketch works with.
How Much Light Do Plants Need?
Growers talk about the daily light integral: the total light a plant receives in a day, not just how bright it is at one moment. A tomato seedling on a dull windowsill may see only a few hundred lux for most of the day, which is why it grows tall and weak, reaching for the window. A lamp that tops up the dark hours gives it a steady dose. Our sketch keeps it simple and watches the light level, but the lamp time it counts is the first step towards a real daily total, and the ideas at the end of this article show where to go next.
Why a Relay?
A grow lamp draws far more current than a GPIO pin can give, and many lamps run from the mains. A relay is a switch moved by a small electromagnet: the Feather only has to drive a transistor on the module, while the lamp's circuit stays completely separate from the board. The contacts are rated for the lamp, and the click you hear tells you it works. The price is a limited number of switching cycles, which is one more reason to keep the relay from chattering.
Two Limits, Not One
The obvious program switches the lamp at one limit, but that fails the first time a cloud drifts past: the reading wobbles around the limit and the relay clicks on and off again and again, which wears out its contacts. The cure is called hysteresis: two limits with a gap between them. The lamp goes on below 800 lx and off only above 1500 lx. Anywhere in the gap it simply stays as it was:
void control() {
  if (mode == FORCE_ON) setLamp(true, "by hand");
  else if (mode == FORCE_OFF) setLamp(false, "by hand");
  else if (lux < LAMP_ON_LX) setLamp(true, "too dark");
  else if (lux > LAMP_OFF_LX) setLamp(false, "enough daylight");
  showPixel();
}
Switching the Lamp
The relay module is active LOW, so writing LOW energises the coil. setLamp() does nothing when the lamp is already in the right state, which is why a single line appears in the log for each change even though the control runs every second:
void setLamp(bool on, const char *why) {
  if (on == lamp) return;
  lamp = on;
  digitalWrite(RELAY_PIN, lamp ? LOW : HIGH);
  digitalWrite(LED_BUILTIN, lamp ? HIGH : LOW);
  Serial.print(F(">> Lamp ")); Serial.print(lamp ? F("ON") : F("OFF")); Serial.print(F(" (")); Serial.print(why);
  Serial.print(F(", ")); Serial.print(lux, 0); Serial.println(F(" lx)"));
}
The NeoPixel
A real greenhouse has no screen, so the board's NeoPixel shows the state from across the room. rgbLedWrite is the standard call of the Arduino ESP32 core; on the real Feather the NeoPixel and the STEMMA QT socket share a power switch on GPIO2, so setup() turns it on first:
void showPixel() {
  if (mode != AUTO) rgbLedWrite(RGB_BUILTIN, 0, 0, 80);     // forced by hand: blue
  else if (lamp) rgbLedWrite(RGB_BUILTIN, 90, 45, 0);       // the lamp is helping: orange
  else rgbLedWrite(RGB_BUILTIN, 0, 80, 0);                  // enough daylight: green
}
The Web Page
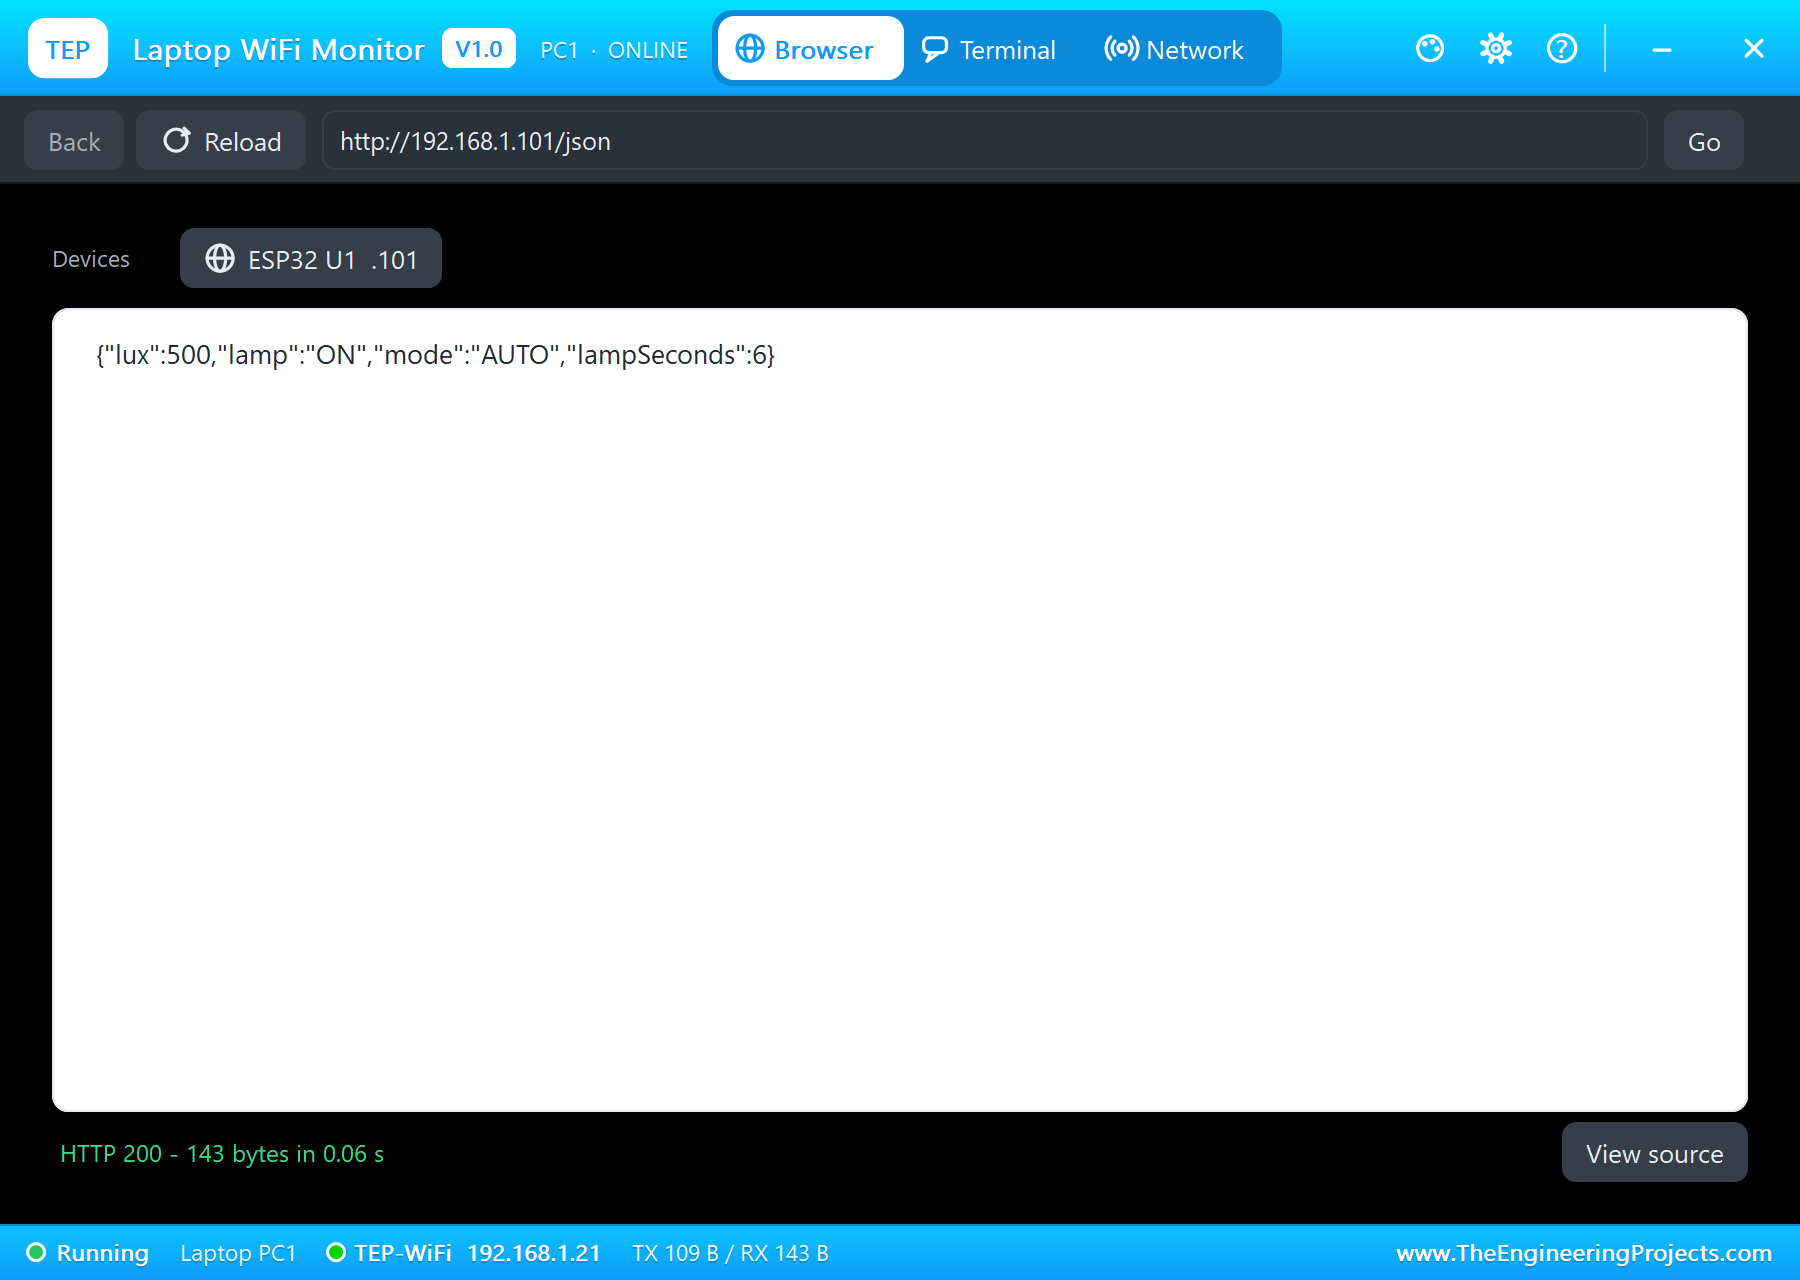
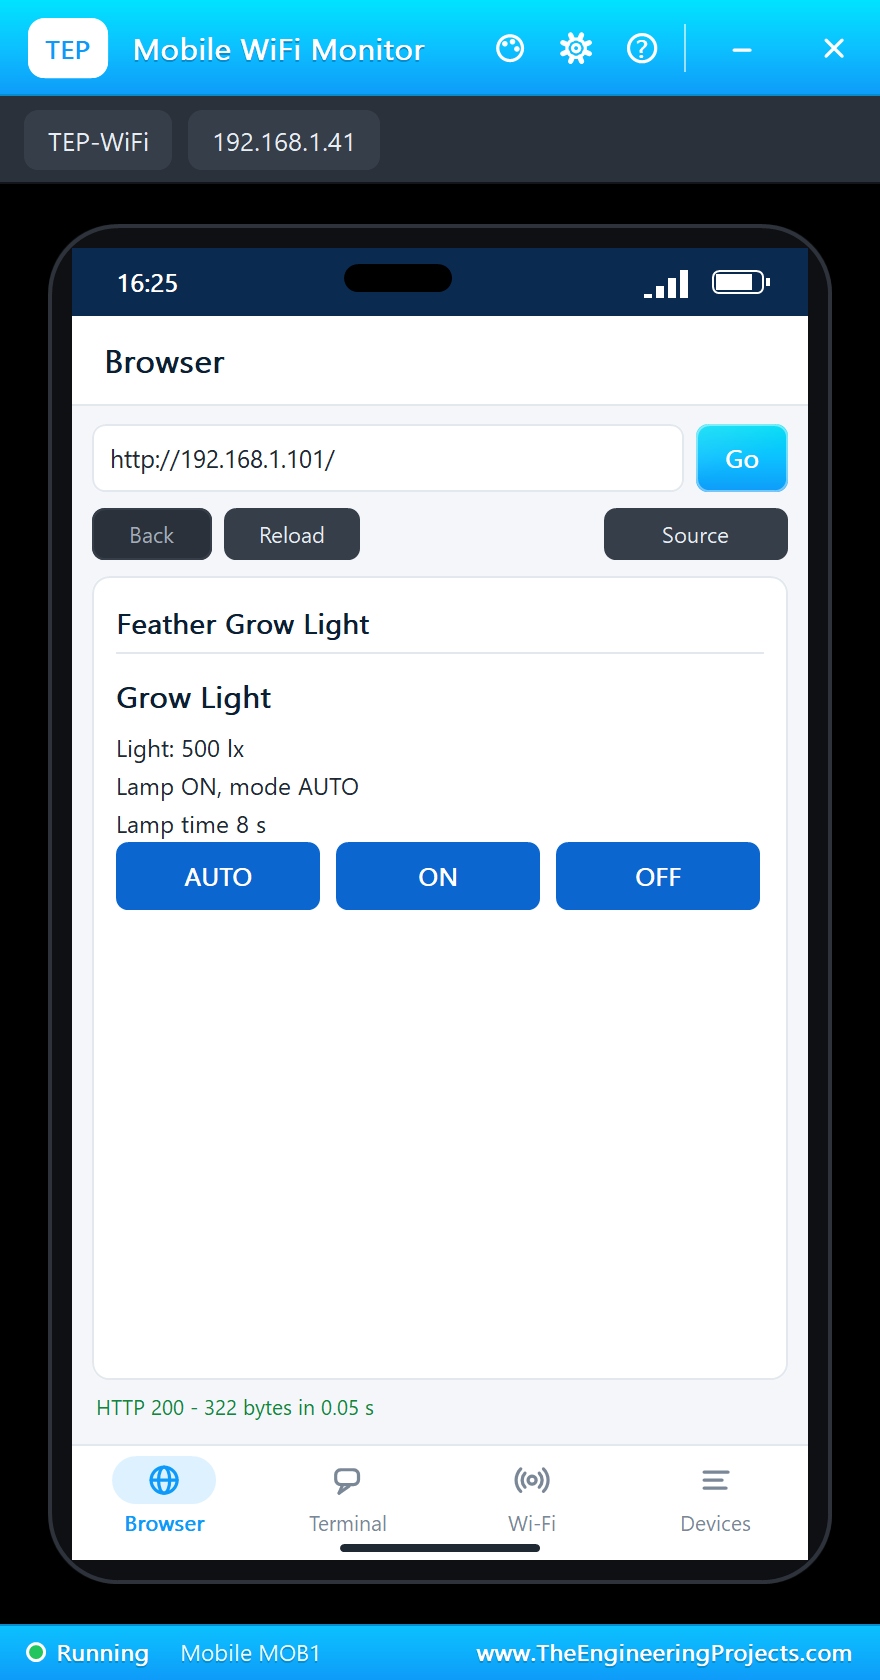
The page shows the light, the lamp and the time it has been on, with AUTO, ON and OFF buttons. The buttons are plain links, each with its own address, and /json gives a computer the same facts:
void handleJson() {
  String j = "{\"lux\":" + String(lux, 0) + ",\"lamp\":\"" + String(lamp ? "ON" : "OFF") + "\",\"mode\":\"" + String(MODES[mode]);
  j += "\",\"lampSeconds\":" + String(lampSeconds) + "}";
  server.send(200, "application/json", j);
}
Run the Demo
Press Run. The serial monitor opens, the sensor answers and the board joins TEP-WiFi. The BH1750 starts at 500 lx, so the lamp goes on straight away:
ESP32 Feather V2 Grow Light - The Engineering Projects
BH1750 ready
Connecting to TEP-WiFi
Grow light page: http://192.168.1.101/
>> Lamp ON (too dark, 500 lx)
Light 500 lx  lamp ON  mode AUTO  lamp time 1 s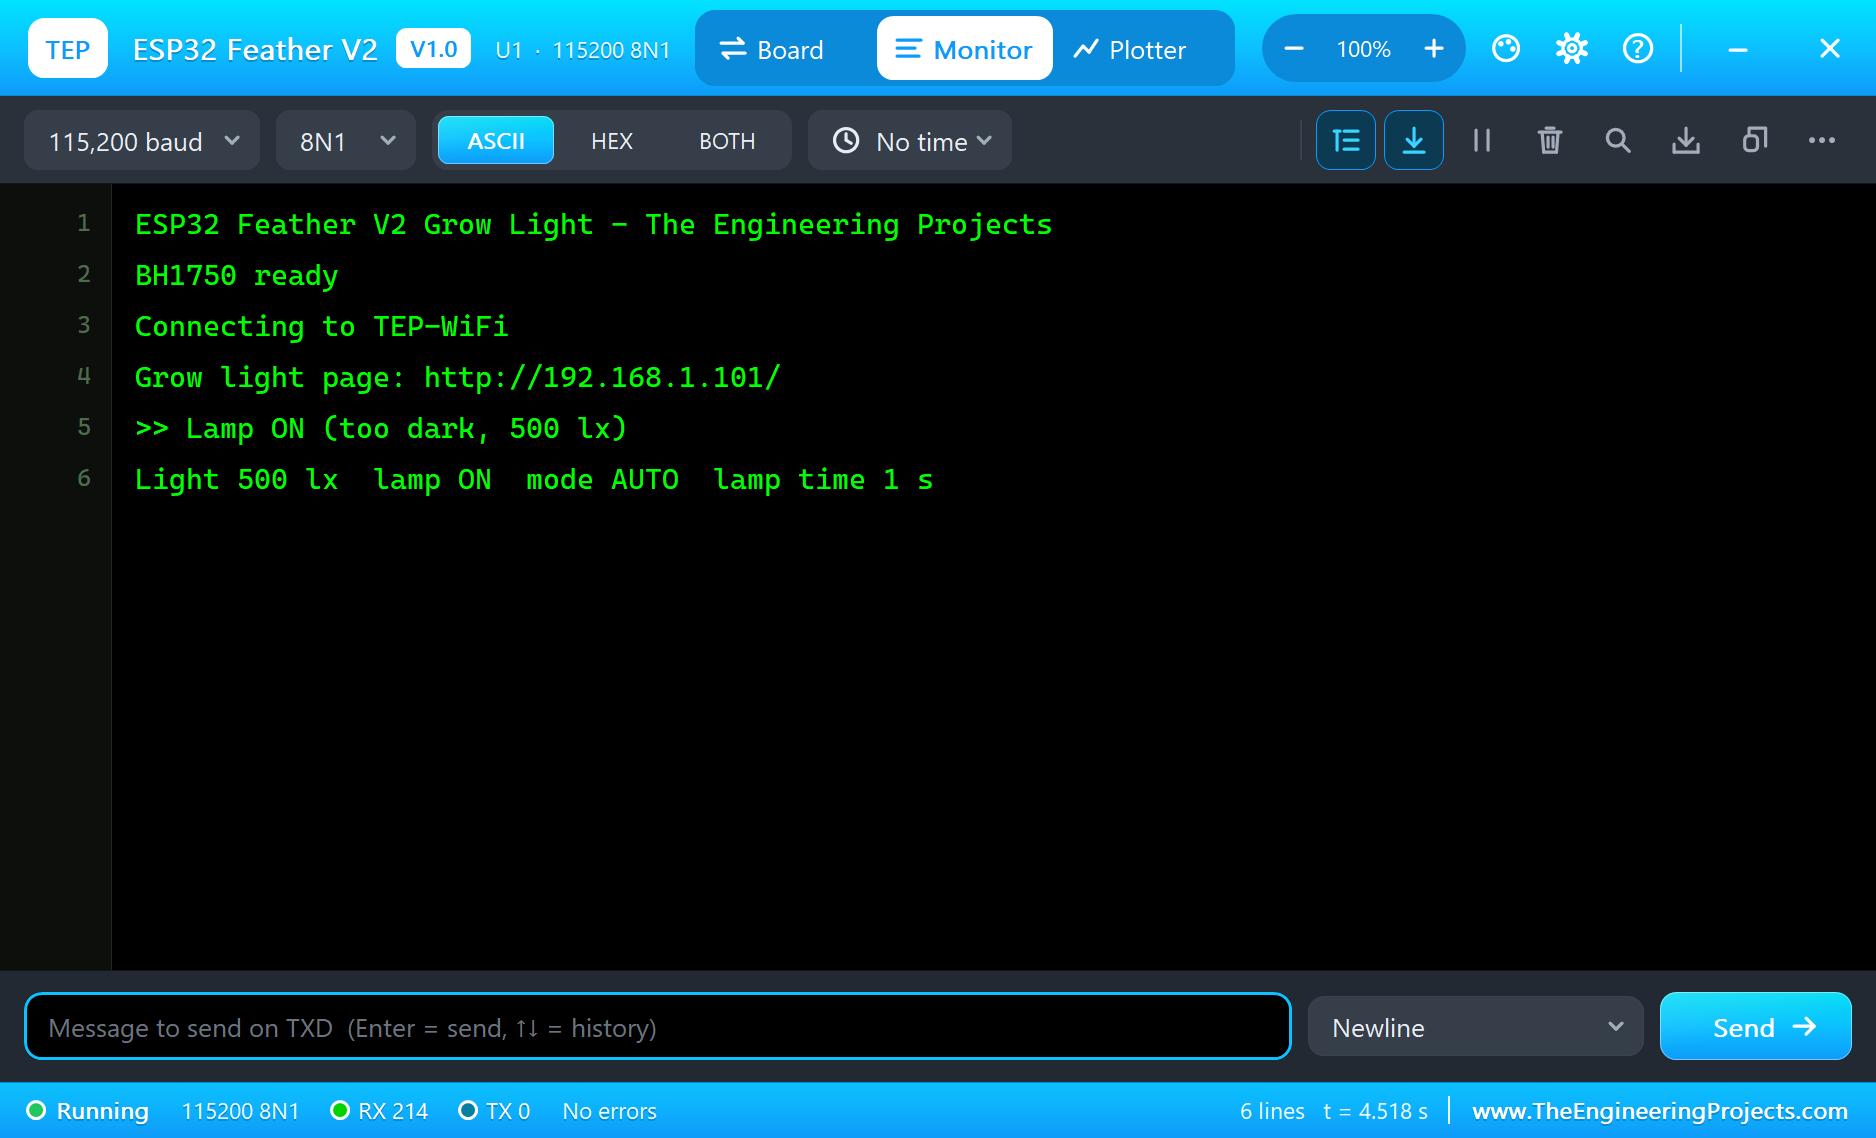
Open the Page
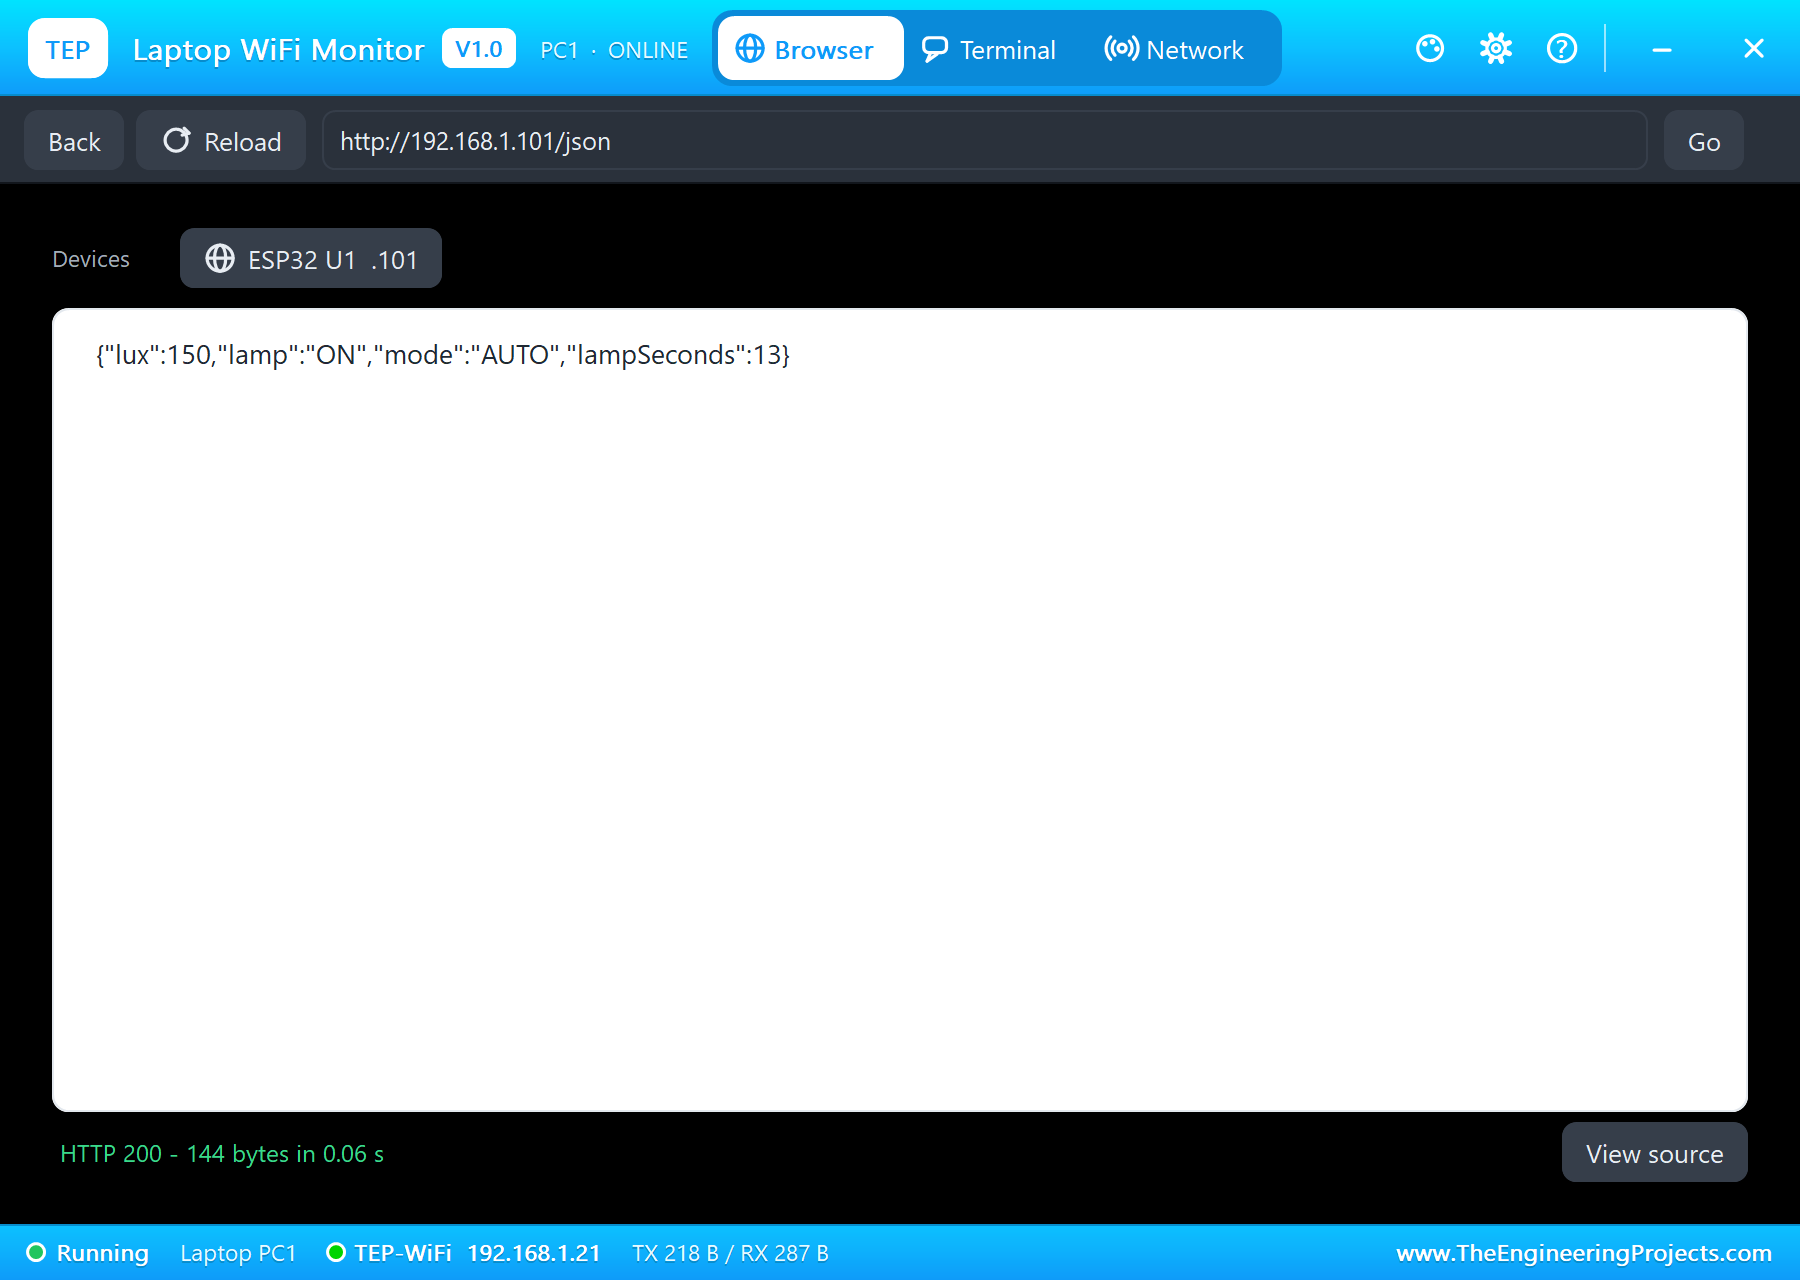
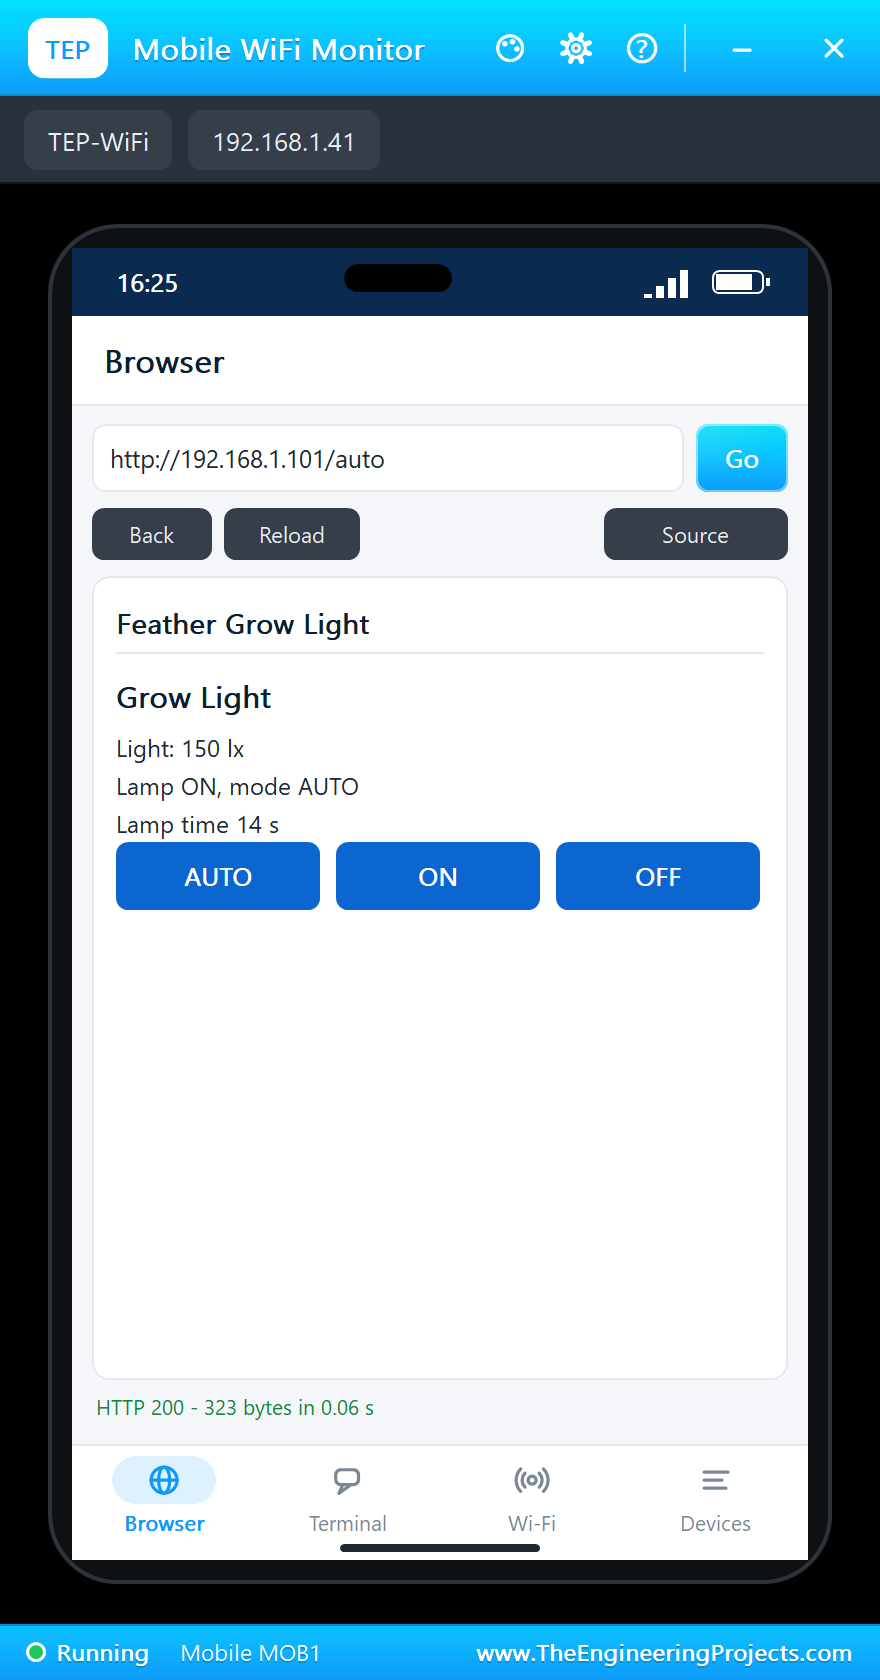
On the laptop click Browser and Go (the home page is http://192.168.1.101/json); on the phone the same with http://192.168.1.101/:
The Sun Comes Out
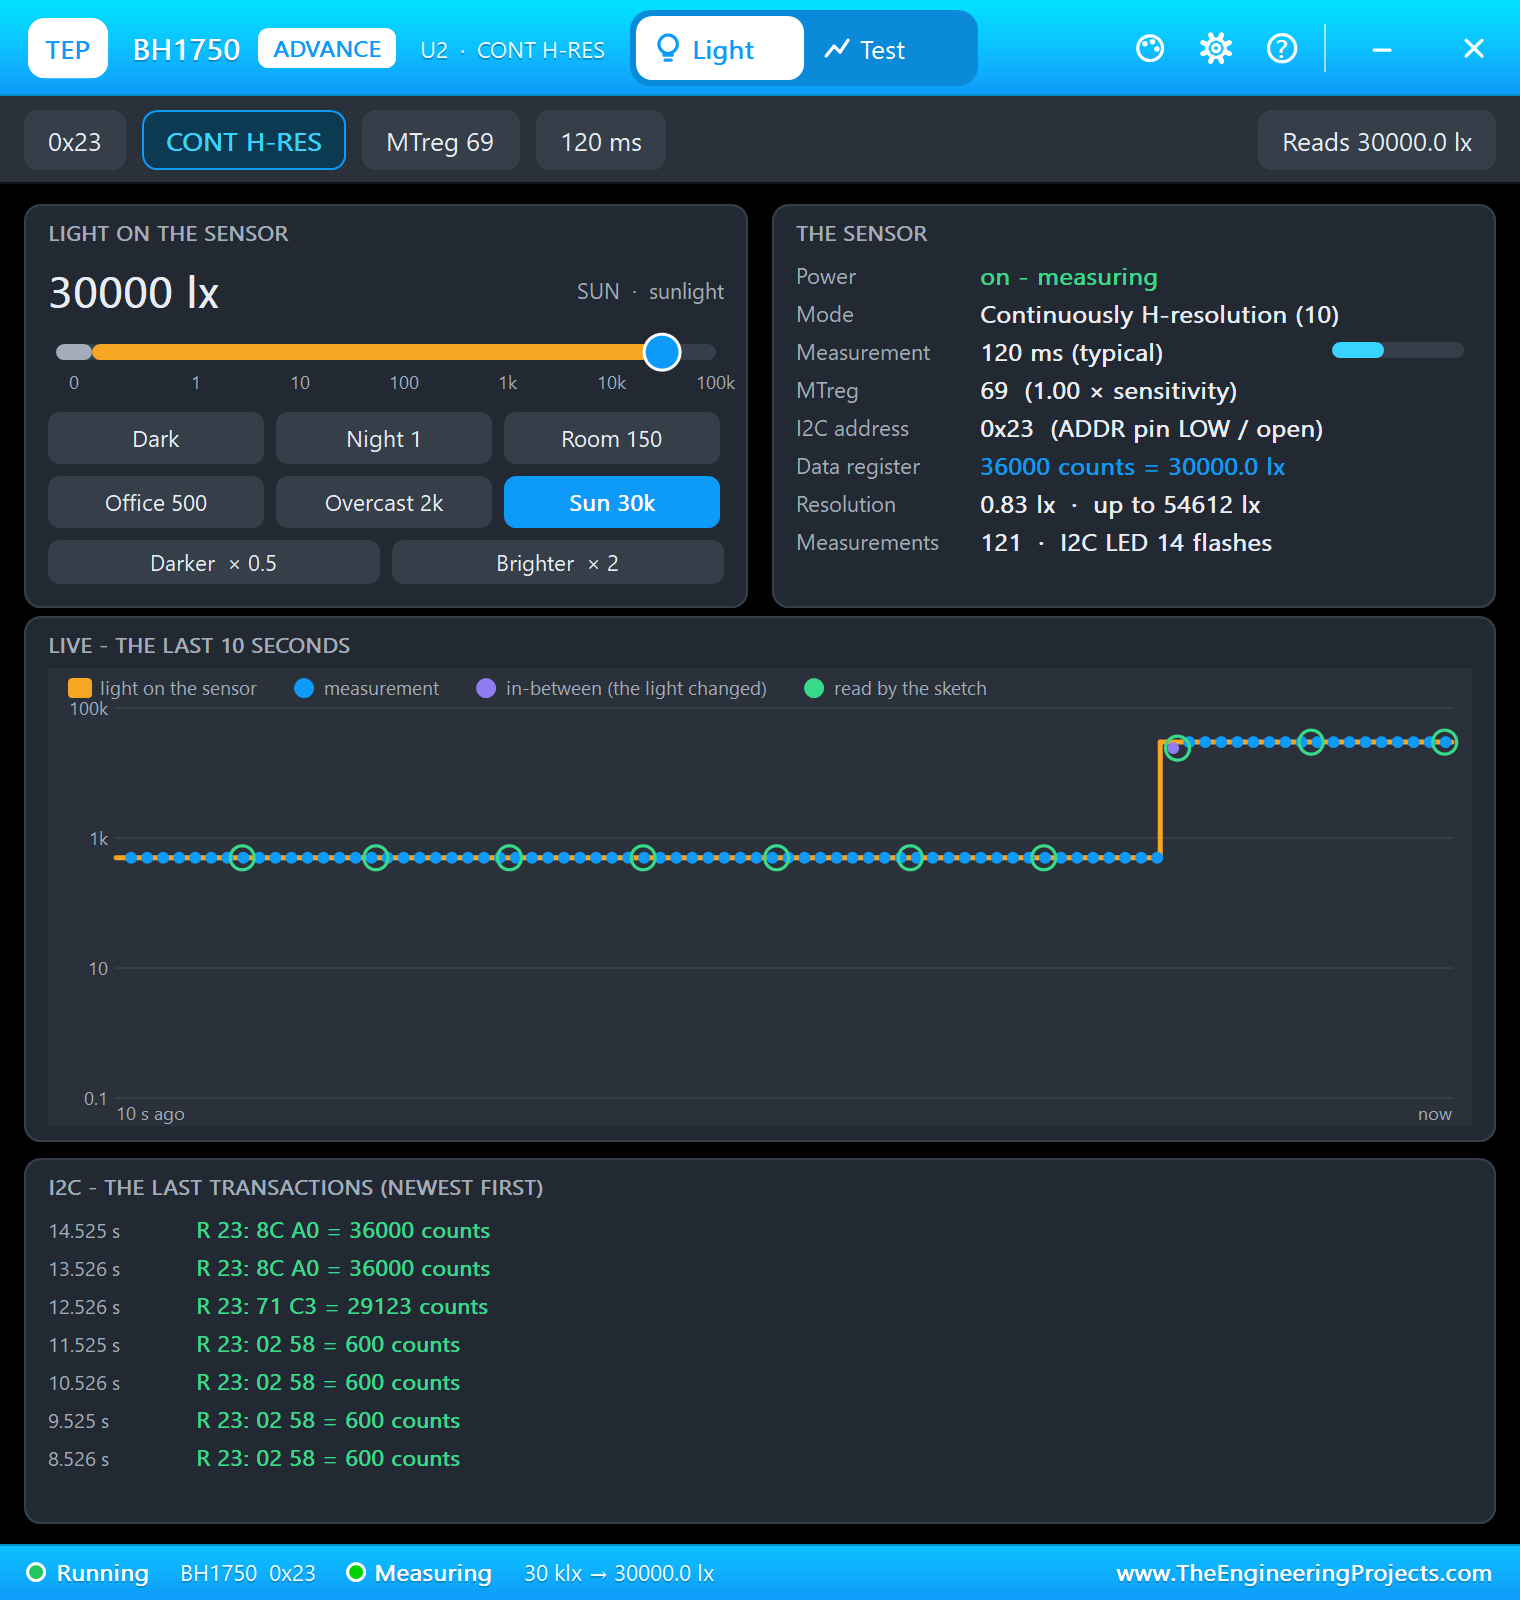
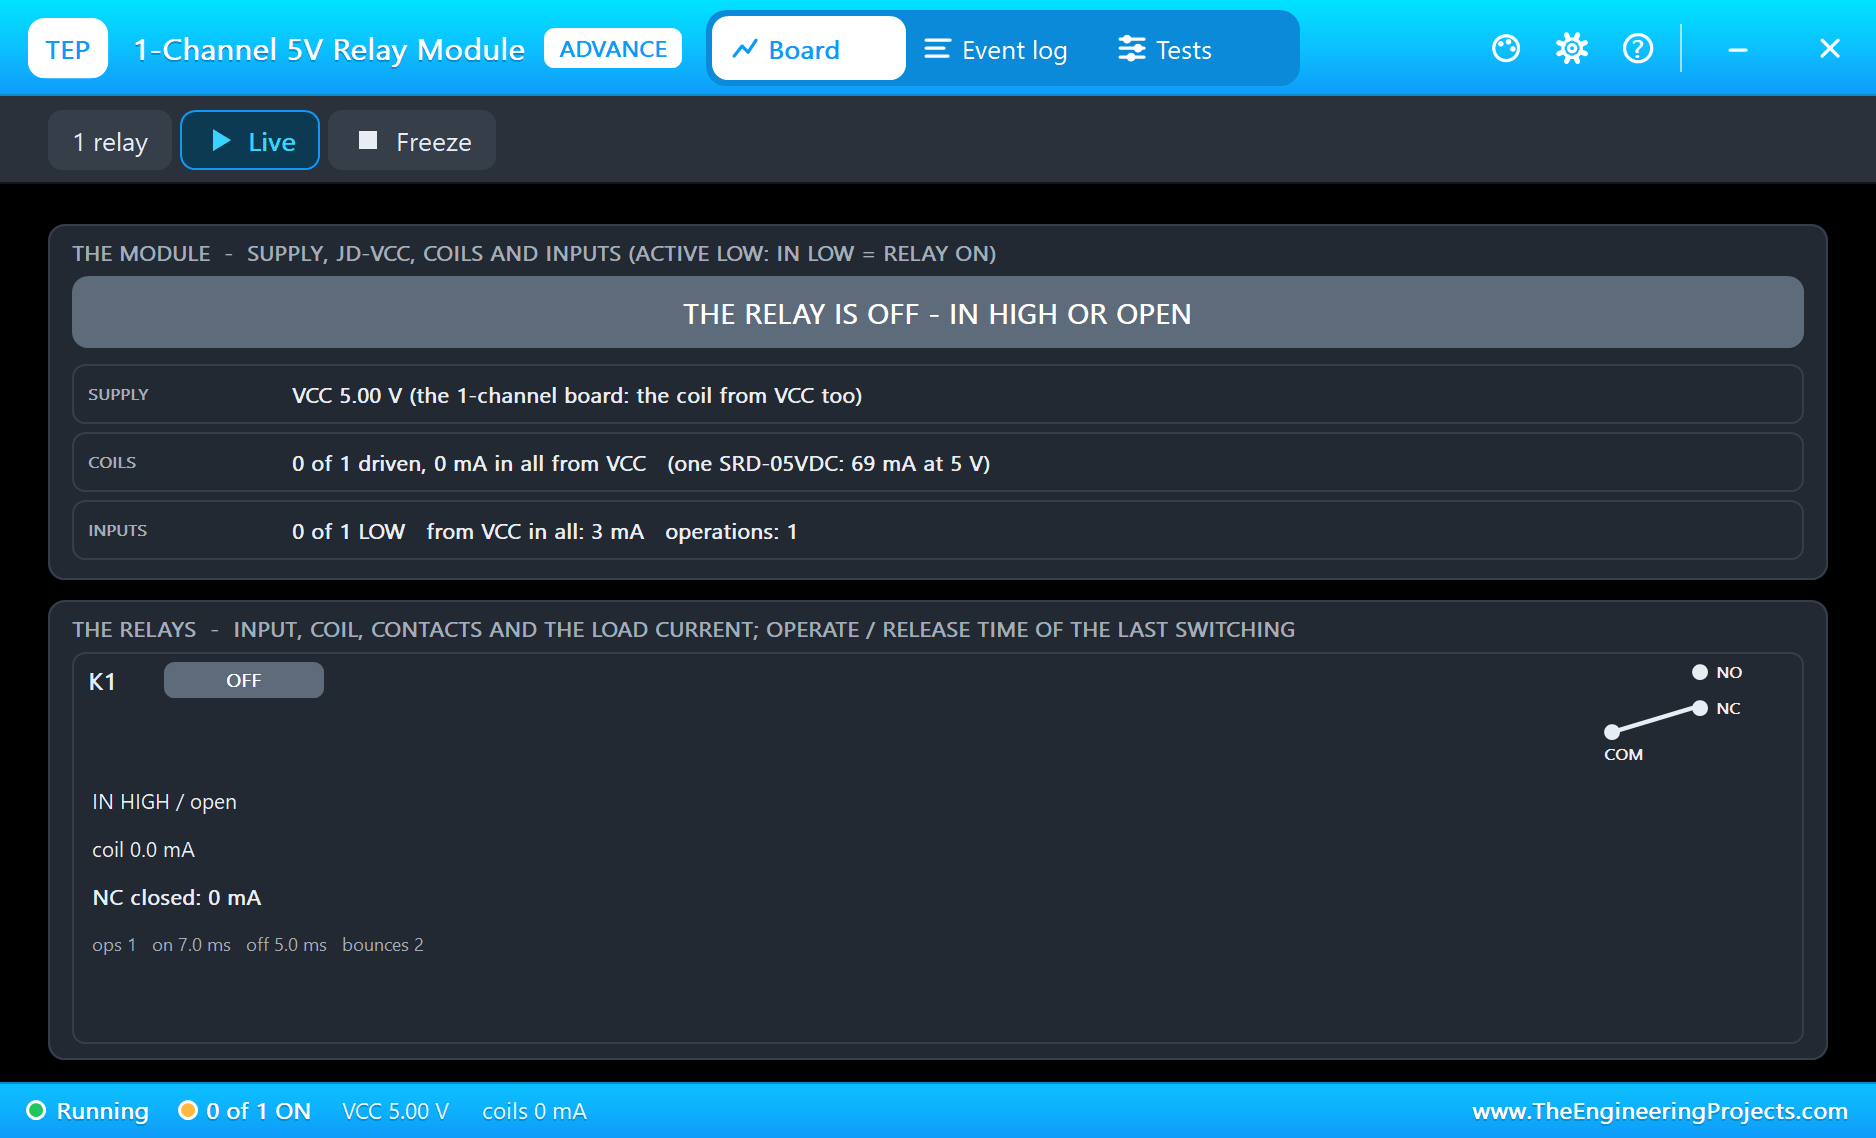
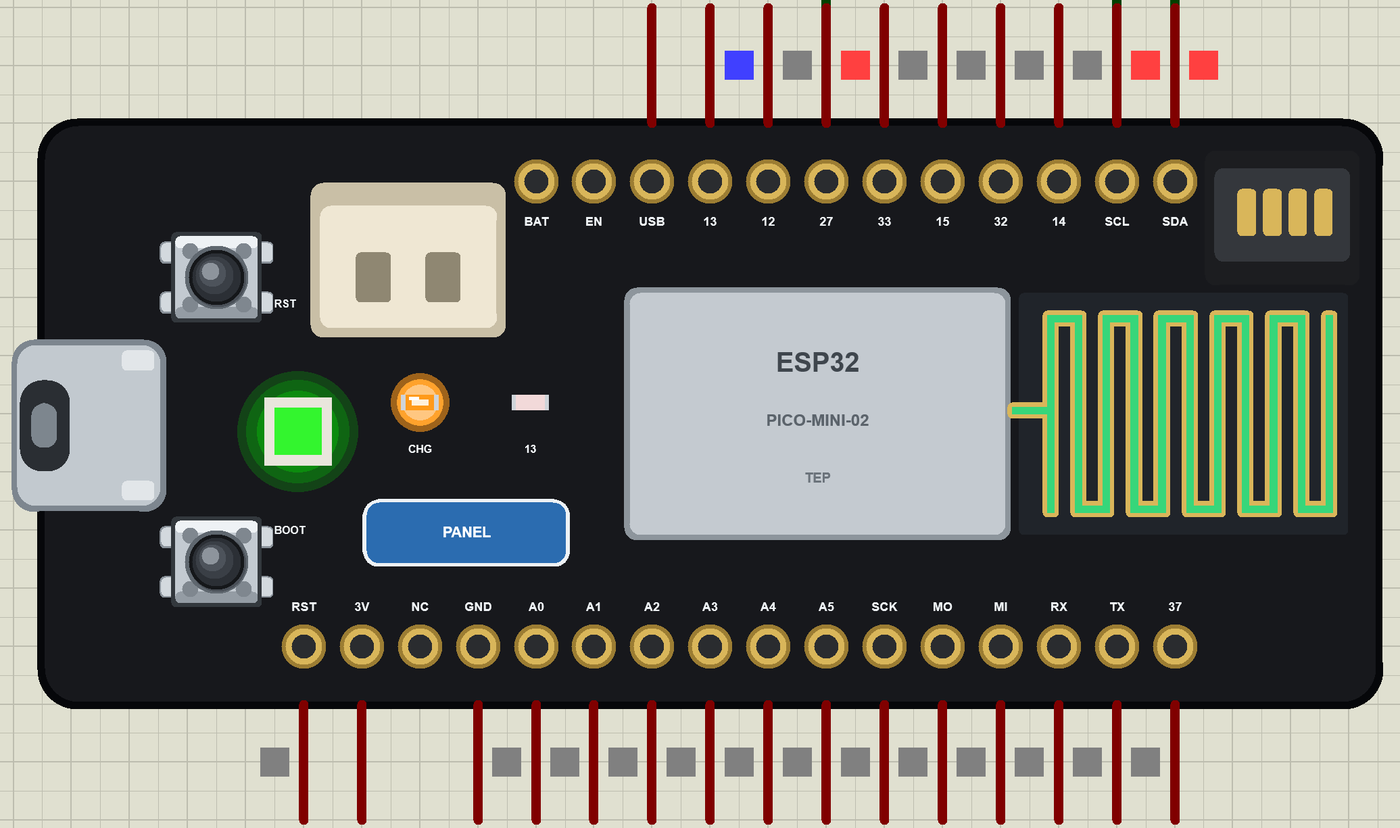
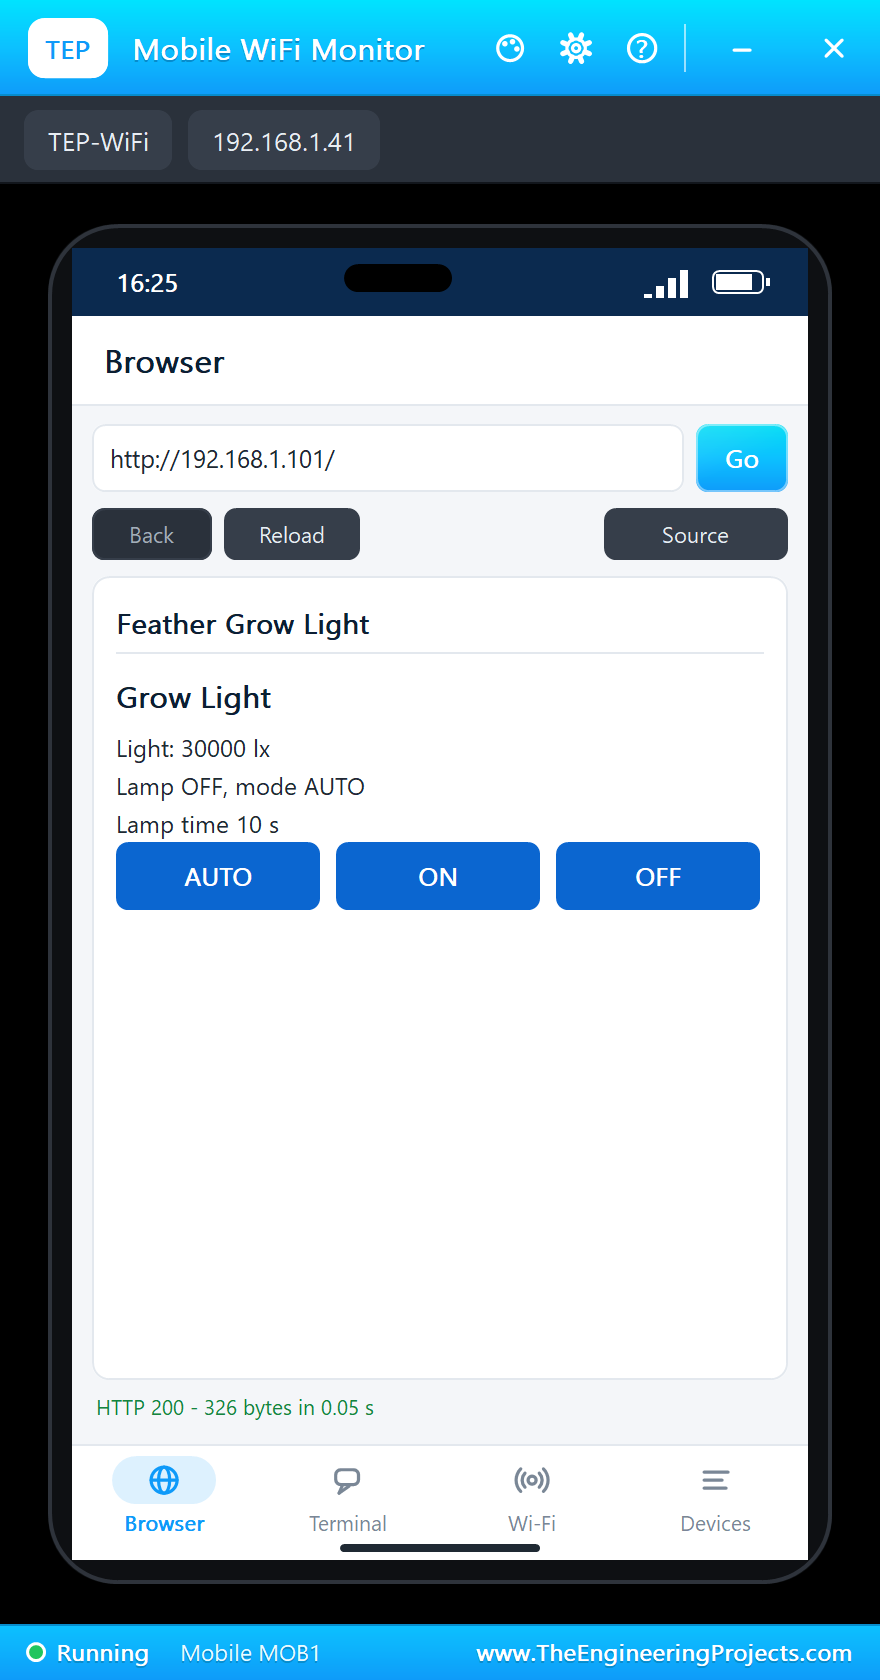
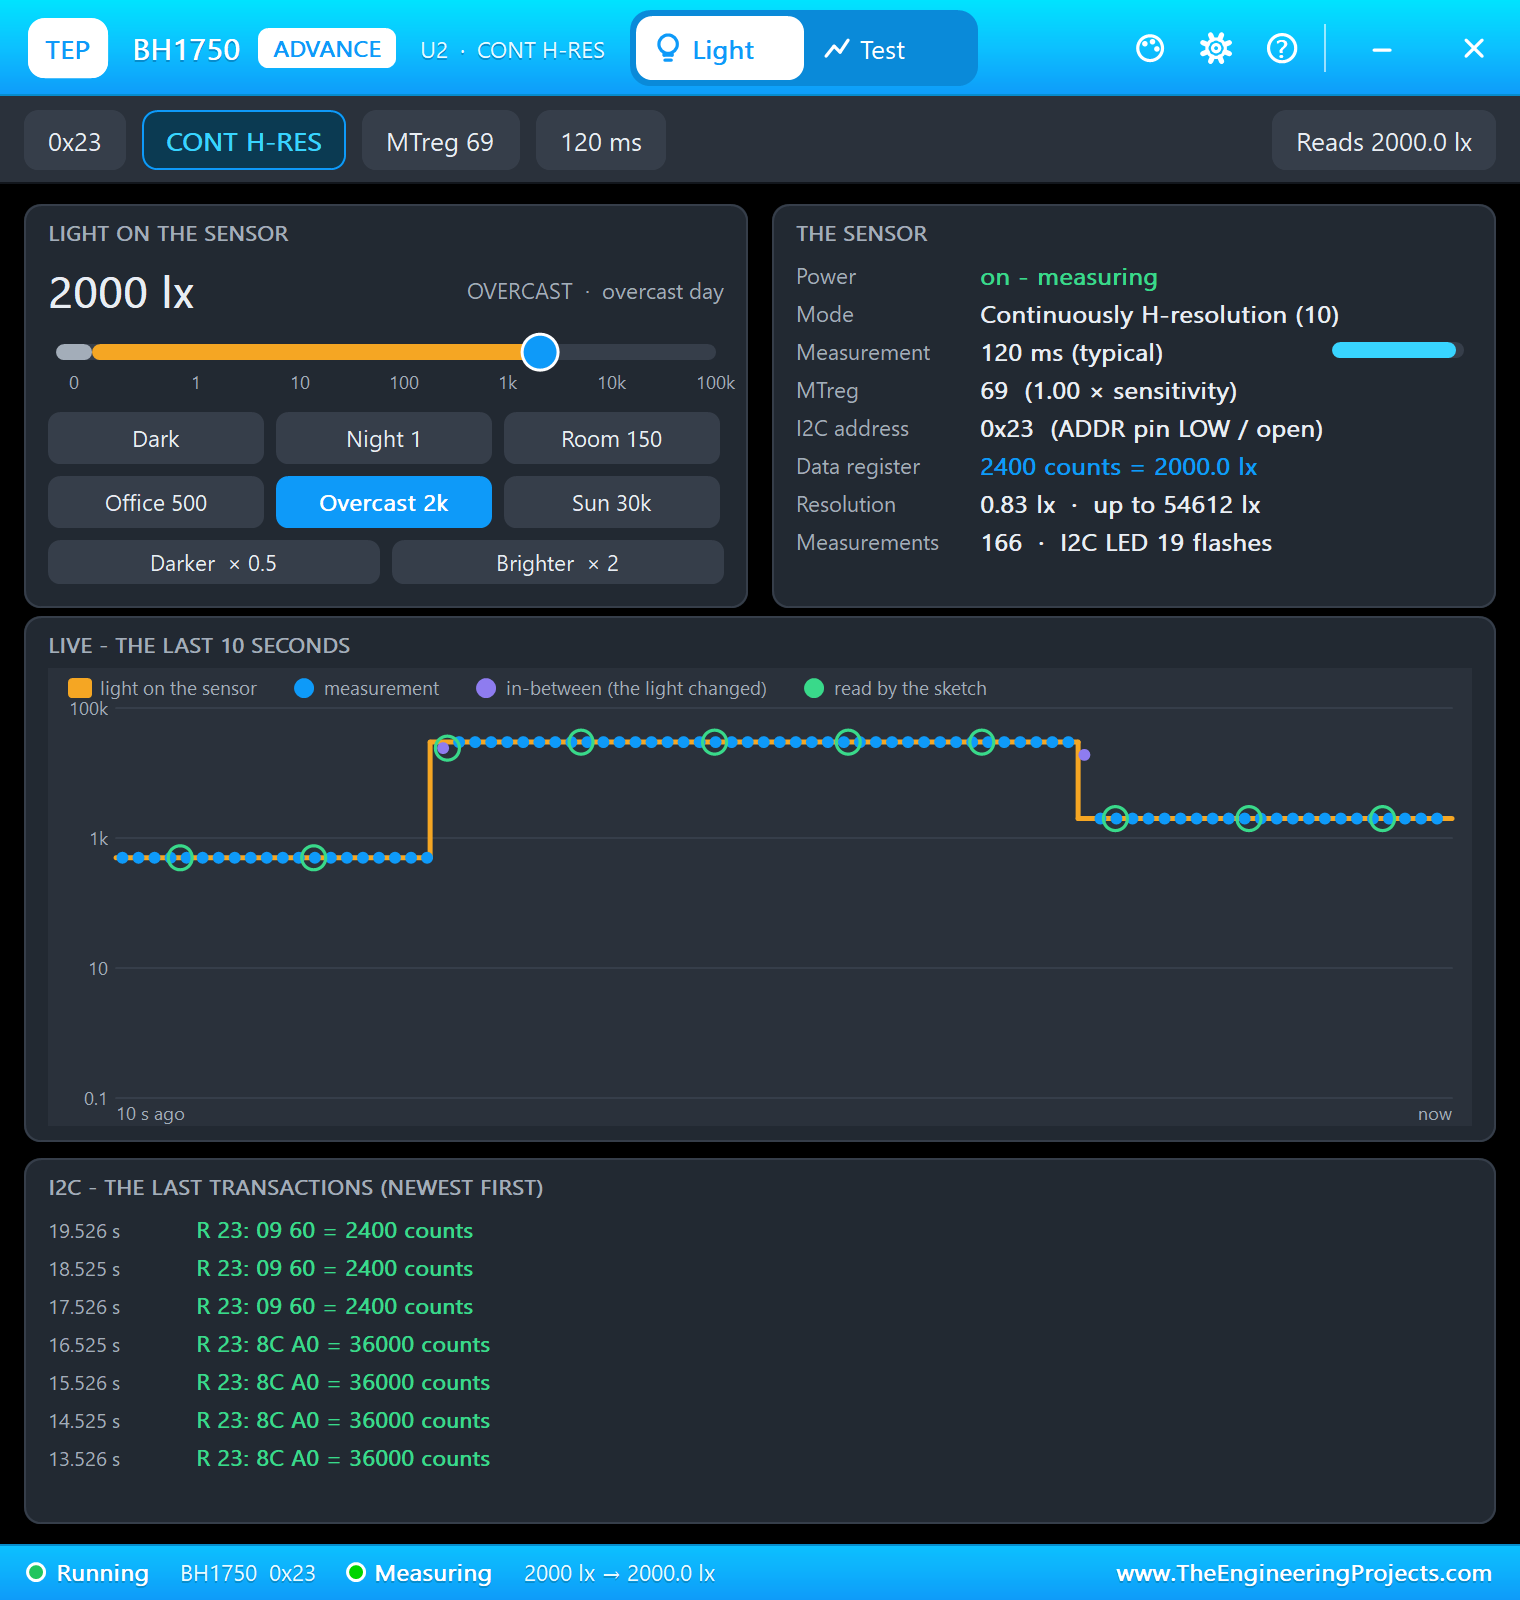
Click Sun 30k on the BH1750's pop-up. The sensor needs 120 ms for one measurement, so the reading taken while the light changed comes out in between, 24269 lx in our run, and the next ones read 30000 lx. Either way the lamp goes off and the NeoPixel turns green:
A Passing Cloud
Click Overcast 2k. The light falls to 2000 lx, far less than a moment ago, and yet nothing happens: 2000 lx is above the upper limit. Even a reading inside the gap would change nothing. This is the hysteresis at work.
Evening
Click Room 150. Now the light is below 800 lx and the lamp comes on again. The laptop's JSON follows:
By Hand
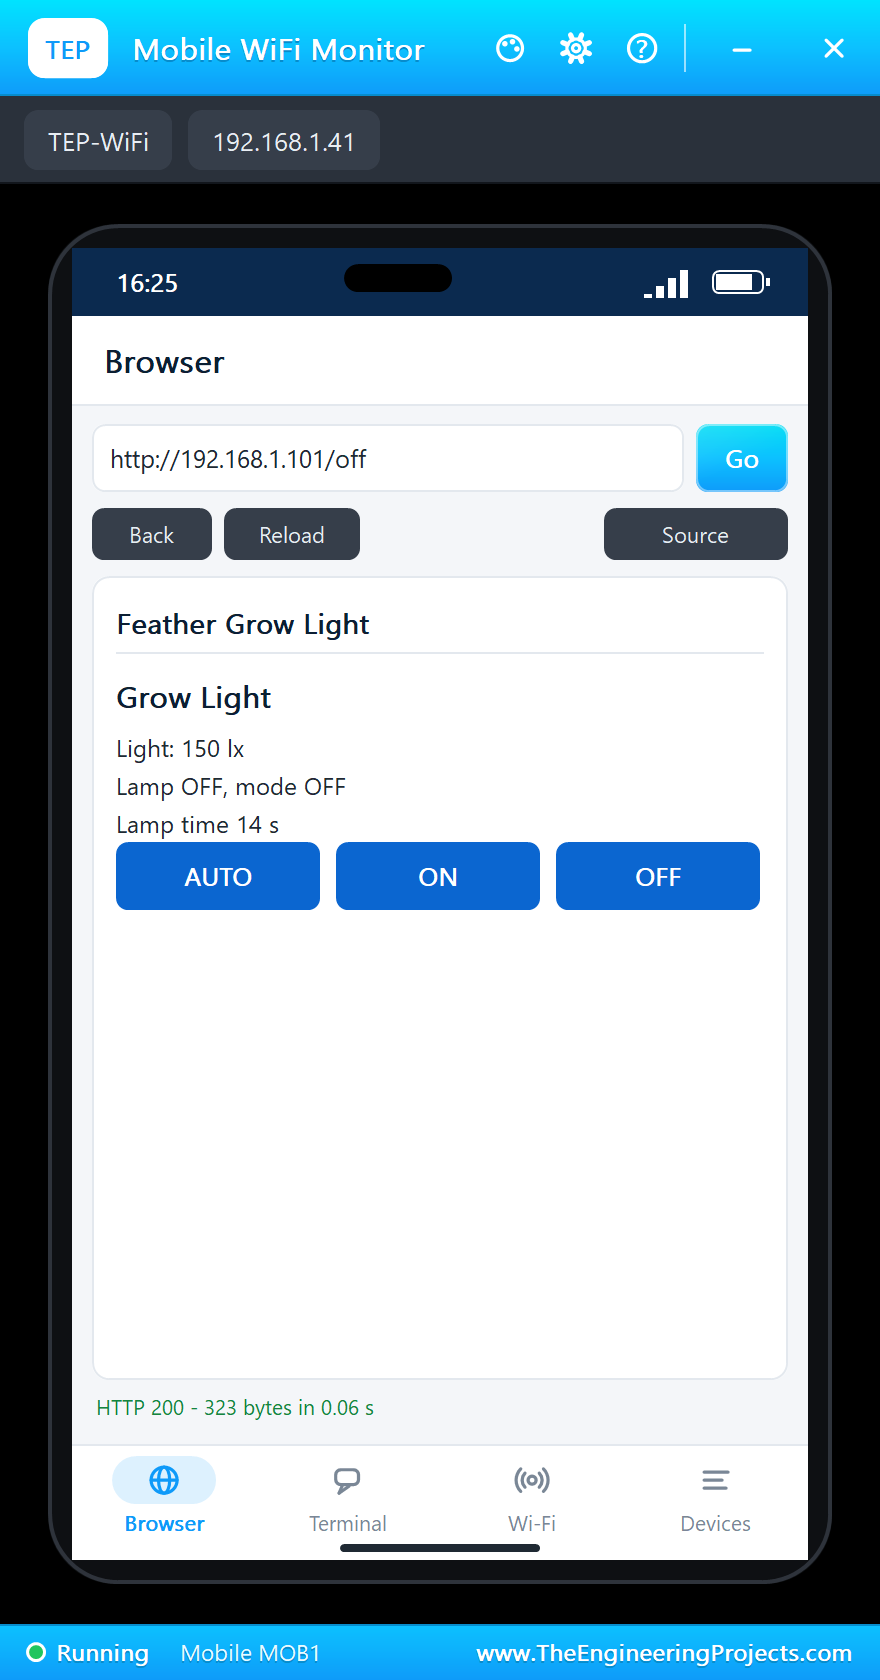
Sometimes you want the lamp off whatever the sensor says, for example while you work on the plants. OFF on the phone forces it and the NeoPixel turns blue, so nobody forgets the board is not in AUTO:
AUTO gives the control back to the sensor, and the lamp comes on again at once:
The built-in serial monitor, in the look of our TEP Serial Monitor Advance for Proteus, has followed everything:
>> Lamp OFF (enough daylight, 24269 lx)
Light 24269 lx  lamp OFF  mode AUTO  lamp time 10 s
Light 2000 lx  lamp OFF  mode AUTO  lamp time 10 s
>> Lamp ON (too dark, 150 lx)
Light 150 lx  lamp ON  mode AUTO  lamp time 13 s
Mode OFF (the web page)
>> Lamp OFF (by hand, 150 lx)
Mode AUTO (the web page)
>> Lamp ON (too dark, 150 lx)
Light 150 lx  lamp ON  mode AUTO  lamp time 15 s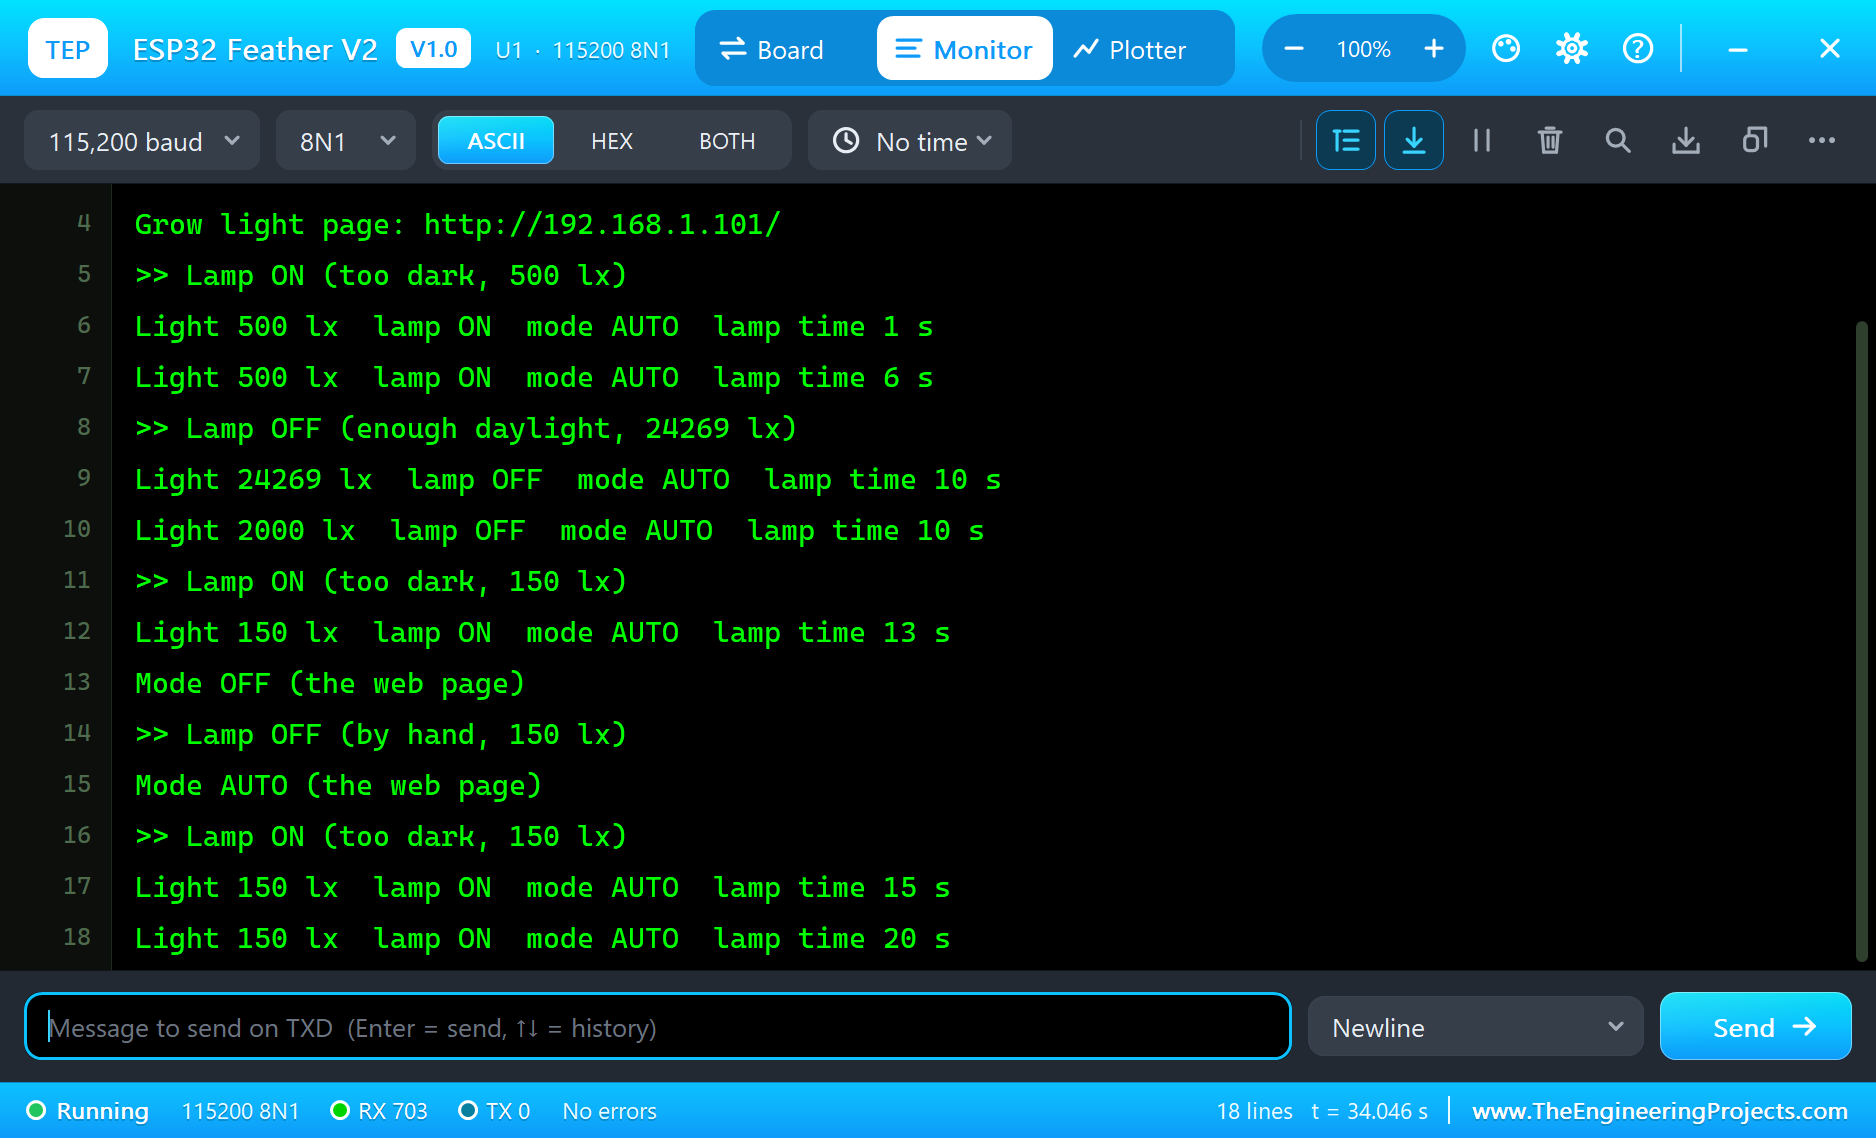
Try It Yourself
- Click Darker and Brighter on the BH1750's pop-up to walk through the gap and see where the lamp changes.
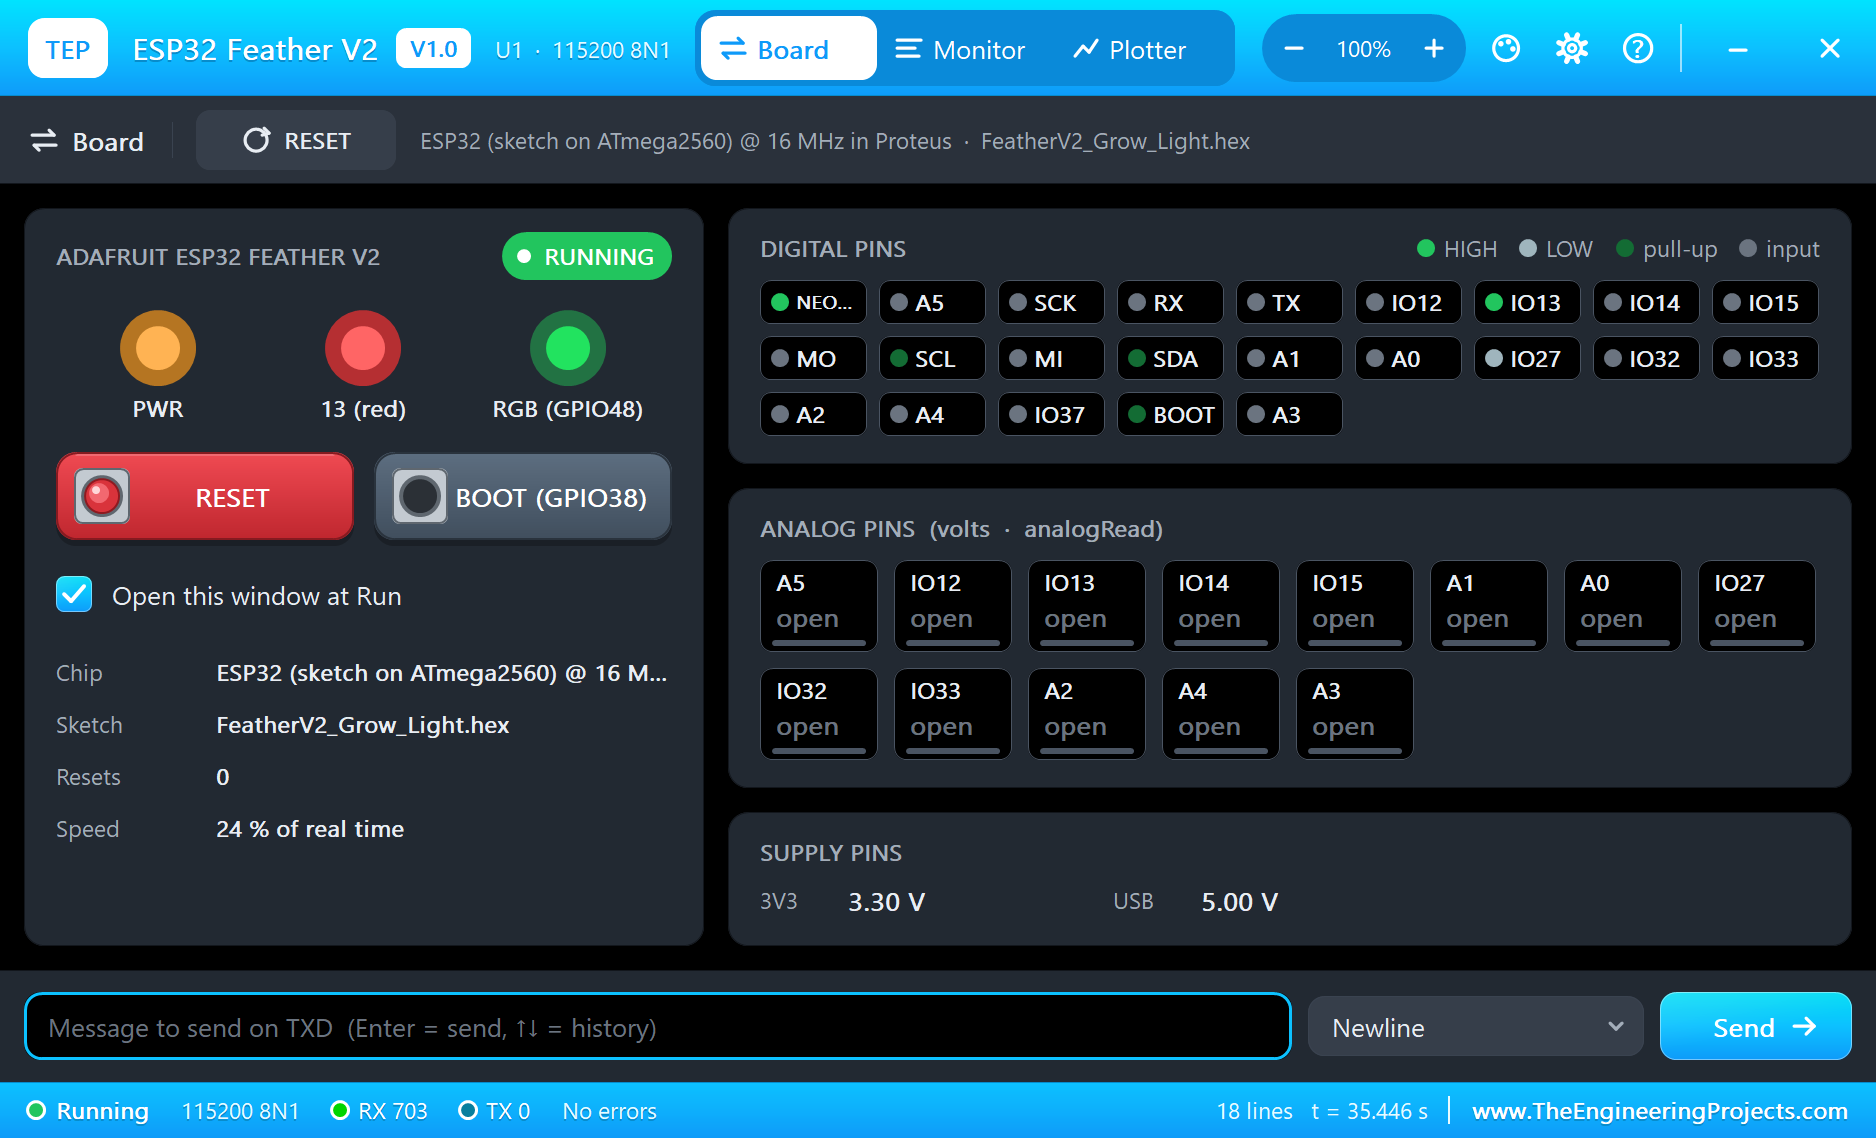
- Press the BOOT button on the monitor's Board tab: it steps AUTO, ON and OFF.
- Type
STATUS,AUTO,ONorOFFin the monitor. - Change
LAMP_ON_LXandLAMP_OFF_LXfor your own plants and rebuild.
Ideas to Extend the Grow Light
- Add up the day's light and switch the lamp off once the plants have had enough.
- Use NTP to keep the lamp off at night, so the plants get their dark hours.
- Add a soil moisture sensor and a pump for a complete greenhouse controller.
- Log the day's light to the laptop over TCP.
Your Own Sketches
Write the sketch in the Arduino IDE with the board ESP32 Feather V2 (TEP Proteus), use Sketch > Export Compiled Binary and set the board's PROGRAM property to the .hex. For a real Feather select "Adafruit Feather ESP32 V2" in Espressif's "esp32" package and upload - the same sketch, with the same names.
Things to Know Before Using a Real ESP32 Feather V2
- GPIO2 powers the extras: set
NEOPIXEL_I2C_POWERHIGH or the NeoPixel and the STEMMA QT socket stay dark. - The Wi-Fi pins: A0 and A1 use the second ADC, which does not work while Wi-Fi is on; use A2, A3 or A4 for analog input.
- 3.3 V logic: the pins are not 5 V tolerant; a 5 V relay module may need a transistor.
- Never switch the mains on a breadboard: a real grow lamp needs a proper enclosure and fuse.
- The battery: check the polarity of the JST plug; LiPo cables differ between makers.
Properties of the ESP32 Feather V2
| Property | What it does |
|---|---|
| PROGRAM | the sketch: a .hex from TEP Boards for Proteus (board "ESP32 Feather V2") |
| WIFISSID, WIFIPASS | the router in range (TEP-WiFi, 12345678) |
| MONITOR, BAUD, AUTOOPEN | the built-in serial monitor: on, its baud rate (115200), open at Run |
| TIME | the clock for NTP: PC or a fixed UTC time |
Troubleshooting
- "BH1750 NOT FOUND": SDA and SCL on the Feather's SDA and SCL pins, ADDR on GND.
- The relay never clicks: it is active LOW, and its IN must be on the pin 27.
- The board stays off the network: the sketch's SSID and password must match WIFISSID and WIFIPASS.
- A number goes wrong above 32767: int is 16 bits in the simulation - use long.
- The page shows old values: use Reload; the monitors do not reload by themselves.
Limitations of the Simulation
- Your sketch gets 8 KB of RAM in the simulation, not the real board's 2 MB of PSRAM, and there are no FreeRTOS tasks and no second core.
- Bluetooth, the USB chip, the battery, the charger, the JST socket and the EN pin are not modelled; the STEMMA QT socket is a drawing, so use the SDA and SCL pins.
- The router, the addresses and the windows are TEP additions.
- Feather is a name of Adafruit Industries and ESP32 of Espressif Systems; this library is not made or endorsed by them or by Labcenter.
- Tested in Proteus 8.5 in October 2026 (the demo as shipped, about 36 s of simulation). Proteus 7 is not supported.
So, that was all about the Adafruit ESP32 Feather V2 Library for Proteus. I hope it helps you build and test your Feather projects before you touch the hardware - the sensor, the relay, the NeoPixel, the Wi-Fi and the web page in one simulation. If you have any questions, ask in the comments and I will help you out. Till the next tutorial, take care and have fun!