


Introduction to MPLAB Compiler


Steps To Follow
I believe that you have installed the MPLAB Software which I have emailed to all the subscribed users on our site. If anyone didn't receive it yet then get subscribed on our site and I will email it to you. You should also have a look at these Top 3 PIC C Compilers. Now follow these steps carefully and if you feel any problem let me know in comments.
Step 1
- Open the software by clicking on the icon placed on your desktop or in the start menu. It will open as shown in the figure below:
Step 2
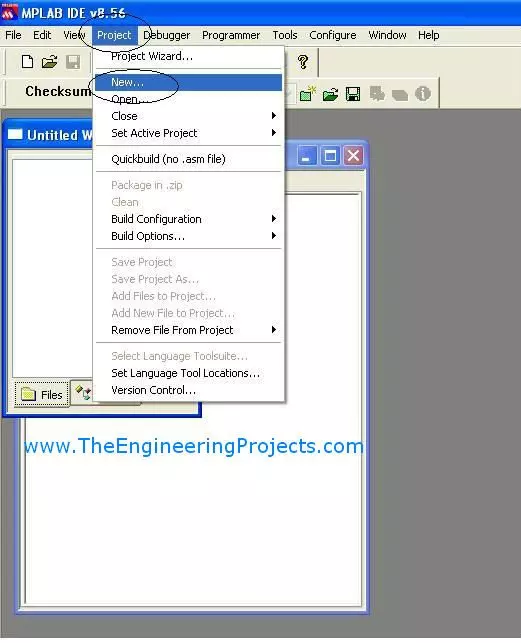
- Now first we need to make a new project to start our programming so click on Project and then New.
Step 3
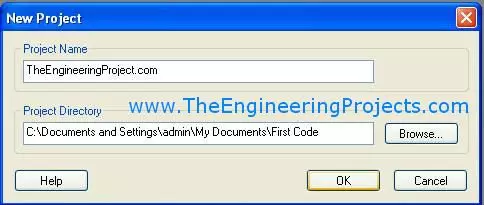
- By clicking on New, it will open a new dialog box, where you need to put the Project name and the destination of your project and click OK.
- I recommend to choose a separate folder for each of your project so that the files never mixed up.
Step 4
- After clicking OK you will see that nothing changed and you are unable to see your newly created project.
- So to view your project click on the View and then Project as shown in image below:
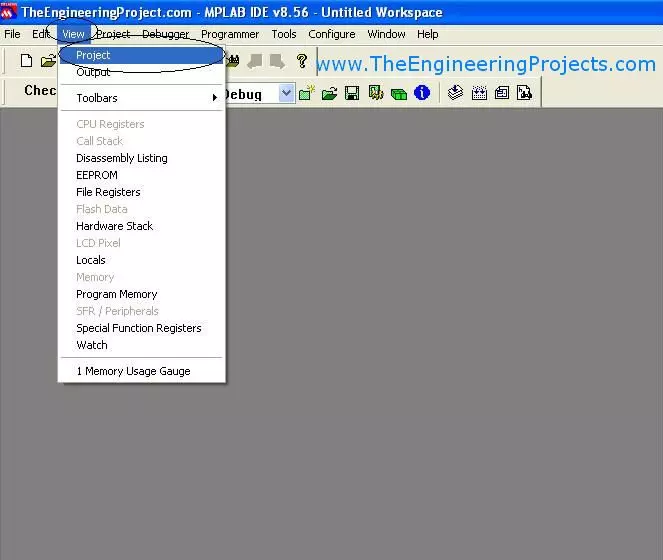
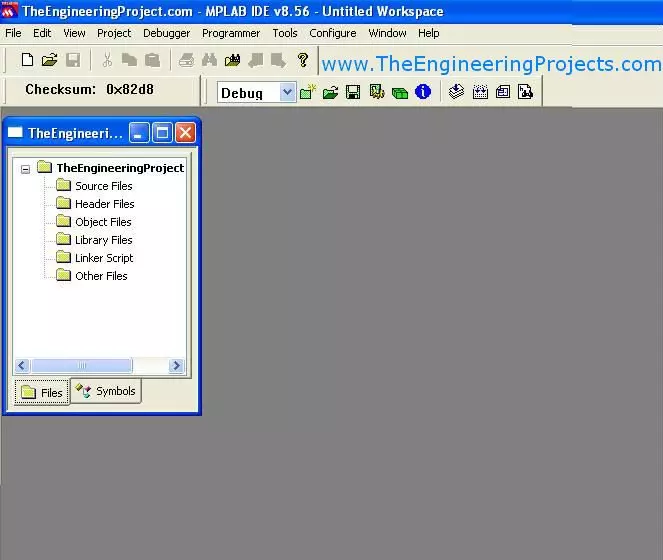
- Now after clicking on project a small window on the right side will open.
- Its called Tree in programming language and it shows all the files you are using in your project but right now its empty because you didn't add any file in your project, you have just created it.
Step 5
- Lets add files in your project. So for this click on the File and then New and you will see a file will open with the name Untitled. this is the file in which we will add our programming code.
- But first we need to add it in our project otherwise it will remain just a notepad file.
- Sorry, I don't have image for this step actually it got lost, i think its not much difficult :))
Step 6
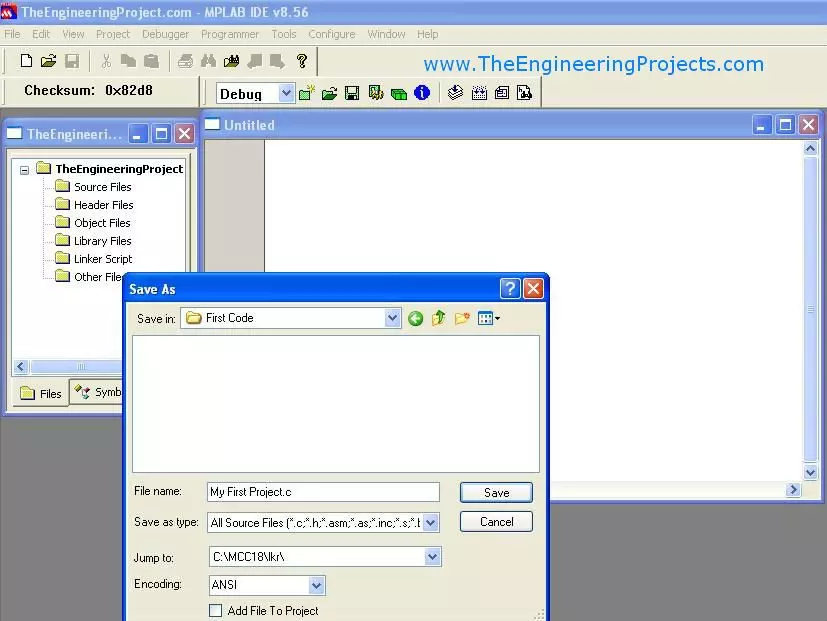
- So now to add you file in your project, click on the File and the Save as.
- A new dialog box will open, now enter name of your project and add it in the same location where you created your project.(it's not necessary but files of project should remain in the same location) and then click Save.
- Here comes the important part must add .c extension after the name of your file. This .c extension will tell the compiler that its our C programming file.
Step 7
- Now we have created our c file but we didn't add it in our project. ( Saving in same location doesn't mean that you have added it your project)
- So to add the file in your project, right click on the Source File in the left side panel and then click on Add Files as shown in the image below.
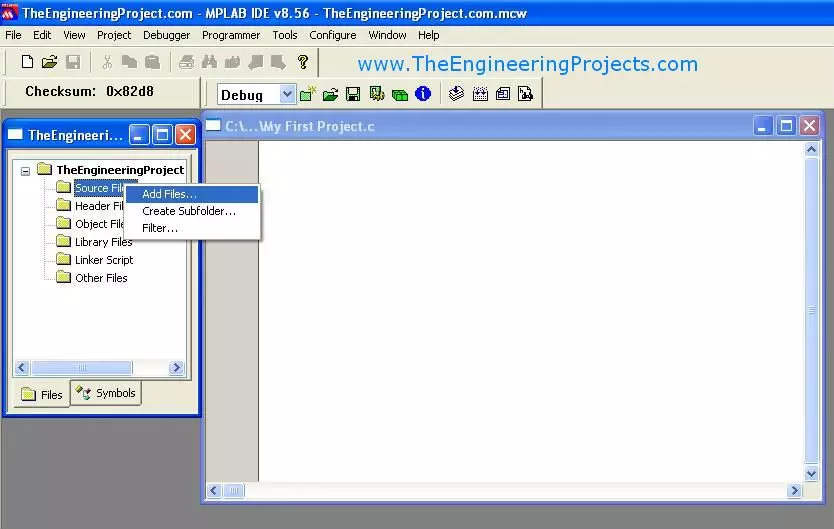
- It will open a dialog box now select your recently created file with the extension .c and click save and you will see that it will appear under the Source File folder.
Step 8
- Now we need to add the header, library and linker files in our project.
- So repeat the same process and right click on the Header Files and then Add Files.
- Now the question is where to find the header file.Move to the location where you have installed your C compiler, the default location is C drive and the name is MCC18.
- Open MCC18 Folder and there you will see many folders.
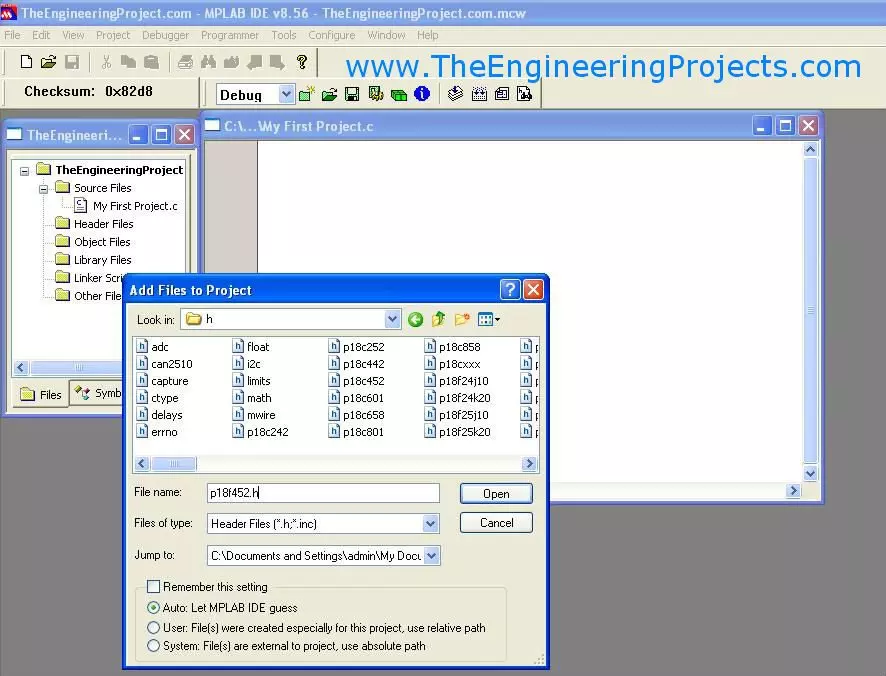
- To add the header file click on the folder with the name "h" (h for header).
- In this folder you will see a lot of files, which file to select depends on the PIC you are using.
- As I am using PIC18F452 so I wrote p18F452 in the File name box and in the suggestions i got my file with the name p18f452.h and i selected it and click save as shown in the image below.
Step 9
- Repeat the same process for linker and library files.
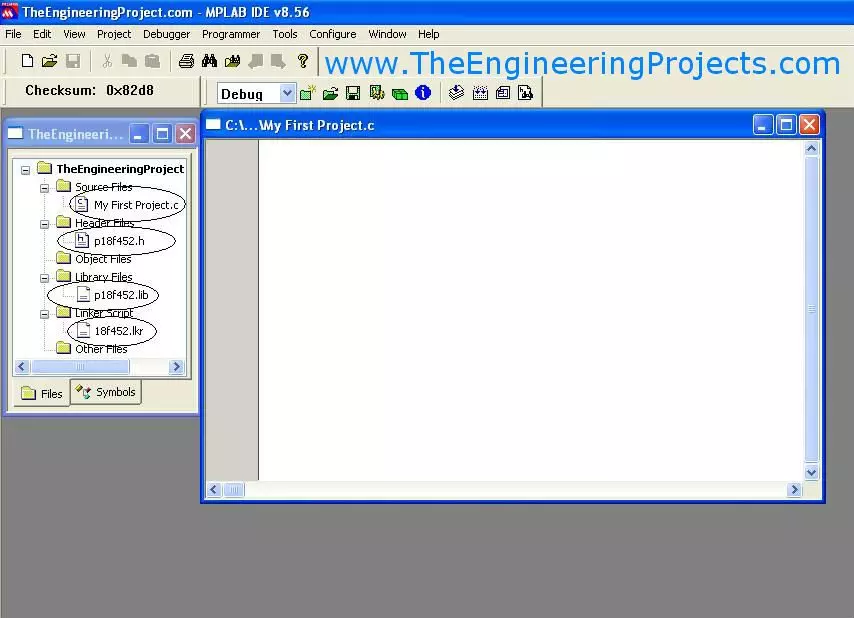
- For linker file open the folder with the name "lkr" in the MCC18 folder and for library file open the folder "lib" and select the file with name of your Microcontroller.
- I have added all my files as shown in the image below and now my project is complete.
- That's all our project structure has completed, now if you want to do coding just add it in your newly created .c file and if you want to save the project then click on File and then Save Workspace and it will save your project.
- In our next class we will add the code in the .c file and execute it on our pic.
×
![]()


