


Project Files of Raspberry Pi 5 CO2 Monitor with Ventilation Fan - Proteus Simulation
 Libraries
 Code
 Projects
 Simulation
pi-5-co2-monitor-tep-v1-0-2687d0c352954f8cbcb5f2cb337d4685.zip
Raspberry Pi 5 CO2 Monitor with Ventilation Fan - Proteus Simulation V1.0
Raspberry Pi 5 CO2 Monitor with Ventilation Fan - Proteus Simulation V1.0 comes as a ZIP archive of 150 files (14.9 MB, 29.6 MB unpacked) holding Proteus library files, simulation model DLLs, a Proteus simulation, source code and a nested archive.
- LIBProteus library
- DLLProteus model
- DSNProteus simulation
- SRCSource code
- ZIPNested archive
Description
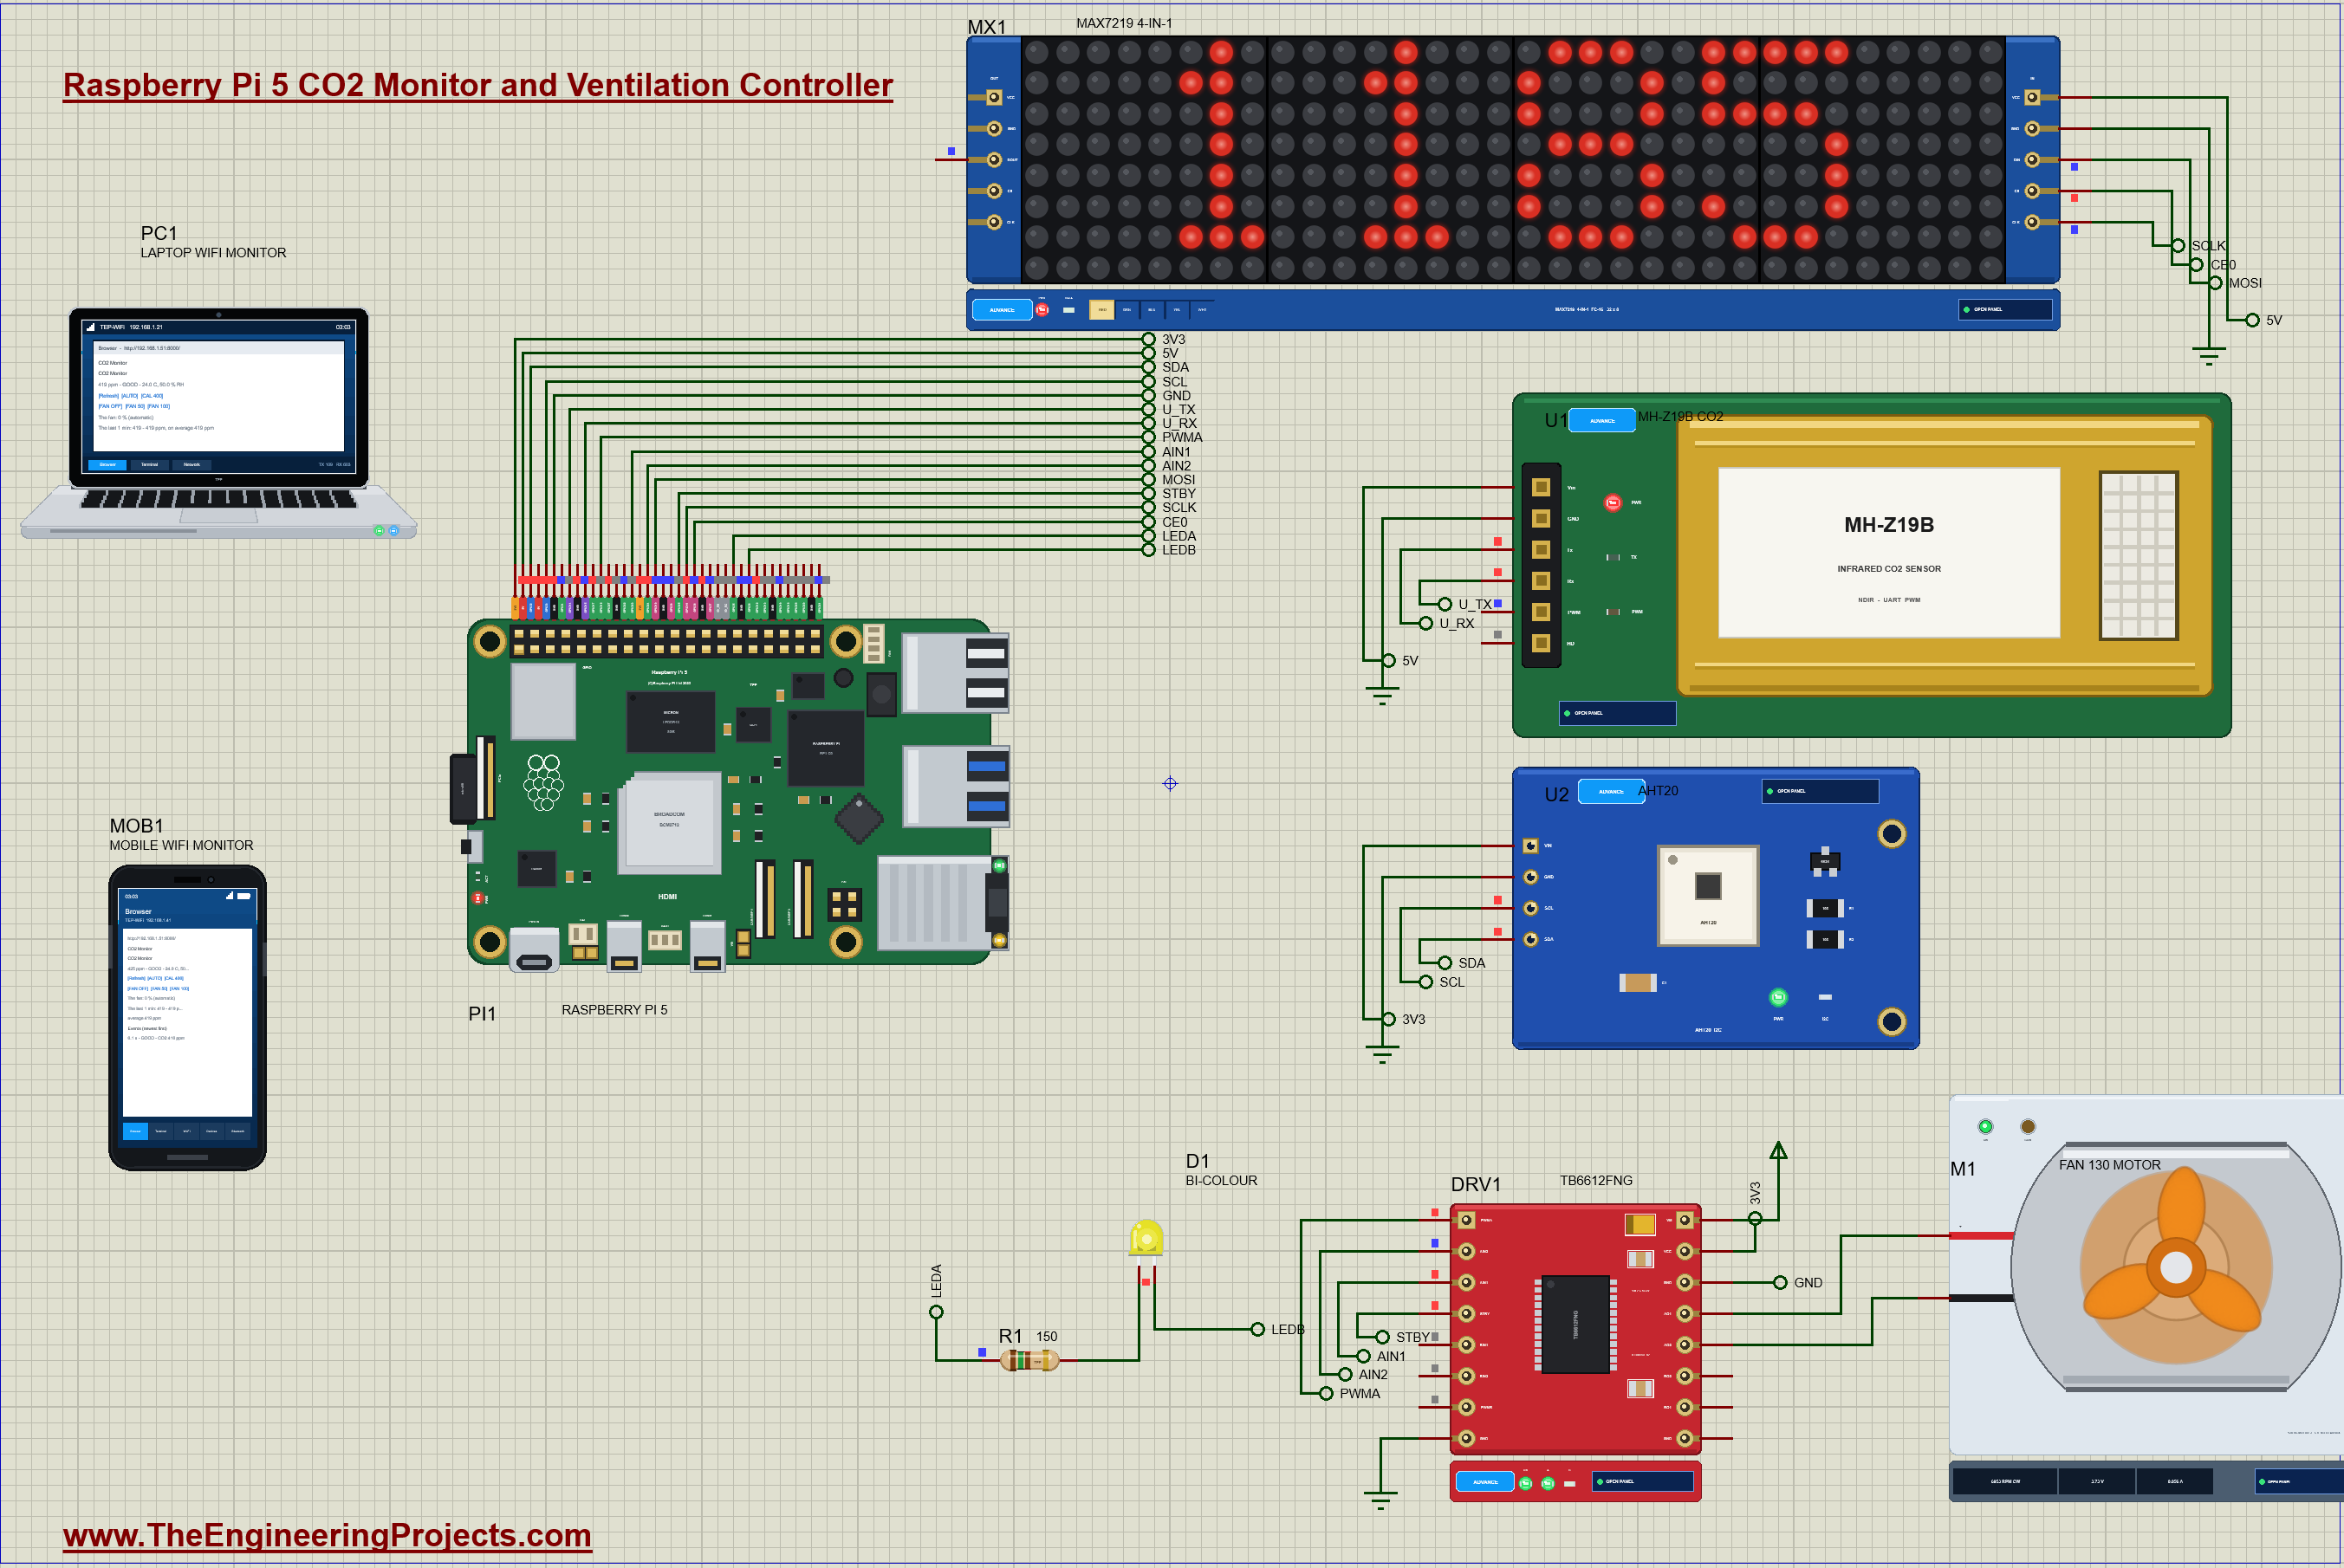
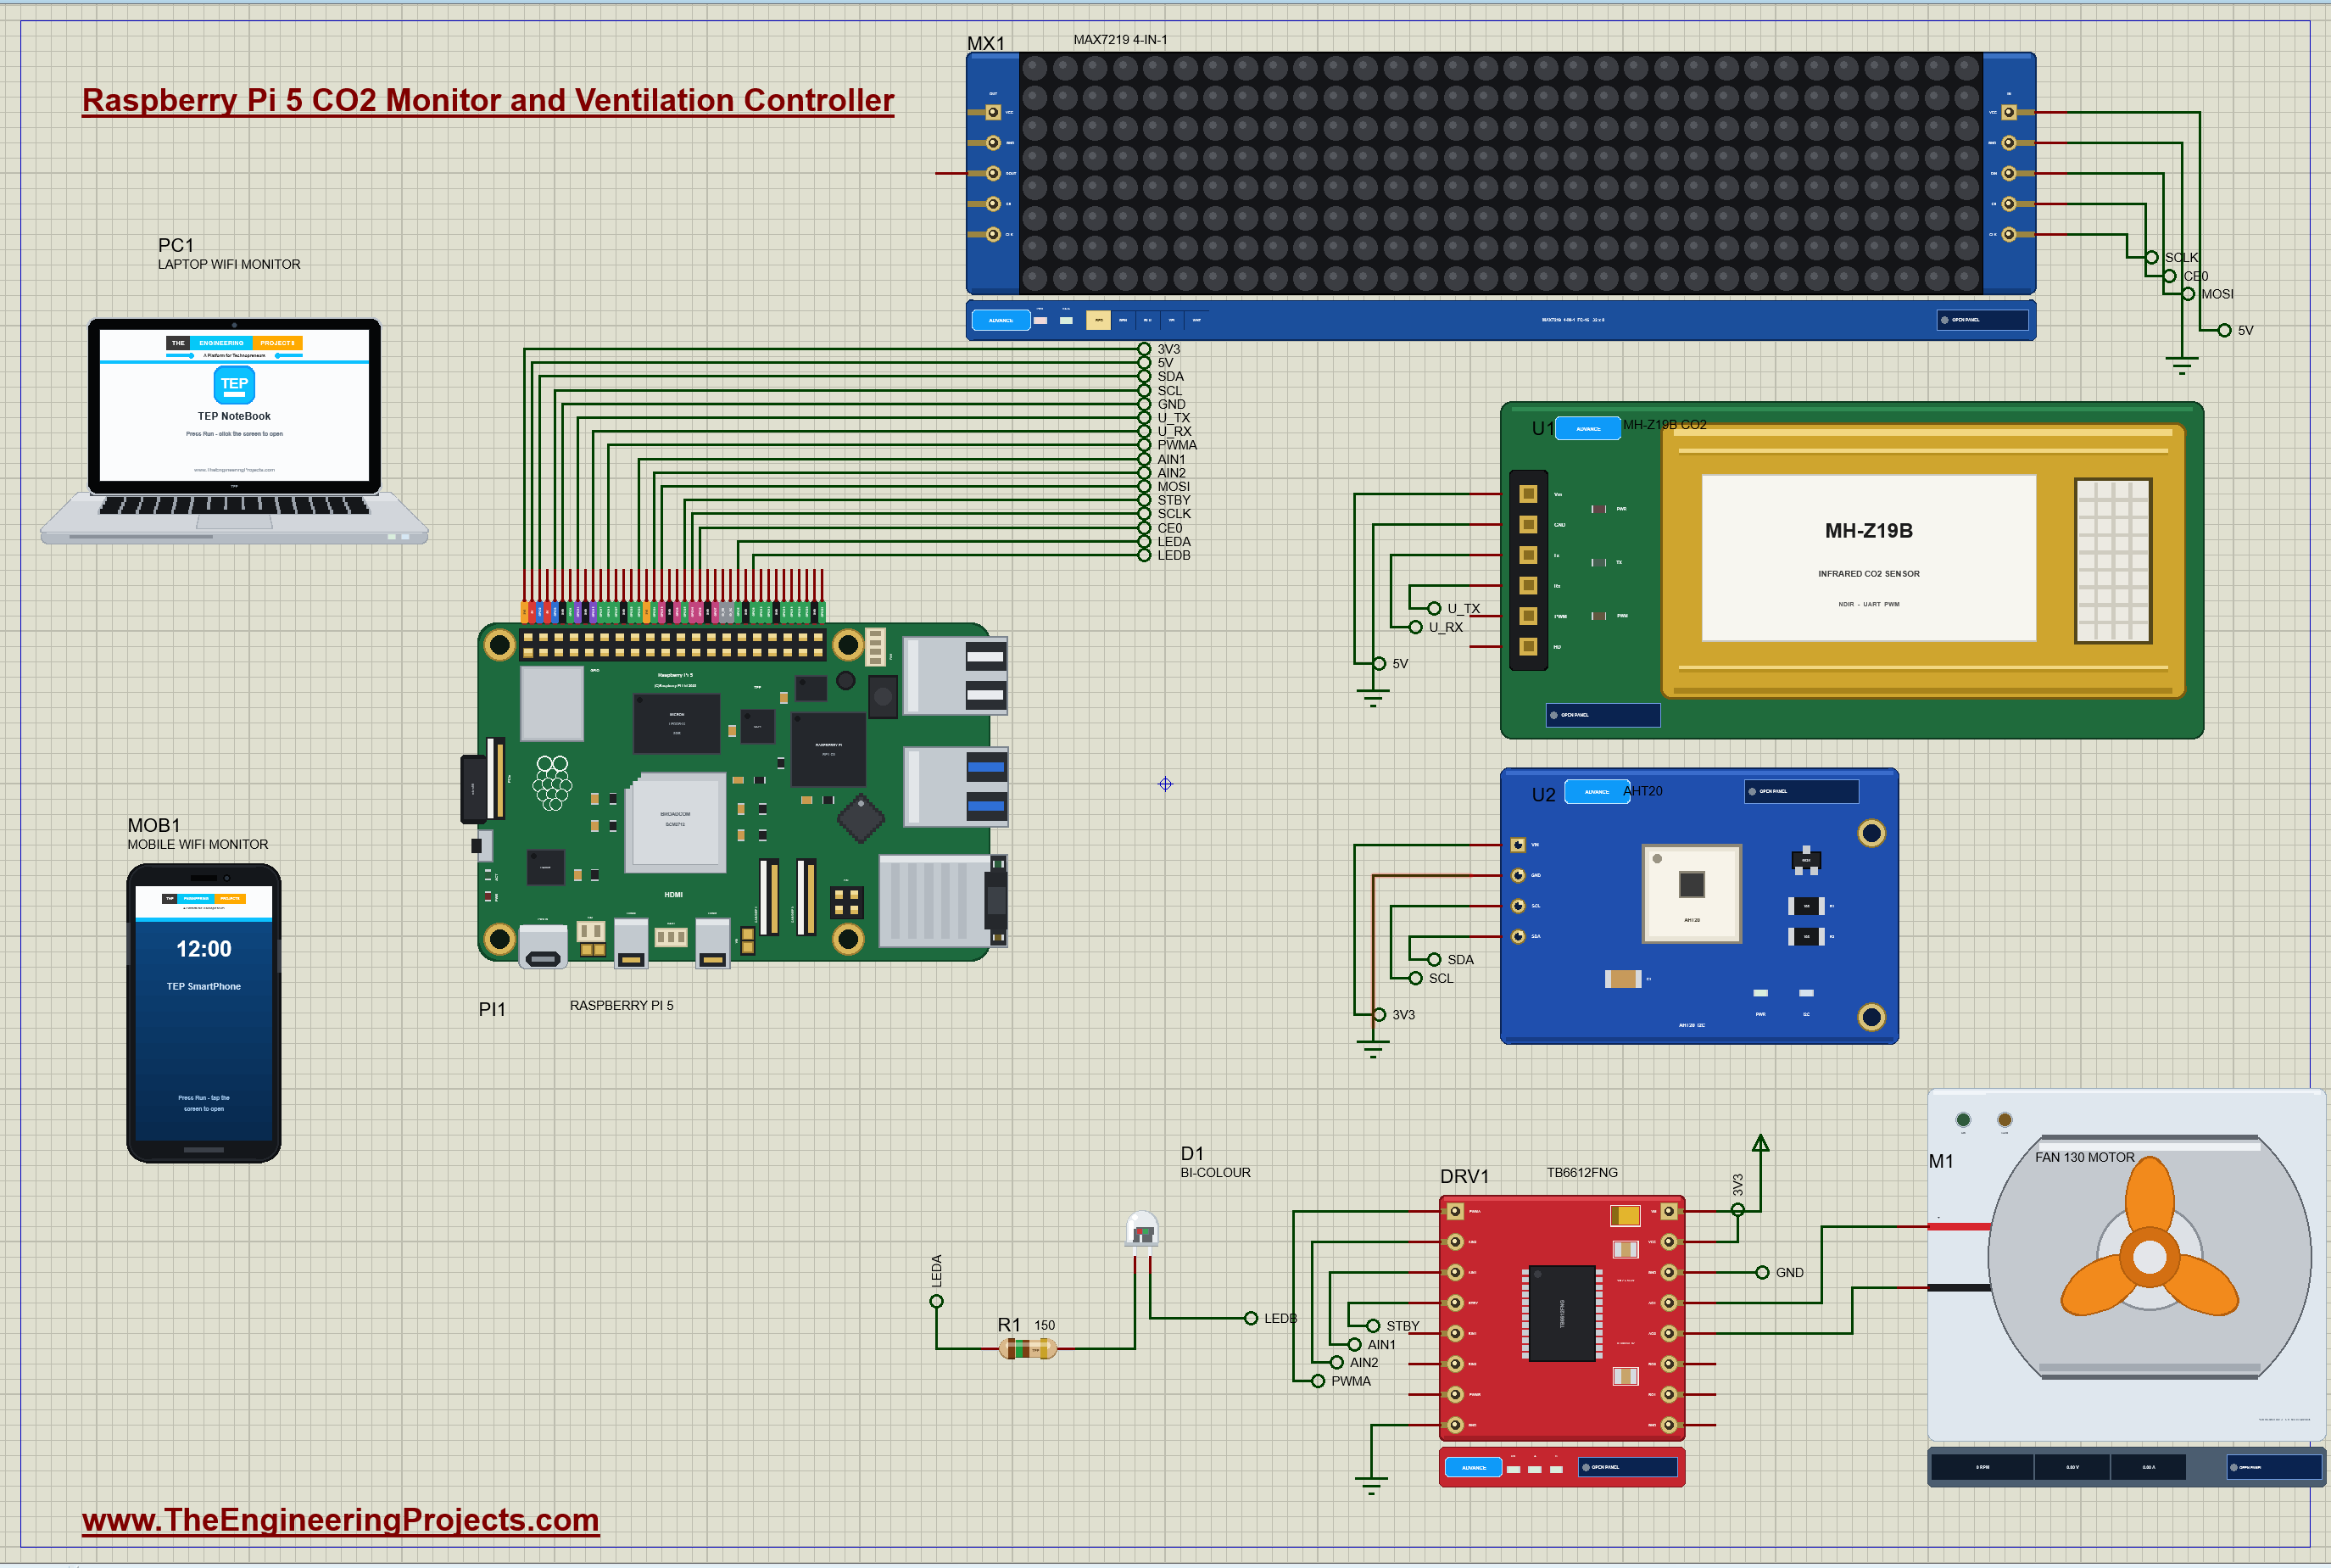
Raspberry-Pi-5-CO2-Monitor-Proteus-Simulation-v1.0.zip: the complete Proteus simulation project (Raspberry Pi 5, MH-Z19B, AHT20, MAX7219 4-in-1 matrix, TB6612FNG with a 130 motor fan, bi-colour LED, the Laptop and Mobile WiFi Monitors), the Python program co2_monitor.py, every LIB and DLL the simulation needs, the TEPPi Python runtime and a README.

File Structure
 File Structure
17.7 KB96.9 KB10.5 KB39.5 KB242.3 KB58.1 KB13.1 KB306.9 KB60.5 KB71.1 KB3.3 MB34.3 KB620.8 KB36 KB169.8 KB628.1 KB99.3 KB65.3 KB4.8 MB4.1 MB80 B97.8 KB26.8 KB1.2 MB1.1 MB88.9 KB27.3 KB55.8 KB79.8 KB105.8 KB193.8 KB113.8 KB48.8 KB145.8 KB36.8 KB29.3 KB42.3 KB28.8 KB67.3 KB89.3 KB153.8 KB22.8 KB38.8 KB2.1 KB9.9 KB4.1 KB1.3 KB4.7 KB431 B2.5 KB17.5 KB283 B6.5 KB37.9 KB11.1 KB5.5 KB885 B13.6 KB9 KB878 B1.5 KB4 KB1004 B10 B110 B2.6 KB1.1 KB8.9 KB58.5 KB12.4 KB6.6 KB18.5 KB20.7 KB27.8 KB21.1 KB7.1 KB7.7 KB2.7 KB51.2 KB100.9 KB1.2 KB24.3 KB7.4 KB53.6 KB26.1 KB20.5 KB60.5 KB19.6 KB1.6 KB8.4 KB20.9 KB2.6 KB539 B1.4 KB9.7 KB2.8 KB21 B92 B7.9 KB264 B3.4 KB3.8 KB17.5 KB55.2 KB3.3 KB10.8 KB1.5 KB4.2 KB7.3 KB2.5 KB32.6 KB14.5 KB283 B17.4 KB257 B691 B14.5 KB12.8 KB3.6 KB1.7 KB37 KB418 B6.2 KB7 KB37.3 KB10.6 KB23.7 KB28.7 KB8.8 KB16.9 KB297 KB336.5 KB285 KB294 KB305 KB2.9 MB311 KB296 KB12.7 KB44.9 KB297 KB336.5 KB285 KB294 KB305 KB2.9 MB311 KB296 KB12.7 KB11.7 KBGallery12 images from the tutorialOpen the tutorial
 Gallery12 images from the tutorial
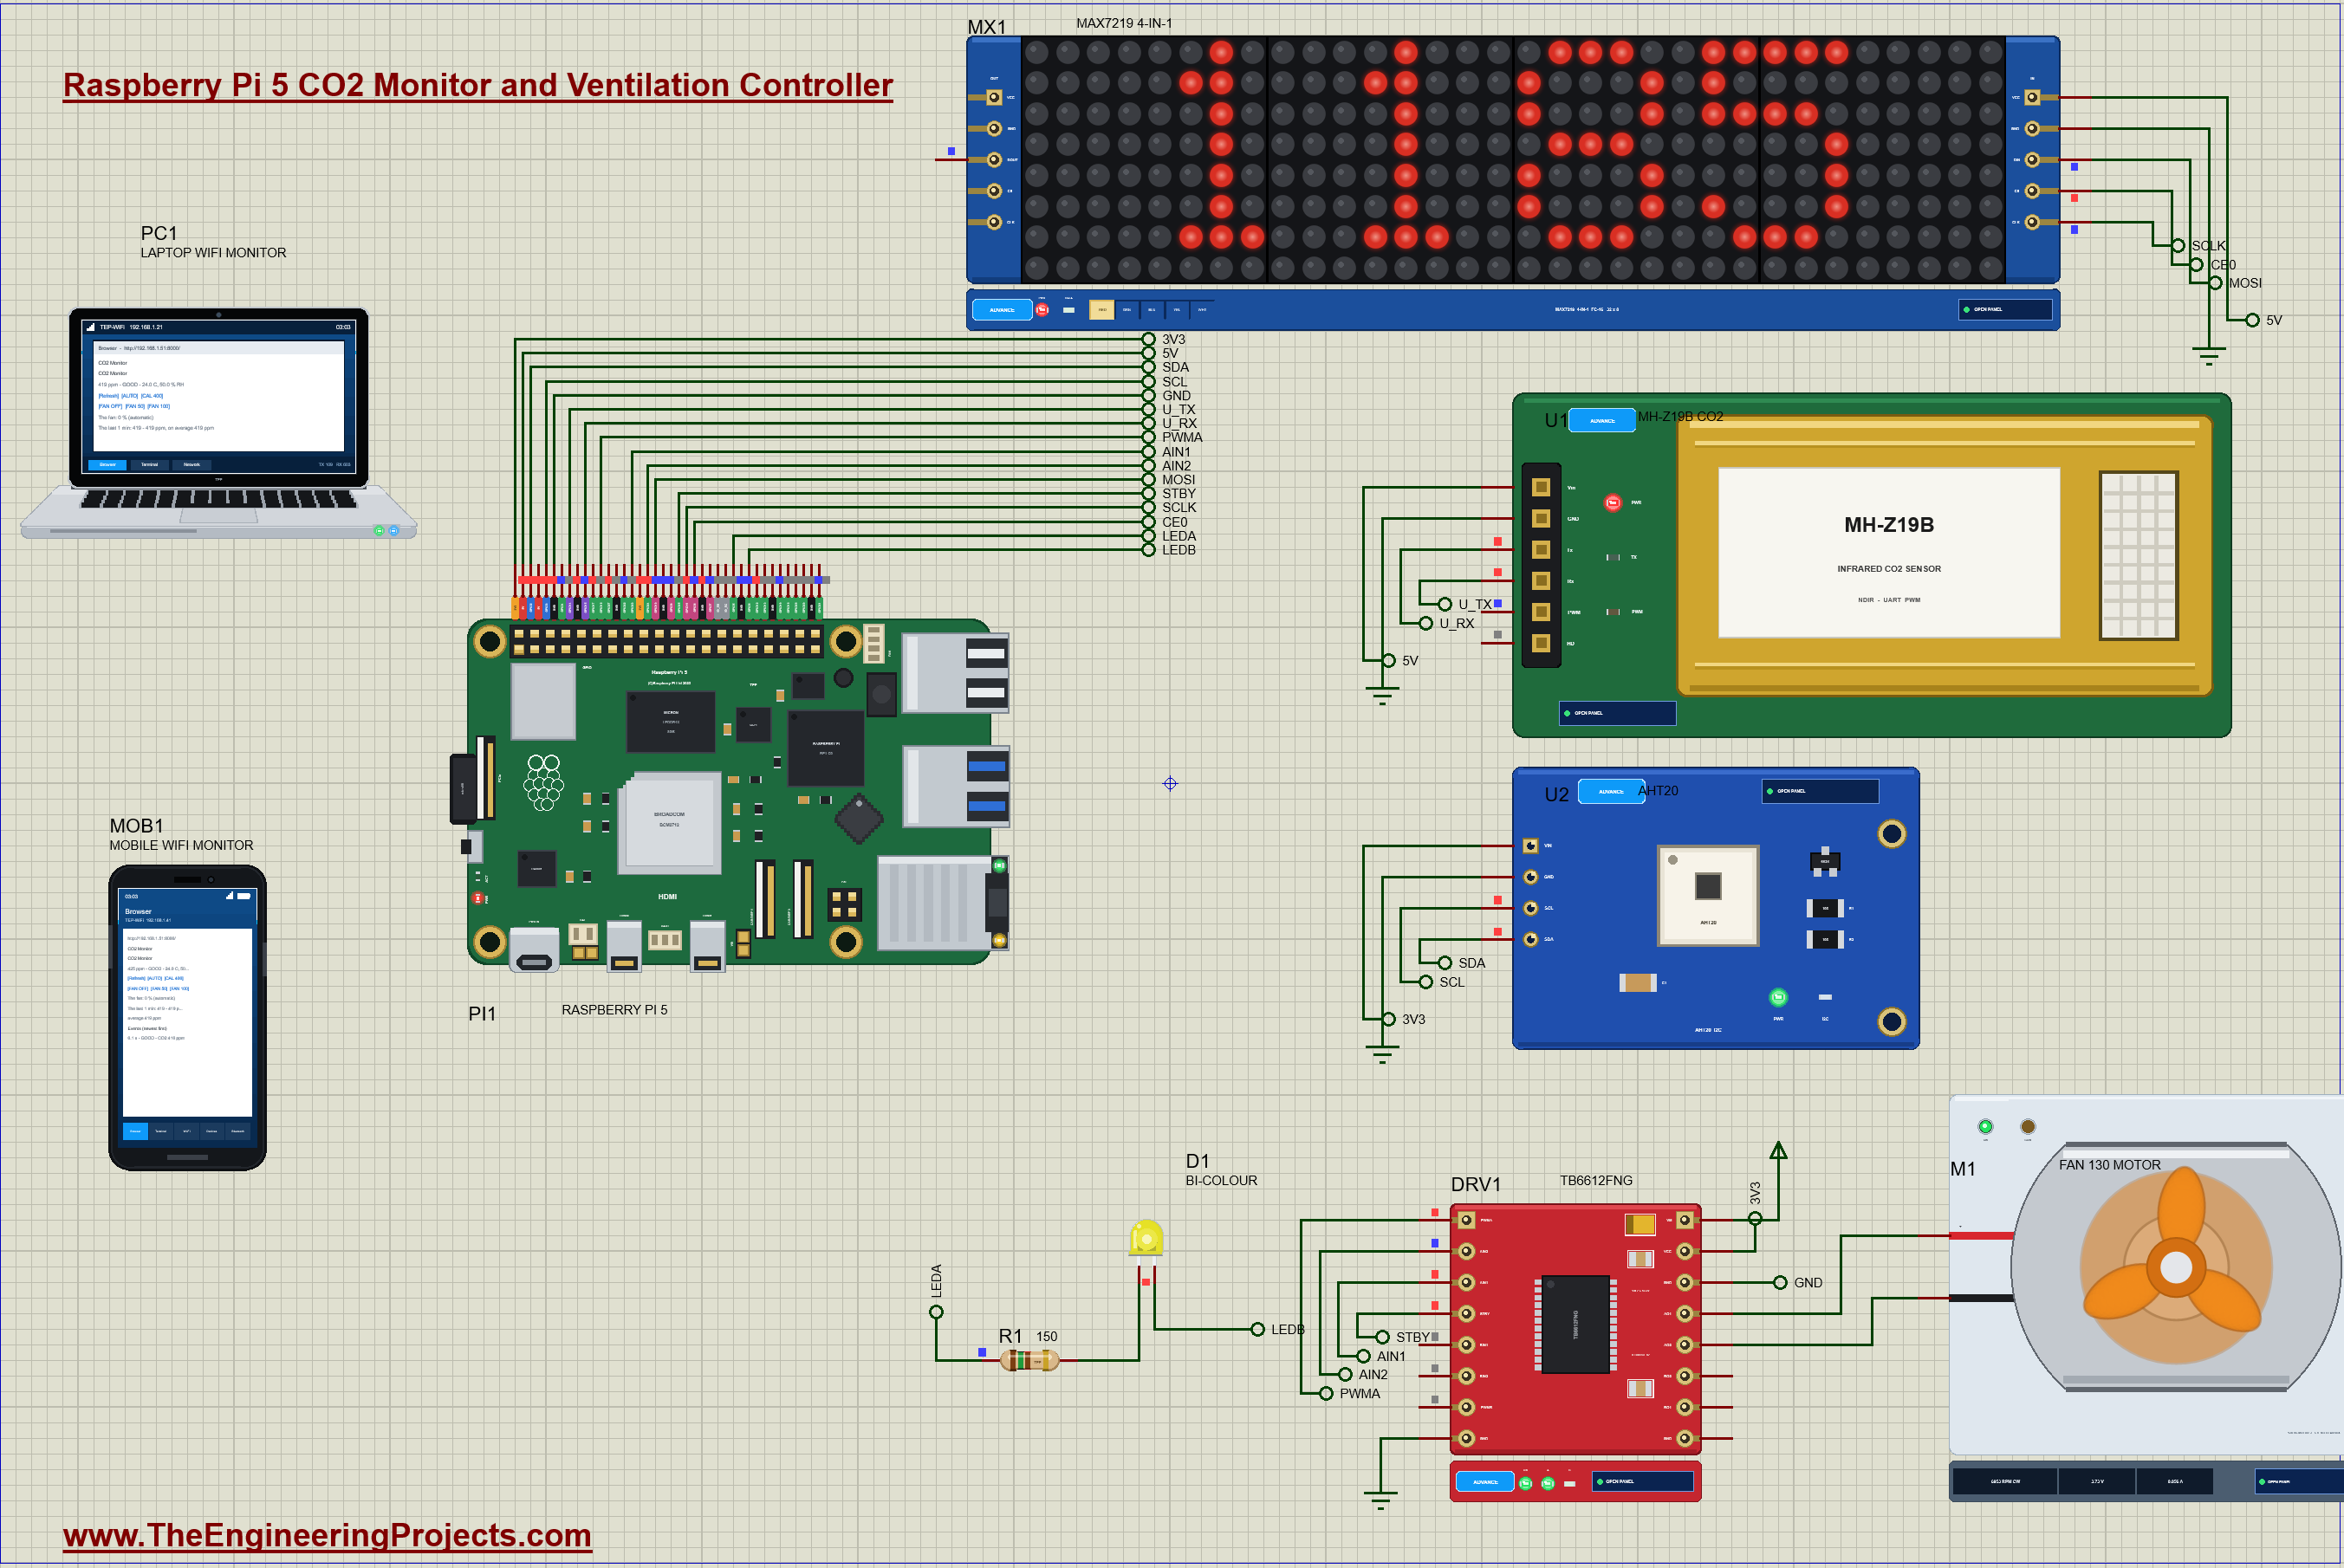
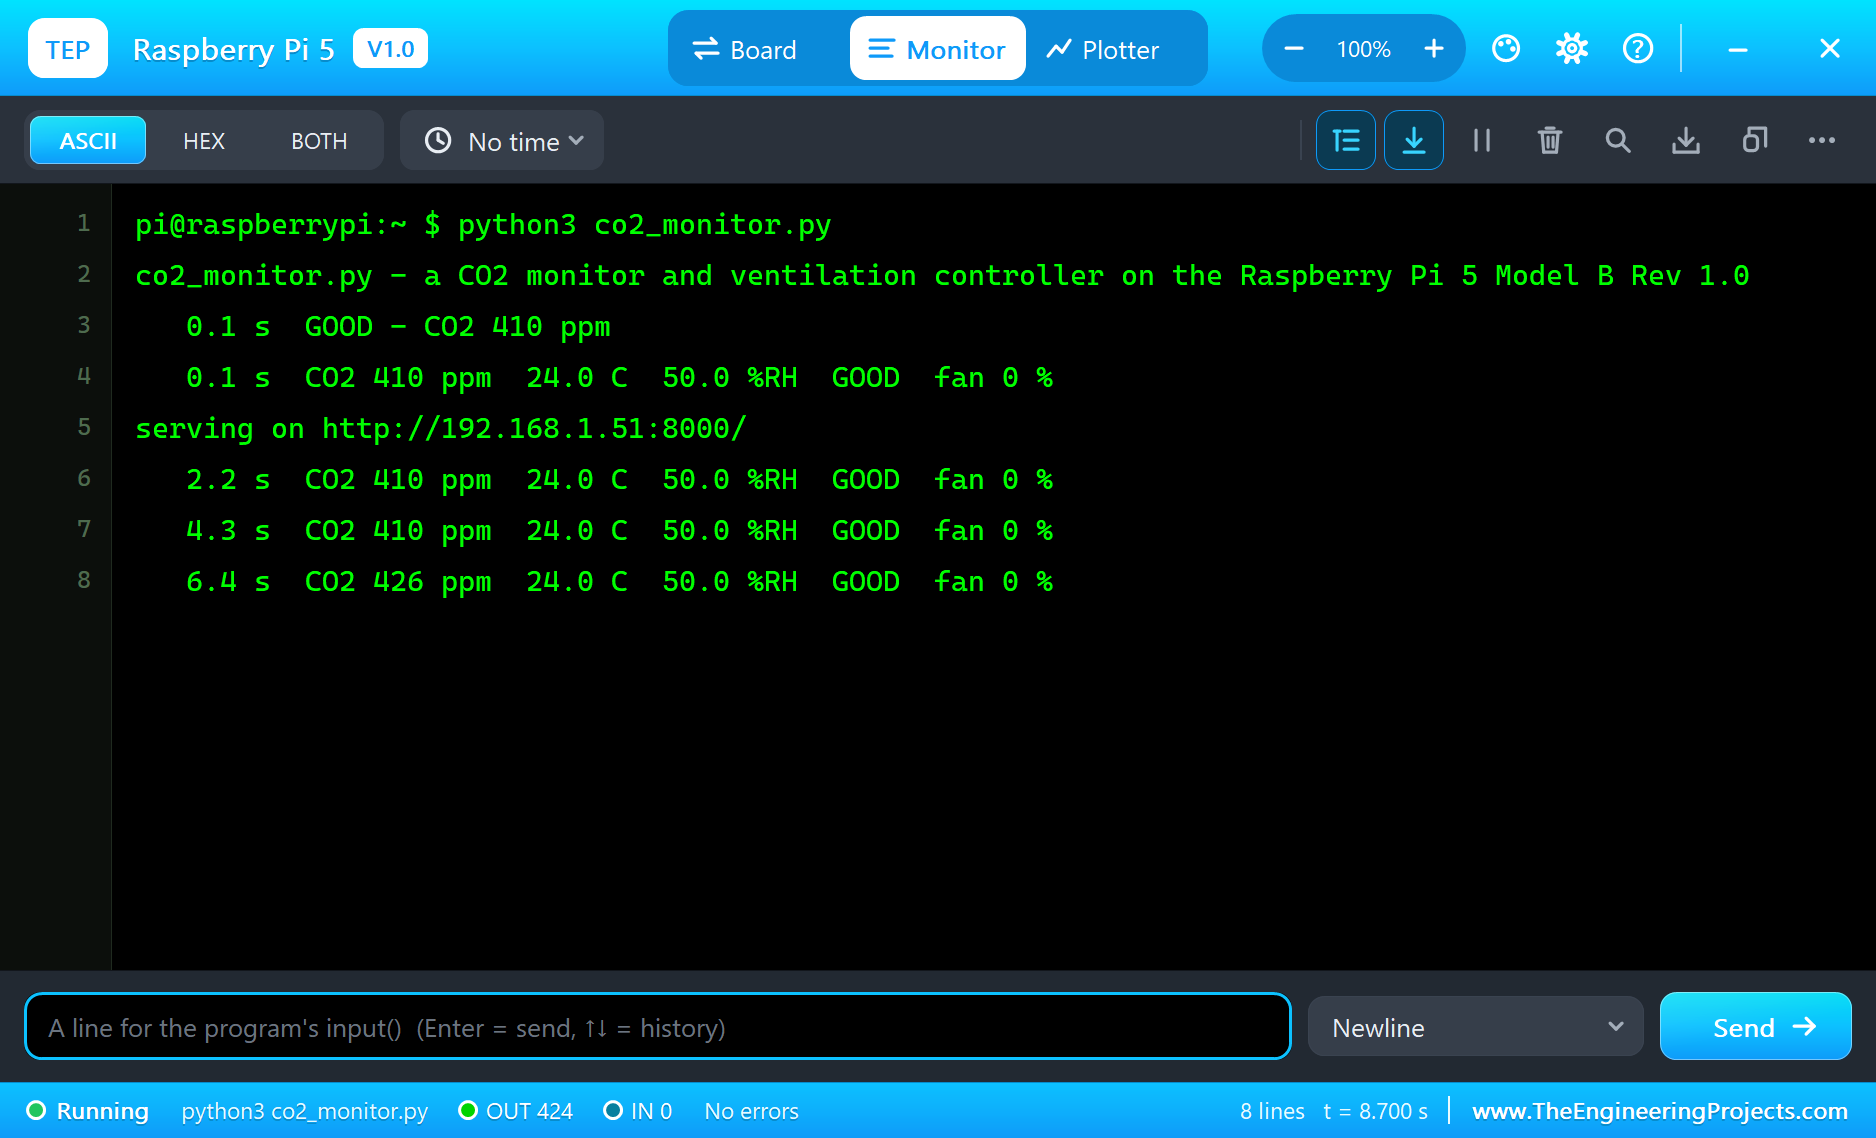
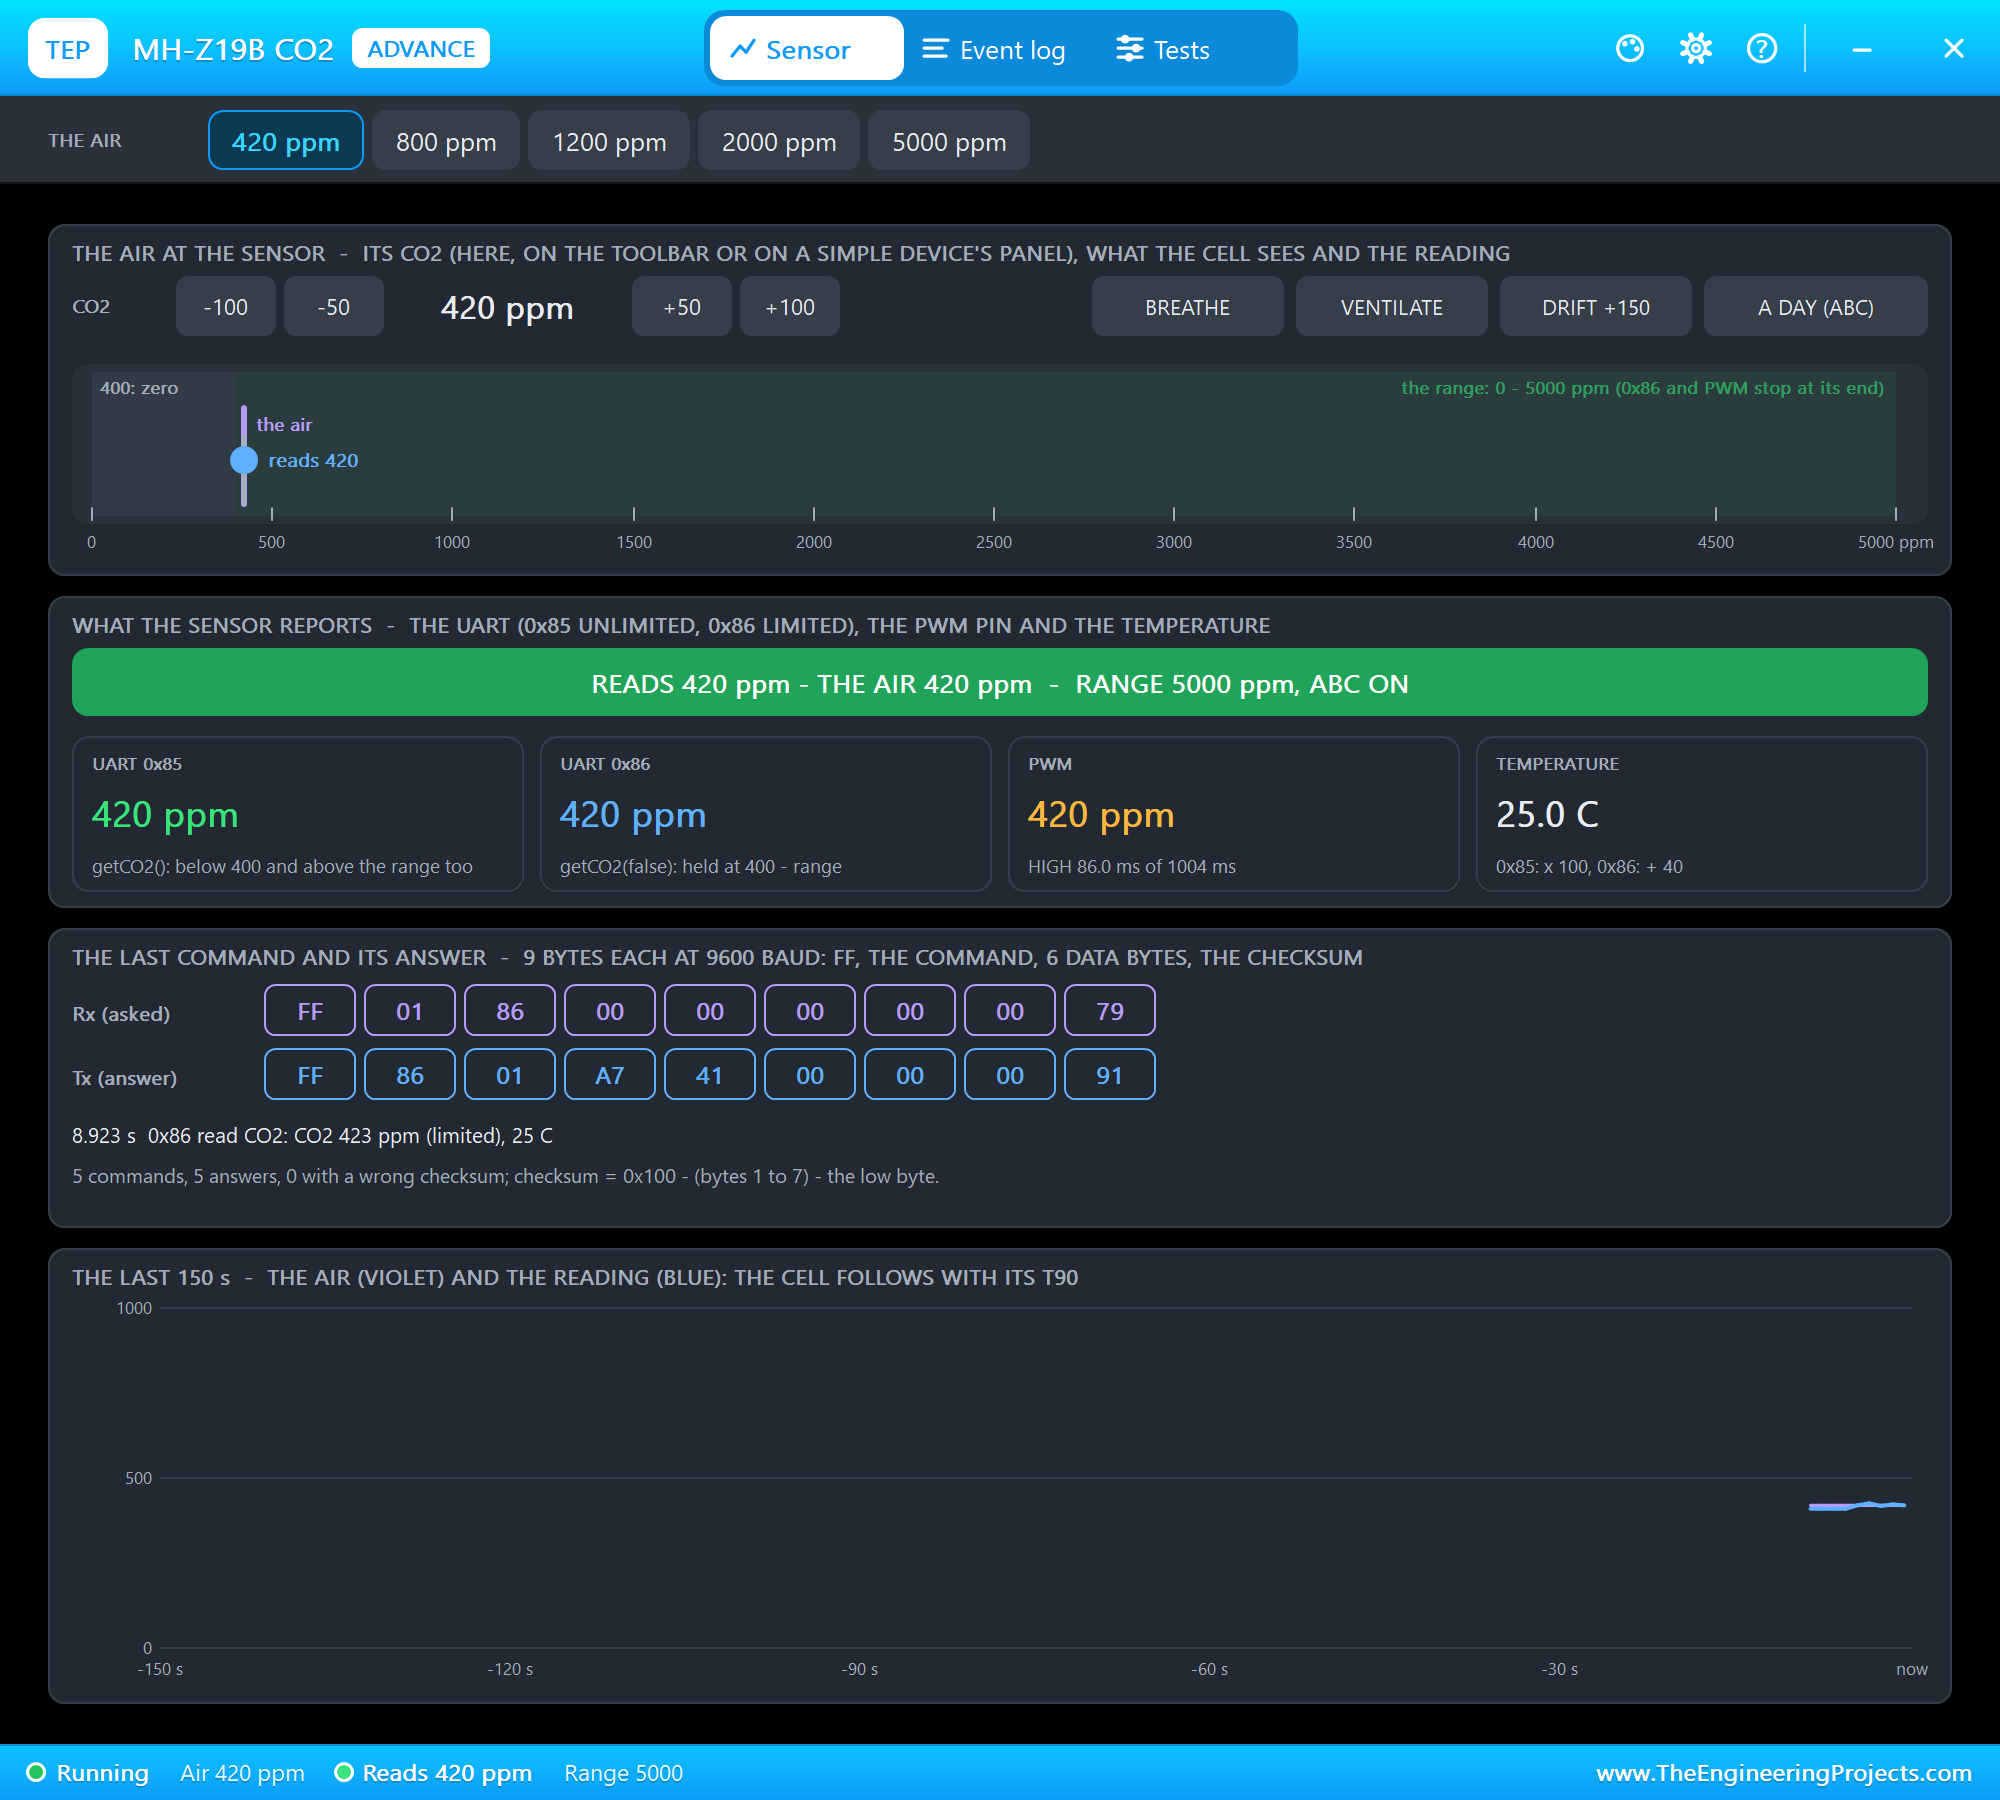
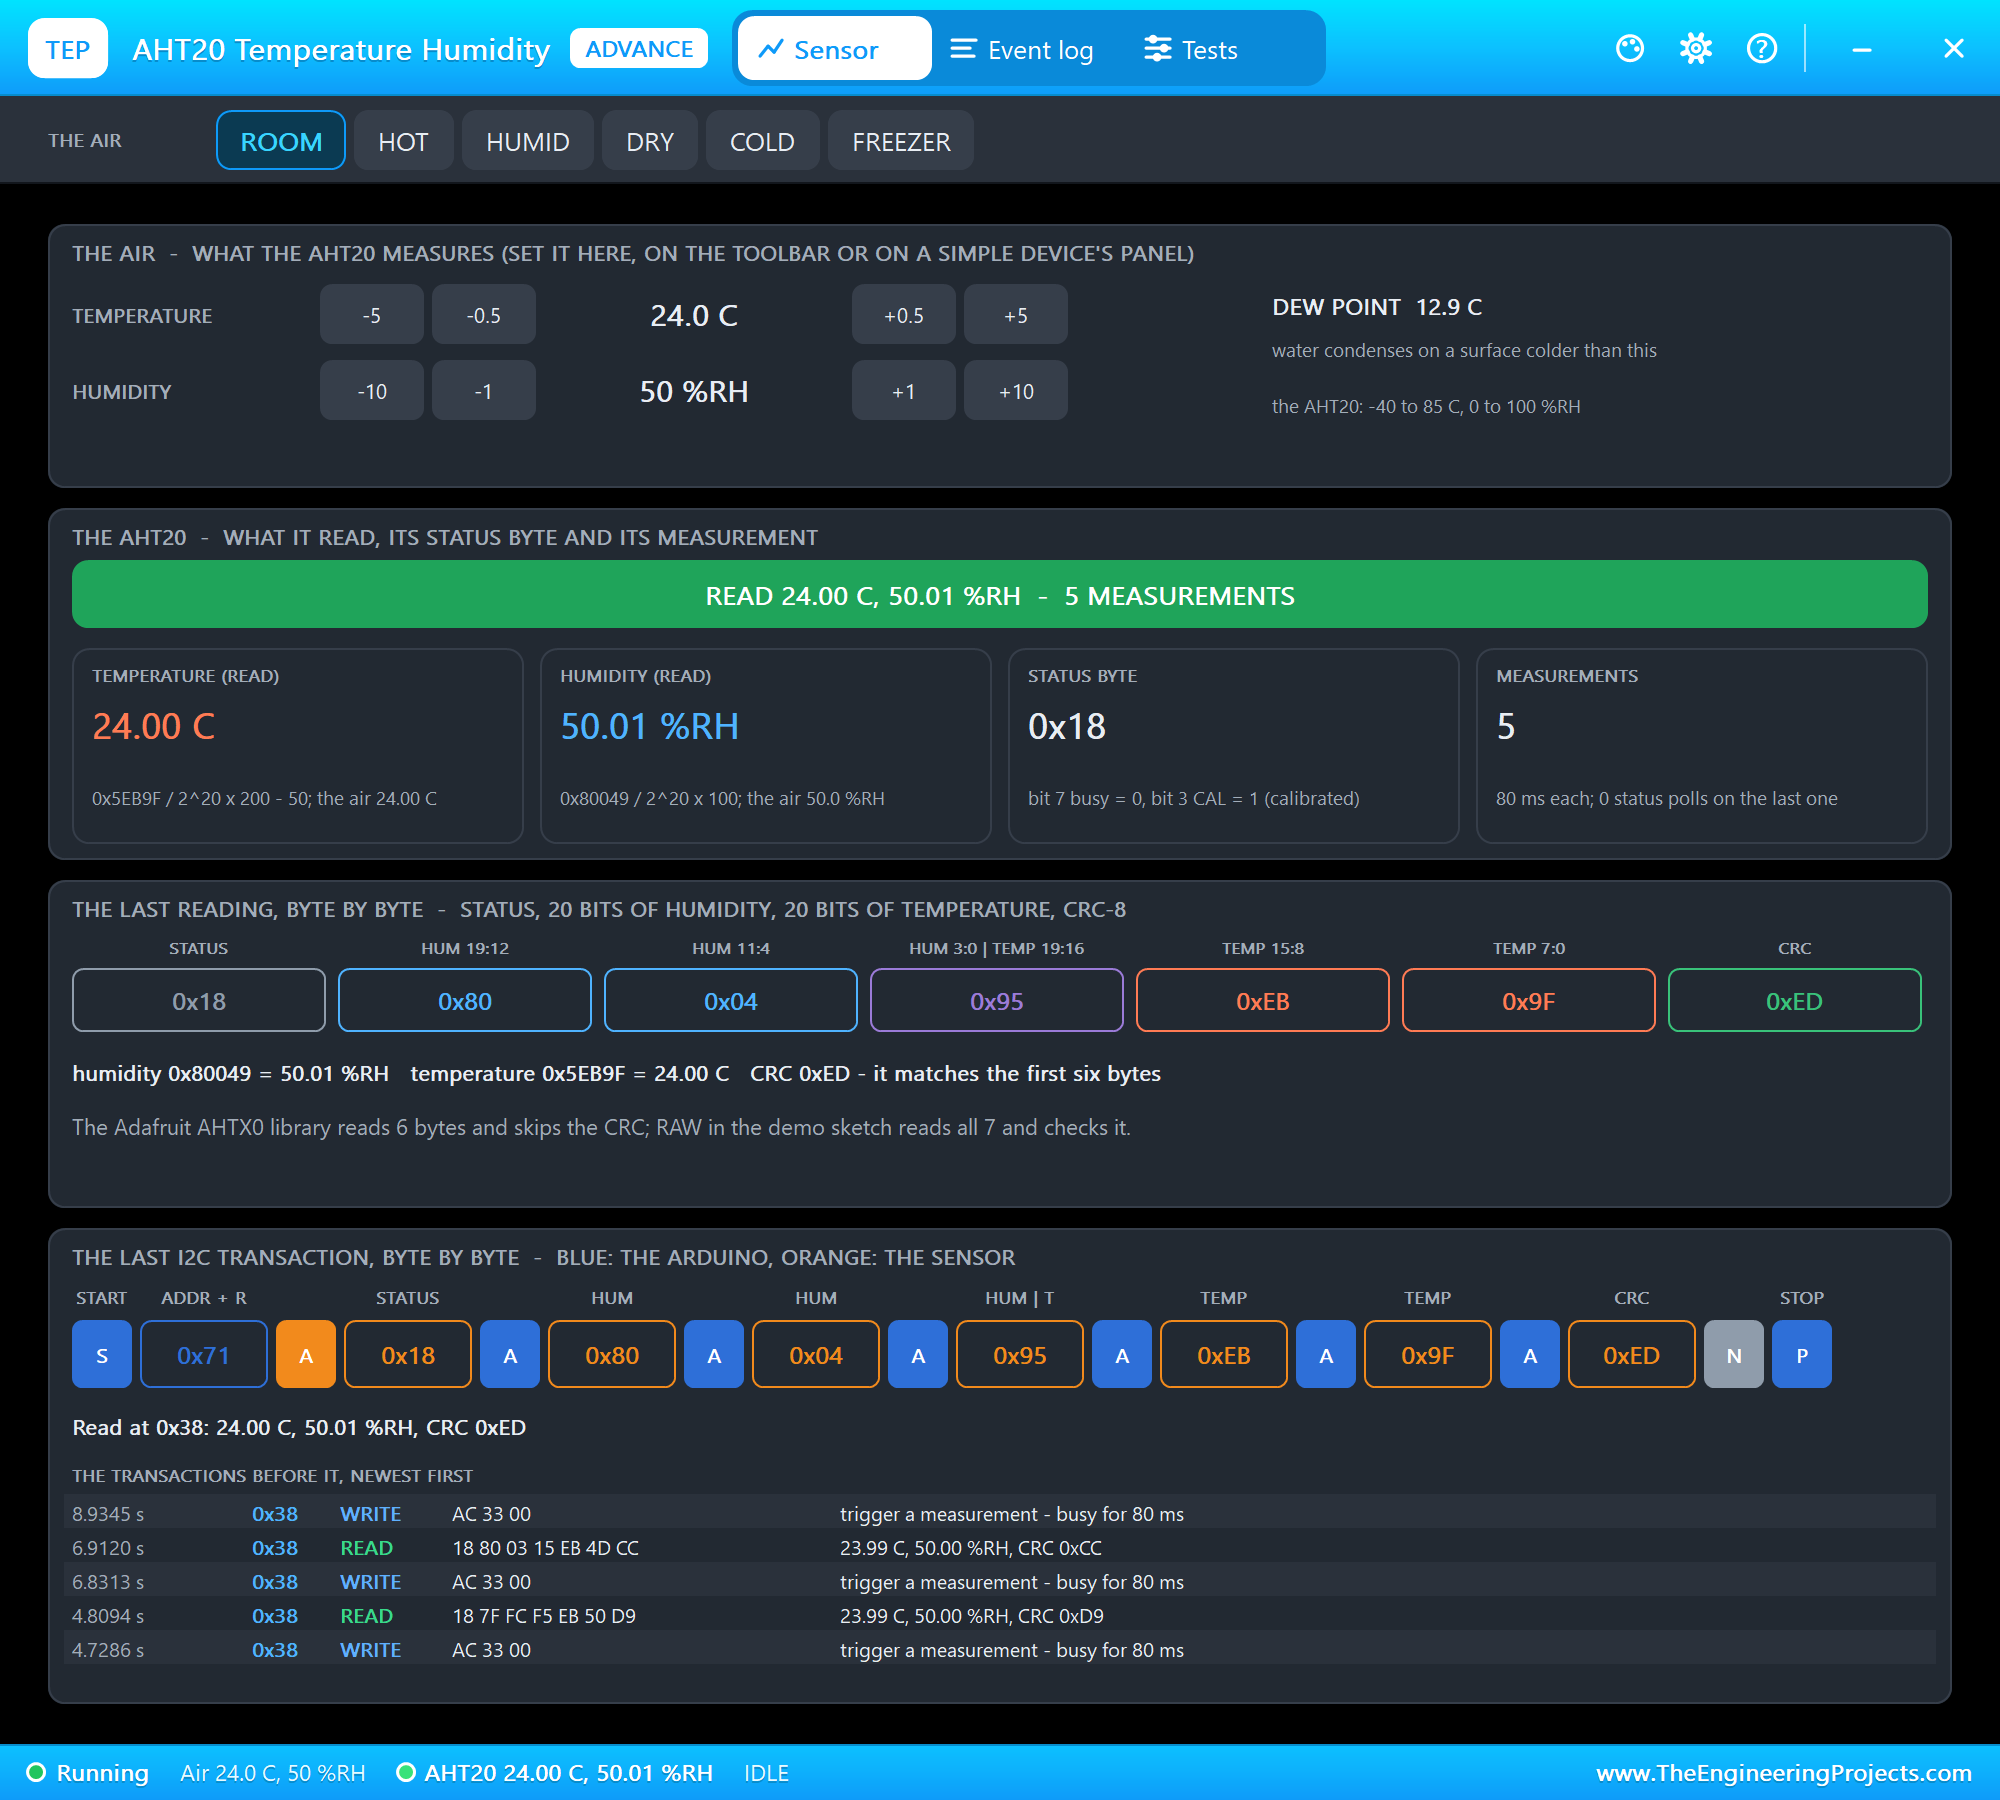
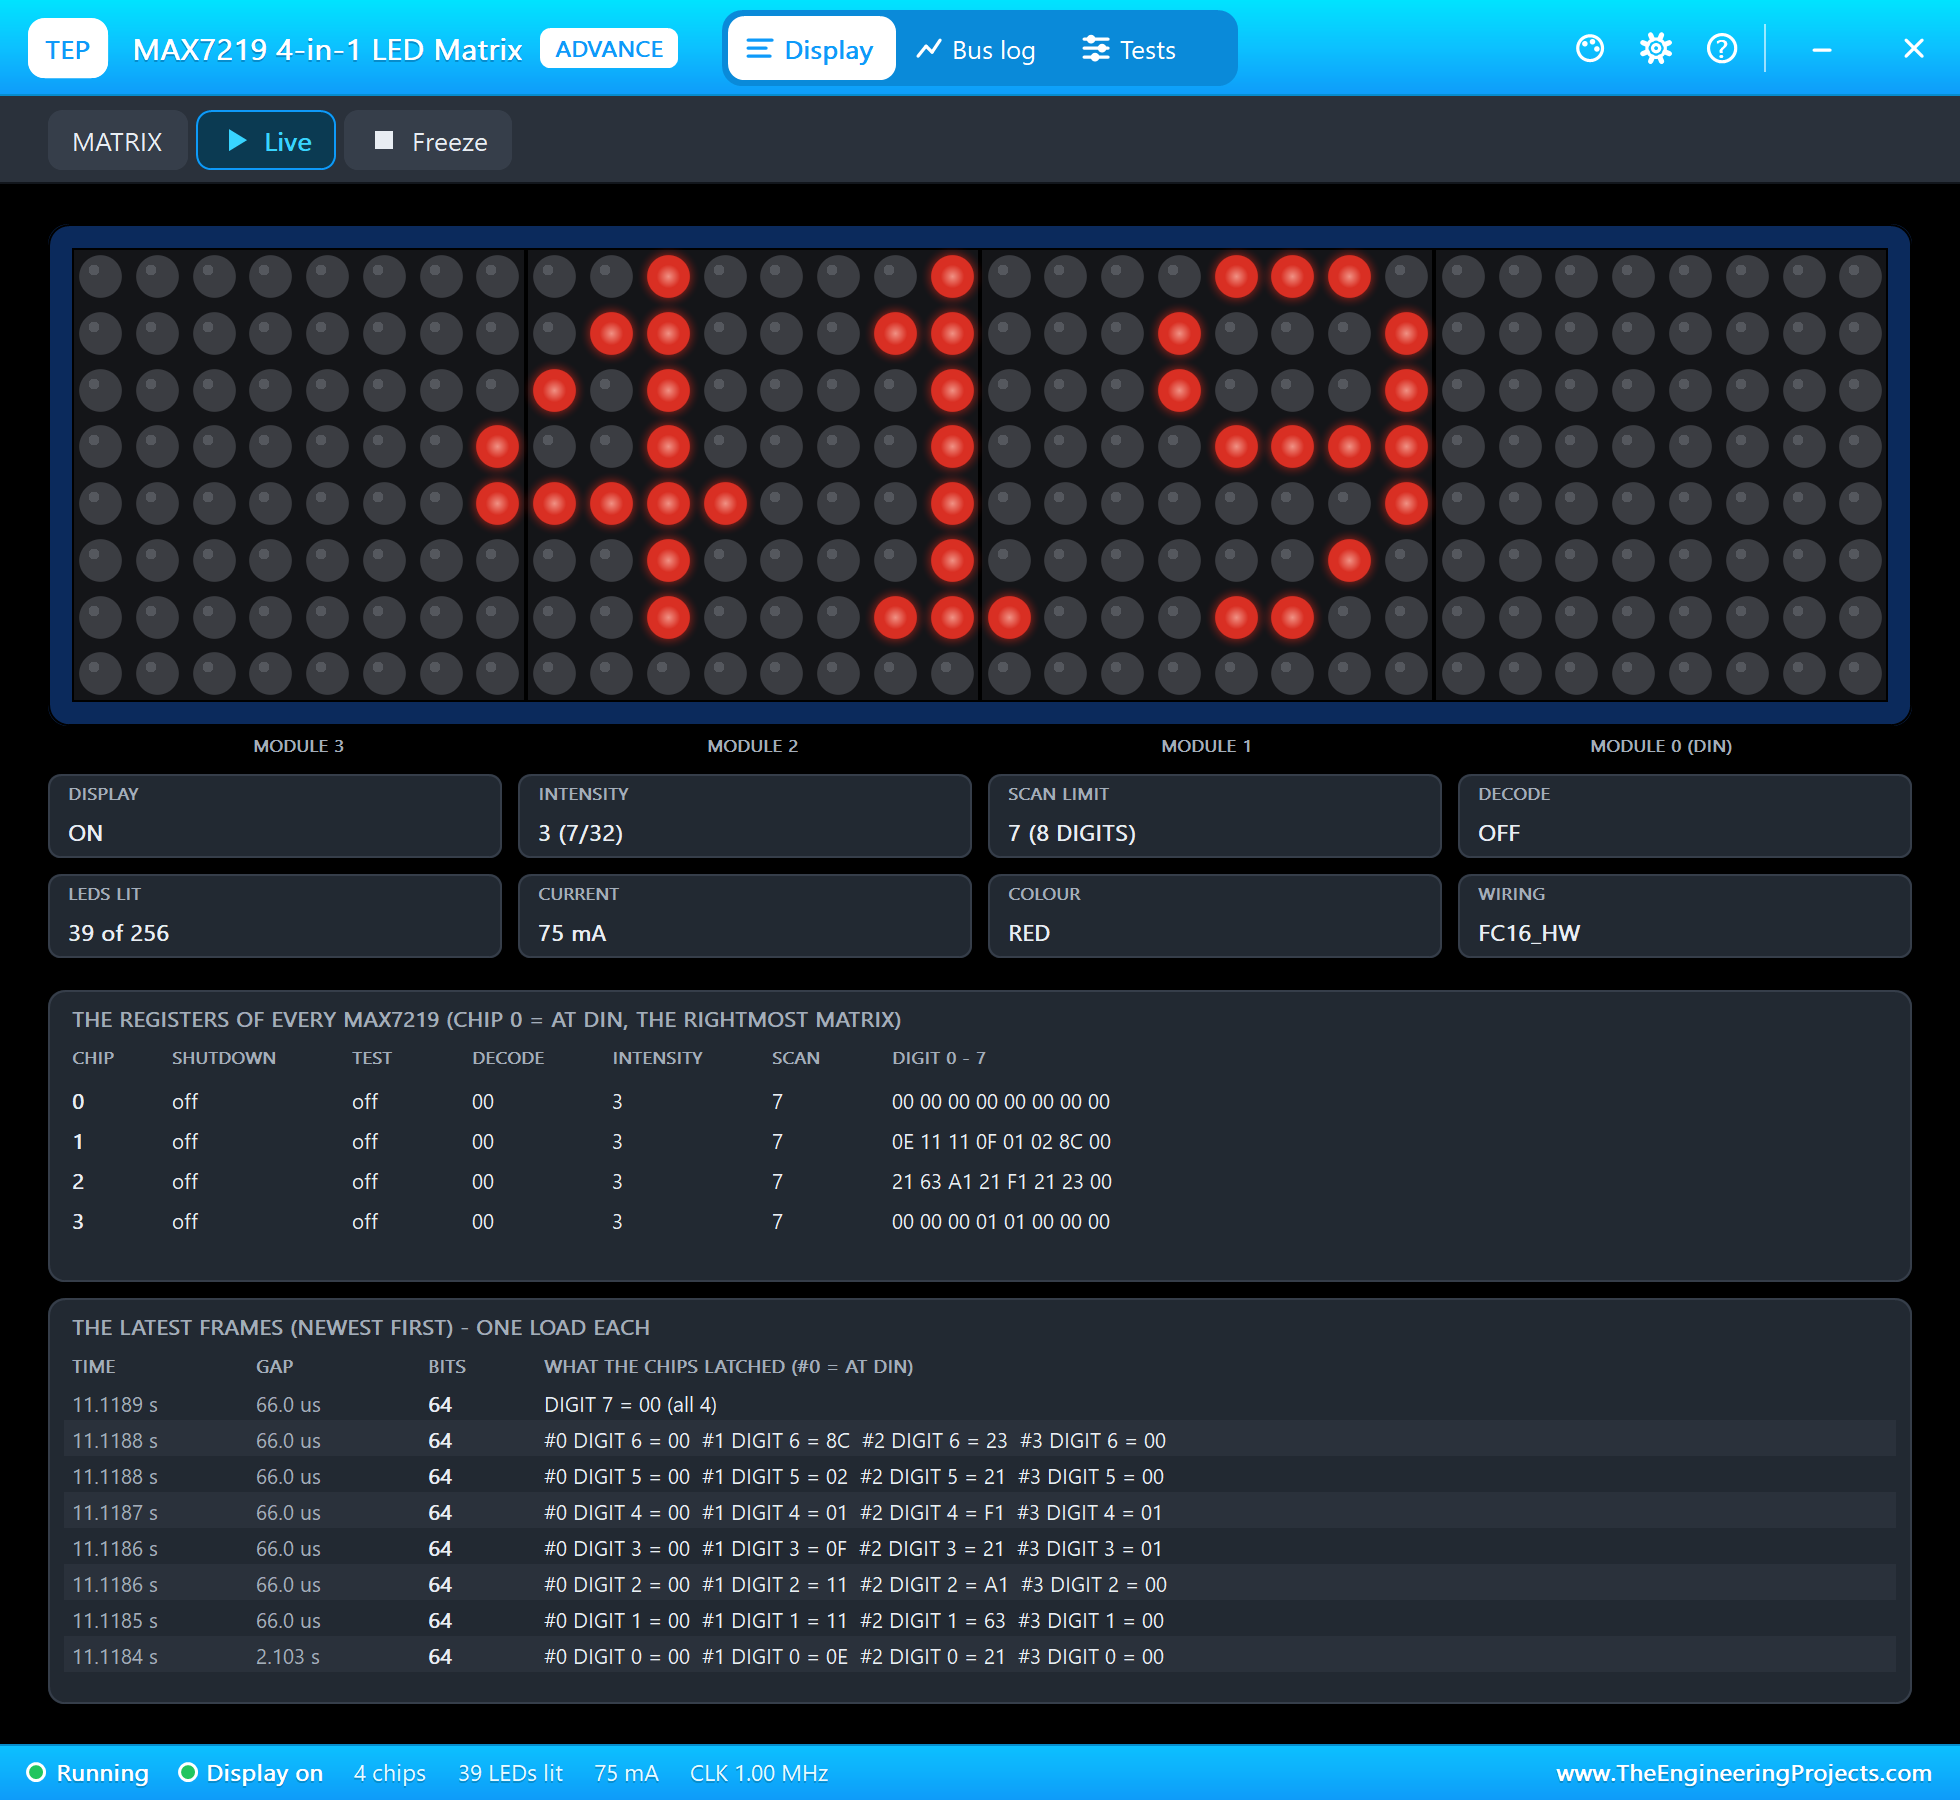
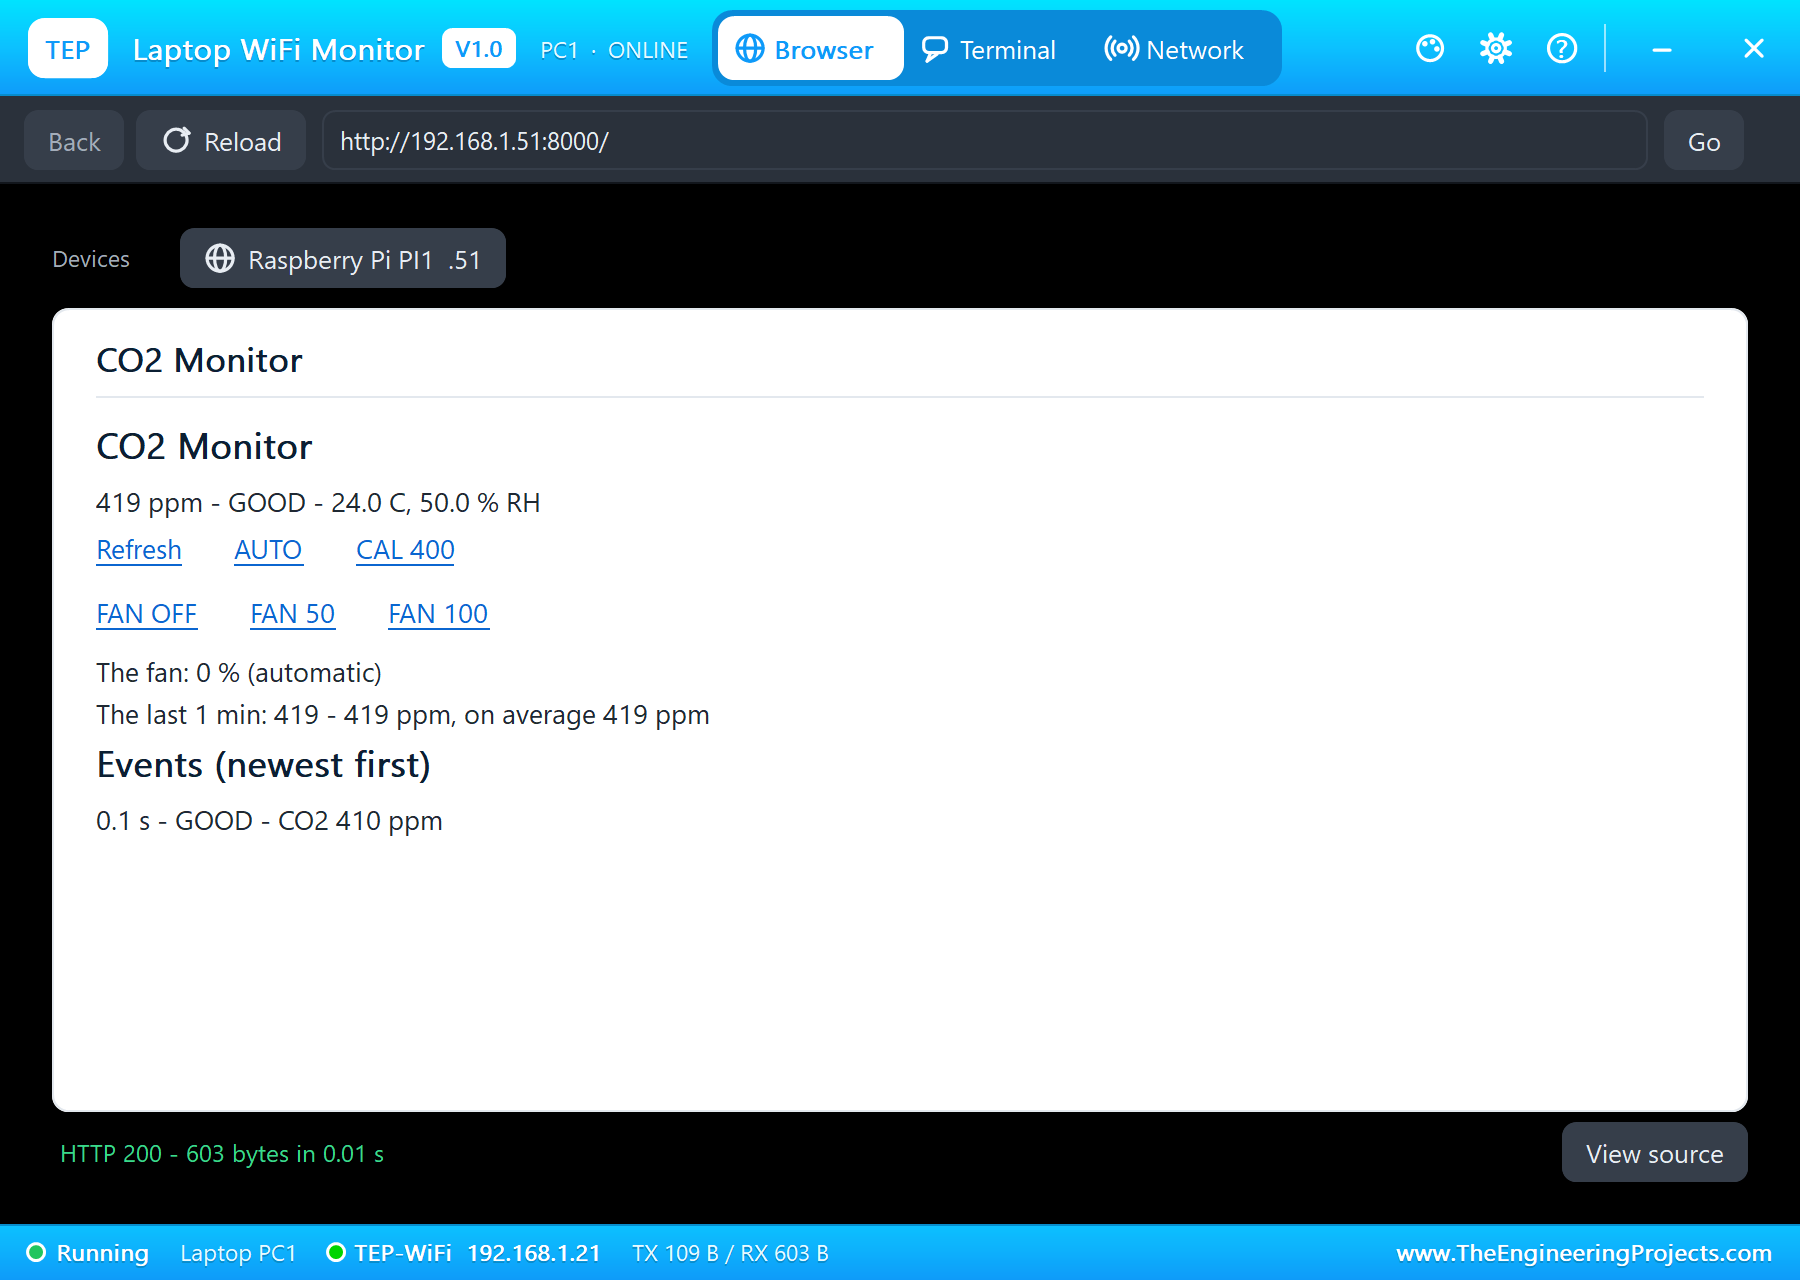
The circuit, the board and the results as they appear in Raspberry Pi 5 CO2 Monitor with Ventilation Fan - Proteus Simulation. Open an image for its full size.
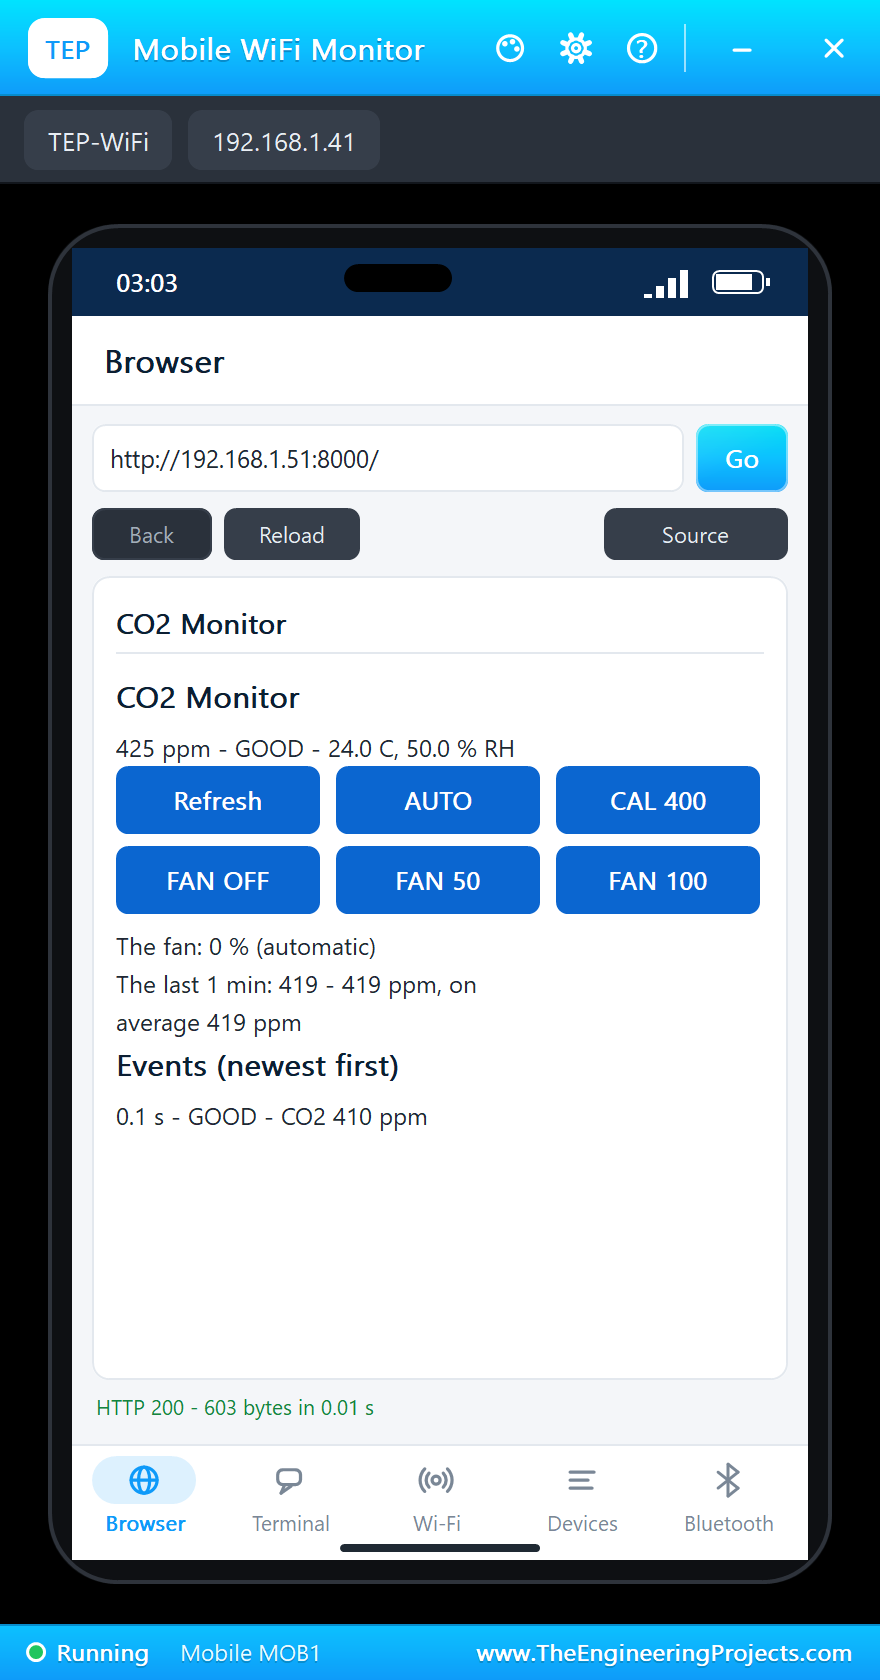
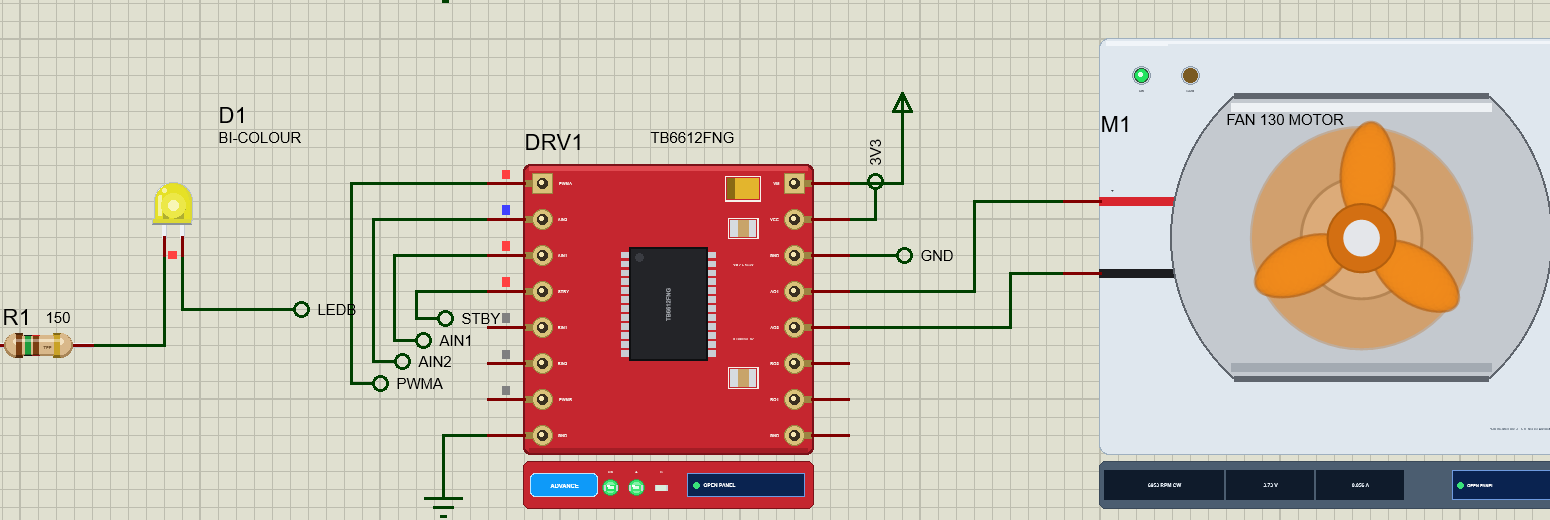
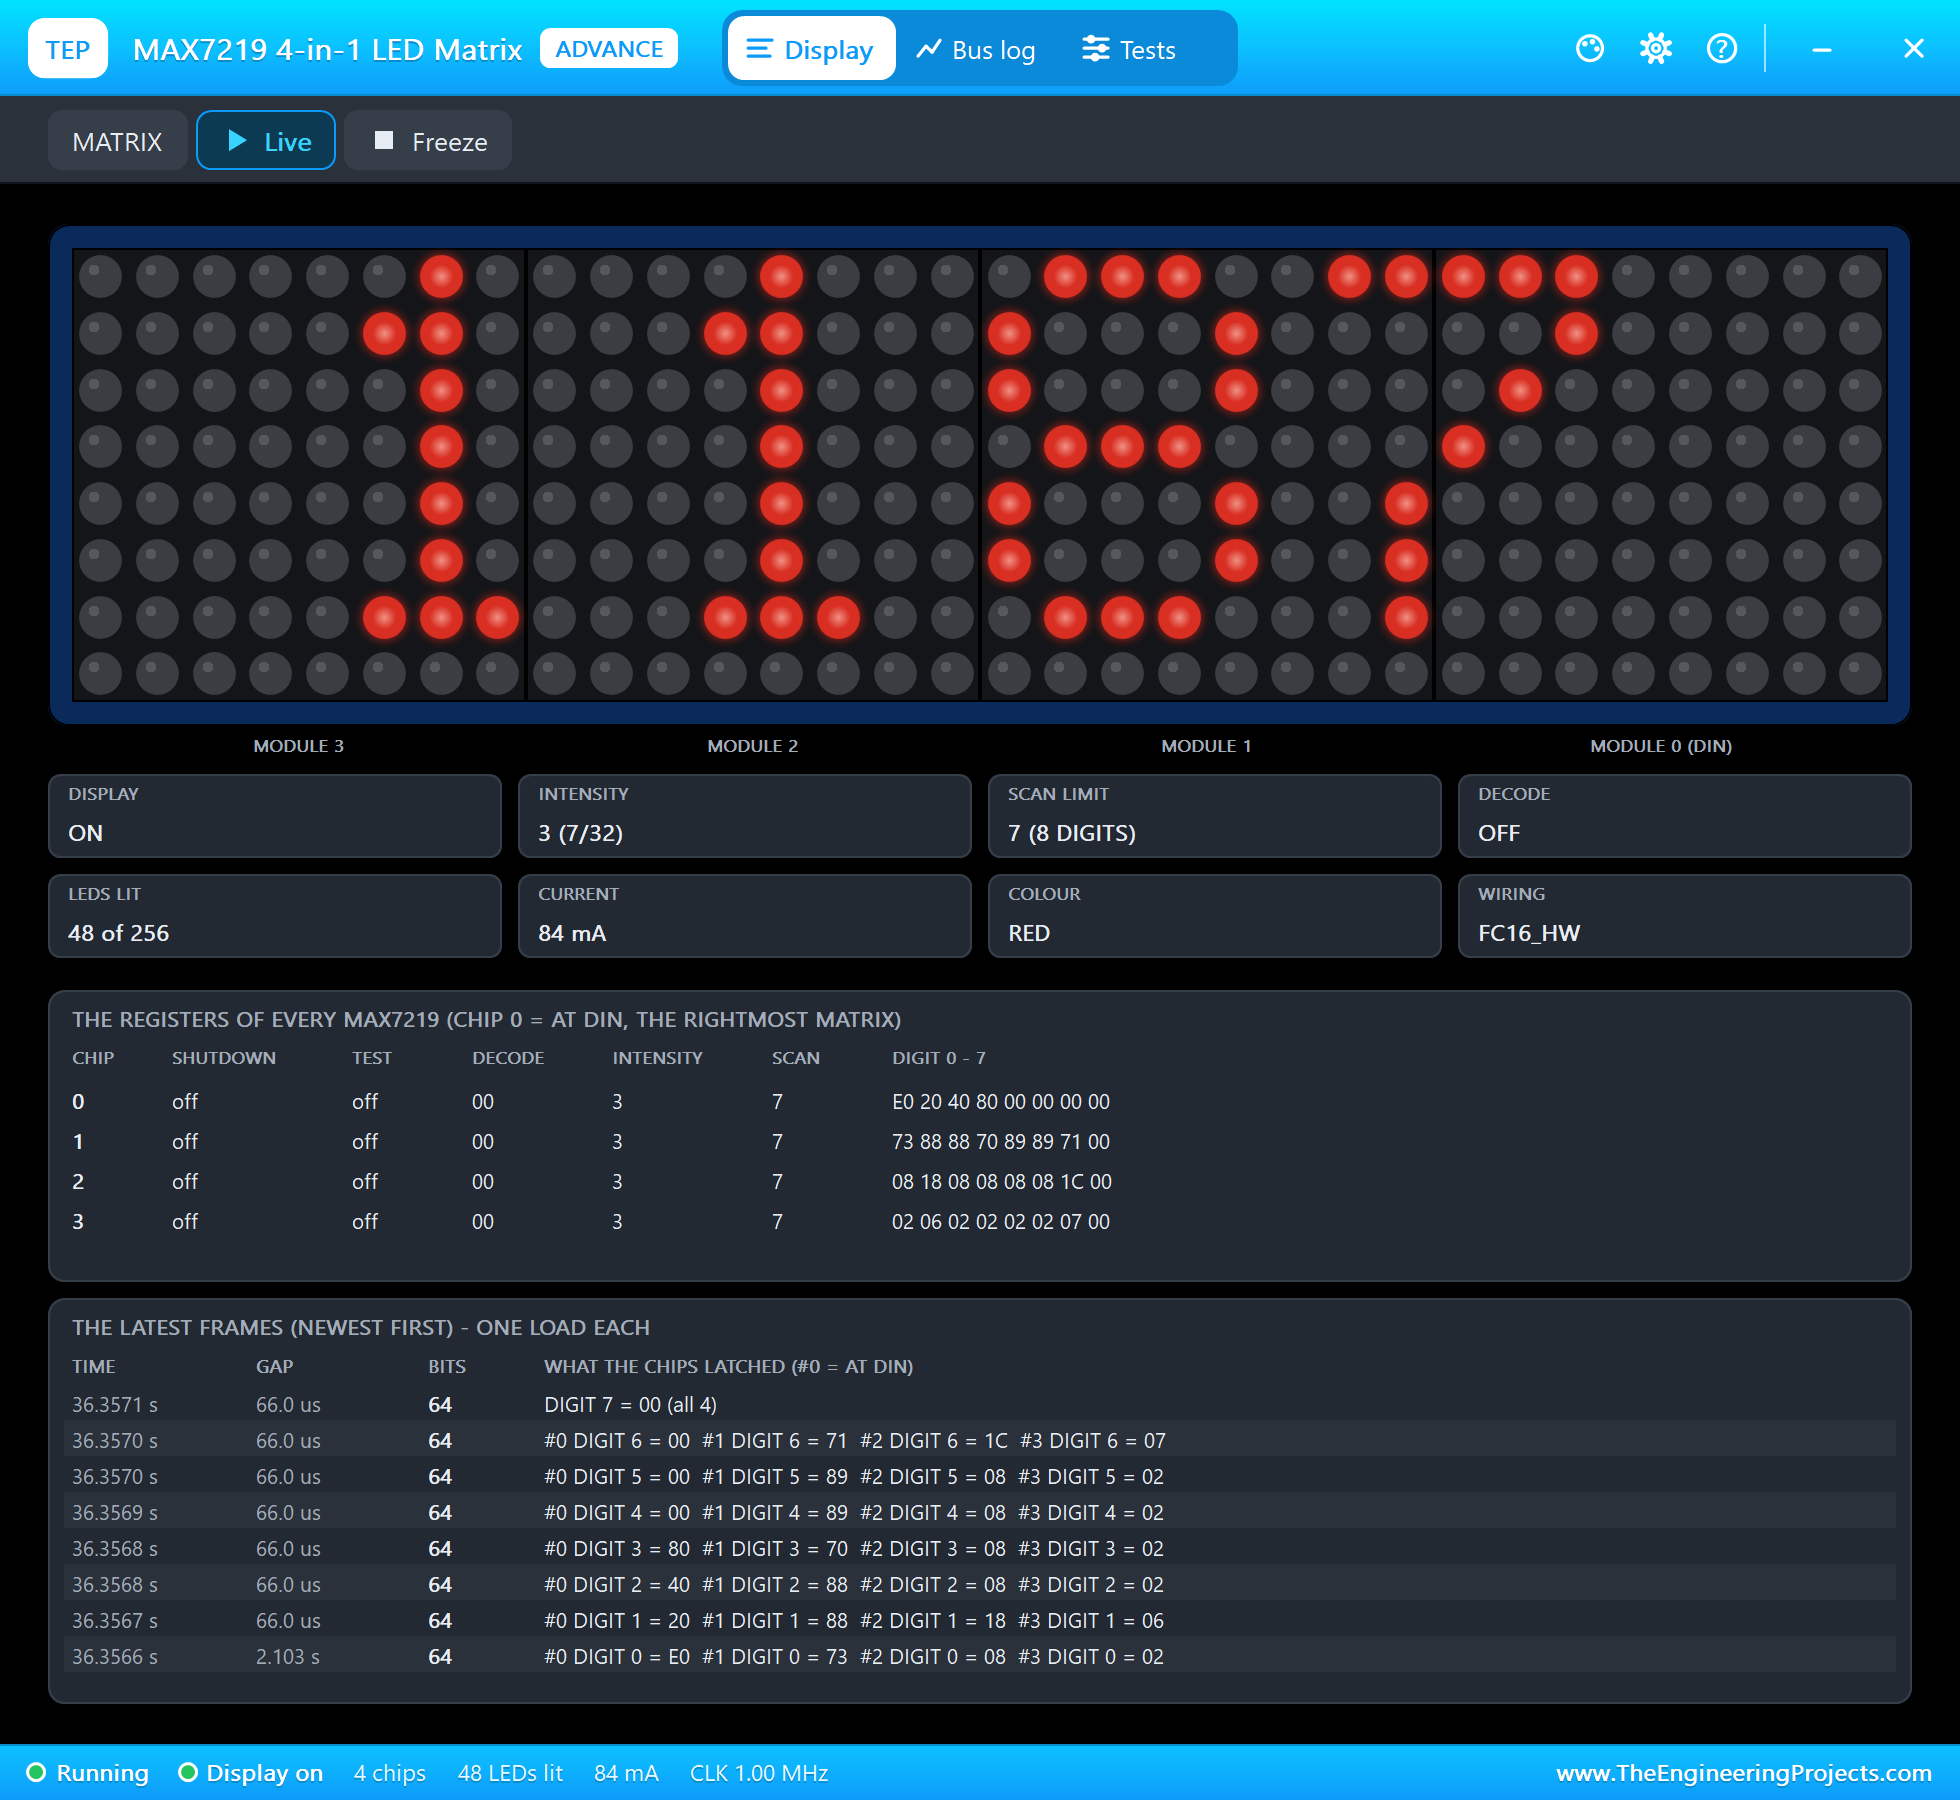
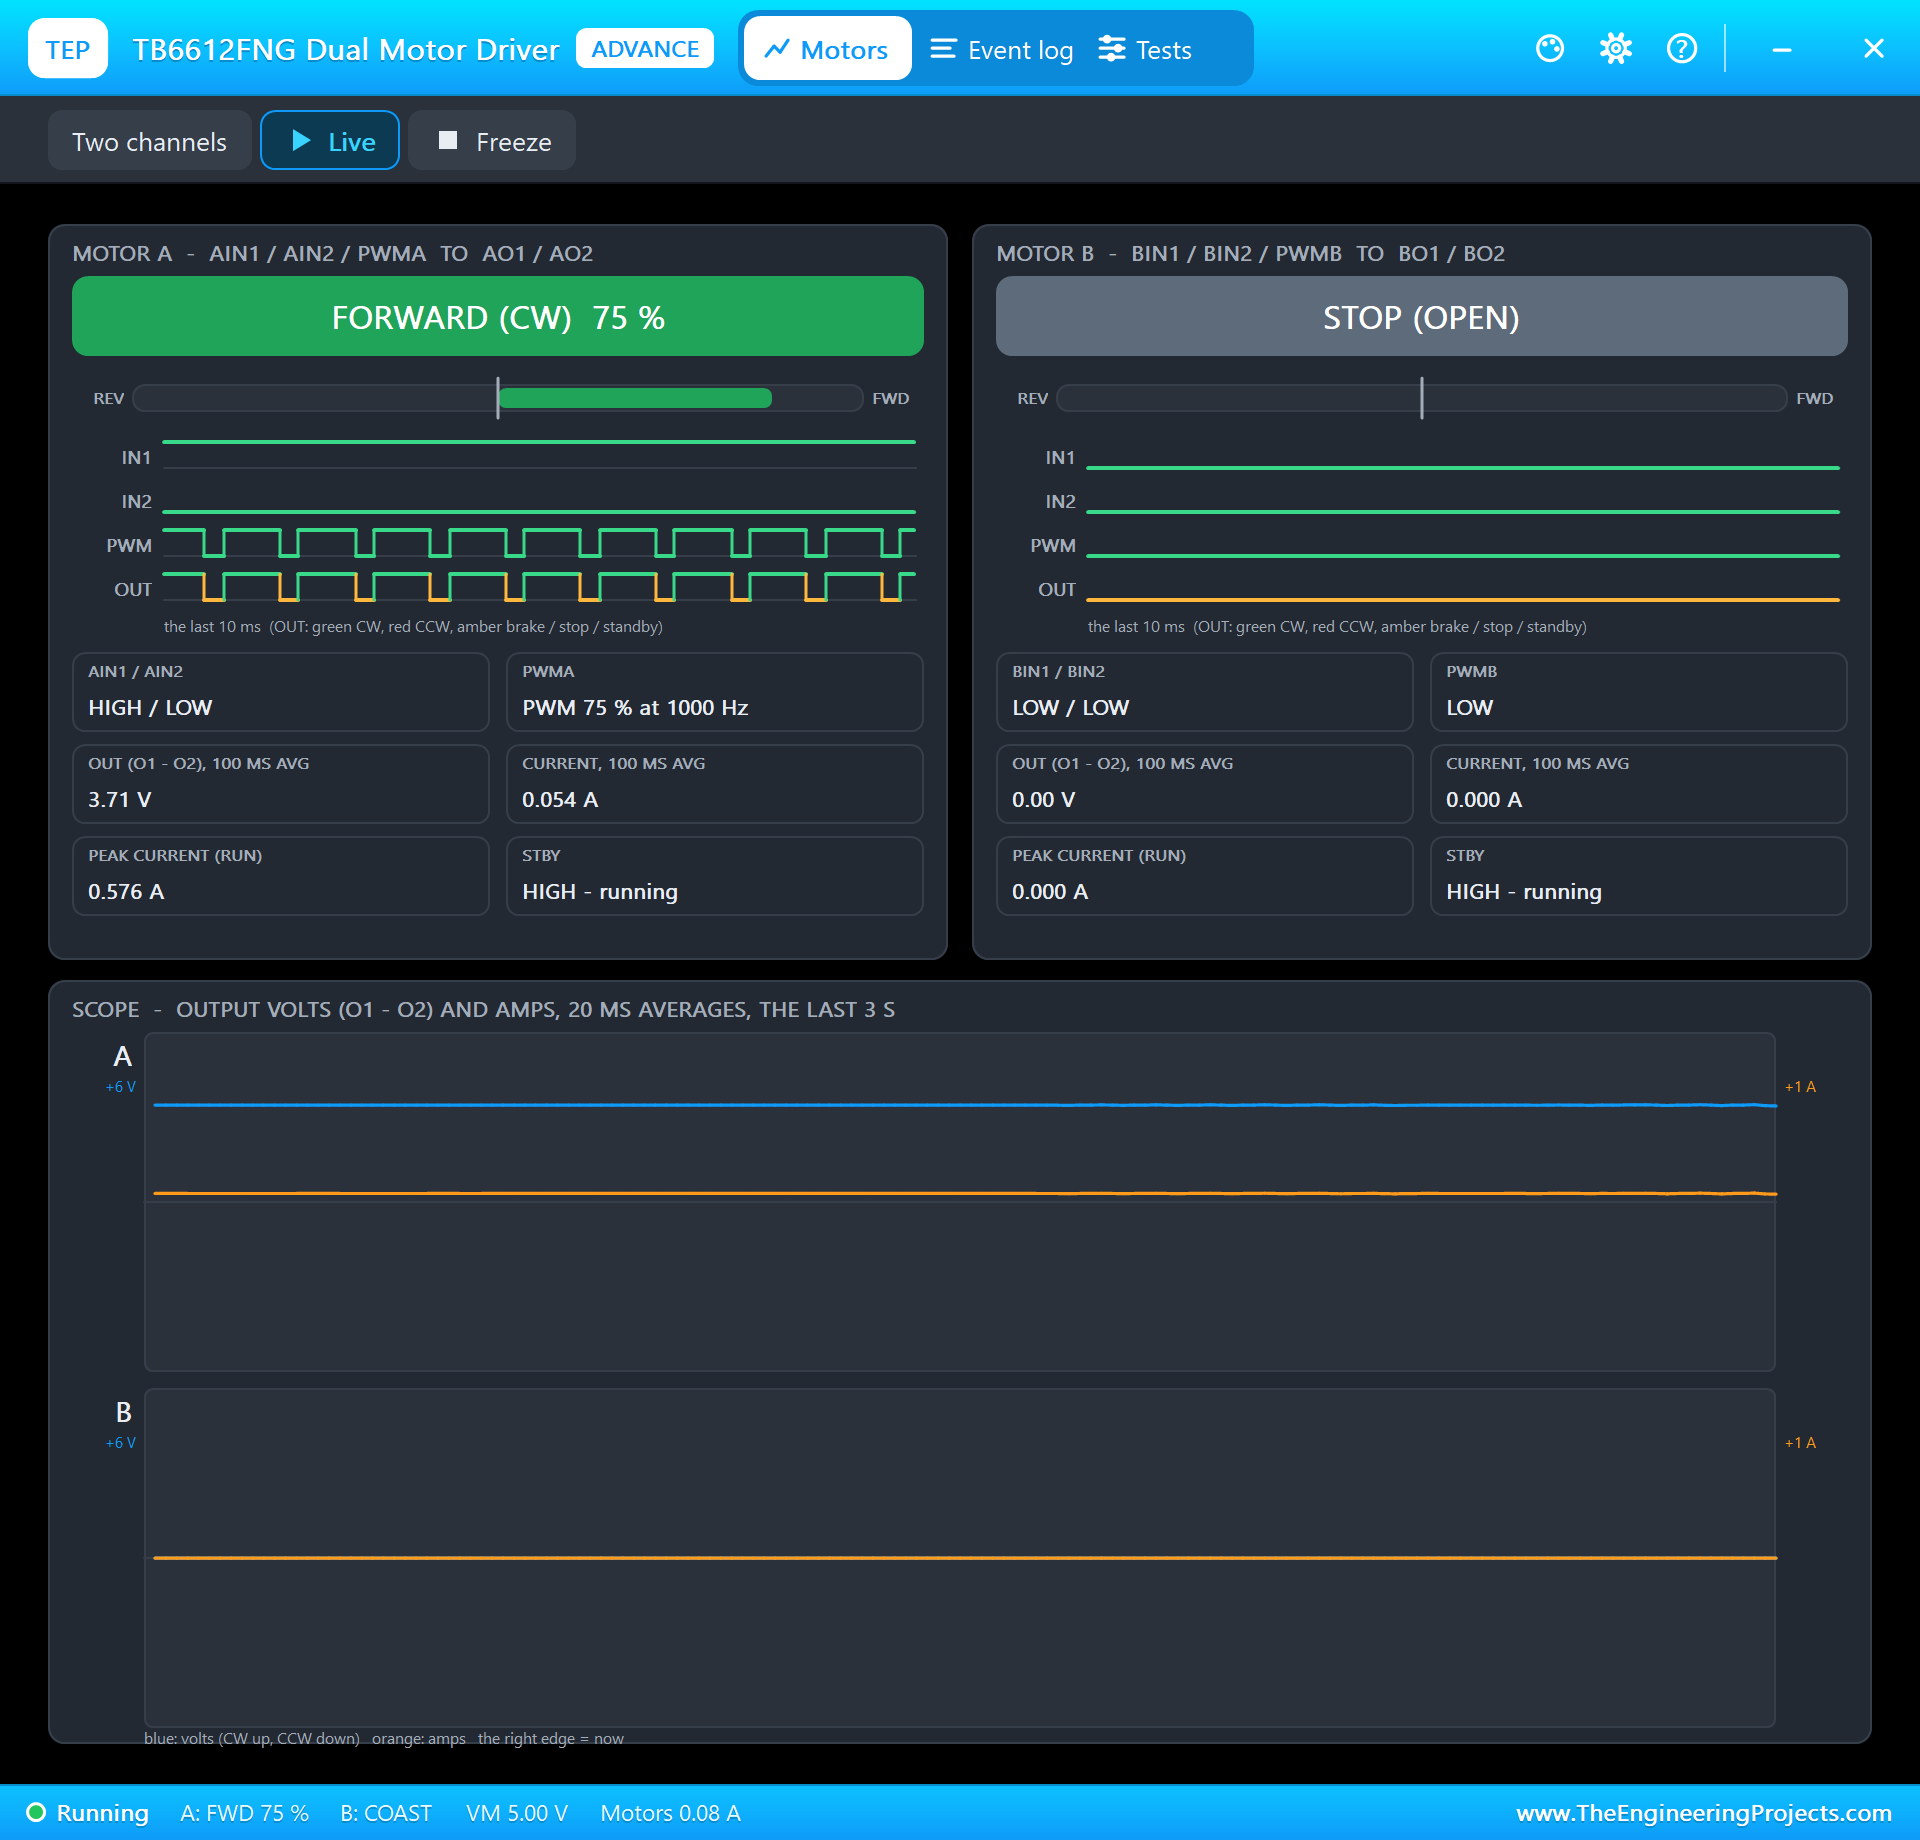
README
 README
===============================================================================================================
  Raspberry Pi 5 CO2 Monitor and Ventilation Controller - Proteus Simulation Project V1.0
  The Engineering Projects - www.TheEngineeringProjects.com
===============================================================================================================

IMPORTANT LINKS
  The project tutorial (circuit, code, simulation results):
    https://www.theengineeringprojects.com/2026/11/raspberry-pi-5-co2-monitor-proteus-simulation.html
  The libraries this project is built from (each post has its own full download and tutorial):
    Raspberry Pi 5 board:
      https://www.theengineeringprojects.com/2026/10/raspberry-pi-5-library-for-proteus.html
    MH-Z19B CO2 sensor:
      https://www.theengineeringprojects.com/2026/10/mh-z19b-co2-sensor-library-for-proteus-v1-0.html
    AHT20 temperature and humidity sensor:
      https://www.theengineeringprojects.com/2026/10/aht20-sensor-library-for-proteus-v1-0.html
    MAX7219 LED matrix:
      https://www.theengineeringprojects.com/2026/10/max7219-led-matrix-library-for-proteus-v1-0.html
    TB6612FNG motor driver:
      https://www.theengineeringprojects.com/2026/10/tb6612fng-motor-driver-library-for-proteus-v1-0.html
    130 DC motor:
      https://www.theengineeringprojects.com/2026/10/130-dc-motor-library-for-proteus-v1-0.html
    Bi-colour LED:
      https://www.theengineeringprojects.com/2026/11/bi-colour-led-library-for-proteus.html
    Resistor:
      https://www.theengineeringprojects.com/2026/11/resistor-library-for-proteus.html
    Laptop WiFi Monitor:
      https://www.theengineeringprojects.com/2026/10/laptop-wifi-monitor-library-for-proteus.html
    Mobile WiFi Monitor:
      https://www.theengineeringprojects.com/2026/10/mobile-wifi-monitor-library-for-proteus.html
  Support our free work: https://www.theengineeringprojects.com/donate

FILE STRUCTURE
Pi-5-CO2-Monitor-TEP-v1.0/
|-- Proteus Library Files/
|   |-- TEP130MOTOR.LIB                                17.7 KB   a part of the project -> LIBRARY folder
|   |-- TEPAHT20.LIB                                   96.9 KB   a part of the project -> LIBRARY folder
|   |-- TEPBICOLOUR.LIB                                10.5 KB   a part of the project -> LIBRARY folder
|   |-- TEPLAPTOP.LIB                                  39.5 KB   a part of the project -> LIBRARY folder
|   |-- TEPMAX7219.LIB                                242.3 KB   a part of the project -> LIBRARY folder
|   |-- TEPMHZ19B.LIB                                  58.1 KB   a part of the project -> LIBRARY folder
|   |-- TEPMOBILE.LIB                                  13.1 KB   a part of the project -> LIBRARY folder
|   |-- TEPRESISTOR.LIB                               306.9 KB   a part of the project -> LIBRARY folder
|   |-- TEPRPI5.LIB                                    60.5 KB   a part of the project -> LIBRARY folder
|   |-- TEPTB6612.LIB                                  71.1 KB   a part of the project -> LIBRARY folder
|-- Proteus Model Files/
|   |-- TEP130MOTOR.DLL                               297.0 KB   a model -> MODELS folder
|   |-- TEPAHT20.DLL                                  336.5 KB   a model -> MODELS folder
|   |-- TEPBICOLOUR.DLL                               285.0 KB   a model -> MODELS folder
|   |-- TEPMAX7219.DLL                                294.0 KB   a model -> MODELS folder
|   |-- TEPMHZ19B.DLL                                 305.0 KB   a model -> MODELS folder
|   |-- TEPNET.DLL                                     2.89 MB   a model -> MODELS folder
|   |-- TEPRESISTOR.DLL                               311.0 KB   a model -> MODELS folder
|   |-- TEPTB6612.DLL                                 296.0 KB   a model -> MODELS folder
|   |-- TEPPi/python/                                 17.54 MB   Python 3.11 embeddable -> MODELS\TEPPi (33 files)
|   |-- TEPPi/runtime/                                 1.11 MB   TEP Pi runtime, gpiozero -> MODELS\TEPPi (87 files)
|-- Proteus Simulation/
|   |-- co2_monitor.py                                 12.7 KB   the program PI1 runs
|   |-- Pi-5-CO2-Monitor.pdsprj                        44.9 KB   the project simulation
|   |-- TEP130MOTOR.DLL                               297.0 KB   copy of the model
|   |-- TEPAHT20.DLL                                  336.5 KB   copy of the model
|   |-- TEPBICOLOUR.DLL                               285.0 KB   copy of the model
|   |-- TEPMAX7219.DLL                                294.0 KB   copy of the model
|   |-- TEPMHZ19B.DLL                                 305.0 KB   copy of the model
|   |-- TEPNET.DLL                                     2.89 MB   copy of the model
|   |-- TEPRESISTOR.DLL                               311.0 KB   copy of the model
|   |-- TEPTB6612.DLL                                 296.0 KB   copy of the model
|-- Python Code/
|   |-- co2_monitor.py                                 12.7 KB   the program (the same file)
|-- README.txt                                        ~10.9 KB   this file
Total: 29.56 MB (unzipped). The C++ source code of the models is not included.

WHAT IS IT?
  A CO2 monitor for a classroom or an office that you can run in Proteus: a Raspberry Pi 5 reads an NDIR CO2 sensor
  and a temperature / humidity sensor, shows the CO2 on a 32 x 8 LED matrix and a bi-colour LED, and runs a
  ventilation fan faster as the air gets staler. A web page shows everything and lets you run the fan by hand.
    * MH-Z19B NDIR CO2 sensor (MHZ19BADVTEP, U1) on the 5 V header pin: TX to the Pi's RXD (GPIO15), RX from TXD
      (GPIO14), 9600 baud. PREHEAT=5 and T90=10 for the demo (the real sensor: 3 minutes and up to 120 s).
    * AHT20 temperature and humidity sensor (AHT20ADVTEP, U2) on 3V3, I2C1 (SDA GPIO2, SCL GPIO3), address 0x38.
    * MAX7219 4-in-1 LED matrix, 32 x 8 (MAX7219X4ADVTEP, MX1) on 5V, SPI0: DIN GPIO10, CLK GPIO11, CS GPIO8 (CE0).
    * TB6612FNG motor driver (TB6612ADVTEP, DRV1): VCC 3V3, VM the 5 V rail, PWMA GPIO18 (1 kHz), AIN1 GPIO23, AIN2
      GPIO24, STBY GPIO25; A01 / A02 to the fan, a 130 DC motor (MOTOR130TEP, M1).
    * Bi-colour LED (LEDBICOLOURTEP, D1): A through R1 150 ohm from GPIO5, B on GPIO6 - green GOOD, yellow FAIR (the
      two directions swapped 100 times a second), red POOR.
    * RASPBERRY PI 5 (PI1) runs co2_monitor.py on Ethernet at 192.168.1.51; the dashboard is on port 8000.
    * Laptop WiFi Monitor (PC1) and Mobile WiFi Monitor (MOB1) open http://192.168.1.51:8000/.
  The rules (at the top of co2_monitor.py):
    * a reading every 2 s; under 800 ppm = GOOD (the fan off), 800 - 1400 = FAIR (the fan from 30 % to 100 %),
      over 1400 = POOR (the fan at 100 %, OPEN on the matrix every other reading);
    * once on, the fan goes off only under 750 ppm; a humidity over 70 % runs it at least at 50 %;
    * the history: a point every 10 s, the last 3 minutes' lowest, highest and average on the page.
  Its pages:
    /            the dashboard: the CO2, the level, the temperature, the humidity, the fan, the history, the events
    /auto        the fan back to automatic
    /fan0 /fan50 /fan100   the fan by hand
    /cal         zero calibration: the air at that moment counts as 400 ppm (ONLY in fresh outdoor air)
    /data        everything as JSON

TEST STATUS
  Tested in Proteus 8 Professional on Windows 11, the run that made the tutorial's screenshots (the program's times):
    * Start: 410 ppm during the preheat, then about 420 ppm, GOOD, green, the fan off; the AHT20 24.0 C, 50 % RH.
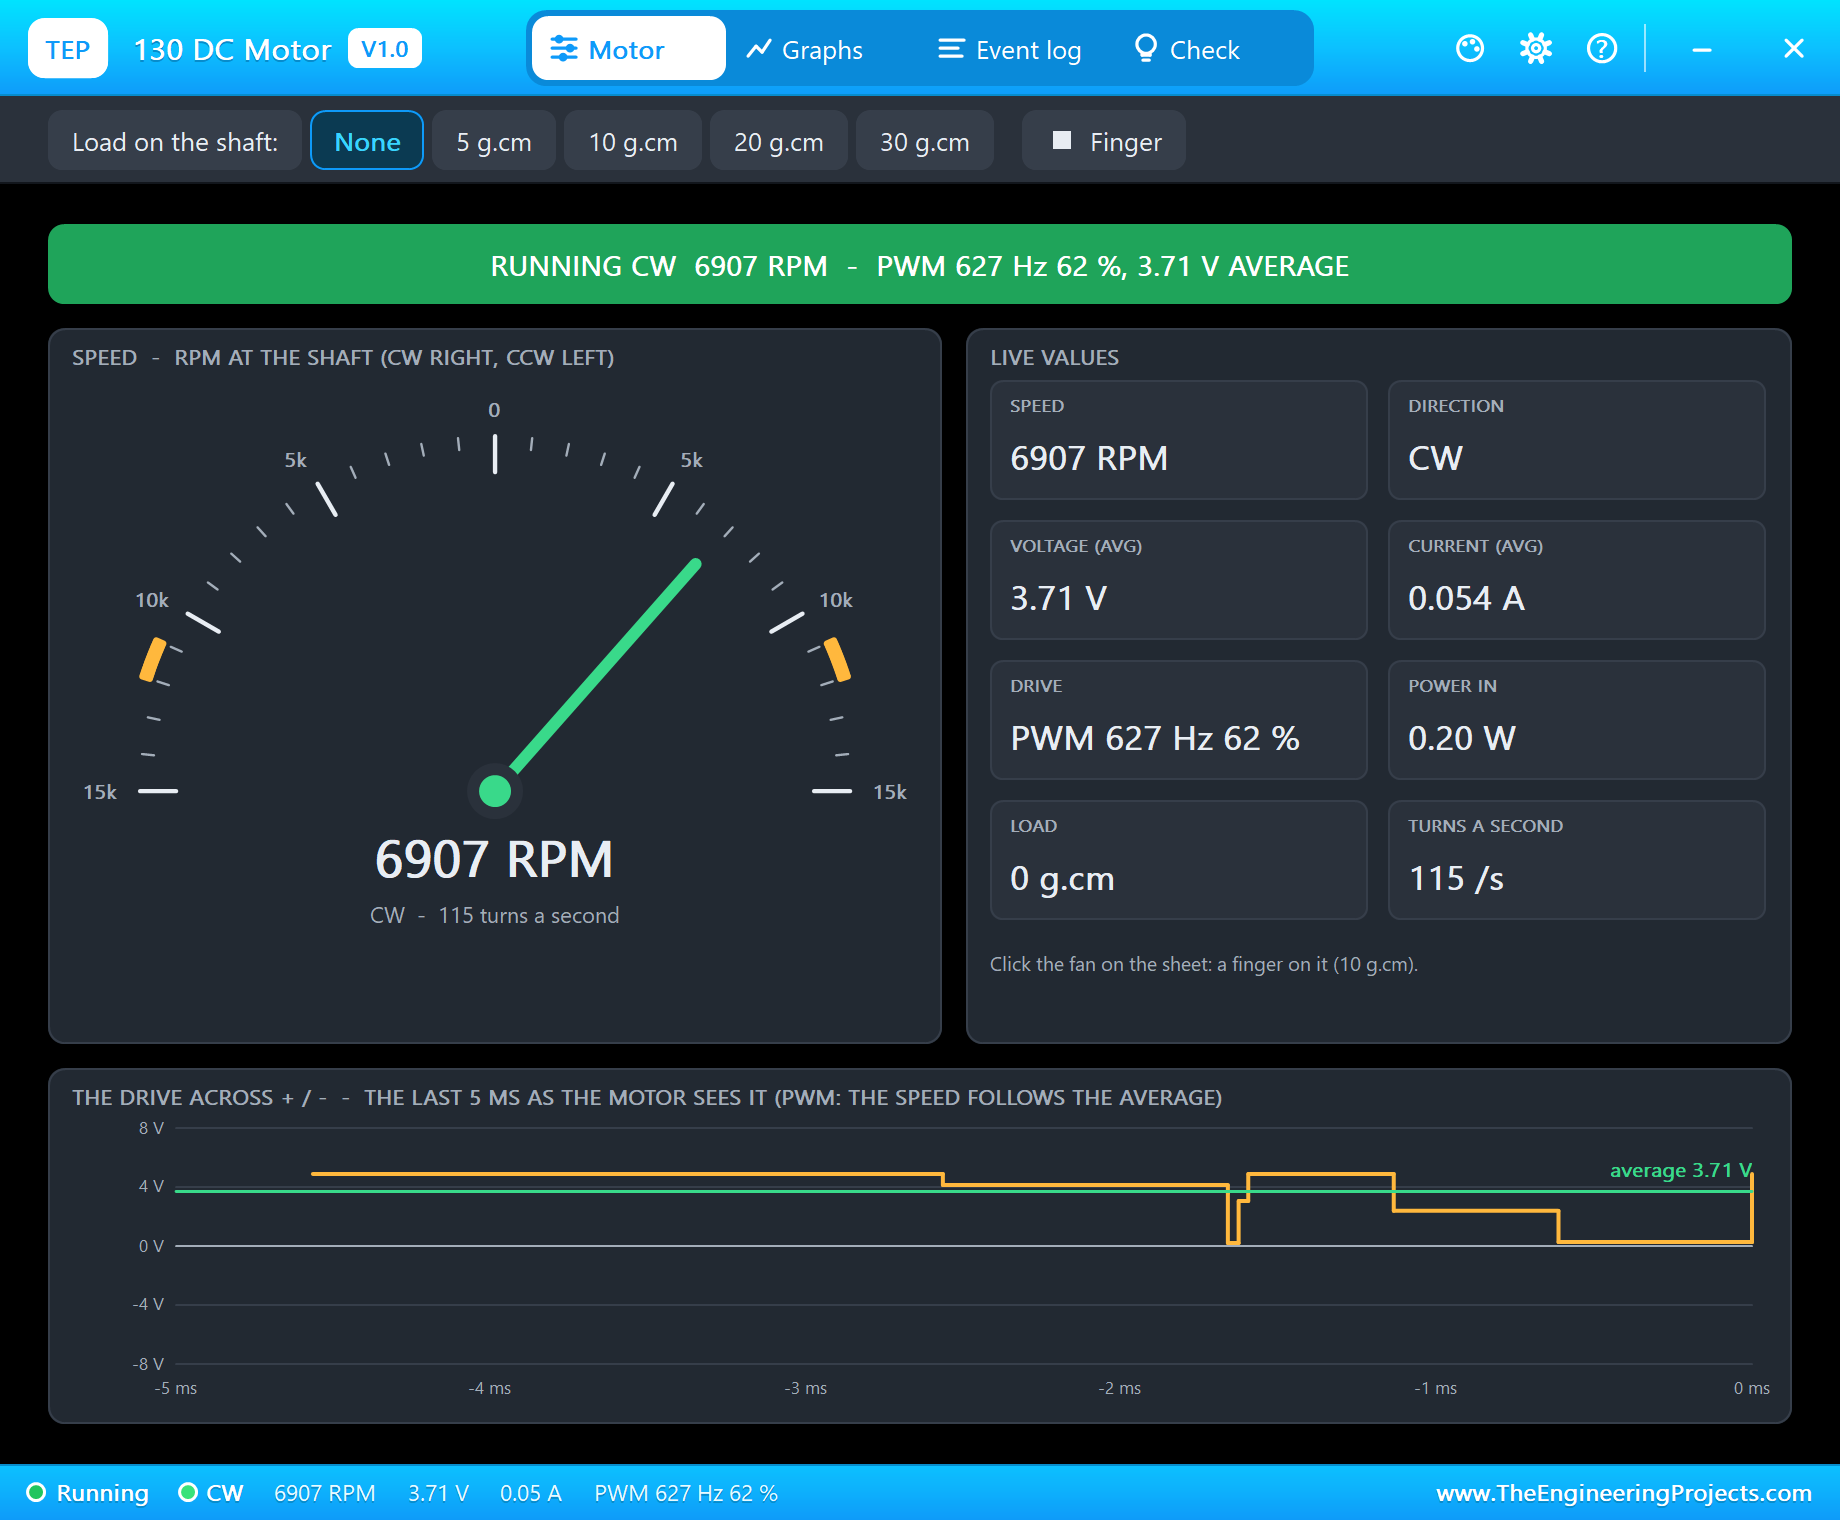
    * 1200 ppm: "FAIR - CO2 884 ppm" at 21.1 s, yellow; at 1194 ppm the fan at 76 % (the TB6612: forward, 75 % at
      1 kHz, 3.71 V on the motor, 6907 RPM).
    * 2000 ppm: "POOR - CO2 1481 ppm - open a window" at 42.2 s, red, the fan at 100 %, OPEN on the matrix.
    * FAN 50 from the phone at 54.9 s (4455 RPM); AUTO from the laptop at 60.4 s: back to 100 %.
    * VENTILATE: FAIR at 77.9 s, the fan 80 / 57 / 34 %, "GOOD - CO2 786 ppm" at 96.8 s, the fan off at 99.0 s.
    * HUMID (90 % RH): the fan at 50 % at 115.8 s; ROOM: off at 122.1 s.
    * DRIFT +150 in outdoor air: the sensor read 567 ppm; CAL 400 at 133.4 s: 400 - 404 ppm after it.
    * The MH-Z19B: 70 commands, 70 answers, none with a wrong checksum.
  An earlier run calibrated while the room's air was still falling after VENTILATE (518 ppm, not outdoor air): every
  reading after it was about 114 ppm too low - the run now waits for outdoor air, as a real calibration must.
  144 s of simulation took about 11 minutes on our PC with all the captures.

INSTALLATION
  1. Close Proteus. Extract the WHOLE zip file, for example to your Desktop.
  2. Copy the files from "Proteus Library Files" into the LIBRARY folder of Proteus, for example
     C:\Program Files (x86)\Labcenter Electronics\Proteus 8 Professional\LIBRARY
  3. Copy everything in "Proteus Model Files" - the DLL files AND the TEPPi folder - into the MODELS folder
     (next to LIBRARY). TEPPi holds the Python 3.11 that the Raspberry Pi board runs and our TEP Pi runtime.
  4. Start Proteus. Press P in the schematic and search for RASPBERRY PI 5, MHZ19BADVTEP or MAX7219X4ADVTEP to check
     that the parts are there.

RUN THE SIMULATION
  1. Open "Proteus Simulation\Pi-5-CO2-Monitor.pdsprj". Keep co2_monitor.py and the DLL files beside it.
  2. Press Play. After the 5 s preheat the matrix shows the CO2 (about 420 ppm), the LED is green, the fan is off.
  3. Open the Laptop WiFi Monitor (PC1) or the Mobile WiFi Monitor (MOB1) and press Go. Press Refresh to update it.
  4. In the MH-Z19B's pop-up (U1) pick 1200 ppm: FAIR, yellow, the fan speeds up. 2000 ppm: POOR, red, OPEN on the
     matrix. VENTILATE brings the air back to 420 ppm. In the AHT20's pop-up, HUMID runs the fan at 50 %.
  Your own program: edit co2_monitor.py beside the project (the limits at the top) and press Play.

PROPERTIES USED IN THIS PROJECT
  PI1 RASPBERRY PI 5          PROGRAM=co2_monitor.py, ETHERNET=IN (192.168.1.51)
  U1 MHZ19BADVTEP             PREHEAT=5, T90=10, CO2=420 (the demo's short preheat and response)
  U2 AHT20ADVTEP              (no changes: ROOM, 24 C, 50 %)
  R1 RESISTOR4BANDTEP         150 ohm
  PC1, MOB1                   HOMEPAGE=http://192.168.1.51:8000/

TROUBLESHOOTING
  * The CO2 stays at 410 ppm: the sensor is still preheating (3 minutes on a real one), or TX / RX are swapped.
  * The matrix shows mirrored or shifted digits: another module type (not FC-16) - change the bit order in show().
  * The fan never turns: STBY is LOW, or the PWM duty is under 30 % (the fan's motor does not start lower).
  * Every reading is far too low after CAL 400: the calibration was done in a room, not in fresh outdoor air.
  * The terminal cannot start Python: the TEPPi folder is not in MODELS (step 3 of INSTALLATION), or an older one.

LICENCES
  * The project, the program, the parts (LIB files) and the models (DLL files) are made by The Engineering
    Projects and are free for learning and for your own projects. The models use only standard Windows libraries.
    The C++ source code of the models is not included; the source code is not included for any model.
  * TEPPi\python is the Python 3.11 Windows embeddable package (Python Software Foundation License); TEPPi\runtime
    holds our TEP Pi runtime with gpiozero and colorzero (BSD licences) - their licence files are inside the folders.
  * Proteus is a product of Labcenter Electronics and is not included. Raspberry Pi is a trademark of Raspberry Pi
    Ltd; MH-Z19B is a product of Winsen. This project is not made or endorsed by them. A hobby CO2 monitor is not a
    certified air quality instrument.

VERSION
  V1.0 - the first release of the project.
===============================================================================================================Development1 release
 Development1 release
-
V1.0Raspberry Pi 5 CO2 Monitor with Ventilation Fan - Proteus Simulation V1.0this page
V1.0 is the only release in the Download Center so far. When a newer version is published, it appears above with its own download page.
Installation7 steps
 Installation7 steps
From the download to a working project, in order. The steps follow what the package contains.
You will need
- Proteus Design SuiteProteus 8 or newer (Labcenter), on Windows
- Pythonto build the source files into firmware
- Any archive toolWindows, macOS and Linux extract ZIP files on their own

Steps
- 1
Extract the archive
Right-click pi-5-co2-monitor-tep-v1-0-2687d0c352954f8cbcb5f2cb337d4685.zip and choose Extract All (or open it with 7-Zip or WinRAR) into a folder you can find again. Keep its folder structure (Pi-5-CO2-Monitor-TEP-v1.0) as it is.
- 2
Copy the library files into Proteus
Move TEP130MOTOR.LIB, TEPAHT20.LIB and TEPBICOLOUR.LIB and 7 more and the files into the LIBRARY folder of your Proteus installation: C:\Program Files (x86)\Labcenter Electronics\Proteus 8 Professional\LIBRARY for Proteus 8, or the matching Proteus 7 folder. Older versions keep it under ProgramData\Labcenter Electronics. If Proteus is open, close it first.
- 3
Add the simulation model
Copy TEP130MOTOR.DLL, TEPAHT20.DLL and TEPBICOLOUR.DLL and 12 more into the MODELS folder next to LIBRARY, so the component can run, not only be drawn.
- 4
Restart Proteus and place the component
Start Proteus, open a schematic, press P (Pick Devices) and search for the component by the name used in the tutorial. It appears with its pins ready to wire.
- 5
Build the source code
Open co2_monitor.py, attr.py and color.py and 28 more in the compiler named in the tutorial (MikroC, Keil, MPLAB, Code Composer or the Arduino IDE) and build it to get the firmware.
- 6
Open the example simulation
Open Pi-5-CO2-Monitor.pdsprj in Proteus to see the wiring exactly as in the tutorial. Check the controller's Program File path, then press Play.
- 7
Follow the tutorial
Raspberry Pi 5 CO2 Monitor with Ventilation Fan - Proteus Simulation explains every connection and setting in order; keep it open beside the files while you build.
FAQs8 questionsContact TEP
 FAQs8 questions
How do I download Raspberry Pi 5 CO2 Monitor with Ventilation Fan - Proteus Simulation V1.0?
Wait for the 30-second guest countdown on this page, then press the download button; the file comes straight from our storage. Members who are logged in skip the wait. If the browser opens the file instead of saving it, use its Save as option. The download link is made for you when the countdown ends and works for 15 minutes; a saved or shared link stops working, so share this page instead.
What is inside the archive?
Raspberry Pi 5 CO2 Monitor with Ventilation Fan - Proteus Simulation V1.0 comes as a ZIP archive of 150 files (14.9 MB, 29.6 MB unpacked) holding Proteus library files, simulation model DLLs, a Proteus simulation, source code and a nested archive. Open the File Structure tab for the full list of 150 files.
What should I do if the download does not start?
Check the browser's download list first; an ad blocker or a company firewall can also hold it back, so try another browser or network. If the file arrives incomplete, download it again. For an installation problem, read the Install tab or tell us in the comments with your software version and the exact error message.
Is this file free?
Yes. Every file in the TEP Download Center is free for learning, personal and student projects. If you share it, link back to this page or the tutorial so others find the latest version.
How do I check that the file arrived complete?
Compare its SHA-256 with the one on this page, 4b983c1add10b37f5d4b6f4ea9d6d7a59fd76dec2ad641b58284c3016d33b46c. In PowerShell run Get-FileHash "pi-5-co2-monitor-tep-v1-0-2687d0c352954f8cbcb5f2cb337d4685.zip"; on macOS or Linux run shasum -a 256 "pi-5-co2-monitor-tep-v1-0-2687d0c352954f8cbcb5f2cb337d4685.zip". The same value means the file is exactly the one in our storage; a different one means the download broke off, so download it again.
Do I need WinRAR to open the ZIP file?
No. Windows, macOS and Linux open ZIP archives on their own (Extract All, or double-click). WinRAR and 7-Zip work too. Extract the whole archive before using the files.
Where do I put the LIB and IDX files?
Both files go into the LIBRARY folder of your Proteus installation (Proteus 8: C:\Program Files (x86)\Labcenter Electronics\Proteus 8 Professional\LIBRARY; Proteus 7 has the same folder under its own name). Restart Proteus afterwards and search for the component with P.
Which Proteus version does the library need?
The tutorial names the Proteus version the library was made and tested with. Most TEP libraries work in Proteus 7 and Proteus 8; if the component does not appear after a restart, check that both the LIB and the IDX file were copied and that Proteus was fully closed while copying.
Members skip the wait. Log in or join TEP.

- 0Total downloads
- 4%Popularity
- ProteusCategory
- 0Comments
- ssyedzainnasirUploaded by
- 14 Nov 2026Uploaded at


 SHA-256
4b983c1add10b37f5d4b6f4ea9d6d7a59fd76dec2ad641b58284c3016d33b46c


 Need help with this file?
 Tags
Related Proteus
All Proteus tutorials


More Raspberry Pi project files
All Raspberry Pi tutorials


Comments
0