Hello everyone! I hope you all will be fine. Today, I am going to elaborate that how to create your First Project using NI LabVIEW Programming . This software is very easy to use in comparison to the other software. You do not have to write the complete source code for the desired output, like in other software e.g. Arduino, MATLAB, Dev C++, Eclipse etc. instead you have to just implement your logic using Field Programmable Gate Array (FPGA) blocks. The program is designed with the help of the FPGA blocks, is usually known as “ Virtual Instruments ”. Normally we used to call it as VI’s. We create in “Block Diagram” window as described in our previous tutorial on Introduction to LabView . If you haven't read that tutorial then I owuld suggest you to read that one first because I have given ...
Hello everyone. I hope you all will be absolutely fine. Today, I am going to share an Introduction to LabView . LabView is a really exciting software and recently I have worked on many LabView Project so I thought to start this new set of series in which I am gonna explain all about LabView from beginners level to Pro Level. So, today I am gonna upload the first tutorial in this LabVIEW series so that's why I have named it Introduction to LabView and I hope you are gonna like this tutorial. :) LabVIEW basically stands for “Laboratory Virtual Instrument Engineering Workbench”. This software is designed by the National Instruments (NI) for the control and design of the projects. You can use it for simulation purposes, can also interface hardware with LabVIEW, data acquisition is another big ...
Hello friends, I hope you are fine and doing great in your lives. Today, I am not going to write an article or a tutorial, rather I am going to tell you about different engineering projects that I have worked on. If I am talking about engineering projects then it means a variety of different kind of projects. These projects may include microcontroller based projects with Arduino, 8051 or pic, 555 timer based projects, Matlab projects, LabVIEW projects, Proteus projects and a lot more. In this article, I am going to share some of the very interesting projects from my list. If you are an engineering student or someone who loves to work on engineering projects, then you can definitely start from here. The first ones that I am discussing with you are Arduino projects. Arduino Based Engineering ...
Hi Friends, I hope you are fine. I have another topic on embedded systems that I am going to share with you. Today, I am gonna tell you about Embedded Systems Software Development Tools . I have already told you about the hardware tools you need for developing embedded systems. You can find them in this article 6 necessary embedded tools . If you are new to Embedded Systems then you should first have a look at What is Embedded Systems? and then you must read What is Embedded Computer because these two tutorials will give a detailed overview of Embedded Systems. Moreover, if you are interested in Learning Embedded System Programming then today's tutorial will help you in choosing the right tools among Embedded Systems Software Development Tools. I have also shared Examples of embedded syste ...
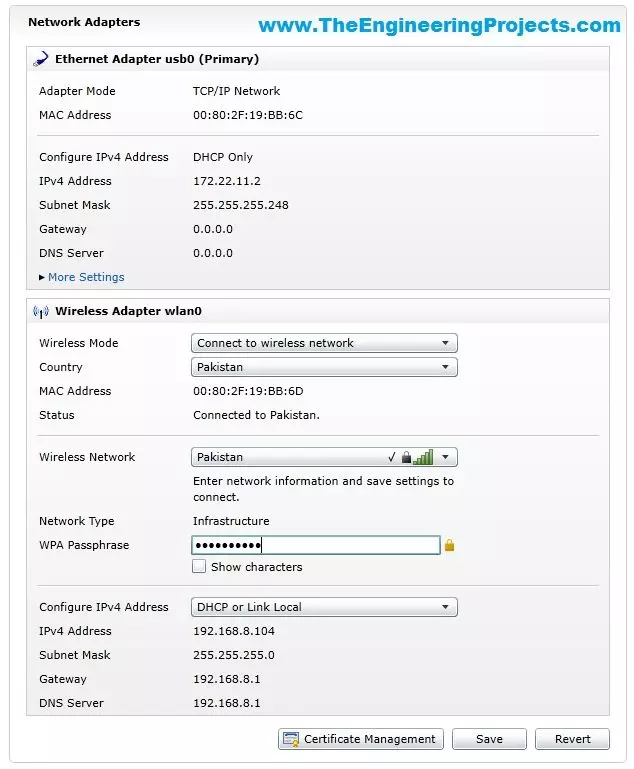
Hello friends, hope you all are fine and having fun with your lives. In today's tutorial, I am gonna show you How to Configure NI MyRio on Wifi. In our previous tutorial, Getting Started with NI MyRio I have show you how to get started with NI MyRio and control LEDs of NI MyRio but you have seen that we have done that over USB. In simple words, we have controlled the LEDs and gyroscope of MyRio over USB but in today's tutorial, first of all, we are gonna configure NI MyRio on Wifi and then we are gonna control all those things over Wifi instead of USB. If you have a project on MyRio then its my recommendation to use Wifi instead of USB for upload and testing your codes because Wifi is quite flexible in use and you no more restricted to use the USB wire. I was working on a robot project in ...
Hello friends, I hope you all are fine and having fun with your lives. Today, I am going to share a tutorial on new board and as you can see in the title, this new board is named as Myrio. So, today, we are gonna have a look at getting started with Myrio. NI myRIO is a combination of dual-core ARM Cortex™-A9 real-time processing and Xilinx FPGA customizable I/O. It is specially designed for engineering students by National Instruments and is a cheap as well as an awesome piece for building your dream projects. Recently I got a chance to work on this NI Myrio board and I really enjoyed while working on them as they not only awesome but also easy in programming. Moreover, because of its awesome speed you can ask it to do any kind of embedded work. You can read more about myRio on the Officia ...
Hello friends, hope you all are fine and having fun with your lives. Today, I am going to share all the LabView Projects, posted on our blog. These LabView projects are entirely designed by the TEP team and I hope they will help you in some way. Rite now the list is quite small but I am gonna post more tutorials and projects related to LabView soon. So, keep visiting or subscribe us via email so that you get these exciting tutorials straight to your inbox. Moreover, LabView is really a difficult software and it really took us a lot of time in designing these projects so other blogger are more than welcome to share our projects on their blog but do mention the respective link from where you copied as a favor. I am gonna share the complete list here. The benefit of doing this is that it will ...
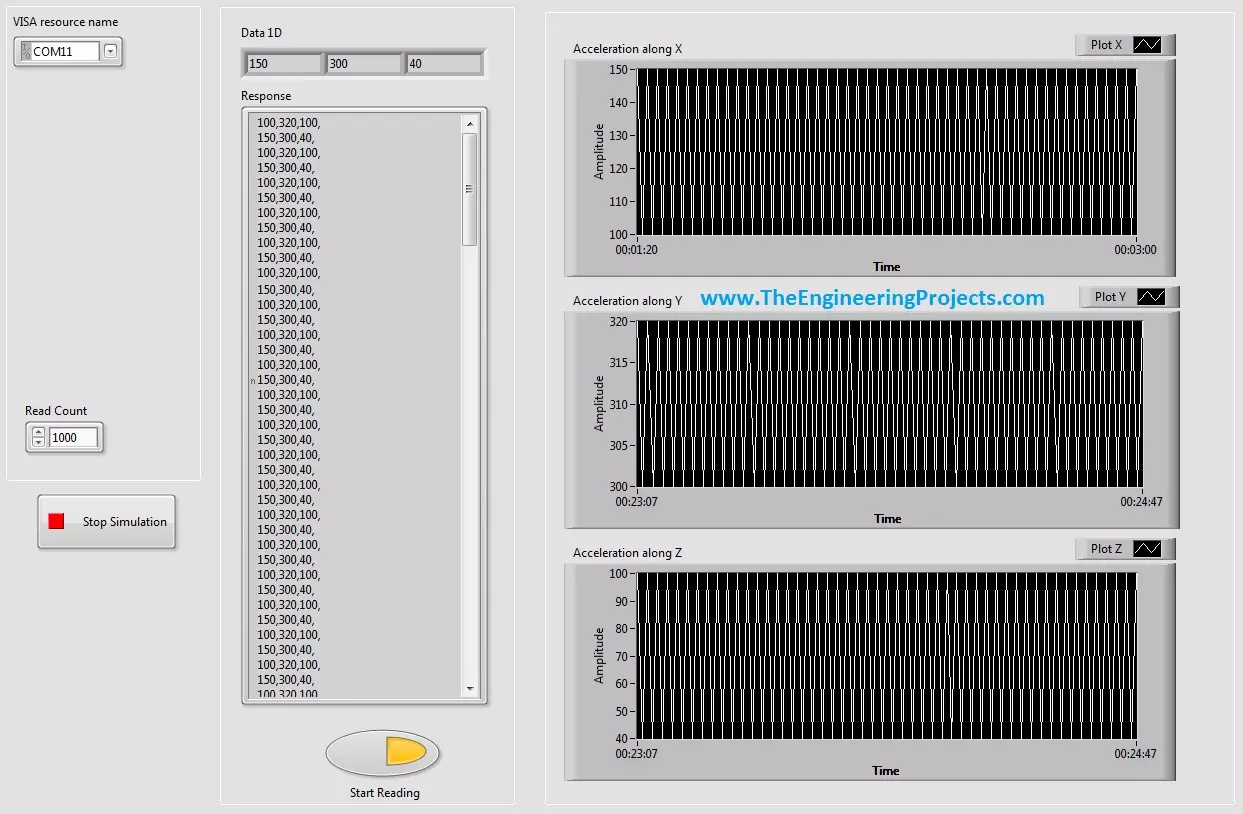
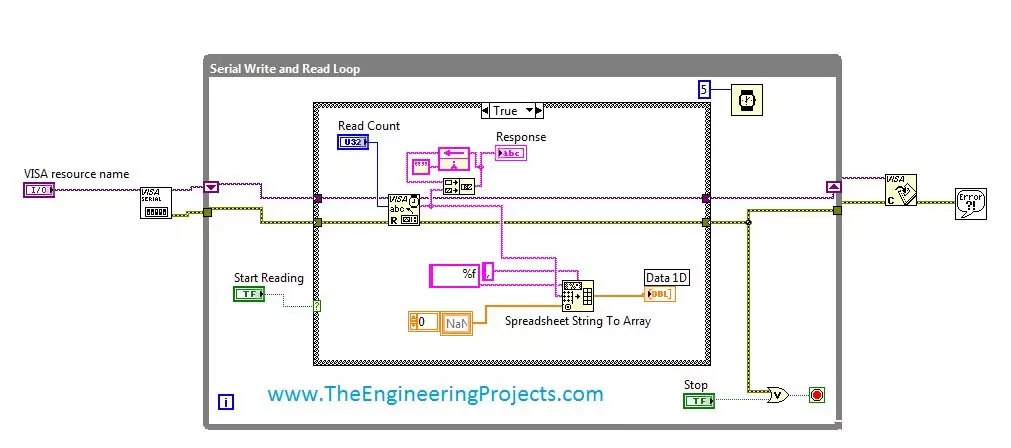
Hello friends, hope you all are fine and having fun with your life. Today's post, as the name suggests is about How to Display Serial Data on Real Time Graph in Labview. In our previous post, we have seen that how to Get Continuous Data From COM Port in Labview . Today's post is a sequel of this previous post so I would recommend that if you haven't had a look on that post then first visit it as I am gonna start today's post from where I stopped the previous one. In the last post, we were able to get the continuous data from COM port using Labview and we have also separated the data based on a character which I have used this one "," i.e. comma. Now, suppose you are sending 3 values from your COM port and these are the sensors' values so tthe best way to display these value is by using a g ...
Hello friends, hope you all are fine and enjoying good health. Today's post is my first post on LabView Software. I have worked on LabView quite a lot in past but these days I am continuously working on LabvView so I thought to write some tutorials on it. In today's tutorial, I will explain in detail How to get continuous data from COM Port in LabView software. LabView is a very handy tool for the engineers. One can easily plot graphs and can work on different hardware modules with it. One of the best feature of LabView is its extensive help desk. There are many examples present in it which are ready to run and can help a lot, moreover their online is also very extensive. I got into many problems while working on it and I never get stuck, I just searched online and got the solutions for my ...