Hello Friends! I hope you are enjoying your life and having fun. Today, I am going to give you brief details on the Introduction to 6n137. It is a photocoupler that is used to transfer electrical signal with the help of light between two separated circuits. It consists of one chip photo IC and high emitting diode. It is a 8 pin device which comes in DIP package. I'll try to cover as many aspects as possible related to this photocoupler. Let's get started.
Introduction to 6n137
6n137 is a photocoupler also known as optocoupler that is used to connects the two electrically isolated circuits with the help of light.
It consists of 8 pins where inputs and outputs terminals are electrically isolated which help in controlling the large power, curren ...
Hello everyone, welcome back to our website and I hope you are getting along with your life pretty well. I always try to discuss the latest tools of SEO that help you in growing your business and set you on top of the search engine. Today I am going to talk about a new topic that is “What is DA And PA & Role of Moz Rank in SEO”.
Moz Rank is an SEO tool that measures your website links popularity score. But most of the marketers are using it to track the search engine result page (SERP) ranking of different website pages and the whole website.
Keep in mind that Moz rank metrics have not any link with Google Search Engine but these are MOZ metrics.
DA and PA are two terms used by Moz to give the score of your website and all the other pages of t ...
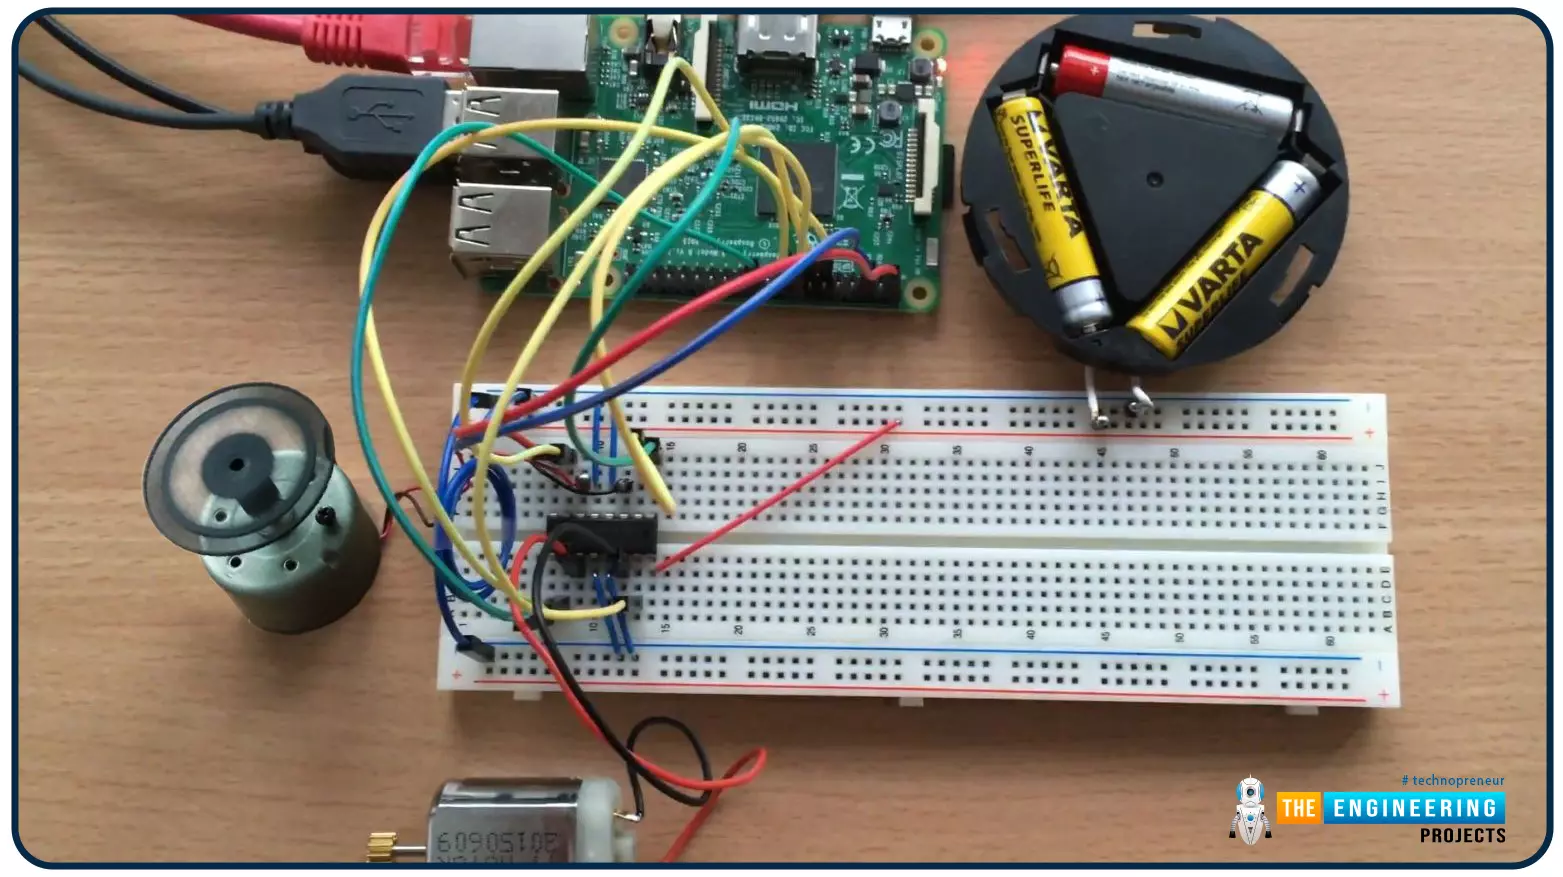
Hello friends, I hope you all are doing well. Welcome to the 9th tutorial of our Raspberry Pi programming course. In the last chapter, we generated a PWM signal from our Raspberry Pi to control the brightness of an LED. We also studied different functions used in Python to perform PWM. In this chapter, we'll get a bit advanced with PWM and use it to control the speed and direction of a DC motor with the help of a motor driver IC.
To control the speed & direction of the DC Motor, we will:
Design a Circuit Diagram.Write Python code.
Components RequiredWe will use the following components to control the DC motor speed:
Raspberry Pi 4.DC Motor.Motor driver IC(L293D).Breadboard.
Jumper wires.
Controlling DC Motor speed wi ...
Hi friends, today we are going to learn one of the most important instructions in the PLC ladder which is MOVE instruction by which we can move data between different memory storage including input, output, marker, and variables. Also, data of different data types and sizes can be transferred from source to destination and source memory locations. For example data types including char, string, integer, floating, time and date can be transferred between source and destination. Memory location like input, output, and marker memory area can be acting as source or destination. Furthermore, a mask can be utilized to customize and control the part of data to be transferred between source and destination. In that move with a mask, the instruction uses a source address, a destination address, and ...
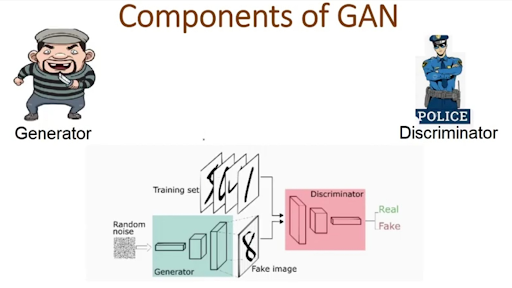
Deep learning has applications in multiple industries, and this has made it an important and attractive topic for researchers. The interest of researchers has resulted in multiple types of neural networks we have been discussing in this series so far. Today, we are talking about generative advertising neural networks (GAN). This algorithm performs the unsupervised learning task and is used in different fields of life such as education, medicine, computer vision, natural language processing (NLP), etc.
In this article, we will discuss the basic introduction of GAN and will see the working mechanism of this neural network, After that, we will see some important applications of GANs and discuss some real-life examples to understand the concept. So let’s move towards the introduction of GANs ...
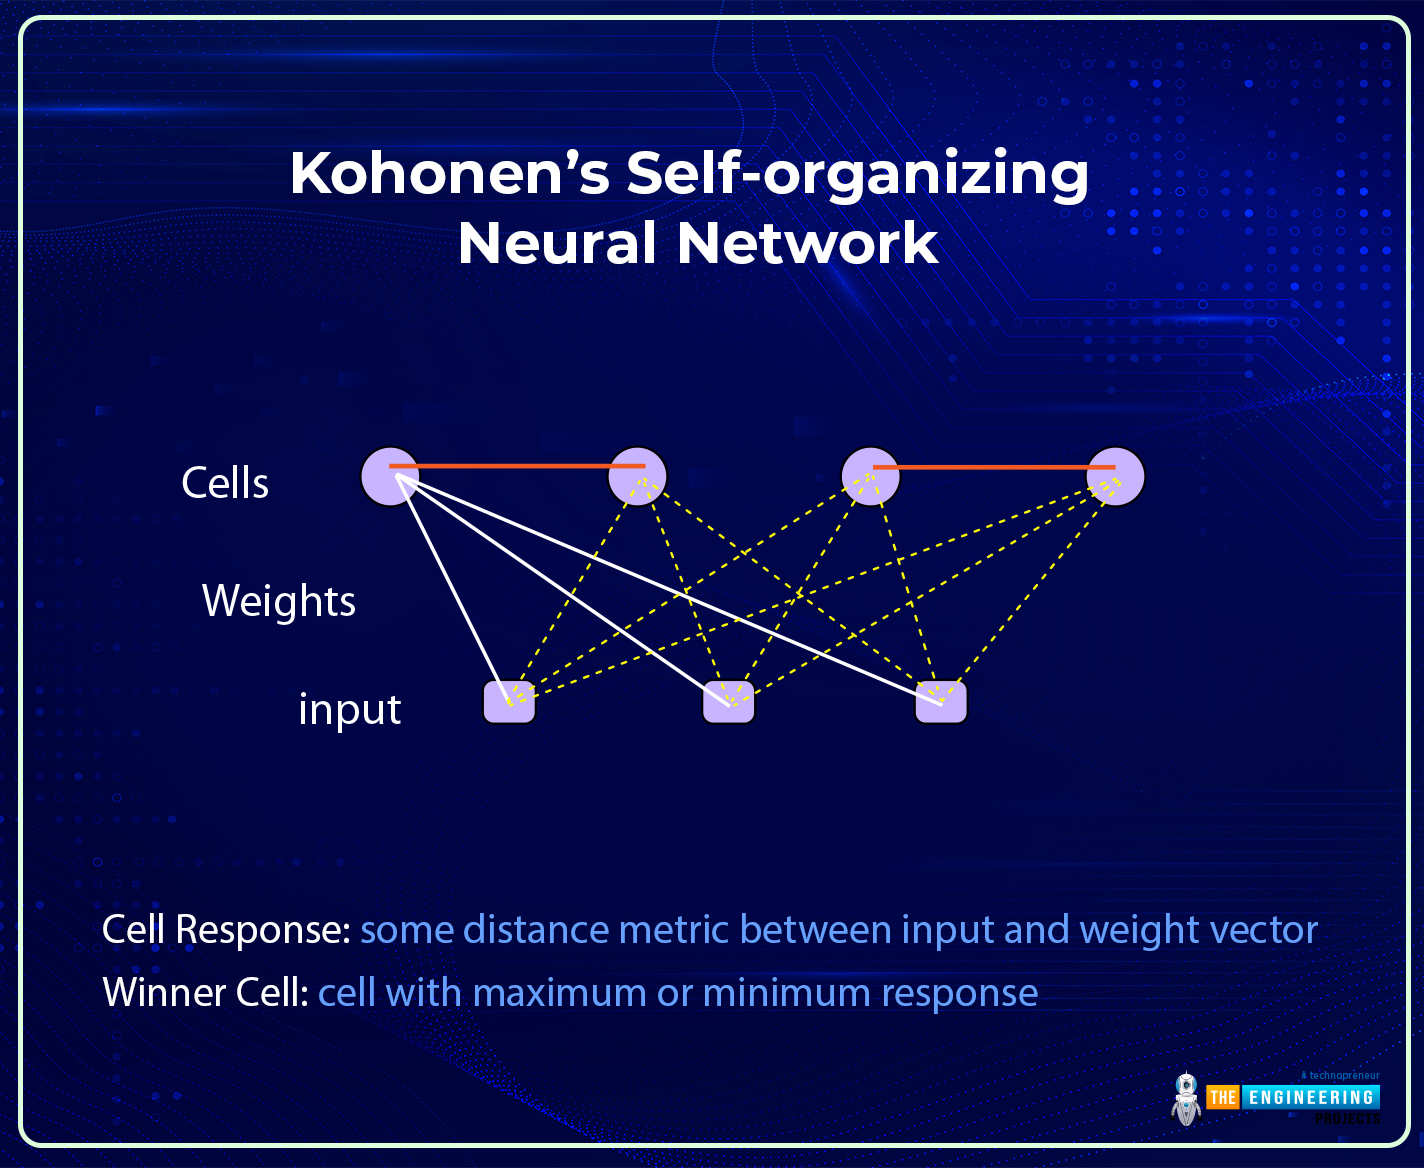
Hi there! I hope you are having a great day. The success of the field of deep learning is due to its complex and advanced neural networks. These networks can be broadly divided into traditional and modern neural networks. We have seen the details of traditional neural networks, and in the previous session, the basic introduction of modern neural networks and the details of their features were discussed. Today, we will talk about one of the most famous modern neural networks, the Kohonen Self-Organized Neural Network.
Modern neural networks are more organized and developed than traditional neural networks, but that does not make traditional neural networks less efficient than modern ones. All the networks are introduced for specific tasks, and this is one of the main reasons behind t ...
Hello friends, I hope you all are doing great. In today's tutorial, I am going to show give you an overview of the future of Cloud Development. As one of the fastest-growing innovations of modern technology, cloud computing has revolutionized our relationship with the internet and the ways we’re able to connect and share resources with others around the globe. As tech companies are rapidly discovering even more ways to utilize all of the cloud’s advantages, the future of cloud development is sure to bring further advancements as an integral part of our everyday lives.
Where it is and where it’s going
Cloud development has taken off because of its ease of use, security, scalability, and reduction of costs. Many companies have been growing more relia ...
Hey Friends! Hope you are doing well. I always strive to keep you updated with valuable information related to engineering and technology. Today, I'll uncover the details on the Introduction to Power Management Integrated Circuits (PMIC). These are the integrated circuits, commonly known as power management ICs or power management unit, used for managing and controlling the power of the host system.
They are mainly used in Consumer Electronics, Automotive Industry, Telecom, and Networking.
Integrated circuits are the part and parcel of some Electronics Projects. If you are a newbie or an expert, you require plenty of ICs every now and then.
Apart from time management other factors that can highly influence the nature of your project include t ...
Hello friends, i hope you all are fine enjoying. Today i am going to share a new project tutorial which is Getting Started with Arduino Programming. In the previous tutorial, which was titled as Getting started with Arduino Software, I have explained in detail the basics of Arduino software. How this software is installed and run.
Today's post is also related to arduino software but, the difference is that, in previous post we learn How to use the arduino software, What are the function keys of this software and Where to write the code(sketch) and after writing the sketch, how it is debugged. Now in today's post which is ' Getting started with Arduino Programming', we will see How a Code is written in Arduino software? What are the built-in functi ...
In this guide, we will explain step by step to start programming on the STMicroelectronics (STM) platform, especially the STM32 family.
The term, "STM32" refers to a family of 32-bit microcontroller integrated circuits based on the ARM® Cortex®M processor. The architecture of these CPUs (Central Processing Unit) is ARM (Advanced Risk Machine) which is a particular family of Reduced Instruction Set Computing (RISC). RISC architecture differs from Complex Instruction Set Computing (CISC) for its simplicity that allows you to create processors capable of executing instruction sets with shorter times. Why use STM32? The advantages are many, and now we will list a part of them:
ST offers a wide portfolio of solutions depending on the developer's nee ...