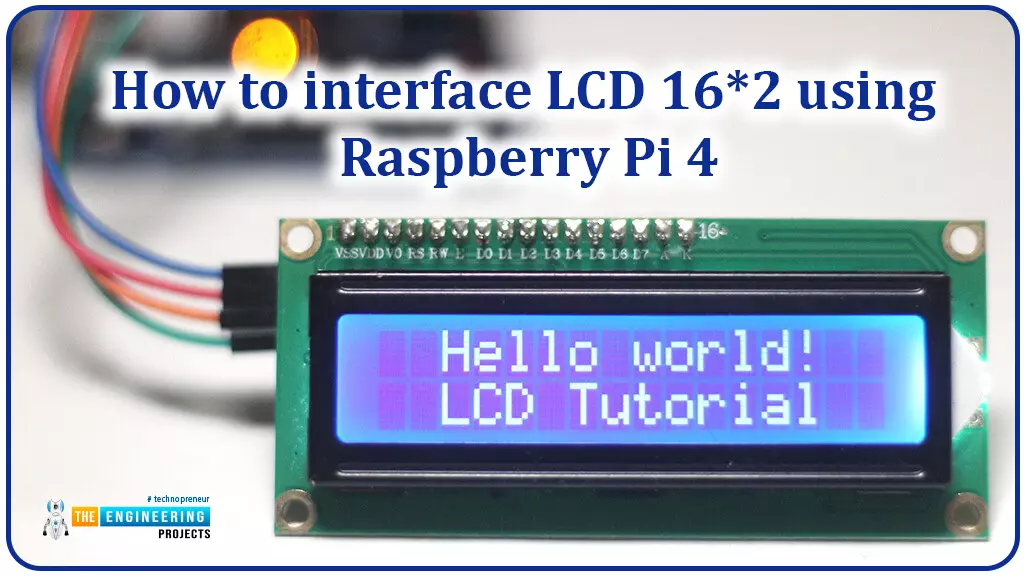
Hello friends, I hope you all are doing great. Today, I am going to share the 6th lecture in the Raspberry Pi 4 Programming series. We're glad you could join us for another lesson in our comprehensive Raspberry Pi programming guide. In today's guide, I'll show you how to interface a 16x2 LCD screen with Raspberry Pi 4.
So, let's get started:Interface LCD 16x2 with Raspberry Pi 4Today, we are going to interface a 16x2 LCD screen with Raspberry Pi 4. At first, we will print the "Hello World" text on the LCD, and in the last section, we will implement the scrolling and blinking of text on the LCD.Here's the video tutorial on LCD interfacing with Raspberry Pi 4:Components RequiredWe will need the following components for today's project:Raspberry Pi 4.M ...
A low-literate audience can nevertheless have their voices heard and their questions answered by using an IVR system, as has been proven time and time again. However, achieving such aims in a development setting calls for a cheap system that welcomes input from various parties. RASP-IVR is an inexpensive IVR system that operates on a PI 4 and a local Global System for Mobile Communications modem. RASP-IVR was designed as an open-source, community-driven solution. It's unusual to find a customer-focused company that still uses human operators rather than an interactive voice response system. Credit card companies typically have IVR systems that can be used to make payments or file fraud reports. Airlines use elaborate IVR systems to schedule flights and check their current status. To facili ...
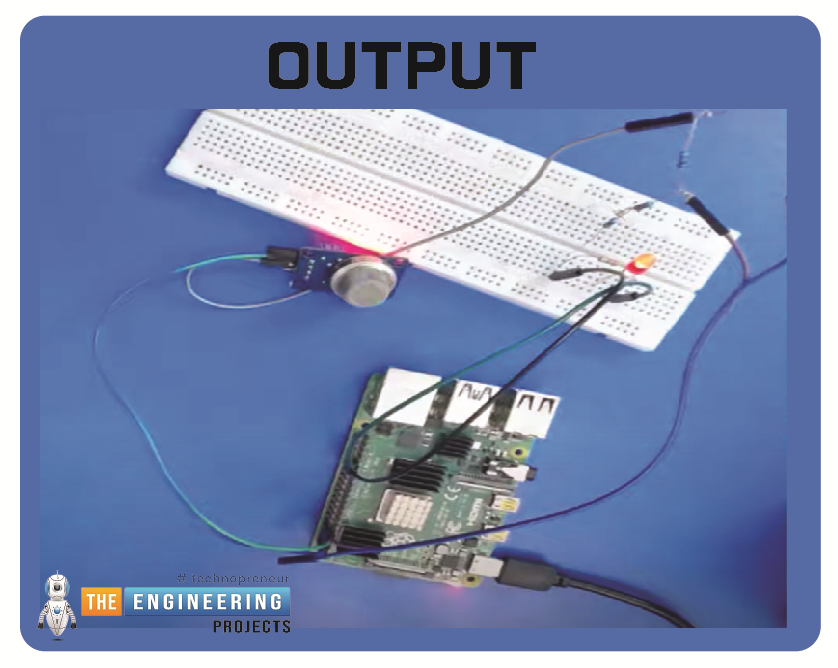
Hello friends, I hope you all are having fun. Today, I am going to share the 9th tutorial of Section-III in our Raspberry Pi 4 Programming Course. In the previous tutorial, we interfaced an air pressure sensor BMP180 with Raspberry Pi 4. In this tutorial, you'll learn how to interface an MQ-2 gas sensor with a Raspberry Pi 4. Many apartments, residences, and workplaces rely heavily on these gas sensors to detect smoke or gas and alert the appropriate personnel in an emergency. In addition to gas and smoke, this sensor is sensitive to various odorous gases.
Project DescriptionToday, we will interface a gas sensor MQ-2 with Raspberry Pi 4 and will display the values on Raspberry Pi Console Window.
Components Required
These are the components use ...
Hello friends, I hope you all are doing well. Today, I am going to share the 8th tutorial of Section-III in our Raspberry Pi Programming Series. In the previous tutorial, we interfaced the temperature sensor DS18B20 with Raspberry Pi 4. In today's guide, we'll discover another temperature sensor BMP180 and will interface it with Raspberry Pi 4.So, let's get started:
Project DescriptionIn today's tutorial, we will interface the BMP180 sensor with Raspberry Pi 4 and will display the values of temperature, barometric pressure and altitude in the Raspberry Pi Console Window.
Components Required
We will use the following components in today's project:Raspberry pi 4BMP180 sensorFemale-Female Jumper wiresBreadboard
BMP180 Air Pressure Sensor
BMP180 i ...
Welcome to the next tutorial of our Raspberry Pi programming course. Our previous tutorial taught us how to use a raspberry pi as a DNS server. We also looked at the benefit of this DNS server. This tutorial will teach us to set up Raspberry pi as a VPN server.
This is an excellent method for increasing your network security and getting access to your local area network from the world wide web, but setting up your VPN server might be a challenge. Pi VPN uses a guided install to turn your Raspberry into a low-cost, high-performance VPN server.
What is Pi VPN?
It is an OpenVPN server optimized for all Raspberry platforms above pi 2. It allows you to access your home network over the internet safely and securely. Smart devices and your network can ...
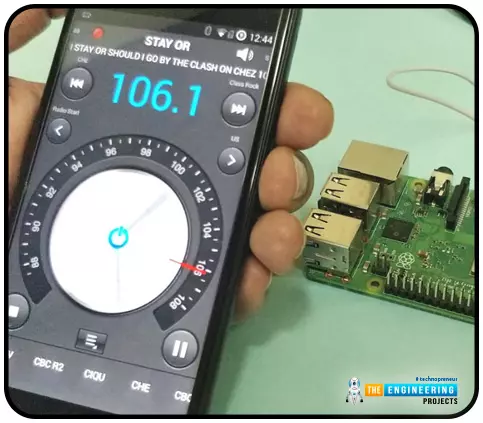
Throughout our lives, we've relied on Radio and tv stations to keep us engaged. While we're on the subject of contradictions, it's also fair to say that these Stations can become tedious at times due to the RJ rambling on about nothing or annoying advertisements, and this may have left you wondering why you can't own a Radio station to broadcast your data over short distances.
Almost any electronics technician uses coils and other hardware to make an FM transmitter, although the tuning process is time-consuming and difficult. Setting up your FM station and going live in your neighborhood shouldn't take more than 30 minutes using an RPi. If you use the right antenna, you must be able to transmit to your school or community within 50 meters. Wow, th ...
Hi Friends! Hope you’re well. In this post today, we’ll discuss What is Raspberry Pi Zero? We’ll also cover Raspberry Pi Zero Pinout, Specs, Projects & Datasheet.
Developed by Raspberry Pi Foundation, Raspberry Pi Zero is a tiny single-board computer, initially introduced to teach basic computers in schools. Later, it rose to popularity due to its low cost and open source design. Now it is widely used in robotics and embedded systems to develop IoT projects. This device is among the bestselling British single-board computers. I suggest you read this post all the way through as I’ll cover Raspberry Pi Zero in detail. Let’s get started.
What is Raspberry Pi Zero?
Raspberry Pi Zero(released in Nov 2015, by Raspberry Pi Foundation) is a sin ...
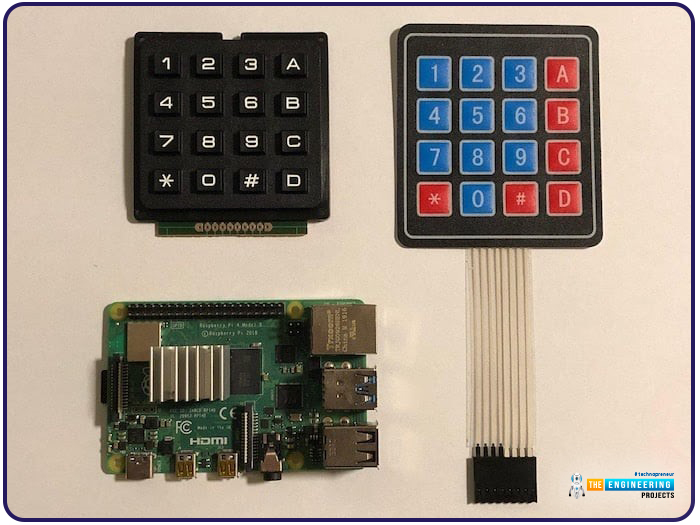
Hello friends, I hope you all are doing well. Welcome to the next tutorial of our Raspberry Pi 4 programming course. In the previous lecture, we interfaced LCD 16x2 with Raspberry Pi 4. Today, we will interface a keypad 4x4 to Raspberry Pi 4. In embedded projects, a keypad is used to get user input i.e. calculator, ATM keypad etc. Different types of Keypads are available i.e. 4x4, 4x3 etc.
So, let's get started:
Components Required
We will need the following components in our today's project:Raspberry Pi 4Keypad 4x4BreadboardConnecting Wires
Keypad 4x4
A keypad is a collection of push buttons, arranged in a matrix form.Keypad 4x3 means the keypad has 4 rows and 3 columns and 12 buttons in total. A 4 by 4 keypad membrane has 8 pins in t ...
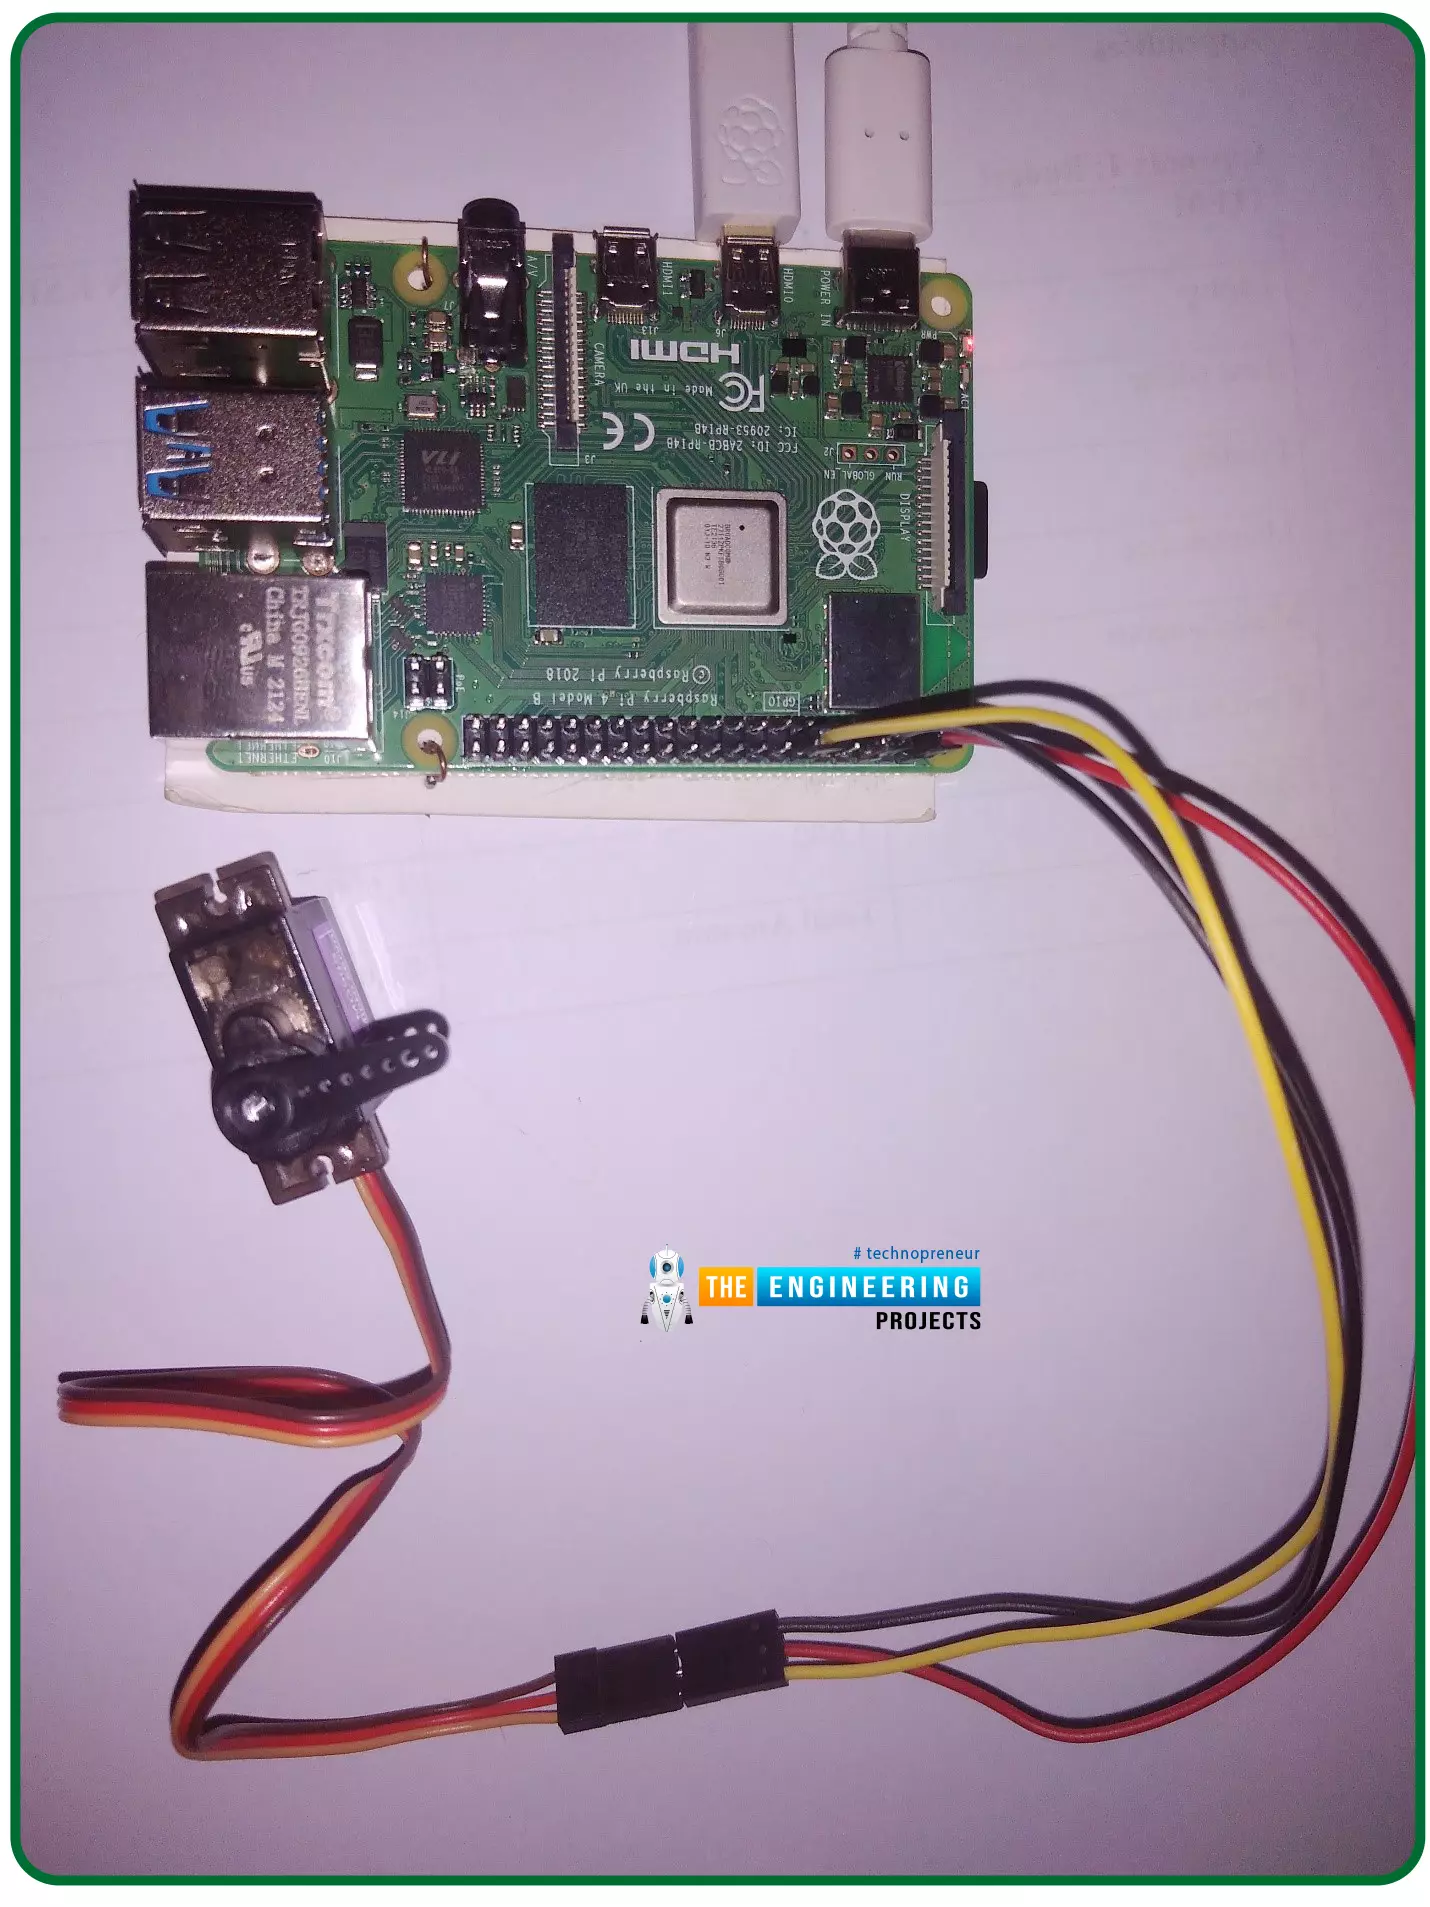
Hello friends, I hope you all are doing well. Welcome to the 11th tutorial of our Raspberry Pi programming course. In the previous chapter, we have seen how to regulate the speed of a Stepper motor with Raspberry Pi 4. Today, we'll work on the servo motor and will control it with RPi4. So, let's get started:
Components Required:We will need the following components to control Servo Motor with Raspberry Pi 4:
Raspberry Pi 4.
Servo Motor.
Male-to-female jumper wires.
What is a servo motor?
A Servo Motor is a simple DC motor with a position feedback Control System and a gearbox.A Servo Motor's primary advantage is its ability to maintain its shaft's angular position at any desired angle i.e. if we want to keep our shaft at 67 degre ...
Hey Fellas! Hope you are doing great. Our team always keeps your needs and demands on the top so you keep coming back for what we have to offer.
Based on recent comments and suggestions given by our valuable visitors, I have decided to arrange all of our Raspberry Pi 3 projects so you get a clear idea What is Raspberry Pi 3 and How it is used for the execution of many projects?
Are you feeling skeptical about learning Raspberry Pi 3 basics? Don't you worry, I have got you covered. I'll arrange all articles related to raspberry pi 3 in a sequence from beginner to pro level, so you find all information in one place and grab the main concept easily. Let's dive in and explore each and everything related to Raspberry Pi 3.
Raspberry Pi 3 - Basics
...