3D printing is one of the most promising technologies in recent breakthroughs. One of the most inherent benefits of 3D printing is additive innovation; it opens up an entirely new way of creating products and provides numerous benefits over traditional fabrication techniques.
Nowadays, more businesses across many industrial sectors adopt 3D printing as a viable alternative to subtractive manufacturing (acquiring machined parts online) and injection molding. We'll look at the benefits of 3D printing and how you can use this production method to benefit your company. Is it worthwhile to use 3D printing for your project?
Affordability
One of the best aspects of 3d printing is the reduced labor costs. Operating costs heavily influence the quantity of ...
Hello everyone! I hope you all will be absolutely fine and having fun. Today, I am going to give a detailed discussion on Introduction to LF411. LF-411 is a Junction Field Effect Transistor (JFET) input Operational Amplifier (Op-amp). It is the most common module available in the market these days due to its cost efficiency. LF 411 has low input offset voltage. Input offset voltage drift is guaranteed for LF-411. A very low supply current is needed for this device. It provides higher slew rates as well as high gain bandwidth product.
Moreover, LF411 also provides lower input bias current as well as lower input offset currents. It is an 8 pin operational amplifier. The details about its pins will be discussed later. Due to its low cost and high ...
Hello friends! I hope you will be absolutely fine and having fun. Today, I will give you a detailed discussion about Introduction to 75N75. I have also shared different articles on Introduction to 2N3904, 2N3906, BC547, C945 and IRF540. You must go through all of these articles for the better understanding of this tutorial. 75-N75 is basically a Metal Oxide Field Effect Transistor (MOSFET). MOSFET is a transistor which is frequently used in electronic devices for the amplification and fast switching purposes.
MOSFET consists of four different terminals. These terminals include body terminal, source, drain and gain respectively. There two different type of transistors i.e. P-channel transistor and N-channel transistor. 75N-75 is N-channel MOSFET. ...
Hey Fellas! I always come with unique topics to whet your appetite with valuable information so you can excel in your relevant field. Today, I am going to unlock the details on the Introduction to 2n2646. It is a uni-junction transistor which is mainly used in thyristor triggering circuits, sensing circuits, and pulse and timing circuits. It features low peak point current of about 5µA, and low emitter reverse current of 0.005µA and passivated surface for uniformity. Let's dive in the details of this transistor and explore what it does and what are its main applications? Let's get started.
Introduction to 2n2646
2n2646 is a three terminal semiconductor device that contains only one junction that behaves like an electrically controlled switch.
...
Hello everyone, I hope you all are fine and having fun. Today's tutorial is the next episode in the series of basic Arduino tutorial for Beginners. In today's tutorial, we are gonna have a look at How to use digitalRead in Arduino. In the previous tutorial, we have seen How to use pinMode Arduino Command, which sets the Arduino Pin either as Input or Output. So, if you are using this pin as input then you have to read its status and that's where you need to use this digitalRead Arduino Command.
Other than Serial Pins in Arduino UNO, we also have 12 digital Pins. Serial Pins are also digital Pins so in total we have 14 digital Pins in Arduino UNO starting from 0 to 13. I am gonna explain them in detail in today's tutorial and we will also have a lo ...
Hey Fellas! Hope you are doing great and having fun in your lives. We always try to keep you updated with useful information that resonates with your needs and expectations so you can grow and excel in your relevant field. I am back to give you a daily dose of useful information that may help you resolve your queries and problems related to engineering and technology field. Today, I am going to unlock the details on the Introduction to 2n6547. It is an NPN bipolar junction transistor that comes with high voltage and current capability and fast switching speed, mainly used in switched mode power supplies and flyback and forward single transistor low power converters. I'll try to cover each and everything related to this NPN transistor, so you don't ...
Hey Friends! Hope you are doing great. I am here to provide you the technical knowledge that helps you stay ahead of your competitors. Today, I am going to unlock the details on the Introduction to 2n5884. It is a power PNP bipolar junction transistor mainly used for general purpose amplification and switching purpose. This is a complementary silicon epitaxial-base transistor that can support 25 A and 80 V. I'll discuss each and everything related to this transistor i.e. what it does, its pinout, circuit diagram and main applications.
You must have a look at comprehensive read on Introduction to Bipolar Transistor if you are unsure how these bipolar transistors work.
Before we dive into the details of this PNP transistor we must be aware what is ...
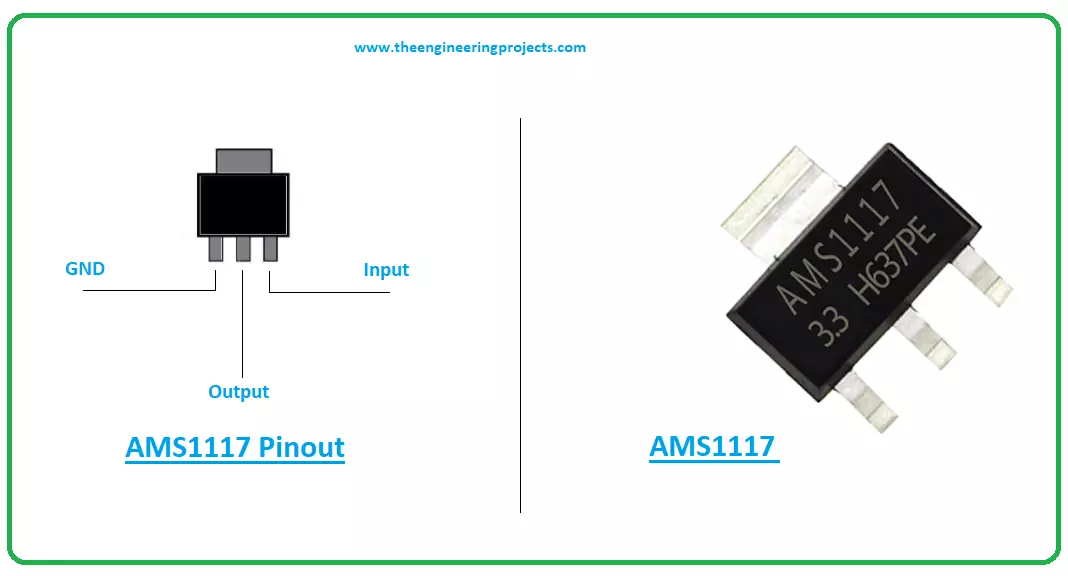
Hello Guys! Hope you’re well today. I welcome you on board. Thank you for clicking this read. In this post today, I’ll walk you through the Introduction to AMS1117.
The AMS1117 is a common voltage regulator that comes with both fixed and customizable voltages. It is a 3-pin device mainly used to drive load under 1A. The output voltage ranges from 1.5V to 5V. When it works at maximum current, it results in a low dropout voltage of 1.3A.
I suggest you read this post all the way through, as I’ll be discussing Pinout, datasheet, features, and applications of this tiny device AMS1117.
Let’s jump right in.
Introduction to AMS1117
The AMS1117 is a common voltage regulator mainly used for high-efficiency linear regulation and post-regulation switchi ...
Hi Friends! Hope you’re well today. I welcome you on board. In this post today, I’ll walk you through the Introduction to Arduino Beetle.
Arduino beetle is the smallest Arduino board that comes with the functionality of Arduino Leonardo. This board is a remarkable addition to the minimalistic Arduino technology. It is based on the microcontroller Atmel Atmega32u4.
With the inception of innovations in modern technology, electronic devices are becoming light, more compact that happen to perform a lot of functions. These devices are economical and require little to no prior knowledge to get your hands dirty with them.
All Arduino boards are microcontrollers but not all microcontrollers are Arduino board. While using the Arduino board, you don’t ne ...
Hello friends, I hope all are fine and having fun with your projects. We have covered enough Arduino commands in this Arduino Tutorial for Beginners series and now we are ready to create a simple project by interfacing an LED (Light Emitting Diode). Today, I am going to share a very Simple Arduino LED Example in Proteus ISIS. First I will blink single LED using Arduino UNO and then I will blink multiple LEDs in Proteus.
When you start working on Arduino then Arduino LED example is the first example which you must try because its the easiest one. Moreover, we all know that we have a small LED connected to pin # 13 on each Arduino so you can also check your Arduino as well that whether its working or not. So, let's get started with Simple Arduino LE ...