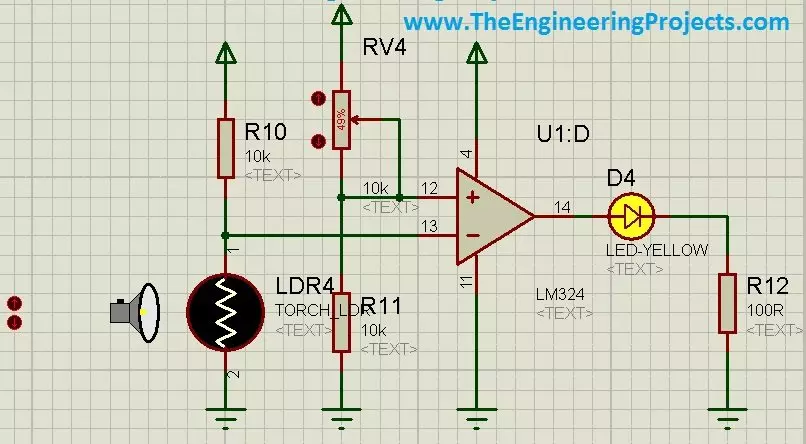
In today's post, I am gonna share how to use LDR sensor in Proteus. Proteus, as we all know, is a very handy software and is used for circuit and PCB designing. It is also used for circuit and programming testing. It is normally used by engineers in their projects and contains a vast list of built-in components. I have posted a lot of tutorials on Proteus and I have got quite a positive feedback from the reader about these tutorials. So, I thought to share another component in Proteus which is quite hidden and I haven't seen much posts on it available online. So, in today's post, first I am gonna explain what is LDR sensor? and we will see where it is used and how it is used. After that I will design a simple circuit in Proteus in which I will turn control a LED using LDR sensor andwill ma ...
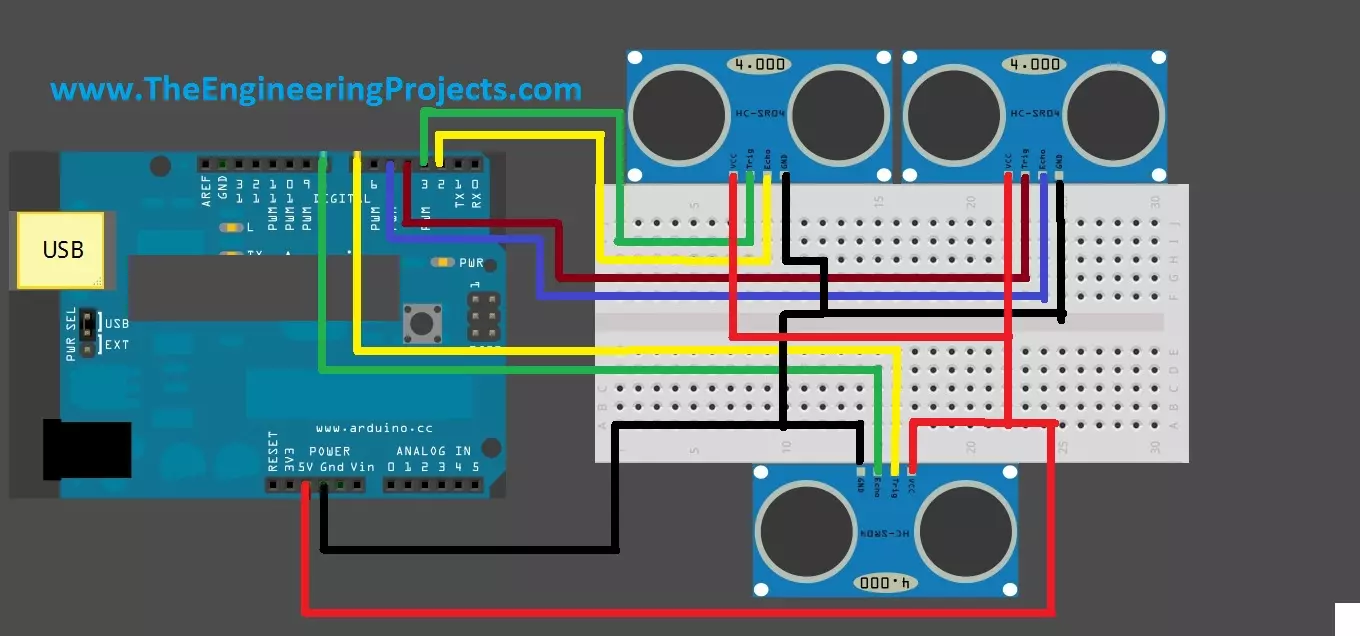
Hello friends, hope you are having fun and enjoying life. Today, I am gonna post about interfacing of multiple Ultrasonic sensor with Arduino. In the previous post, we have seen Interfacing of Ultrasonic Sensor With Arduino and in this post I have interfaced single ultrasonic sensor but in projects especially related to robotics, we have to interface multiple ultrasonic sensors. For example you have an obstacle detection robot, now in order to detect obstacle in front of robot you have to place once sensor on the front side but now you can't detect any object present on left or right side of your robot, so you have to place two sensors one on the left side of robot and one on the right side so in this project you need to use total three ultrasonic sensors, one on the front, one on left and ...
Today, we are gonna have a look on How to Interface Ultrasonic Sensor with Arduino . Few days ago, I have posted a complete tutorial on How to Use Ultrasonic Sensor Library in Proteus and later I have posted different examples on How to Simulate Ultrasonic Sensor in Proteus . Those posts were about Proteus Simulations and weren't about hardware interfacing, so I thought today let's interface it in hardware. Simulation is a good starting point for projects but they are really far away from real world. It happened to me a lot of times that my simulations are working perfectly fine but when I design the same circuit in hardware then it says no I am not gonna work. :) So, the bottom line is never trust simulations, unless you properly test it on hardware. So, today I am gonna interface an Ultr ...
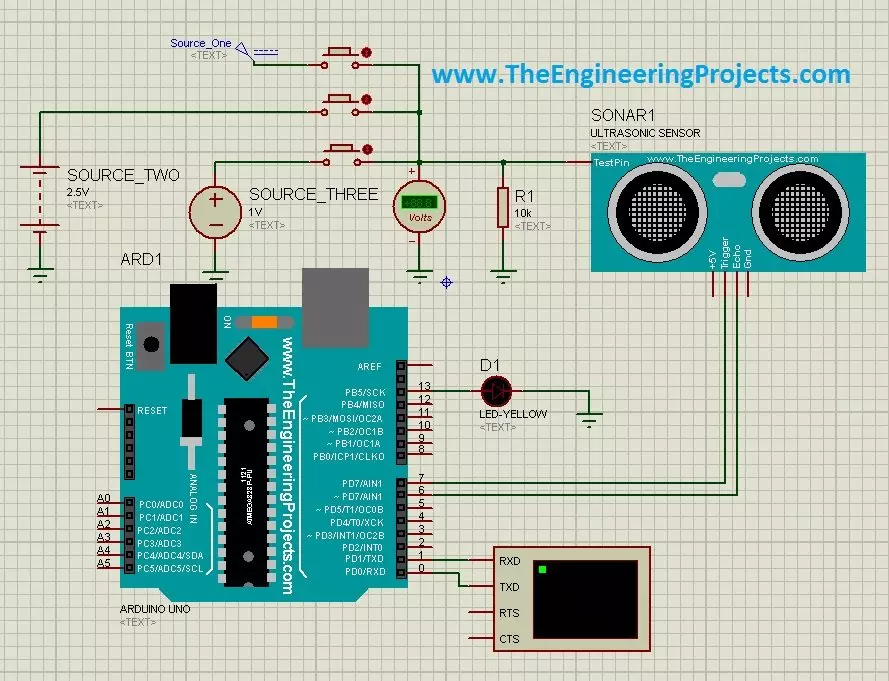
Hello friends, a few days ago I posted an Ultrasonic Sensor Library for Proteus , using which one can easily simulate ultrasonic sensor in Proteus. The post was highly praised by the reader and I have received quite good feedback from the followers. So, I thought of sharing some more examples related to it so that users can get a complete understanding of how to use Ultrasonic sensors in Proteus. Today, we are gonna have a look on different Ultrasonic Sensor Simulation in Proteus. If you haven't read the previous post then first have a look at it because without the installation of Ultrasonic Sensor Library in Proteus, you won't be able to use these examples. Ultrasonic Sensor is used widely in Embedded Systems . Today, I am gonna share three examples of Ultrasonic Sensor Simulation in Pro ...
Hello friends, hope you all are fine and having good health. In today's post, I am going to share an Ultrasonic Sensor Library for Proteus. A few days ago, I posted a tutorial on Arduino Library for Proteus, and today I am going to share the new Ultrasonic Sensor Library for Proteus . Using this library, you can easily interface Ultrasonic Sensors with different Microcontrollers like Arduino, PIC Microcontroller etc. First of all, let's have a brief introduction to ultrasonic sensor. In an ultrasonic sensor, there are two nodes available, one is the transmitter while the other is the receiver. The transmitter sends an ultrasonic wave and this wave strikes any hindrance present in front of it and then bounces back. This bounced ultrasonic sensor is then captured by the receiver and on the b ...
Yesterday, I have posted a new Arduino Lilypad / Nano Library for Proteus in which we have seen how to add that library into Proteus so that you could be able to use these boards in Proteus. That was quite easy. Today I am gonna post a small project in which we will see how to use that library and produce an Arduino Lilypad simulation in Proteus. In this Arduino Lilypad simulation in Proteus, I am gonna use obviously he Arduino Lilypad board along with few LED lightsand will make them blink. Its also quite easy and you can also download the simulation and the hex file at the end of this project but I would suggest you to do it yourself so that you learn something out of it. Before starting this project, you must have first integrated the Arduino Lilypad Library as without it you wont be ab ...
Hello friends, few day ago I have posted a tutorial on how to do Arduino Simulation in Proteus . In that post, we have used an Arduino Library for Proteus but as this library is in its initial phases that's why currently it supports only three basic Arduino boards which are Arduino UNO, Arduino Mega2560 and Arduino Mega1280. But as we know there are numerous Arduino boards which are used these days. So, I searched a little and I came across this amazing Arduino Lilypad Library for Proteus which has the support for few other arduino boards, so I thought to share it with you guys. I have tested this library myself as always and its 100% working. I have tested it on Proteus 7 and I think it will work fine on Proteus 8 as well. As we have the support for above three boards in the previous libr ...
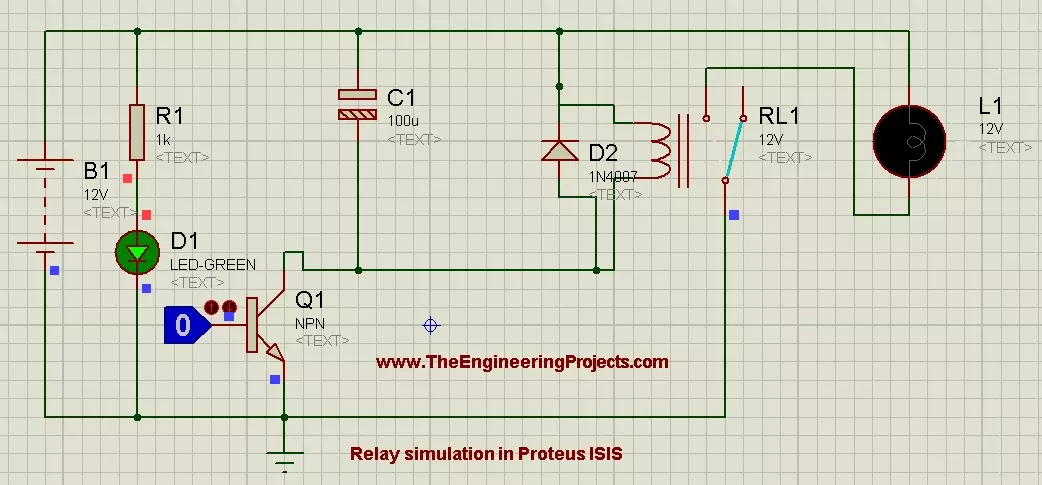
Hello friends, hope you all are fine and having fun. In the previous posts, we have discussed DC motor Control in Proteus ISIS and after that we have discussed the Stepper Motor Control in Proteus ISIS and finally we had a look at Servo Motor Control in Proteus ISIS . Now when you talk about motors control then first thing came in mind is Relay, because relay is the best way of controlling any motor. In today's post, we are gonna have a look at How to Control Relay in Proteus ISIS. Relay is a key components of any electronics or electrical circuit and is usually a problem for the engineers and students. Although, its not as difficult as it seems so I thought to post about it. In today's post, we will first simulate the Relay in a simple circuit in which when you run the simulation, the rel ...
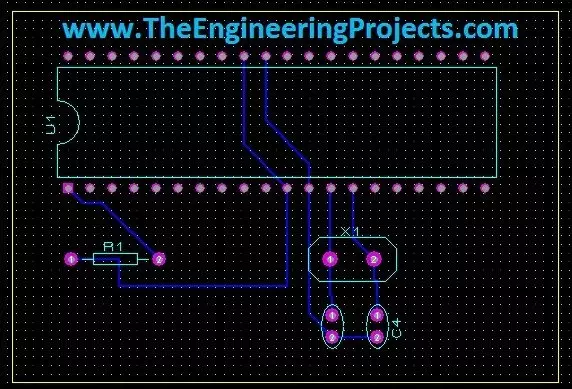
Hello friends, today's the last post of this Proteus tutorial. I have tried my best to explain everything but knowledge is limitless so explore this software, play with it and you will know many new things. Today's topic is about the PCB designing in Proteus. When you install Proteus, you have seen that along with ISIS there's also another package named as Proteus ARES. This Proteus ARES is used for PCB designing. You should also check the Arduino UNO PCB Design for Proteus ARES . In order to design the PCB in Proteus ARES, first you need to make the circuit of that PCB in Proteus ISIS. You can also make PCB directly but I recommend that use Proteus ISIS first, its quite the easy approach as you don't need to do anything in it and the software intelligence helps you throughout the designin ...
Hello friends, hope you all are having fun in your life. Today's tutorial is about the component designing in Proteus ISIS. This tutorial actually deals with the presentation of your project. Usually when students give presentation of their projects, then it is asked that add the circuit diagram of their project. Now when students open Proteus in order to design their circuit, they found out that the components they have used in their project are not available in the Proteus Directory. Now what to do ? In that case, there's a need to design your own component in Proteus and place it in the circuit. Although, this new designed component won't work as the real component but for presenting the circuit, it will be enough. ofr example, we don't have Arduino boards in Proteus software. so, I hav ...