Solar power is now generating the cheapest electricity in history, a new report by the International Energy Agency reveals. Harnessing energy from the sun via solar panels is key to reducing greenhouse gas emissions and creating a sustainable world. Heavy investment in solar infrastructure will also play a much-needed role in this transition. In turn, solar energy is creating a diverse range of careers for engineers, including industrial engineering, mechanical engineering, electrical engineering, and material science and chemistry.
Industrial Engineering
In recent years, solar panels have become increasingly efficient and affordable. As such, commercial install projects are becoming more and more in demand. Commercial solar panels can help busines ...
Hey learners! Welcome to another deep learning tutorial, in which we are beginning the practical implementation of Python on the TensorFlow library. We installed and checked TensorFlow in detail while we were in the previous lecture, and today we are going to use it for our practice. We have checked the presence of a perfectly installed library of TensorFlow in our tutorials and seen the basic structure of this library. As a result, we will skip the details and jump right into learning Python. In this tutorial, the main focus will be on Python instead of learning the workings of TensorFlow. You have to remember one thing: all the discussion will be from the point of view of deep learning, and it is not a general tutorial in which you will learn to develop apps or have a discussion about th ...
Hello friends, I hope you all are doing great. In today's tutorial, I am going to show you How to use IF Else in Python. It's our 5th tutorial in python series. In our previous lectures, we have covered the detailed Introduction to Python and then we have also discussed Data Types in Python & How to use Strings in Python. So, now it's time to move on a little further.
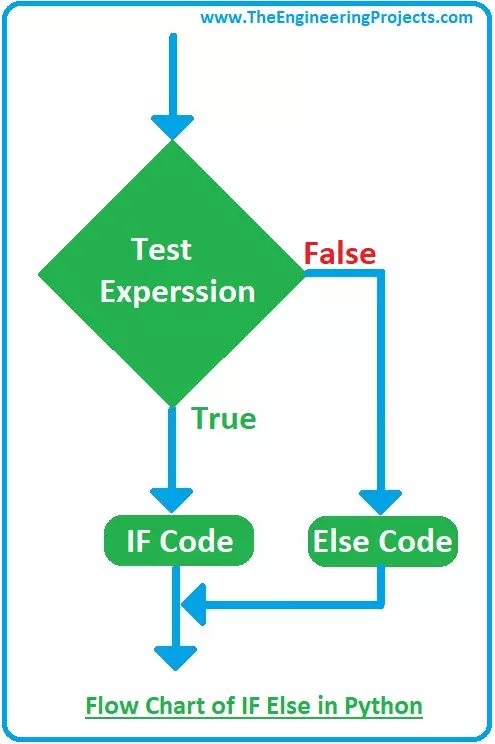
In today's tutorial, we will cover If else statement in python and its not that difficult to understand but quite an essential one as its use a lot in programming projects. So, let's get started with How to use IF Else Statement in Python:
How to use IF Else Statement in Python
IF Else Statement in python takes a Boolean Test Expressio ...
Hello friends, I hope you all are doing great. In today's tutorial, I am going to give you 8 Live Streaming Alternatives to Sky News. In today’s world, remaining informed is very important, which means that choosing our news sources matters more than you think. The political landscape is so volatile and the world moves so quickly, it’s necessary to keep track of the things that matter most. But it’s also necessary to be careful with the quality of the content we allow into our brains. You should also have a look at 7 Reasons to Choose Satellite Streams for Live Streaming TV, that will much better idea about its importance in digital world.
That’s why it’s essential to choose news outlets and networks that we can trust to deliver high-quality, obje ...
Hello everyone! I hope you all will be absolutely fine and having fun. Today, I am going to give a detailed discussion on Introduction to LM318. LM 318 is basically a high speed Operational Amplifier (Op-amp). It provides higher slew rates and wide range of bandwidth. LM-318 has processing speed 10 times higher than the common operational amplifier. It has unity gain frequency compensation. External components are not required for its operation.
Feed forward compensation increases the slew rate up to 150 V/us for inverting applications. It also doubles the bandwidth as compared to the earlier. In LM 318, in order obtain the high stability level we overcompensation can be used with amplifier. LM 318 setting time can be reduced by adding an extern ...
I still remember the first time I had to choose between a strain gauge and a torque sensor. It was a cramped motor lab. Old bench. Coffee gone cold. The project manager wanted answers by Friday. On paper the choice looked simple. In the real world it never is. Every project has its own personality. Speed. Budget. Accuracy. Abuse level. And usually a deadline that doesn’t care about any of that.
If you have spent time around test stands and factory motors you know this dilemma well. Torque measurement sounds straightforward until you actually have to do it. That is when questions start piling up. How accurate do we really need to be. Will this thing survive vibration. Can we install it without tearing the whole setup apart. And the big one. Will it still read the same after six months of h ...
Hello readers! Welcome to the next episode of the Deep Learning Algorithm. We are studying modern neural networks and today we will see the details of a reinforcement learning algorithm named Deep Q networks or, in short, DQN. This is one of the popular modern neural networks that combines deep learning and the principles of Q learning and provides complex control policies.Today, we are studying the basic introduction of deep Q Networks. For this, we have to understand the basic concepts that are reinforcement learning and Q learning. After that, we’ll understand how these two collectively are used in an effective neural network. In the end, we’ll discuss how DQN is extensively used in different fields of daily life. Let’s start with the basic concepts.
...
Creating and running your websites has partially become the trend in all internet affairs. You can have more than one websites that belong to you, but though it’s easy to create your website, it’s hard enough to make it run on the proper way and successfully. And it you can’t run your website properly and successfully, it’ll go all futile. So in case of getting the best hang of your websites you need an excellent hosting service. But it’s imperative to choose the best hosting service out of them which provides you the best functionalism. There might be a variety of hosting services but, hostinger is currently the best out of them. It’s affordable on price and carries the best rating. The detailed review of Hostinger is as follows.
About The Price
C ...
Hello readers, hope you all are doing great. In this tutorial, we will discuss another ESP32 protocol that is Web Socket and we will also explain how to create a web server using web socket protocol with ESP32. So, we will have a look at What is a web socket server, How web socket protocol is different from HTTP protocol, What is handshaking in networking, Three-way handshaking, Web socket application, Creating web socket server using ESP32 module etc. Let's get started:
What is a web socket protocol?
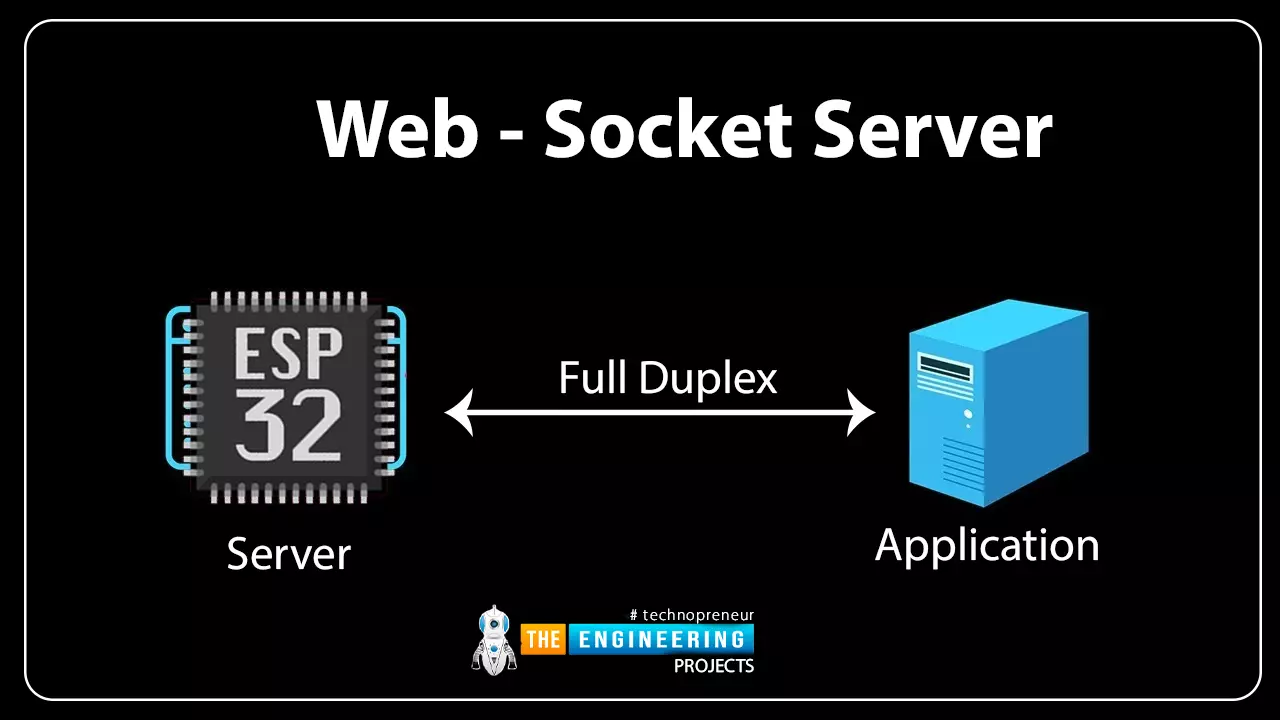
Fig 1 Web-socket server
A Web Socket is a full-duplex (both the server and the client can send and receive data at the same time) computer communication protocol. Web socket protocol, like HTTP (hypertext transfer protocol), also works in server an ...
Hello friends, I hope you all are doing great. In today’s tutorial, we will discuss What are Sound Transducers. The transducer is a module used for the transformation of energy from one type to other types of energy. For instance, the loudspeaker converts the electrical signal into the sound. Transducers are mostly used in automation (It is a technology that used for a different process where most work is done with less manpower), measuring devices, and for the conversion of the electrical energy into the different physical parameters like force, sound, light, etc.
In today's we will have a look at sound transducer's working, construction, applications and other related terms. So let's get started with What is Sound Transducers.
What are Sound Tra ...