Hi Guys! Hope you’re well today. I welcome you on board. In this post, I’ll walk you through How a Hobbyist Can Work on Electronic Projects in America.
Working on electronic projects is a bit inundating.
From selecting the topic to research work and development to execution, you need to hustle, grind and drill to keep your final product up and running.
When you are new to the electronic field, you must not be afraid to get your hands dirty in diving deep into the nitty-gritty of the project. This means that no matter what kind of technical project you pick, you need to spend a significant amount of your time and money to reach your final goal. It's not just about making sure that whatever it is you're looking for is done well—it's also about making sure that your project is done ri ...
Update: I have updated the code and removed the bug. Thanks for informing. Now this code will work perfectly.
Buy This Project
Hello friends, hope you all are fine and having good health. Today, as the name suggests, I am gonna post on how to Receive SMS with AT Commands using Sim900 and Arduino. I have already posted a tutorial on How to Send SMS with Arduino UNO and Sim900, so now we are gonna check the opposite. Sending SMS is quite easy, you just need to write some AT commands and write the message you wanna send and hit the Cntrl + Z and it will be sent. But receiving a text message on your SIM900 shield is a bit difficult because now you need to place a check when user will send a message. So, ideally whenever anyone send a message to yo ...
Hello geeks, welcome to our new project. In this project, we are going to make a very useful and interesting electronics tool that we as engineers or tinkers need in everyday life. We use the capacitor in most of our projects for various purposes such as filters or power supplies. Most of the time, we do not have a provision to measure the capacitor value in our digital multimeter. So, this time we came up with the solution. Hence, we will make our own capacitance measurement tool using Arduino.
Rather than investing in new electronic equipment, we will use an Arduino board and some basic components to measure the capacitance. To make this project, we should have some working knowledge about the capacitor. Here, we will not discuss the in-depth wo ...
Hi Guys! I welcome you on board. Glad to see you around. Thank you for clicking this read. In this post today, I’ll detail the Introduction to 1n5817.
The 1n5817 is a Schottky diode used in extremely fast switching applications and carries high forward surge capability and low forward drop voltage. It is available in the DO-201AD package and can do high-frequency operations.
Read this post till the end as I’ll discuss the complete introduction to 1n5817 covering the datasheet, pinout, features, and applications of this component.
Let’s get started.
Introduction to 1N5817
The 1n5817 is a Schottky diode, also known as a hot-carrier diode, used in extremely fast switching applications.
It comes in the DO-201AD package and contains low forward ...
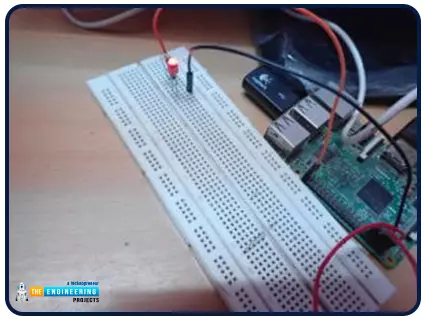
Hello friends, I hope you all are doing great. It's the 8th tutorial in our Raspberry Pi programming course. In the previous lectures, we interfaced LCD 16x2 and Keypad 4x4 with Raspberry Pi 4. In this chapter, we are not going to interface any external module with Pi, instead, we'll create a PWM signal in the raspberry pi using Python. Let's get started:
Components RequiredWe are going to use the below components in today's PWM project:
Raspberry Pi 4.
LED.
A resistor of 330 ohms.
Breadboard.
Jumper wires.Before going forward, let's first understand what is PWM:
What is PWM?
In PWM(Pulse Width Modulation), we simply turn on and off our power supply at regular intervals and thus ...
Hello friends, I hope you all are doing great. In today's tutorial, we will have a look at URL Routing in ASP.NET Core. It's our 11th tutorial in ASP.NET Core series and it's an important but quite easy concept to understand.
You must be wondering how we are routing rite now as we haven't added any routing codes yet. But if you remember, we have used MVC with default route middleware in our pipeline and this middleware automatically sets up this default URL routing for our web application. So, let's understand how this URL Routing works in ASP.NET Core:
URL Routing in ASP.NET Core
URL Routing in ASP.NET Core is used to provide the controller's action method to the incoming HTTP request.
In simple words, when a user enters an HTTP URL in its ...
Hello friends, I hope you all are doing great. In today's tutorial, we will have a look at URL Routing in ASP.NET MVC. It's the 8th tutorial in this ASP.NET MVC series. Today's tutorial is on a new concept in asp.net and it's essential to understand URL routing before going any further.
URL Routing is actually a part of core ASP.NET but MVC applications also use it. URL Routing is implemented by System.Web.Routing and ASP.NET MVC uses System.Web.Routing. So, let's have a look at what's URL Routing in ASP.NET MVC:
URL Routing in ASP.NET MVC
URL Routing is used for directing the HTTP request (generated by the user) to the respective controller in ASP.NET MVC.
Whenever a user types some url in the browser and hit enter then an HTTP request is ge ...
Hello everyone, I hope you all are fine and having fun with your lives. Today, I am going to share a new Capacitive Touch Sensor Library for Proteus, which is designed for the first time by our team. :) Capacitive Touch Sensor is used to sense the presence of a human finger on the sensor.
We all know that human carries a charge, which is used by these touch sensors. These sensors are available these days online and you can easily buy them. I have designed its Proteus Library which I am presenting today for free to our readers. I hope you guys are going to enjoy working on it. :) So, let's get started with Capacitive Touch Sensor Library for Proteus:
Capacitive Touch Sensor Library for Proteus
First of all, click on the below button to down ...
Hello everyone, I hope you all are doing great. Today, I am going to share with you about "How To Calculate Liquidated Damages in Construction?" In almost all construction contracts that will be a clause that provides that the contractor will pay liquidated damages to the owner of the project in case there is a breach of contract. In construction, a breach of contract, which leads to the owner claiming liquidated damages, usually relates to a failure to complete a project in contractual time (that is, failing to complete works and handing over the house to the client at the date agreed on the contract).
When calculating liquidated damages, the client bases them on a daily or weekly rate – the amount a contractor is required to pay will depend on t ...
Hello readers, I hope you all are doing great. In our previous tutorial, we discussed the implementation of pulse width modulation (PWM) in Raspberry Pi Pico using the MicroPyton programming example. We also implemented the LED brightness control program to demonstrate an application of the pulse width modulation technique.
In this tutorial, we are going to implement another application of pulse width modulation technique which is ‘Direction and position control of a servo motor’ with Raspberry Pi Pico module and MicroPython programming language.
Later in this tutorial, we will also discuss how to control the position of a servo motor with push buttons (to be used as control inputs) and also to use LEDs for indication purposes.
What is Servo Motor?
Before interfacing the servo motor with ...