Hello Learners, hope you are doing well. I am here with a new tutorial. We'll discuss about Junction Field Effect transistors. In this tutorial, we will learn the basic Introduction to JFET nad will also have a look at its practical Implementation and simulation in Proteus.
Basically, Junction Field Effect is a type of transistor, similar to Bipolar Junction Transistors but they have different characteristics due to some reasons as discussed below:
Introduction to JFET
We Define the JFET as:
"Junction Field Effect transistors or simply JFET is the semiconductor ,Voltage Control, three terminal device that is present in both configurations either N channel or P channel."
JFET are named so because the the operation of JFET relies on the Field of th ...
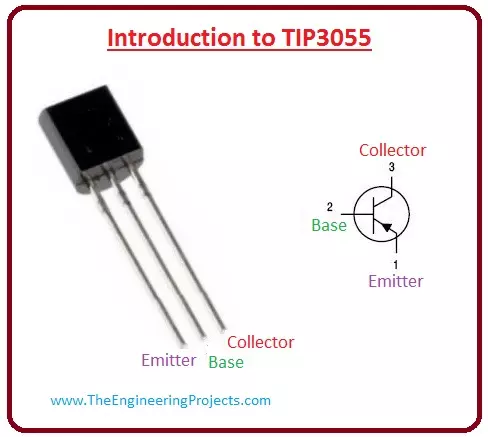
Hello friends, I hope you all are doing great. In today's tutorial, we are gonna have a look at detailed Introduction to TIP3055. TIP3055 is a silicon epitaxial-ignoble NPN transistor, which is assembled in TO-218 malleable parcels. It is the best device for power swapping circuits, parallel and series controllers (regulators), output phases and high power amplifiers. Its corresponding PNP transistor is TIP2955.
It is a universal device used in many industrial projects where audio amplification is required. Its structures are attractive much the identical excluding for the maximum power indulgence that is a slightly lesser. In today’s post, we will have a look at its fortification, smashup, prominence, proposals, etc. I will also share some links ...
Hello everyone! hope you all will be fine. In this article I am going to share the knowledge about displaying Scrolling Text on LCD with Arduino. A Liquid Crystal Display is usually known as LCD in the market. It is a display unit made up of liquid crystal. When we want to made electronics based projects, we need a device on which we can show the system’s output and the desired messages. There are a lot of such devices which are helpful to display the output messages and the most common is a seven segment display.
Alternate good option is LCD, which are now available in different size having different qualities. 16×2 LCD Module is a most frequently used device for the electronic projects out of all the other types of LCD’s available in the marke ...
Hello friends! I hope you all will be absolutely fine and having fun. Today, I am going to share my knowledge with all of you about how to make a simple program for DC Motor Direction Control using Arduino. The word DC is basically an abbreviation of Direct current. So, a direct current motor is commonly used motor having two input terminals, one is positive and the other one is negative. If we connect these terminals with the voltage supply the motor will rotate. If you change the polarity then motor will rotate in opposite direction. You should also have a look at Difference between DC & AC Motors to get a better idea about these motors.
DC motor has a lot of applications. You can use it in automation projects, for controlling static as wel ...
Hey Learners, welcome to another exciting tutorial about electronics. We are talking about an audio amplifier using LM386. This is a very simple IC that we are going to used for the amplification of the audio signals. We shall go through the core postulation about the topic and then work on the practical implementation of the experiment. Just have a look at the topics of discussion:
Introduction to LM386 Audio Amplifier.
Components of LM386 Audio amplifier.
LM3386 Audio Amplifier Working.
Simulation of the LM386 Audio Amplifier Circuit in Proteus.
In addition, you will find interesting information in the DID YOU KNOW sections.
Introduction to LM386 Audio Amplifier
Audio signals play important role in many devices. These signals are used ...
Hello Guys! Hope you’re well today. I welcome you on board. In this post today, I’ll walk you through the Introduction to BD136.
BD136 is a medium power general-purpose transistor mainly used for switching and audio amplification purposes. It belongs to the PNP transistor family and comes with collector current 1.5A, indicating it can drive loads under 1.5A. The amplification factor ranges from 40 to 250, which means it can amplify the input signal up to 250 times. Both collector-emitter and collector-base voltages are 45V while the emitter-base voltage is 5V, indicating only 5V is required to bias this transistor.
I suggest you read this entire post, as I’ll be detailing complete introduction to BD140 covering pinout, working principle, power r ...
Hello friends, hope you all are fine and having fun with your lives. Today I am going to share a problem and also its solution with you guys. A few days ago, I bought new NRF24L01 modules as they were needed for a project. So, today when I started working on them, I encountered a very strange problem. When I interfaced my NRF24L01 with Arduino and uploaded the transmitting and receving codes in them, I couldn't get anything on my serial terminal as I explained in my previous post Interfacing of NRF24L01 with Arduino. That was quite strange for me as I have worked on this module many times and it never troubled me before. So I keep on working on it but no luck. I even changed my RF modules as I thought may be they are faulty modules but still no lu ...
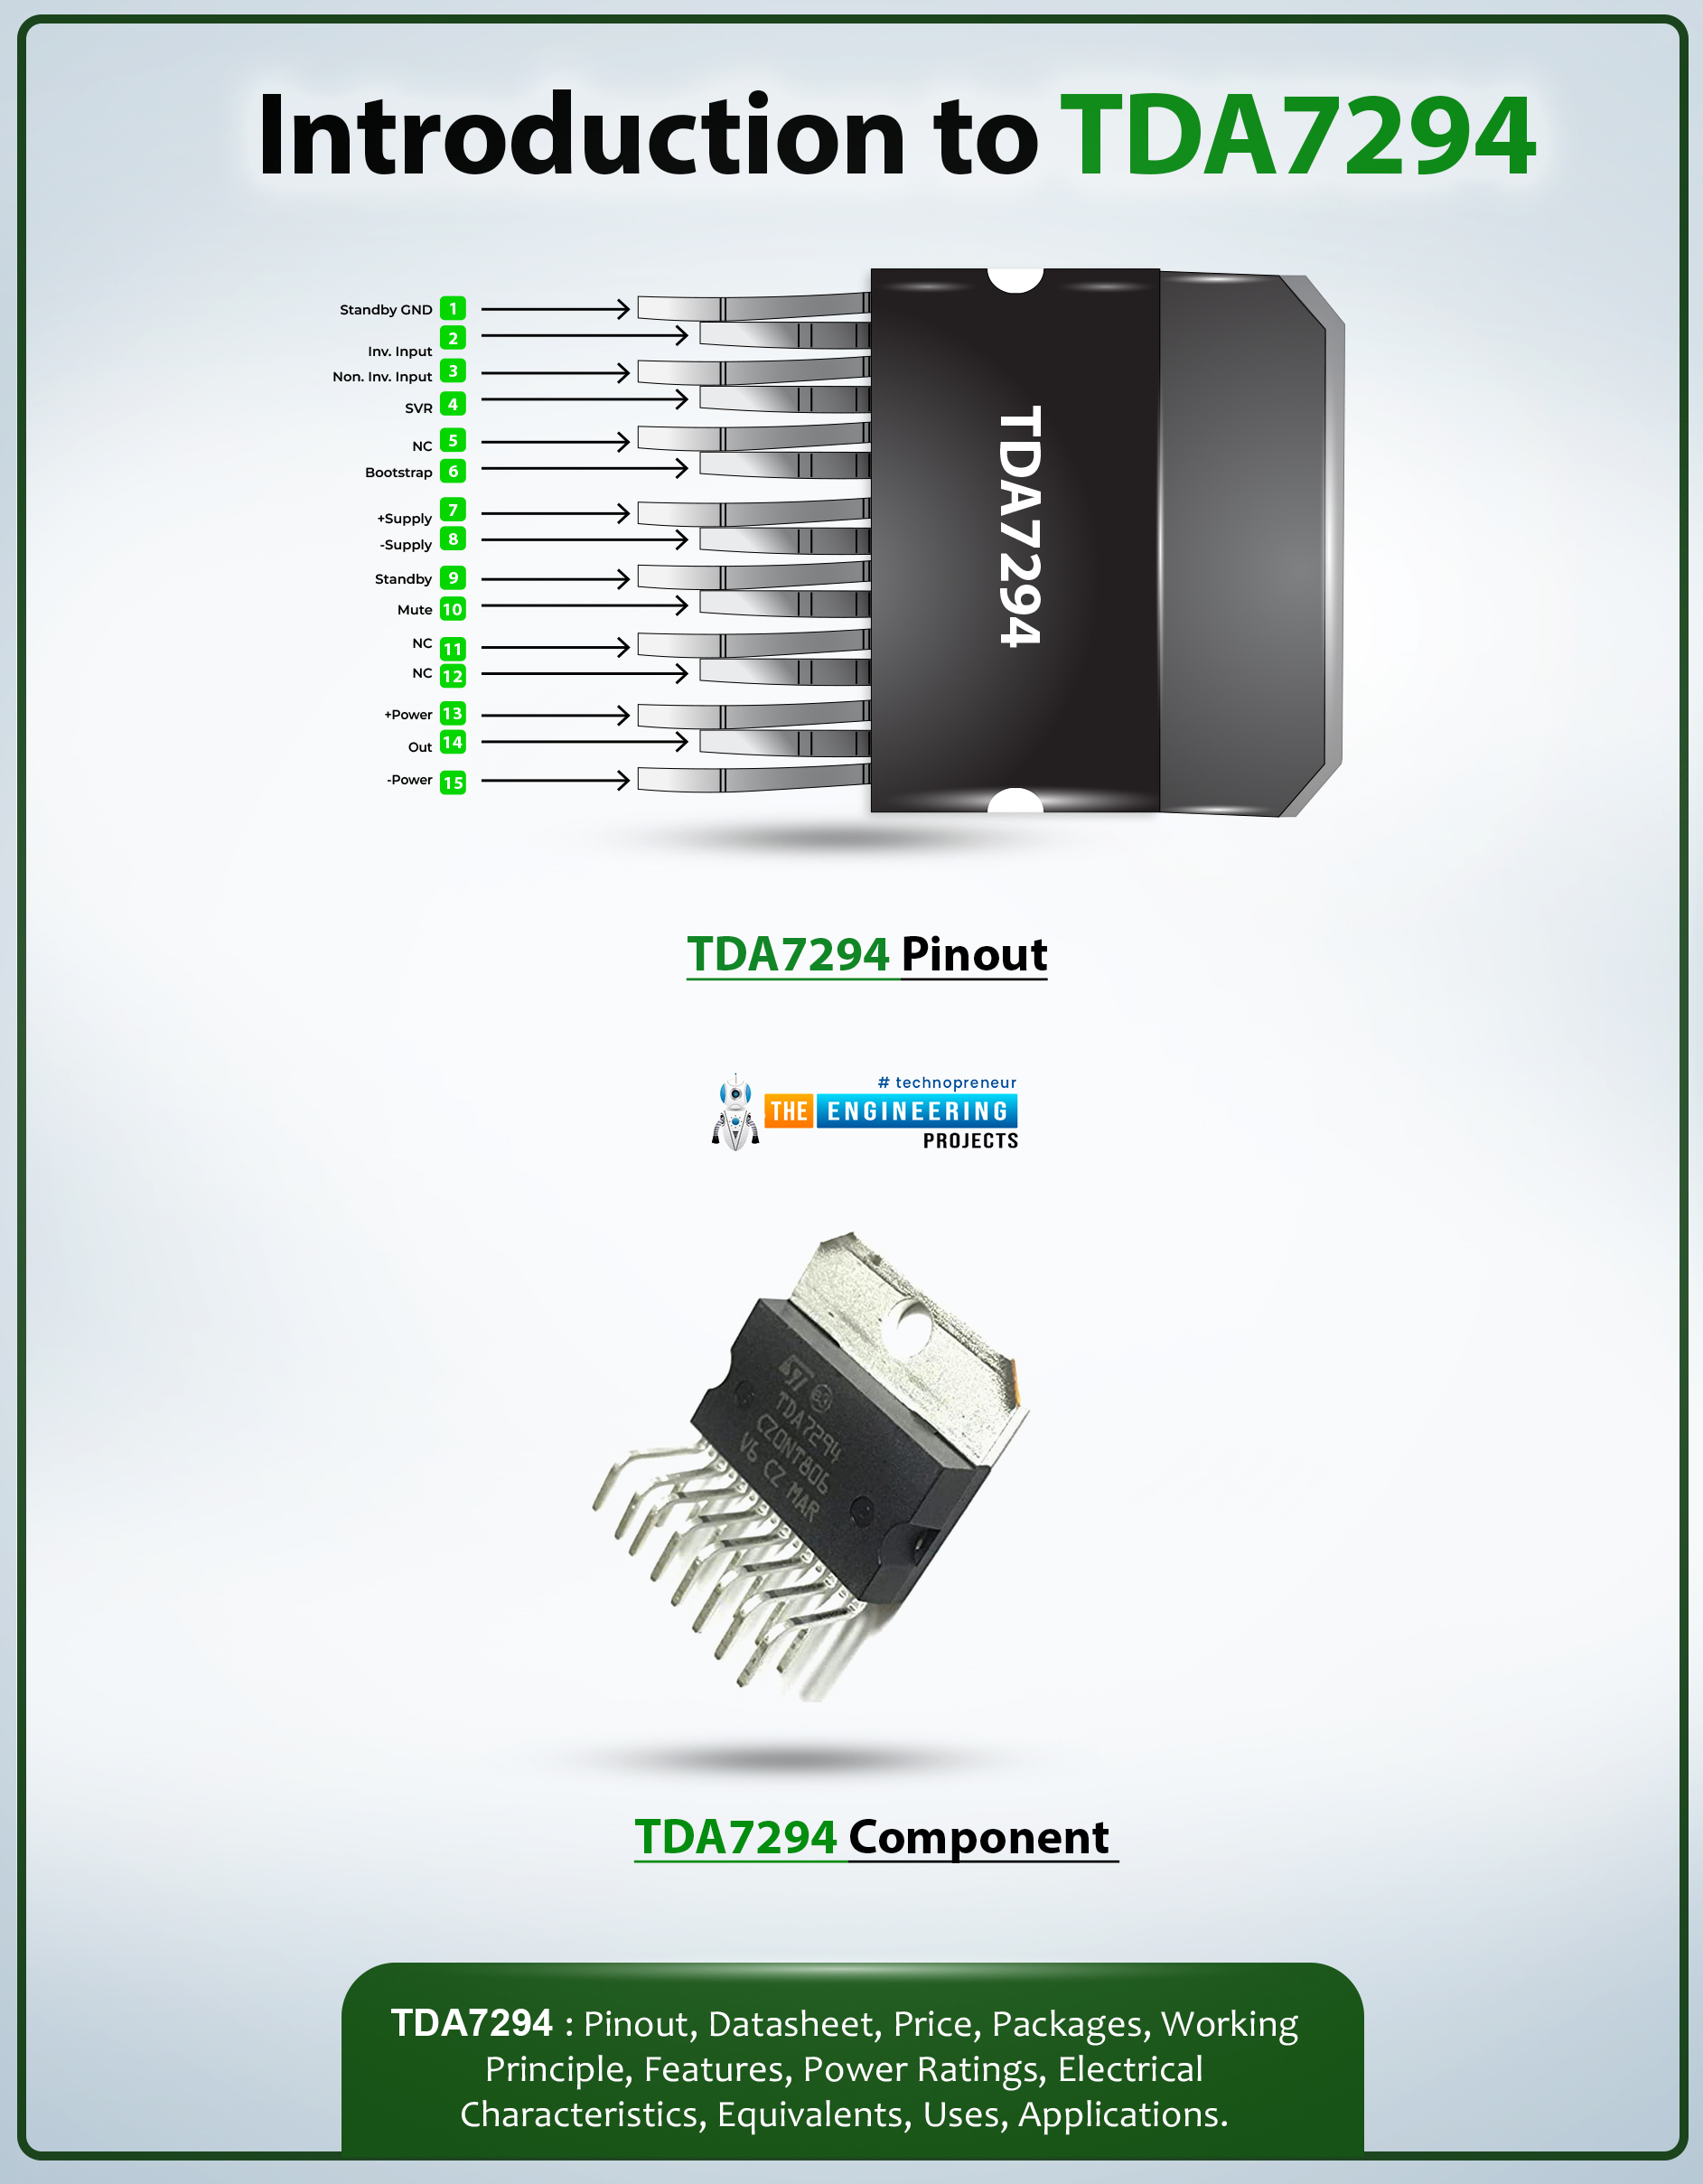
Hi Guys! Hope you’re well today. I welcome you on board. In this post today, I’ll walk you through the Introduction to TDA7294.
TDA7294 is a monolithic class AB power-based audio amplifier that comes with a DMOS output stage. It is primarily used for the amplification of audio signals in Hi-Fi field applications containing self-powered loudspeakers. The fault protection circuitry used in this device protects against short circuits.
I suggest you read this post all the way through, as I’ll detail the complete introduction to TDA7294 covering datasheet, pinout, features, and applications.
Let’s get started.
Introduction to TDA7294
TDA7294 is a monolithic class AB power-based audio amplifier that comes with a DMOS output stage.
This device comes with a wide voltage supply ra ...
Today, we are gonna have a look on How to Interface Ultrasonic Sensor with Arduino. Few days ago, I have posted a complete tutorial on How to Use Ultrasonic Sensor Library in Proteus and later I have posted different examples on How to Simulate Ultrasonic Sensor in Proteus. Those posts were about Proteus Simulations and weren't about hardware interfacing, so I thought today let's interface it in hardware.
Simulation is a good starting point for projects but they are really far away from real world. It happened to me a lot of times that my simulations are working perfectly fine but when I design the same circuit in hardware then it says no I am not gonna work. :) So, the bottom line is never trust simulations, unless you properly test it on hardwar ...
Buy This Simulation
Hello friends, Hope you all are fine and having fun with your lives. In today's post, I am going to show How to display a Scrolling Text on LED Matrix 8x8 using Arduino in Proteus ISIS. We all know about LED Matrix but if you don't know then google it. :P LED Matrix is used to display long messages, the best thing about LED Matrix is you can combine then in serial way and can make it of any size you want. Like in this post I have combined 8 LED matrices and then displayed my message on them. I have given all the details here but as you can see we have done a great effort in designing this simulation so I haven't posted it free but have placed a very small amount of $20 on it and you can buy it quite easily from our shop by cl ...