This is the third tutorial in our Raspberry Pi programming course. In the previous chapter, we learned how to install Raspbian on our Raspberry Pi mini-computer. In this chapter, we'll learn how to use a VNC server to remotely control and see its desktop from our computer.
What is VNC?
Computing over a network is known as "virtual network computing," or "VNC." To remotely control another computer, you can use this screen-sharing technology, which works on all major operating systems. As a result, a remote user can interact with a computer's display (screen, keyboard, and mouse) as if they were sitting right in front of it.
VNC takes advantage of the client/server concept. Rather than installing a VNC s ...
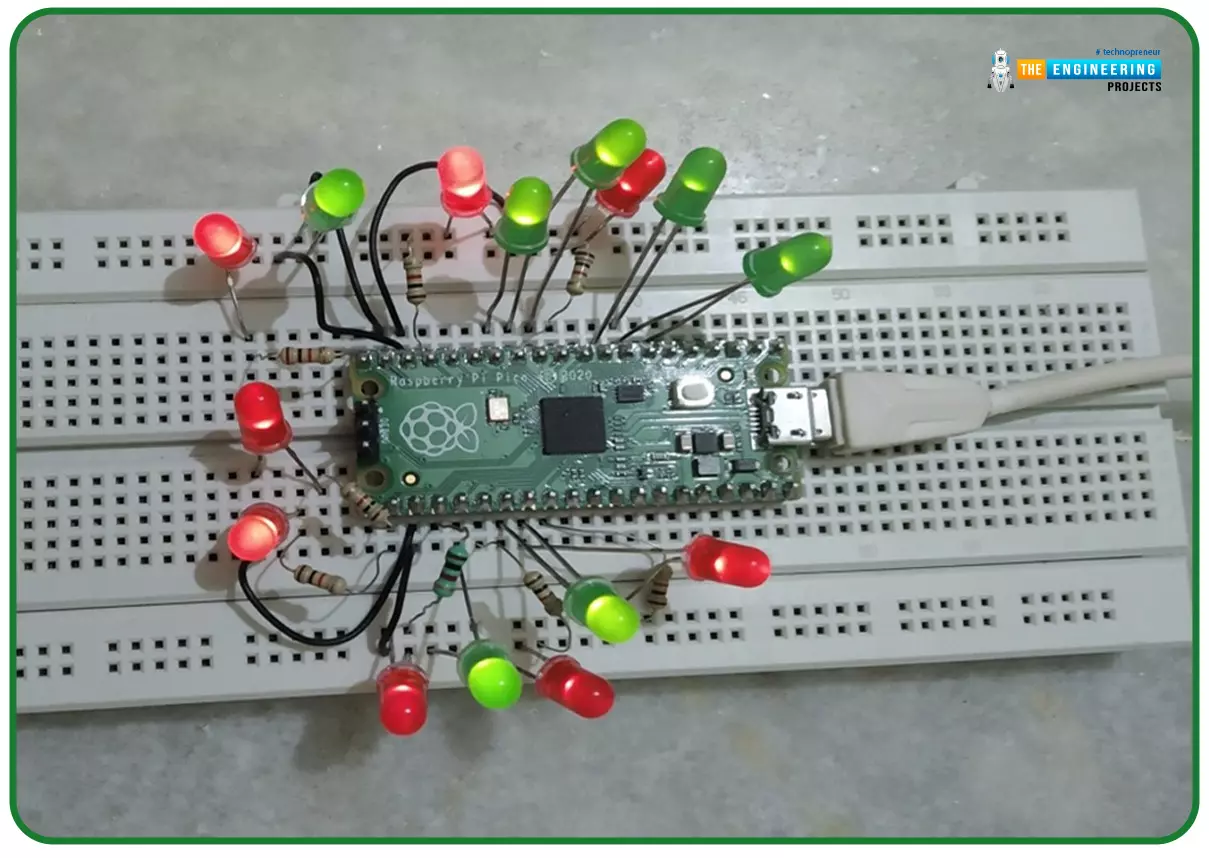
Hello readers, I hope you all are doing great. In our previous tutorial, we discussed the installation procedure of Visual Studio Code for programming Raspberry Pi Pico.
We have already mentioned in our previous tutorials that RP2040 or Raspberry Pi Pico supports multiple programming languages like C/C++, Circuit python, MicroPython cross-platform development environments. Raspberry Pi Pico module consists of a built-in UF2 bootloader enabling programs to be loaded by drag and drop and floating-point routines are baked into the chip to achieve ultra-fast performance.
There are multiple development environments to program a Raspberry Pi Pico board like Visual Studio Code, Thonny Python IDE, Arduino IDE etc.
So, in this tutorial, we will learn how t ...
The IoT is the interconnection of physical objects or devices with sensors and software accessing capabilities to communicate data or information over the internet.
To build an IoT network, we need an interface medium that can fetch, control, and communicate data between sender and receiver electronics devices or servers.
Espressif Systems created the ESP32 Wi-Fi chip series. The ESP32 module is equipped with a 32-bit Tensilica microcontroller, 2.4GHz Wi-Fi connectivity, an antenna, memory, and power management modules, and much more. All of these built-in features of this ESP32 module make it ideal for IoT applications.
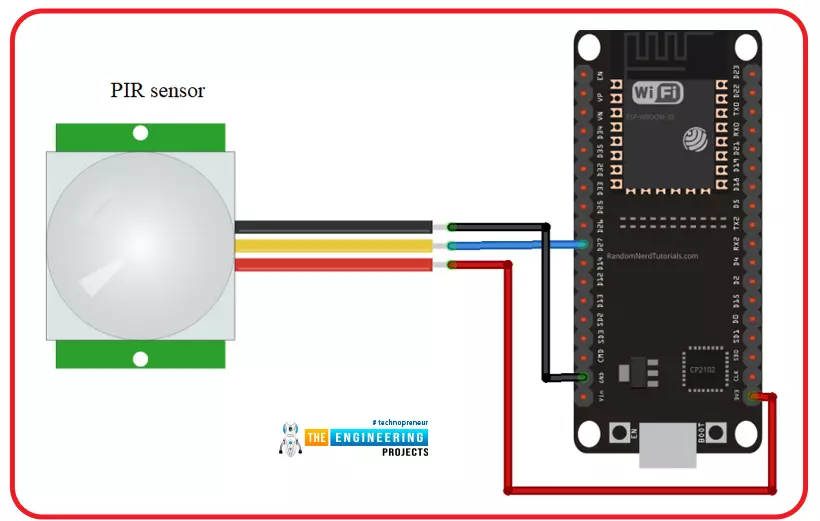
Hello readers, I hope you all are doing great. In this tutorial, we will learn another application of ESP32 in the field of IoT (Internet of Things). We are using a PIR s ...
Hello Folks! Glad to have you on board. Thank you for clicking this read. In this post today I’ll walk you through What is Cloud Computing?
Cloud computing is not a buzzword anymore. Even though most companies are familiar with this term, they don’t know what it does and how it works. If you’re one of them, this read is for you. In simple terms, cloud computing allows you to use computer system resources over the internet. This means you can manage your data remotely over the internet from anywhere in the world. We’ll touch this further in our article.
I suggest you read this post all the way through as I’ll cover what is cloud computing, how does it work, the types of cloud computing, the advantages of cloud computing, and the future of cloud computing.
Let’s get started.
What is Cloud ...
Hello readers, we hope you all are doing great. Welcome to the 1st lecture of Section 4 in the ESP32 Programming Series. In this section, we will interface the ESP32 module with common Embedded modules(i.e. LCD, Keypad, RTC etc.).
In today's tutorial, we will interface ESP32 with a 16x2 LCD and will display data using both Data Mode and I2C Mode. LCD is the most commonly used embedded module in IoT Projects. It is used to display different types of data i.e. sensor readings, warning messages, notifications etc.
Before going forward, let's first have a look at what is LCD and How it works:
16x2 LCD Module
LCD(Liquid Crystal Display) is a type of electronic display module that is used in a wide variety of applications and devices such as calculators, computers, mobile phones, ...
Welcome to the next tutorial of our Raspberry Pi programming course. Our previous tutorial taught us to how to print from a Raspberry pi. We also discussed some libraries to create a print server in our raspberry pi. We will learn how to take screenshots on Raspberry Pi using a few different methods in this lesson. We will also look at how to take snapshots on our Raspberry Pi using SSH remotely.
Why should you read this article?
This article will assist you when working with projects that require snapshots for documenting your work, sharing, or generating tutorials.
So, let us begin.
Screenshots are said to be the essential items on the internet today. And if you have seen these screenshots in tutorial videos or even used them in regular commu ...
Hello readers, I hope you all are doing great. In our previous tutorial, we discussed the implementation of LED interfacing and blinking program with Raspberry Pi Pico using MicroPython programming language. So continuing with our previous tutorial, in this tutorial we will learn how to control the LED brightness using PWM (pulse width modulation technique).
As we mentioned above, in our previous tutorial we implemented the LED blinking program with a Raspberry Pi Pico board. Blinking an LED means turning ON and OFF and thus the process involves only two states that are ‘1’ (HIGH) and ‘0’ (LOW). But, sometimes it is required to change the digital output between these two (ON and OFF states) for example changing the LED brightness. PWM or Pulse Width Modulation technique is used to change ...
Hello, Students here I am present to cover an article on a series of Electronic devices and circuit theory. The foremost article of this series is Ideal diode vs practical diode. I try to elaborate on basic to modern theory related to the diode. This component act as fundamental to many important circuit devices such as rectifiers, transformers, etc. The question which we cover in this article are;
What is a diode?
How a diode is formed? Which methodology manufacturer utilized while the formation of the diode?
What is the concept of doping and PN junction in diode theory?
How does a Diode work?
What type of biasing allows a diode to conduct? Under which situation of biasing diode offers a restriction while conducting?
Upon which cha ...
Hi Guys! Happy to see you around. Thank you for clicking this read. In this post today, I’ll walk you through Types of Cloud Computing.
Cloud computing is not a new term. Companies have been using this infrastructure for the past two decades. You might be familiar with this term, in case you don’t, cloud computing is the on-demand availability of computing resources over the internet. Simply put, you can process, store and manage a large amount of data using this architecture. The companies offering these services to end-users are called Cloud Service Providers (CSP). And most of these services offer the pay-as-you-go model which means you can ask for only those computing resources required for your business; you don’t pay for the resources you don’t use in the cloud computing model. This ...
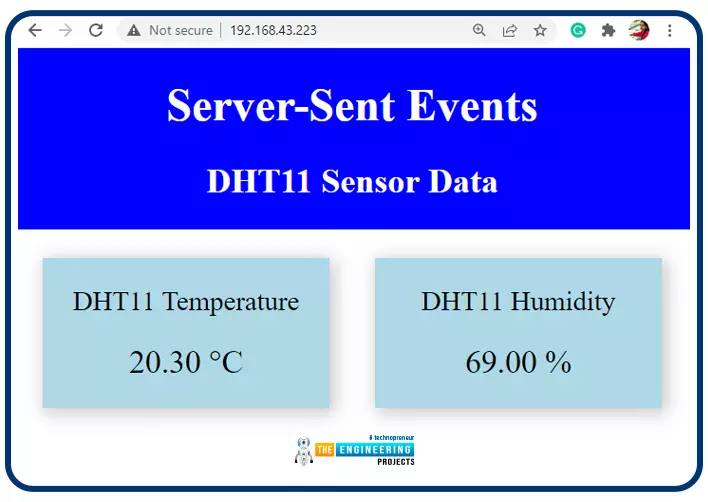
Hello readers, I hope you all are doing great. In this tutorial, we will learn how to update a webpage using Server-Sent Events and the ESP32 web server.
What is Server-Sent Events (SSE)?
It is a server push technology that enables the client devices to receive automatic updates from a server over HTTP (Hypertext Transfer Protocol) connection. SSE also describes how the server can initiate data transmission towards the client once an initial connection with the client has been established.
We have already posted a tutorial on how to implement Web socket protocol with ESP32 which is also a protocol used to notify events to a web client. Both the Server-Sent Events (SSE) and Web-Socket technologies seem to be quite similar but they are not.
The major difference between the two is that SSE ...