Today all businesses utilize databases for practically all operations, ranging from sales & marketing to CRM. Hence, whenever organizations face a database failure, they are susceptible to losing crucial data that may be costly for the entire business. Microsoft SQL is a popular RDMS in all firms or organizations for professionally managing valuable data. SQLServer is incredibly useful in the business circuit, yet it has some corruption issues and errors that DBAs need to tackle strategically.
Because of SQL database errors, users are unable to access their valuable data, and it is their responsibility to fix the issues promptly to make sure that there are no severe data loss issues. There are some predominant database corruption errors and is ...
Hello friends! I hope you will be absolutely fine and having fun. Today, I will give you an elaboration on Introduction to SG3524. I have already shared articles on Introduction to 74HC245, 74HC595, CD4051, L293D, L298, LF351 and LF411. You should also go through all of these tutorials in order to have a better understanding. SG 3524 consists of all the important functions necessary to design inverters.
Moreover, using SG-3524 we can also design regulation power supplies as well as switching regulators. This all design is based on a single chip. High power applications can also be controlled through this device. SG-3524 is especially designed for voltage doublers without transformers, transformer coupled DC to DC converters. Their design was als ...
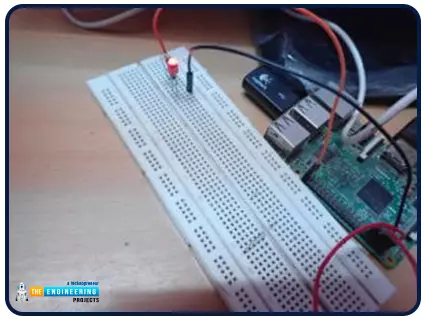
Hello friends, I hope you all are doing great. It's the 8th tutorial in our Raspberry Pi programming course. In the previous lectures, we interfaced LCD 16x2 and Keypad 4x4 with Raspberry Pi 4. In this chapter, we are not going to interface any external module with Pi, instead, we'll create a PWM signal in the raspberry pi using Python. Let's get started:
Components RequiredWe are going to use the below components in today's PWM project:
Raspberry Pi 4.
LED.
A resistor of 330 ohms.
Breadboard.
Jumper wires.Before going forward, let's first understand what is PWM:
What is PWM?
In PWM(Pulse Width Modulation), we simply turn on and off our power supply at regular intervals and thus ...
Several manufacturing processes for plastic manufacturers and metalworkers, like milling or casting, produce burrs. However, to guarantee the safety and quality of a component, one needs to ensure smooth edges that will not cause any problems in further processing or use of the item. Deburring and brushing machines are solutions to this issue. High-quality deburring technology from Germany can be integrated into casting and cutting machines, and to automatically produce flawless components.
Deburring and Brushing Machines from Germany
What are Burs, and How do They Develop? Burrs are unwanted protrusions of a material like metal or resin that can develop during processing. When picturing a component like a gear, it is easy to understand, th ...
Hi Friends! Hope you’re well today. I welcome you on board. Happy to see you around. In this post today, I’ll walk you through the Introduction to SR5100.
The SR5100 is a Schottky diode used to generate extremely fast switching. It is also called a hot-carrier diode and is protected against overvoltage. It comes with a high surge current capability and low forward drop voltage. It contains a forward rectified current around 5 A and terminal resistance around 28 C/W. It is available in epitaxial construction with a peak reverse voltage of around 100 V.
You are most welcome to see the Introduction to 1n4744 and Introduction to 1n4742 that I have uploaded recently.
Read this post all the way through as I’ll detail the datasheet, pinout, features, ...
Hi mentees, we are here with a new tutorial. I hope you all are fine. So far, we have been designing combinational circuits i.e. Adder, Subtractor, Multiplexer etc. using logic gates. But from today onward, we will design sequential circuits using logic gates i.e. Latches, Flip Flops etc. Let's quickly recall what's the difference between combinational & Sequential Circuits:
Combinational Circuits:
Combinational circuits only use the current state of the input values to generate the output.Examples of DLD Combinational Circuits are: Adders, Subtractors, Multiplexers etc.
Sequential Circuits
Sequential Circuits use both the current & previous states of the inputs to generate the output.Examples of DLD Sequential Circuits are: Latches, Flip Flops, Timers, Counters etc.
Digital M ...
Hello friends, I hope you all are doing great. In today's tutorial, we are gonna have a look at a detailed Introduction to MSP430. MSP430 is a microcontroller portfolio that offers different varieties of sixteen-bit Microcontrollers. These microcontrollers are integrated with ultra-low power and digital and analog peripherals devices for sensing and measurement applications. MSP430 microcontrollers with non-volatile FRAM (ferroelectric random access memory) provide the lowest stand-by power (350nA with RTC), 100 µA/MHz active power and have the capability to recover system state after sudden power failures.
MSP430 is used in different applications such as sensor systems which receive analog signals and convert them into digital values and after processing send these values to host syst ...
As the cryptocurrency market continues to evolve, the importance of secure and user-controlled wallets has never been greater. Decentralized wallets, which allow users to retain full control over their private keys, are becoming the go-to choice for crypto enthusiasts.
These wallets not only provide enhanced security but also offer greater privacy and compatibility with decentralized applications (DApps). This post will explore the top five wallets available in 2024 to help you pick the best decentralized crypto wallet
for your needs.
Wallet
Supported Cryptos
Security Features
User Control
Compatibility with DApps
MetaMask
Ethereum, ERC-20
Password, seed phrase, open-source
Full control
High
Trust Wallet
Multiple
Encryption, biometric authent ...
Hello friends! Welcome to another useful article of The Engineering Projects. I hope you are having a shinning day. Let's add some reproductive information in your day. Today we'll grasp about the establishment skills in Engineering Consultant Firm. Consequently, we'll learn about 6 tremendous ideas for the Establishment an Engineering Consultant.
Starting any business can be difficult. As a matter of fact, some individuals state that around a third of new enterprises fail within the first year of operation. From there, this does not get any easier. These numbers increase to half by the second year of running a business.
This might put you off when you decide to start your engineering consulting firms. However, you can make an engineering consult ...
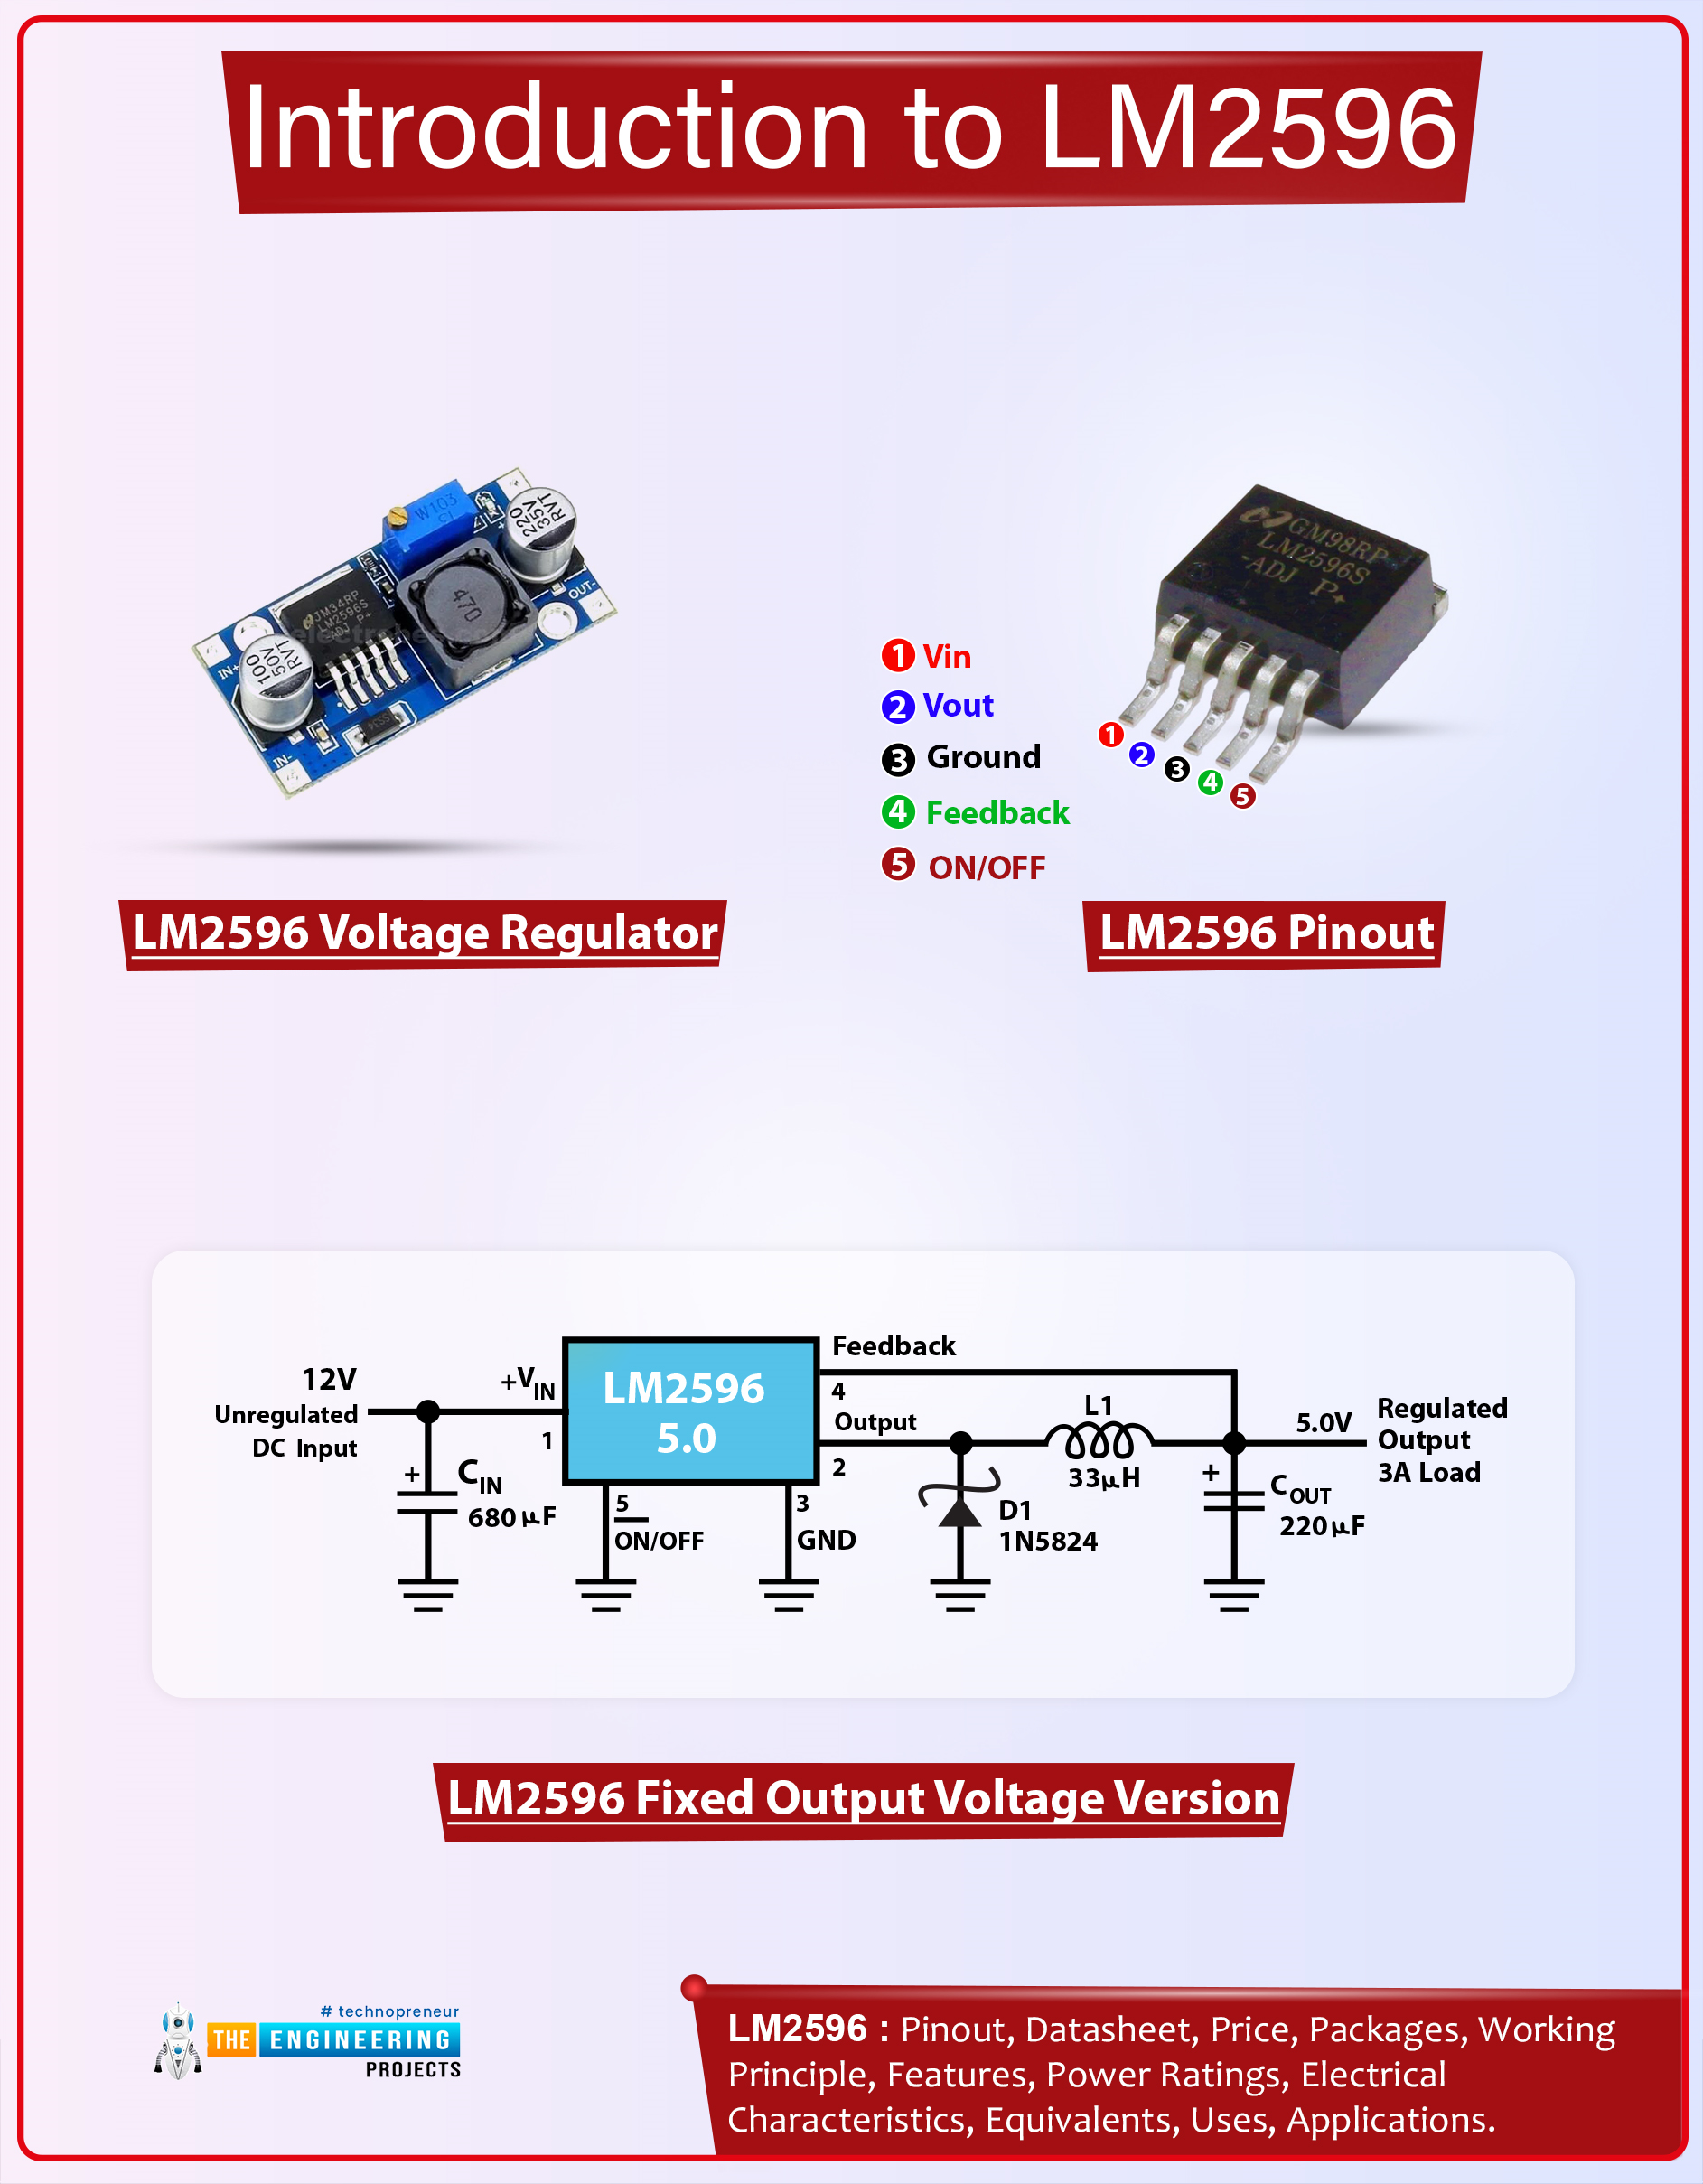
Hi Guys! Welcome you on board. Happy to see you around. In this post today, I’ll detail the Introduction to LM2596.LM2596 is a step-down voltage regulator, also known as a buck converter, mainly used to step down the voltage or to drive load under 3A. It carries remarkable load and line regulation and is available in fixed output voltages including 3.3V, 5V, and 12V. It also comes with a customized output version where you can set the output voltage as per your requirement.
Just stay with me for a little while, as in this post I’ll walk you through the Introduction to LM2596 covering the datasheet, pinout, features, and main applications of this tiny device. Let’s jump right in.
Introduction to LM2596
LM2596 is a voltage regulator mainly used to step down the voltage or to drive ...