Hello friends, I hope you all are fine and having fun with your lives. Today, I am going to show you Color Detection in MATLAB Live Video. In this project I am gonna take a live video feed from a camera and then will detect a specific color in that video feed. I have posted a project before in which I have done the same Color Detection in Images using MATLAB but that color detection was for images but in today's post I am gonna do the color detection in MATLAB for live video feed.
I have designed this project in MATLAB 2009 and have also tested it on MATLAB 2015 and it works fine. So, I think it will work on any version of MATLAB. You must have the image processing toolbox in your MATLAB. If you got any questions then ask in comments and I will t ...
Hello Learner! I hope you are doing great. Welcome to another tutorial at The Engineering Projects. This blog is the part of series we have stated about the Digital Logic Circuits. Previous to this, we learned Implementation of SK Flip Flops in Proteus. at the present day, we'll seek the knowledge about the following points:
What are Flip Flops?
What are JK Flip Flops?
How can we record the Truth Table of JK Flip Flops?
What is the Procedure to Construct the circuit of JK Flip Flop through Logic Gates and IC circuit?
Moreover, we'll also have some useful bits of Information in Did you know Sections. Let' see the explanation of the concepts given above.
Flip Flops
The Flip Flops are the building blocks of many of the Electronic Circuits. ...
Hello everyone! I hope you all will be absolutely fine and having fun. Today, I am going to share my knowledge about How to use Print MATLAB. As you all know that the design of an algorithm is not enough until we observe its results too. So, there should be a debugging tool in order to check the performance and accuracy of the designed algorithm. Debugging tool helps us to improve the algorithm’s performance and accuracy too by observing its output again and again. In this tutorial I will tell you about using print command in MATLB for different purposes. So, in this tutorial I am going to use print command as a debugging tool in order to observe the output of the algorithm. You should also have a look at how to use MATLAB ?
I am going to use pr ...
Hello friends, I hope you all are fine and having fun with your lives. Today, I am going to share a new project which is ECG Simulation using MATLAB. In this project, I have designed a complete simulation in MATLAB which is acting as ECG Simulator. This ECG Simulation also extracts ECG features and performs different functions which are explained in detail below. We have put a lot of effort in designing this project that's why its not free and we have placed a very small amount of $50 so that engineering students can buy it easily. You should also have a look at ECG Averaging in MATLAB.
Moreover, I have also designed a user friendly GUI which is quite easy to operate and you can simulate any kind of ECG data on this ECG Simulator. I have also extr ...
Hello everyone! I hope you all will be absolutely fine and having fun. Today, I am going to share my knowledge with all of you guys, about Communication Signals Generation in LabVIEW. In the previous tutorial, we have seen the Introduction to LabView and after that we have designed our First Project using LabView Programming so if you haven't read them yet then I would suggest you to read them so that you have the basic knowledge of LabView. In earlier days people used to convey their messages or some important notifications using a piece of paper and by delivering it to the other places with the help of the pigeons. It took a lot of time for the message conveying procedure because there are some notifications or messages in which such a huge delay ...
Hello friends, hope you all are fine and having fun with your lives. In today's post, I am going to share How to do USB Communication between Android and Arduino. I have designed many projects before in which I have interfaced Android and Arduino and communicated between them but in those projects I have used either Wifi or Bluetooth as a mode for communication. But recently I got a project in which I have to do USB Communication between Android and Arduino, they have this restriction of using USB. So, I have to work on it and I got it working successfully. You should also have a look at How to Install Android Studio. and Getting Started with Android.
So, today I thought to share it with you guys. It isn't much difficult but will need a little pa ...
Hello everyone! I hope you all will be absolutely fine and having fun. Today, I am going to share my knowledge about Calculating Values of Trigonometric Functions in MATLAB. Trigonometric function have a great importance in latest mathematics. There are six types of trigonometric functions out of which first three are used more frequently in comparison to the other three. Trigonometric functions are important in the study of triangles.
Trigonometric functions show the relationship between the angles of the triangle and the lengths of its sides. The positive and negative signs with the trigonometric functions indicate the portion of the quadrants. Well known theorem of mathematics i.e. Pythagoras Theorem is used in case of the right angle triang ...
Hello friends hope you all are healthy and enjoying good health. In today's tutorial, I am going to share How to Protect Simulink Design in MATLAB and in order to do so I have used S Function method. In my previous post I have explained How to Protect your m-file Codes in MATLAB by converting it to p-file so that no one can reach to your code and now I am gonna explain how to protect your simulations in MATLAB which you create in Simulink so that your intellectual work wont go waste.There are many methods to protect the Simulink simulations and the easiest of them is using S-function. Now follow these simple steps and it won't be much difficult.
Protect Simulink Design in MATLAB
Open the simulation which you want to protect. Make sure you are ...
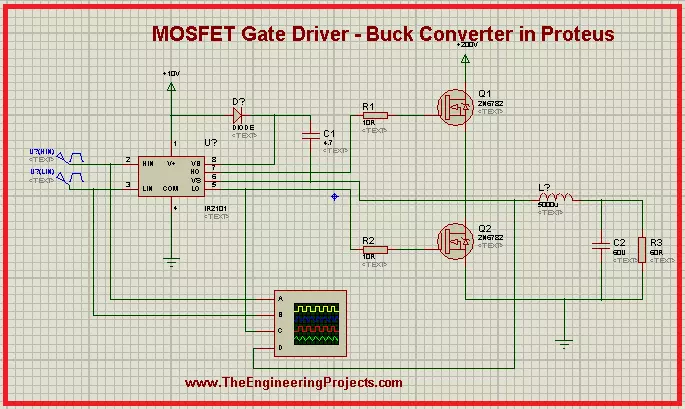
Hey Geeks! Welcome to The Engineering Projects. We hope you are doing great. MOSFET is a predominant component widely used in electronics due to its performance. We are working on the Projects of MOSFET and today's experiment is really interesting. We are working on the MOSFET Gate Driver and we will work on the following concepts:
Introduction to MOSFET Gate Driver.
Circuit of MOSFET Gate Driver.
Working of MOSFET Gate Driver.
Simulation of MOSFET Gate Driver in Proteus.
Applications of MOSFET Gate Driver.
You will find important information about the topic in DID YOU KNOW sections.
Introduction to MOSFET Gate Driver
We all know MOSFET is a type of transistor and is used in a wide range of circuits. It has many interesting features and ...
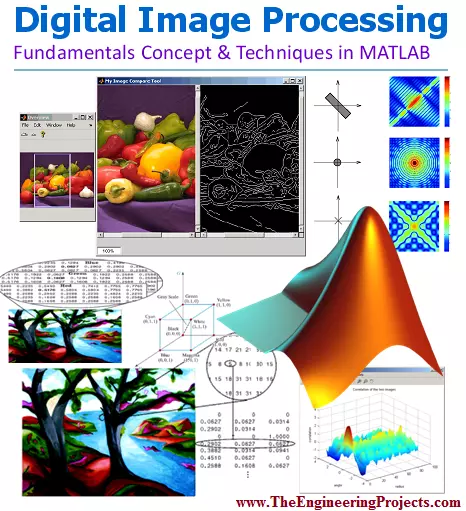
Hello everyone! I hope you all will be absolutely fine and having fun. Today, I am going combine all of my previously published tutorials based on MATLAB Image Processing. Image processing can be defined as to convert an image into digital form and to perform some actions on it to improve its quality. I have published a number of tutorials on MATLAB image processing but they are not well arranged. So, I am going to combine the links for all of them in order to access them easily. All of the projects that I am going to combine today, are designed and compiled by our team with a lot of hard work.
A number of MATLAB Image Processing based tutorials are compiled into this single tutorial. These are divided into two different categories i.e free and ...