Hello everyone! I hope you all will be absolutely fine and having fun. Today, I am going to share my knowledge about Introduction to 1N4007. It is a PN junction diode. Diodes can be made by combining two different types of semiconductor e.g. P and N. PN junction is a junction formed between P and N types of semiconductors. You guys should also have a look at Introduction to 1N4148.
1N 4007 belongs to the series of 1NXXXX devices. Its an American standard numbering system standard used for semiconductor devices. This standard has been adopted globally now. In 1N 4007 the first part 1N indicates single junction semiconductor. 1N indicates 1 junction whereas N indicates the semiconductor diode. 4007 is the specific number to indicate the particular ...
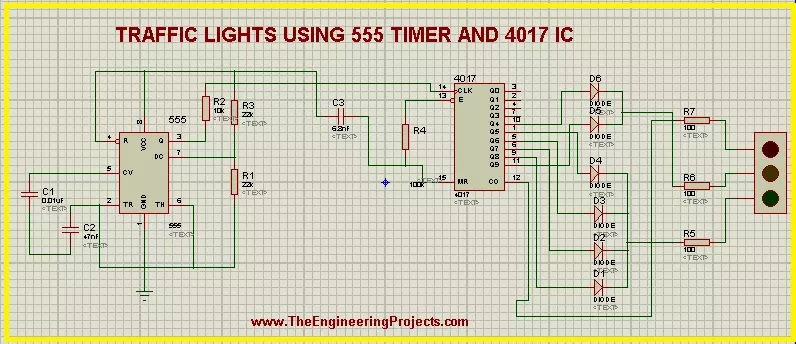
Hey pals! Welcome to the board. We are talking about a fascinating experiment about The Engineering Projects. We all know about the Traffic Lights. But today, we'll see inside the Traffic Lights and find some interesting working of the circuit of Traffic Lights. Before this, just have a look at the topics of discussion:
What is the Traffic Lights circuit with 555 Timer?
What does the 555 timer do in Traffic Lights?
What is the purpose of the 4017 IC Counter in the circuit?
How does the circuit of Traffic Lights work with 555 Timer IC?
How can we perform experiments with the circuit of 555 Timer Traffic Lights in Proteus ISIS?
In addition, we'll see some important points about the topic in DID YOU KNOW sections.
Traffic Lights circuit ...
Hey Fellas! We always strive to keep you updated with best and valuable information so you keep coming back for what we have to offer. Today, I am going to uncover the details on the Introduction to 7805. It is a positive voltage regulator used for providing constant output voltage over a wide range of input voltage.
Before we move on, you must be clear what is voltage regulation? Voltage regulation is referred as the measure of voltage change between input and output.
The IC 7805 does the same thing. It provides constant output voltage when a range of different voltage is applied at the input terminal. This component comes with three terminals called input, ground, and output.
This is called positive voltage regulator because it generates posi ...
ESP32 module comes with multiple inbuilt features and peripheral interfacing capability is one of those features. ESP32 module also consists of an inbuilt temperature sensor, but that can only measure the temperature of the ESP32 core not the temperature of the surrounding environment. So it is required to use a peripheral sensor to measure the temperature of the surrounding environment like home, garden, office etc.
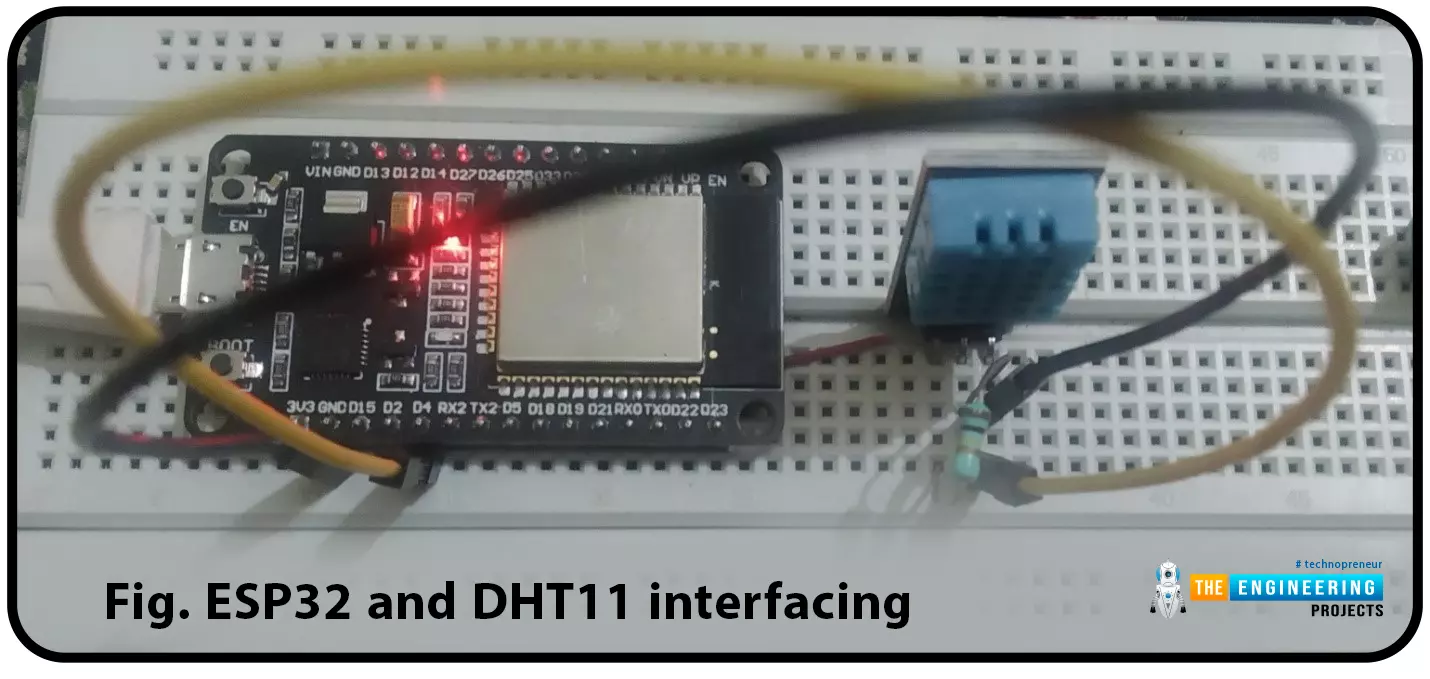
Hello readers. I hope you all are doing great. In this tutorial, we will learn how to interface DHT11 (temperature and humidity sensor) with the ESP32. Later in this tutorial, we will discuss how to share the sensor readings obtained from the DHT11 sensor to a web server.
Before moving towards the interfacing and programming part, let’s have a short introduction to the DHT11 ...
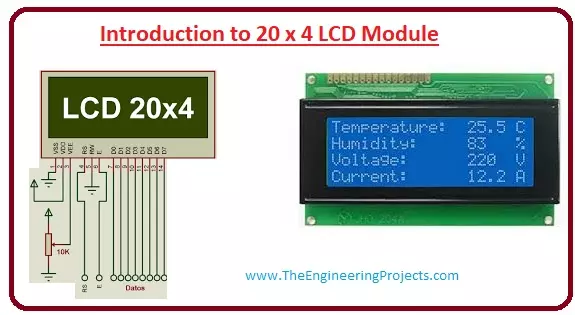
Hello friends, I hope you all are doing great. In today’s tutorial, we will have a look at the Introduction to 20x4 LCD Module. The LCD stands for liquid crystal display, which works on the light modulation features of liquid crystals. It is available in electronic visible display, video display and flat panel display. There are numerous categories and features are exist in markets of LCD and you can see it on your mobile, laptop, computer and television screen.
The invention of LCD gives new life to electronic industries and replaces lED and gas plasma techniques. It also replaces the CTR (cathode ray) tube that is used for visual display. The input power consumed by the liquid crystal display is less than the light-emitting diode and plasma display. In today's post, we will have a loo ...
Hello friends, hope you all are fine and having good life. In today's project, we will see how to display ADC value on LCD using Arduino in Proteus ISIS. Its quite a simple project in which we are gonna measure the voltage of ADC pins and then will display them over to LCD. The microcontroller I am using in this project is Arduino. The simulation is designed in Proteus ISIS. IF you are working on PIC Microcontroller then you should have a look at How to Display ADC value on LCD using PIC Microcontroller in Proteus ISIS.
Arduino has 10 bit ADC pins so whenever you apply voltage on these pins it will give you a value ranging from 0 to 1023 depending on the voltage provided. One can easily get this value using a simple function in Arduino analogRead( ...
Hey Guys! Hope you are doing great. Today, I am going to discuss the details on the Introduction to BJT (Bipolar Junction Transistor). It is an electronic component mainly used for amplification and switching purpose. As the name suggests, it is composed of two junctions called emitter-base junction and collector-base junction.
Don't confuse BJT with regular transistors. A transistor is a semiconductor device, comes with three terminals that are used for external connection with electronic circuits. A transistor is termed as a trans resistor which is used as switch or gate for electronic signals. Small signals applied between one pair of its terminals are used to control much larger signals at the other pair of terminals.
Actually, transistors are divided into two categories called u ...
In today's post we are gonna have a look at How to Train Pixy Camera with Computer. We have yet posted three tutorials in the Pixy Camera series. In the first tutorial, we have seen How to Get Started with Pixy Camera in which we have studied the basics of Pixy Camera. After that that we have seen the Installation of Pixy Camera Software which is named as PixyMon and in the third tutorial we have covered How to Upload the Latest Firmware in Pixy Camera because its always the best strategy to deal with latest tools. So until now we have configured our Pixy Camera in all possible ways now the next thing is to train our Pixy Camera with Computer using PixyMon software.
Let's first discuss How the Pixy Camera works. Pixy Camera has on board NXP microc ...
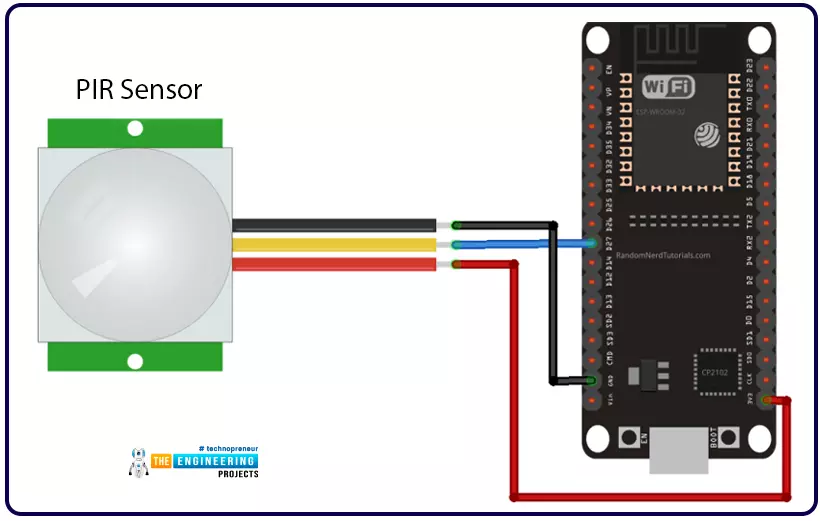
Hello readers, we hope you all are doing great. Welcome to the 4th lecture of Section 5(ESP32 Sensor) in the ESP32 Programming Series. So far, we have discussed the ESP32 built-in sensors in this section. Today, we are going to interface an external embedded sensor(i.e. PIR Sensor) with the ESP32 Microcontroller board. At the start, we will discuss the basics of a PIR Sensor(HC-SR501) i.e. its pinout and working. After that, we will design a simple project to detect the motion with a PIR sensor and ESP32. Finally, we will display the motion detection results on the ESP32 WebServer.
We will use ESP32 interrupts to detect the motion. Interrupts are used when a microcontroller needs to continuously monitor an event while executing other tasks at the same time. We have already posted a tuto ...
Hello Everyone! Hope you’re well today. I welcome you on board. In this post today, I’ll walk you through the Introduction to Arduino USB Host Shields.
With Arduino USB host shield you can interface the USB device to your Arduino board. This USB host shield is based on MAX3421E which is mainly known as the USB host controller that contains the analog circuitry and digital logic required to apply the USB full speed peripheral to USB specifications rev. 2.0.
Moreover, this shield is compatible with TinkerKit which projects you can plug this TinkerKit module with the Arduino Boards.
Introduction to Arduino USB Host Shields
Arduino USB host shield is used to connect a USB device with the Arduino Board. Simply put, USB host shields provide the USB ...